Bohemian Romance Jewelry

Chandelier Pieces Transformed

UncategorizedSamantha ExtanceComment

On our anniversary trip to the Grand Canyon, Rhys took me to this amazing little antique shop in Amarillo, Texas called Texas Ivy. I absolutely loved it! It is worth a stop--and a detour if you're driving nearby. I found all kinds of wonderful things there: vintage cookie cutters, lace, costume jewelry galore, books--but one of my favorite finds were these vintage chandelier pieces. They're plastic, but have the classic shape of many vintage glass chandelier pieces. They're just perfect to re-create into necklaces!

Here are a few necklaces I've made with these pieces so far. Hope you enjoy them!

If you'd like to see or purchase any of these, I'll be at Carols & Crumpets this Saturday, Dec. 3rd from 8 a.m.-3:00 p.m. at the Tulsa Garden Center (in Woodward Park).

This necklace also has a light bulb, chain, and a sewing hook!

A cuckoo clock gear and a chandelier piece--simply steampunk!

I'm a big fan of long necklaces, especially in the winter so you can still wear a cozy scarf! Hope to see you at Carols & Crumpets this Saturday! If not, be sure to catch me at The Alliday Show next weekend!

DIY Steampunk Halloween Mask

UncategorizedSamantha ExtanceComment

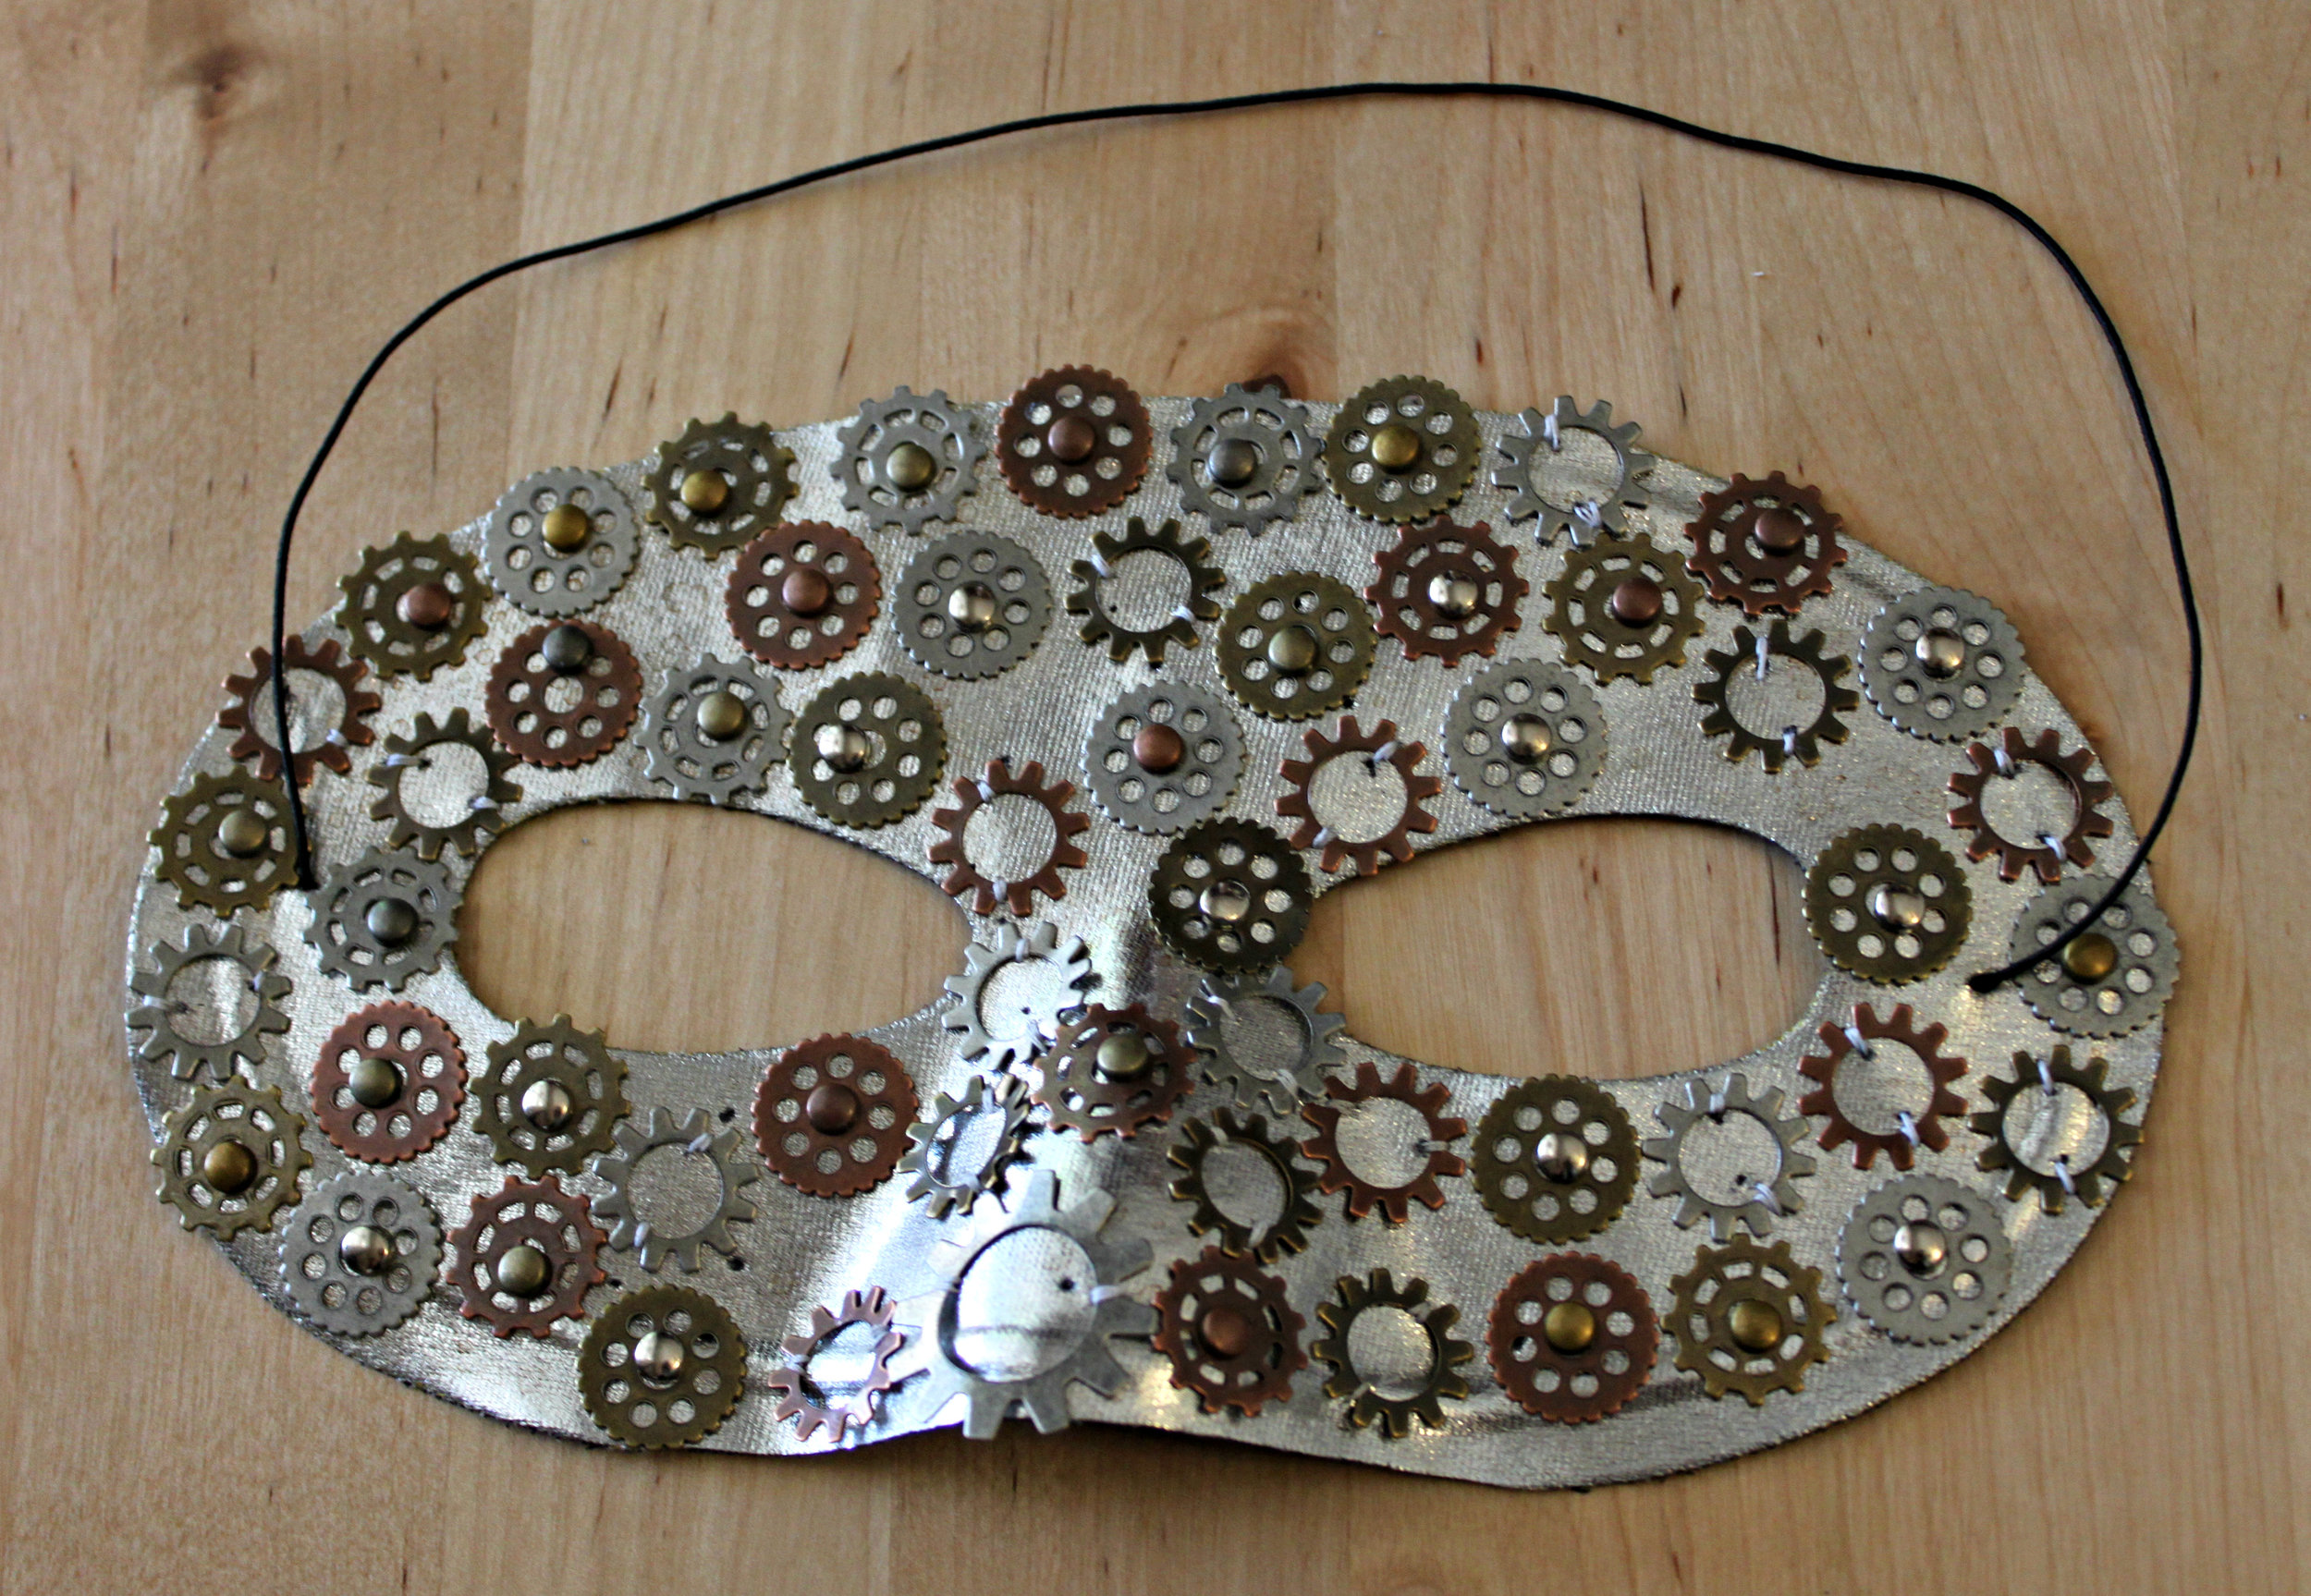
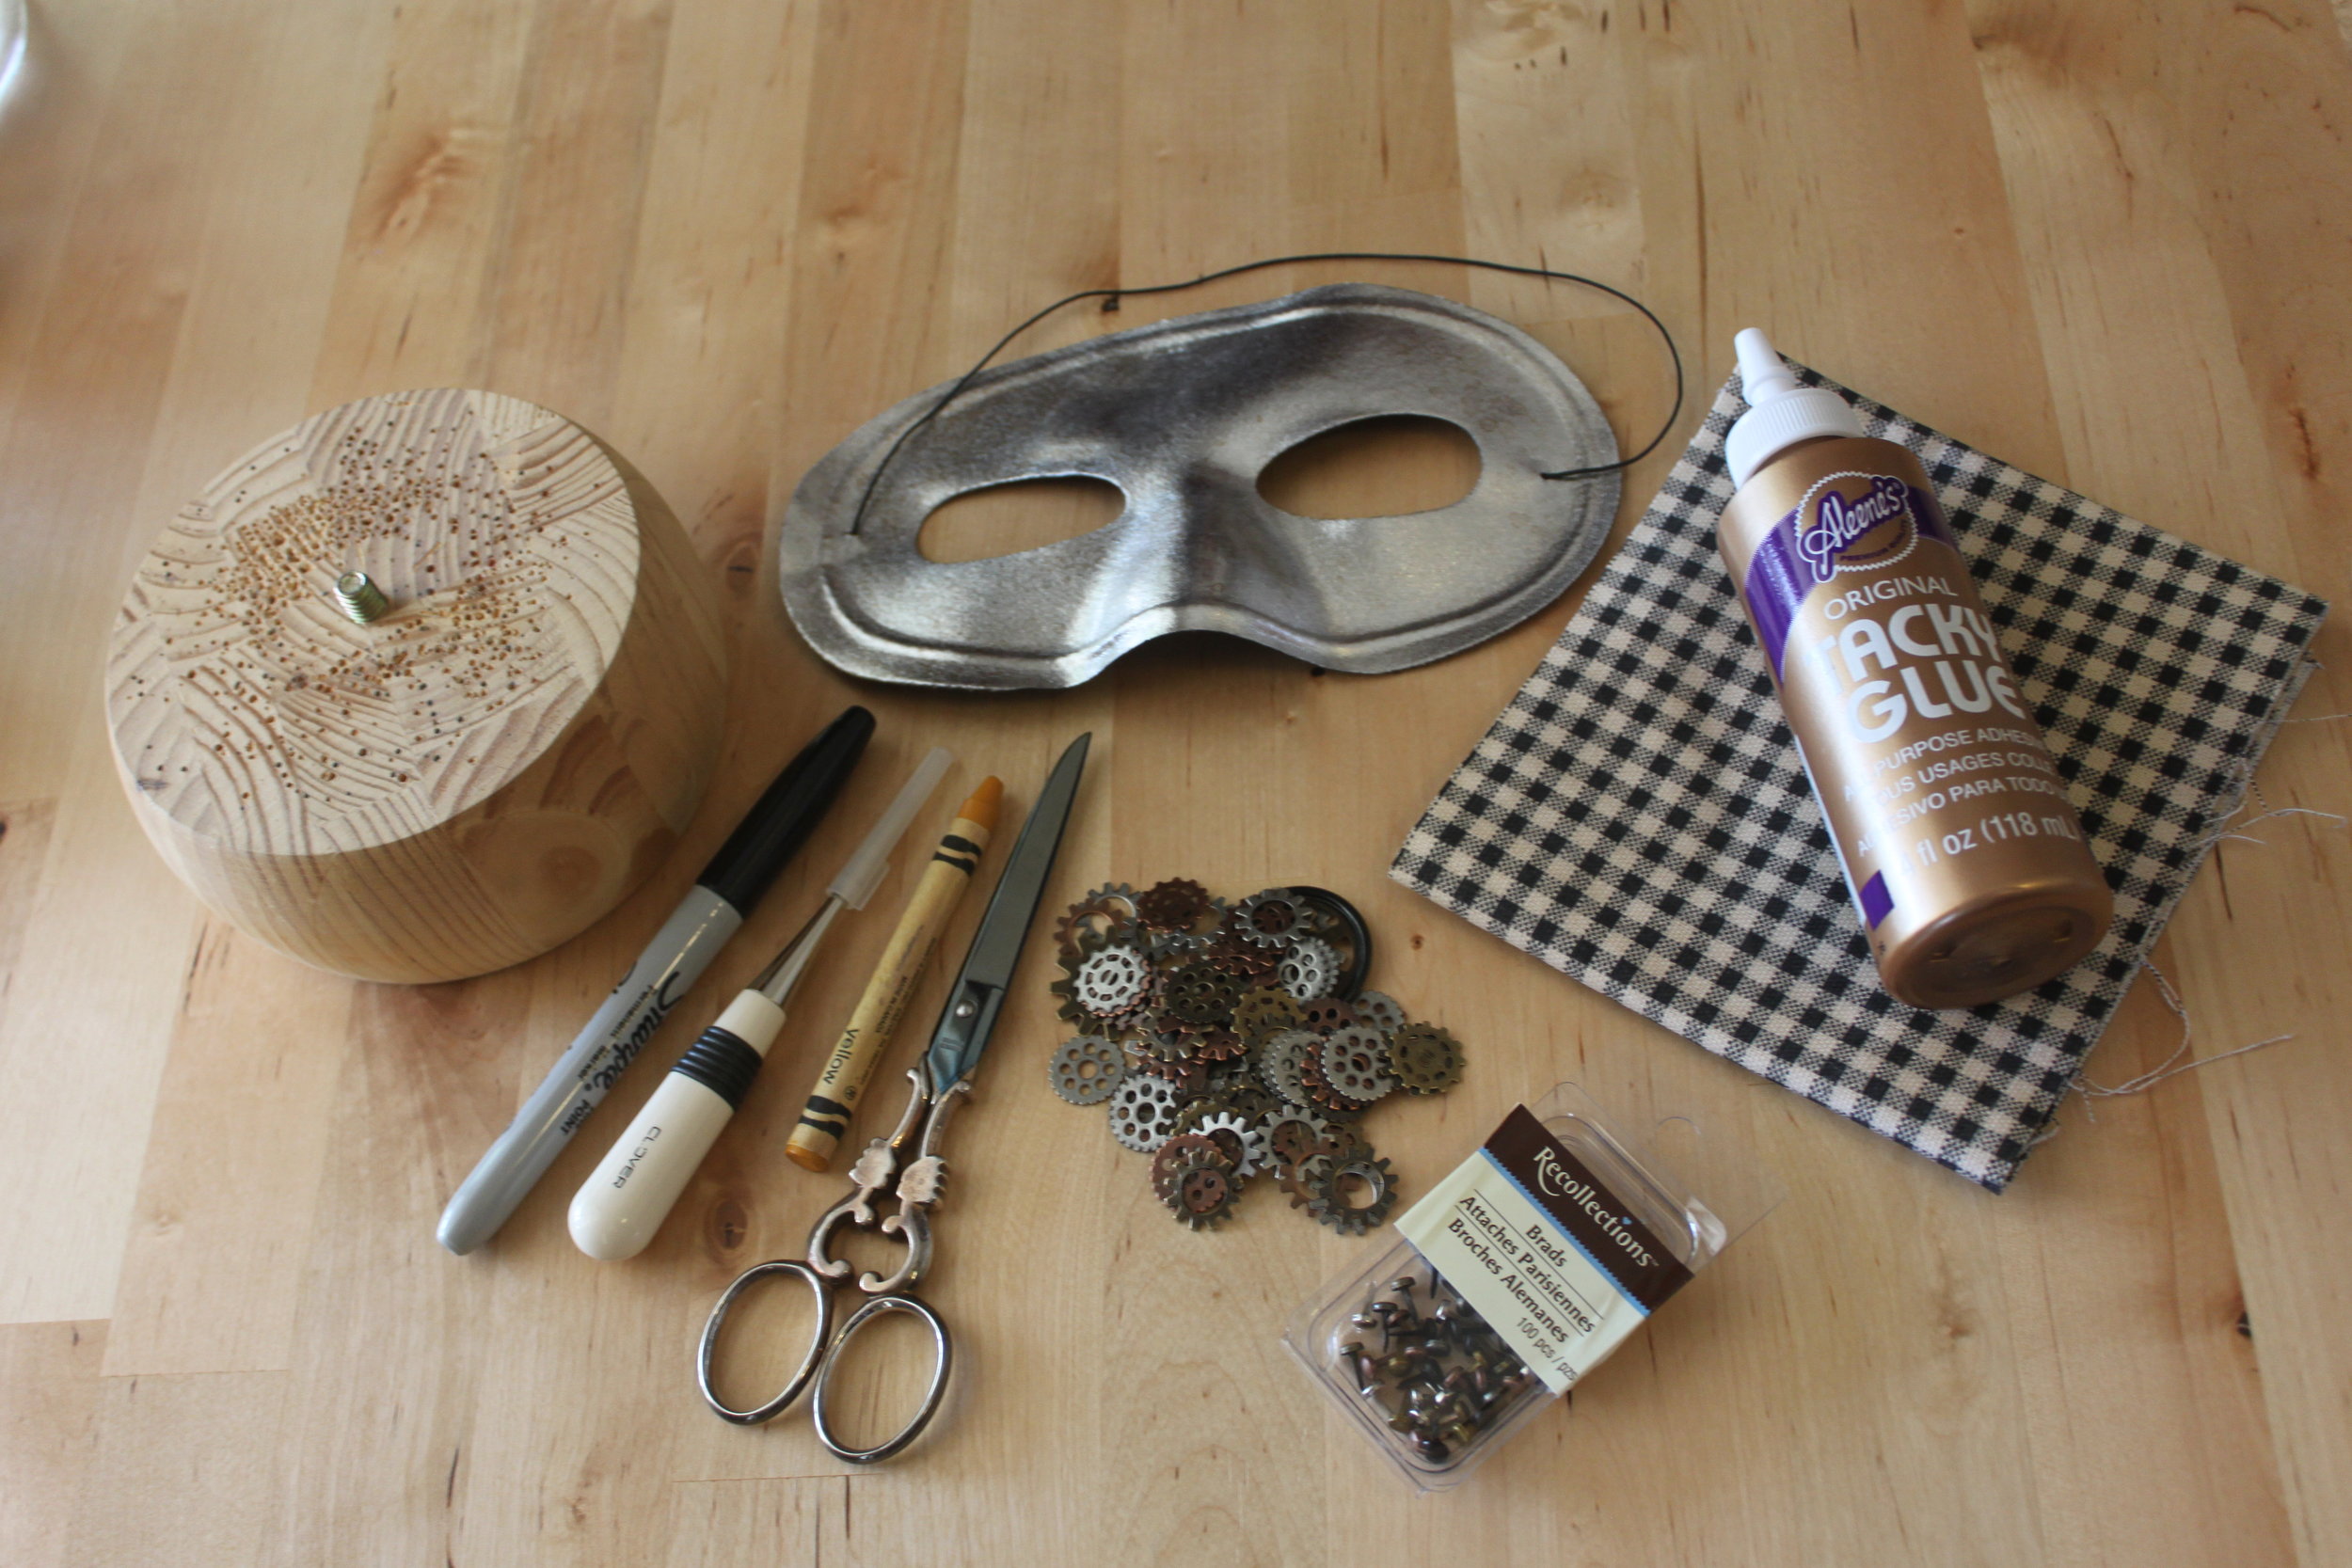
IMG_3618Here's is the 2nd DIY Halloween mask I've created this year. It's simple, yet time intensive to create. Here's what you'll need:

  • Mask (I purchased mine from Party City for 99 cents)
  • Reproduction Gears (I don't recommend using actual gears since the weight of real gears will pull the mask away or down from your face because of the additional weight)
  • Brads
  • Needle & thread (matching the color of your mask)
  • Embroidery needle
  • Marker, fabric crayon, or chalk
  • Scissors
  • Tacky Glue (or any other all-purpose glue)
  • An awl
  • Cotton Cloth or felt (for backing your mask)
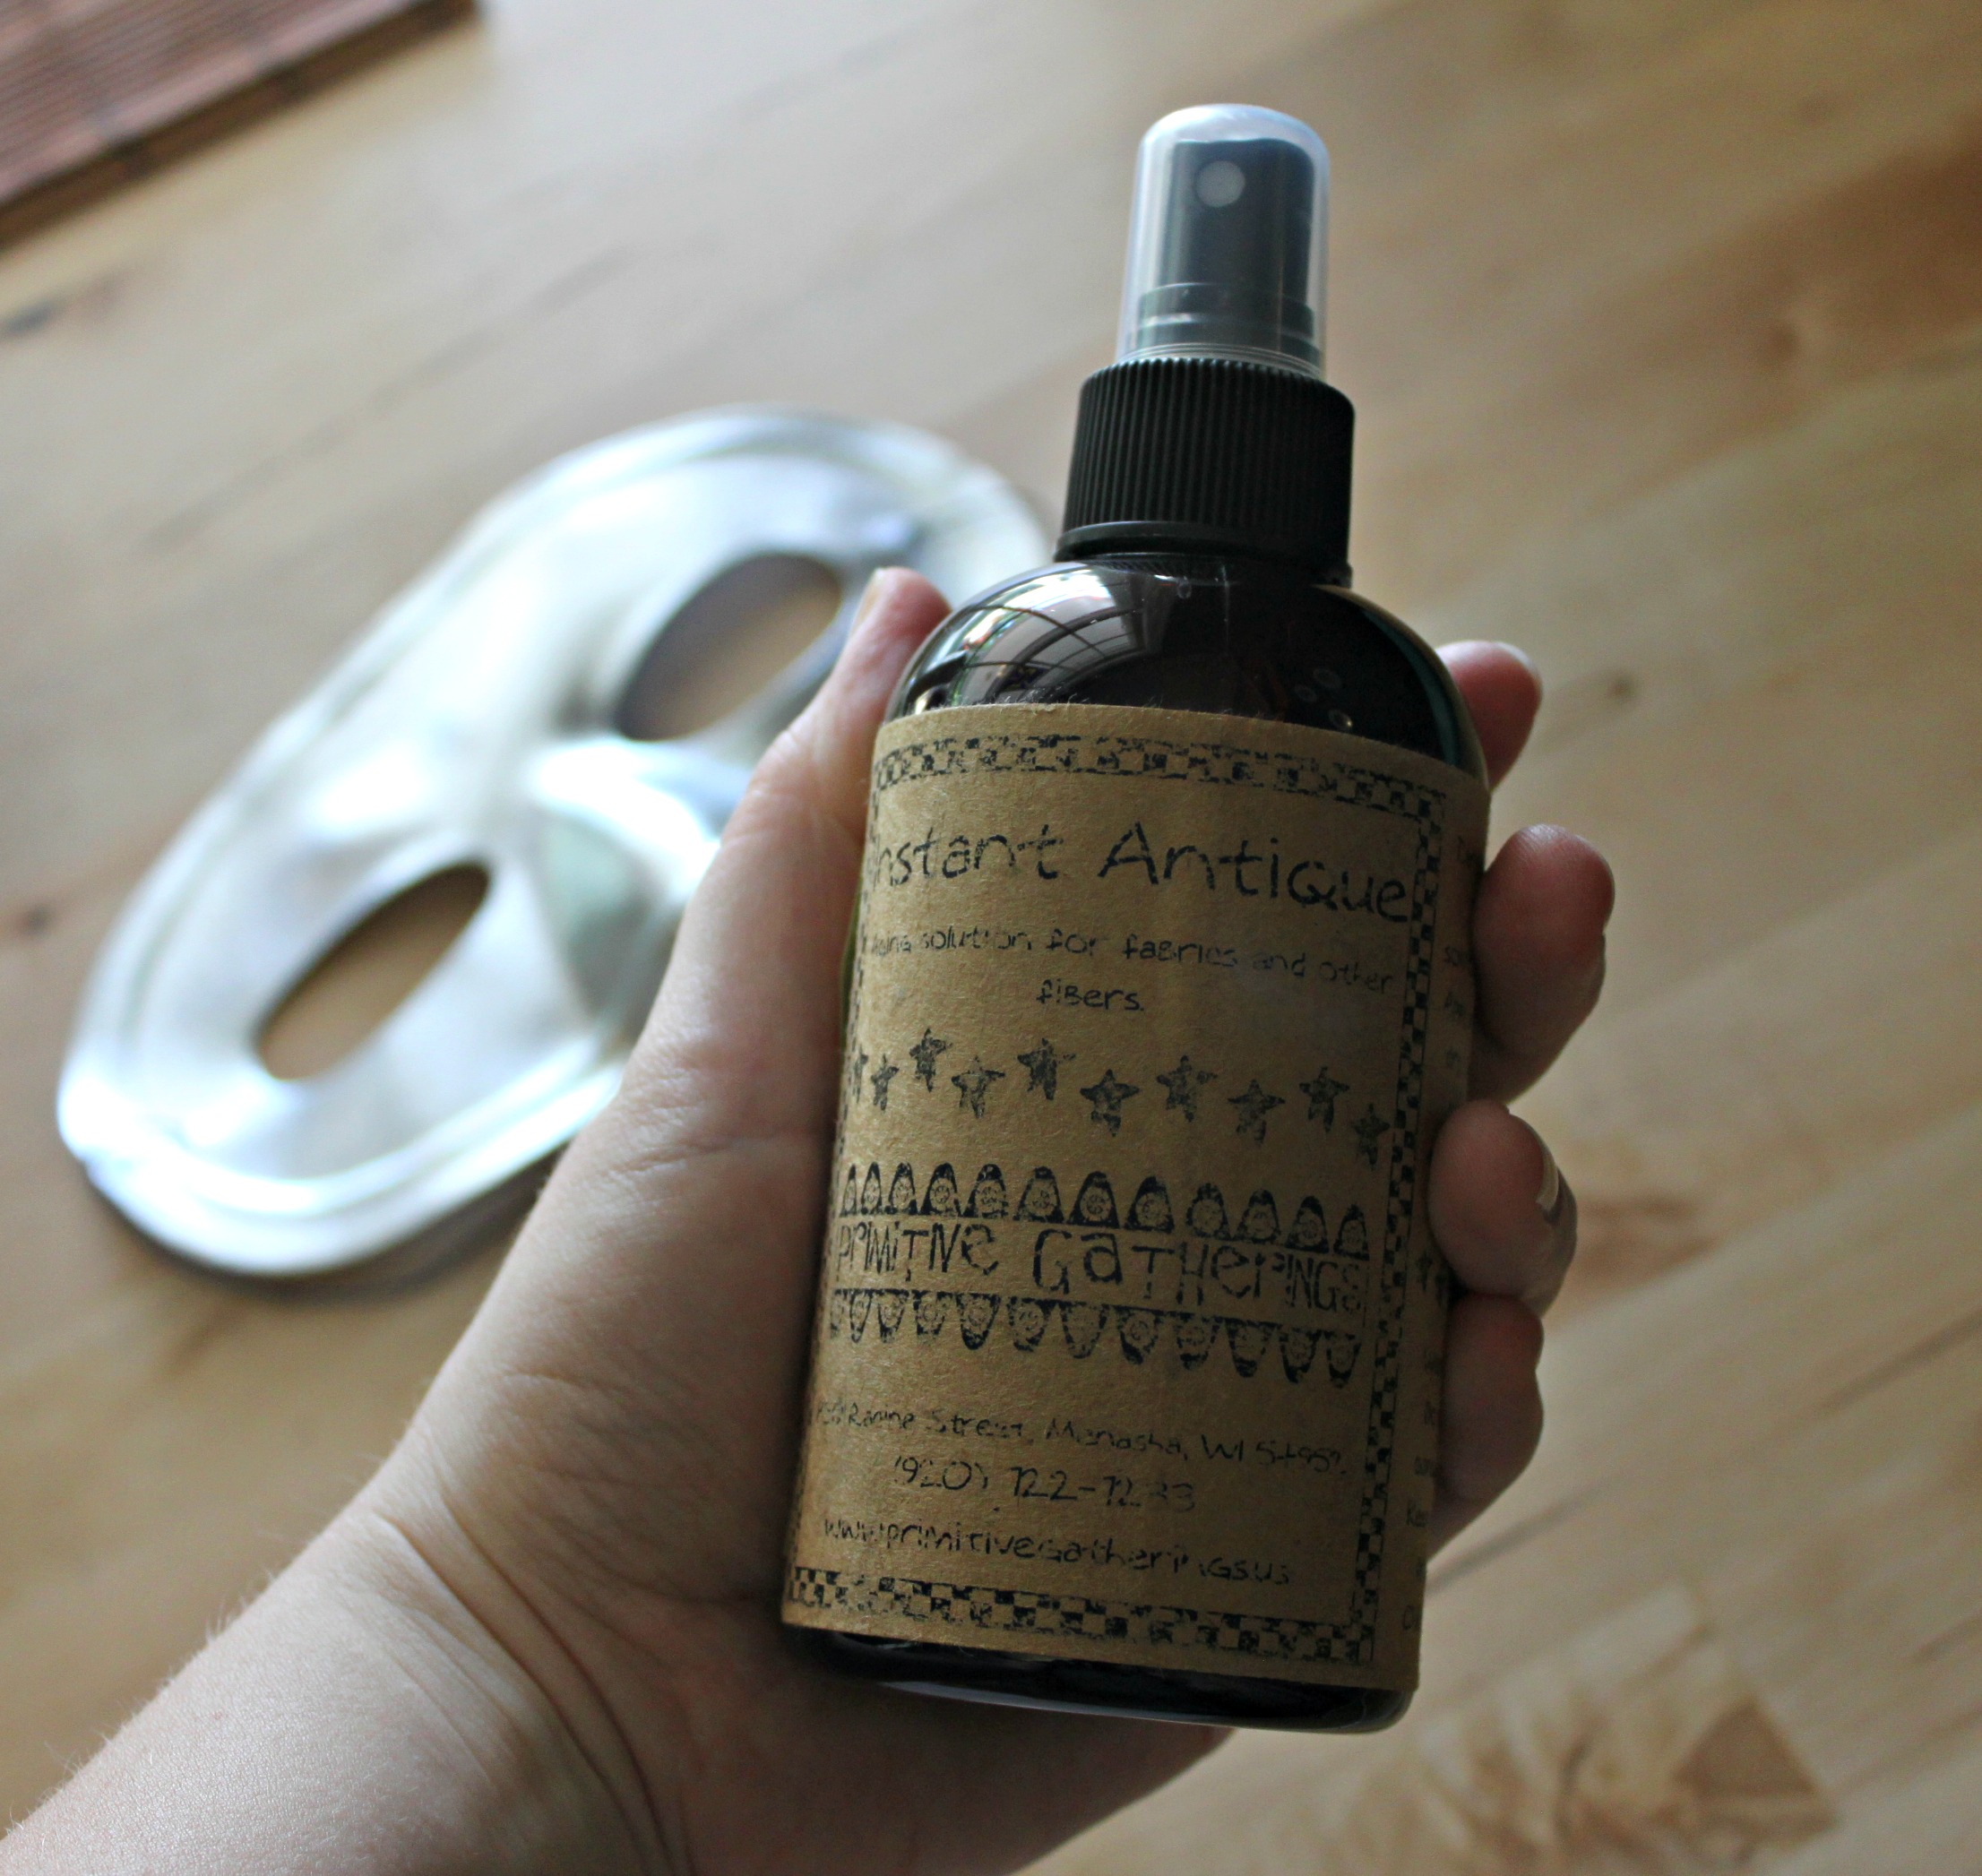
  • Fabric Antique Spray (optional)
  • Work surface (I have a portable thick wood piece that I use)

IMG_3583Steps:

  1. Antique your mask (optional). I used an antique fabric spray. It dulled the newness of the mask nicely.IMG_3536
  2. Untie your elastic head strap from your mask. Set elastic aside for later.IMG_3586
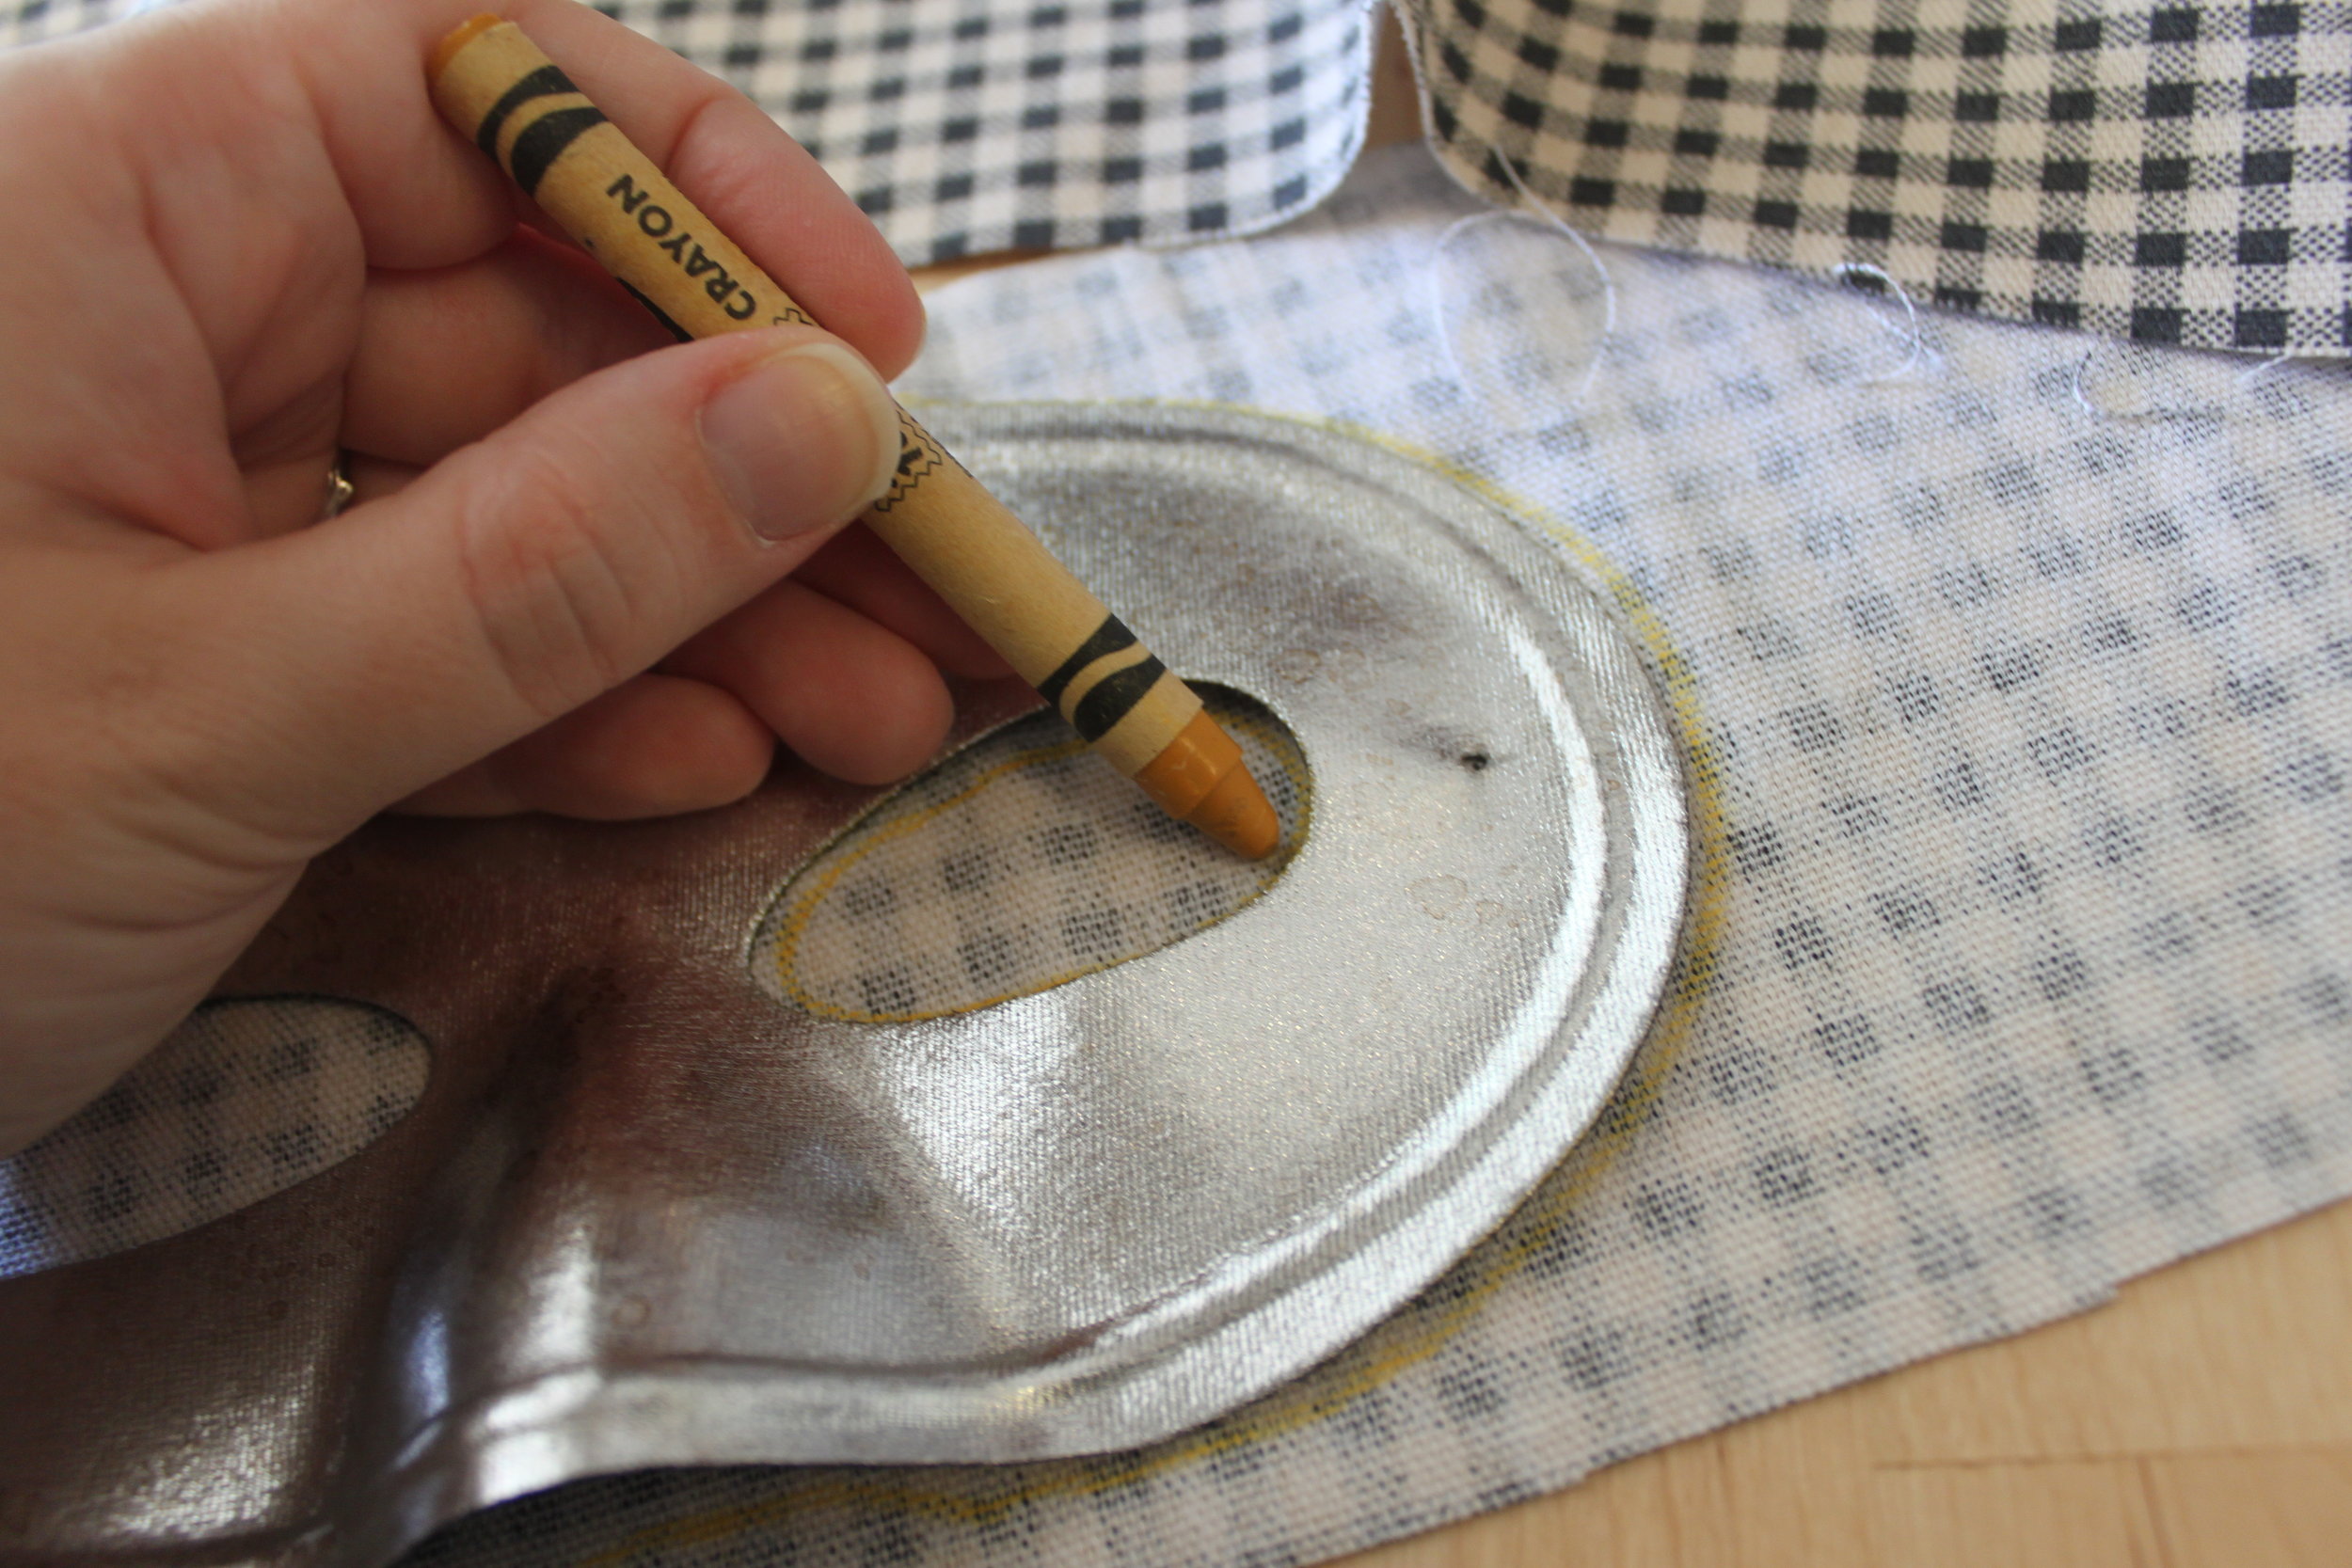
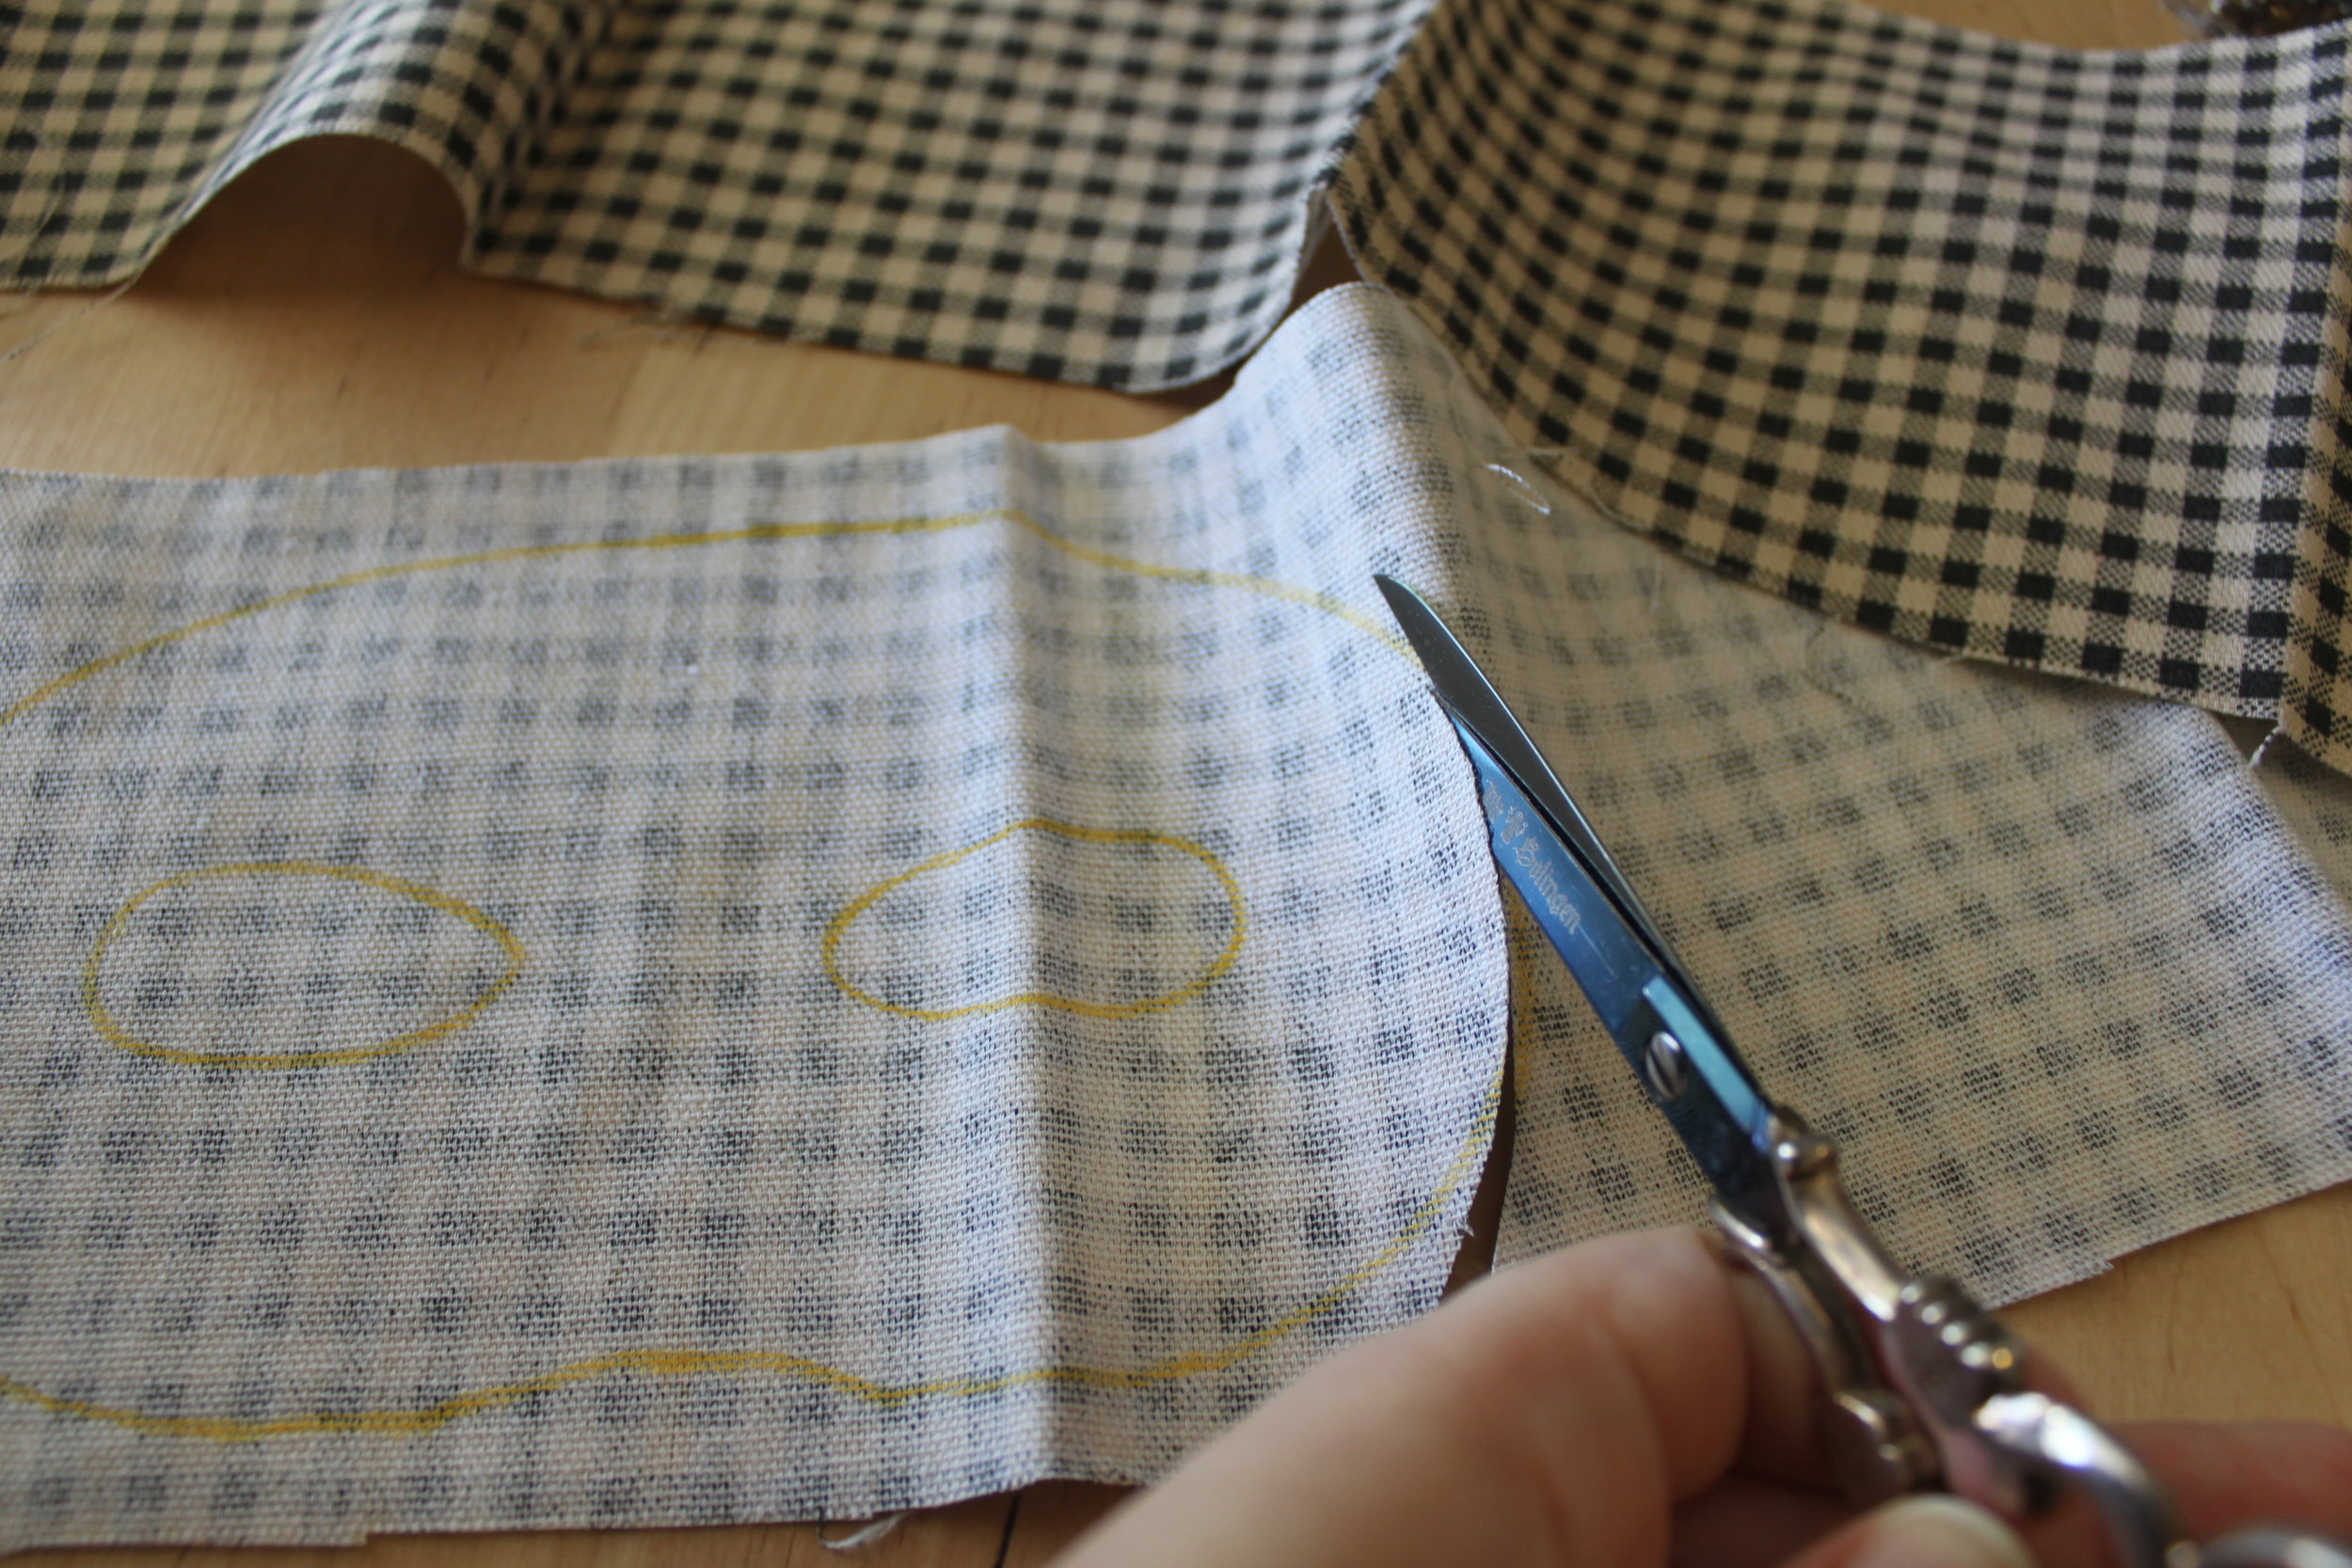
  3. Spread your cloth (or felt) out flat on the table. Trace the outline of your mask & the eye holes with chalk or fabric crayon.IMG_3589 Here's what it should look like fully traced. Be sure to also mark where your holes are for re-attaching your elastic band.IMG_3590
  4. Cut inside the lines you've created for yourself. Cutting inside the lines ensures that your cloth won't stick out past your mask & be seen from the front. IMG_3591
  5. Once you've finished cutting around the outside of your mask, it's time to cut out the eyes. Begin by partially folding your mask and cutting slits in the middle of the space for the eyes. IMG_3592
  6. After you've made these slits, it will be easier to maneuver your scissors to cut the holes for the eyes. IMG_3593
  7. Place your cut cloth (or felt) piece on the back of your mask. Trim any fabric that hangs over your mask. Set aside. IMG_3594
  8. Now you can begin placing your gears onto your mask. I like to figure out placement before permanently fixing the gears to the mask. Take a picture once you're done so that you can easily remember your gear placement. IMG_3596
  9. Once you're happy with the placement of your gears--mark where you'll need to place brads (or stitches) with a marker or piece of chalk. I suggest using a writing utensil that will either wash away or blend into your mask. (Please note that I have not done this & some of my markings do still show. I wanted this step to be clear and so I used a black sharpie instead of a silver one.) IMG_3599
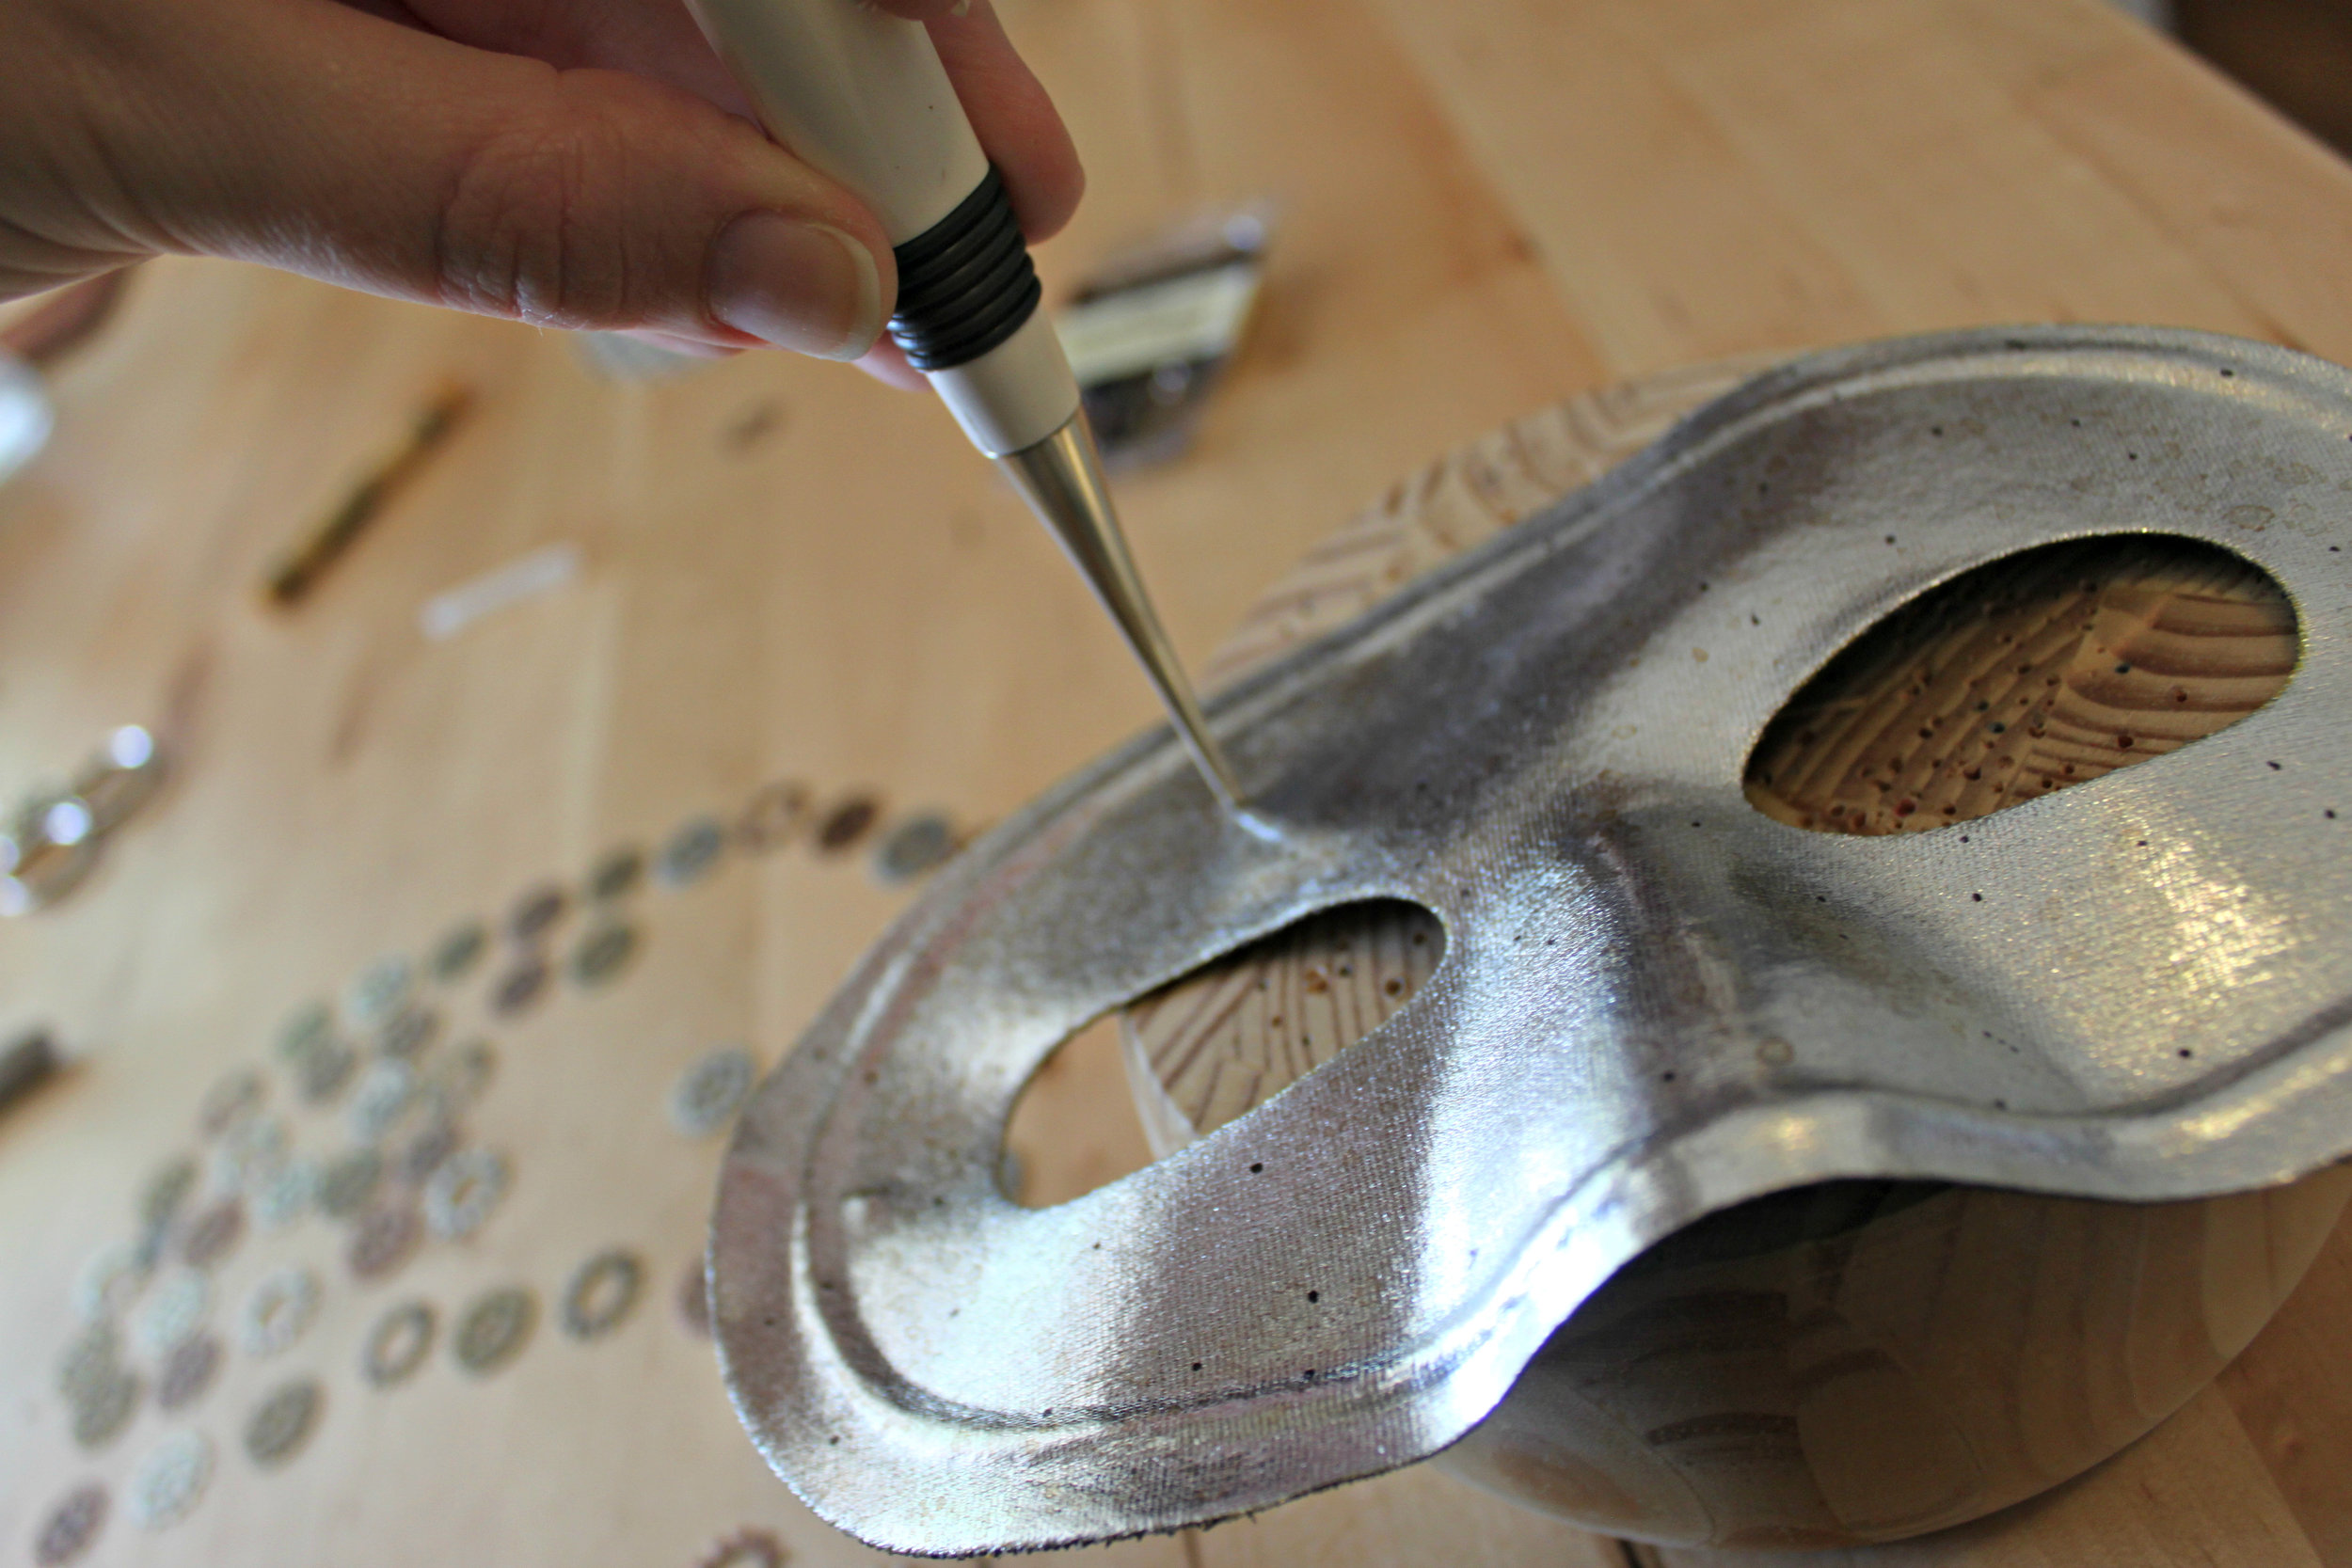
  10. Remove all gears from your mask. On your work surface, begin poking small holes using your awl on the places you've marked. Be sure that your holes are not too big. IMG_3600Here is the mask with all of its holes made. IMG_3601
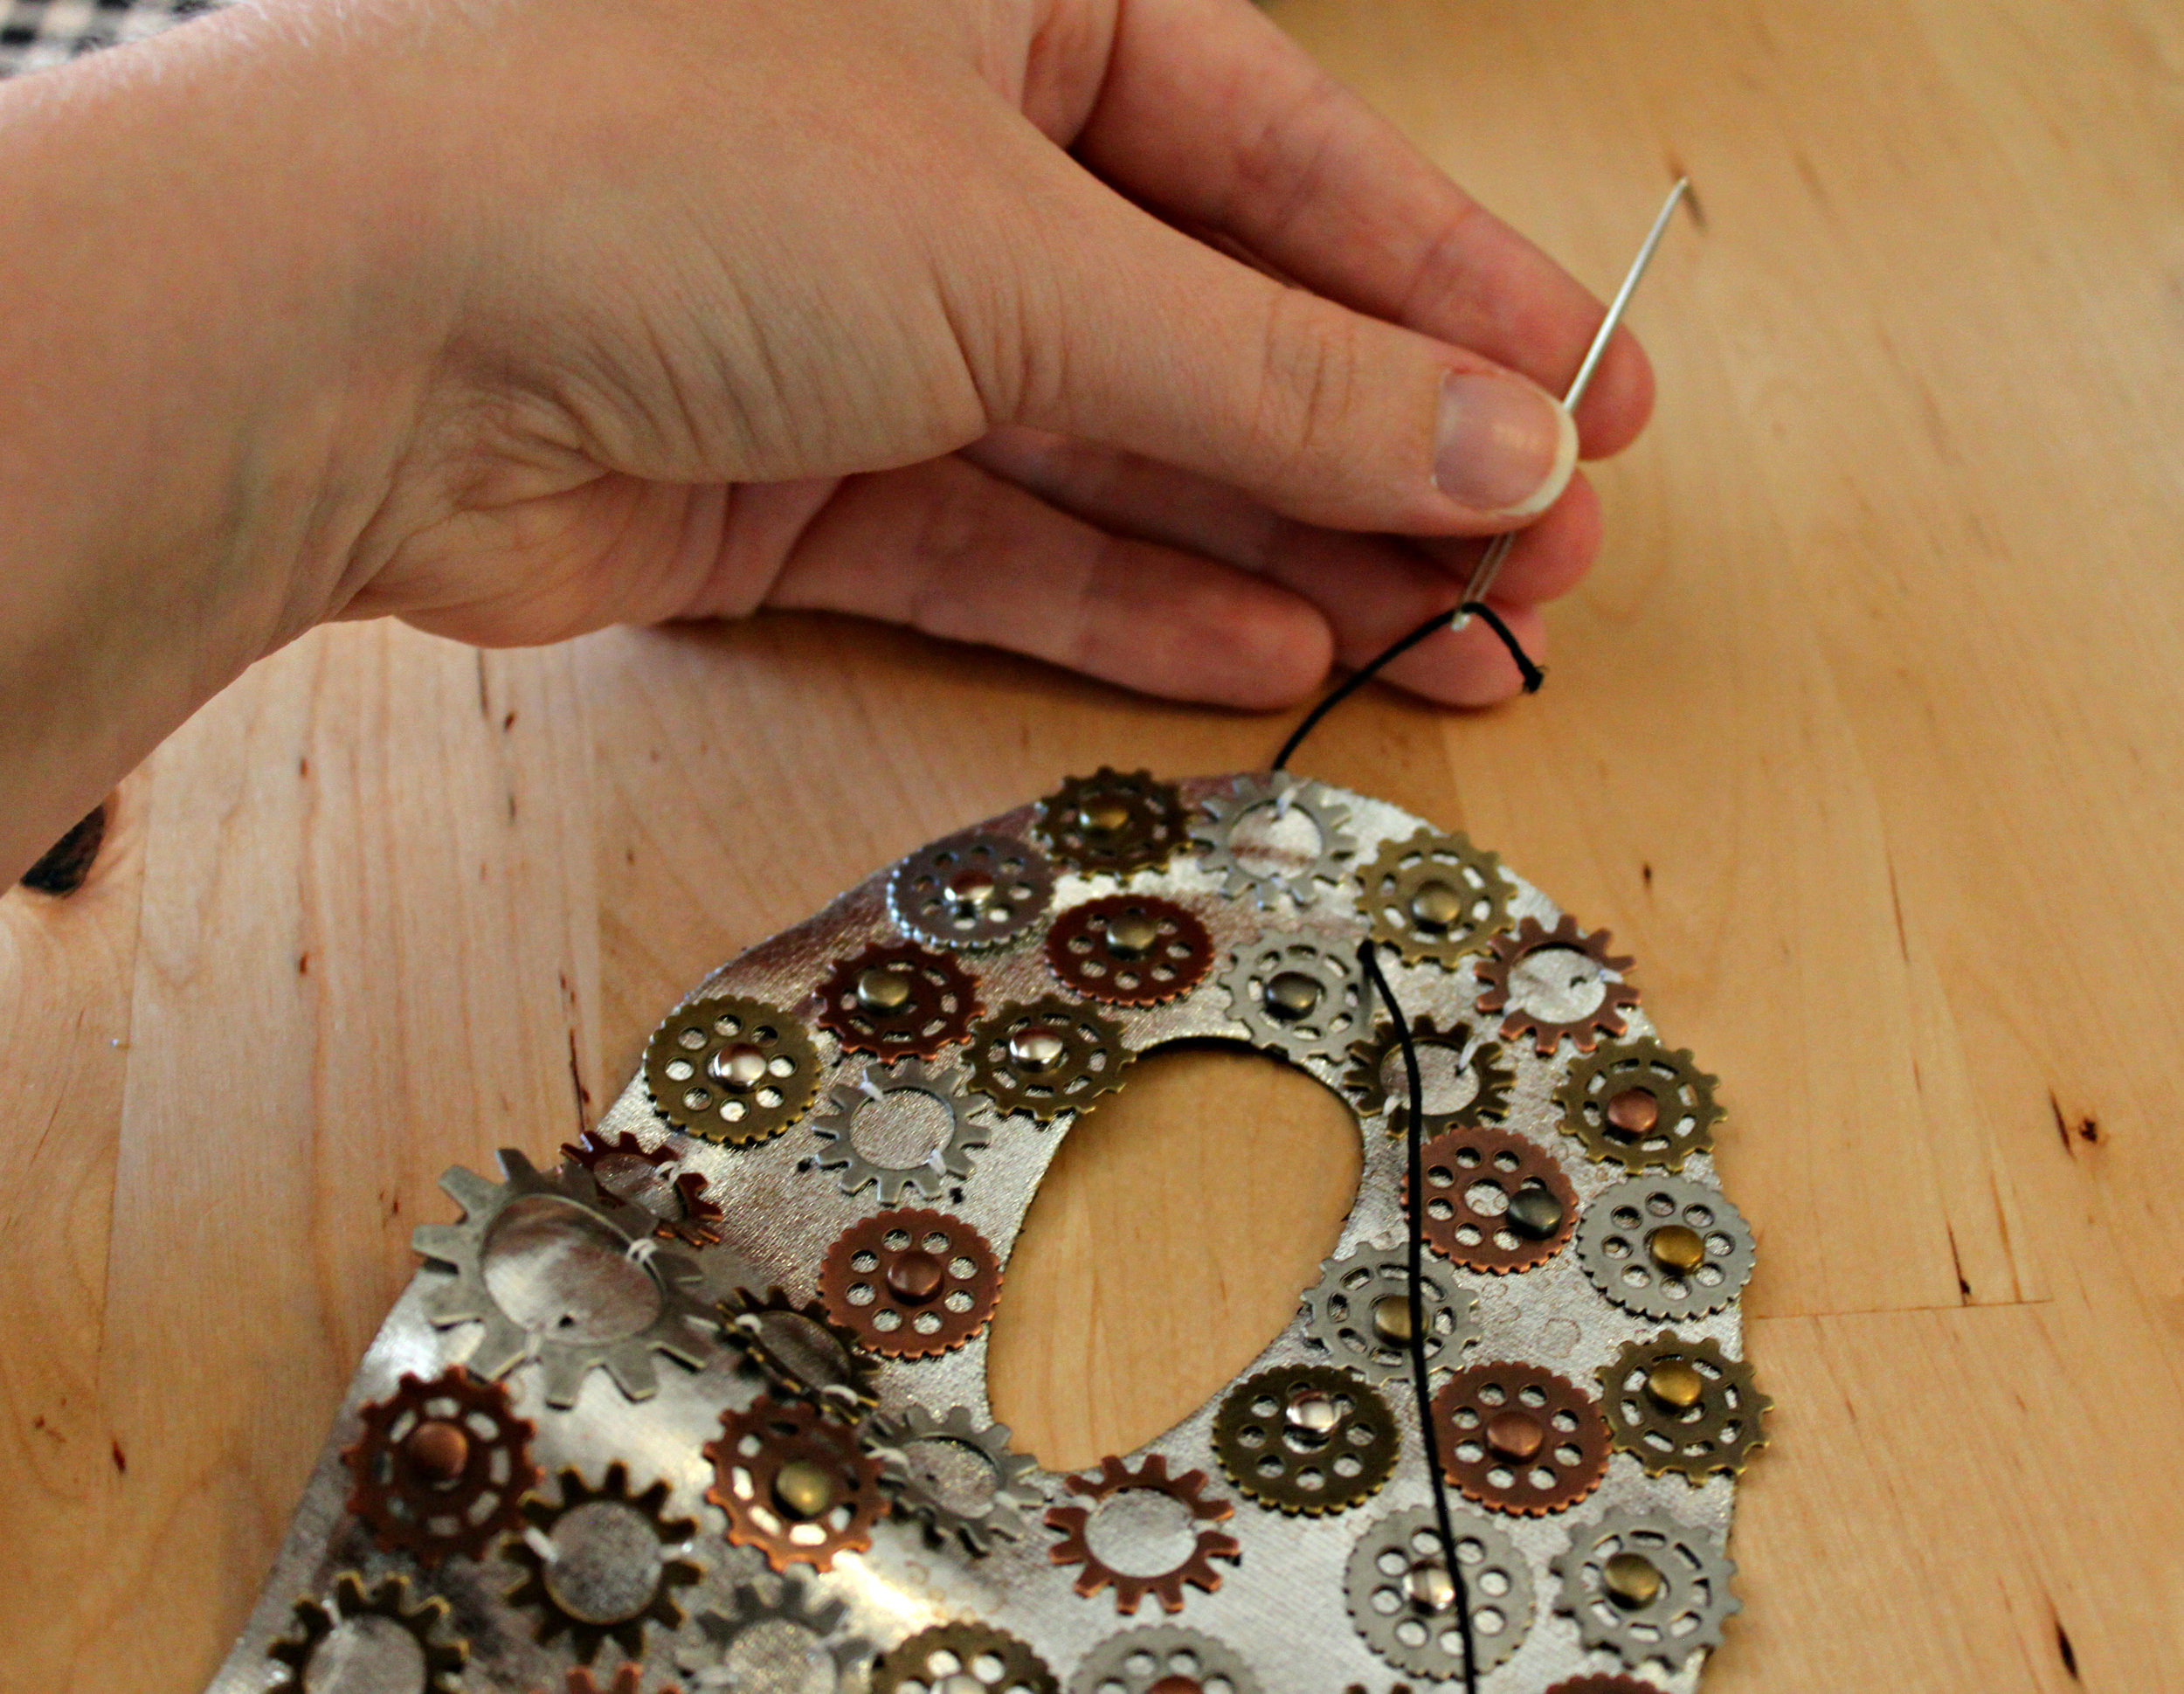
  11. Now you can start attaching your gears in place! Pull up your picture to help you recall placement. Affix each gear using a small brad. Load your brad first with the gear and then the mask. Push the brad firmly in place. IMG_3602Flip over your mask to the back side and pull apart the brad's two prongs while holding the front of the brad firmly in place with your finger. IMG_3604You can also sew the brad onto your mask using a needle & matching thread. This is not as quick as using a brad, but for gears that cannot be affixed to your mask with a brad (i.e. a gear with a huge gap in the middle), this is the only method that works. Be sure to keep your stitches tiny & neat, tie sturdy knots on the back of your mask, and to place at least 2 stitches for each gear (on opposite side of each other to keep the gear from flapping around). IMG_3605
  12. Once you've attached all of your gears, flip over your mask to the back side. Using tacky glue (or any all-purpose glue), spread an even amount of glue over all of your cloth (or felt) mask piece.IMG_3610
  13. Press the cloth piece in place. Smooth out any air bubbles. Let the glue dry completely (approximately 10-15 minutes; and for felt, 15-20 minutes). IMG_3612
  14. Grab your elastic that you set aside earlier. To re-attach it, thread it onto an embroidery needle & pull it through the existing hole. Be sure to pull the elastic from the front of the mask to the back.IMG_3615
  15. Remove the elastic from the embroidery needle & knot it. IMG_3617
  16. Repeat steps 14 & 15 for the other side.
  17. Wear proudly! IMG_3621As always, Merry Making! I am also excited to announce that I will be teaching a class on how to make this very mask at the Schusterman-Benson Library on October 21st! Check out more details here! I am also co-organizing Swap-o-Rama-Rama again & this year it's better than ever! We're swapping & re-vamping Halloween costumes! RSVP on Facebook. Also tune in to Good Day Tulsa on Tuesday (Oct. 14th) between 9-10 am to hear more about our fun projects!

Steampunk Hallow's Eve Party~Decorations (Re-blogged)

D-I-Y-Samantha Extance3 Comments

Having a Halloween party? Want to Steampunk it up? Here are a few ideas that won't break your wallet (gotta have money for all that candy right?)! Jars of candy are a given for any Halloween party--to add just a touch of mystery & oddness you can attach labels like the one below from VectoriaDesigns.  They are much classier than your average Halloween labels, indicating the jar's contents are brains, zombie boogers, blood, etc. VectoriaDesign's labels, for instance, help set a Steampunk/Sci-Fi mood with labels like: Anti-Time Tablets, Steam Engine Oil, Octopus Ink, and my favorite Time Traveler Pills to name a few.

The labels are a digital download. Total cost: $3.50 label images (15 total), $11.99 label printer paper...$15.49

Another great digital downloadable decoration for your party are Victorian style paper dolls with a Halloween & Steampunk twist. My favorite paper doll artist is RhondasOrignials. Her dolls are by far the most unique and strikingly odd. She has over 50 paper dolls for Halloween alone. These dolls make excellent centerpieces for your table or to fill up empty space on your mantle or shelves.

What makes Rhonda's paper dolls so special is the accessories that come with each doll and the characters that she creates. You can download her dolls on her Etsy shop, click here to follow the link. Rhonda also has specials where she bundles a number of her dolls together for Halloween. The bundle costs $23.25 or you can purchase individual doll patterns for $6.00 each. The instructions on how to assemble your dolls is very easy to follow and the colors are true to how they print on your home printer. Total Cost: (for a bundle) $23.25, brads (found in your local arts & crafts store in the scrapbooking aisle)  $1.39, Aleene's Tacky Glue $2.50...$27.14

Aside from digital downloads, hit your local flea markets, garage sales, and estate sales for old jars & bottles. You can fill these bottles & jars with an assortment of items to fit the mood of your party. Inkling for a bit of twisted romance, dry some red roses beforehand and place them in your jars for a pretty bit of decay to display or paint them black (how very Alice in Wonderland of you to do so!). Want your party to look like a Mad Scientists Laboratory, fill those jars up with an assortment of colored liquids & place glow sticks inside so that they give off an eerie luminescence. There's also my DIY on steampunk candles--they're perfect for a Hallow's Eve Bash!

There are other items you can make to give your party a steampunk feel. Craft recently posted a DIY on how to make your own miniature hot air balloon.

You can suspend them from the ceiling to give your party-goers the feeling that they are on an airship deck among the clouds--you can even make clouds! Click here to find out how!

If you do not have a specific steampunk  theme in mind, you can be more general and decorate using broken machines, machine parts, clocks, and other mechanicals you may already have or ones that you can thrift. Great items to pick up: tea cups & saucers, china, clocks of any kind (you can line them all up on your mantle, table, or along your stairs), jars of light bulbs, globes or old maps, or springs (to make a garland to hang in your doorway or off your fire place).

These are just a few ideas to get you started! Stay tuned for the rest of October for my Steampunk Halloween DIY series  and get ideas on steampunkins and how  to make your own steampunk halloween costumes for adults & kids.


Update an Old Pair of Gloves

D-I-Y-Samantha ExtanceComment

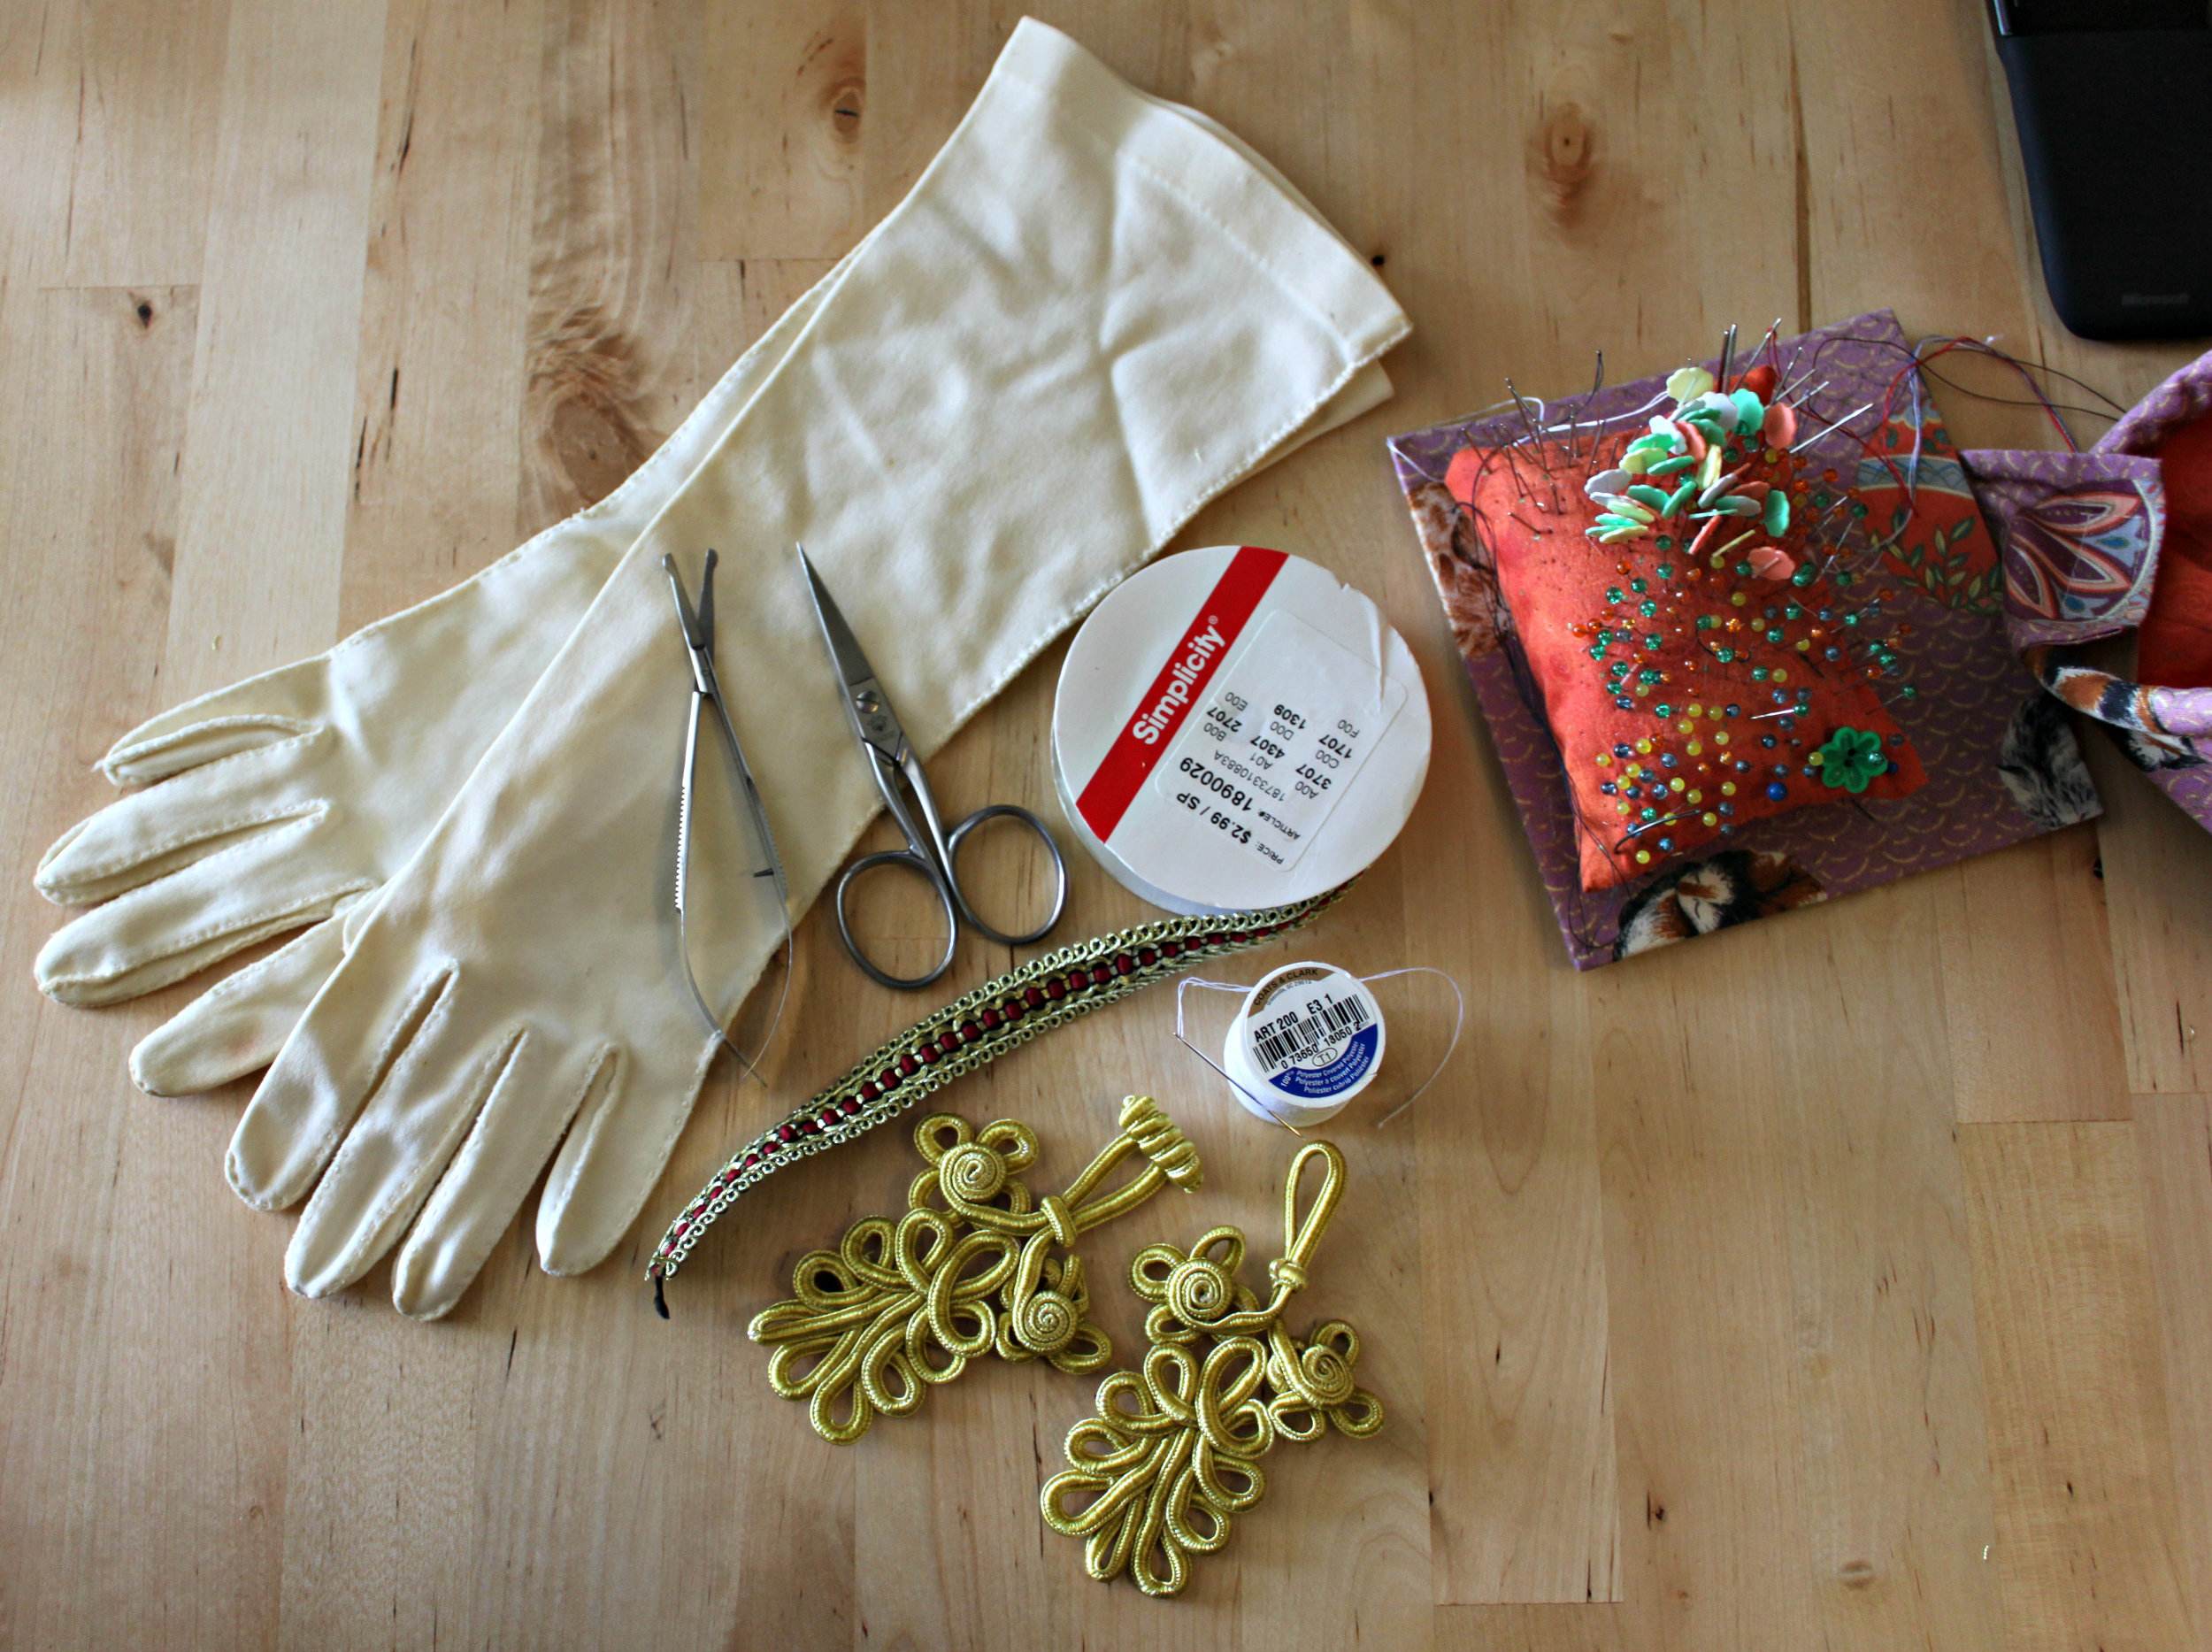
With Halloween coming up soon, I've been dreaming up new steampunk costume DIYS.  The easiest way to create a Halloween costume is to simply update an older one. Many costumes include a pair of gloves. Gloves are a versatile accessory and easily updated. Here's what you'll need:IMG_3415

  • Pair of gloves
  • Scissors
  • Needle & Thread (the thread should match the color of your gloves)
  • Pins
  • Decorative ribbon (I purchased mine from JoAnn's for just $2.99)
  • Embroidered Ribbon Clothing Toggle (you can find these in any sewing or fabric store in the belt & fasteners aisle)
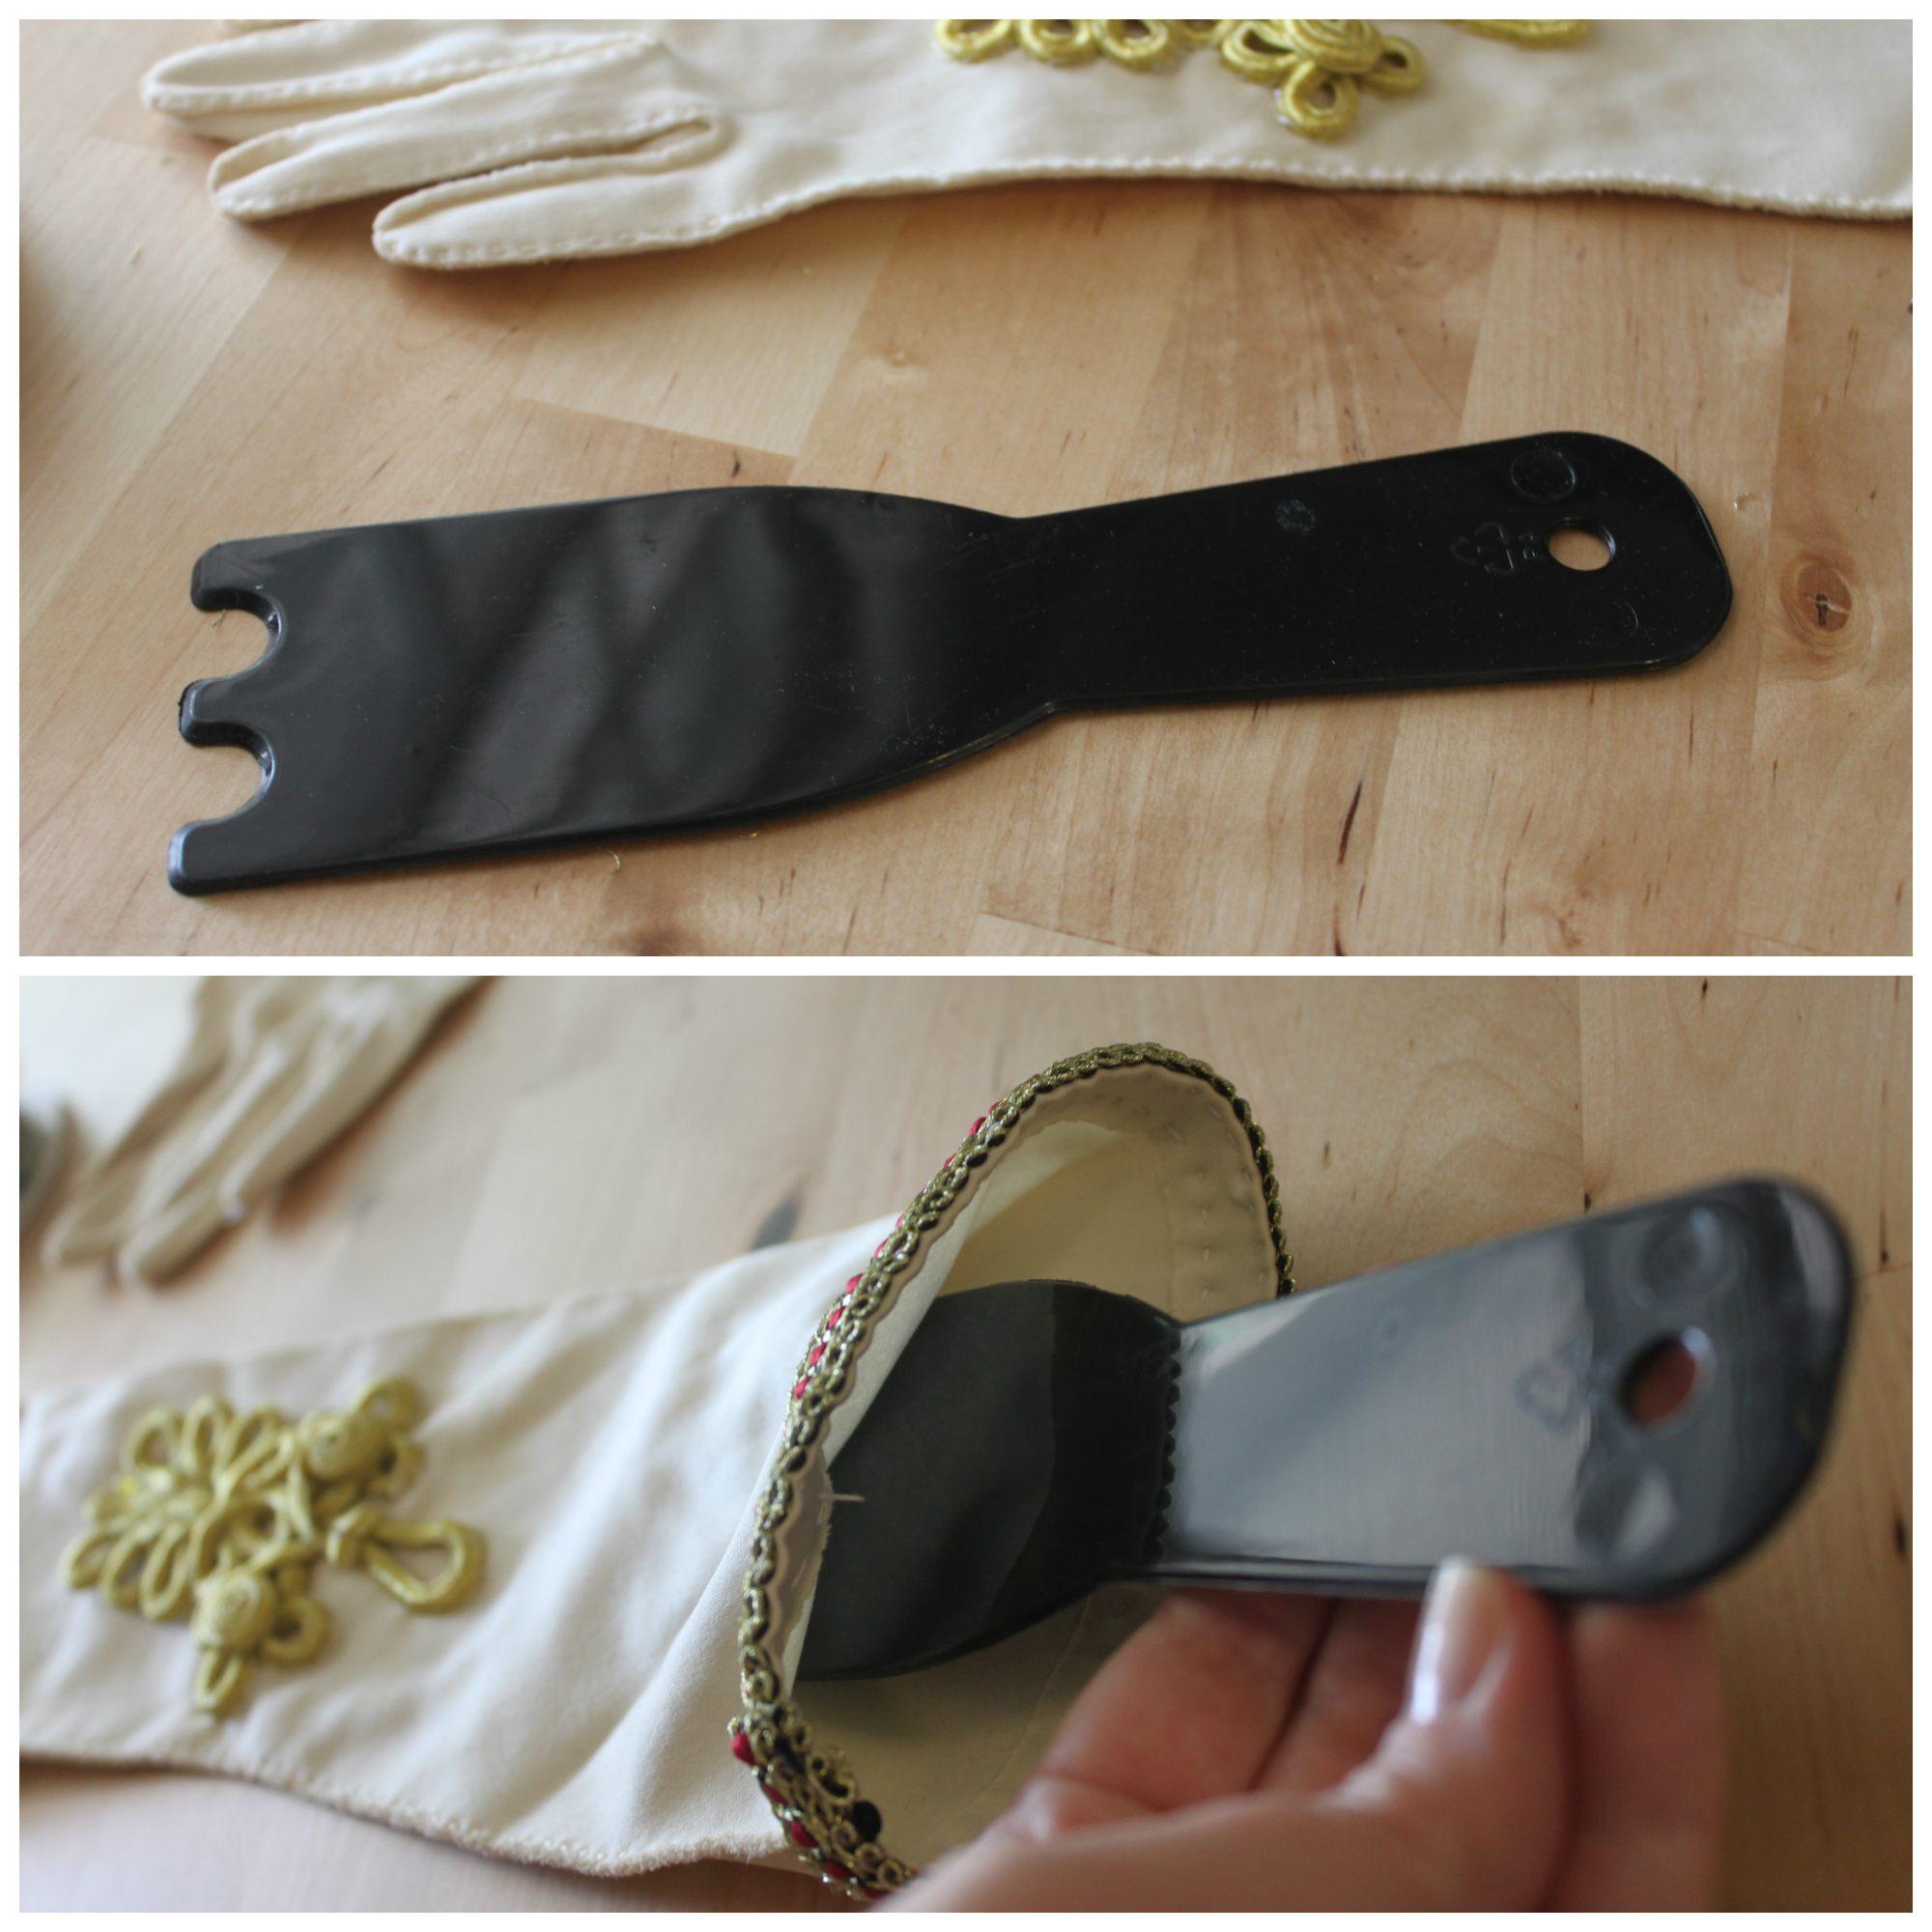
  • Piece of plastic that fits inside your gloves (You may need to get creative with this supply--I used a kitchen utensil. You want something that will fit inside your glove & is preferably plastic so that you don't sew through both sides of your glove when attaching the clothing toggle. Plastic is smooth and so your needle will slide once it hits it)

Steps:

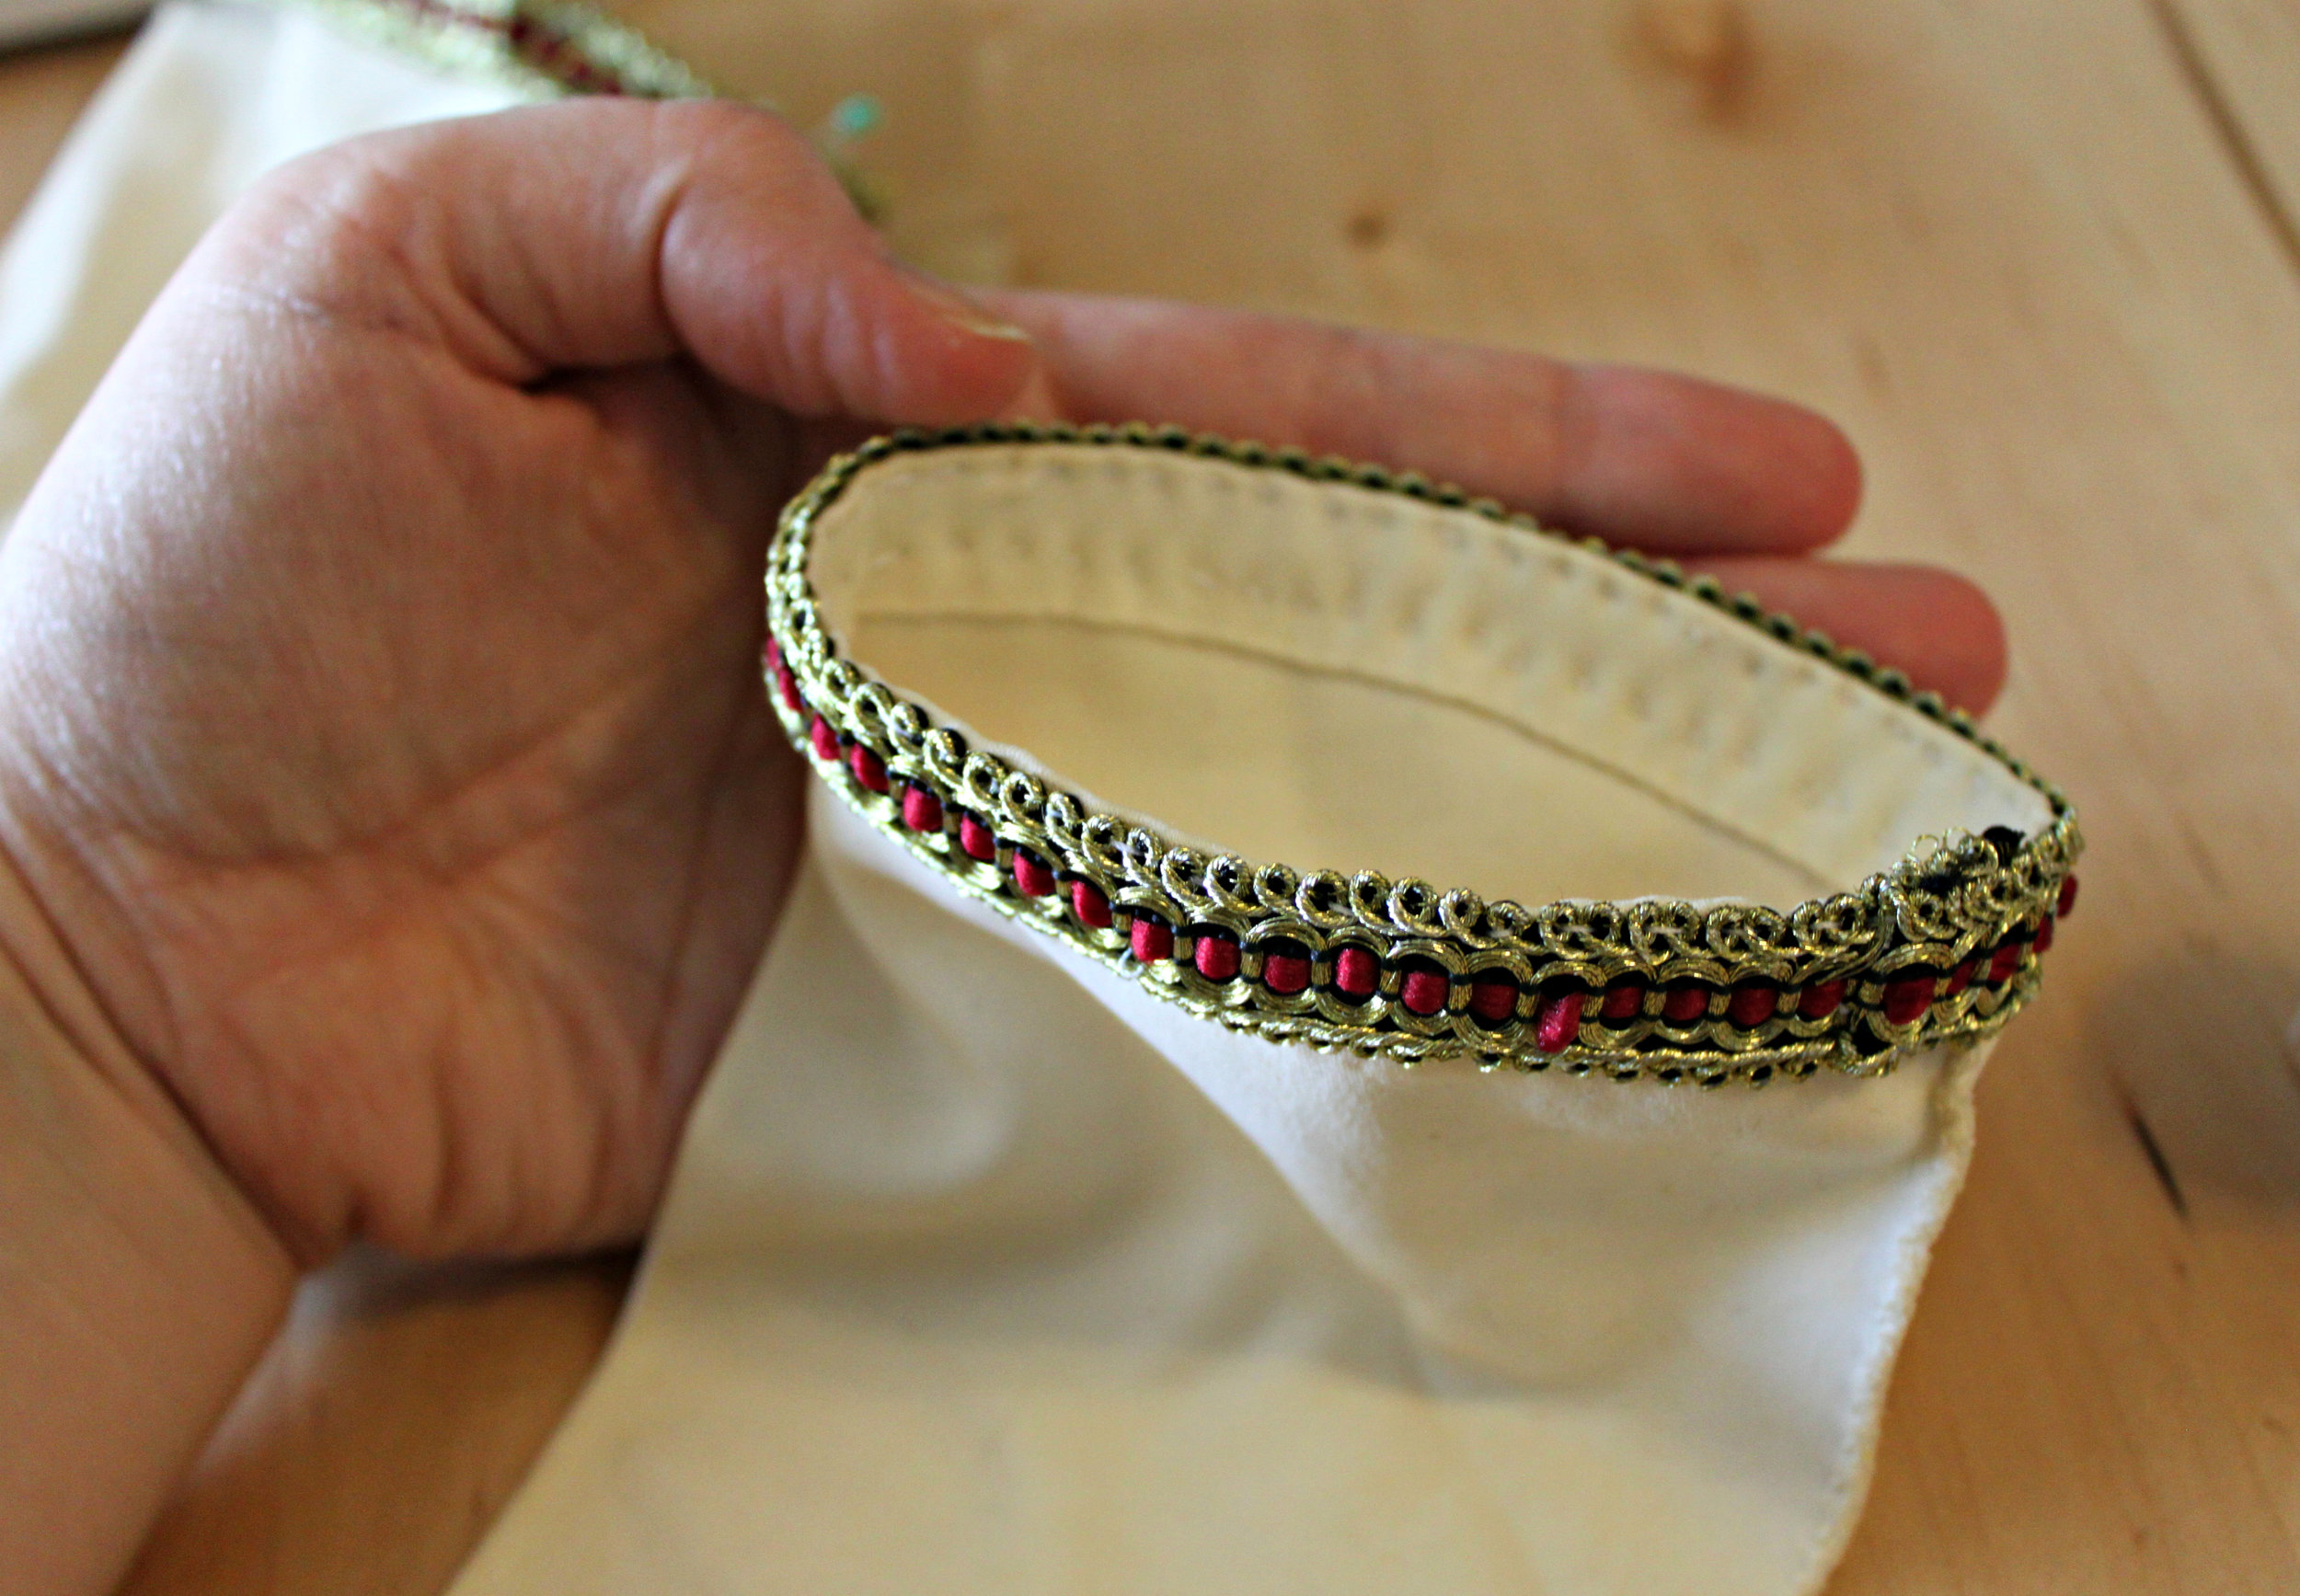
  1. Begin by pinning your decorative ribbon in place. To ensure that you place your ribbon evenly, line up the edge of your ribbon with the edge of your glove. Also, to hide your seam, begin pinning your ribbon on the part of the glove that will be closest to your body. Leave 1/4 inch of extra ribbon at the end. Fold this extra 1/4 inch of ribbon under & be sure that it covers up any raw edges. Pin in place.IMG_3416
  2. Using your needle & thread, sew your ribbon onto your glove. Any style of stitch will do. Be sure to keep your stitches neat & even. (Also, try to hide your stitches in the pattern of your ribbon or use a matching thread.) Remove the pins as you go.IMG_3419
  3. Repeat Steps 1 & 2 for the other glove. IMG_3421
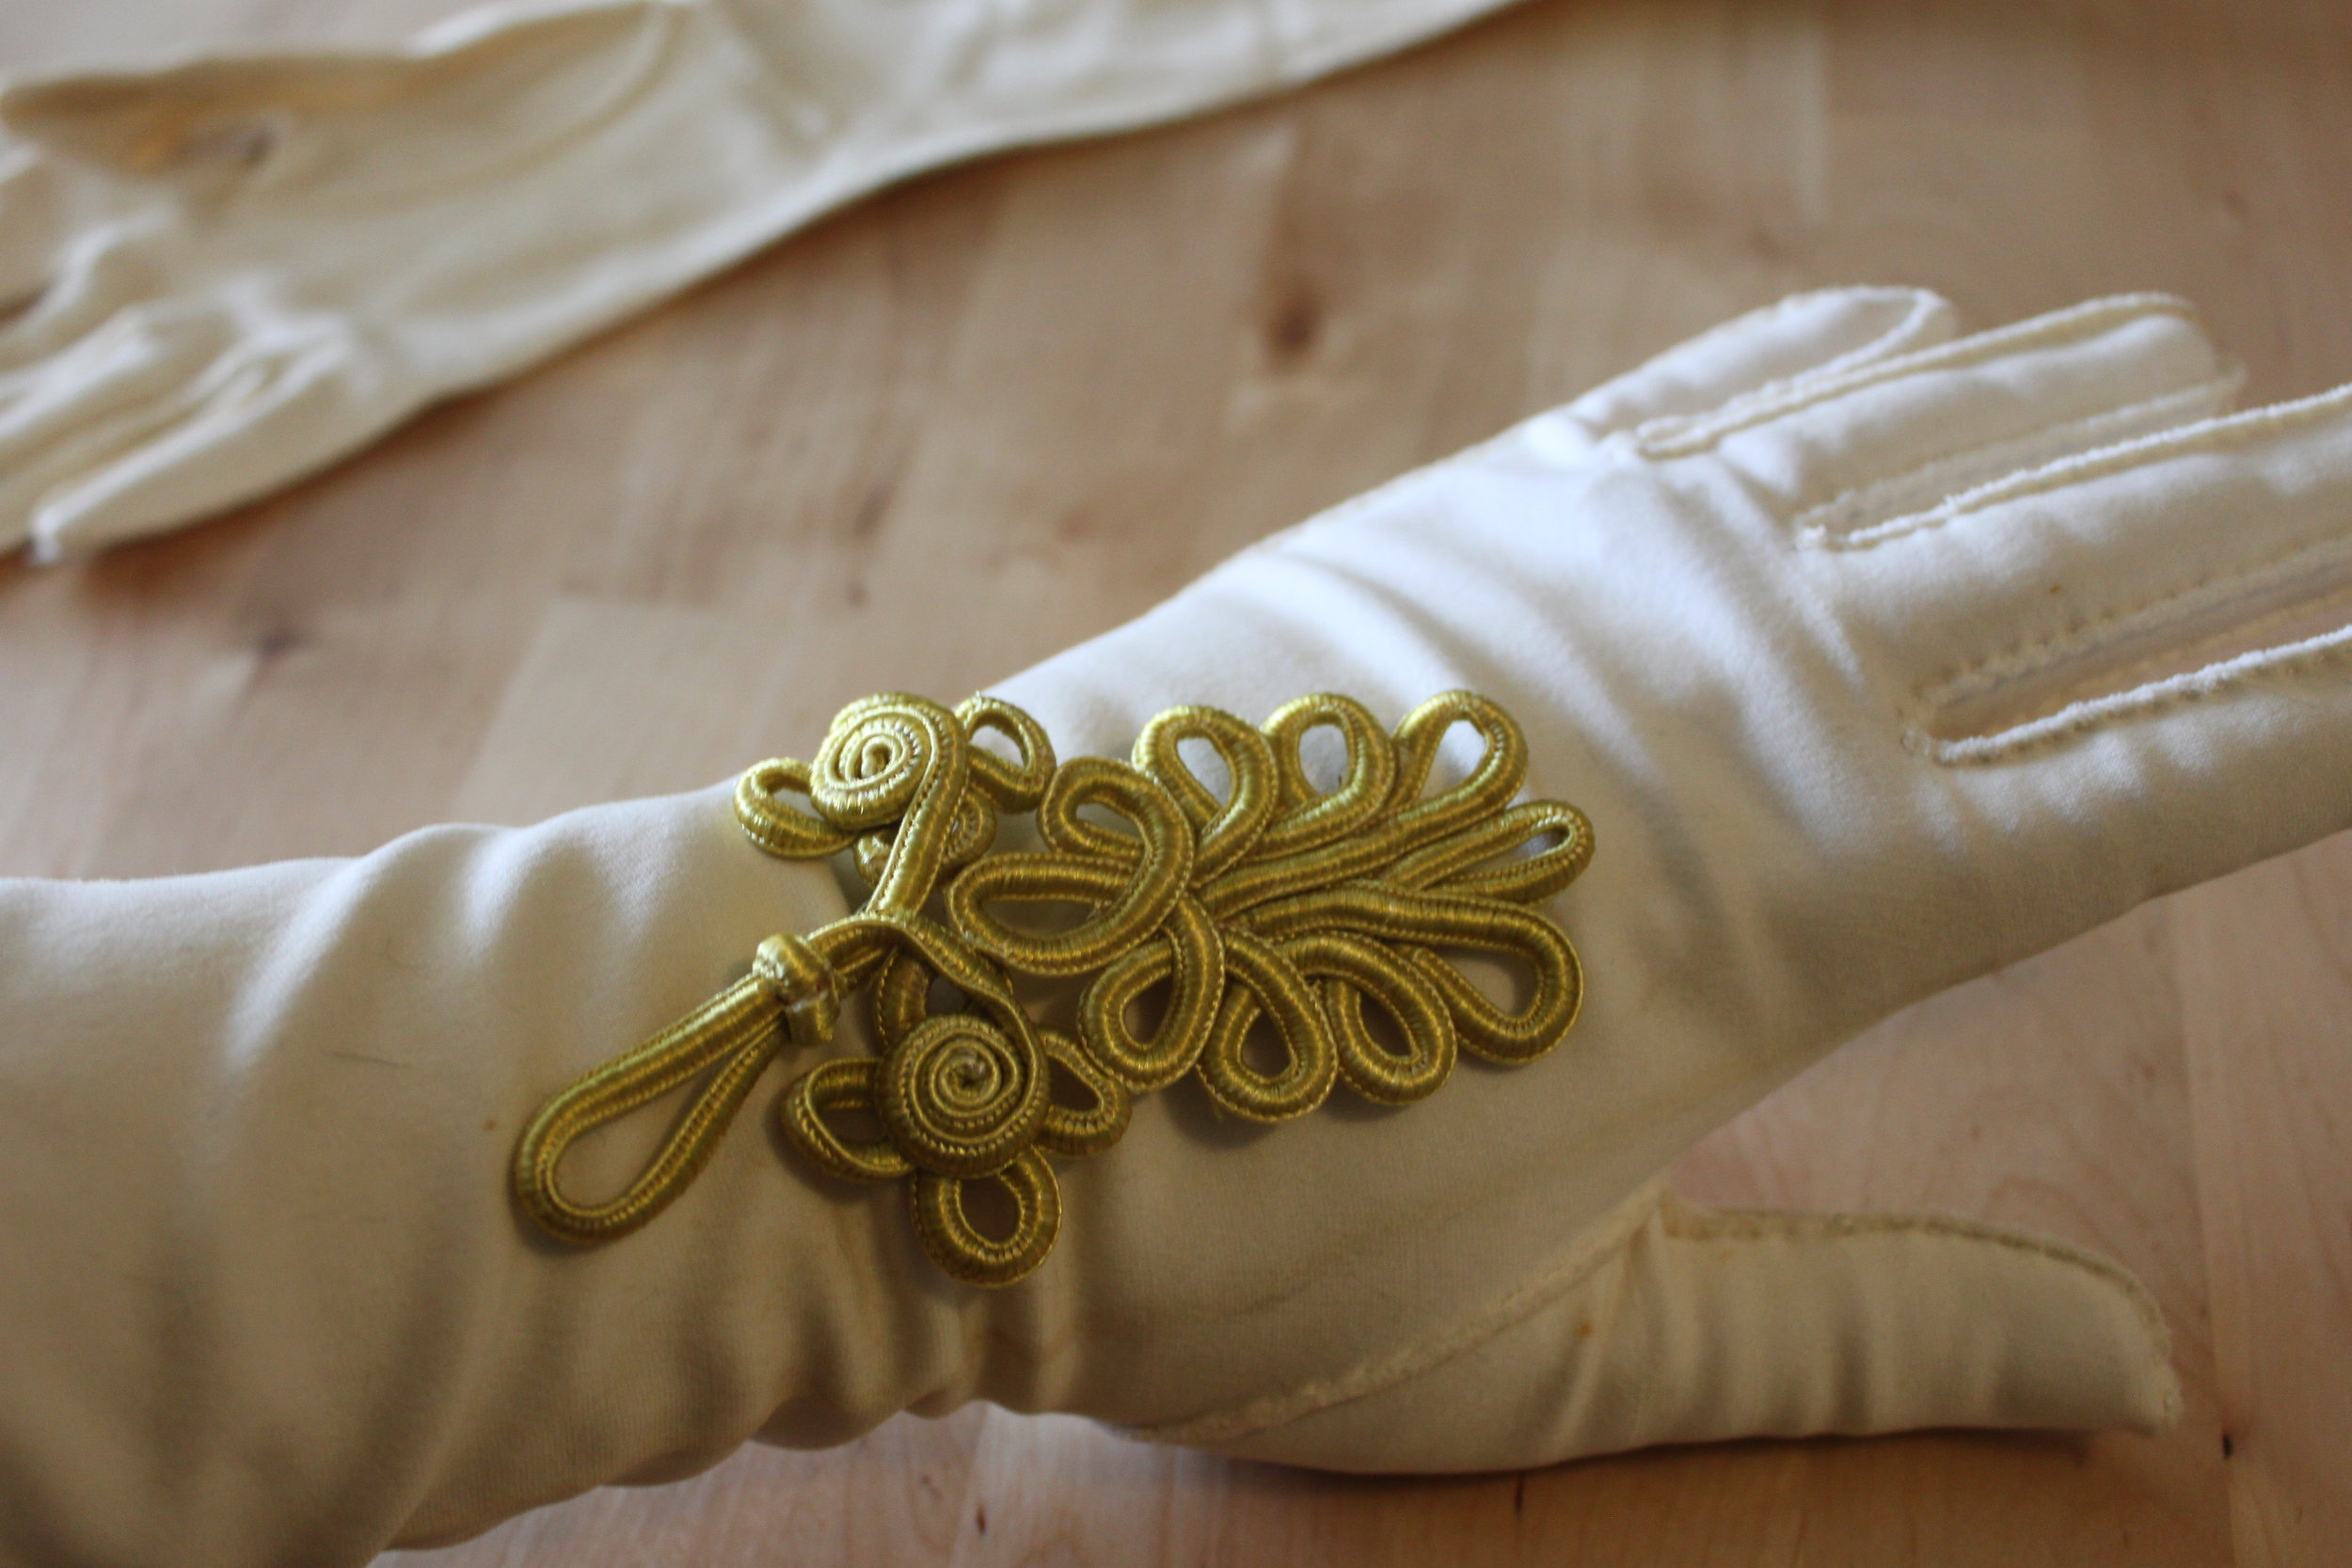
  4. Next, put on the glove and determine where you would like to place your embroidered ribbon clothing toggle piece. (Do not pin the piece in place while you are wearing the glove...unless of course you want the Halloween gore to be real.)IMG_3422
  5. After removing the glove, pin the toggle piece in place.
  6. Before sewing, insert the piece of plastic into your glove. This will ensure that you do not sew your glove shut/together. PicMonkey Collage2
  7. Using your needle & thread, sew your toggle piece to your glove. The best stitches to use are: slip stitch, blanket stitch, or an oversewing stitch. PicMonkey Collage
  8. Repeat Steps 4-7 for the other glove. IMG_3430
  9. Now your gloves are like new! Hope they'll keep you warm & feeling fancy this Halloween! IMG_3444

As always, Merry Making! Check back again soon for more Steampunk Halloween Costume DIYS--I have 3 already in the works on how to steampunk a mask! IMG_3436

Carve Your Own Steampunkins! (Re-blogged)

D-I-Y-Samantha Extance1 Comment

As promised, here are a few ideas & DIYs (3 different DIYS) on how to Steampunk your Pumpkin  this Halloween! Happy Carving! 1) Kid Friendly Steampunkins, or the "Mr. Potato Head" Approach

What You'll Need:

  • Pumpkin Carving Tools (You can purchase a kit or gather up the following: A large knife, paring knife, toothpicks, a corn-on-the-cob utensil (optional but it makes poking holes so much easier), small & large metal spoons, newspaper or trash bags to protect your table from all the pumpkin guts, and a bucket or big pot lined with a trash bag for pumpkin guts & seeds)
  • 2 gears, or as many as you prefer your pumpkin can have many cog & gear eyeballs (salvaged is preferable but if you cannot find any you can purchase reproduction gears from Michaels. Just look for the "Industrial Chic" or "Found Objects" items).
  • 3 springs (use 5-6 springs if you have a large pumpkin)
  • Accessories, goggles, a top hat, a monocle, pocketwatch, eyepatch--get creative! Create your very own Steampunk Pumpkin Character!

Steps:

  1. (For adults only) Carve a lid, scoop out the pumpkin guts, and poke starter holes where the gear eyes & spring mouth will be inserted. The holes for the spring-mouth should be relatively small because your springs will be held in place by 2 toothpicks (as shown below). The toothpicks should stick out approximately 1/2-1 inch.
  2. (For kids) Stick the eyeball gears into their pumpkin sockets and give that steampunkin the ghoulish grin it's been waiting for! Link the springs and place them on the toothpicks.
  3. (For kids) Last but not least, dress up your pumpkin with a pair of googles & a hat, an eyepatch, or a monocle on chain! Whatever your heart desires!

2) Painting on the Punk! Another kid friendly approach to pumpkin decorating!

What You'll Need:

  • Various Acrylic Paints (any colors you choose. I like black, white, red, & metallics)
  • Paintbrushes (or various sizes, at least 1 small paintbrush for details & 1 large brush)
  • Water & Jar & Paper plate (or cardboard) for mixing your paints

Steps:

  1. Paint some Steampunk scenes, objects, or faces onto your pumpkins!
  2. (Option 2 for tiny tinker-tykes ) Cut out some gear shapes or pocketwatch shapes from some sponges & give them to your tyke to dip in paint and place on their pumpkin! Download a template for gears below!

3) Classic Carving & Pumpkin Poking

What You'll Need:

  • Pumpkin Carving Tools (You can purchase a kit or gather up the following: A large knife, paring knife, toothpicks, a corn-on-the-cob utensil (optional but it makes poking holes so much easier), small & large metal spoons, newspaper or trash bags to protect your table from all the pumpkin guts, and a bucket or big pot lined with a trash bag for pumpkin guts & seeds)
  • Template or Design, to trace or draw freehand on your pumpkin (you can download Steampunk ones here)
  • Tea candle (I prefer electric, but that's up to you!)

Steps (for tracing your design):

  1. Carve a lid & scoop out the pumpkin guts.
  2. Next, place your design over your pumpkin and trace using your special pumpkin poking tool (in your kit). I used a corn-on-the-cob utensil instead. It worked really well and had the added benefit of creating 2 holes instead of just one per punch so I was finished poking holes a lot sooner.
  3. Once you're done tracing your design, place your tea candle inside and affix your lid! Enjoy your steampunkin's ghoulish glow!

Steps (for carving your design):

  1. Carve a lid & scoop out the pumpkin guts.
  2. Next, free hand sketch the design or template of your choice onto your pumpkin. I recommend using a pencil as pen can smudge and show on the skin.
  3. Carve out your design!
  4. Once you're done carving, place your tea candle inside and affix your lid. Enjoy your steampunkin's eerie luminescence!

Templates: (Free to download, my gift to you! Happy Halloween!) 

Don't forget to post pictures of your steampunkins! I'd love to see 'em! Happy Carving!

DIY Steampunk Monocle Bowler

D-I-Y-Samantha ExtanceComment

A fun DIY for Halloween! Great for a steampunk Sherlock Holmes or Watson! shot_1373926098697This DIY is relatively simple though it can be expensive (if you can't find a bowler for cheap). Here's what you'll need:

Bowler hat (preferably thrifted); Thick Chain (I used 4 inches); Safety Pin; Needle & Thread; Ribbon (mine was ribbon made to look like measuring tape); Small leather pouch; Magnifying glass; Game Spinner; Clock Gear; Jumps Rings; Pliers; Scissors, an Awl; Pins; and a medium Bike Gear (from a cassette)

Steps:

  1. Measure the amount of ribbon you'll need to fit snugly around the base of your bowler hat. Be sure to leave at least a 1/2 inch on each side to fold over your bike gear. Once you've measured the amount of ribbon you'll need, cut it. Set aside.
  2. Pick up your leather pouch, using your scissors (or an exacto knife), cut 2 slits on the back of your pouch (about 1/4 inch from one another in the same direction--either horizontally or vertically), then thread your ribbon through the slits. Next, using your awl, poke a hole in the front of your leather pouch (so that you can affix your chain to the pouch with a jump ring). Using your flat nosed pliers, attach the chain and the magnifying glass with a jump ring. Optional, also add a game spinner and a clock gear  with jump rings for further decoration.Hat 2
  3. Next, thread your ribbon (with the right side facing up) through your bike gear's holes on one side. Pin in place. Hold your bike gear in place (where you want it situated on your bowler hat and then wrap the ribbon around the base of your hat. Thread the end of the ribbon through the bike gear and pin in place. When you are pinning your ribbon, be sure that you are only pinning the ribbon together and not the ribbon to the hat. Hat 1
  4. Next, slide the ribbon off of the base of your bowler hat and sew the ribbon in place. Keep your stitches small and close together. Be sure to tie a sturdy knot and hide that knot on the side of the ribbon that will go against your hat (and therefore not be seen). Cut off any excess ribbon in the back. Repeat for the other side.
  5. Slide your ribbon down onto your bowler hat in place around the base. Place the magnifying glass inside the leather pouch and see how far the chain dangles off of the hat's brim. If desired, using your safety pin, pin the chain to the opposite side of your bowler hat's brim until you want to use the "monocle"/magnifying glass. Hat 3
  6. Wear proudly! Hat 4As always, happy crafting!

DIY Steampunk Filigree Halloween Mask

UncategorizedSamantha Extance1 Comment

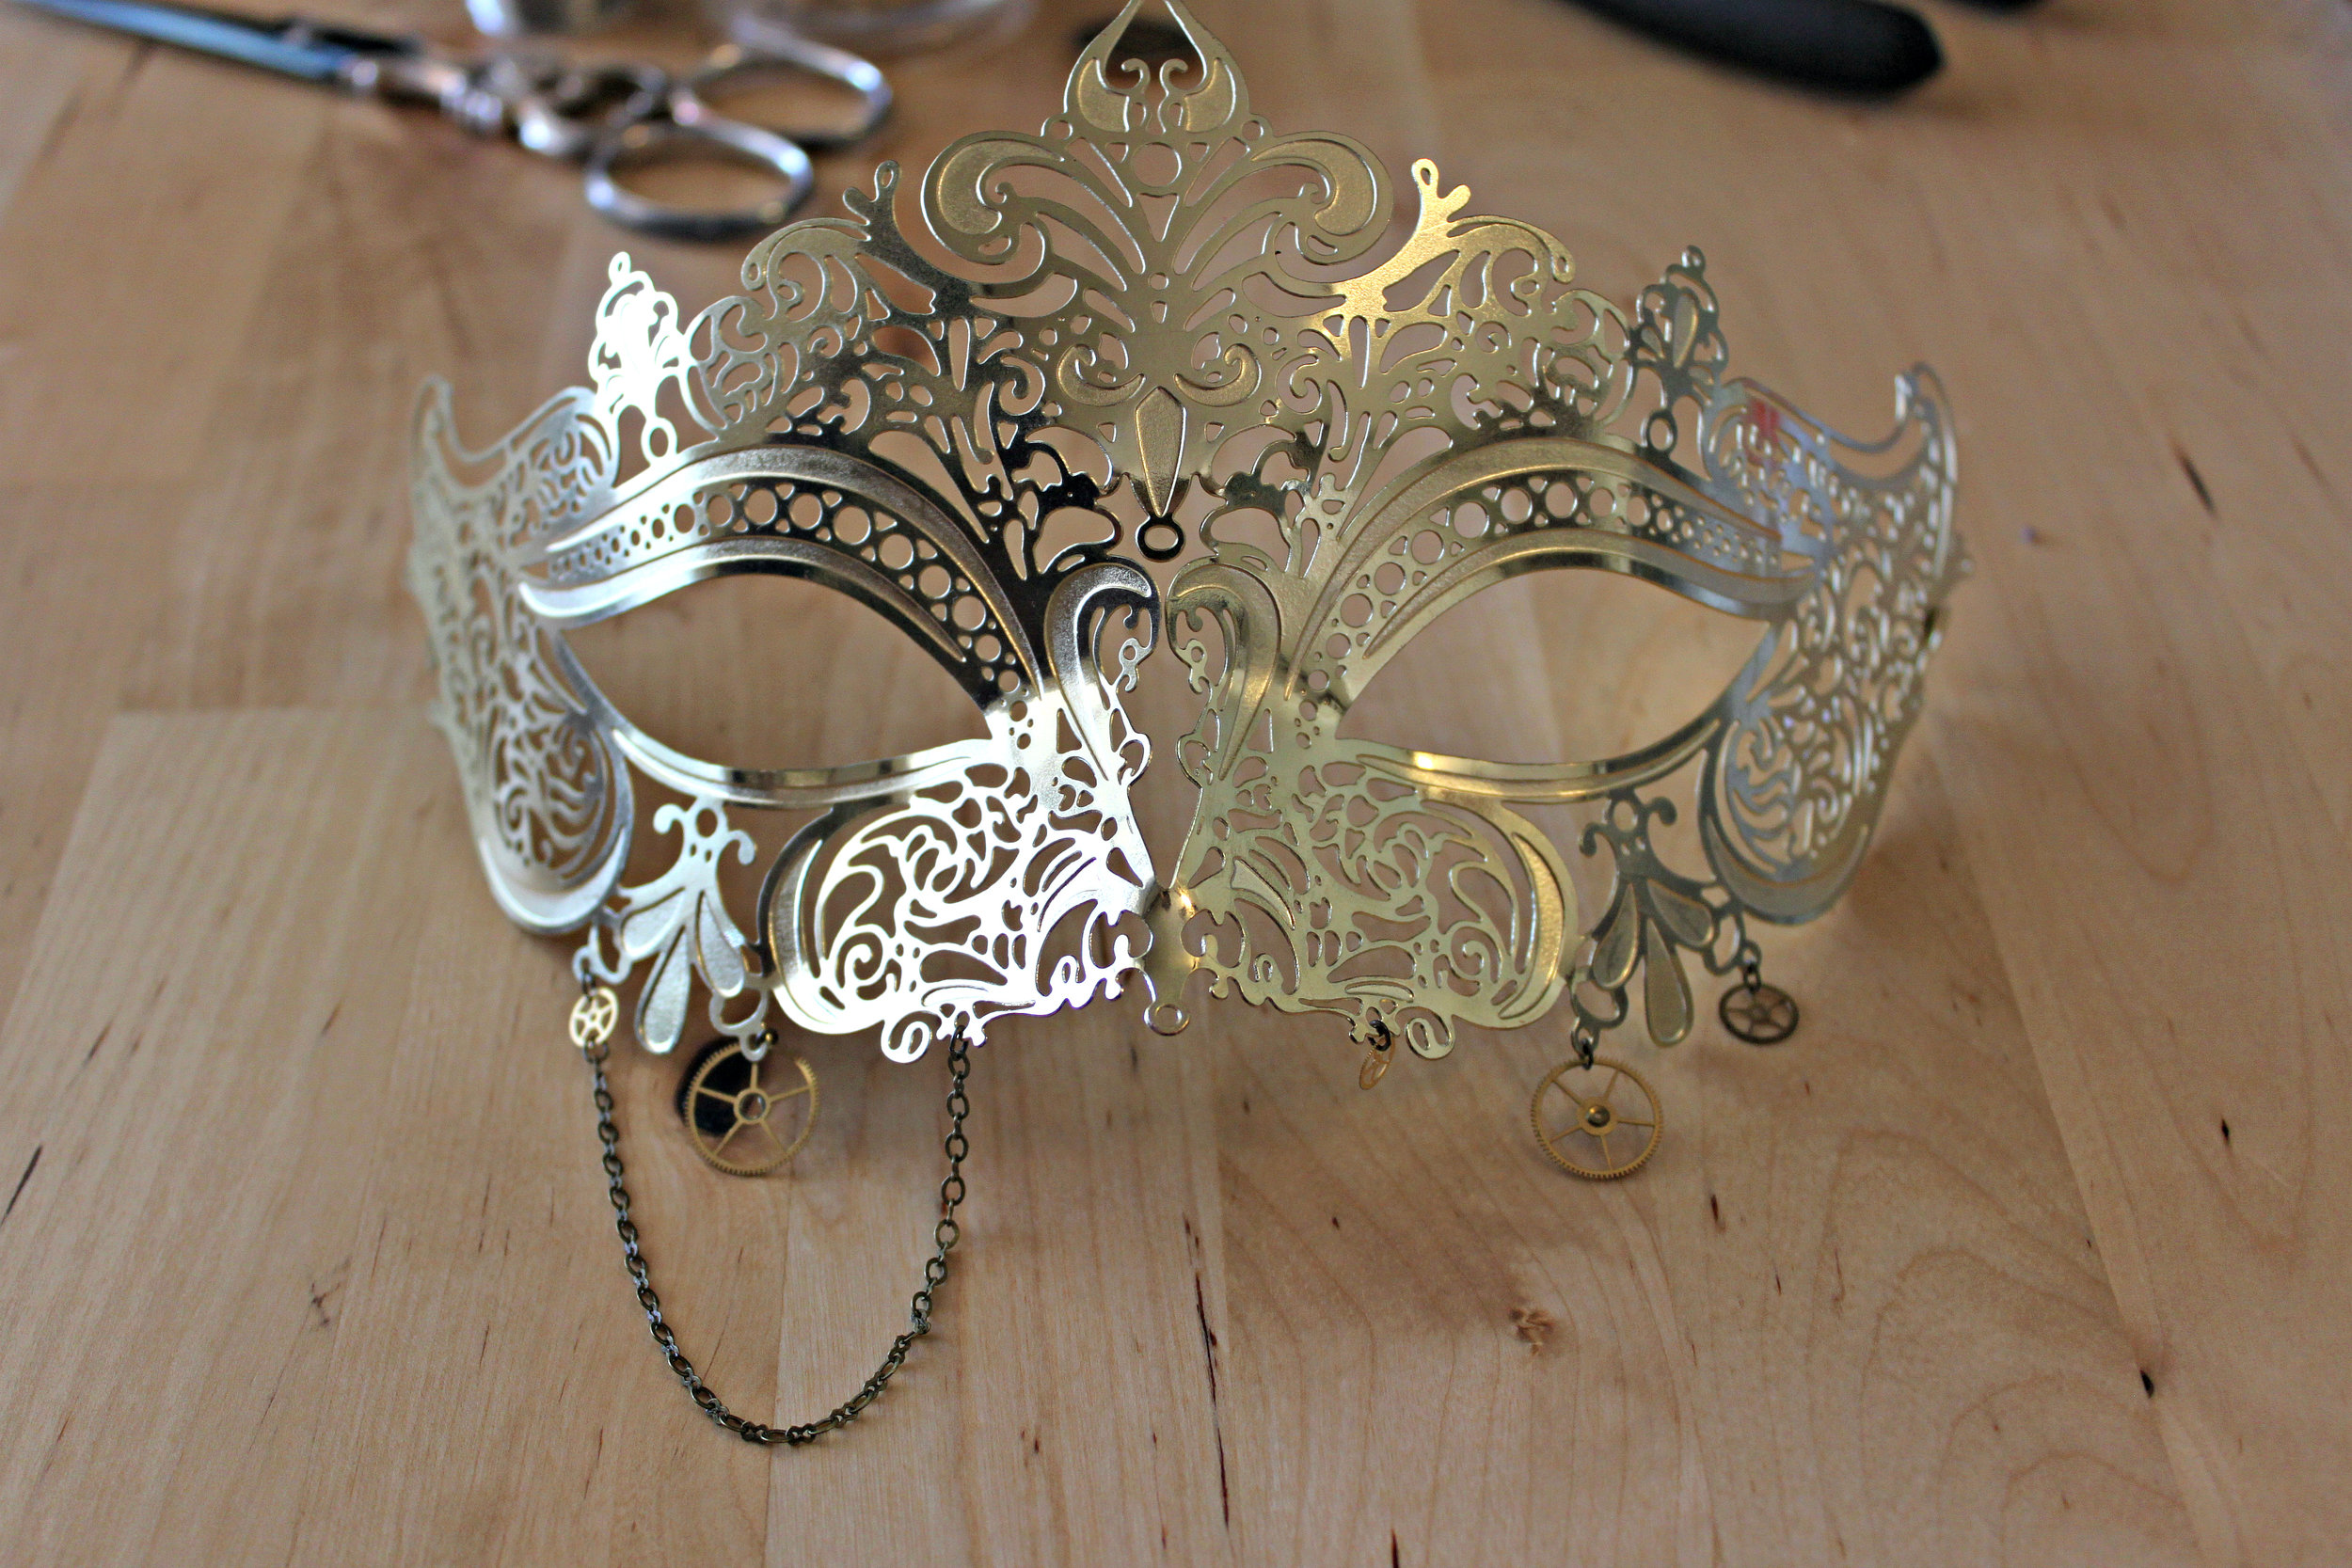
Here is my last DIY Halloween mask for this season...and it may just be my favorite. I love the gleam of metal once light touches it and this mask gleams brightly! SamGoldThe wonderful thing about a detailed accessory such as this is that your costume can be more subdued (paired with a simple dress, gloves, and jewelry) and still be breathtaking & memorable. IMG_3639Here's what you'll need:

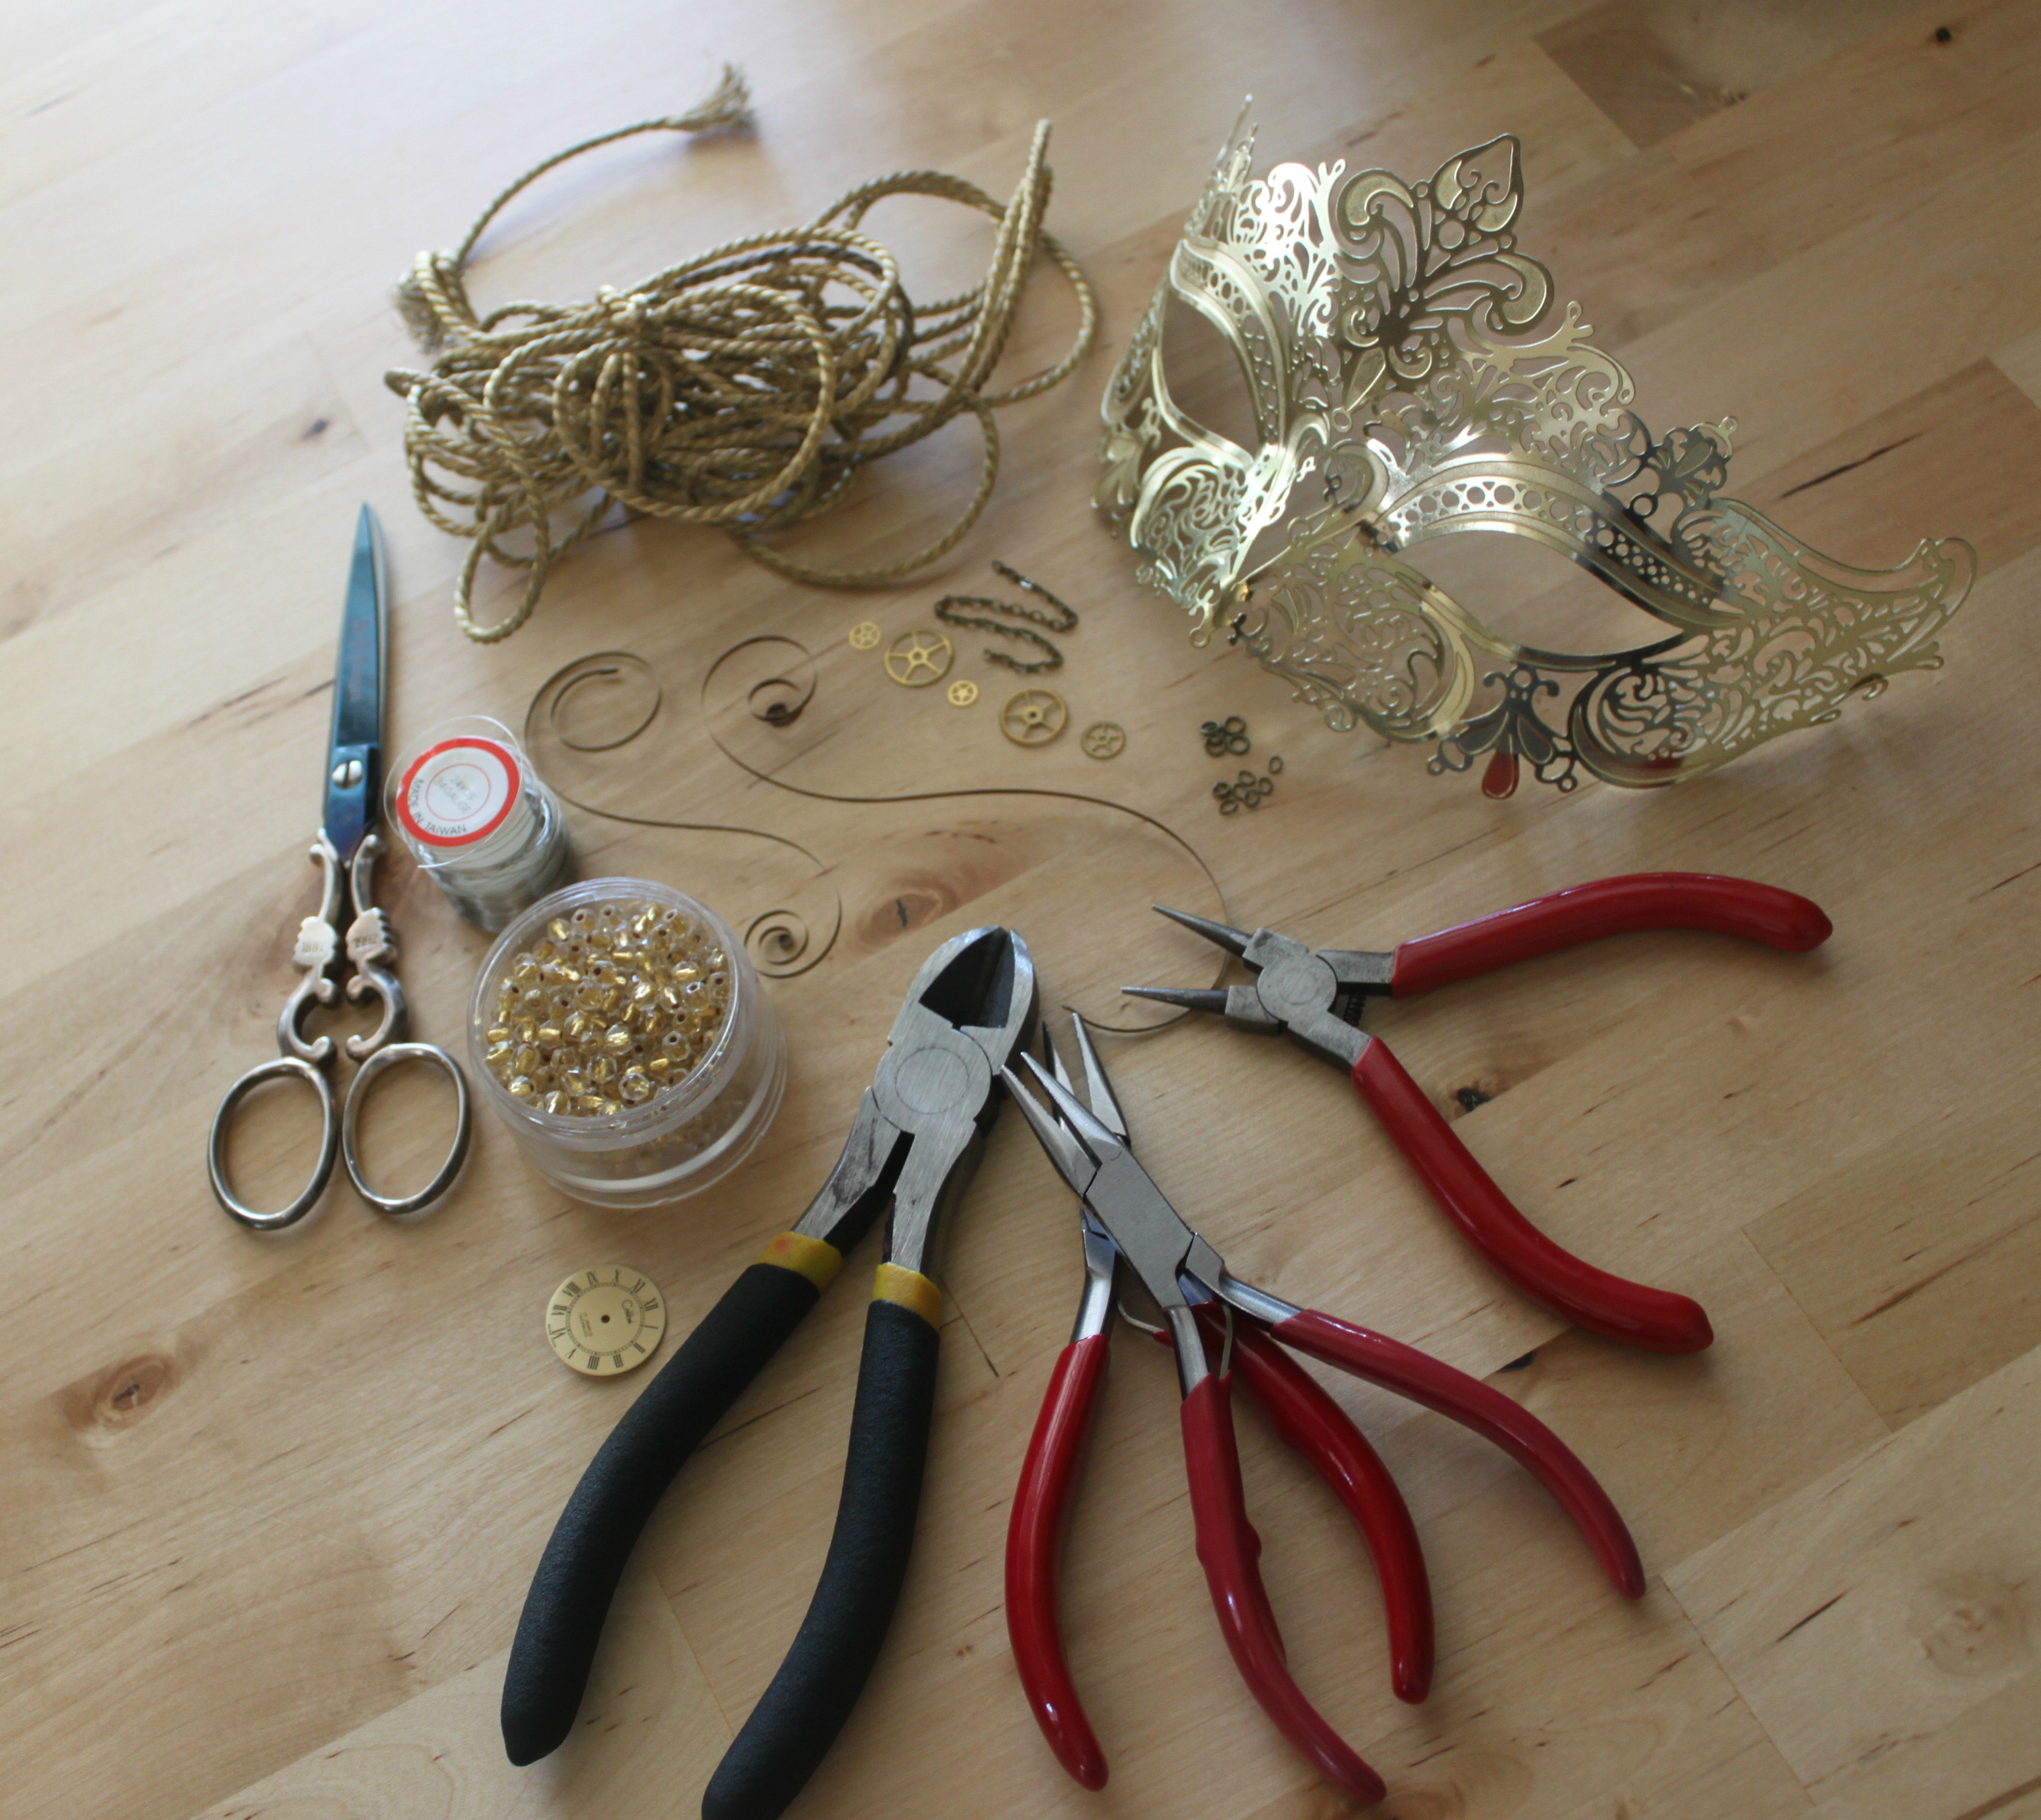
  • Metal Filigree Mask (I purchased mine from Party City for $14.99)
  • Gold Ribbon
  • 1-2 inches of gold or brass chain
  • Jump rings (assorted sizes)
  • Gold foil beads (or any beads that suit your taste)
  • Headpins
  • Clock Face
  • 1 brad (preferably matching the color of your clock face)
  • 2 clock springs (preferably from a wristwatch--they are the easiest to manipulate & cut)
  • Clock gears (I used 5; you can use more if desired)
  • 34 gauge jewelry wire (or any fine wire)
  • Scissors
  • Wire cutters
  • Flat nosed pliers
  • Needle nosed pliers

Steps:

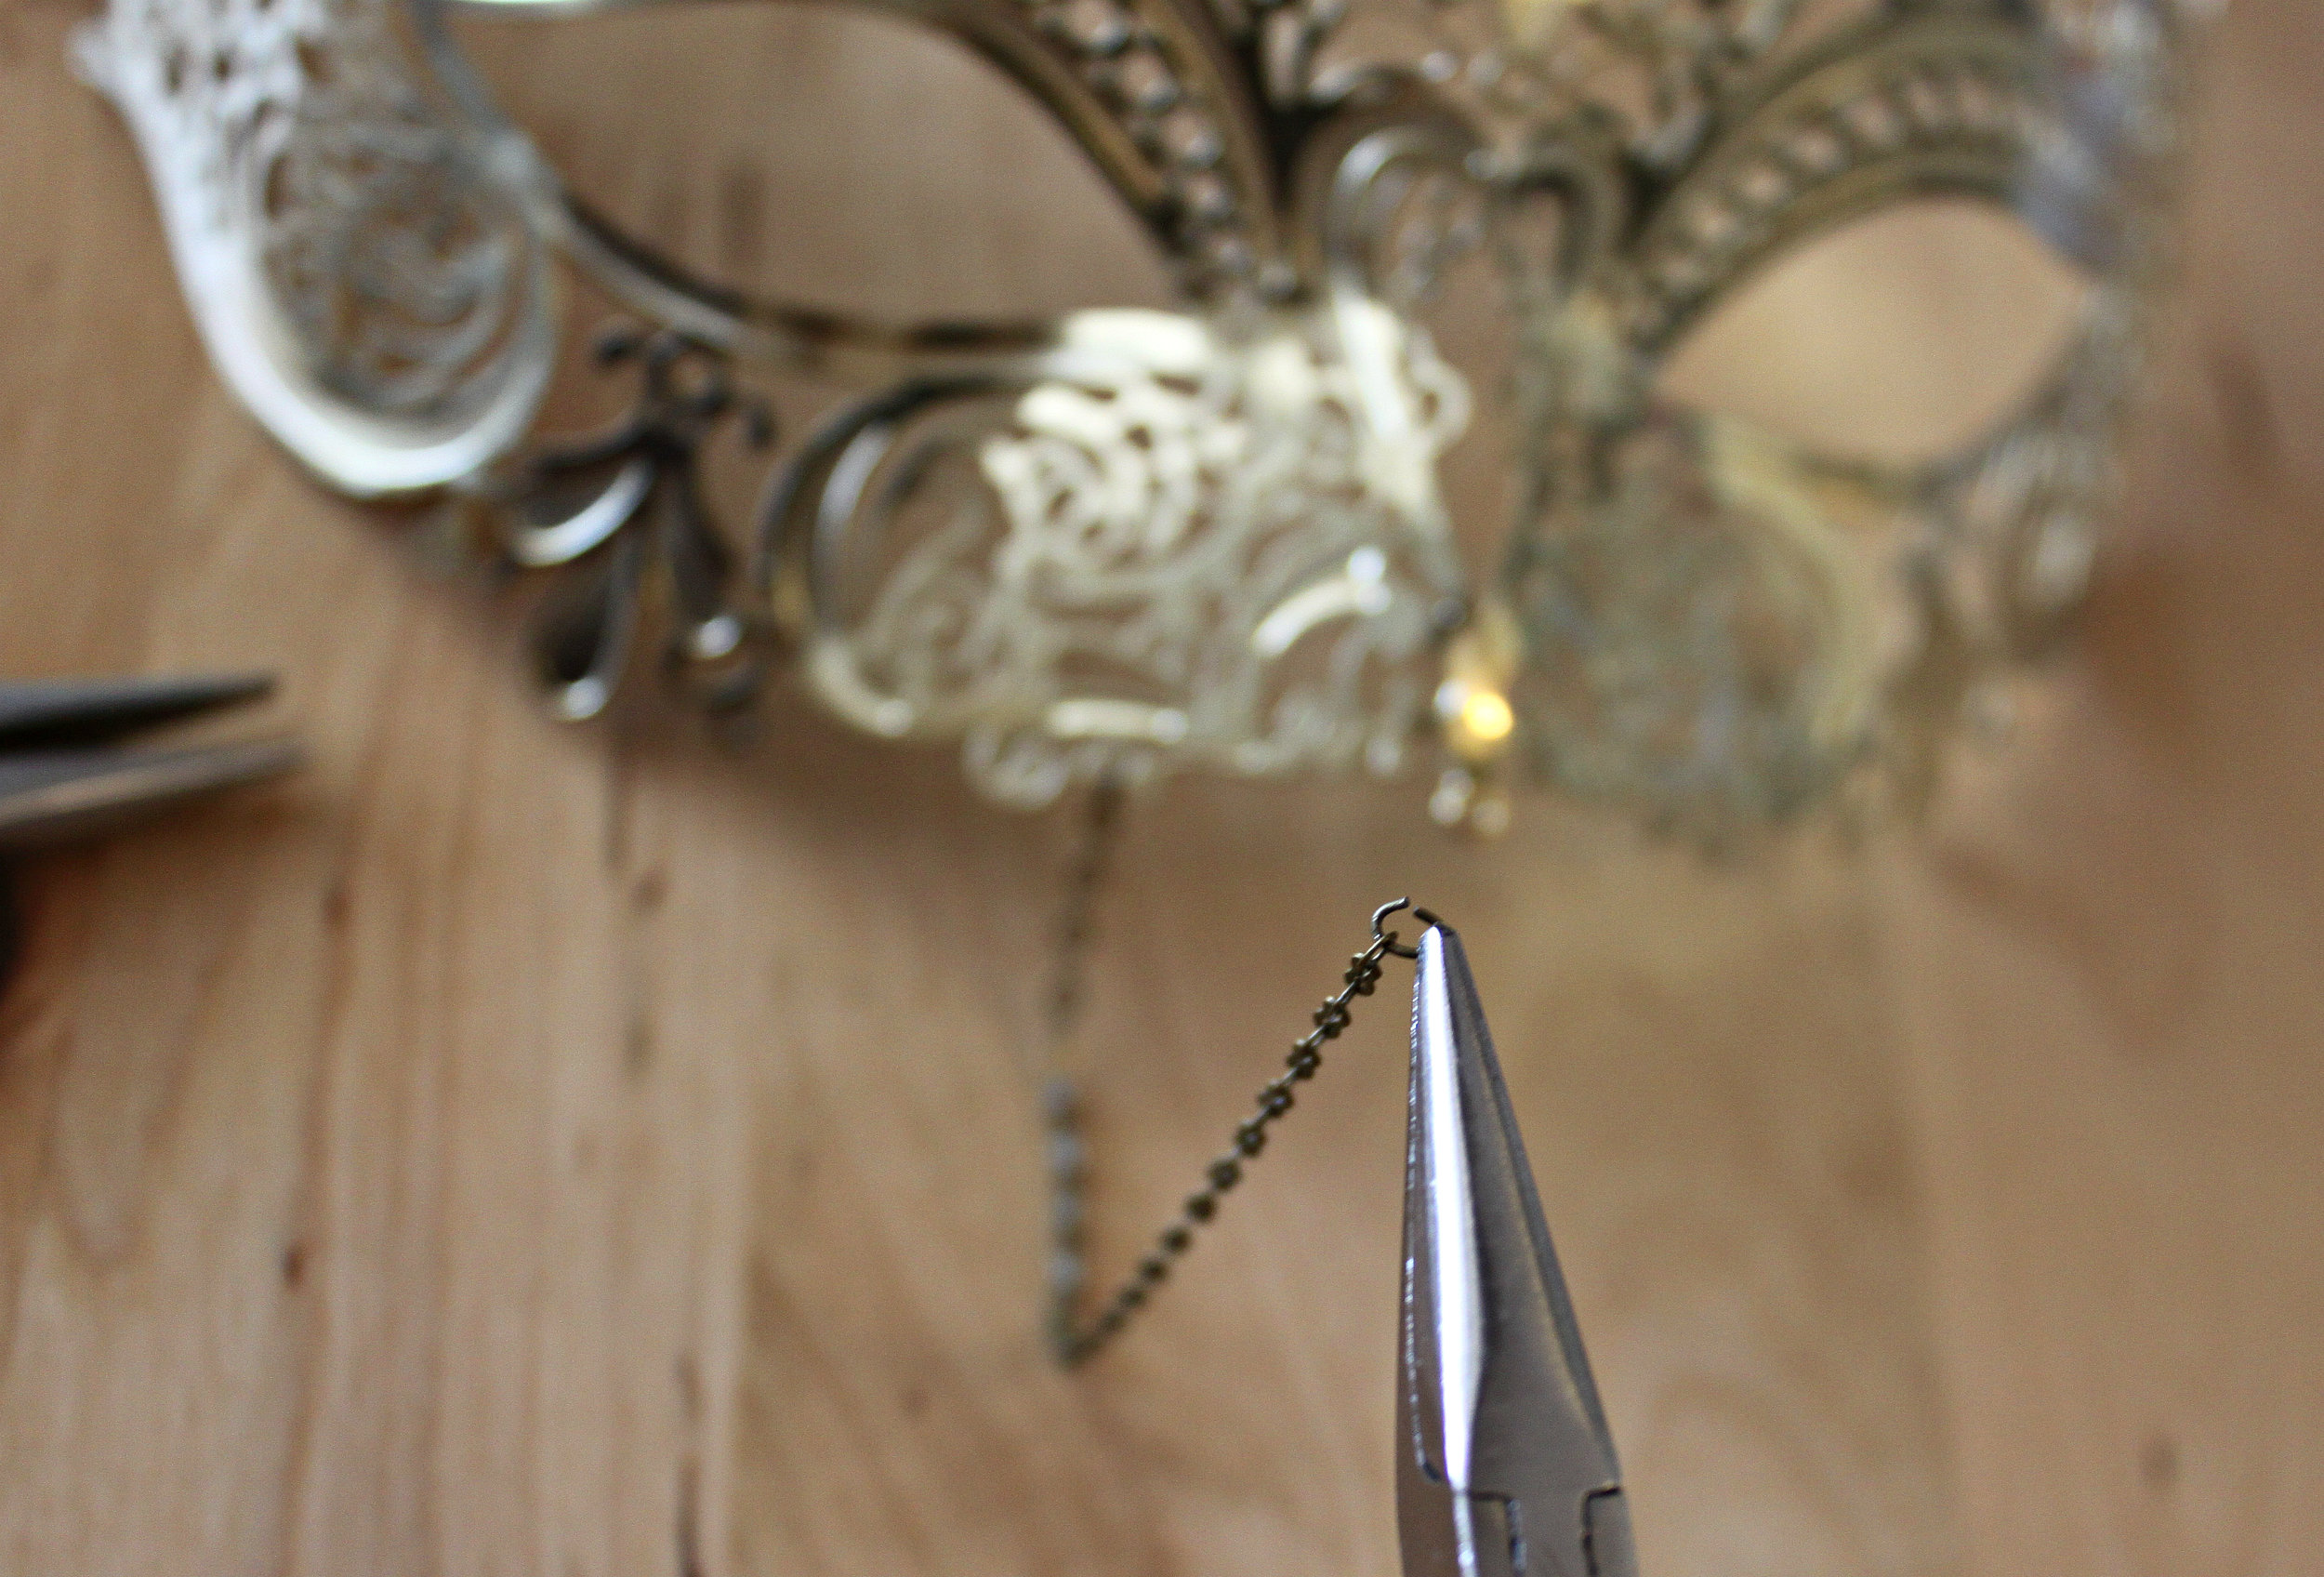
  1. Begin by adding your chain to your mask. To attach the chain, use your flat nosed pliers & jump rings. IMG_3641
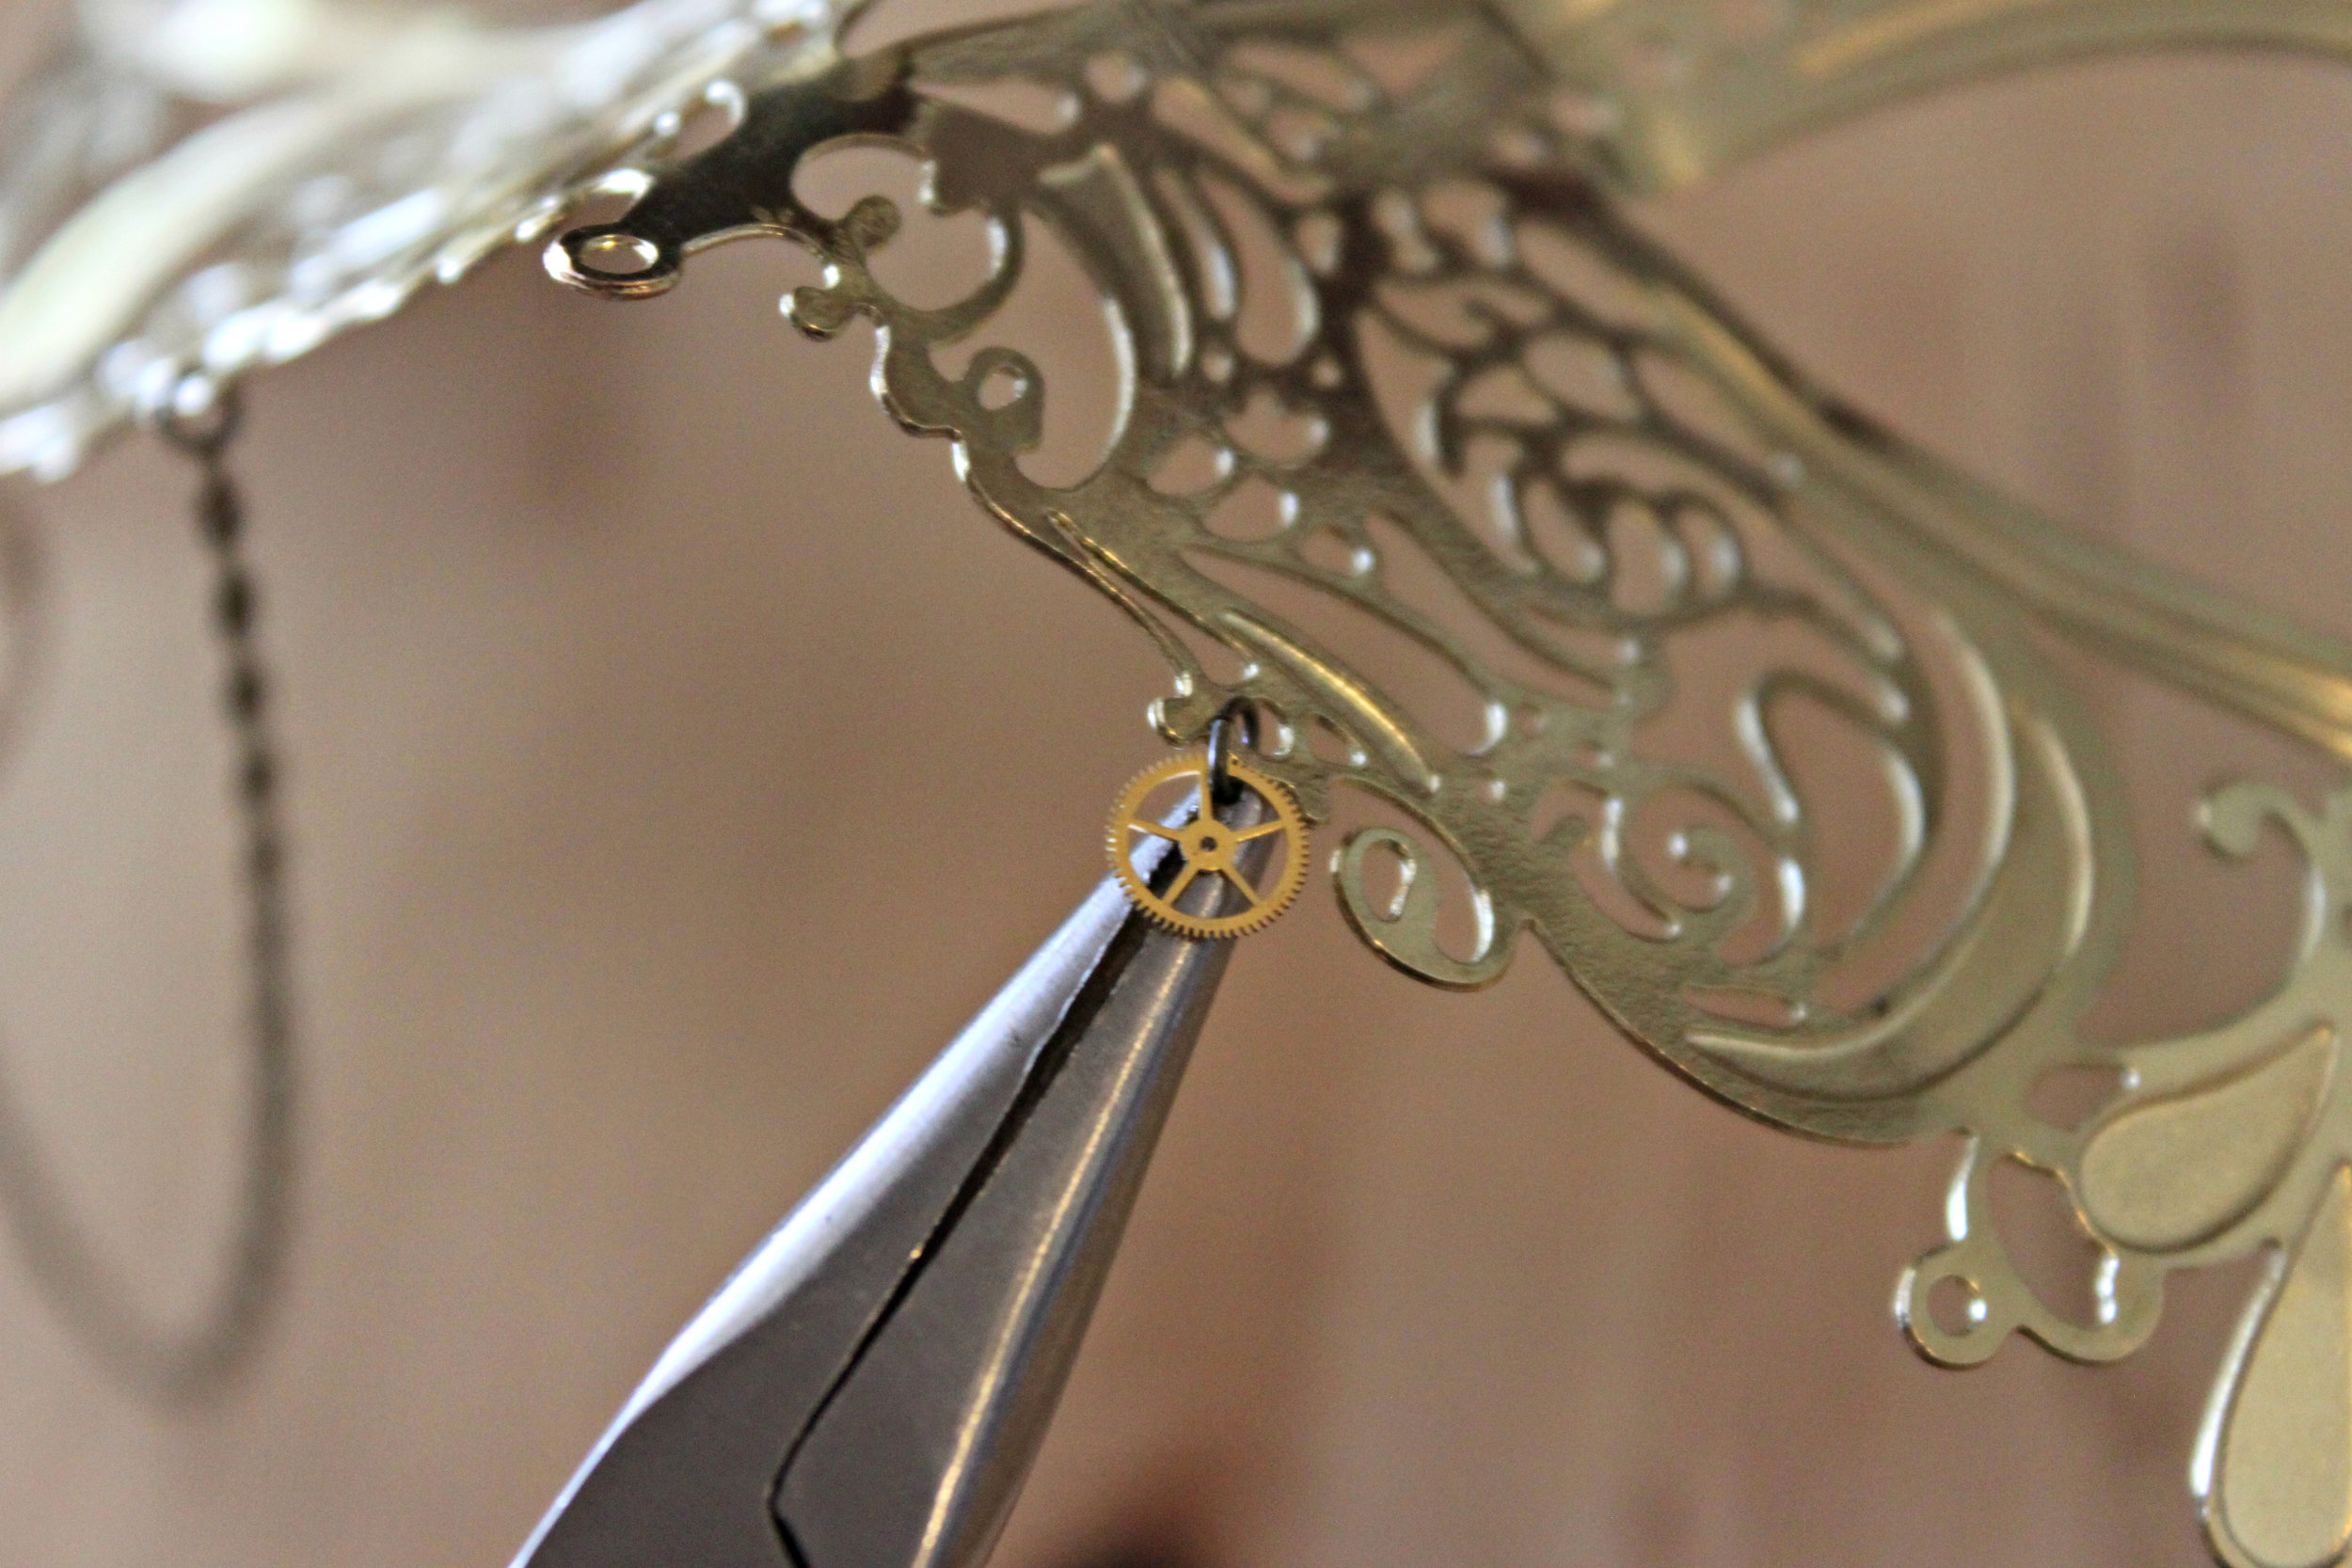
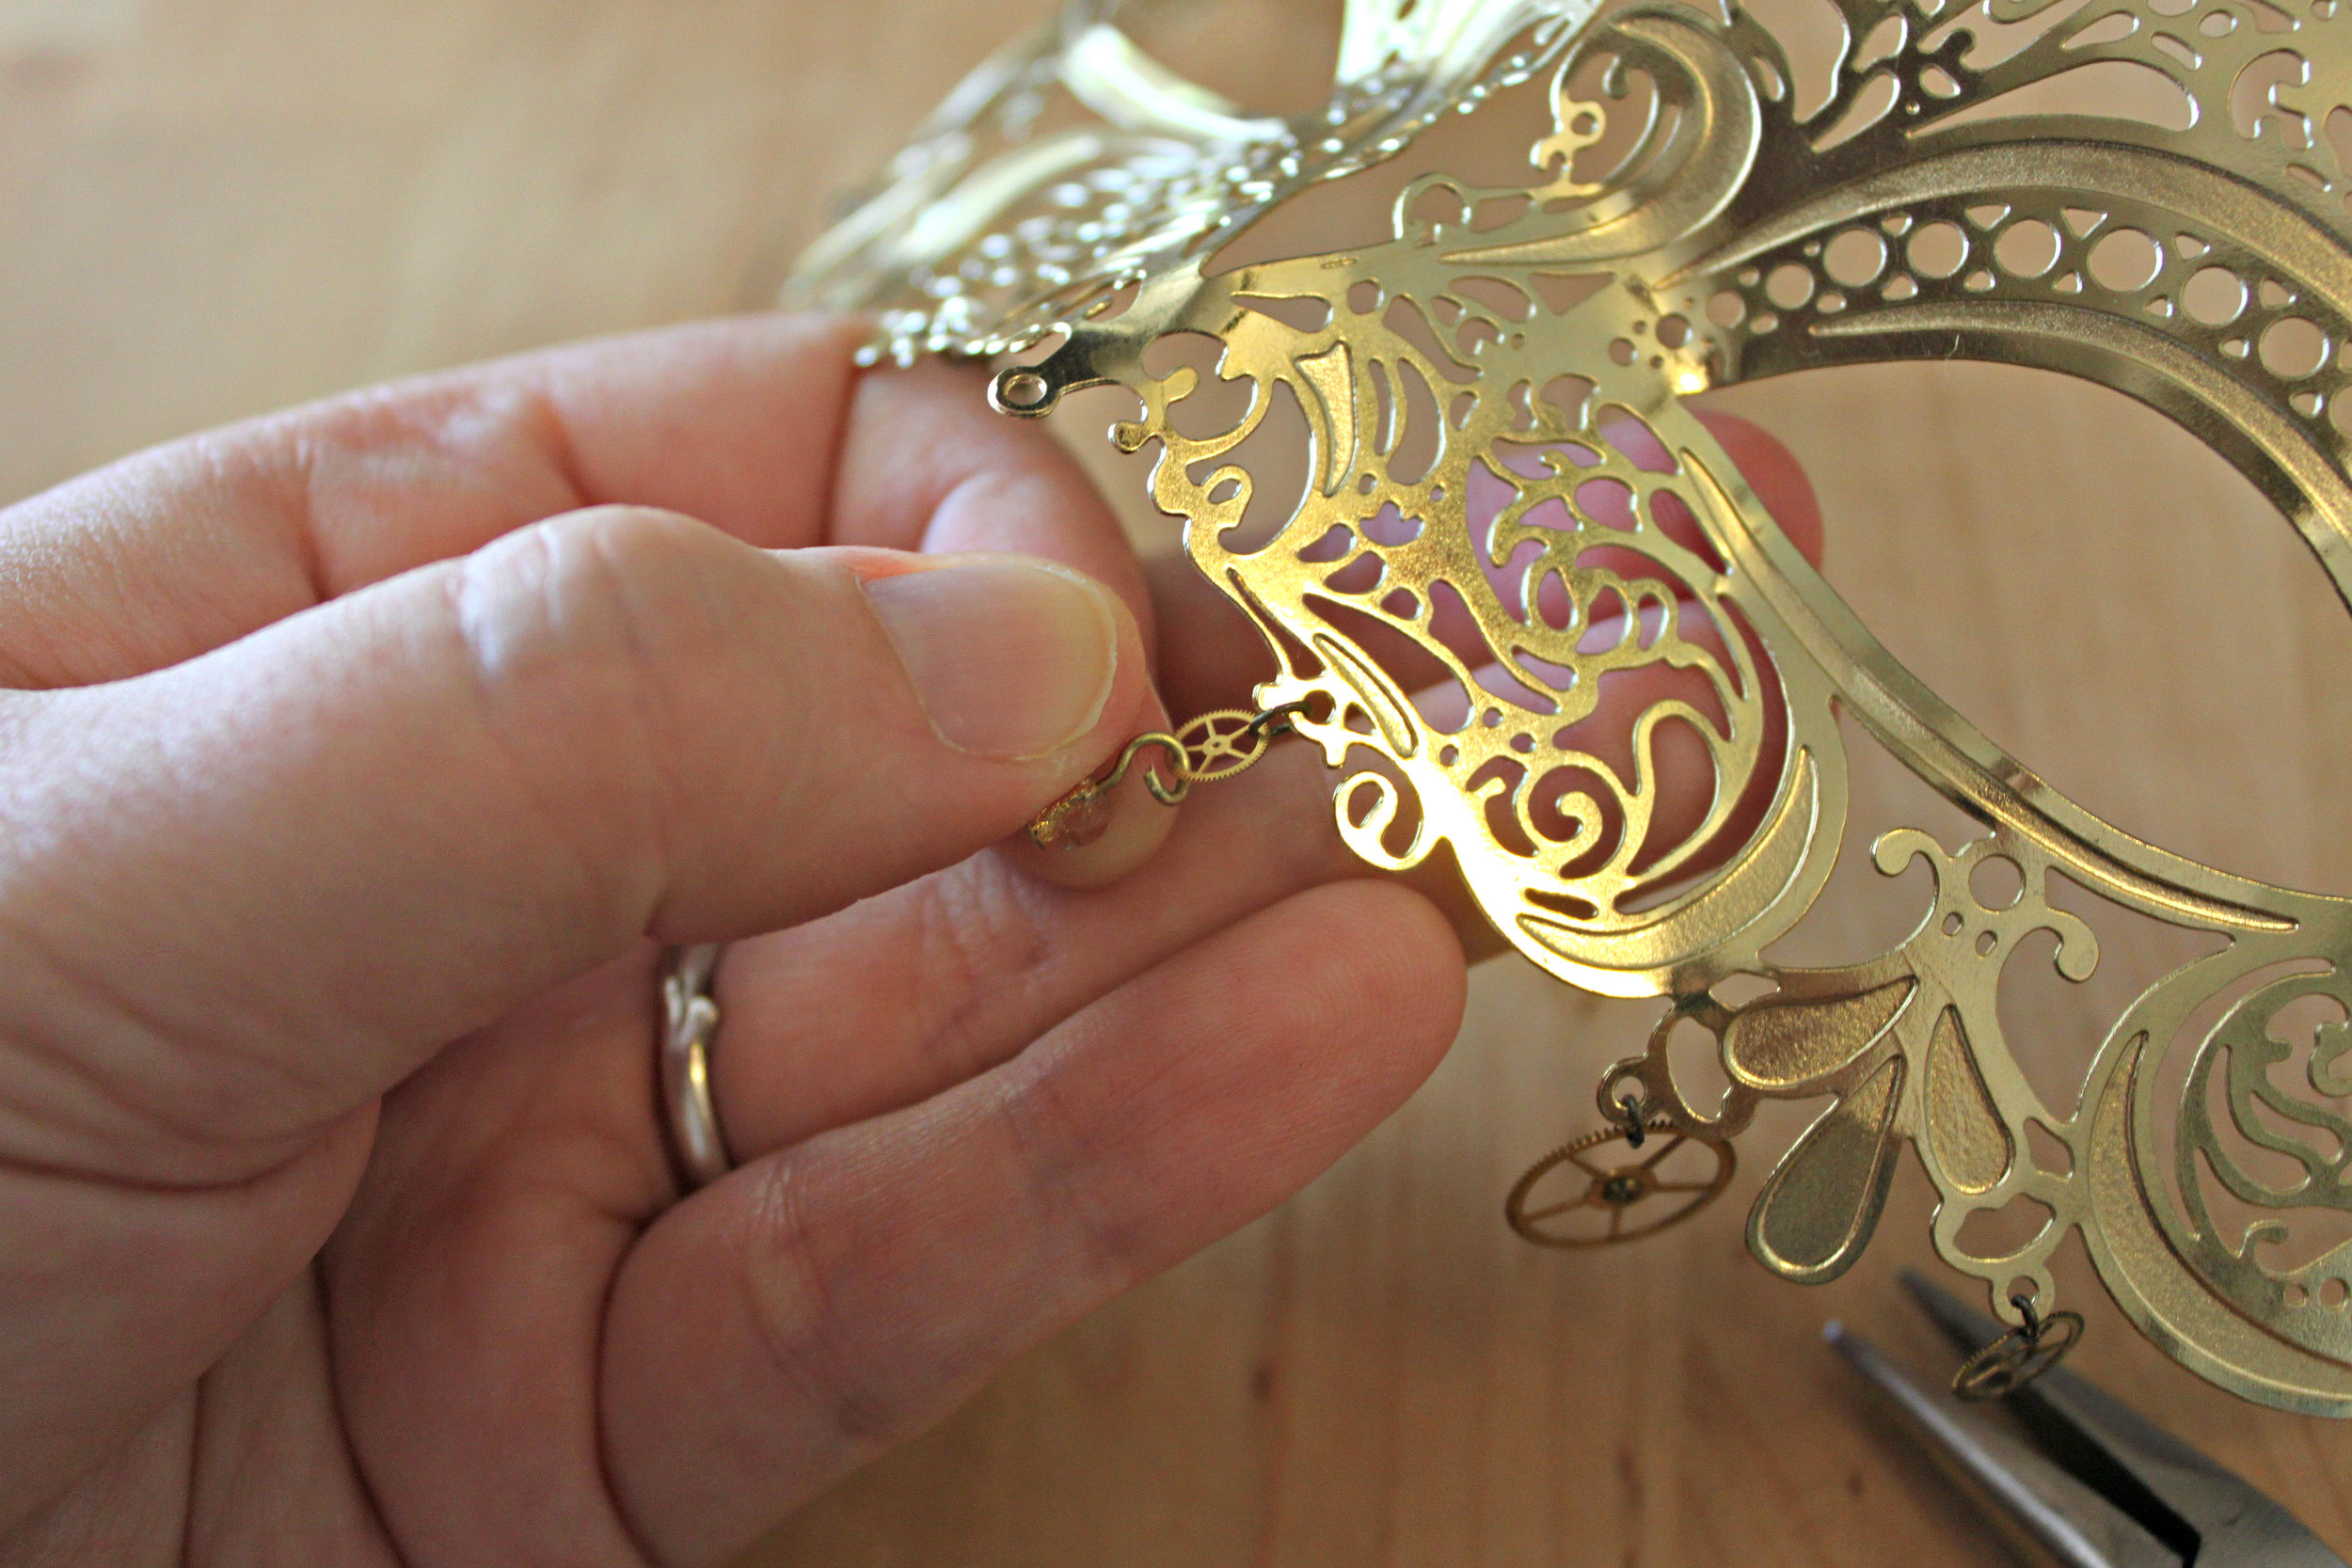
  2. If desired, add a gear to the chain too using your flat nosed pliers and a jump ring. IMG_3642Then attach the gear to the mask. IMG_3643
  3. Next attach the rest of your gears to the bottom of your mask. Use preexisting holes (this is what's so great about working with filigree!).  IMG_3645IMG_3646Be sure to close your jump rings well as many gears are paper thin and can easily fall out of even the slightest of gaps. IMG_3647
  4. For added elegance & sparkle, add gold foil beads to your gears (or other areas of your mask). IMG_3648For each bead, you need a headpin. IMG_3649Place the bead on the headpin. Be sure to slide the bead all the way down to the end. Make sure there is no space left over or you'll have an excess of the headpin showing. IMG_3650Using your flat nosed pliers, bend the headpin wire 45 degrees (so that the headpin wire is horizontal).IMG_3651Using your finger as a measure, cut off the excess headpin wire (the amount that sticks out past your finger) with your wire cutters. Discard the excess wire. IMG_3652Using your needle nosed pliers, create a loop on top of your bead. To do this, hold your bead in one hand. With the other, grip the very end of your headpin wire with your pliers and twist upward and around to the top of your bead. (Think of a making a motorcycle revving motion.)IMG_3653Once your loop is made, open it with your flat nosed pliers (like you would a jump ring). IMG_3654Place your bead into your gear (or mask). Close your loop again, using your flat nosed pliers. IMG_3655Repeat the above process for each bead.
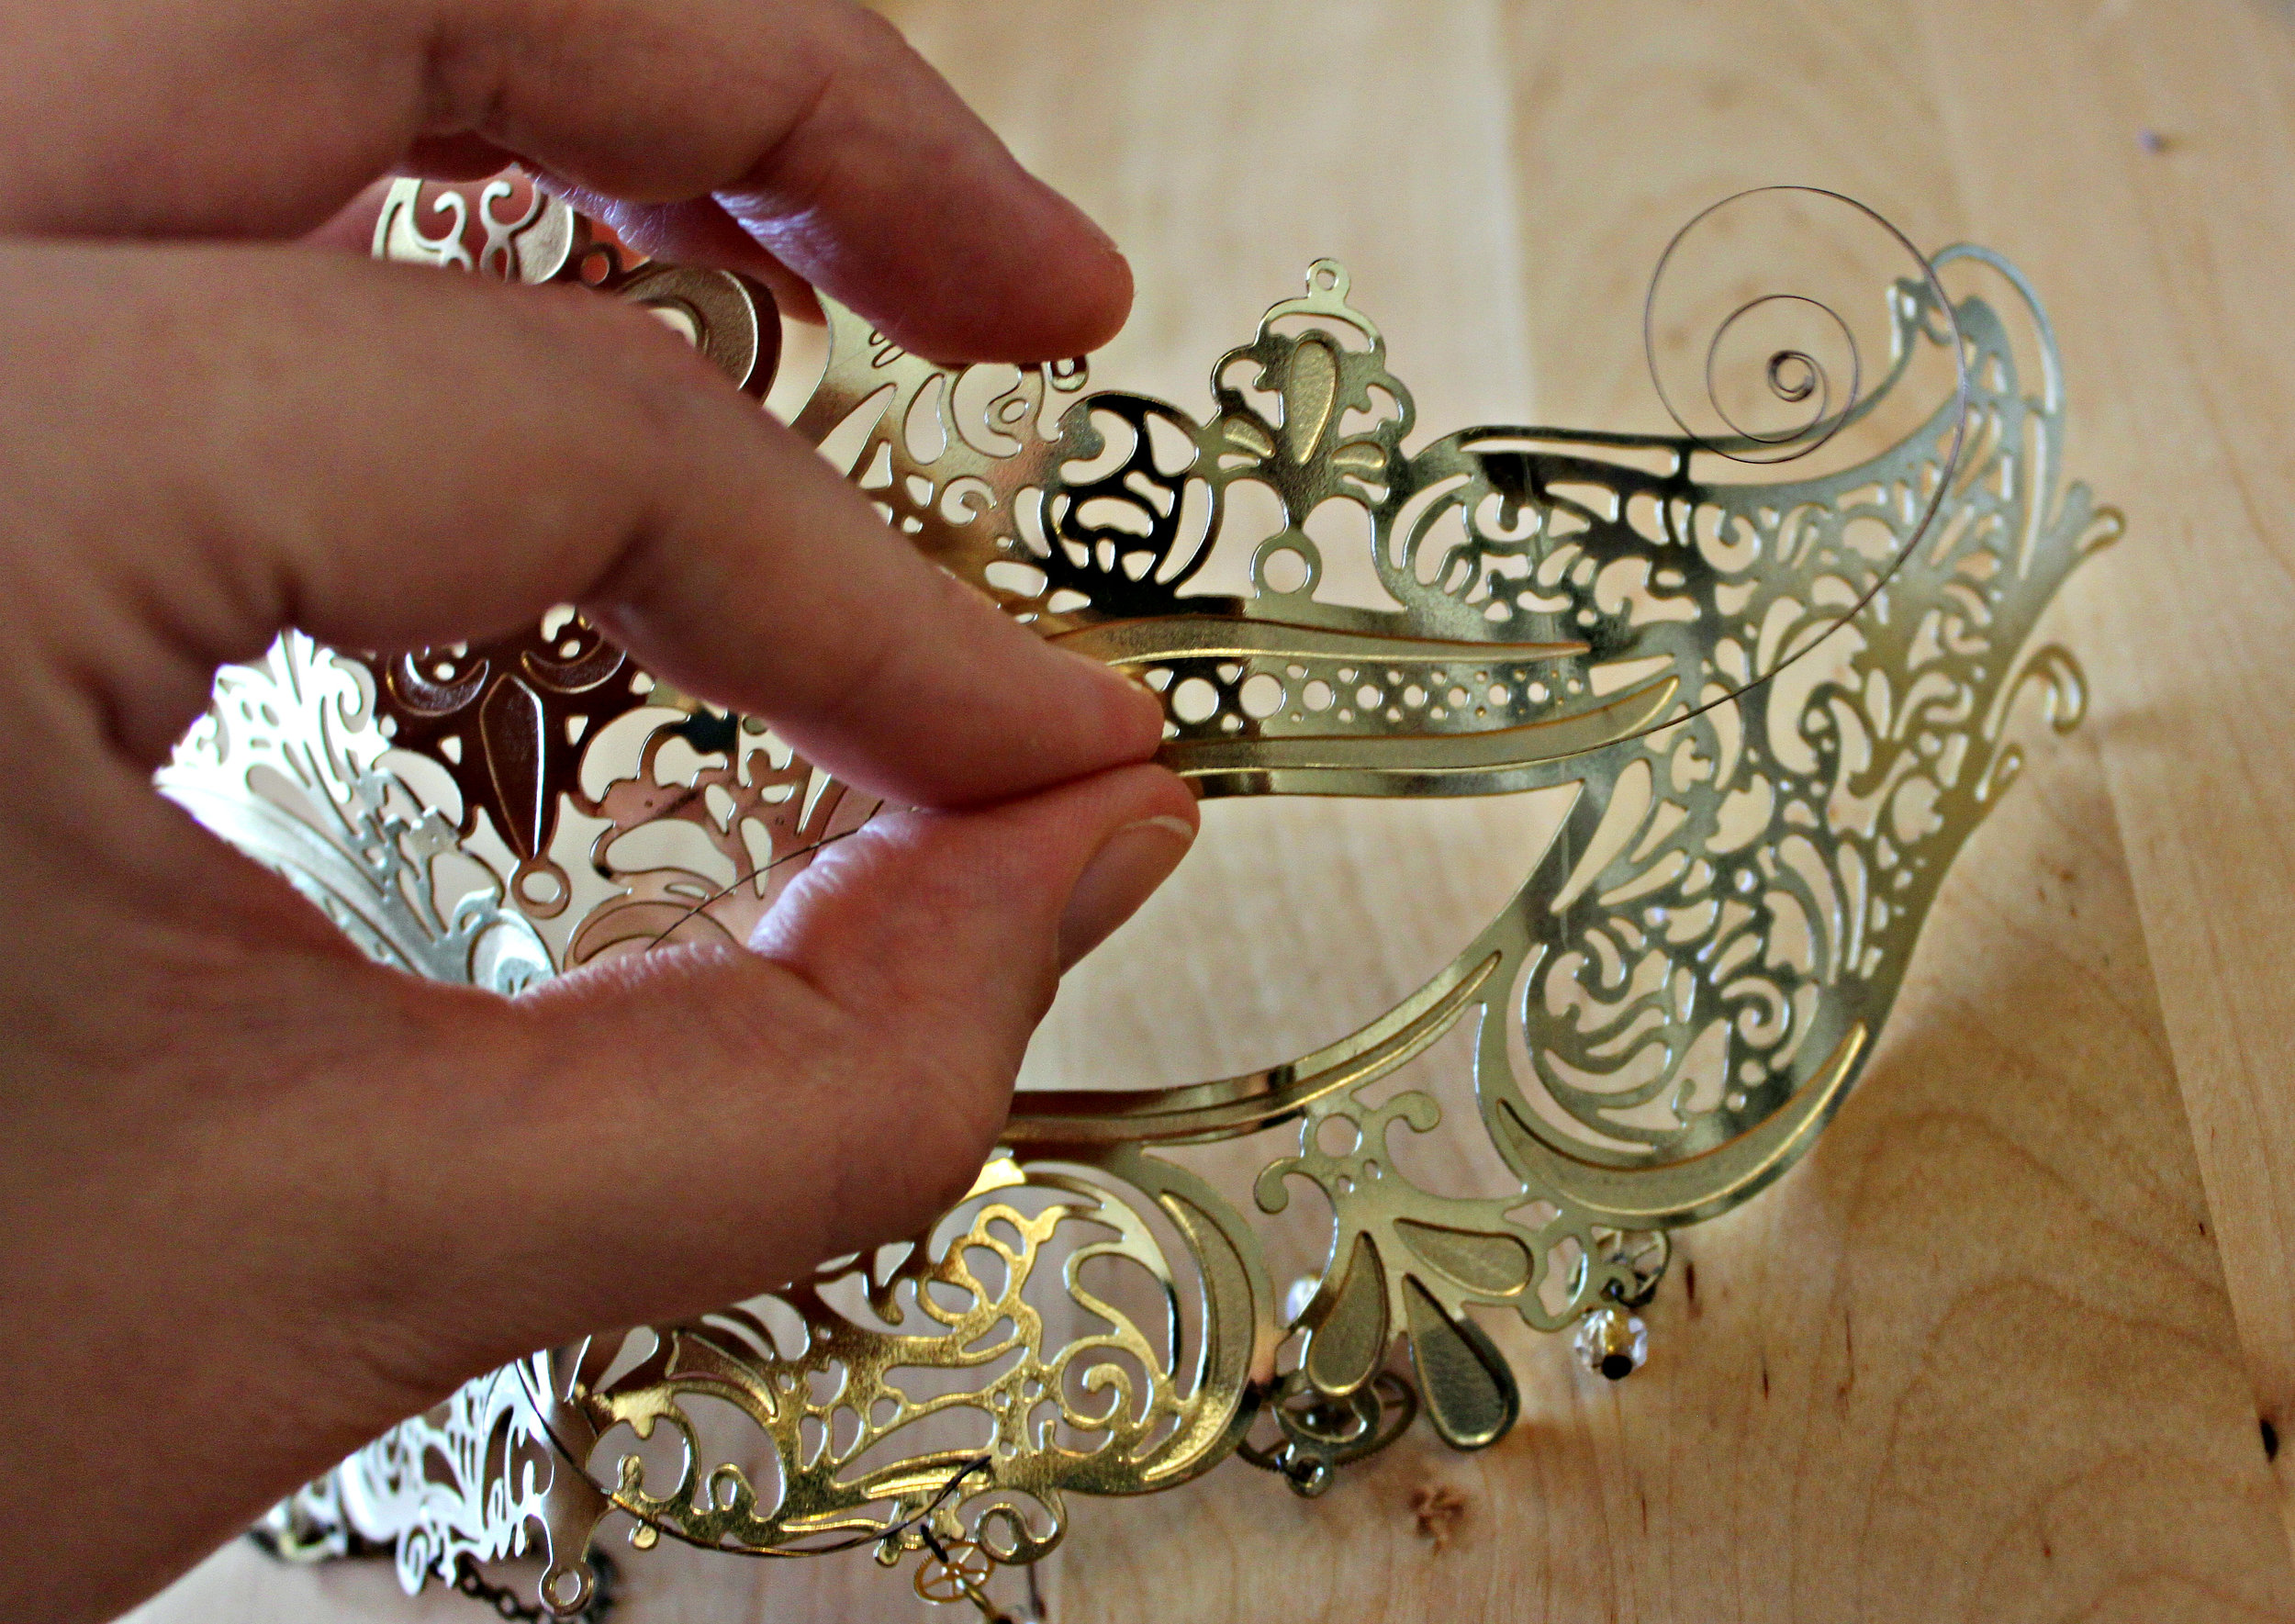
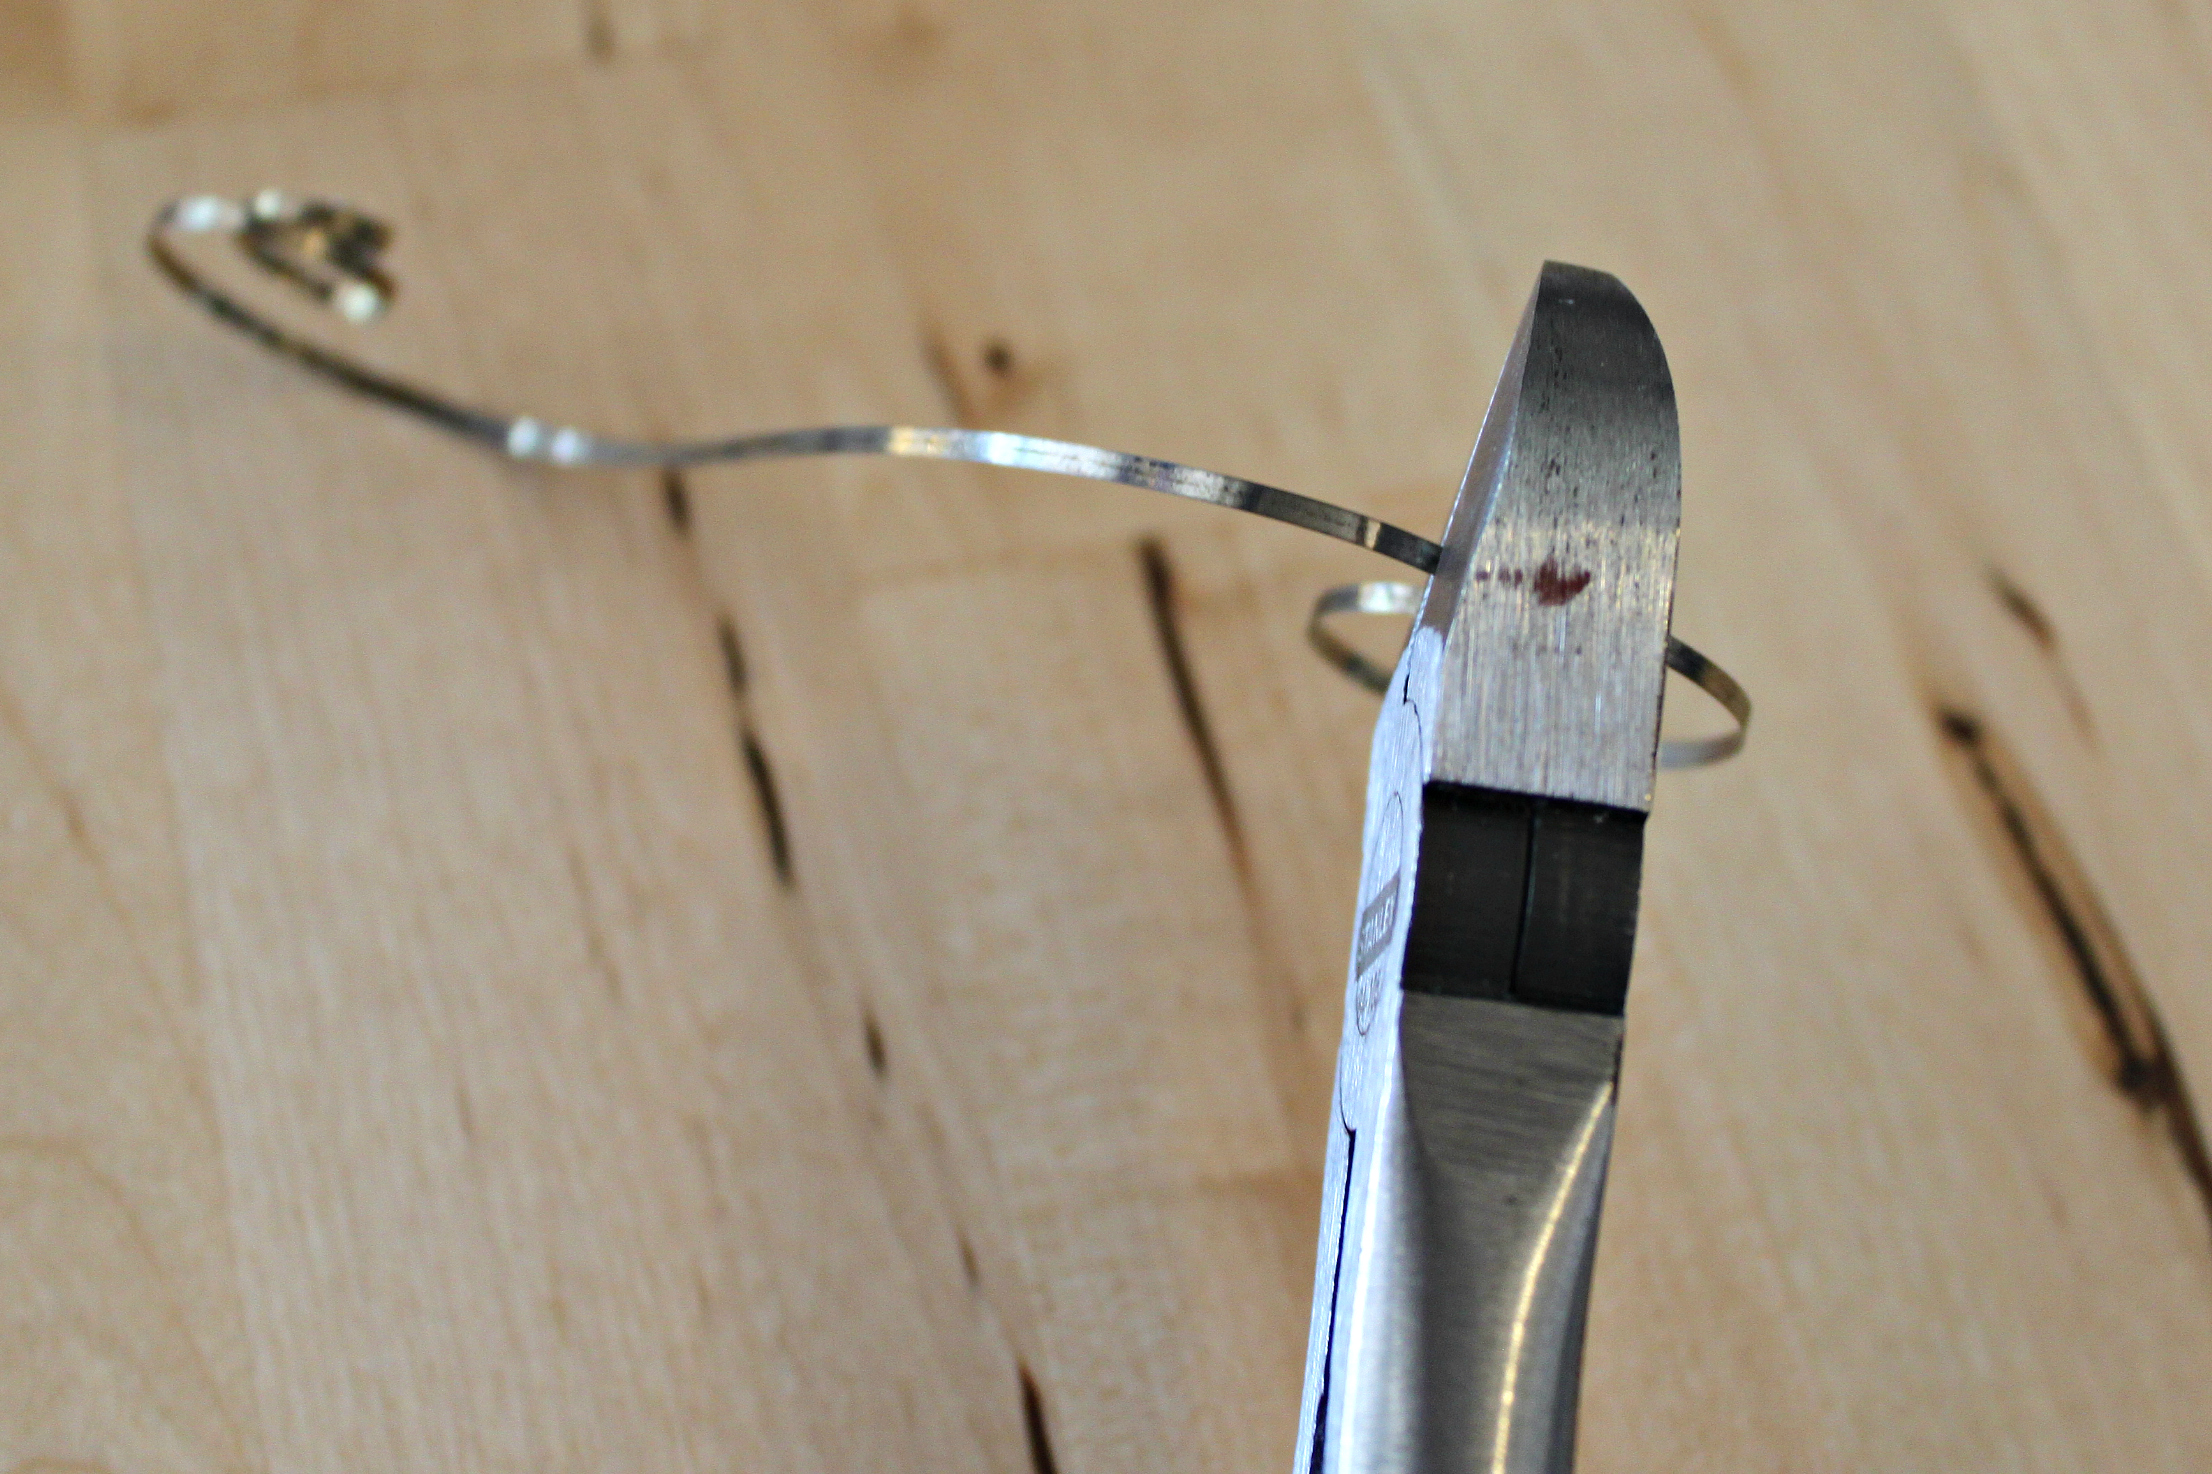
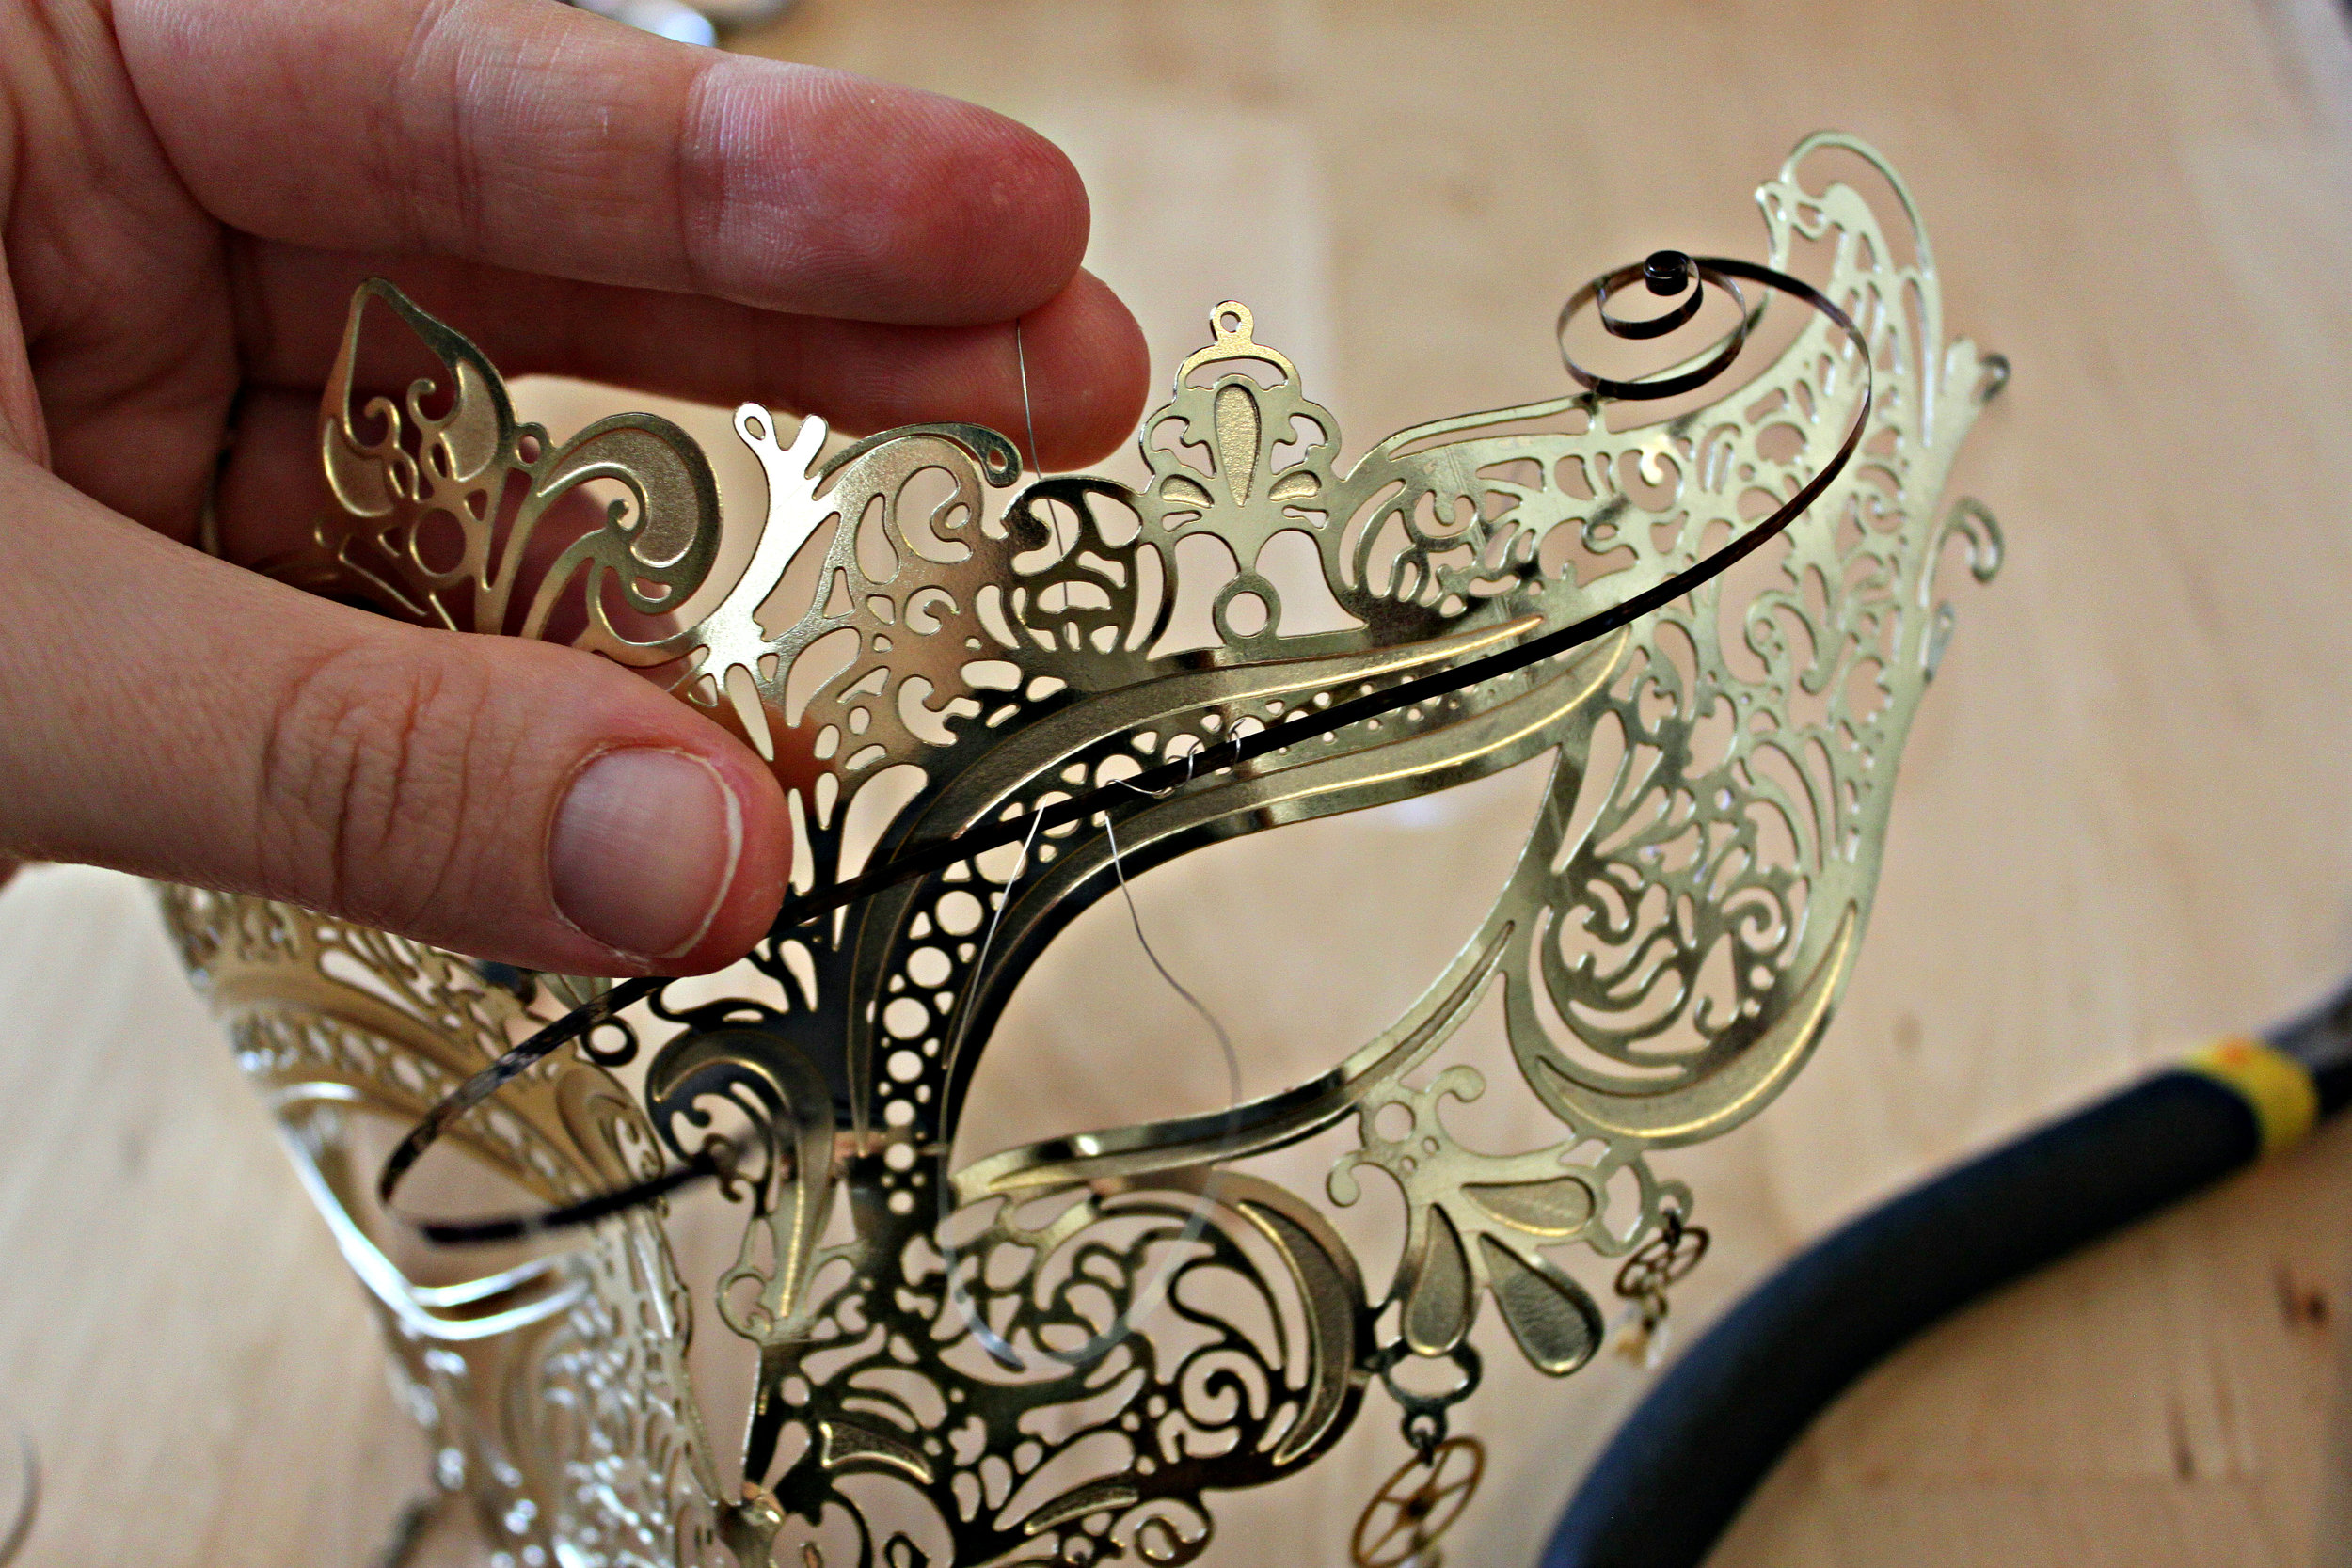
  5. Now it's time to create our "clock spring eyelashes." This is what makes this a really different, ultra feminine DIY. First figure out the placement of your clock springs over the eyes of your mask. IMG_3657Once you've figured out placement, cut down your springs. To cut your clock springs, use your wire cutters, and also gently move the spring back and forth. IMG_3663This allows for an easier, cleaner break. Once you've cut your springs you may need to file them down a bit. Sandpaper or a metal file is preferable. IMG_3664
  6. Now you can begin attaching your clock springs over the eyes of your mask. Cut a medium length piece of your 34 gauge wire. IMG_3658Using this wire, wire wrap the spring in place by weaving through the preexisting holes in the filigree mask. Be sure that your clock spring does not twist as you are wire wrapping it in place. IMG_3659Remember to pull the wire taut. Twist the wire together & around each other to "tie" it off. Cut off any excess wire. Be sure to push all raw edges of the wire away from your eyes & face. IMG_3661
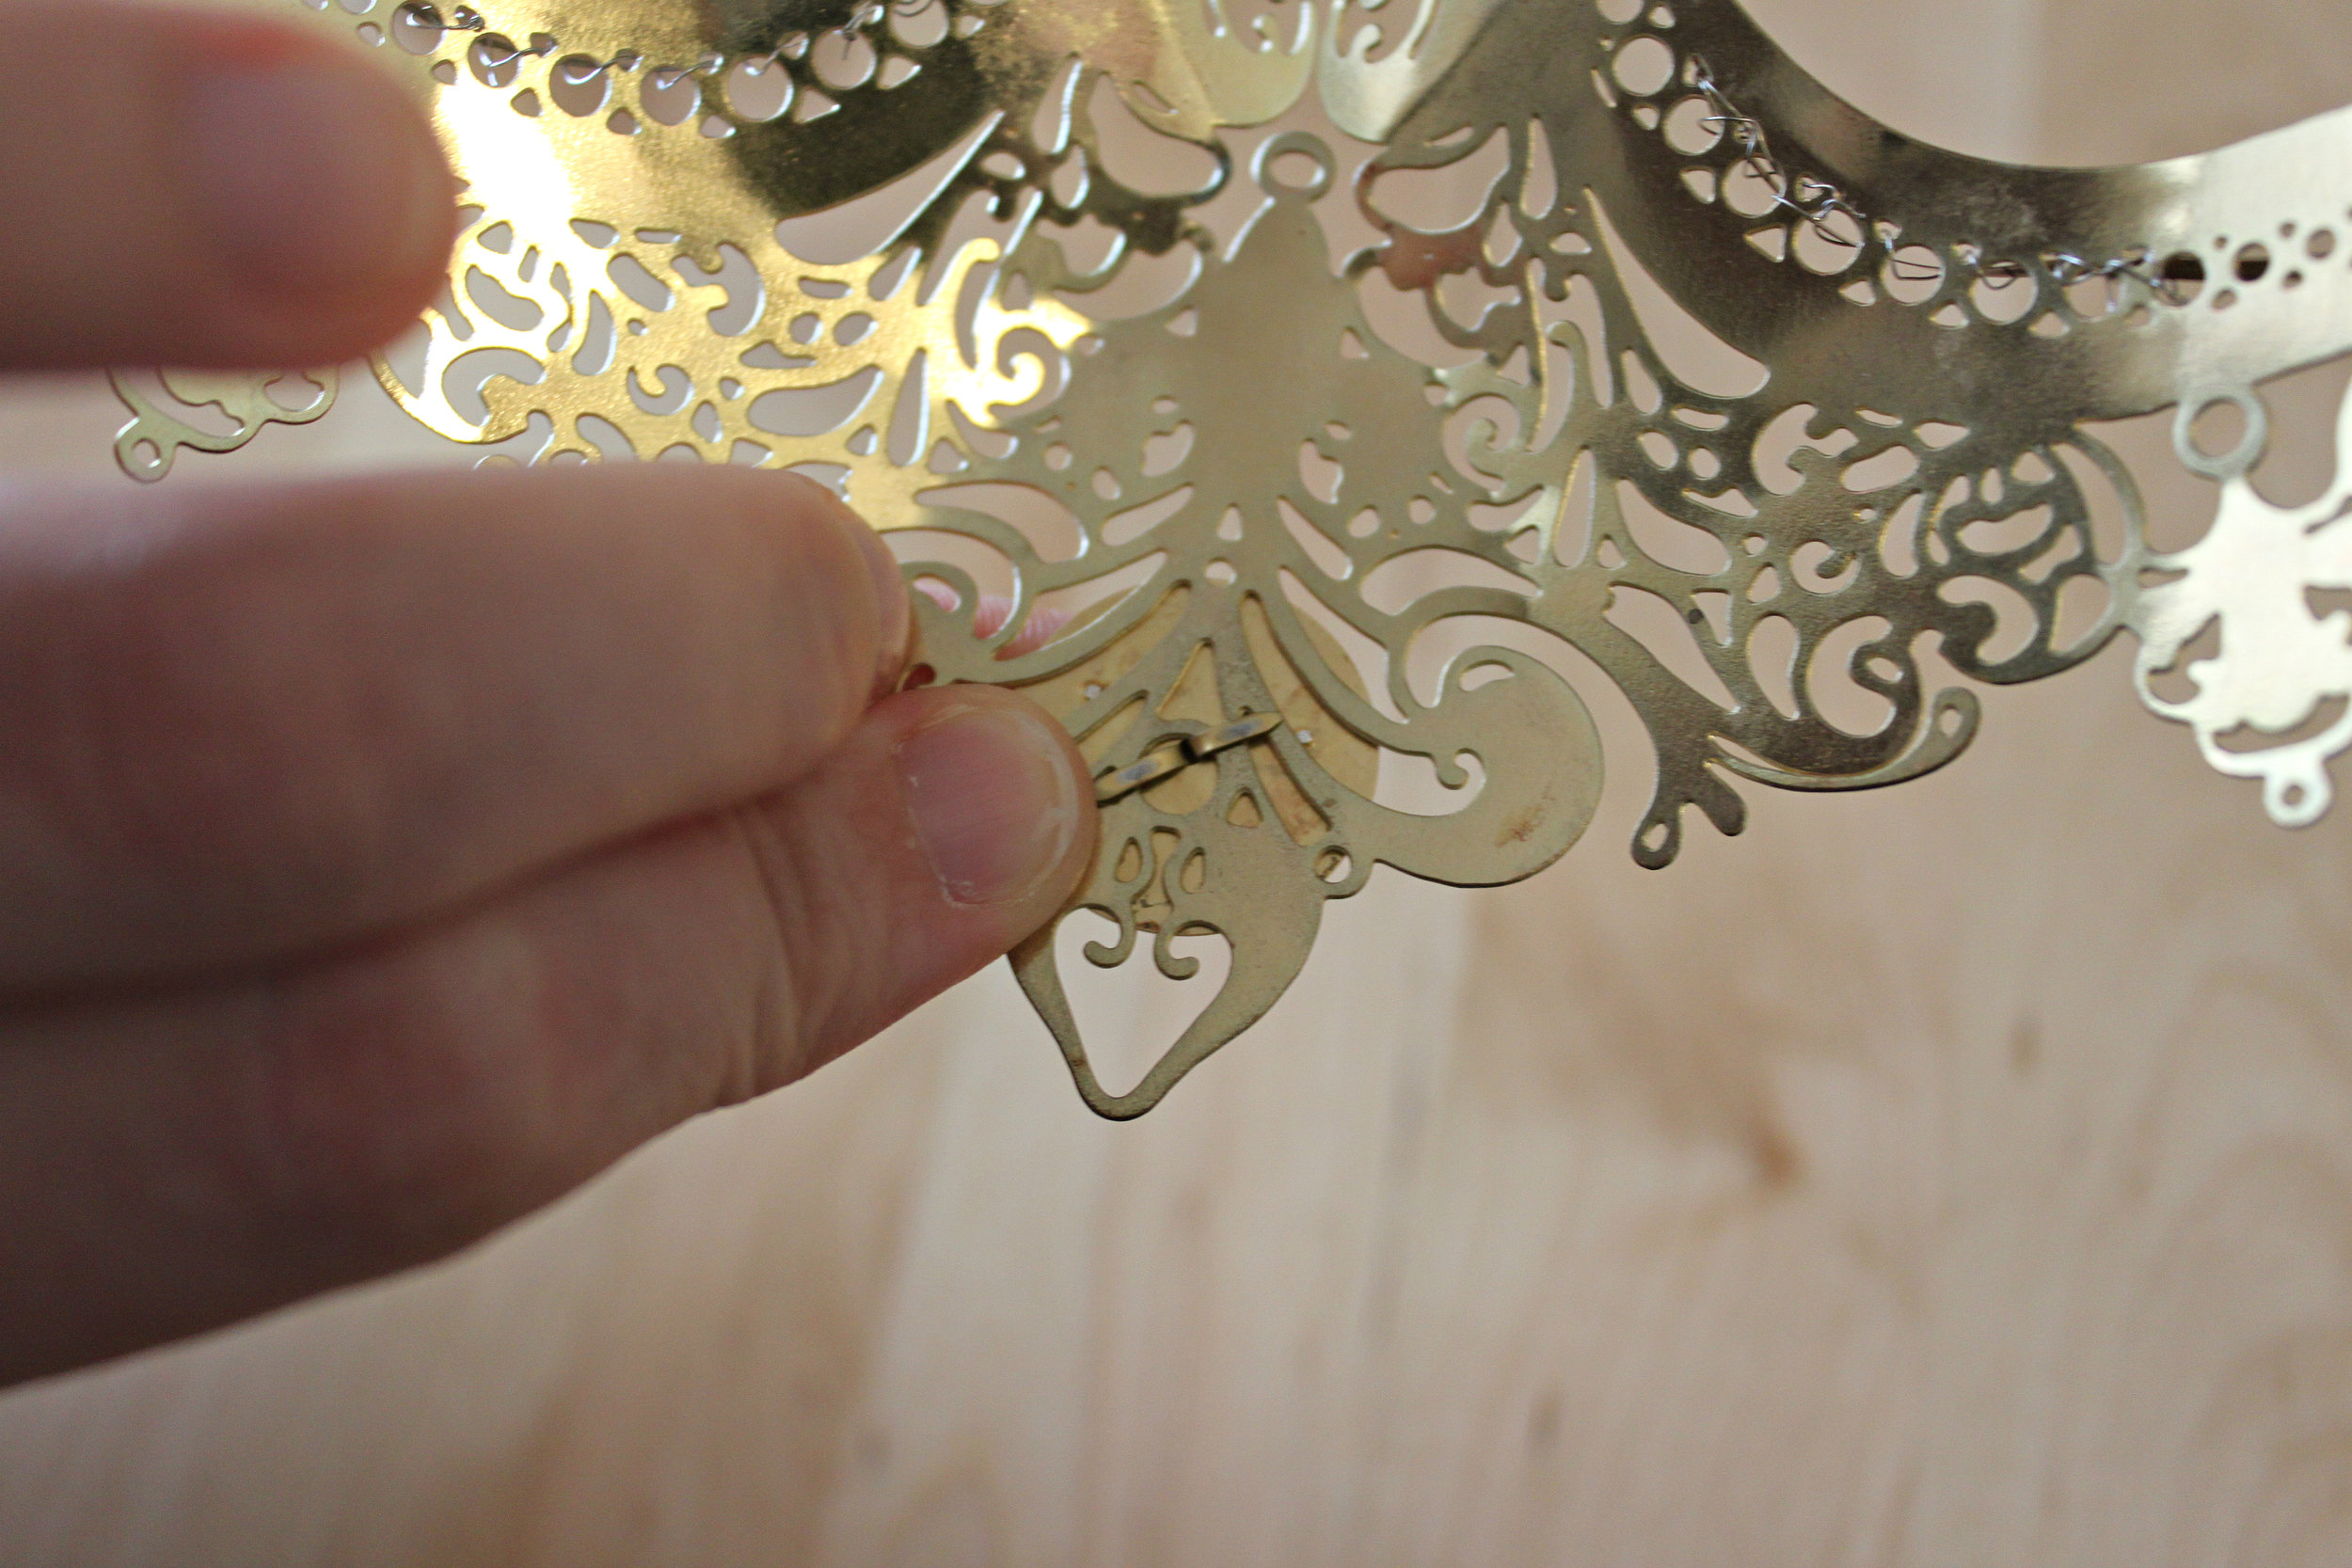
  7. (Optional) Add a clock face to the top of your mask using a brad. First, load the clock face onto the brad. IMG_3665Then push it the brad through a hole in the mask. Flip the mask over to the back, and pull apart the brad's prongs to secure the clock face in place. IMG_3666Be sure that when you pull apart the brad's prongs that you firmly hold the clock face in place on the front side of the mask. Otherwise, you may have a slight gap in between all of your layers which will cause your clock face to slide out of place. IMG_3667
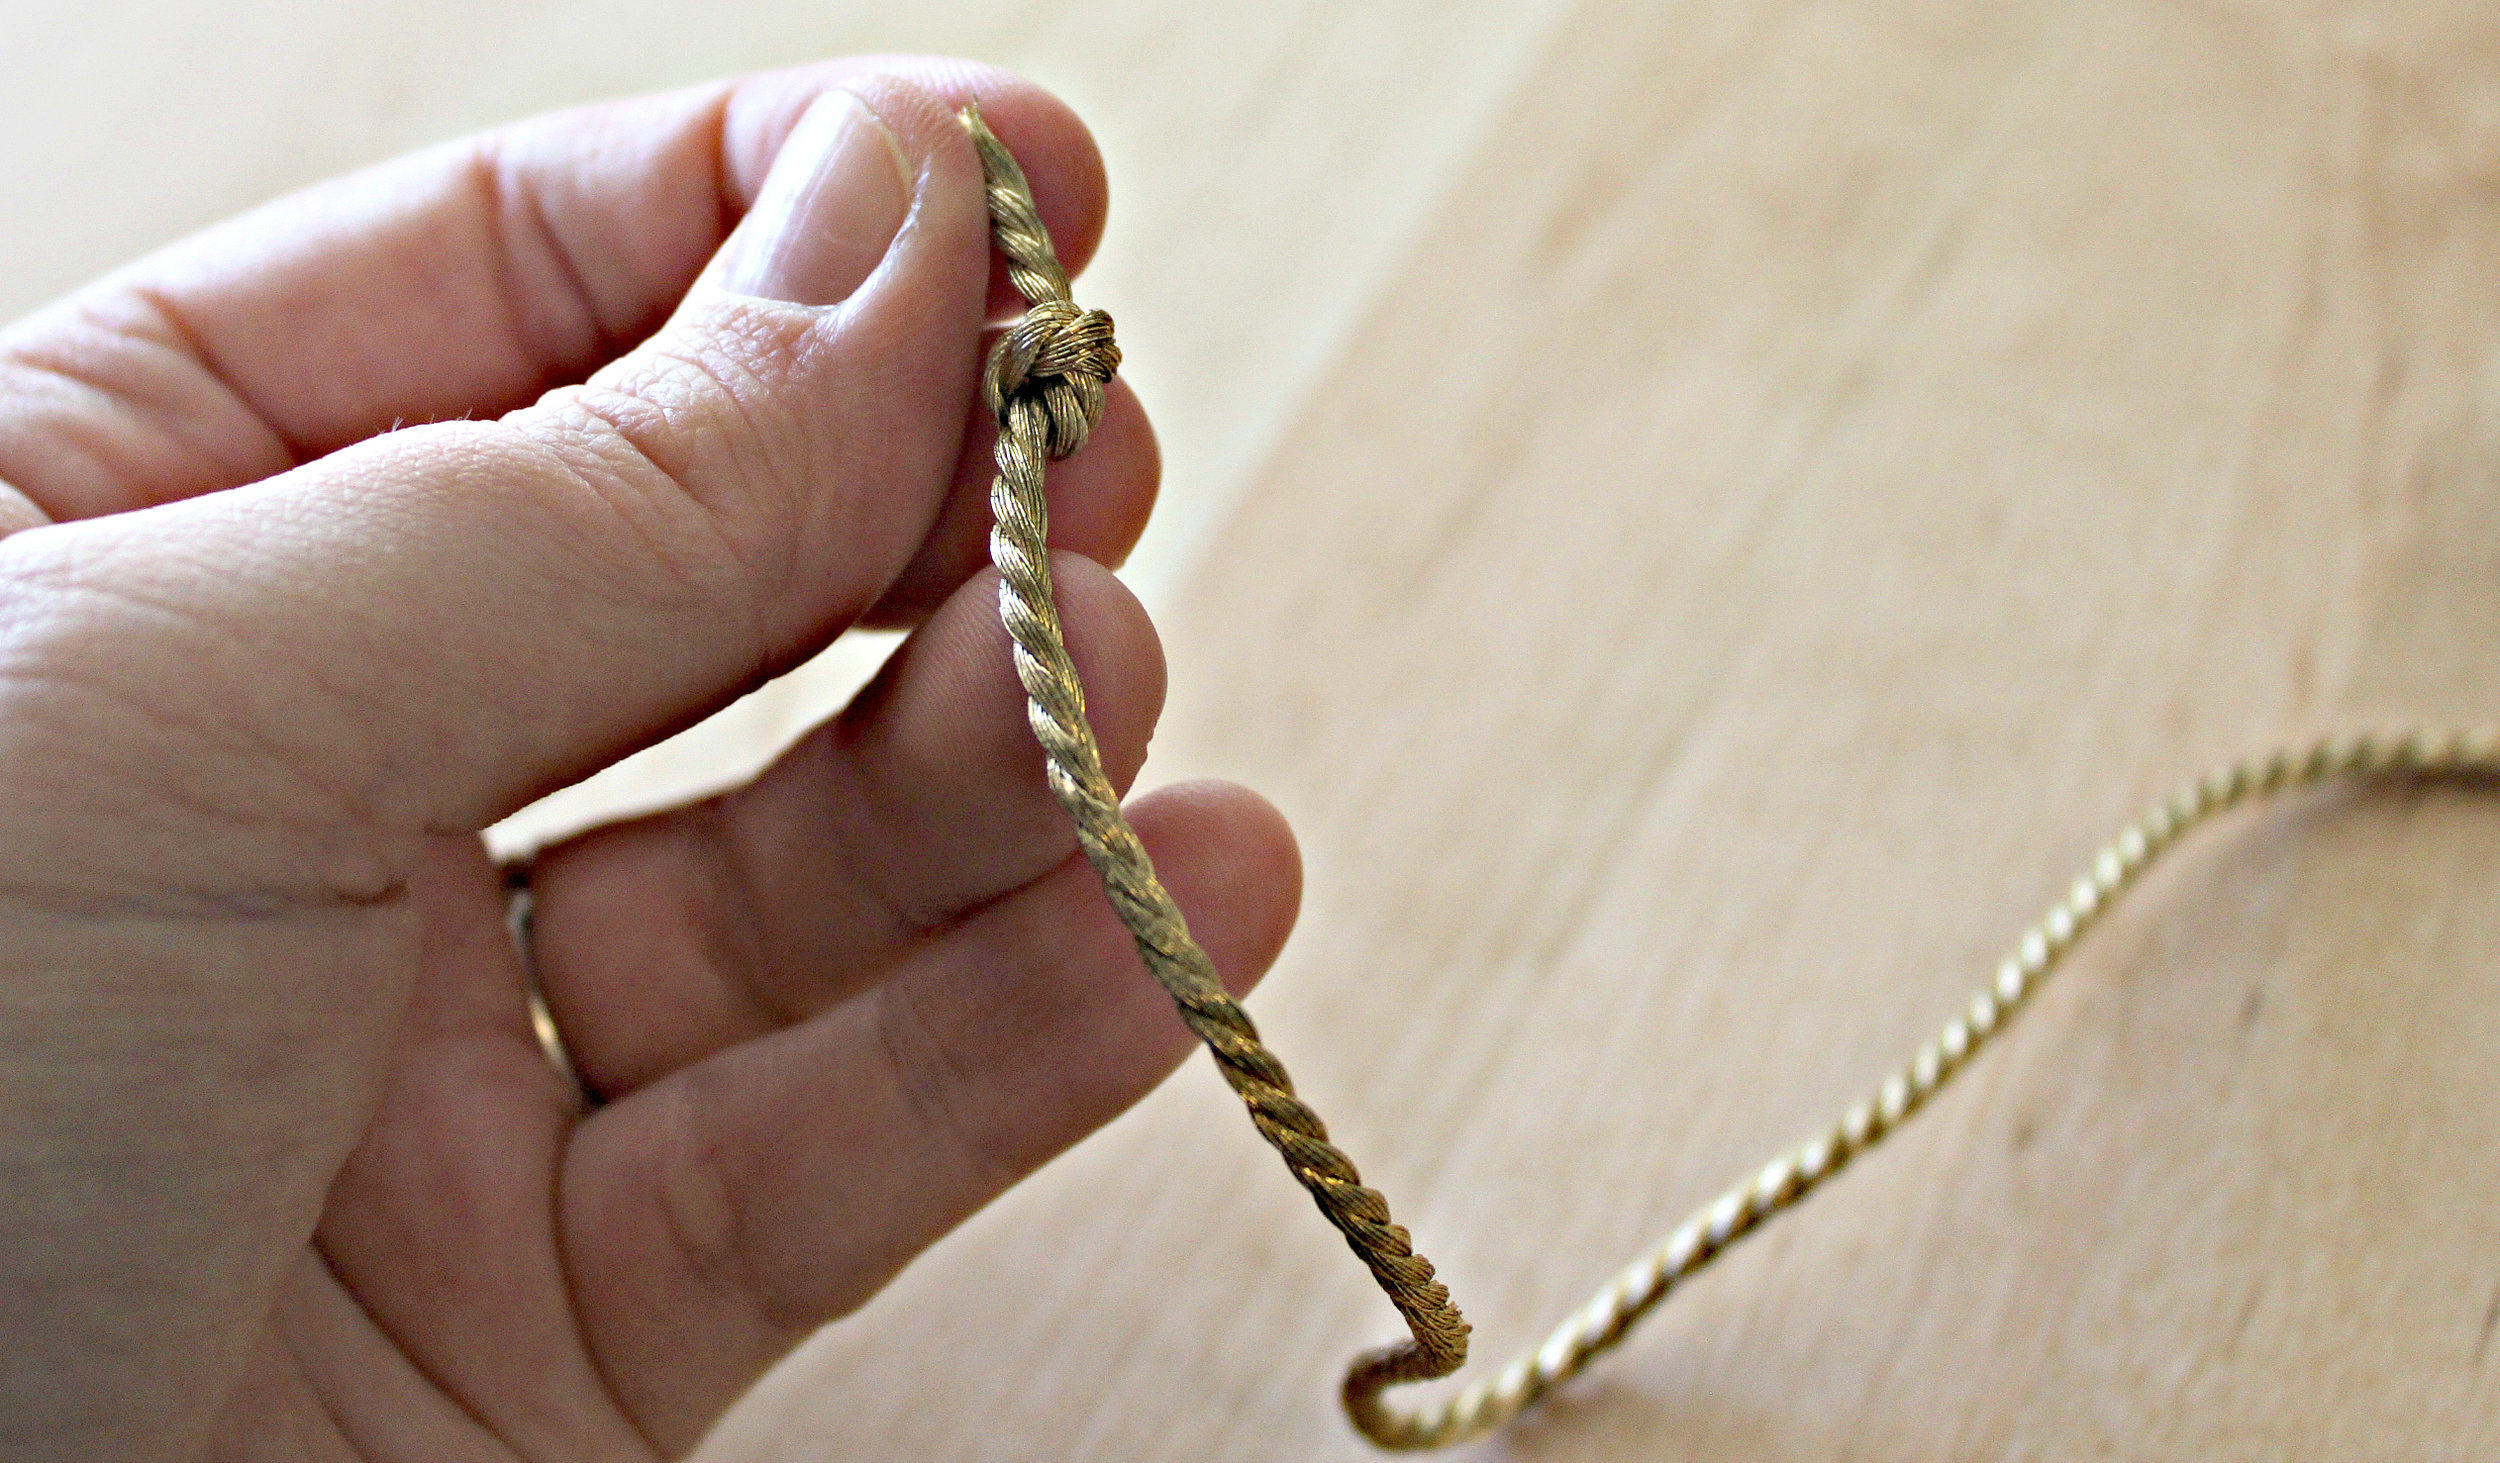
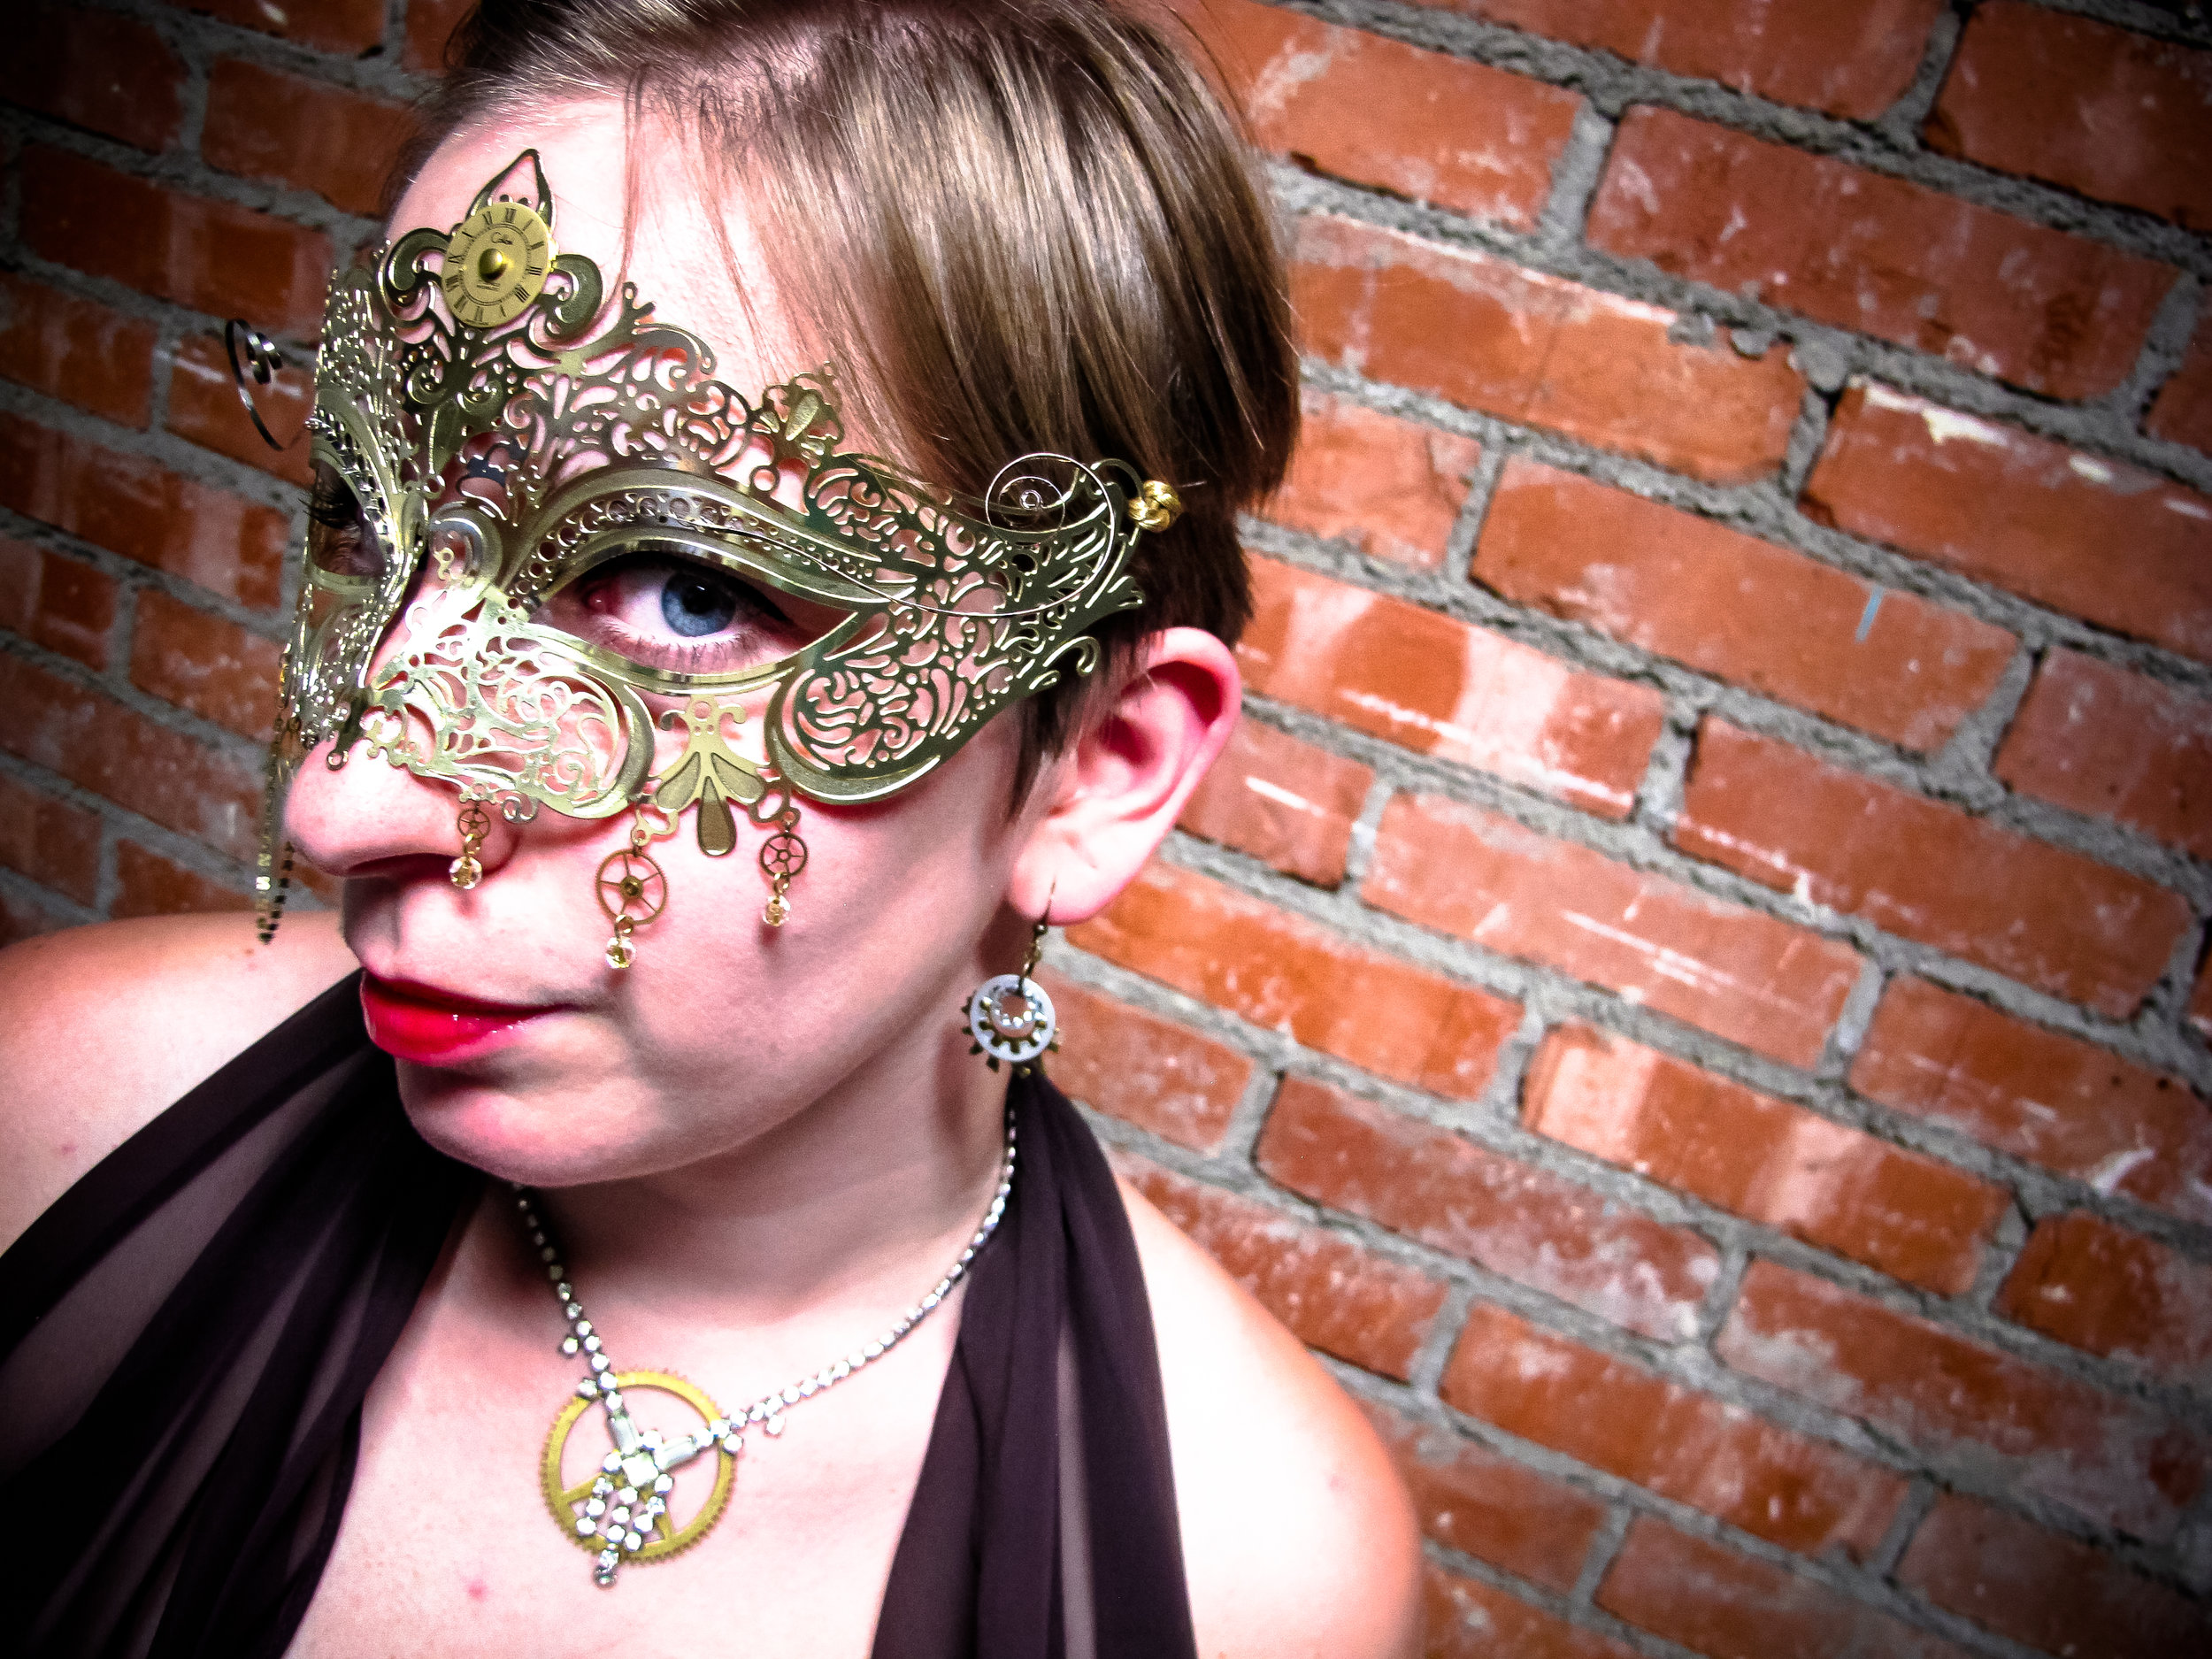
  8. Now all that is left is to attach the ribbon that will hold your mask onto your face. (You can also use elastic. An elastic band came with this mask but it was really cheap looking & flimsy so I decided to replace it). Measure the amount of ribbon you'll need--take into account knotting both sides of the mask, knotting the ends (if your ribbon is prone to fraying), and the amount you'll need to tie the ribbon in a bow. IMG_3668Once you've measured the amount you need, cut the ribbon with your scissors. Then cut the ribbon in half (one for each side of your mask). Take the first piece of ribbon and tie it to your mask. I used a simple knot. Knot the end as well. IMG_3670Repeat for the other side. Cut off any excess ribbon. IMG_3669You now have a completed mask! Pair with an elegant dress, pair of long gloves, and some fabulous jewelry for a posh Steampunk Halloween costume! IMG_3672SamGold-4Thanks to Rhys for the amazing pictures! SamGold-3As always, Merry Making! I hope you've enjoyed my Halloween DIYs this month! Check out some of my past steampunk costume & Halloween Decor DIYs for further inspiration!

SamGold-5For websites where I find costume inspiration, visit: A Mighty Girl and also Take Back Halloween (which I blogged about last Halloween). Both sites have excellent ideas & costumes for girls & women that empower & celebrate what it means to be an imaginative, creative woman--which for me, is what Halloween is all about!

DIY Steampunk Medals

D-I-Y-Samantha Extance1 Comment

Steampunk Medal DIY CollageMake your own steampunk medal! A perfect, easy addition to any Halloween costume! Materials & Tools Needed:

  • Medal Ribbon (any length you desire)
  • Bicycle Gear (from a cassette)
  • Pocketwatch part (preferably one of the cover pieces which are more ornamental)
  • Pin
  • Safety pin
  • EE3000 or 5000 glue
  • Needle & Thread (if you prefer to hand sew) or Sewing Machine (which I'd suggest)
  • Scissors

Steps:

  1. Cut ribbon for the medal.
  2. Place your bike gear in the middle of your ribbon.
  3. Grab your pocketwatch part (the piece I used is the cover which you can detach by removing the hinge pin which attaches the cover to the rest of the watch).
  4. Glue a pin to the back of your pocketwatch part with EE3000 or 5000 (or another kind of glue that fuses to metal).
  5. Fold your ribbon (lining up the 2 ends evenly).
  6. Fold over the top of your ribbon (toward the back side of your medal ribbon). Place your safety pin inside the fold.
  7. Sew (by either hand stitching or machine sewing) along your fold. Be sure to stitch and back stitch if you are using a sewing machine.
  8. Cut off the excess thread.
  9. Pin your pocketwatch part to the front of your ribbon.

You're finished! Wear with pride!


DIY Steampunk Gun Holster

D-I-Y-Samantha Extance1 Comment

For those who know me, my fetish for hip holsters (regardless of who's wearing them--men & women alike are somehow more attractive to me with a hip holster strapped around their waist & leg-I blame Han Solo for this) but I digress. I've always wanted a hip holster and this Halloween I was determined to steampunk one of my very own. IMG_9234Steampunking on a budget can be tricky and oftentimes we have to sacrifice quality for fit. I found a really great holster for 9.99 at a local Halloween store. It was imitation leather, but that worked to my advantage. I was able to easily manipulate the fabric and sew on accessories. IMG_9196So let's get started! Here's what you'll need:

  • Imitation leather gun holster (sourced from your local Halloween store; mine is a kid's Indiana Jones holster--very appropriate, since I seriously love both Solo & Dr. Jones!) Mine came with a gun too; if yours does not, then you will need to purchase a toy gun. Water guns make excellent steampunk guns when painted. Here is a DIY that I love on steampunking toy guns.
  • Needle & Heavy thread (to match your leather and preferably, the kind used for coats)
  • Long Springs (upcycled from a local flea market)--You can substitute any straight metal material here: wire, typewriter keys, or even chain
  • Medium Grandfather clock gear (or reproduction gear)
  • 2 large jump rings (and flat nosed pliers)
  • 15-20 small Clothing Snaps (sourced from flea markets, but you can also go to any Fabric or Sewing store)--Mine are black, but you can also use silver
  • 1 large Clothing Snap (optional)--I used mine to disguise the modern plastic snap on my holster. You could also substitute an ornate button here if you wish
  • 1 Long metal pin (optional)--This gives your holster a little feminine flair. Choose any pin or brooch you like.

Steps:

  1. Before sewing, lay out your springs on your holster & figure out their placement. I wanted mine to create a striped pattern so I spaced them a 1/4 inch apart. Once you've got all of your springs placed, sew your springs onto your holster. Be sure to tie sturdy knots & cut off any excess thread. Hide all of your knots on the inside of your holster. IMG_9198(Side note: I wanted one of my springs to curve a bit, and so I placed a couple of stitches in the middle of the spring so that it would keep a curved shape.) holster sew collage
  2. Place your pin above your springs. A large, long pin works best because it covers the tops of your springs. IMG_9213  IMG_9216
  3. Next, sew on your clothing snaps. Sew them in a pattern that you like. I alternated larger & smaller clothing snaps for a more textured look. IMG_9217    IMG_9224
  4. If desired, sew on your large sewing snap or button (over the holster's plastic snap to hide it). This step is optional. IMG_9226
  5. Last, using your flat nosed pliers--attach your gear to your pin with your 2 jump rings.IMG_9228        IMG_9233Now hook to your belt & rustle up some trouble like the airship cowgirl (or cowboy) you are!

Halloween Steampunk Costume CollageHave a Happy Halloween everyone!


DIY Steampunk Halloween Candelabra

D-I-Y-Samantha ExtanceComment

I love Halloween! It's a great excuse to go over-the-top and get a little campy. This year I made a cool Steampunk Candelabra that you could easily make for yourself. It's easy to make, relatively inexpensive (if you're making only one), and you can use either re-purposed materials or reproduction materials and the outcome is still impressively spooky! Perfect for any Halloween decor!IMG_9147

Materials & Tools:

  • 2 bike gears, cleaned (free)
  • 1 candelabra (I purchased mine from Michaels for 24.99)
  • 2 skeleton keys (mine are fake metal keys, also purchased from Michaels in the dollar section: 4.00)
  • Chain (1 pkg., 2.99)
  • 4 large swivel hooks (1 pkg. of 4, 1.99) *Be sure to purchase hooks that are: easy to open (like a partial split ring) and large enough to fit around your candelabra's arm with enough space leftover to dangle your skeleton key comfortably
  • Ideology brand reproduction gears (2 pkgs., 4.99 ea.)
  • Jump rings
  • 4 candlesticks (1.00 ea.)
  • Wire cutters
  • Flat nosed pliers

Note on the materials: You can use actual gears & keys that your re-purpose, but for those looking for a cheaper version reproduction gears & keys are fine too.

Steps:

  1. Measure the amount of chain you need by taking a piece of string and configuring it to hang  in between your candelabra's arms. Keep in mind how far down you'd like your chain to hang.  Cut and then measure against a ruler. You may even want to bring the piece of string with you to the store to purchase your chain.
  2. Cut your chain pieces using your wire cutters. You want 4 total.
  3. Once you've cut your chain, decorate it with your gears. To fasten a gear to a chain link, use your flat nosed pliers. Open a jump ring, load the gear onto it, and then load the chain link onto the jump ring. Close your jump ring. Do the "shake test" to make sure your jump ring is firmly closed. Repeat for all chain pieces. (I put 6 gears on each chain piece.) Once you are finished, set your chain links aside.IMG_9162
  4. Next, attach your large swivel hooks onto your candelabra's arms.IMG_9160
  5. After all of your hooks are in place, load your skeleton keys onto your swivel hooks.IMG_9156
  6. Once your keys are in place, attach your decorated chain pieces to the swivel hook with a jump ring. You are connecting your chain to one hook  as well as the hook across from it. Repeat for each chain piece.IMG_9161
  7. Next, place your bike gears onto your candelabra. Mine fit comfortably over the middle candelabra arm and pedestal. Place yours where you like.IMG_9152IMG_9159
  8. Last, affix your candlesticks in their holders.IMG_9158IMG_9166

Steampunk Costume Ideas for Ladies & Lil' Ladies

InspirationSamantha ExtanceComment

The best part about making your own costume is that you have total aesthetic control. The greatest benefit to a handmade Halloween is that you are not inhibited by a limited selection (and do not have to weigh those unappealing options--like deciding between a slutty nurse  costume or a ladybug for you or your child). It seems like most costumes these days for women fall into 2 categories: hyper-sexual or infantile. This is precisely the kind of social issue that drives the Take Back Halloween project. Take Back Halloween is a blog & website that offers up ideas on how to create costumes for women & girls that are not only imaginative, fun, and yes even macabre but empowering and inspiring. Their costumes are based on real women (a smattering of scientists, queens, explorers, and entrepreneurs) and also strong female figures from world mythologies. I've been a fan of their blog for some time, I find its dedication to positivity and multiculturalism refreshing and I wanted to share it with those of you who are figuring out what you'd like to be this Halloween.

Here are some Victorian women--who you could either emulate or steampunk (I offer a couple of steampunking suggestions for each lady)!

1) Ada Lovelace: Aristocrat Scientist & Daughter of Lord Byron

Steampunk Suggestions: "Nowadays she’s recognized as 'the world’s first computer programmer,'" drawing from this fact you create a cool accessory (a fan, necklace, or pair of earrings perhaps) out of an old computer circuit board or if you feel daring--a masquerade style mask made out of computer parts!

2) Carlota of Mexico: Renowned Beauty & Empress of Mexico

Steampunk Suggestions: Carlota was famous for her jewels and in fact Take Back Halloween points out that "(They’re still famous—one of her diamonds sold at auction in 2010 for 1.7 million dollars.)." Steampunking Carlota would be simple & elegant--painting gears over crystal glass beads (which you would then use to make a pair of dangly earrings) or a pearl necklace with a cog/gear pendant & pearl dangling from the bottom. If you feel particualrly adventurous, you might even create a cog & gear crown for yourself.

3) Emma Goldman: American Anarchist & Activist, nicknamed “Red Emma”

Steampunk Suggestions: Accessorizing to look like Emma Goldman is steampunk enough! It's be easy. Pince-Nez glasses, button up boots, & her fantastic Victorian style hats.

4) Jane Austen: Needs No Introduction! Technically she's not Victorian, but regency costumes are fun too!

Steampunk Suggestions: Why not be Jane Austen, Vampire Hunter or Zombie Killer?! Accessorize with not only a deadly pen but a broadsword or stake!

5) Lise Meitner: Nuclear Physicist who discovered Nuclear Fission

Steampunk Suggestions: To accompany your outfit, grab tubes & bottles and fill them up with various liquids & stick a glow stick inside to give them a radioactive luminescence and goggles are a must (laboratory safety after all!).

6) Lizzie Borden: Murderess (hey, it’s Halloween!)

Steampunk Suggestions: Leg-o-mutton sleeves are a must, blood spattered spats, and an axe!

7) Madam C.J. Walker: Self-Made Millionaire & One of America’s first Female (and Female African American) Entrepeneurs

Steampunk Suggestions: My favorite picture of Madame C.J. is of her driving--such an empowering image of a mobile woman--a force to be reckoned with! I suggest some driving goggles, gloves, and a large opulent hat!

8) Susan B. Anthony: Suffragist Extraordinaire!

Steampunk Suggestions: Keep it simple--wear a Votes for Women sash or bring a sign or soap box to stand on throughout the night!

9) Queen Victoria: I'd recommend that you watch the movie The Young Victoria starring Emily Blunt for good ideas

Steampunk Suggestions: This is another costume that is easy to steampunk--you hardly have to do anything or you could re-interpret Queen Victoria into your own steampunk narrative--how about a robot Queen Victoria? You could draw gears on your skin (particularly at your joints) with henna or face paint and make a huge wind up key out of cardboard and run 2 lengths of ribbon on each side of the cardboard pieces so that you could fasten to your back like a belt!

10) Annie Oakley:Nicknamed "Little Sure Shot," Annie Oakley was a force to be reckoned with. She could hit any target no matter how small and was a part of Buffalo Bill's traveling Wild West Show. Annie designed and sewed all of her own clothes for the show too!
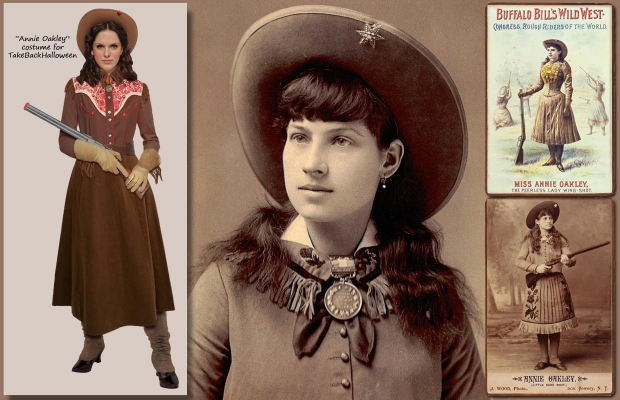
annie-oakley

Steampunk Suggestions: A steampunk version of Annie Oakley would be fun and rather simple. You could keep the costume relatively the same, and just create a steampunk blunderbuss or rifle. Other ideas are using steampunk gear buttons, like the kind you can purchase at JoAnn Fabrics, in lieu of traditional wood or brass buttons in her costume.

11) Marie Curie: Who wouldn't want to dress up as the first woman to win a Nobel Prize?! Marie Curie is a famous scientist, best known for discovering radiation/radium. A costume of Curie would also be simple, but there are certainly ways to steampunk it!
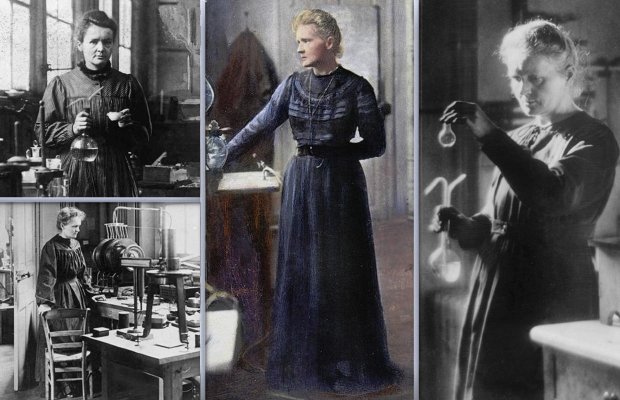
marie-curie

Steampunk Suggestions: You could 'punk it up with accessories like a steampunk eyeglass or monocle. Props are key--a couple of old beakers filled with glow in the dark liquids would be really cool. You could also paint your costume with glow in the dark paint for a radioactive Marie Curie. It would make the costume a bit more spooky and macabre since Curie died of radiation poisoning.

12) Queen Liliuokalani:  Liliuokalani was the last reigning monarch of Hawaii. According to Take Back Halloween, "She came to the throne in 1891 as a pro-native, pro-woman advocate for her people, and quickly found herself at odds with the American businessmen (sugar barons, pineapple planters) who wanted to annex the islands to the United States."

liliuokalami

Steampunk Suggestions: Steampunk through accessories--a steampunk rhinestone necklace and sash!

Good luck brainstorming & creating your Halloween costumes! Check out Take Back Halloween for more ideas!


DIY Halloween Mask

D-I-Y-Samantha ExtanceComment

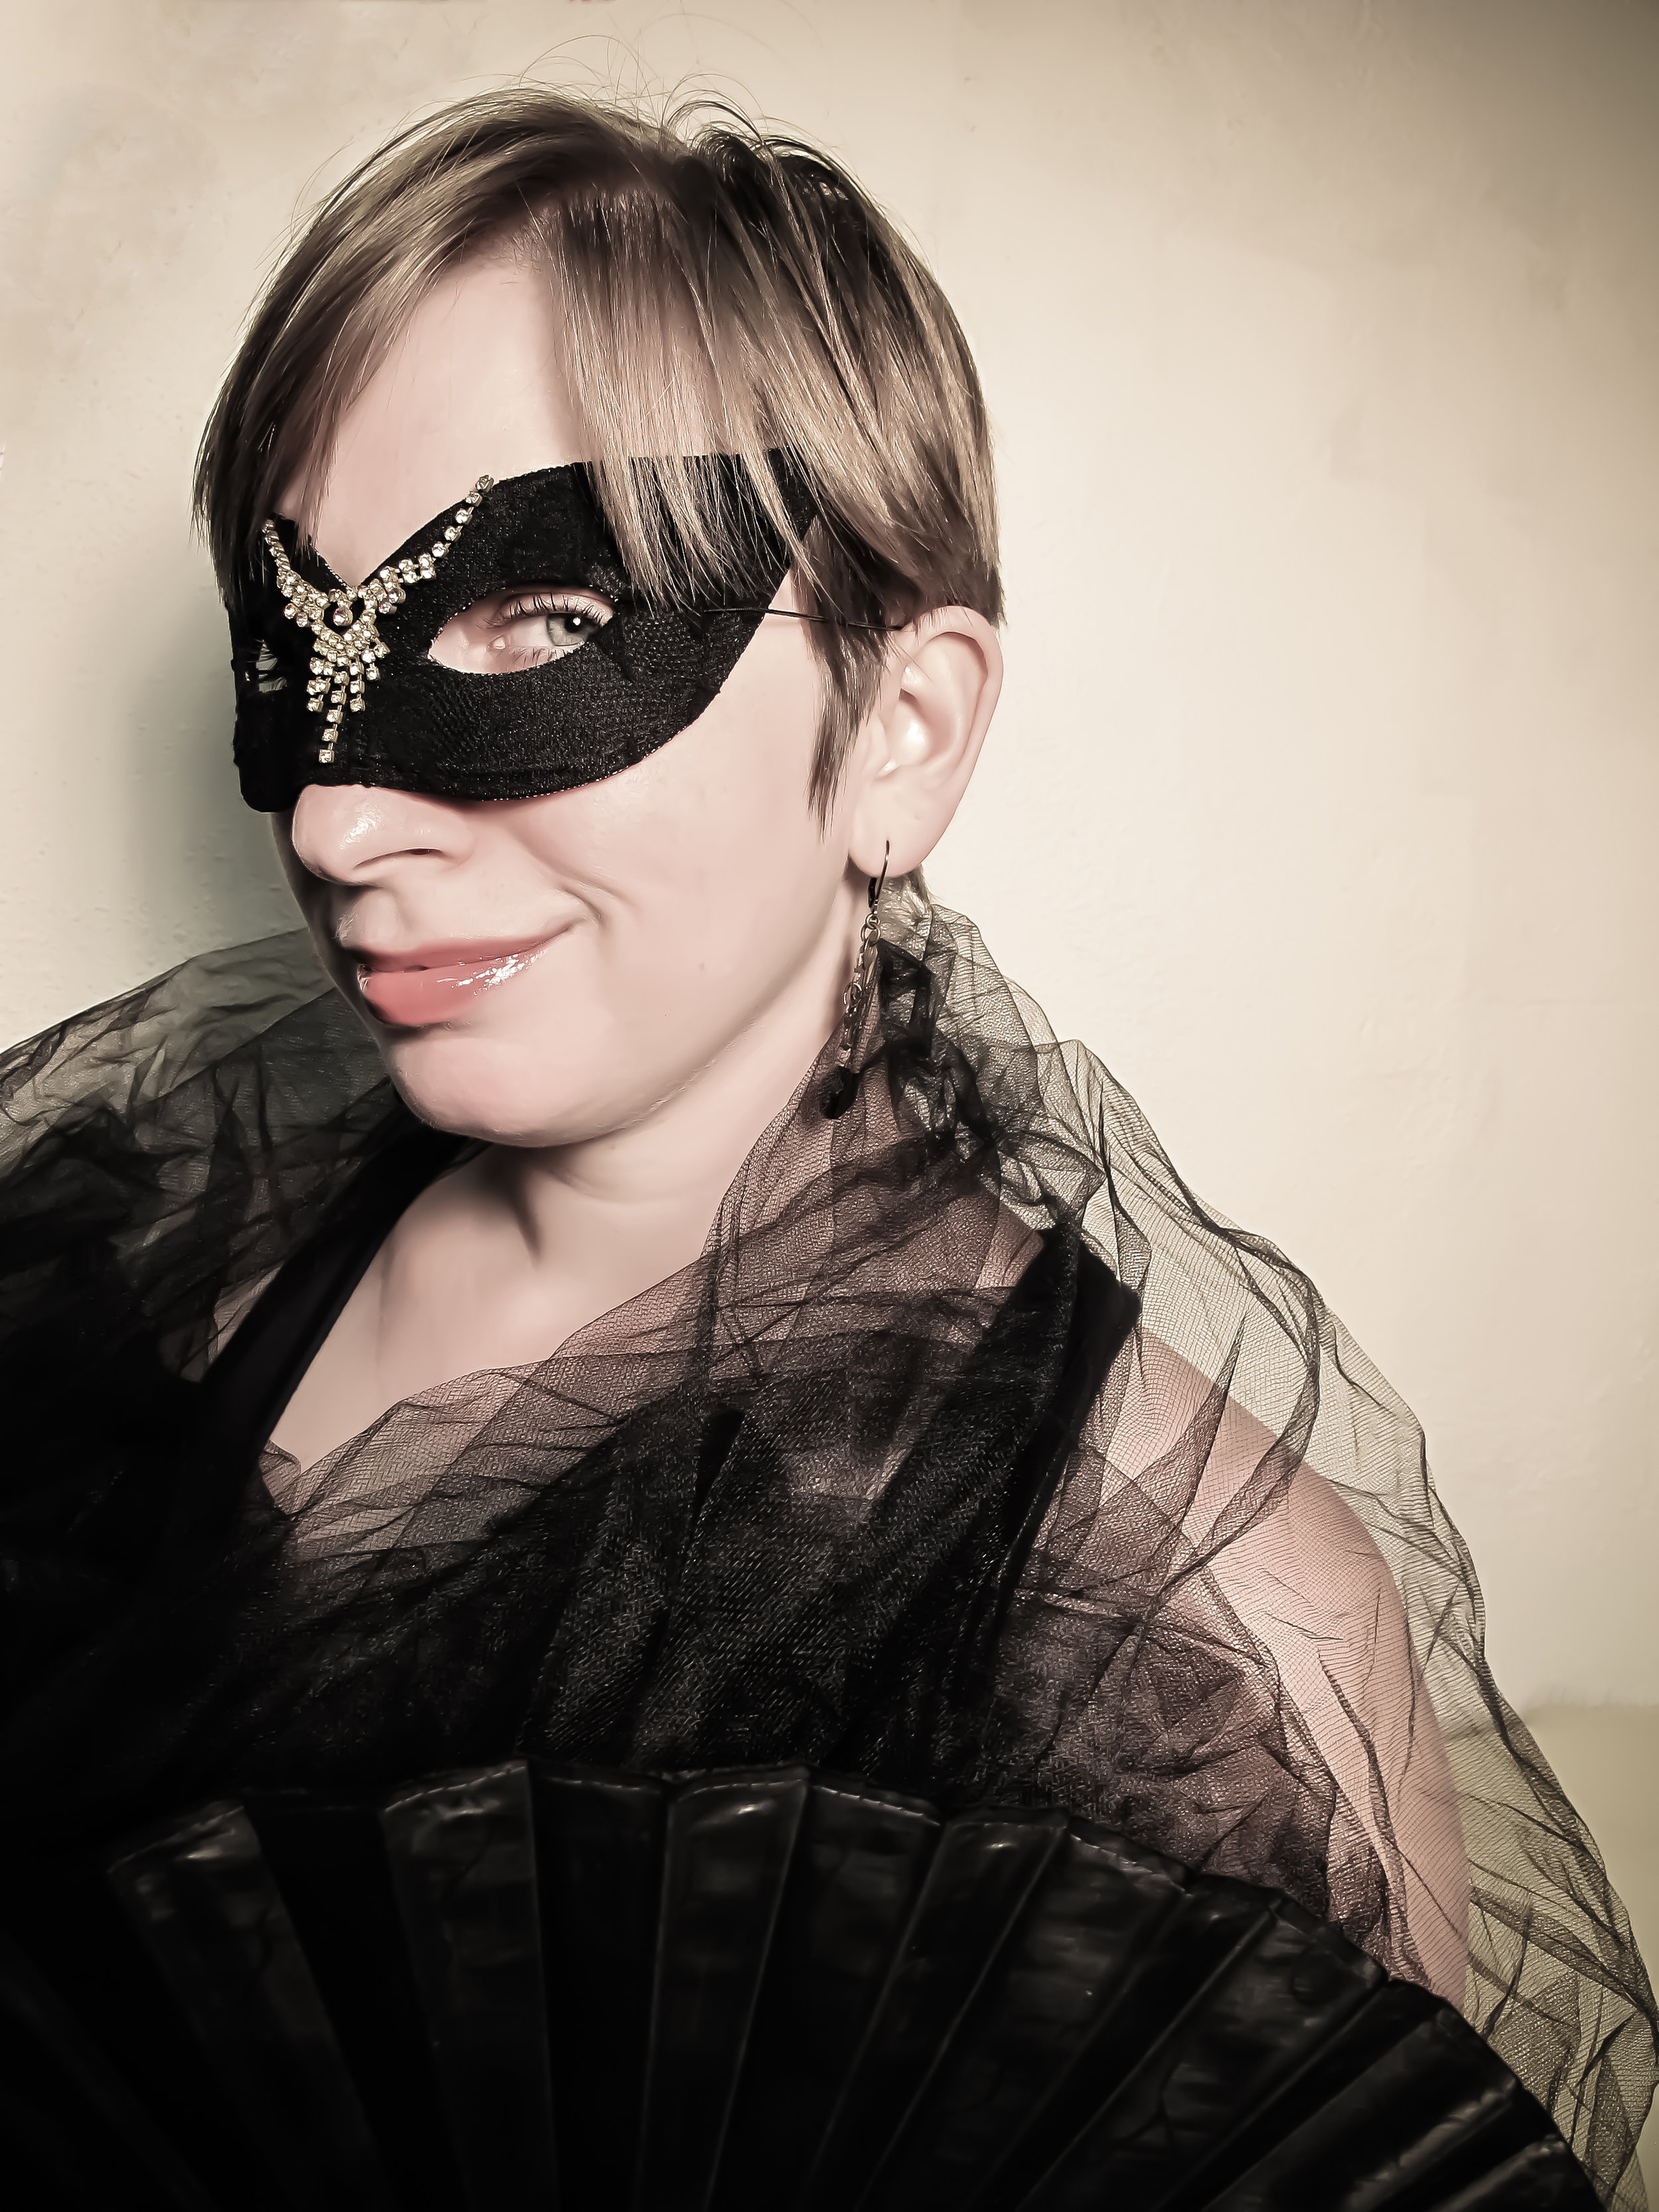
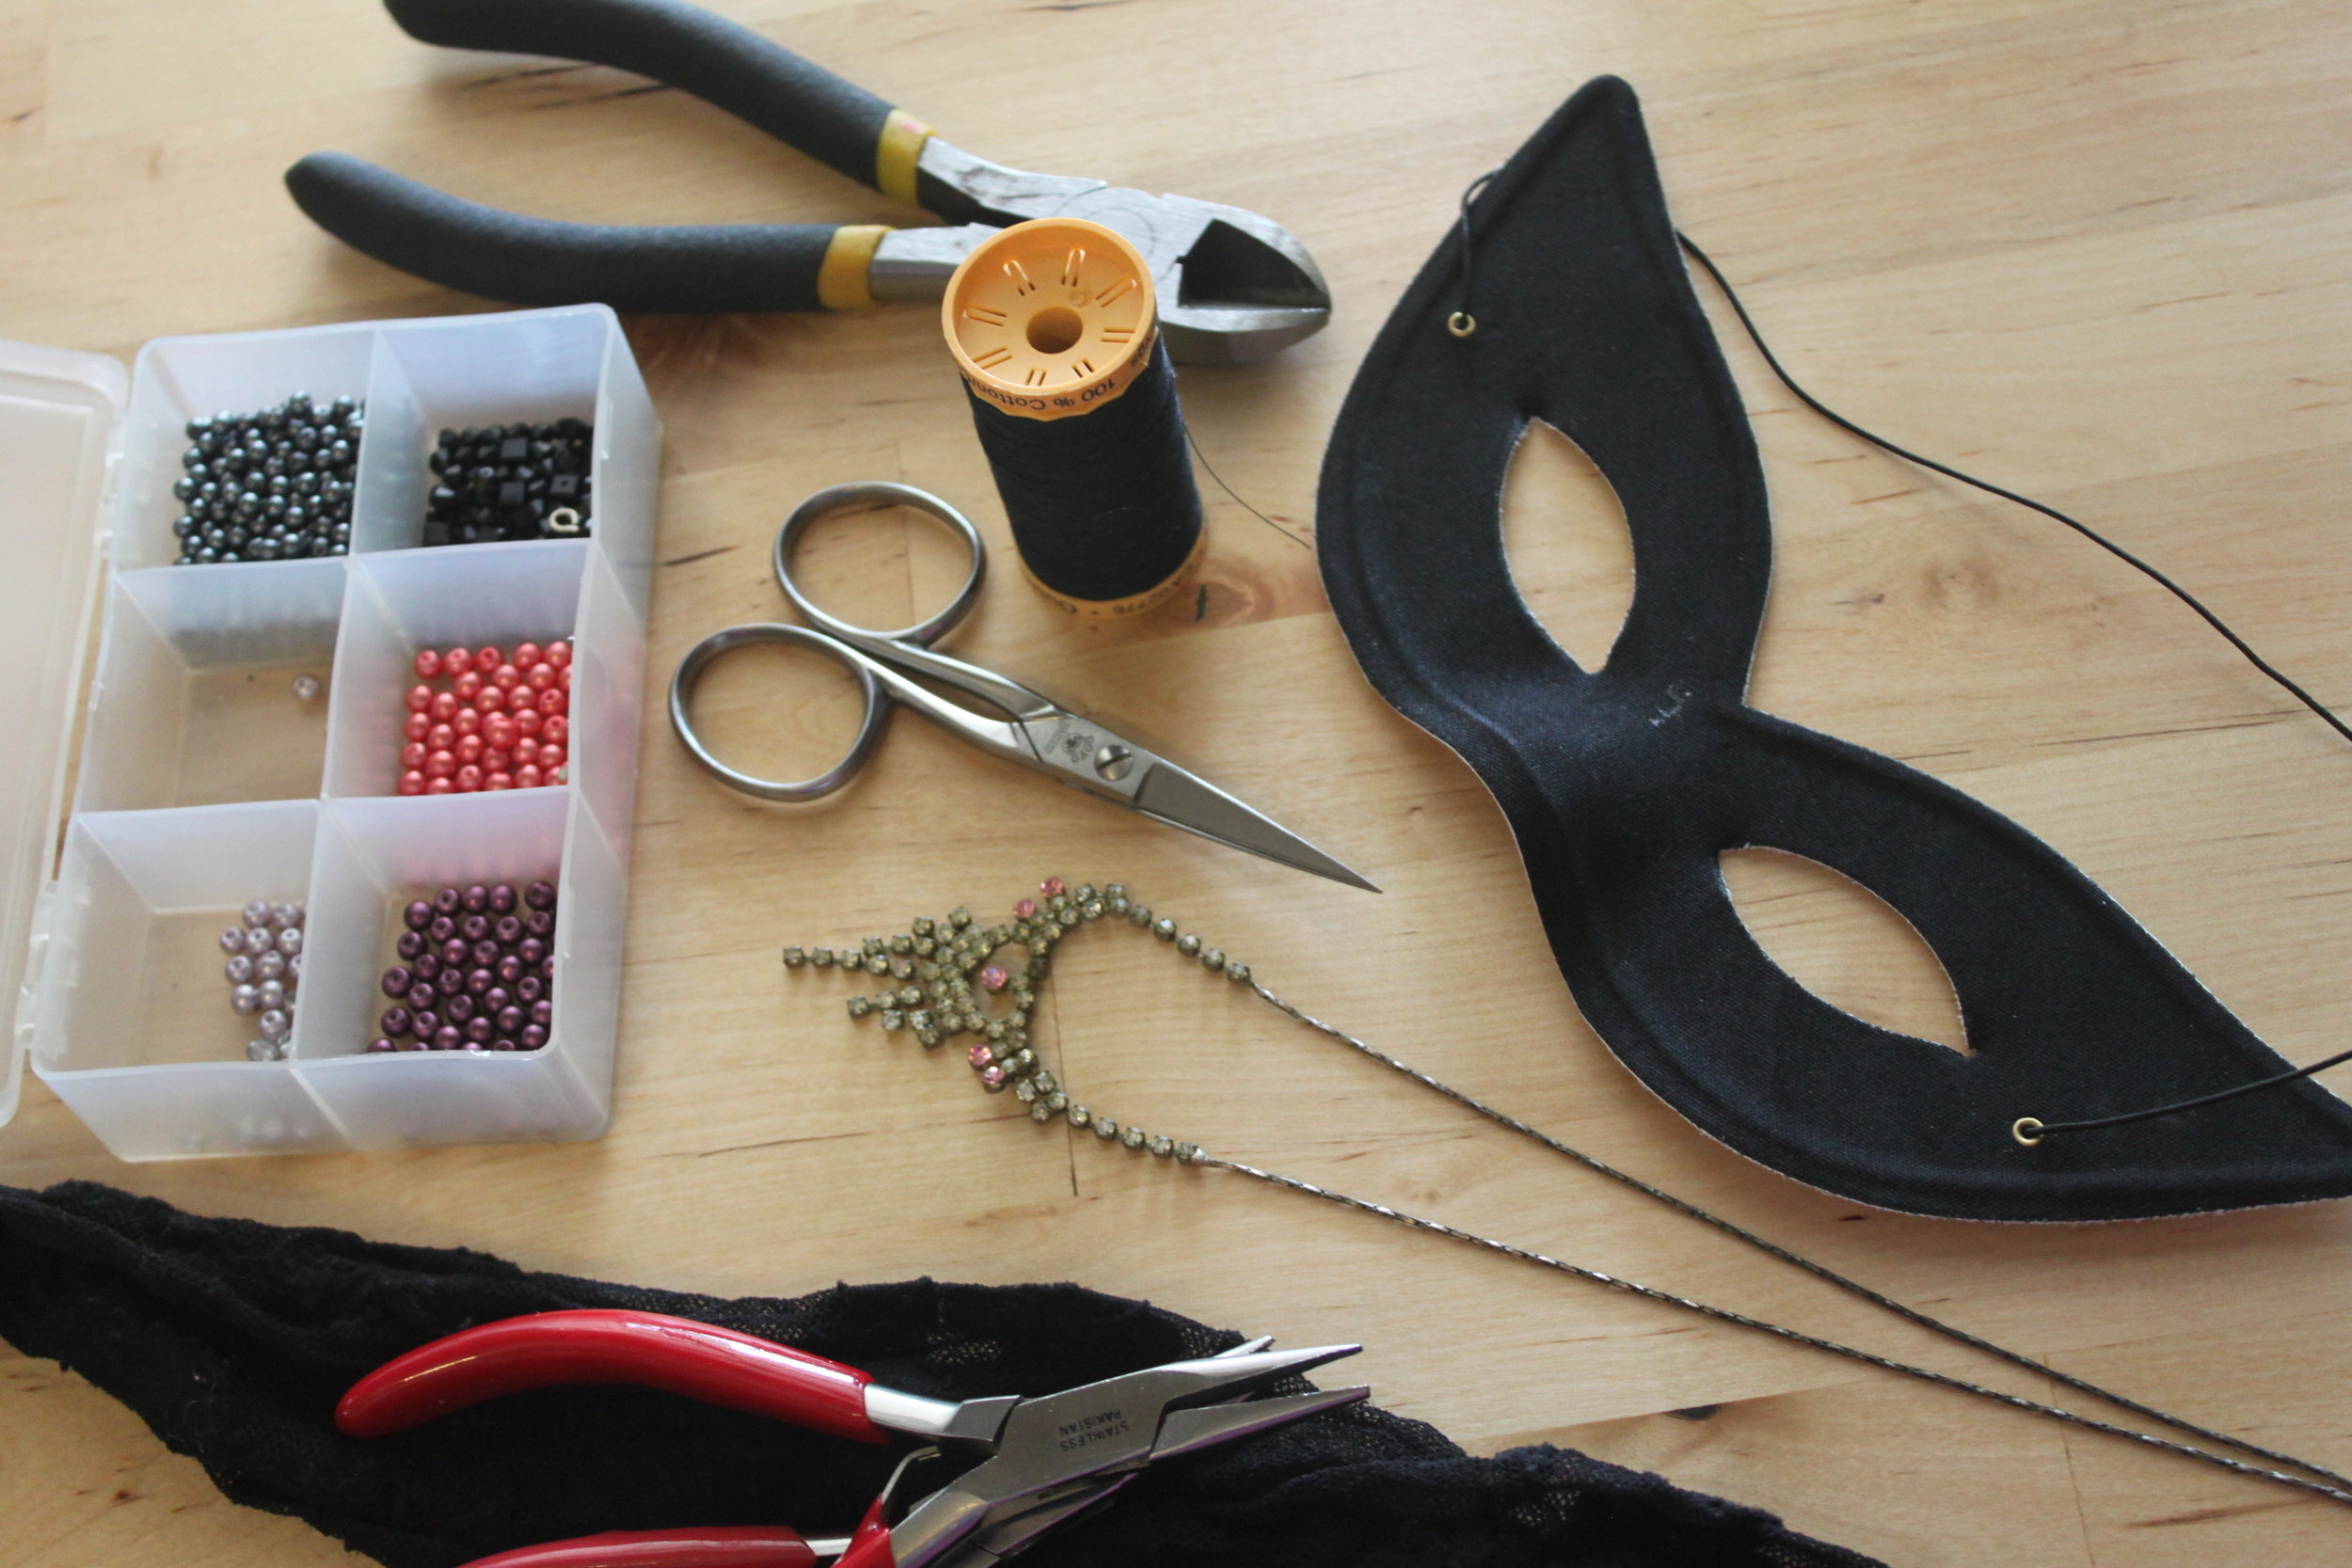
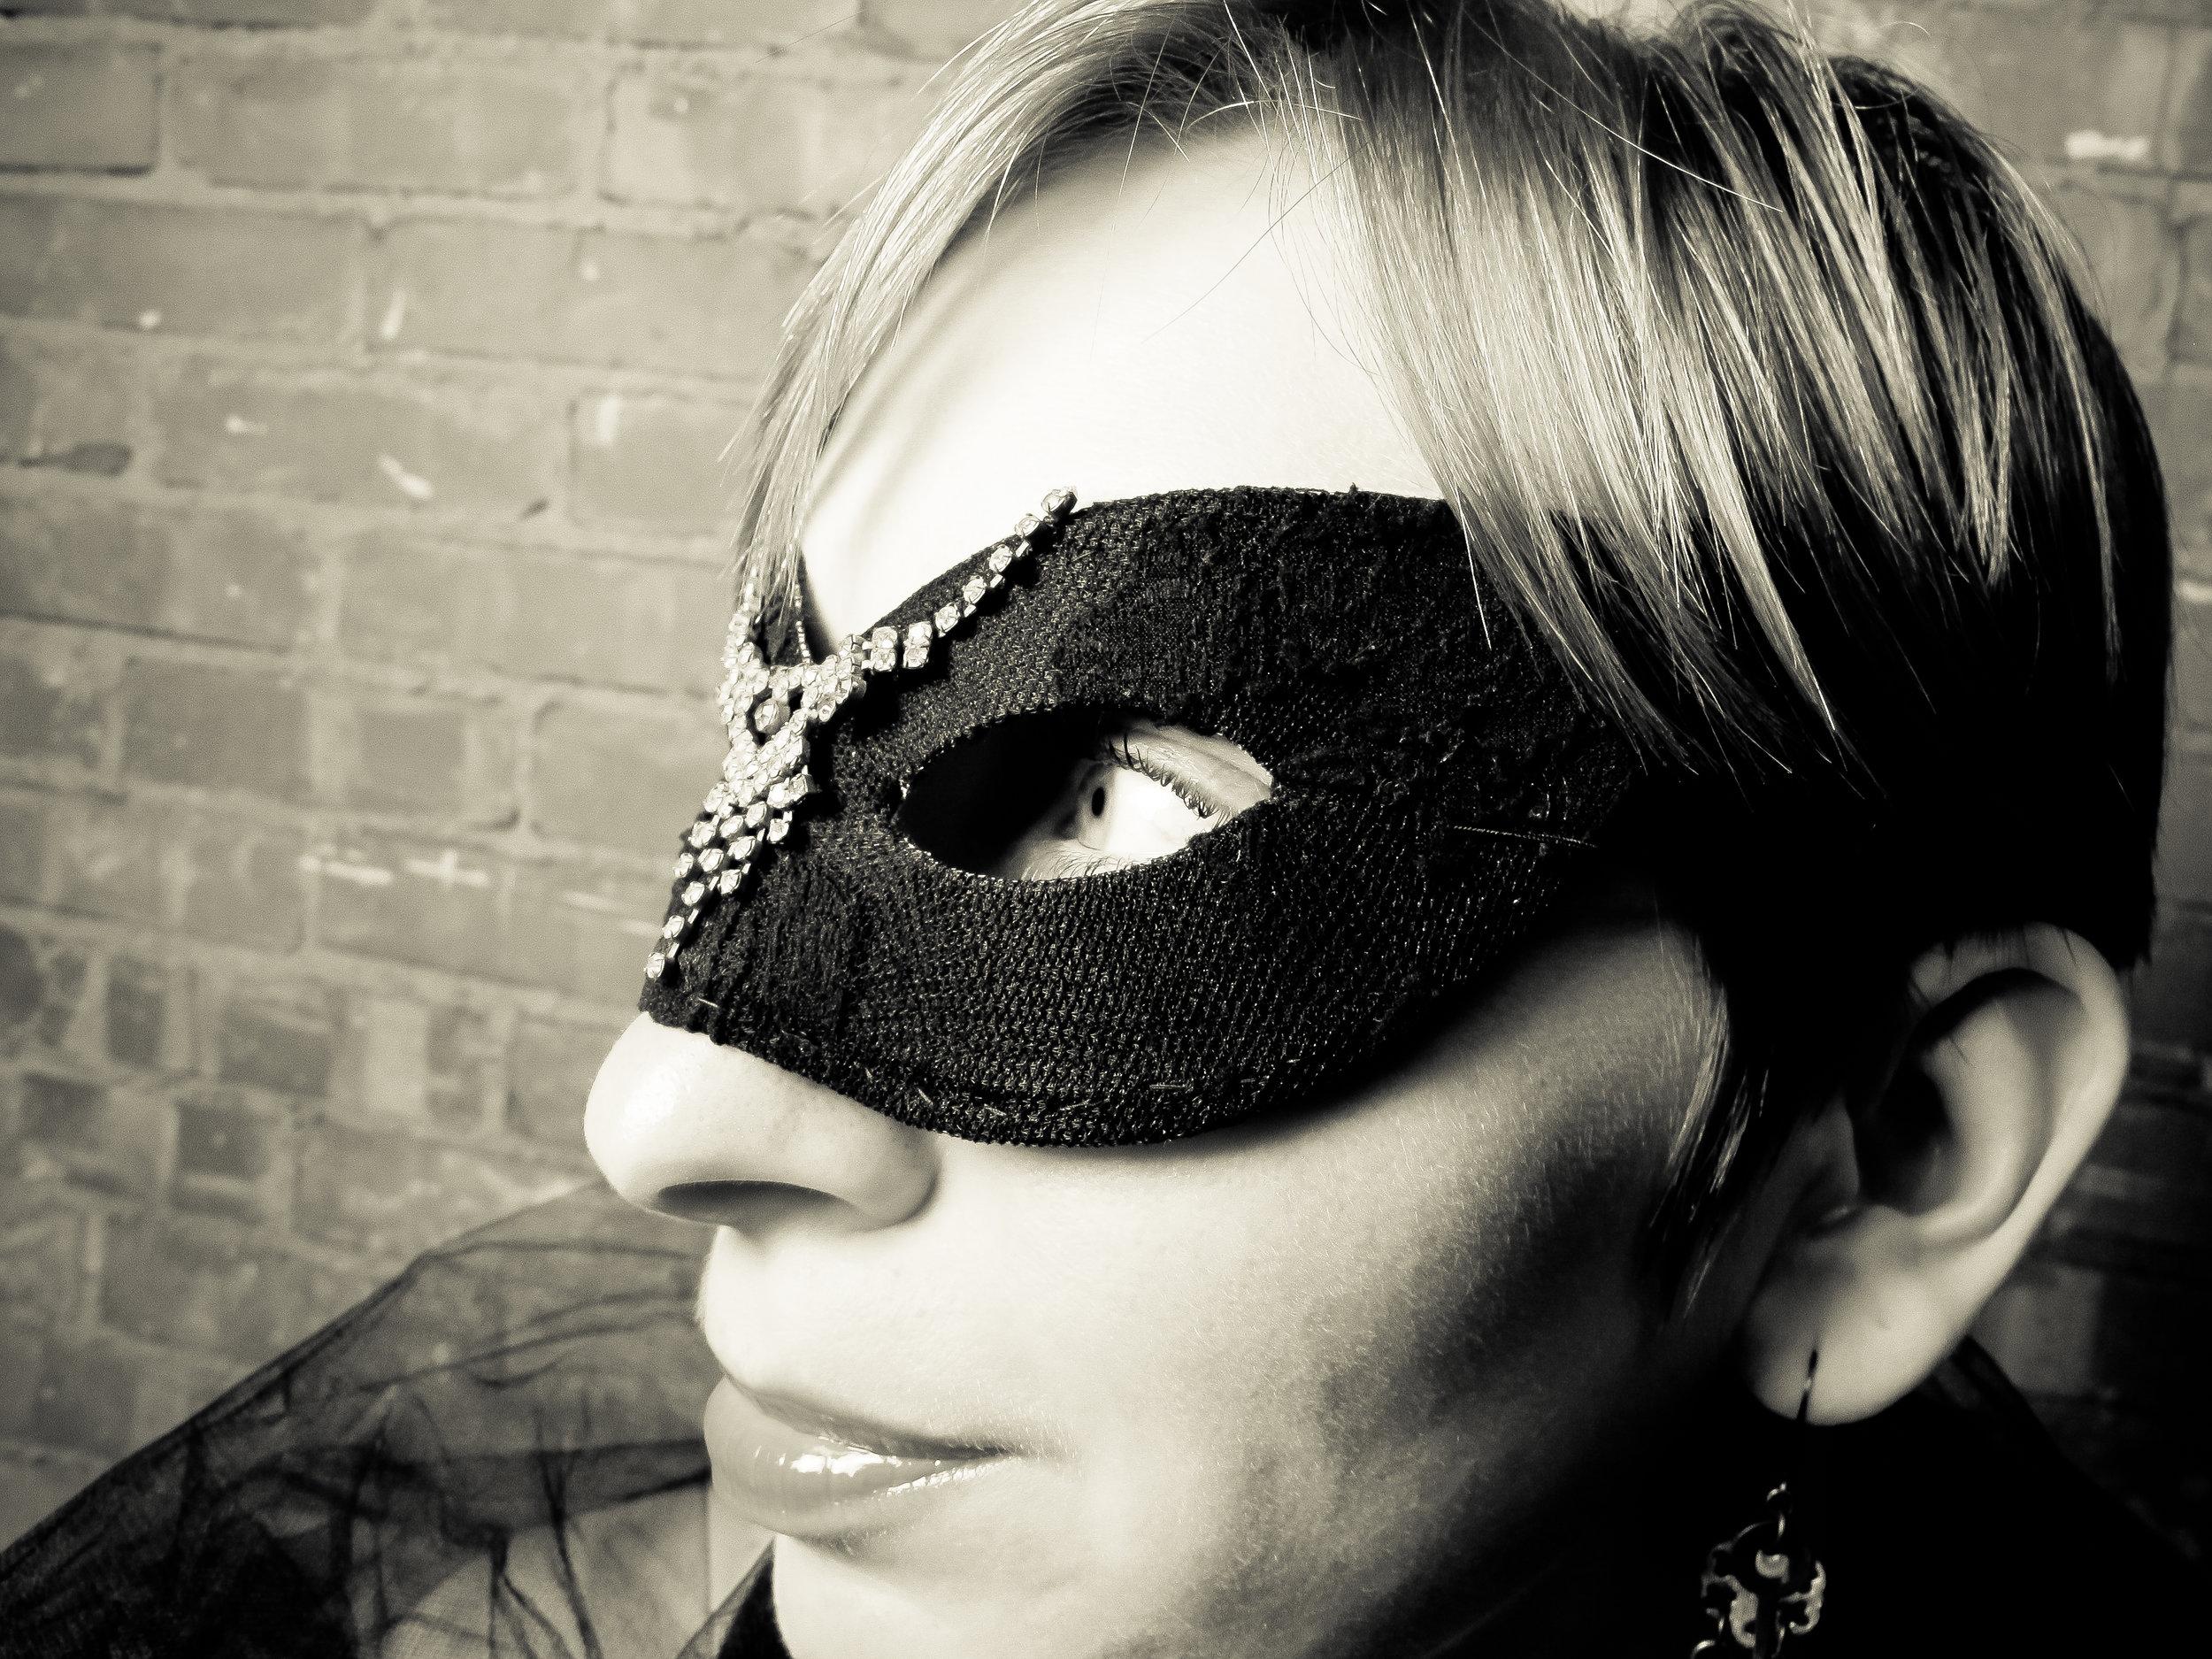
I love Halloween! I look forward to it every year because it is such a source of creative energy. Perhaps that is because Halloween is more transparently handmade. Here is the first of 3 Halloween mask DIYs that I have dreamed up for this year! It's elegant, inexpensive, and can be made with a majority of salvaged materials! SJE-6 Here's what you'll need:

  • Mask (mine was $2.99 from Party City)
  • Lacy tights (mine were a pair that I had to stop wearing because of a huge tear--this is a great DIY for reusing ruined fancy/patterned tights)
  • An old rhinestone necklace
  • Needle & thread (in a color that matches)
  • Wire cutters (or toenail clippers)
  • Pliers (if needed)
  • Embroidery needle
  • Pins
  • Scissors
  • Beads (optional, if desired)

IMG_3551Steps:

  1. Untie your elastic head strap from your mask. Set elastic aside for later. IMG_3553
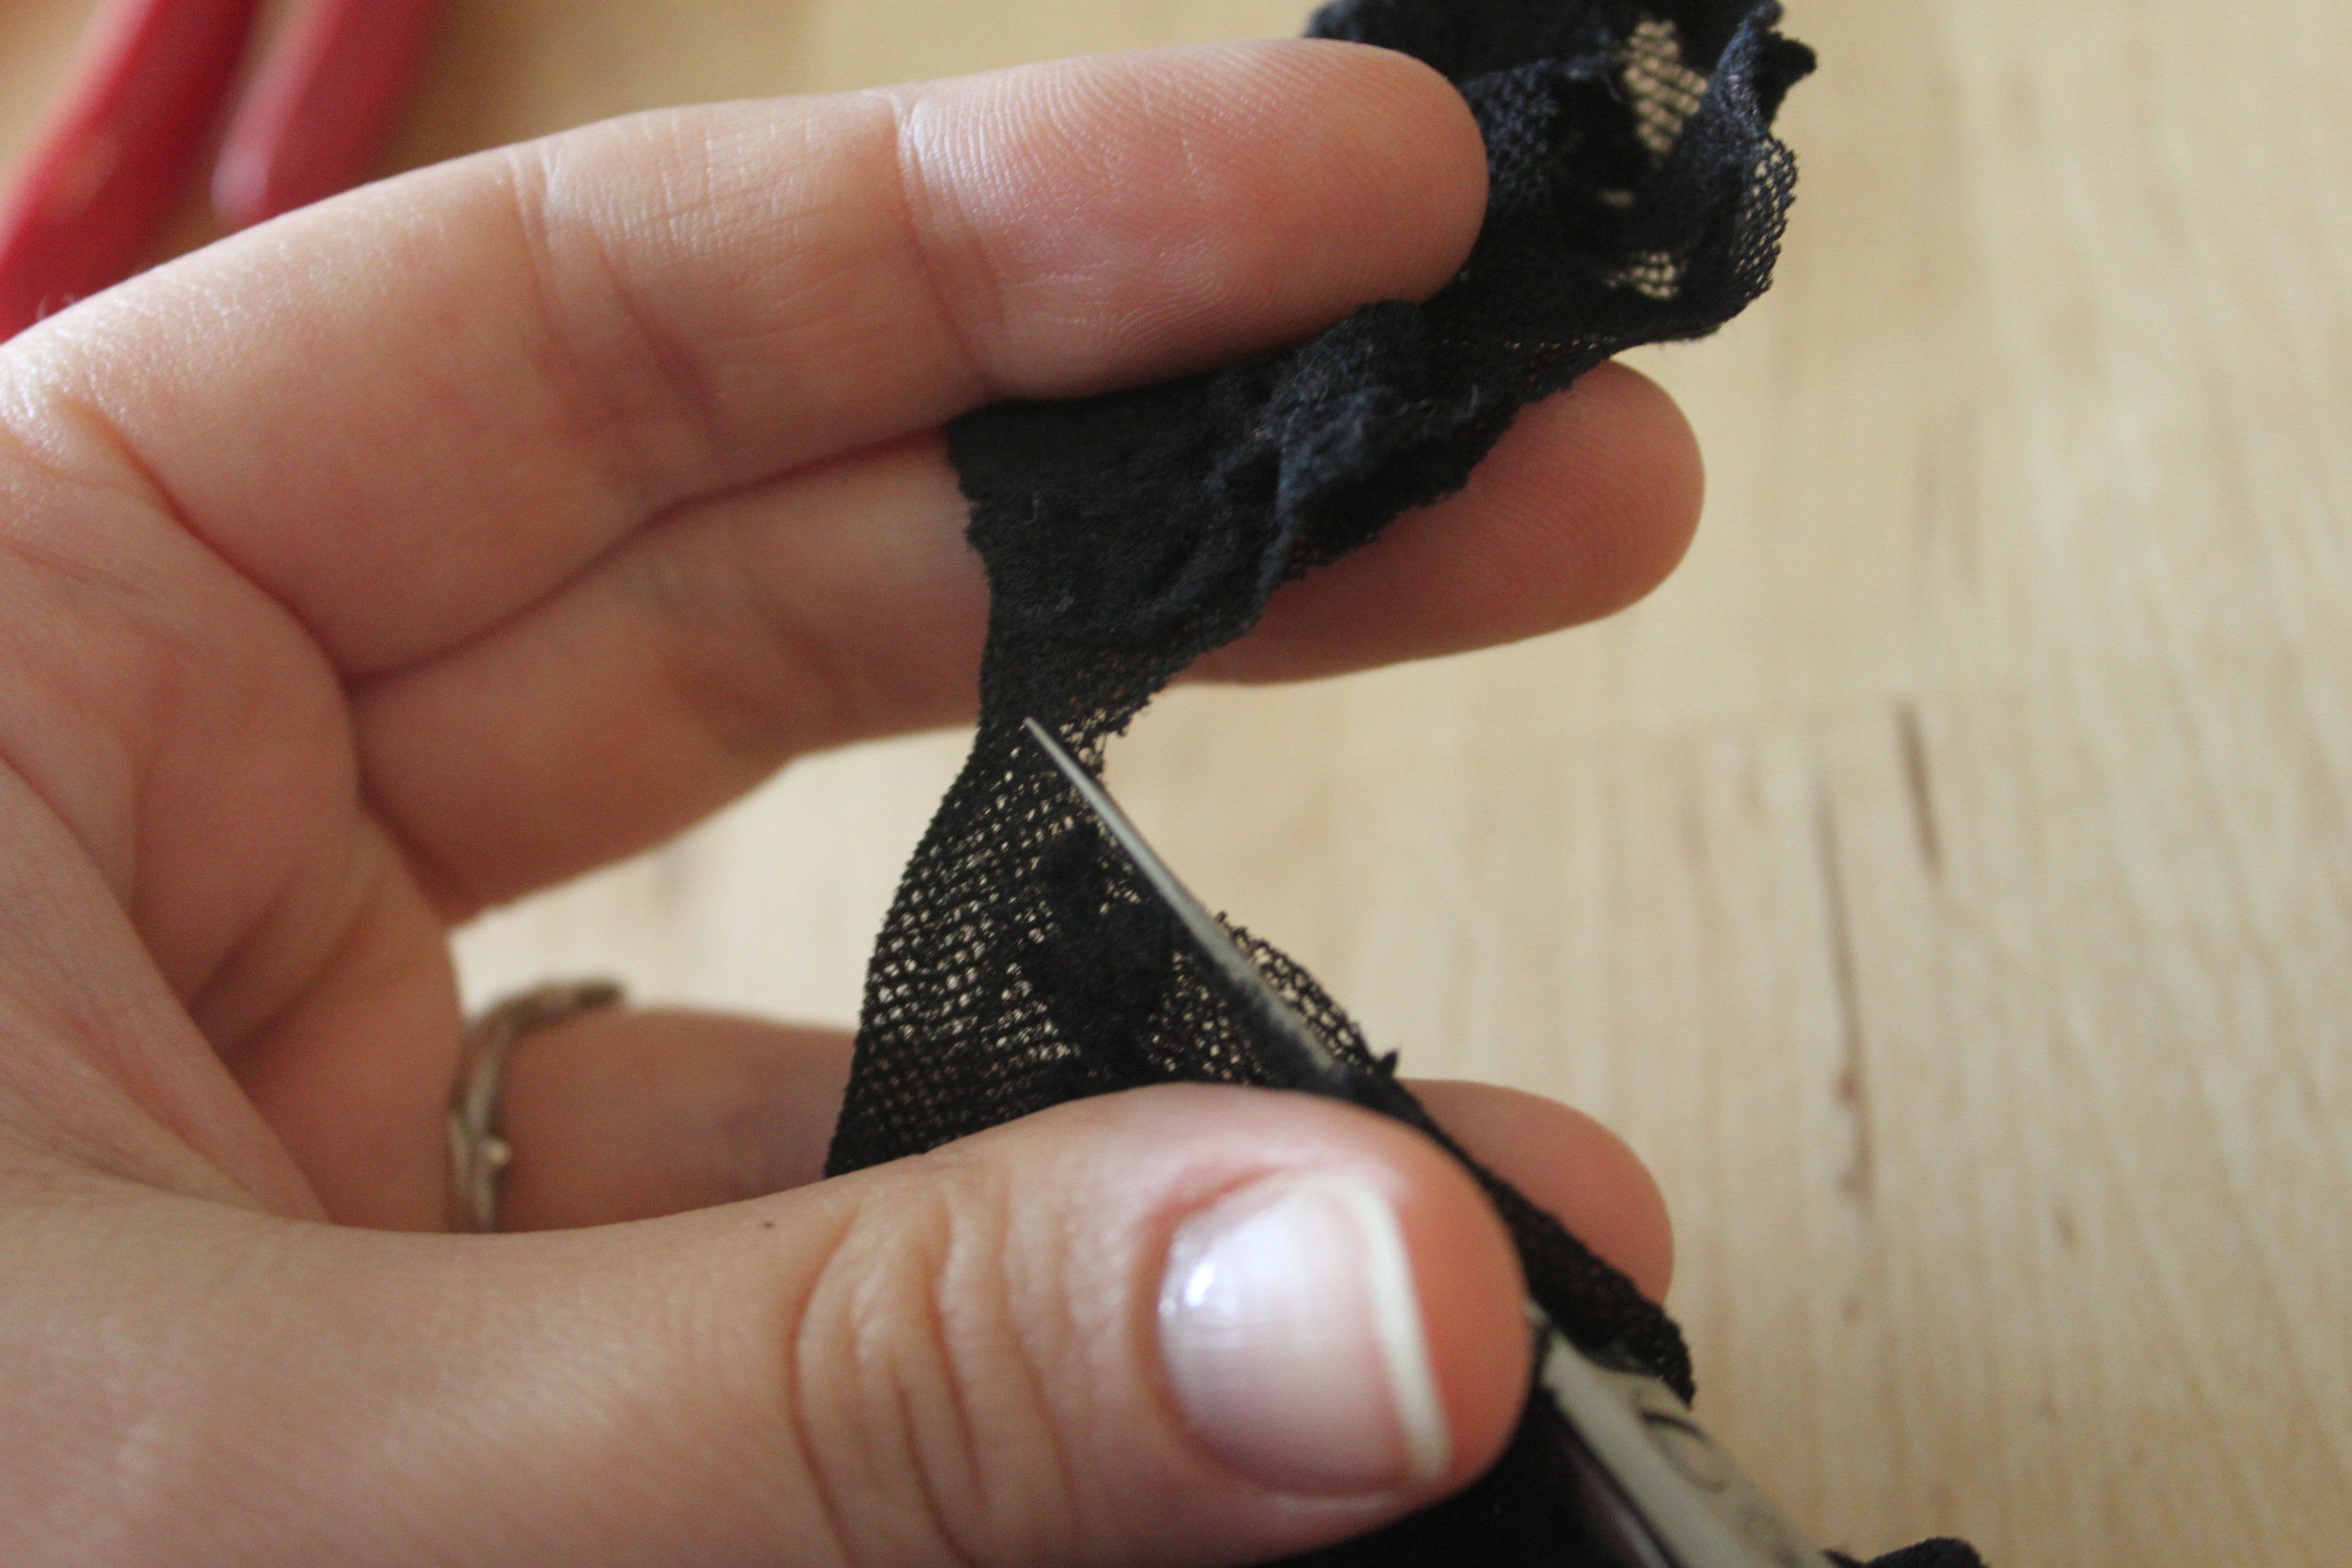
  2. Next, cut a hole in the foot of your tights. The foot & lower leg areas are the best spots because they are smaller and less stretched out. IMG_3554
  3. Insert your mask into the tights. Once you've got your mask completely covered and the pattern/lace positioned as you like it, cut the other end of the tights (opposite your initial entry point detailed in Step 2). Then cut a slit in the back of your tights (and the back of your mask). IMG_3555
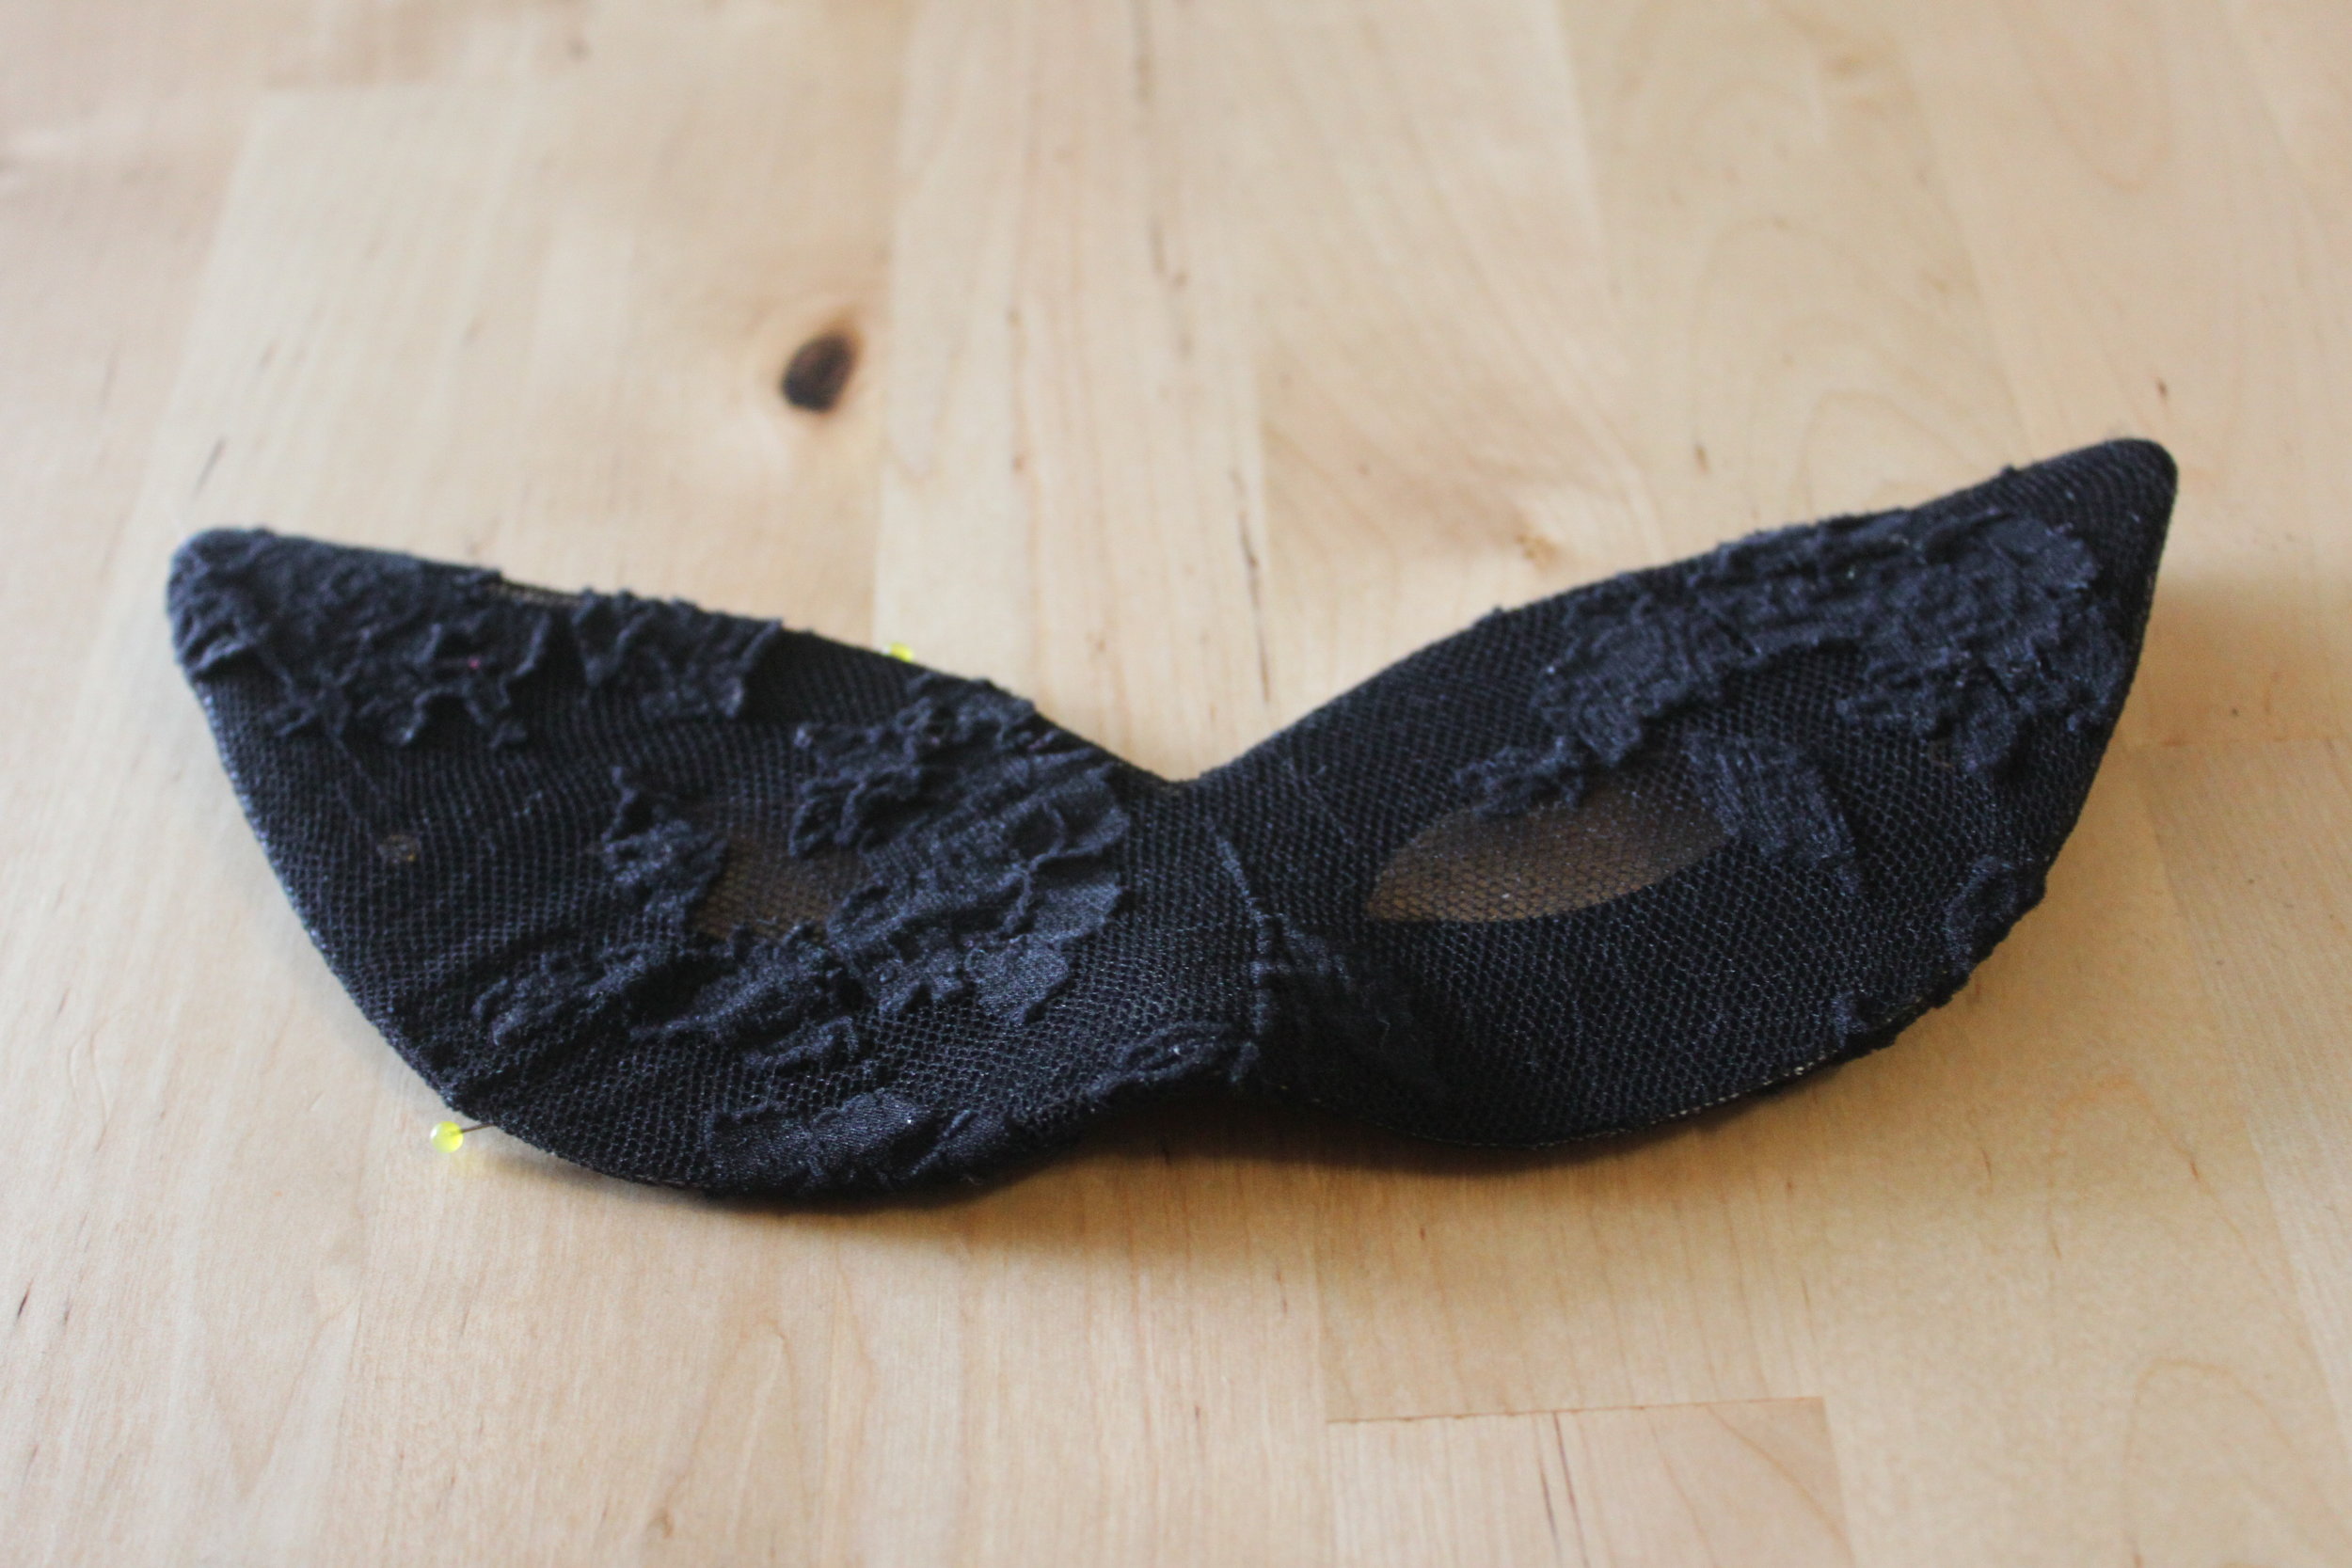
  4. Pin the tights in place. Be sure to pull the fabric taut over the front of your mask & over to the back of your mask. IMG_3556When you've finished pinning, your tights should be firmly taut around your mask (as pictured below). If you have any loose fabric, re-pin that area. IMG_3557
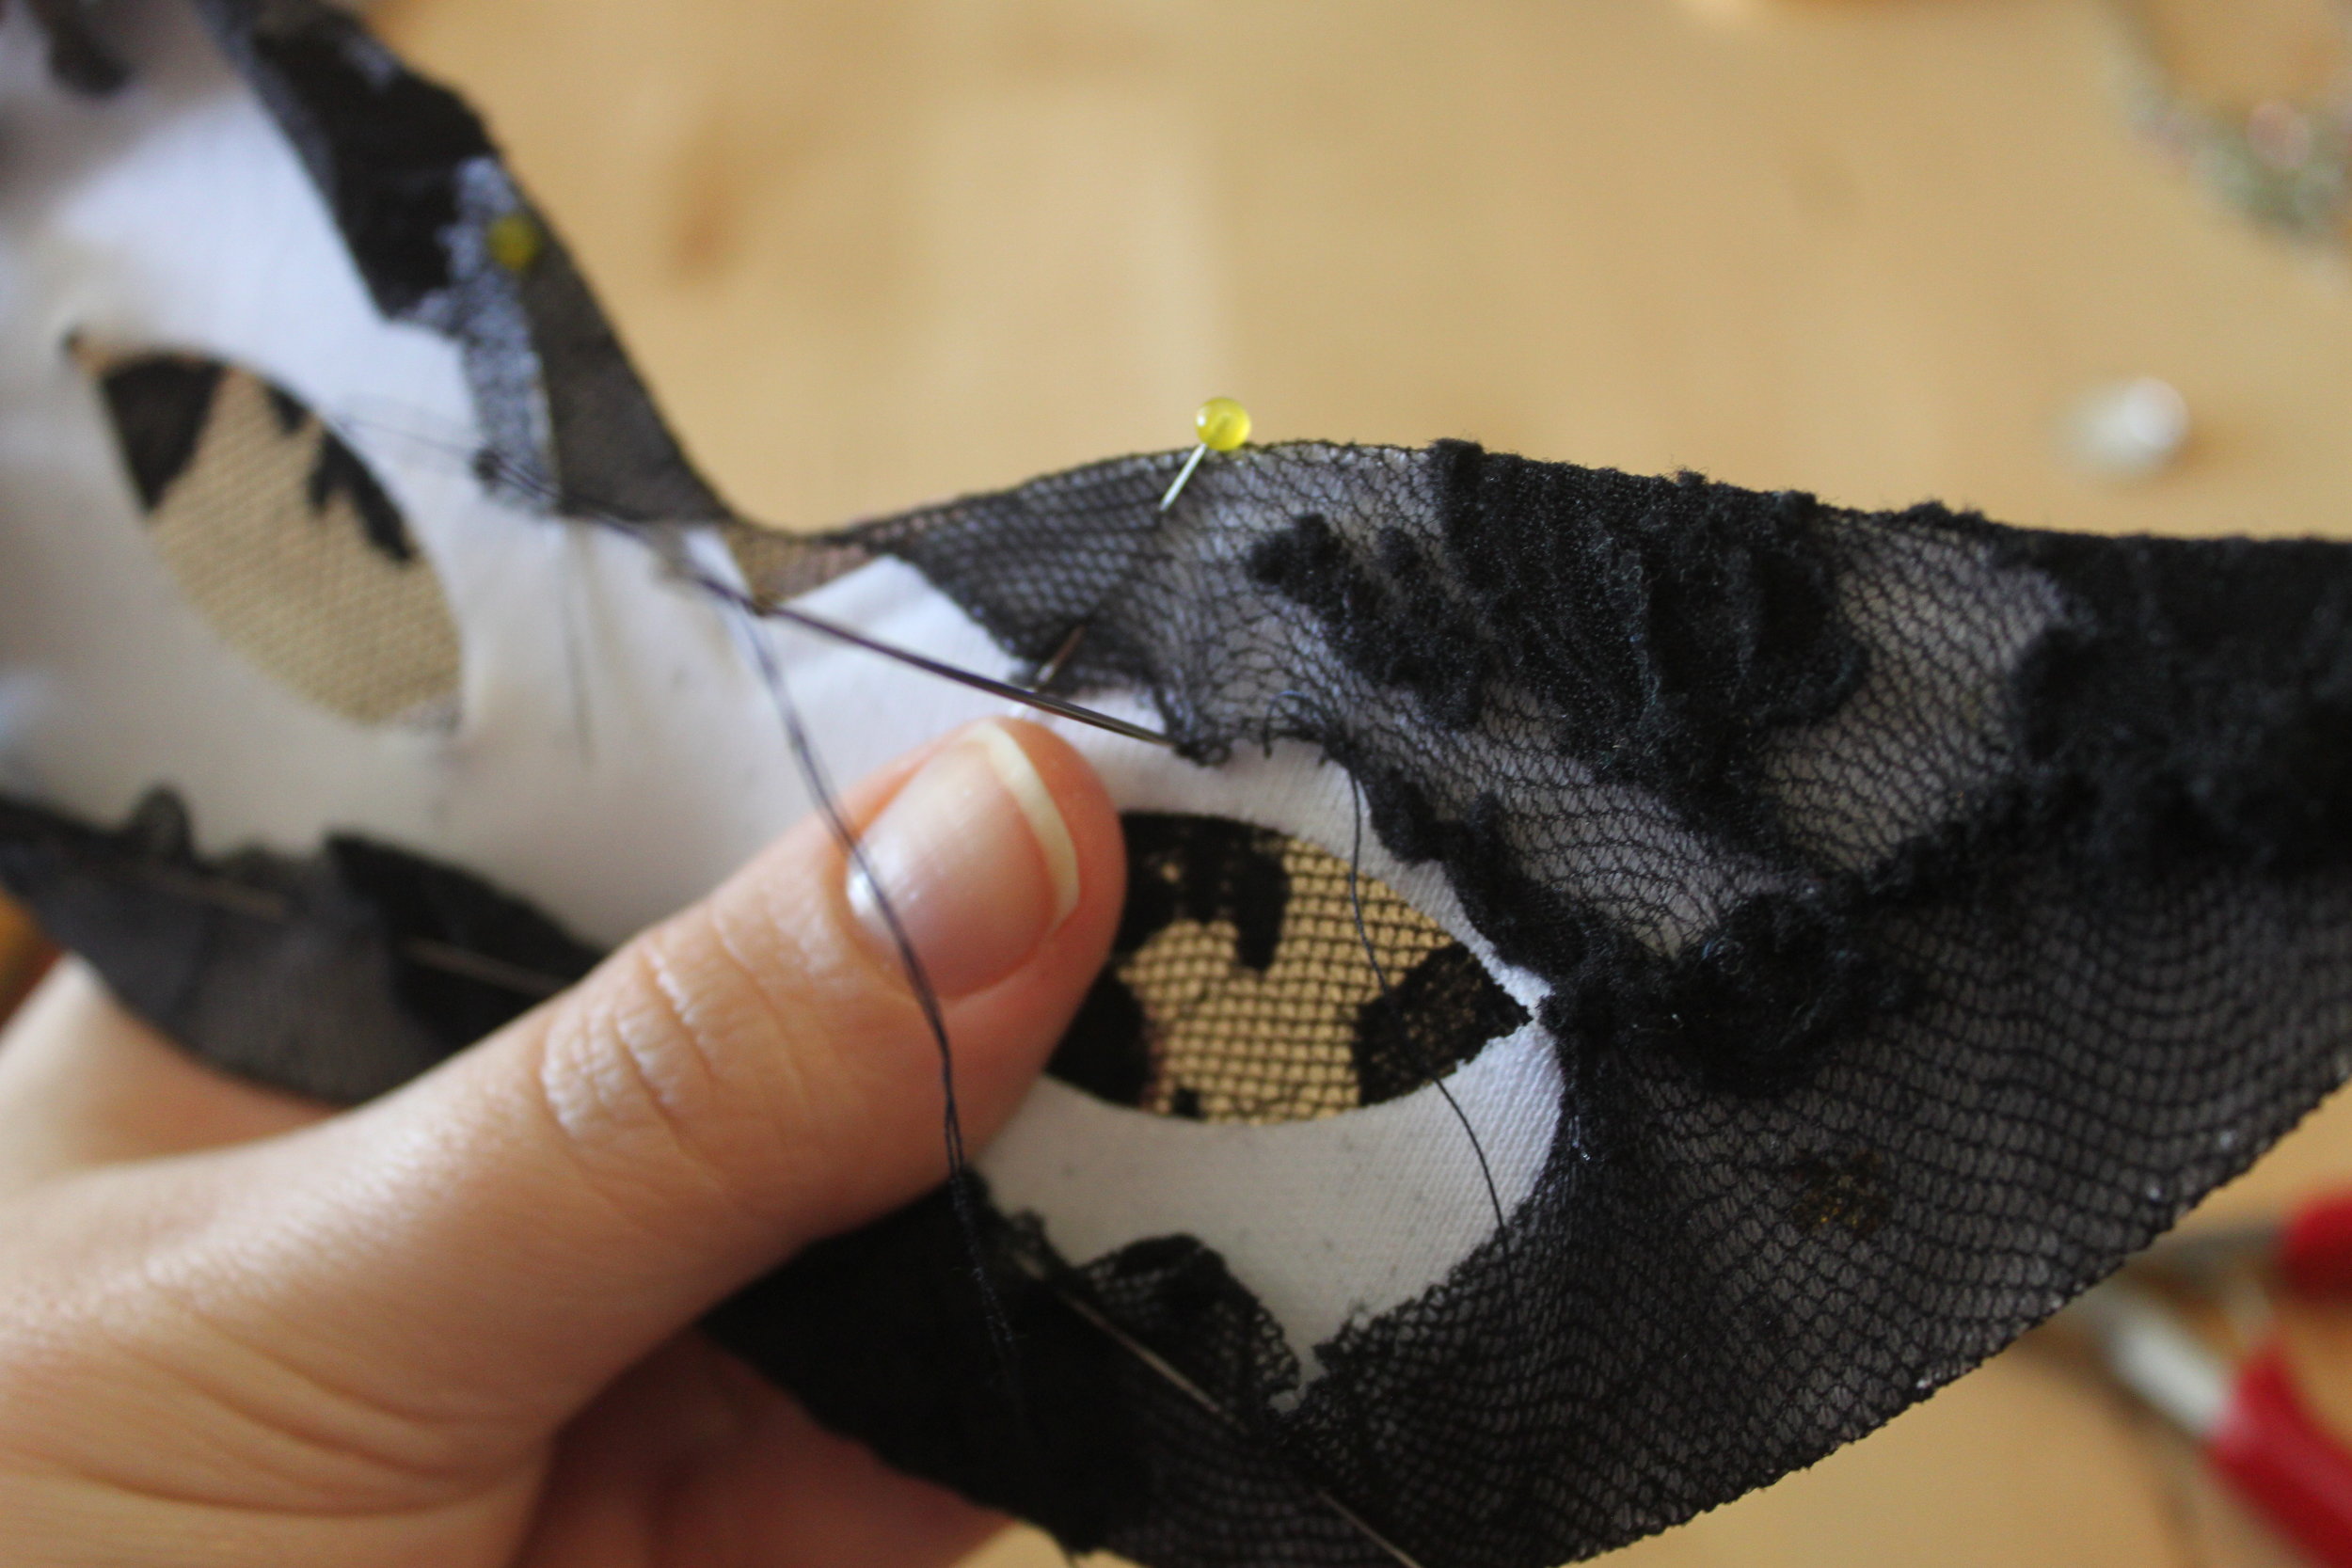
  5. Next sew the tights in place by stitching around the perimeter of the mask. (If your mask is shaped, as this one is, be sure to hand stitch the tights in place otherwise your machine will crack the mask or break/ruin the molding & shaping. If you have a simple cloth mask without any shaping, you can use a machine for this step.) Be sure to keep all of your stitches even and small. Tie sturdy knots.

    IMG_3558

    IMG_3559Be sure that as you go, you are continuing to pull the tights taut. As you sew, feel free to trim any excess fabric. You don't want too much fabric in one place or it will cause your mask to lay crooked on your face.

  6. Next, cut slits in the fabric in the middle of the eye holes of your mask. Pull these taut around to the back of your mask. Pin if needed.IMG_3560  IMG_3562
  7. Sew the tights in place by stitching the fabric you've pulled to the back of your mask (from the slit) to the fabric above it/below it (above, if stitching the top of the eye; below, if stitching the bottom of the eye).  IMG_3561
  8. You've successfully covered your mask! On to the fun part, accessorizing it!

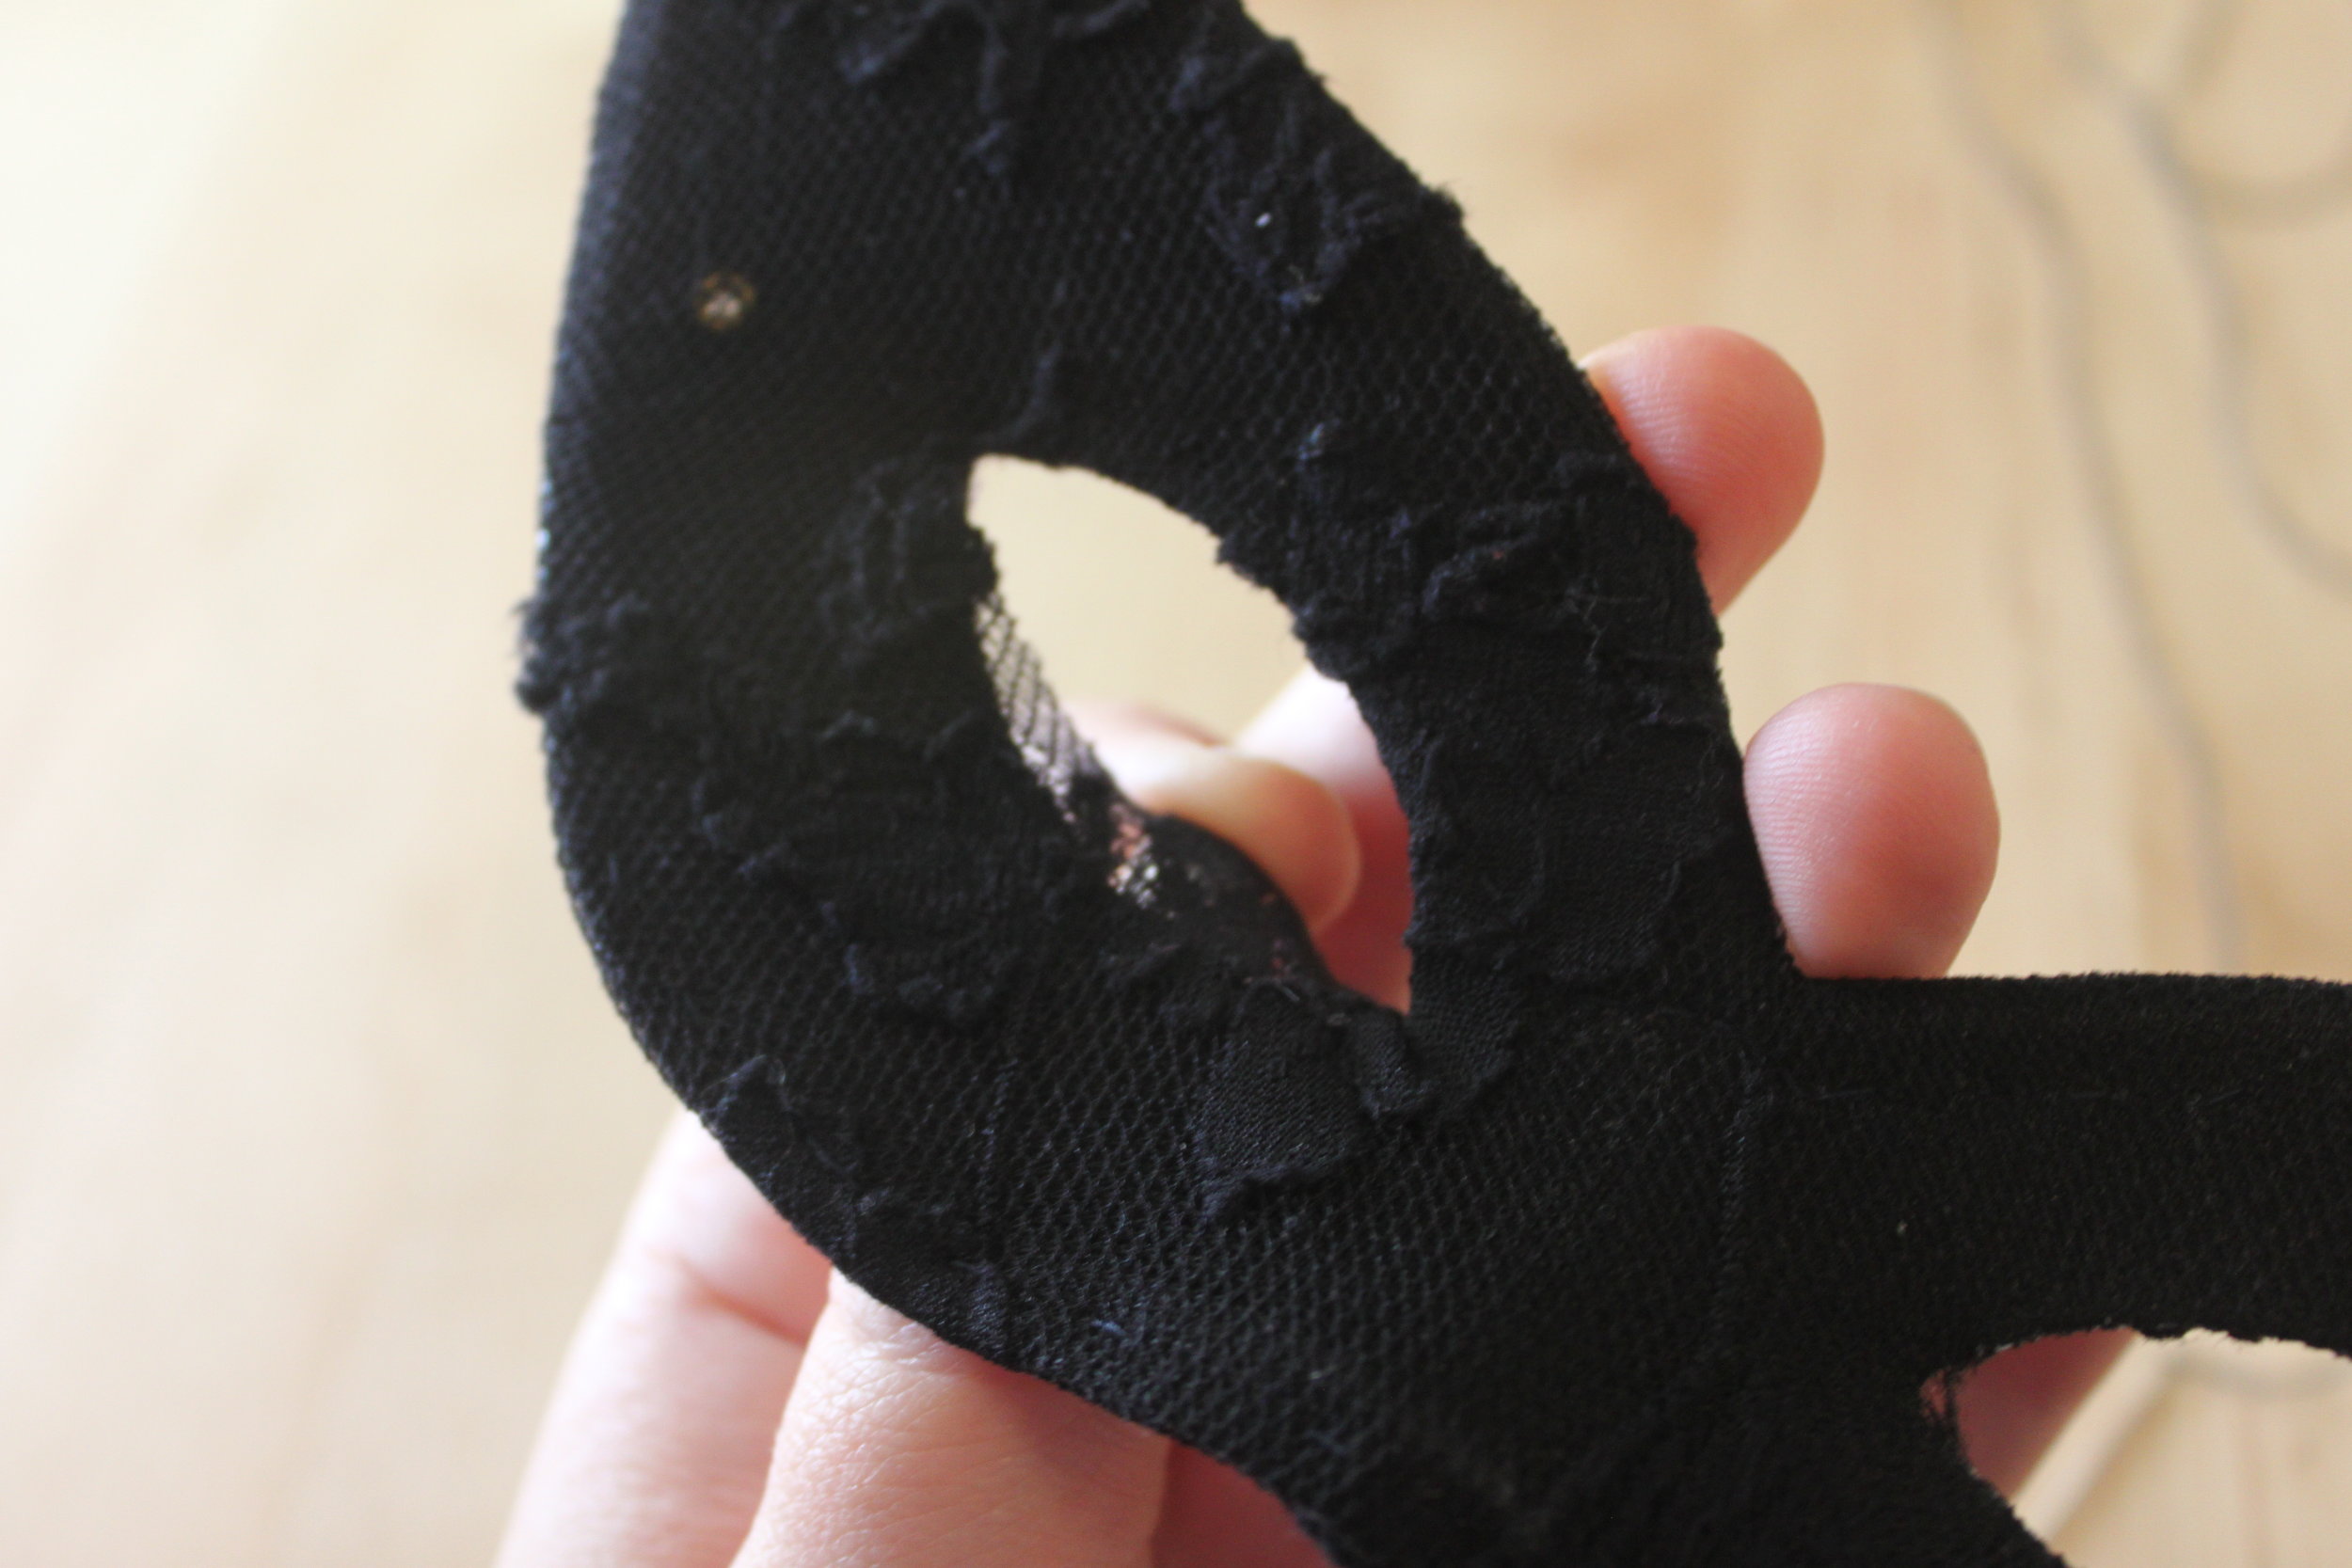
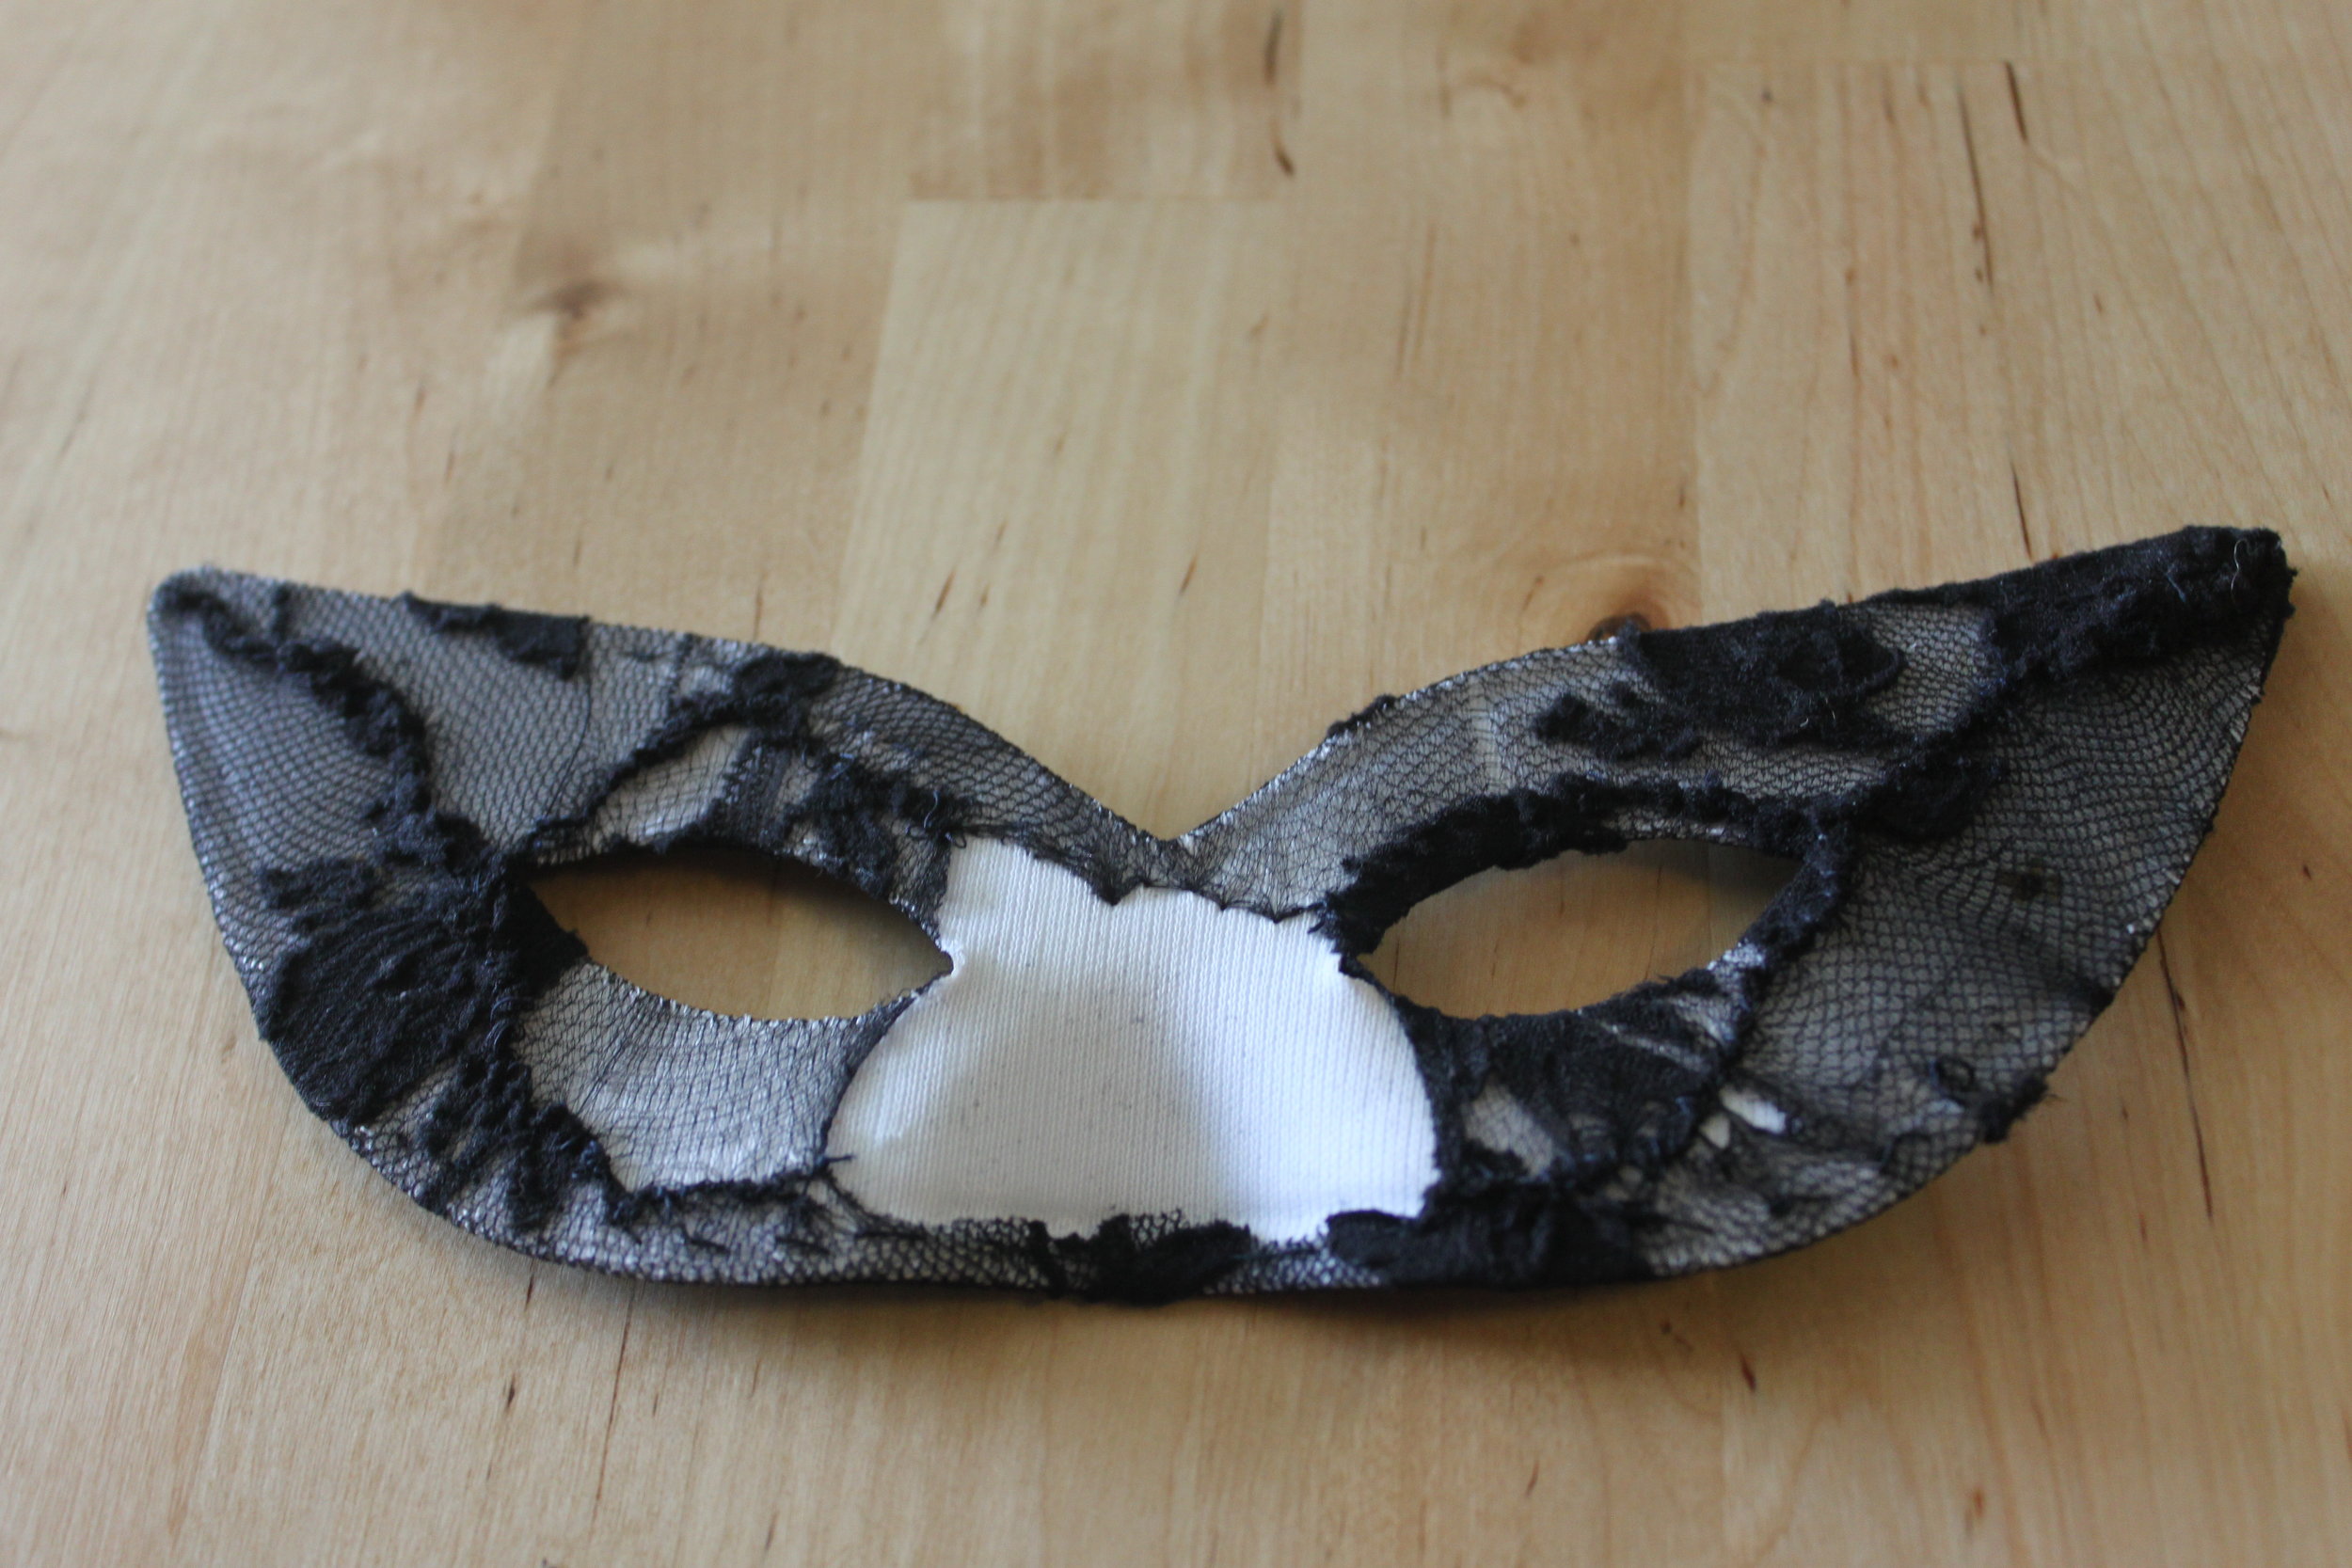
    The completed back--not too fancy looking but no one is going to see it.

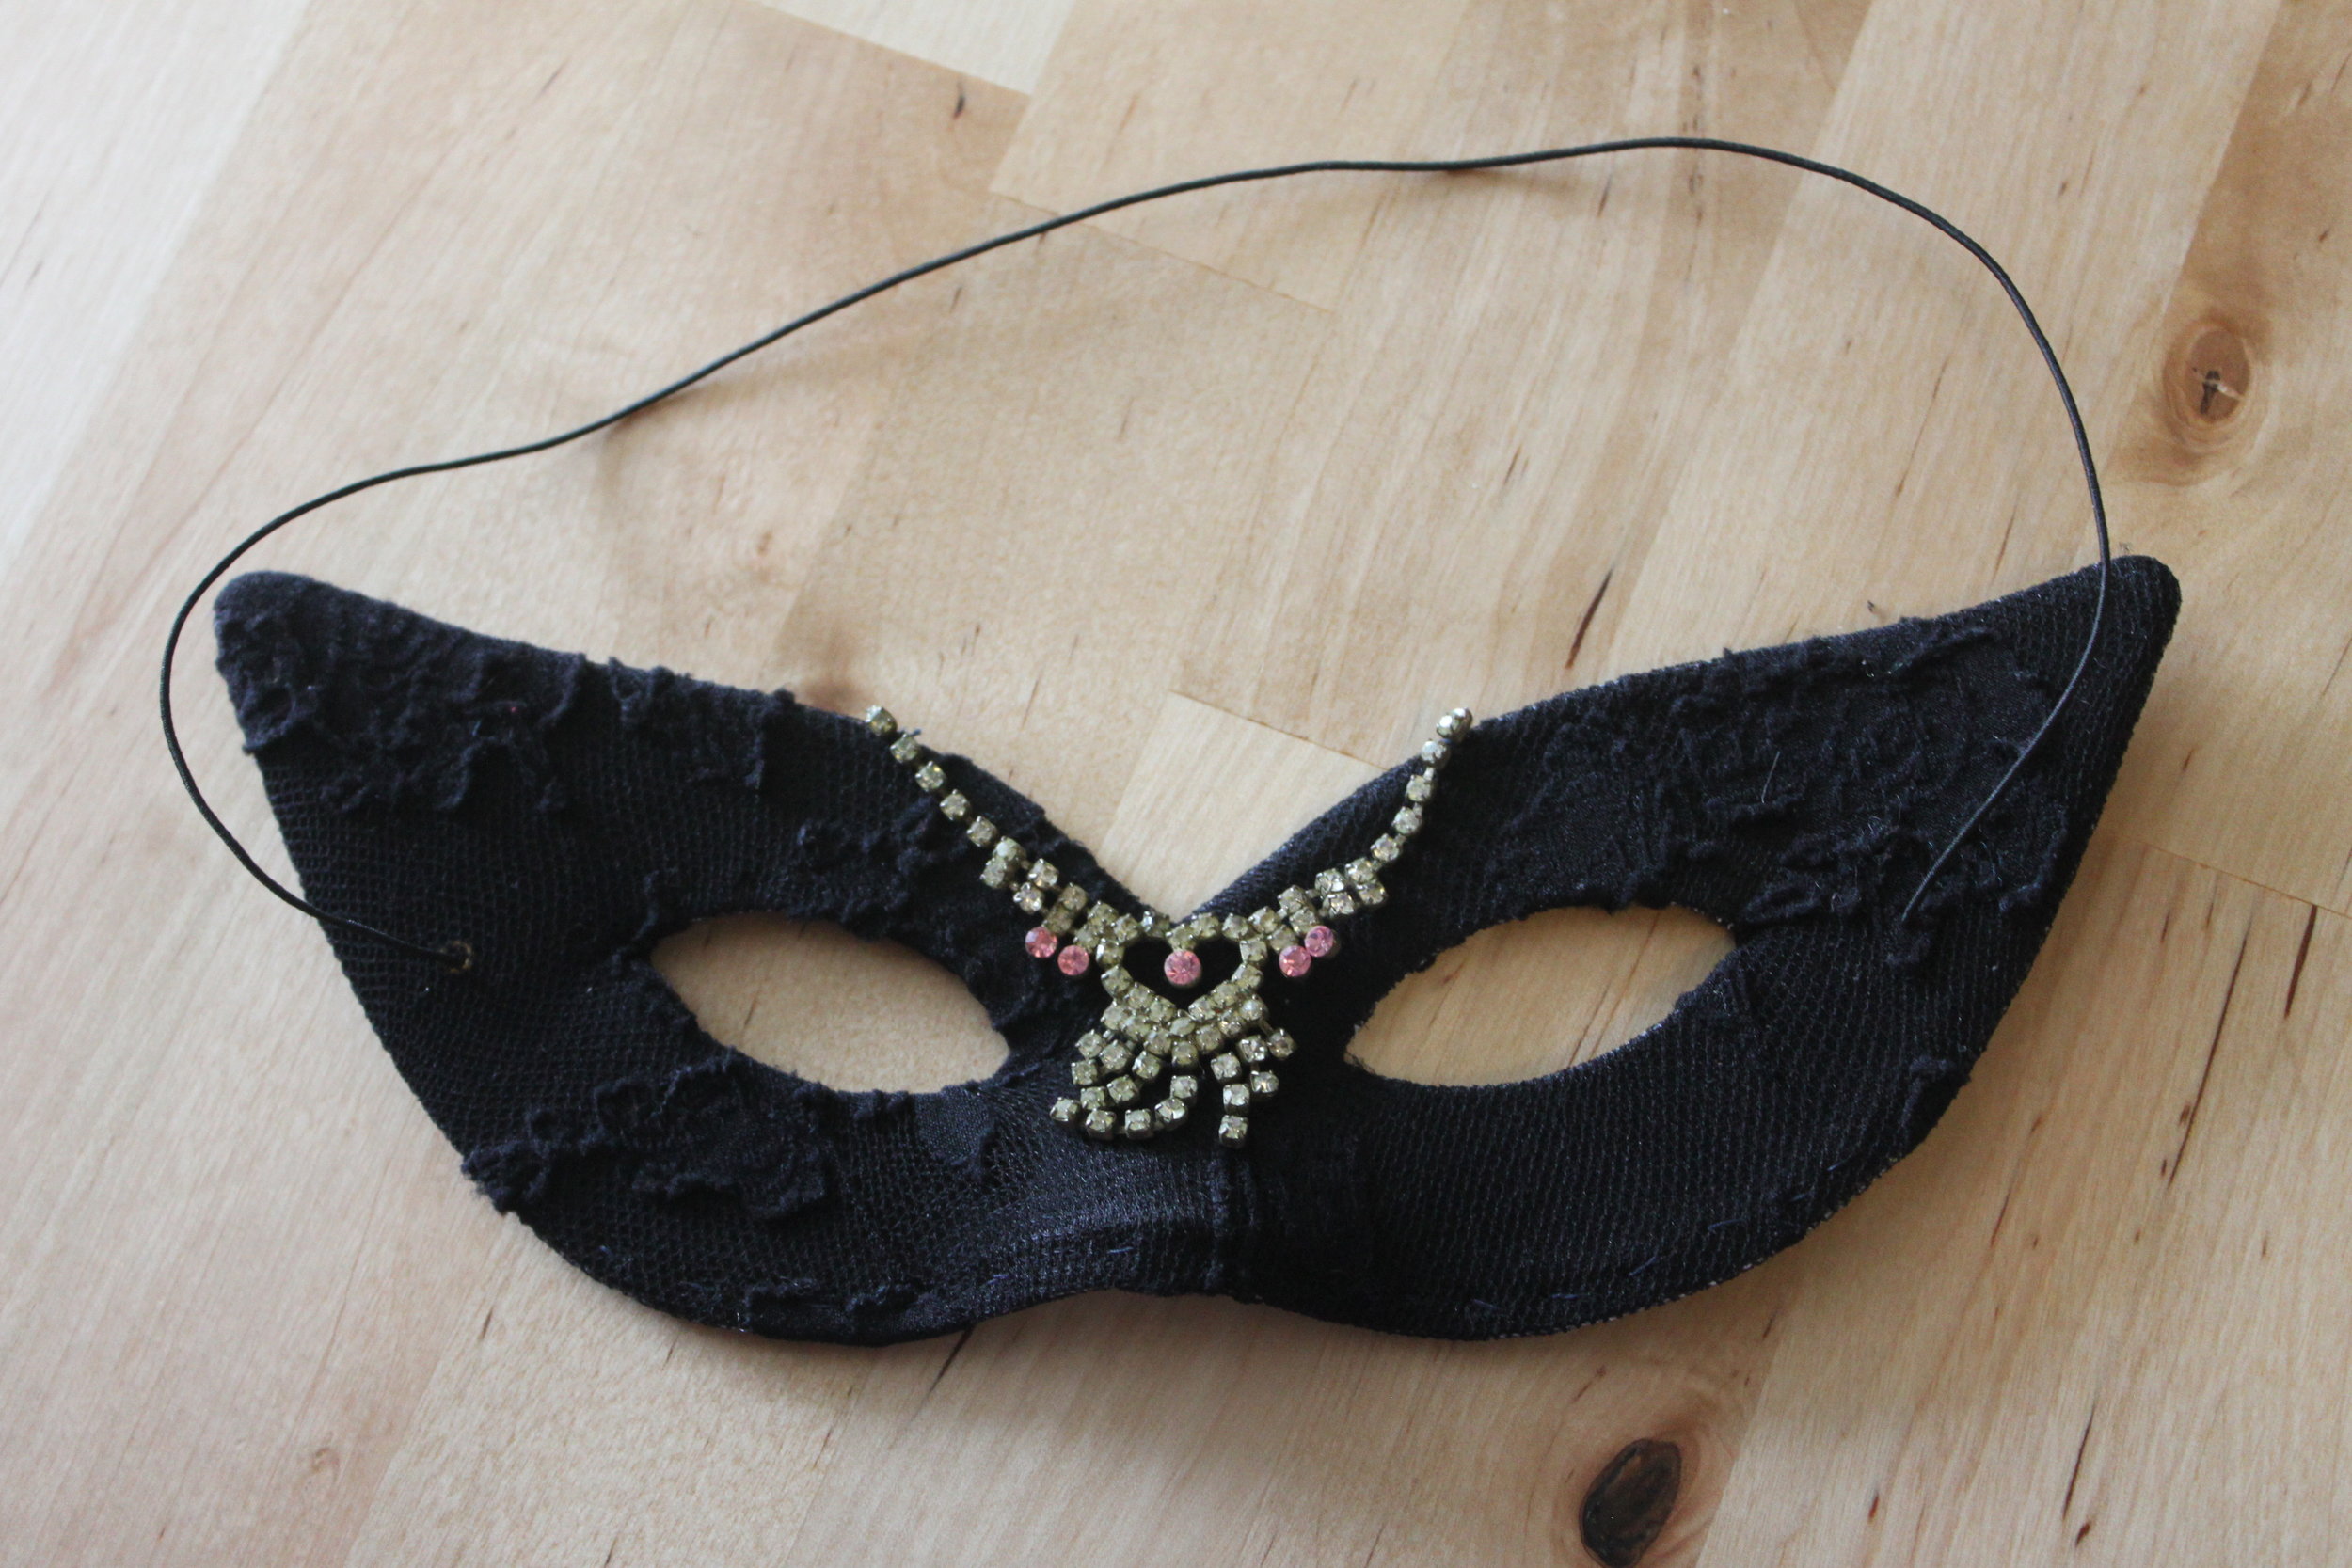
    The completed front--notice that there is no loose fabric. If you do have some loose fabric, pull it toward the back and stitch it securely.

    Adding fabric to a simple mask gives it texture & a bit of romance!

  9. Figure out the placement of your necklace piece & how much of the necklace you want to use on your mask. I liked mine just over the nose & at the start of the eyebrows on each side. IMG_3565
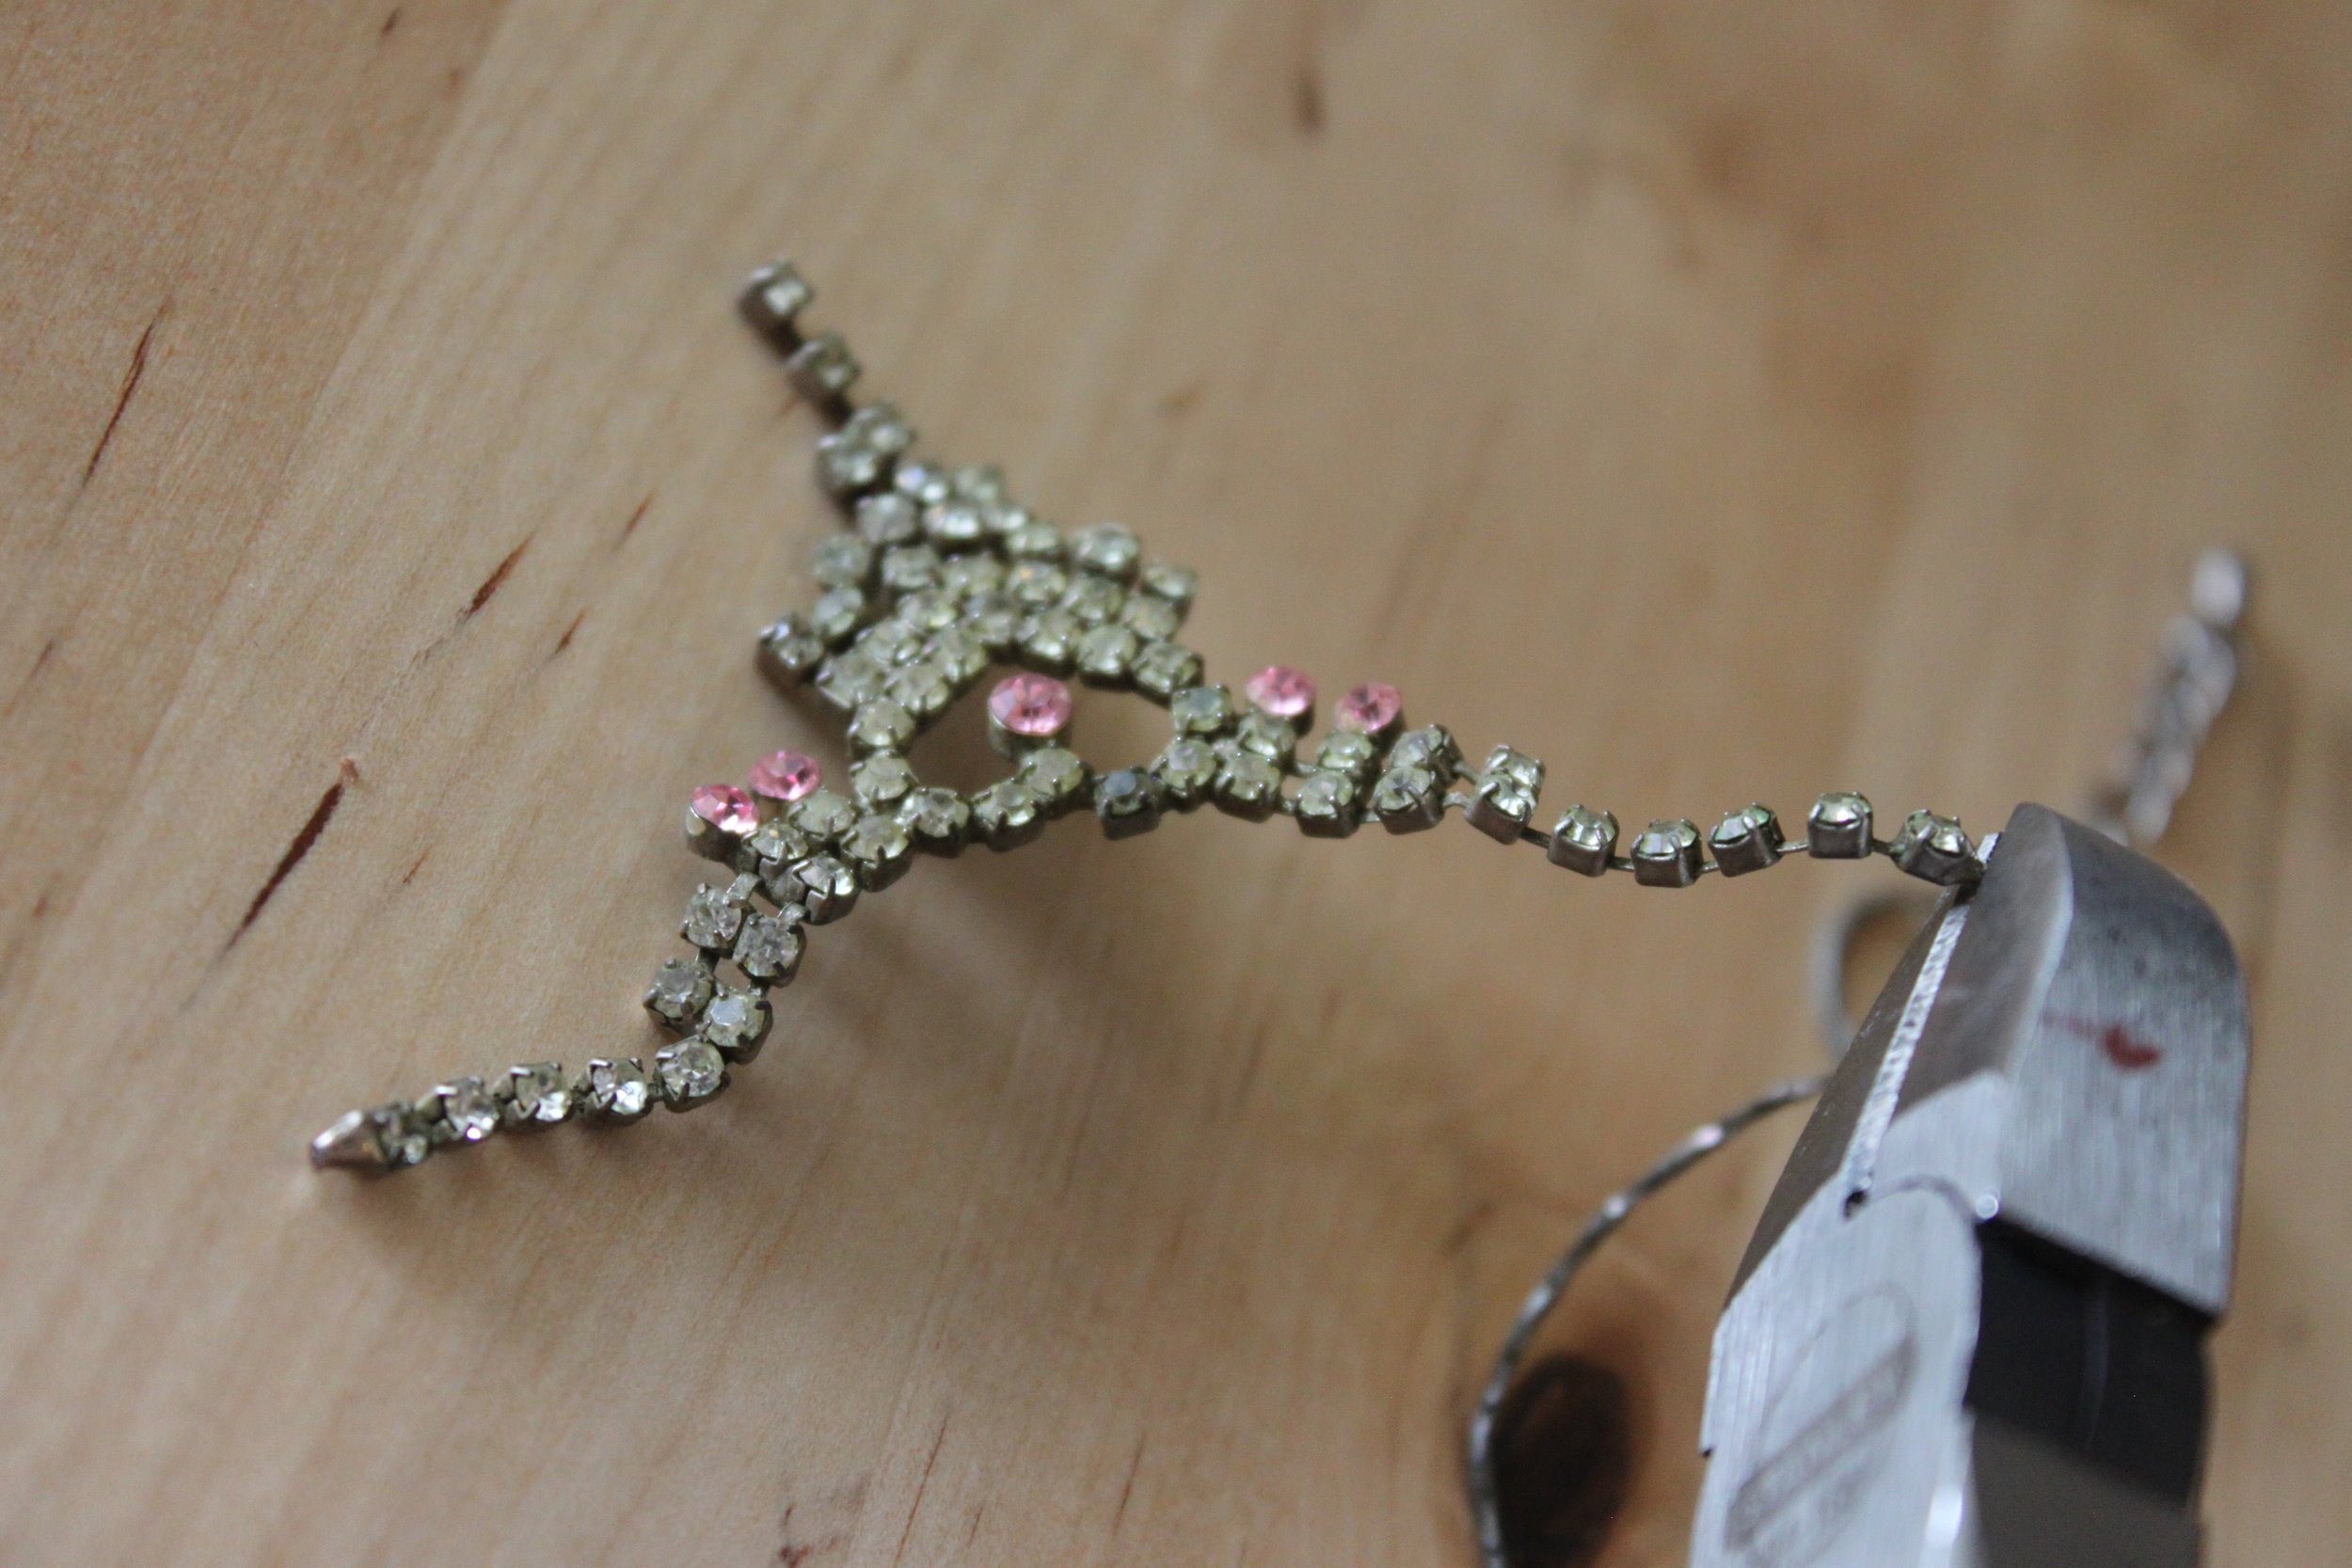
  10. Once you've figured out the placement, cut off any excess chain with your wire cutters (or toenail clippers, if you do not own a pair of wire cutters). IMG_3571
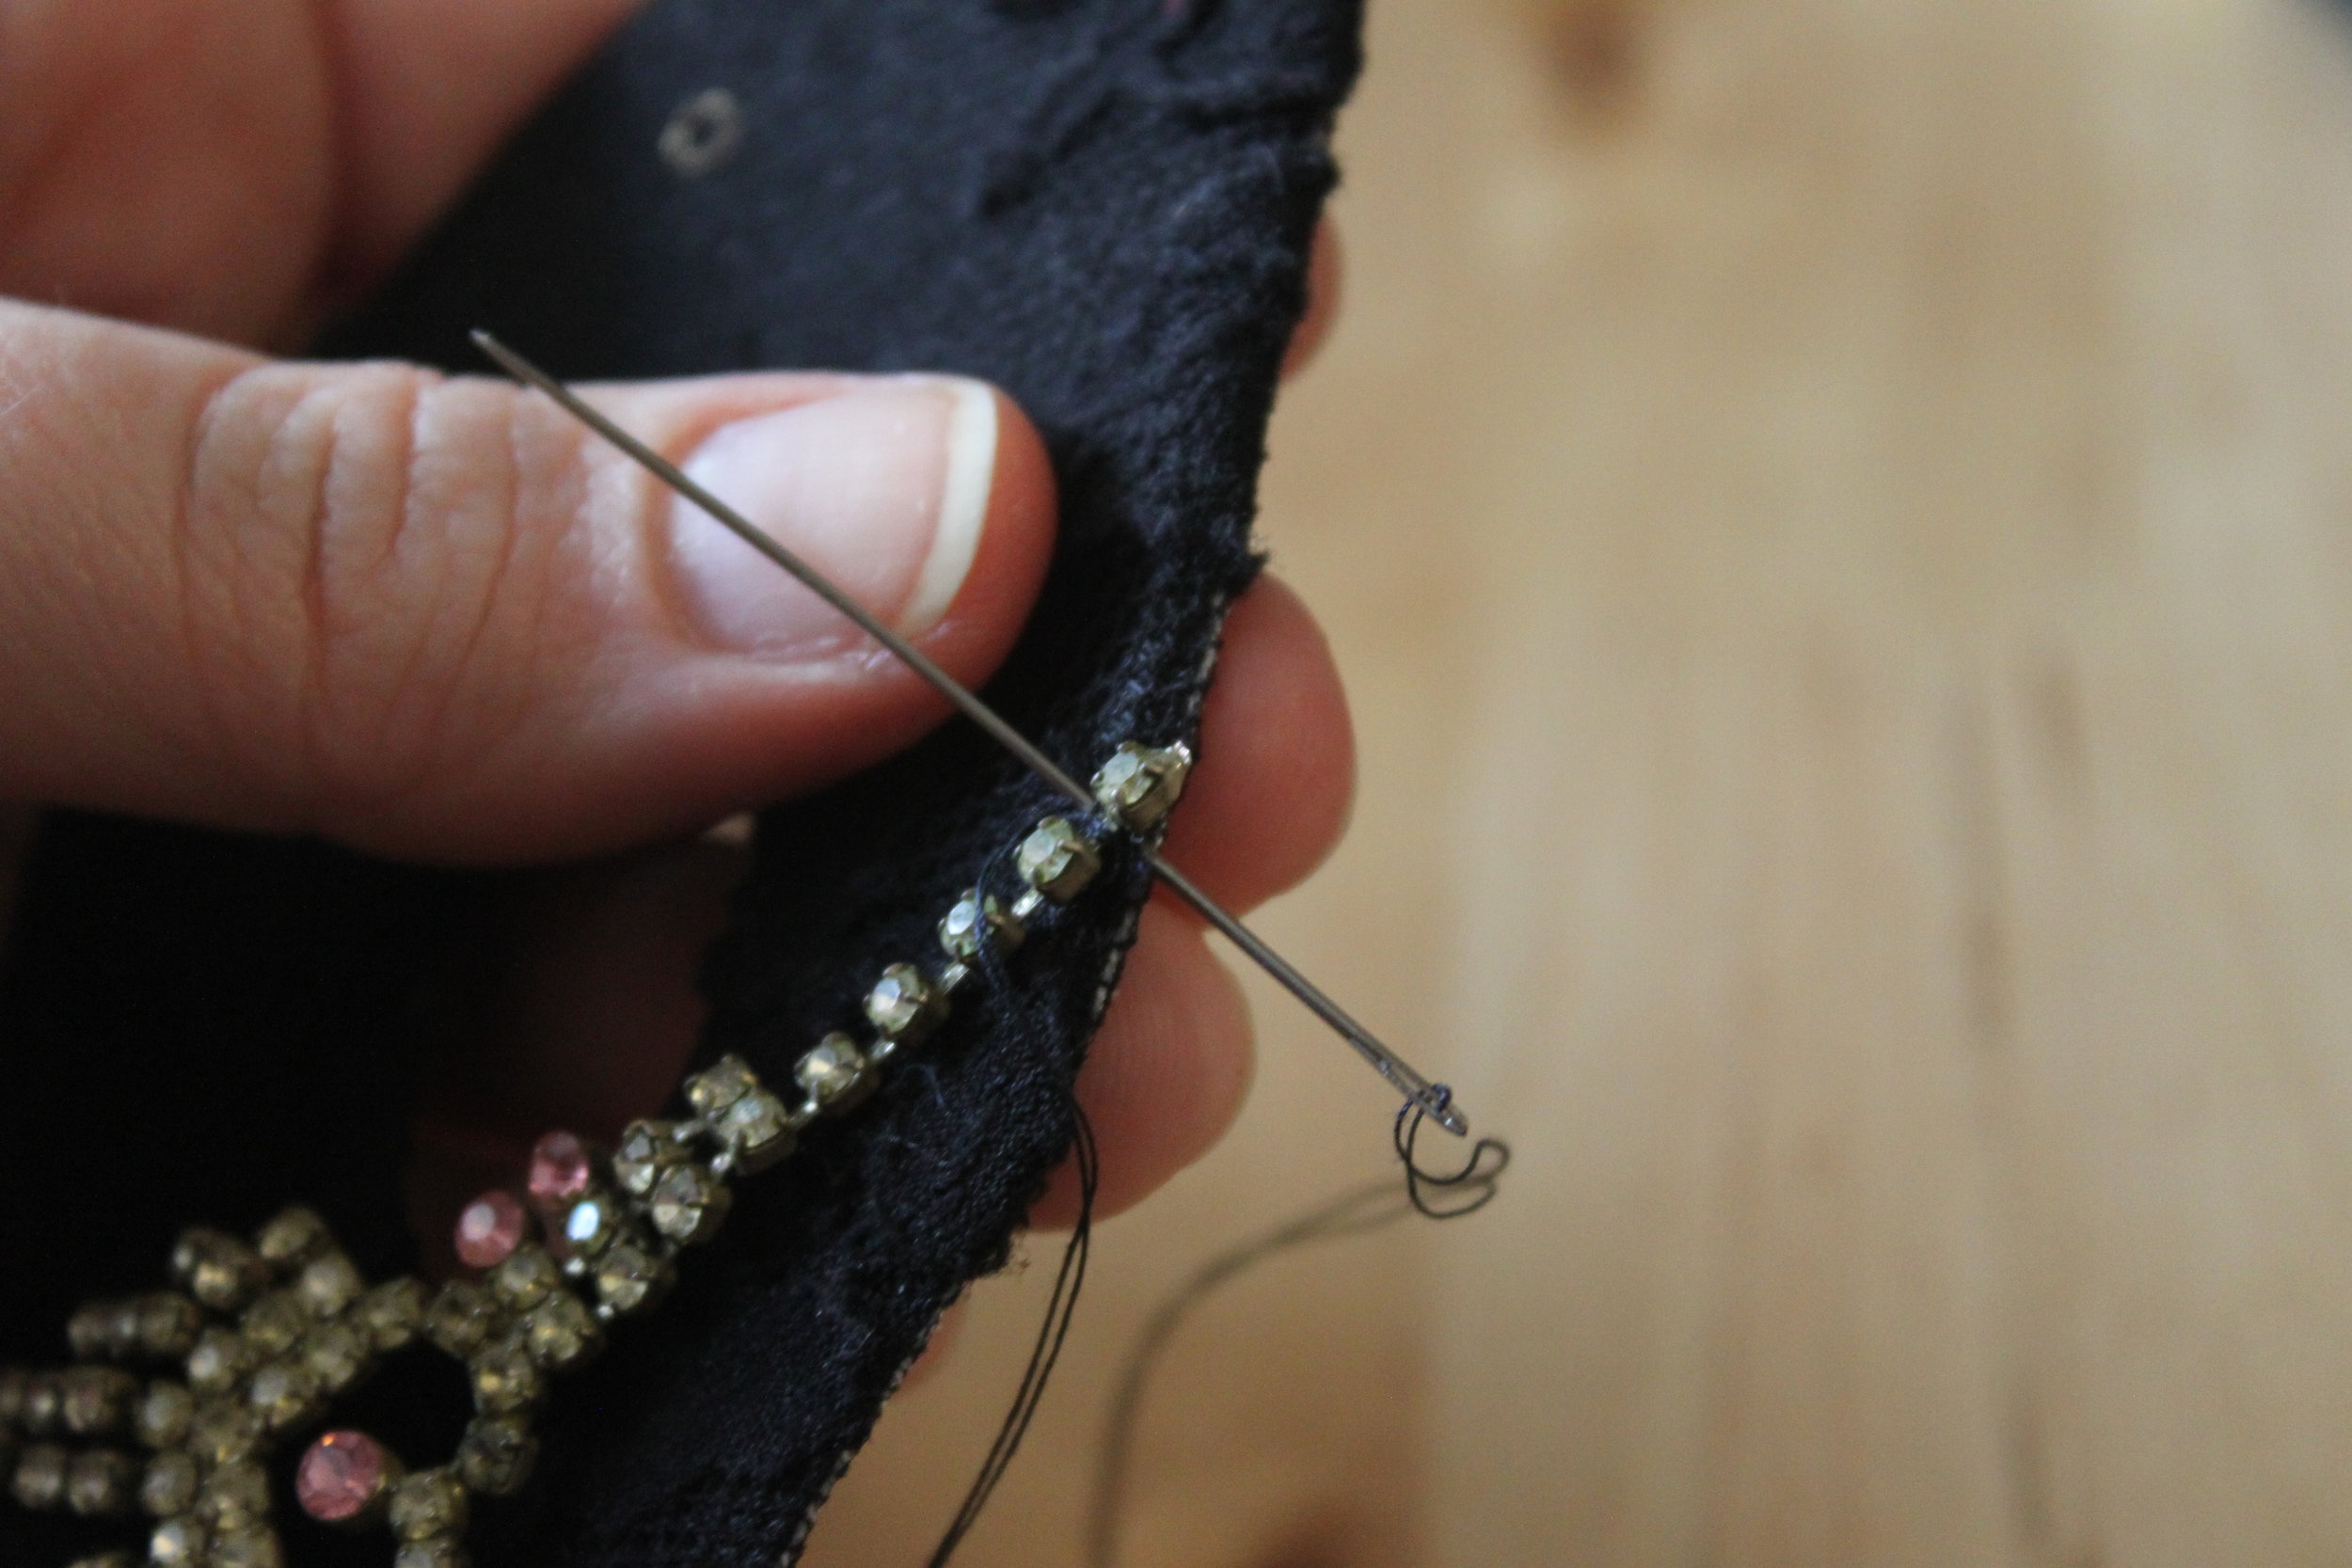
  11. Sew your necklace piece in place. Be sure to hide your knots on the back side of your mask. Sew between two rhinestone links; onto a jump ring; or onto a chain link. IMG_3573
  12. If needed, also sew the middle of your necklace piece in place. (This is especially important if your piece moves a lot. You don't want it to hit you in the eye all night if you're dancing). IMG_3574
  13. Grab your elastic that you set aside earlier. To re-attach it, thread it onto an embroidery needle & pull it through the existing hole. Be sure to pull the elastic from the front of the mask to the back.IMG_3575
  14. Remove the elastic from the embroidery needle & knot it. IMG_3576
  15. Repeat Steps 13 & 14 for the other side. IMG_3580
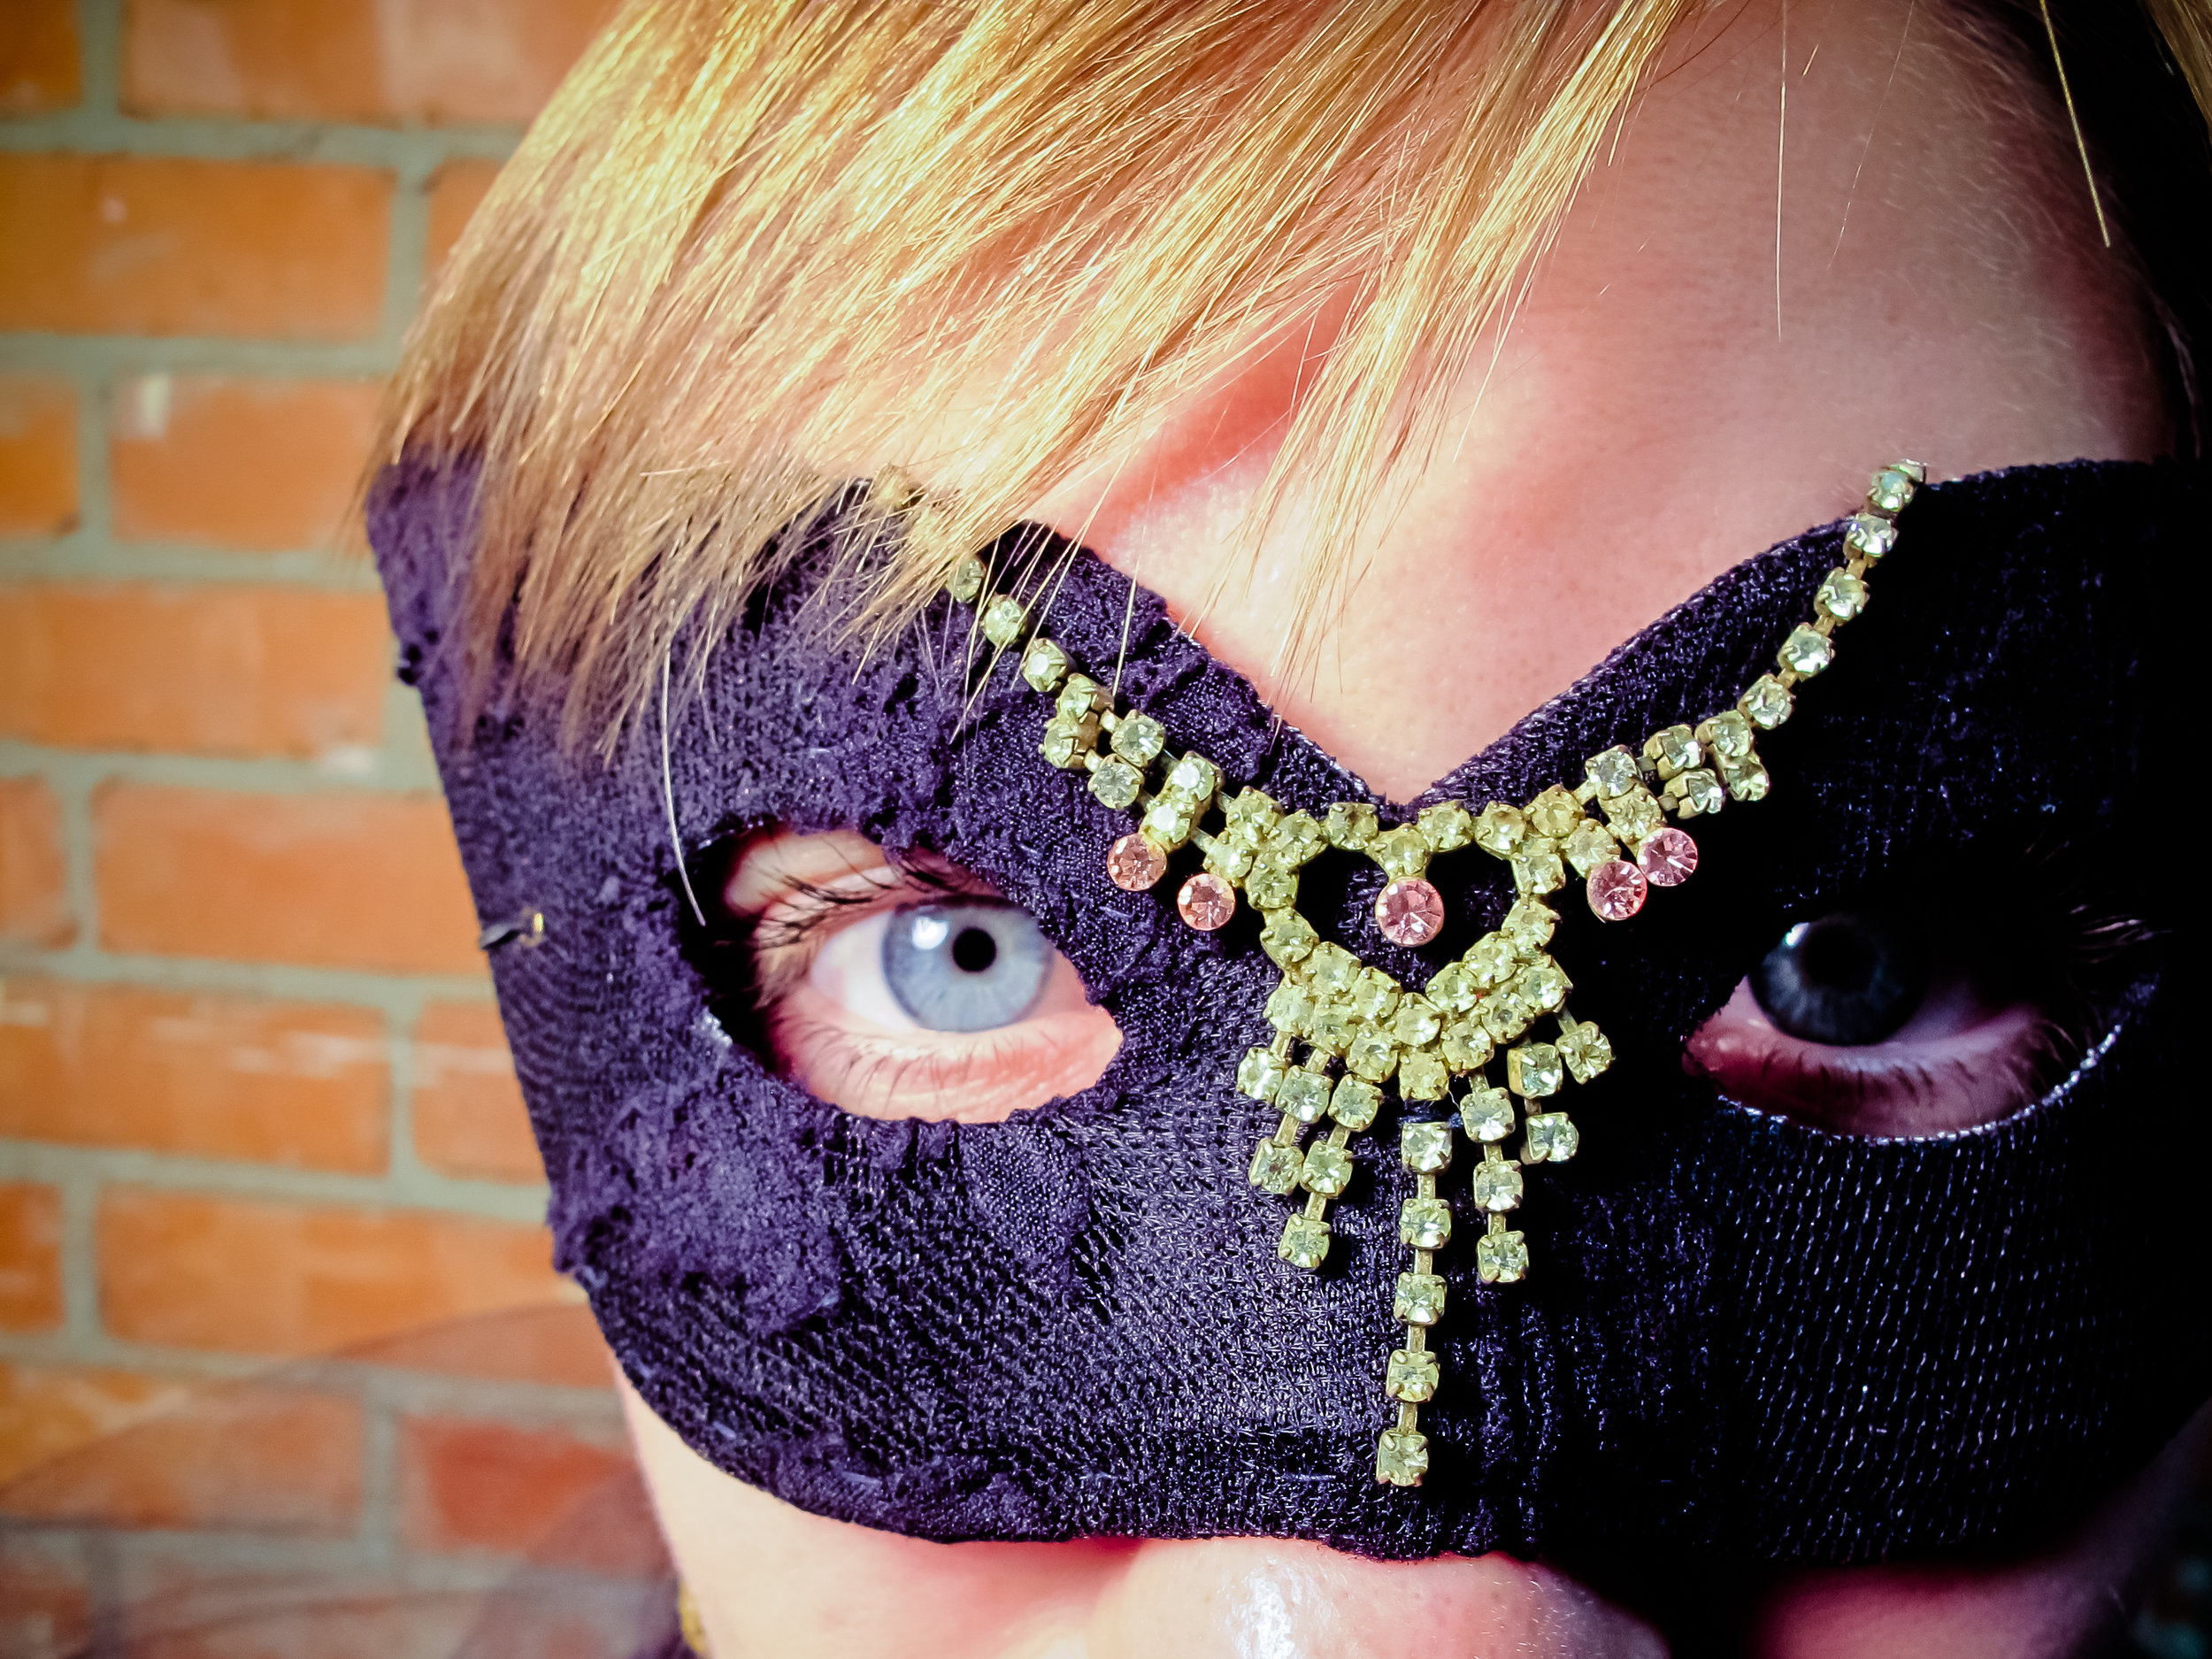
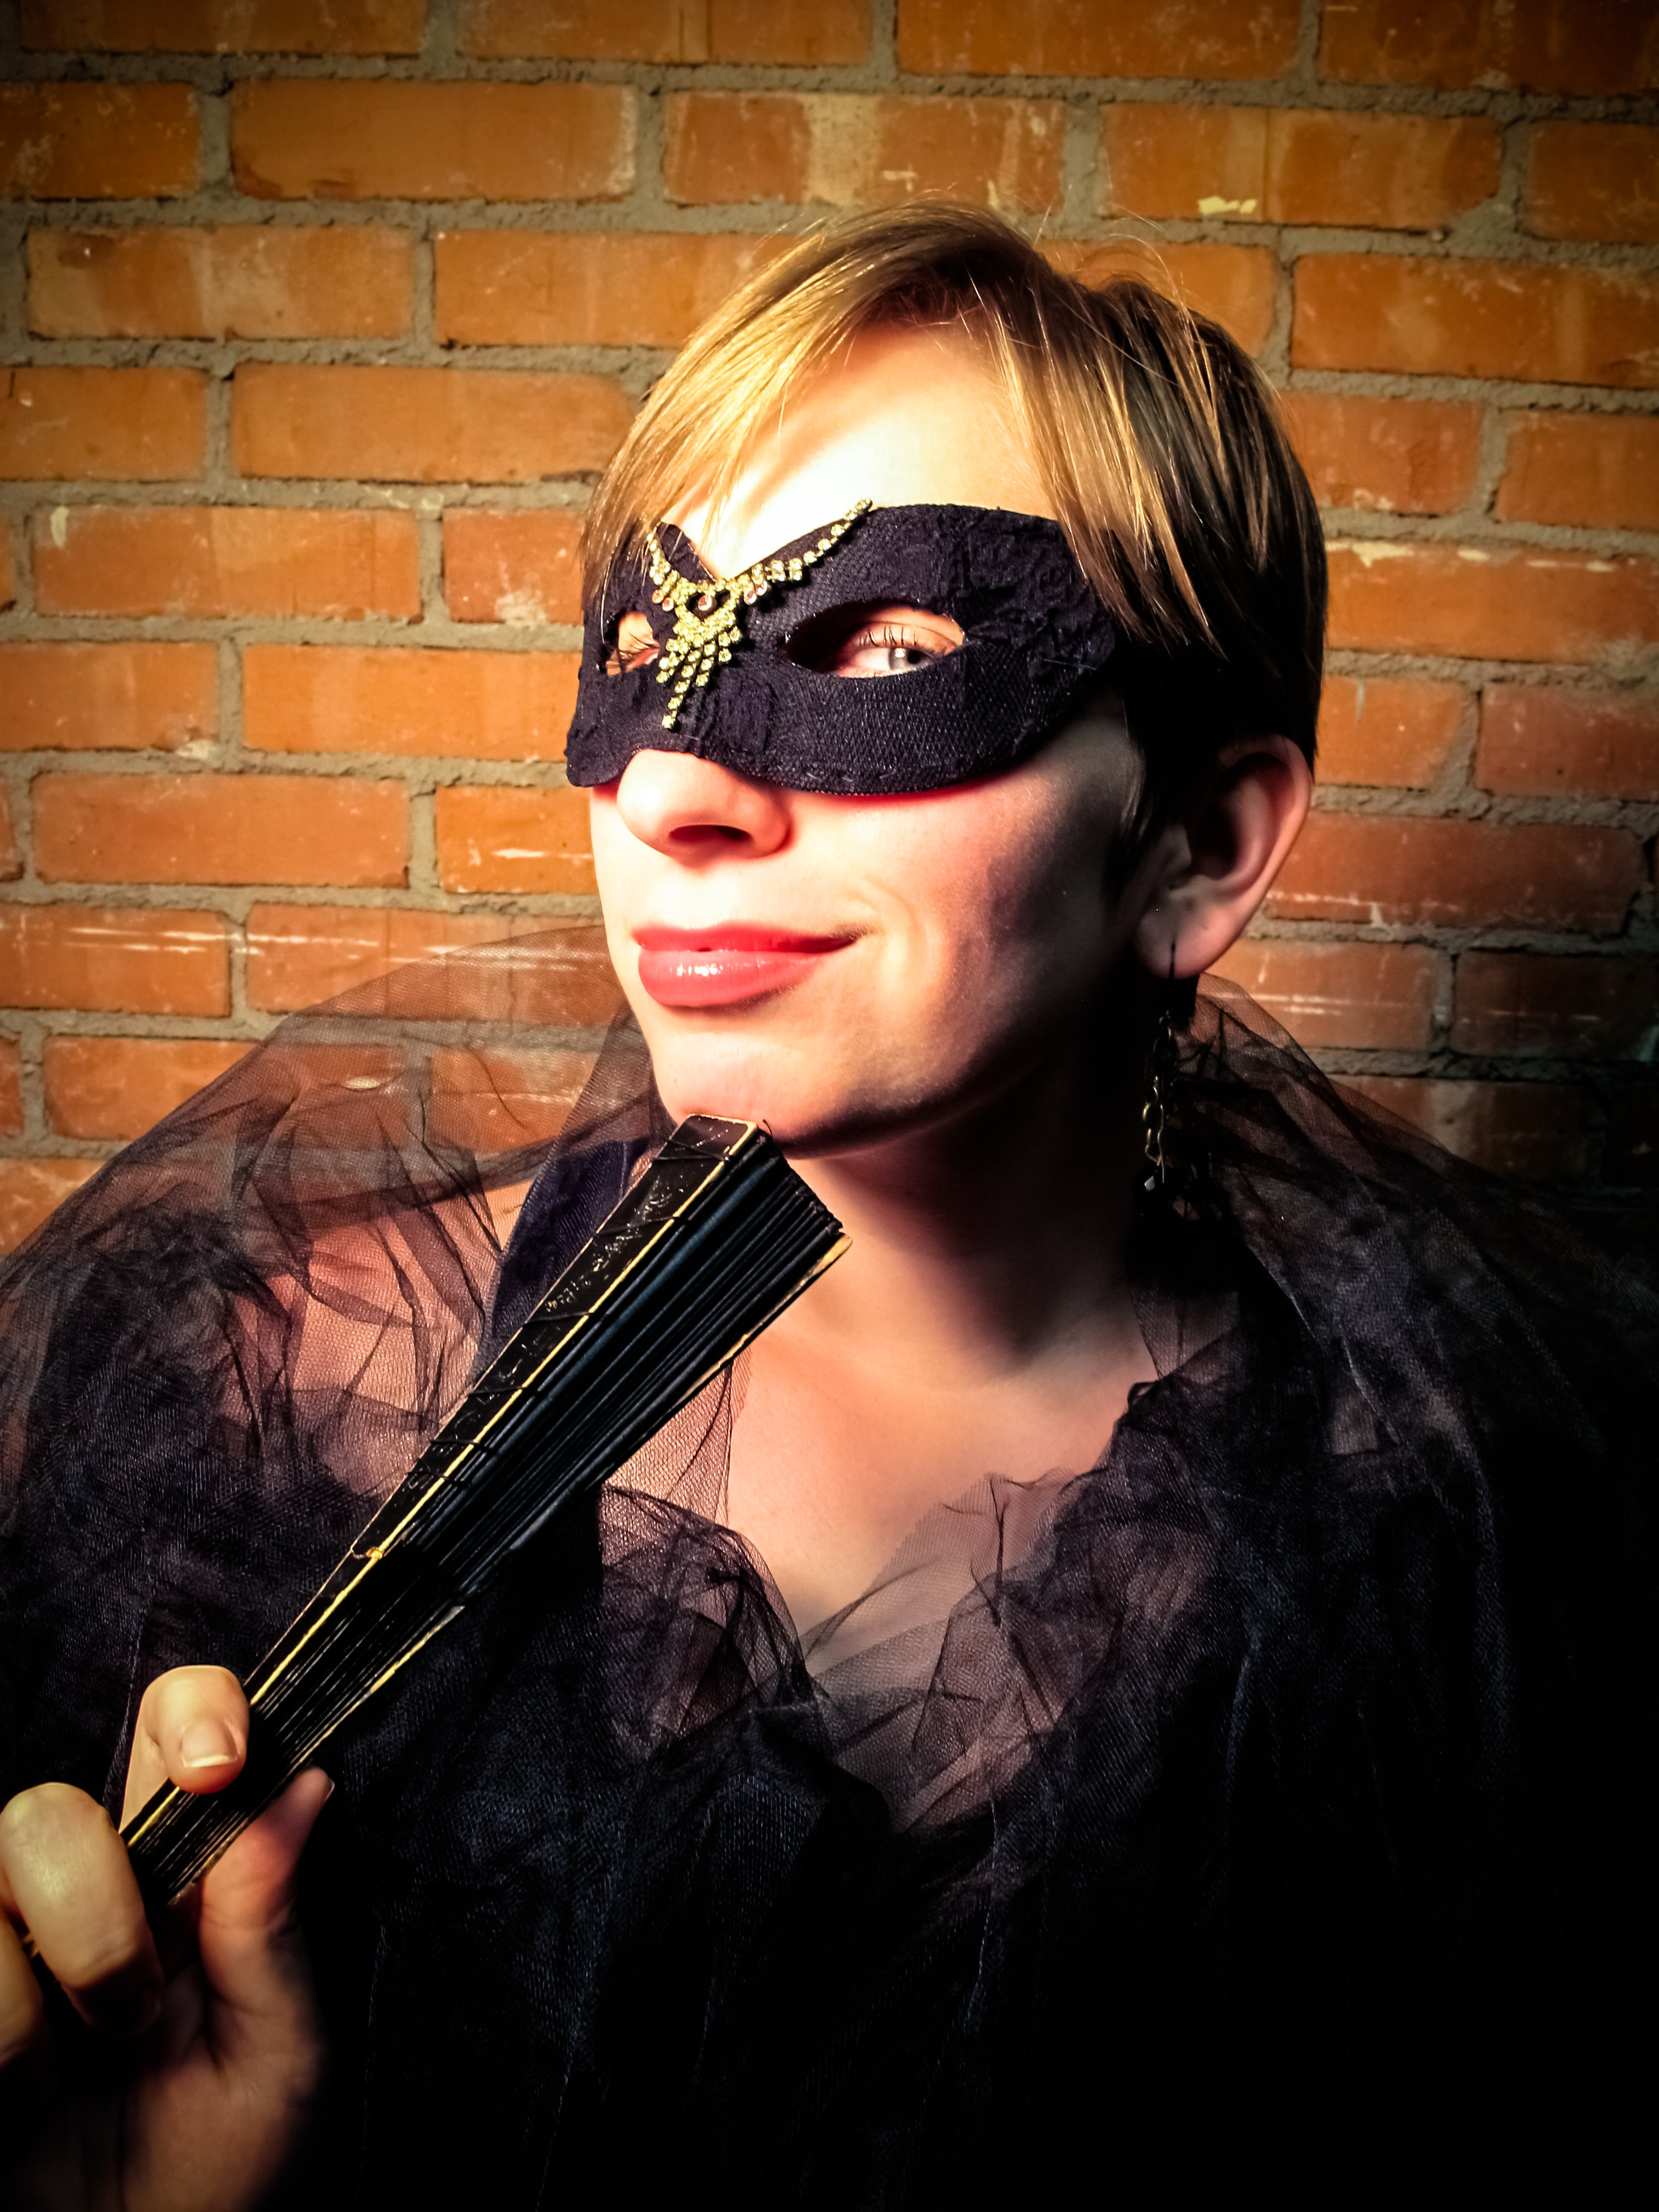
  16. Wear proudly! SJE-4To Make this a Full Costume: Put on one of those fancy dresses you hardly get to wear, wrap some tulle around your shoulders, grab a fan, and don some femme fatale makeup! Perhaps you are a spy at a masquerade, or a jilted tango dancer, or even a princess incognito--whoever you are--Happy Halloween & as always, Merry Making! SJE-3  SJE-5A special thanks to my lovely fiancee, Rhys, for the wonderful pictures of me wearing the mask I just made. Love you, shutterbug!