A Round Up of Fun, Cheap Steampunk Costume DIYS
halloween
Steampunk Hallow's Eve Party~Decorations (Re-blogged)
D-I-Y-3 CommentsHaving a Halloween party? Want to Steampunk it up? Here are a few ideas that won't break your wallet (gotta have money for all that candy right?)! Jars of candy are a given for any Halloween party--to add just a touch of mystery & oddness you can attach labels like the one below from VectoriaDesigns. They are much classier than your average Halloween labels, indicating the jar's contents are brains, zombie boogers, blood, etc. VectoriaDesign's labels, for instance, help set a Steampunk/Sci-Fi mood with labels like: Anti-Time Tablets, Steam Engine Oil, Octopus Ink, and my favorite Time Traveler Pills to name a few.
The labels are a digital download. Total cost: $3.50 label images (15 total), $11.99 label printer paper...$15.49
Another great digital downloadable decoration for your party are Victorian style paper dolls with a Halloween & Steampunk twist. My favorite paper doll artist is RhondasOrignials. Her dolls are by far the most unique and strikingly odd. She has over 50 paper dolls for Halloween alone. These dolls make excellent centerpieces for your table or to fill up empty space on your mantle or shelves.
What makes Rhonda's paper dolls so special is the accessories that come with each doll and the characters that she creates. You can download her dolls on her Etsy shop, click here to follow the link. Rhonda also has specials where she bundles a number of her dolls together for Halloween. The bundle costs $23.25 or you can purchase individual doll patterns for $6.00 each. The instructions on how to assemble your dolls is very easy to follow and the colors are true to how they print on your home printer. Total Cost: (for a bundle) $23.25, brads (found in your local arts & crafts store in the scrapbooking aisle) $1.39, Aleene's Tacky Glue $2.50...$27.14
Aside from digital downloads, hit your local flea markets, garage sales, and estate sales for old jars & bottles. You can fill these bottles & jars with an assortment of items to fit the mood of your party. Inkling for a bit of twisted romance, dry some red roses beforehand and place them in your jars for a pretty bit of decay to display or paint them black (how very Alice in Wonderland of you to do so!). Want your party to look like a Mad Scientists Laboratory, fill those jars up with an assortment of colored liquids & place glow sticks inside so that they give off an eerie luminescence. There's also my DIY on steampunk candles--they're perfect for a Hallow's Eve Bash!

There are other items you can make to give your party a steampunk feel. Craft recently posted a DIY on how to make your own miniature hot air balloon.
You can suspend them from the ceiling to give your party-goers the feeling that they are on an airship deck among the clouds--you can even make clouds! Click here to find out how!
If you do not have a specific steampunk theme in mind, you can be more general and decorate using broken machines, machine parts, clocks, and other mechanicals you may already have or ones that you can thrift. Great items to pick up: tea cups & saucers, china, clocks of any kind (you can line them all up on your mantle, table, or along your stairs), jars of light bulbs, globes or old maps, or springs (to make a garland to hang in your doorway or off your fire place).
These are just a few ideas to get you started! Stay tuned for the rest of October for my Steampunk Halloween DIY series and get ideas on steampunkins and how to make your own steampunk halloween costumes for adults & kids.
Update an Old Pair of Gloves
D-I-Y-CommentWith Halloween coming up soon, I've been dreaming up new steampunk costume DIYS. The easiest way to create a Halloween costume is to simply update an older one. Many costumes include a pair of gloves. Gloves are a versatile accessory and easily updated. Here's what you'll need: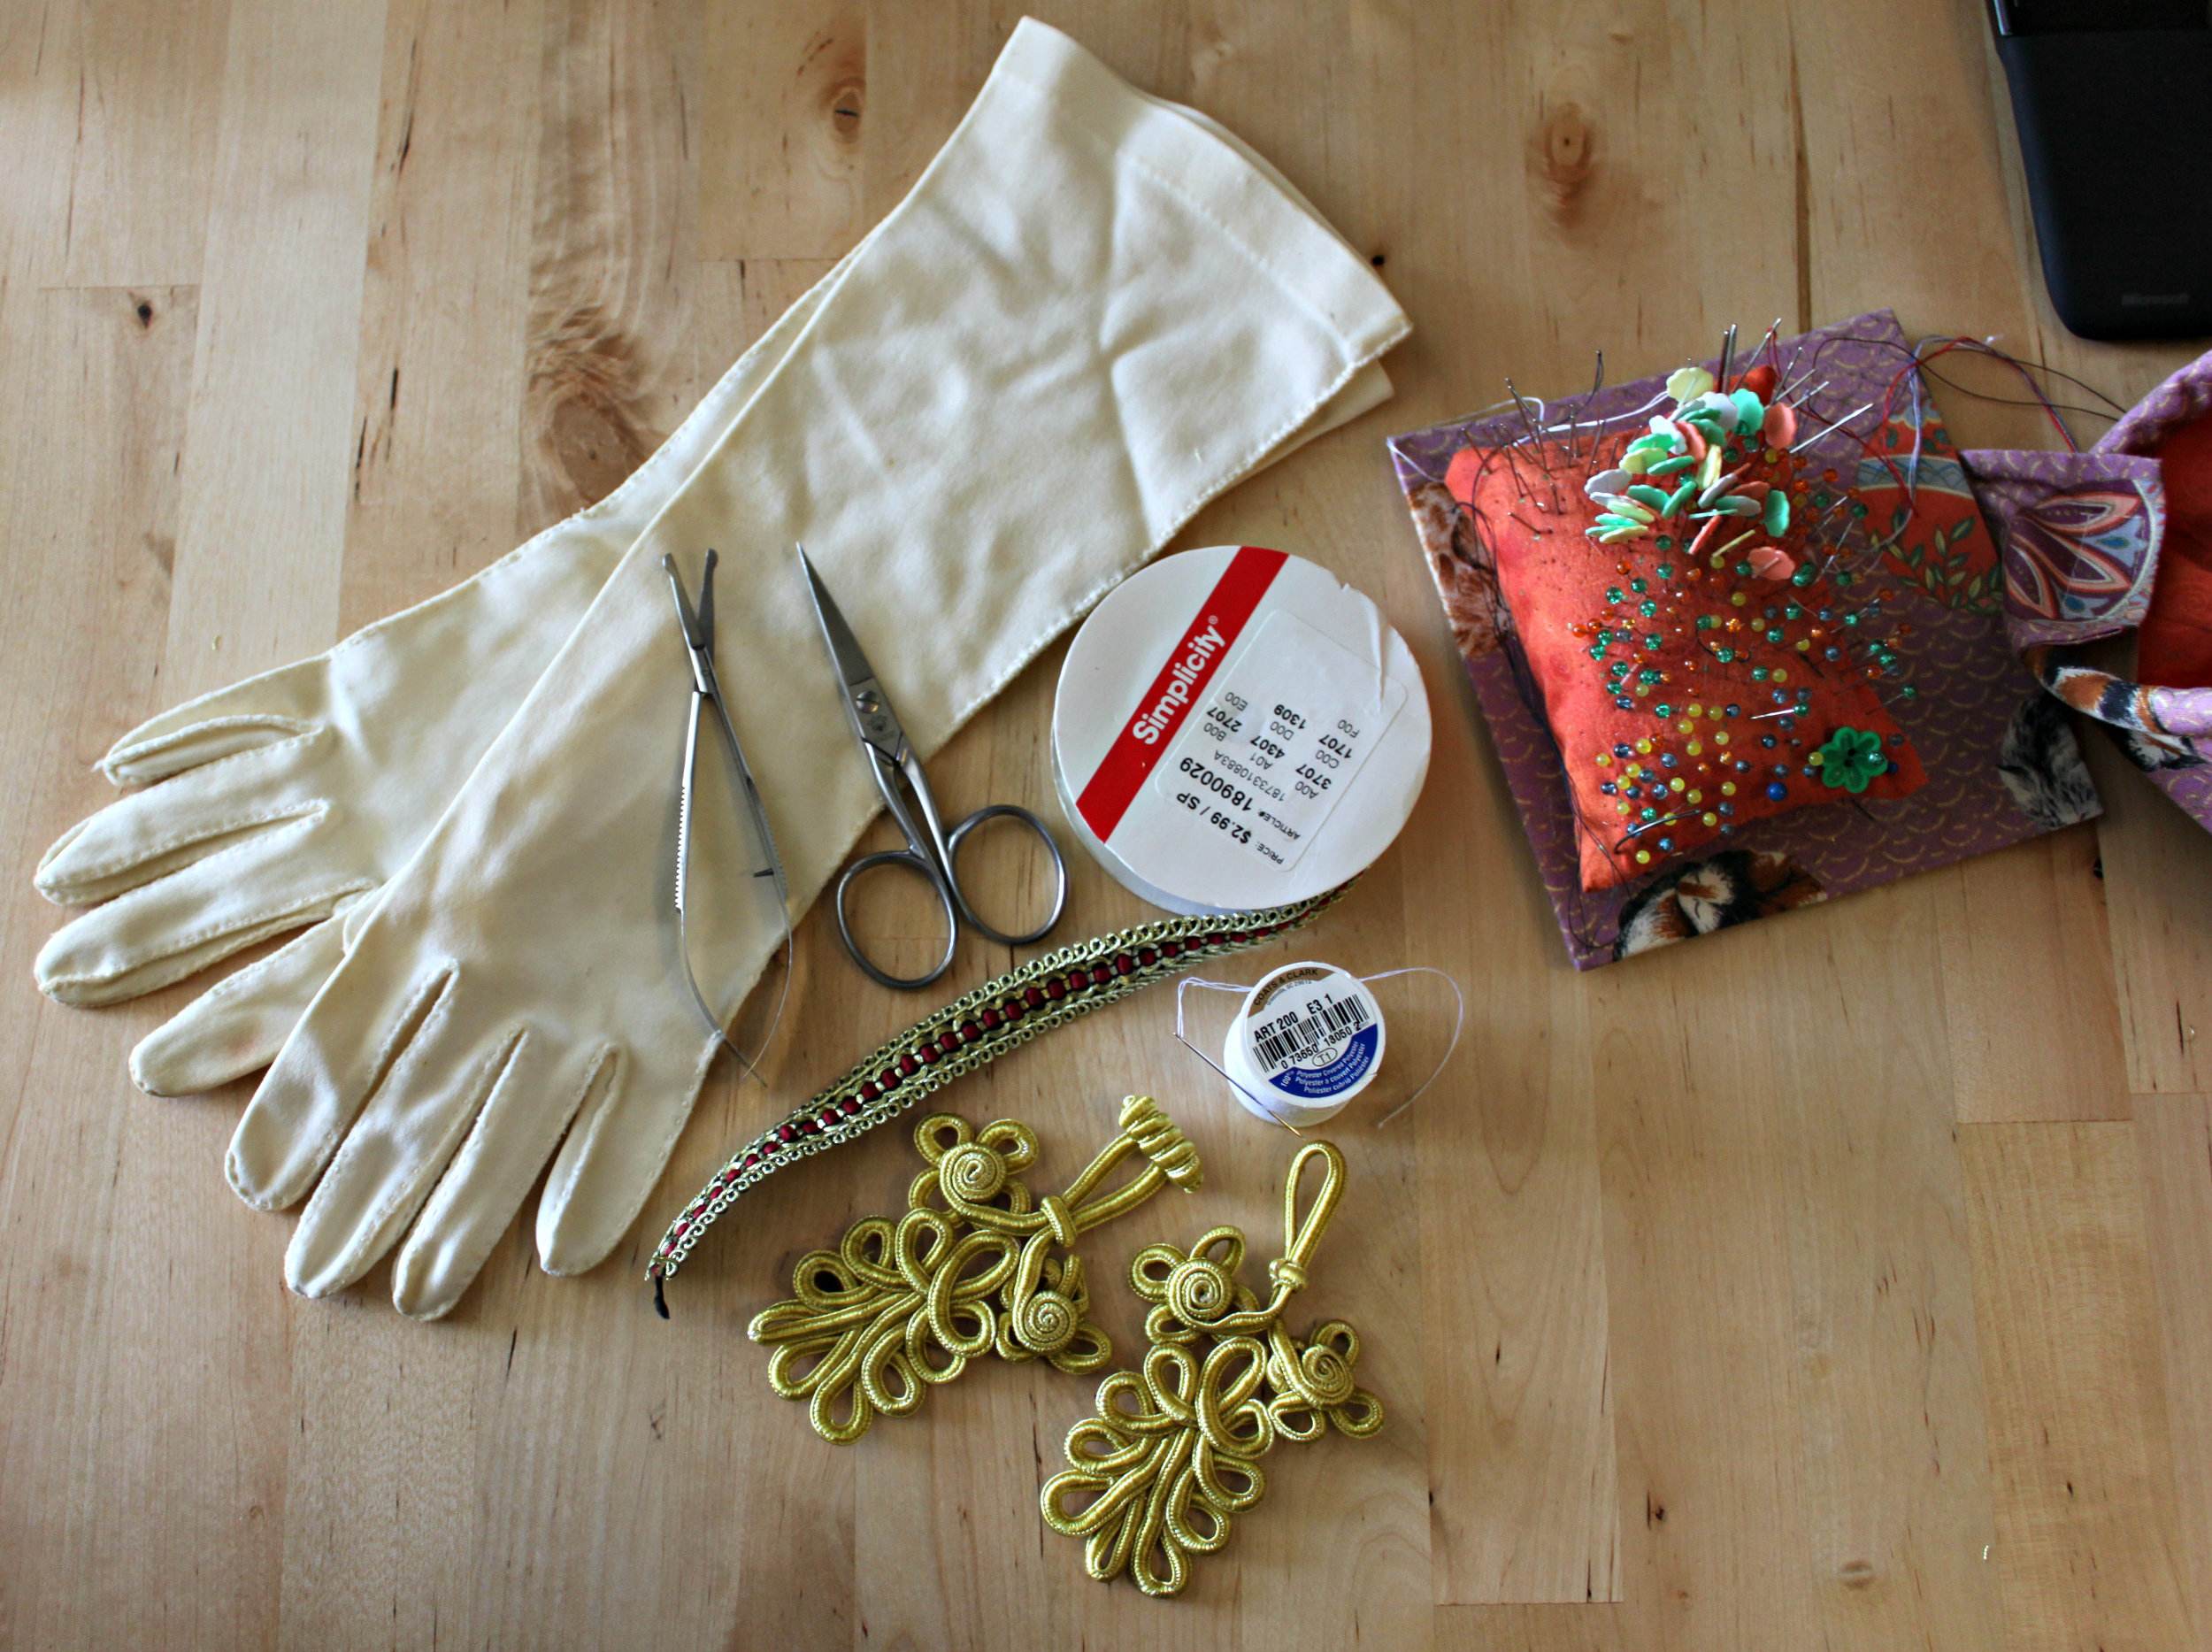
- Pair of gloves
- Scissors
- Needle & Thread (the thread should match the color of your gloves)
- Pins
- Decorative ribbon (I purchased mine from JoAnn's for just $2.99)
- Embroidered Ribbon Clothing Toggle (you can find these in any sewing or fabric store in the belt & fasteners aisle)
- Piece of plastic that fits inside your gloves (You may need to get creative with this supply--I used a kitchen utensil. You want something that will fit inside your glove & is preferably plastic so that you don't sew through both sides of your glove when attaching the clothing toggle. Plastic is smooth and so your needle will slide once it hits it)
Steps:
- Begin by pinning your decorative ribbon in place. To ensure that you place your ribbon evenly, line up the edge of your ribbon with the edge of your glove. Also, to hide your seam, begin pinning your ribbon on the part of the glove that will be closest to your body. Leave 1/4 inch of extra ribbon at the end. Fold this extra 1/4 inch of ribbon under & be sure that it covers up any raw edges. Pin in place.

- Using your needle & thread, sew your ribbon onto your glove. Any style of stitch will do. Be sure to keep your stitches neat & even. (Also, try to hide your stitches in the pattern of your ribbon or use a matching thread.) Remove the pins as you go.

- Repeat Steps 1 & 2 for the other glove.
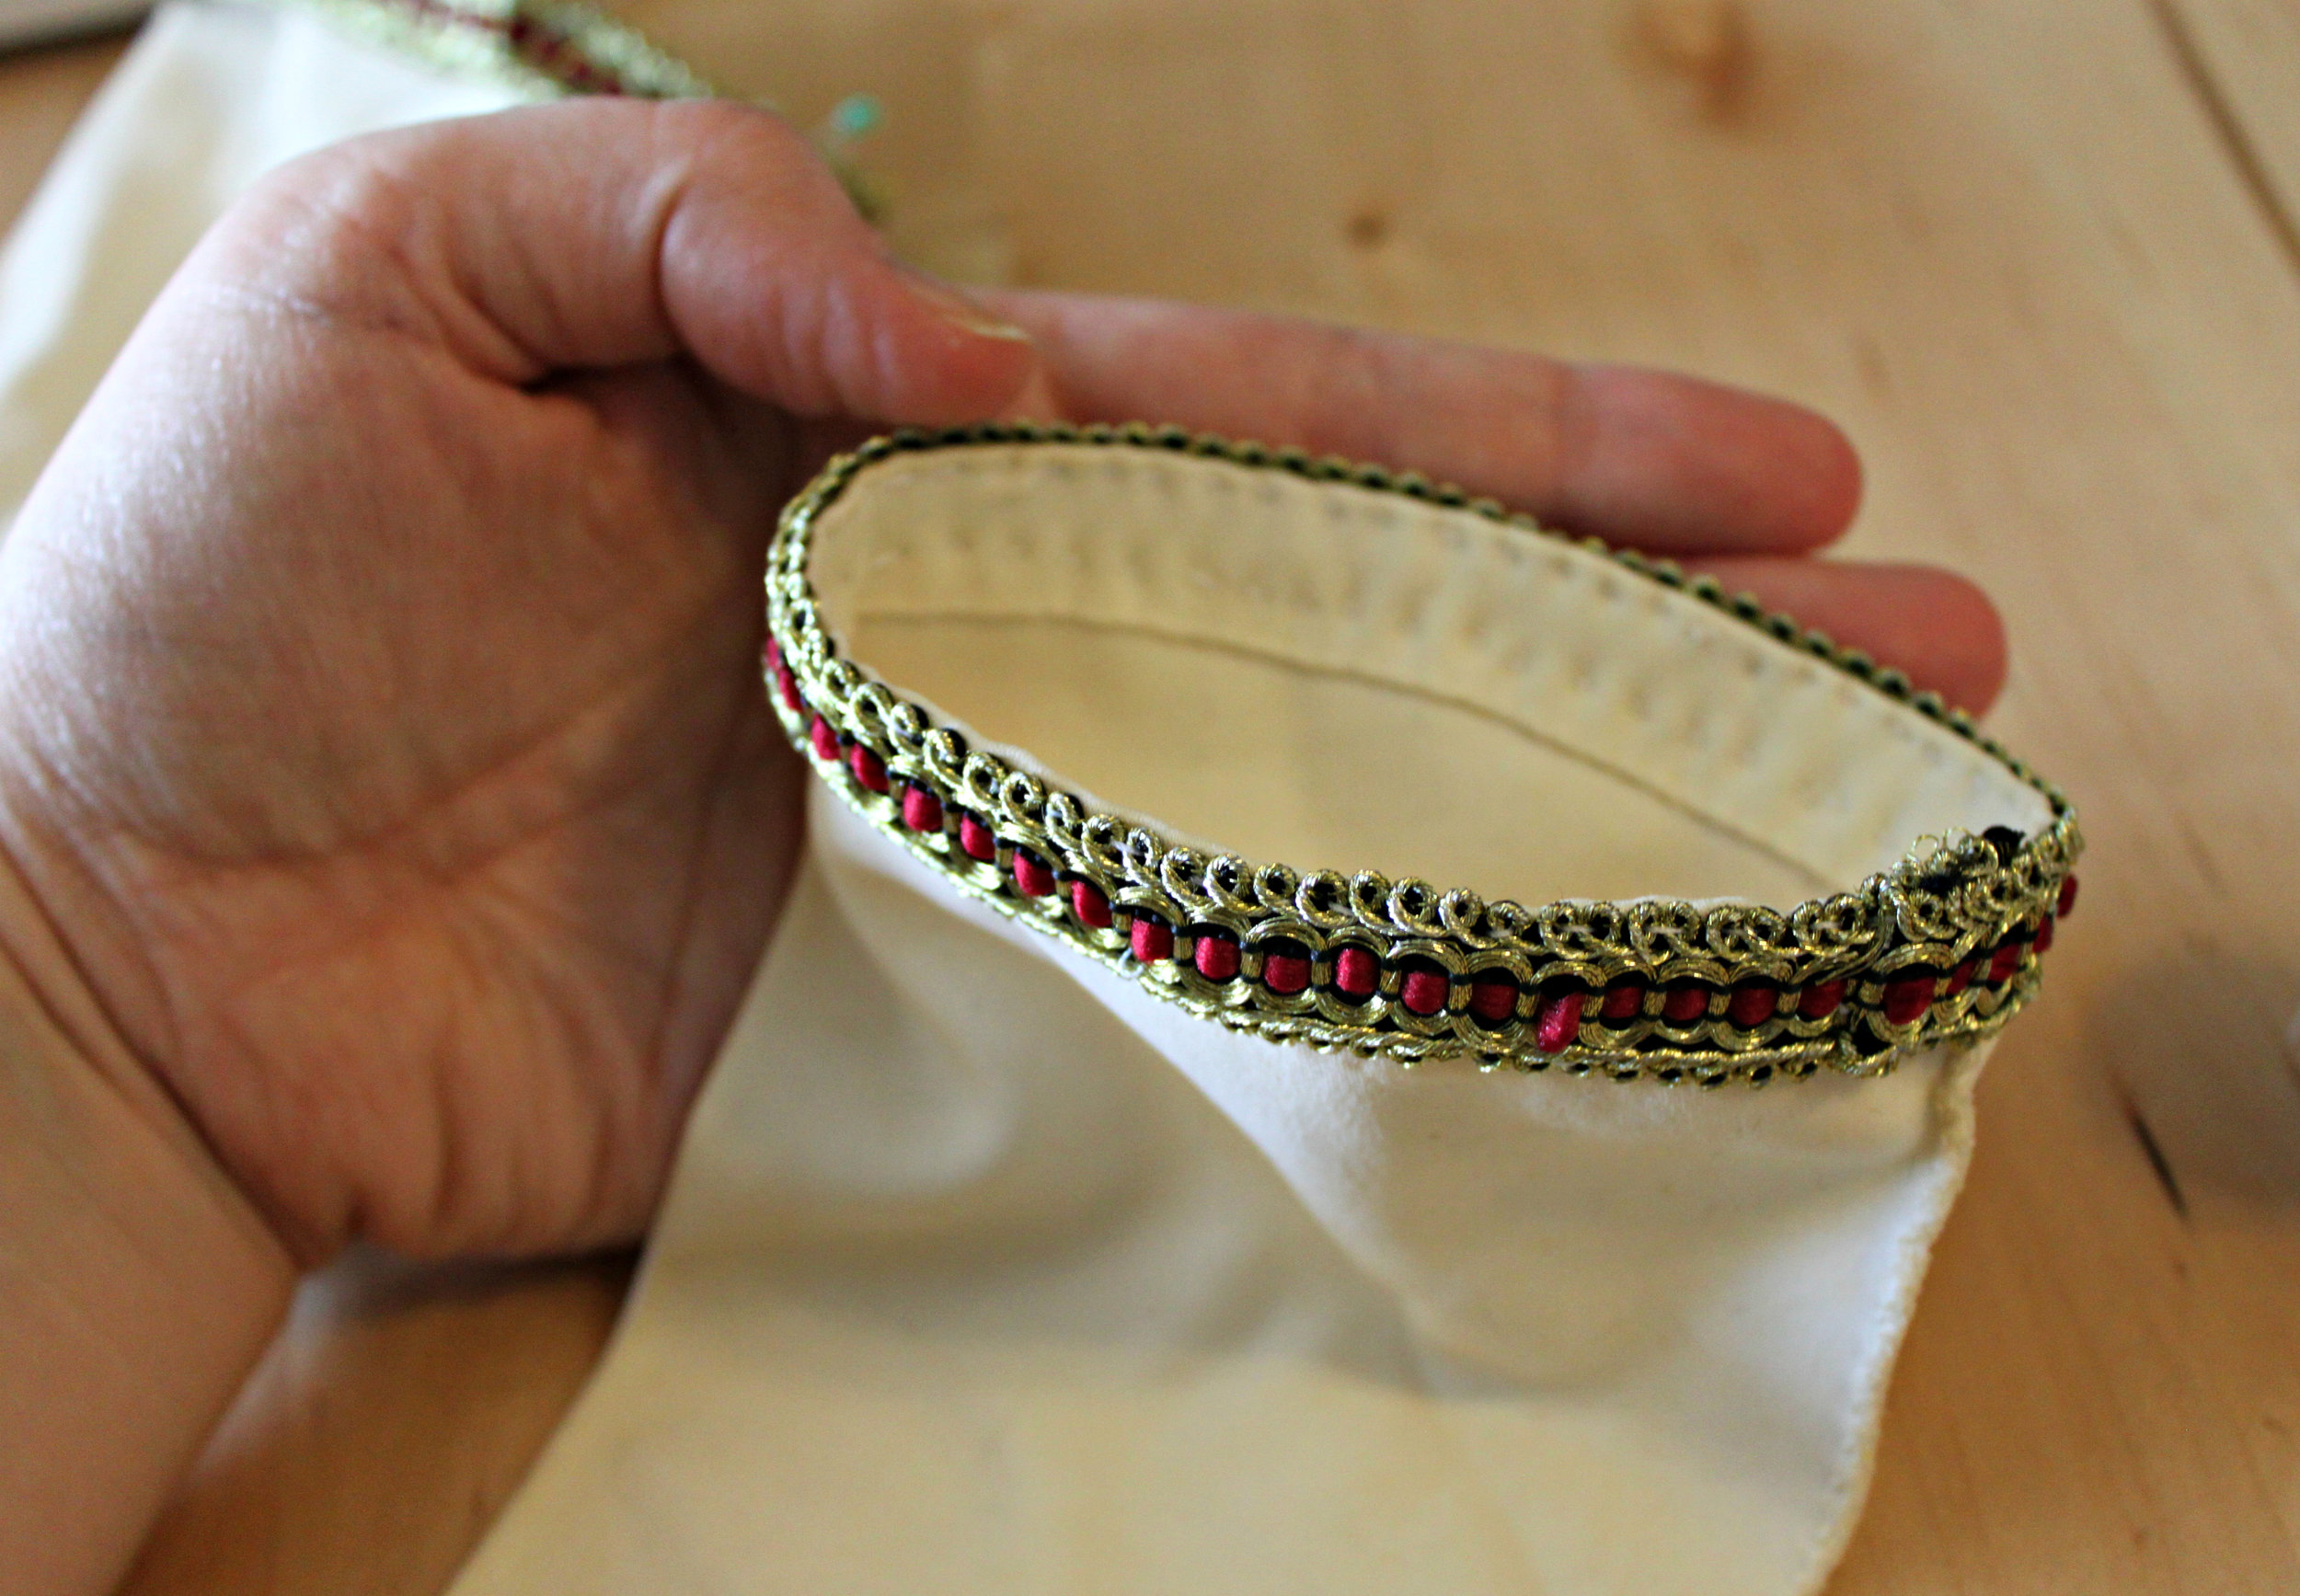
- Next, put on the glove and determine where you would like to place your embroidered ribbon clothing toggle piece. (Do not pin the piece in place while you are wearing the glove...unless of course you want the Halloween gore to be real.)
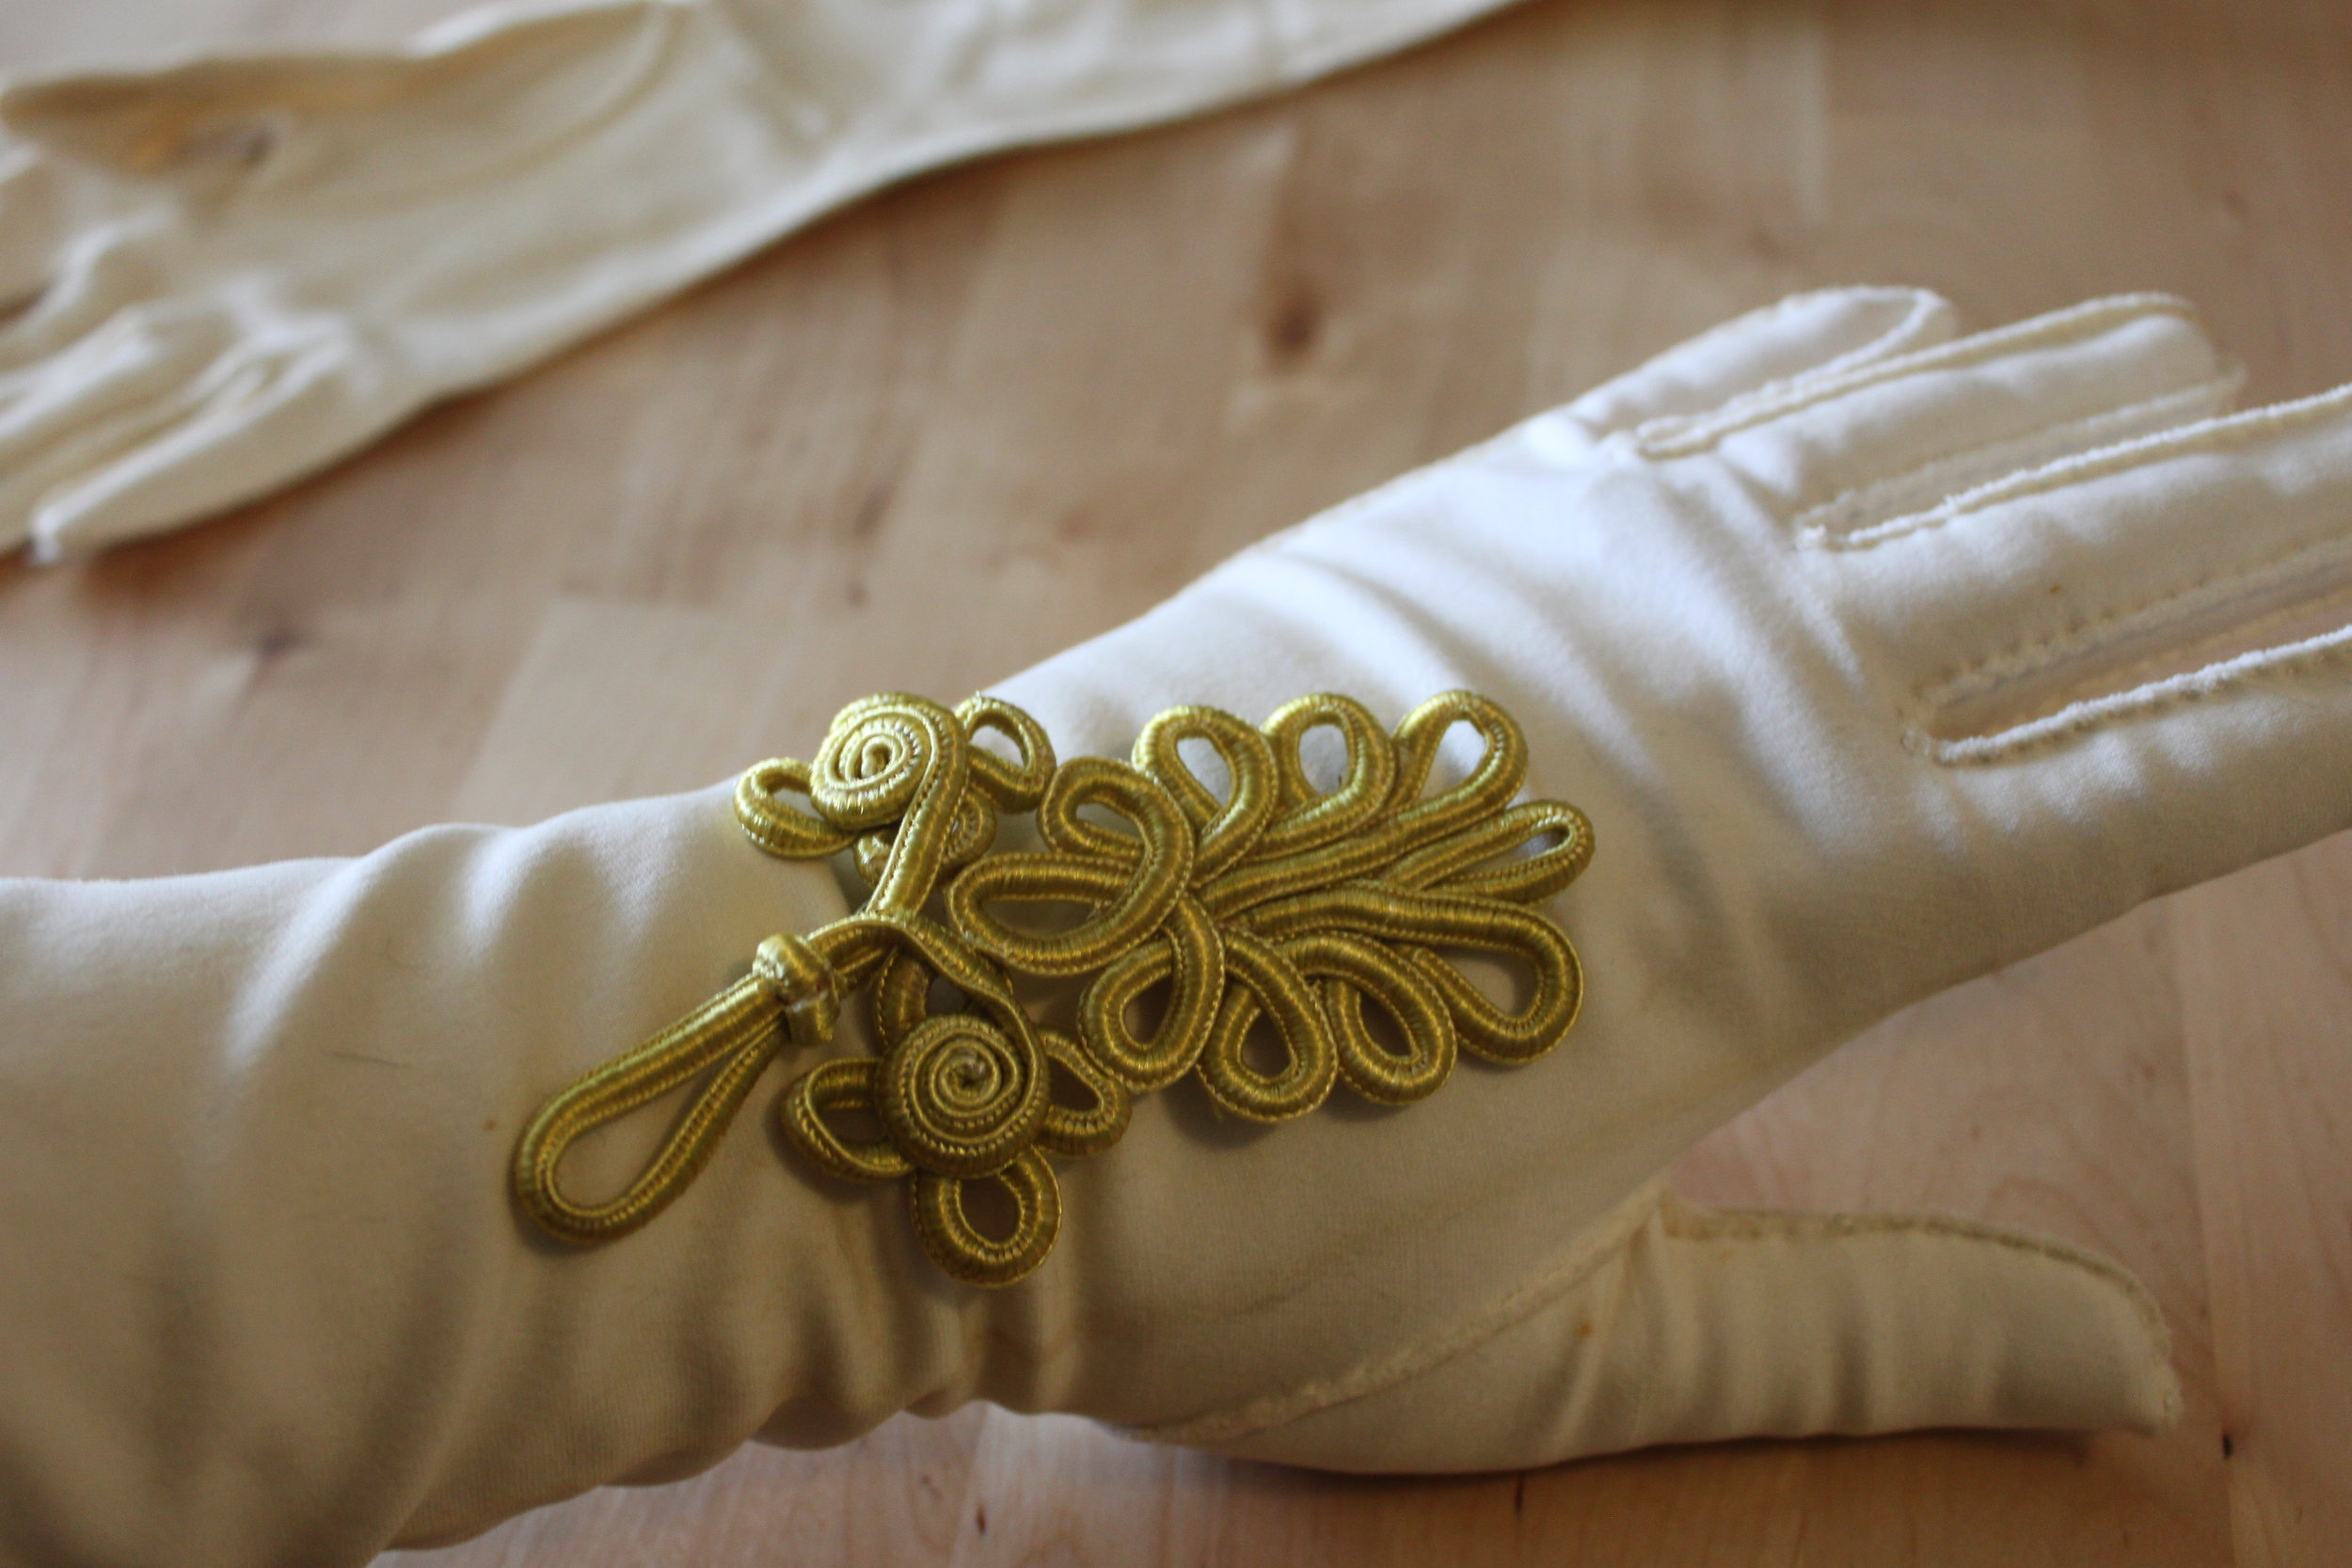
- After removing the glove, pin the toggle piece in place.
- Before sewing, insert the piece of plastic into your glove. This will ensure that you do not sew your glove shut/together.
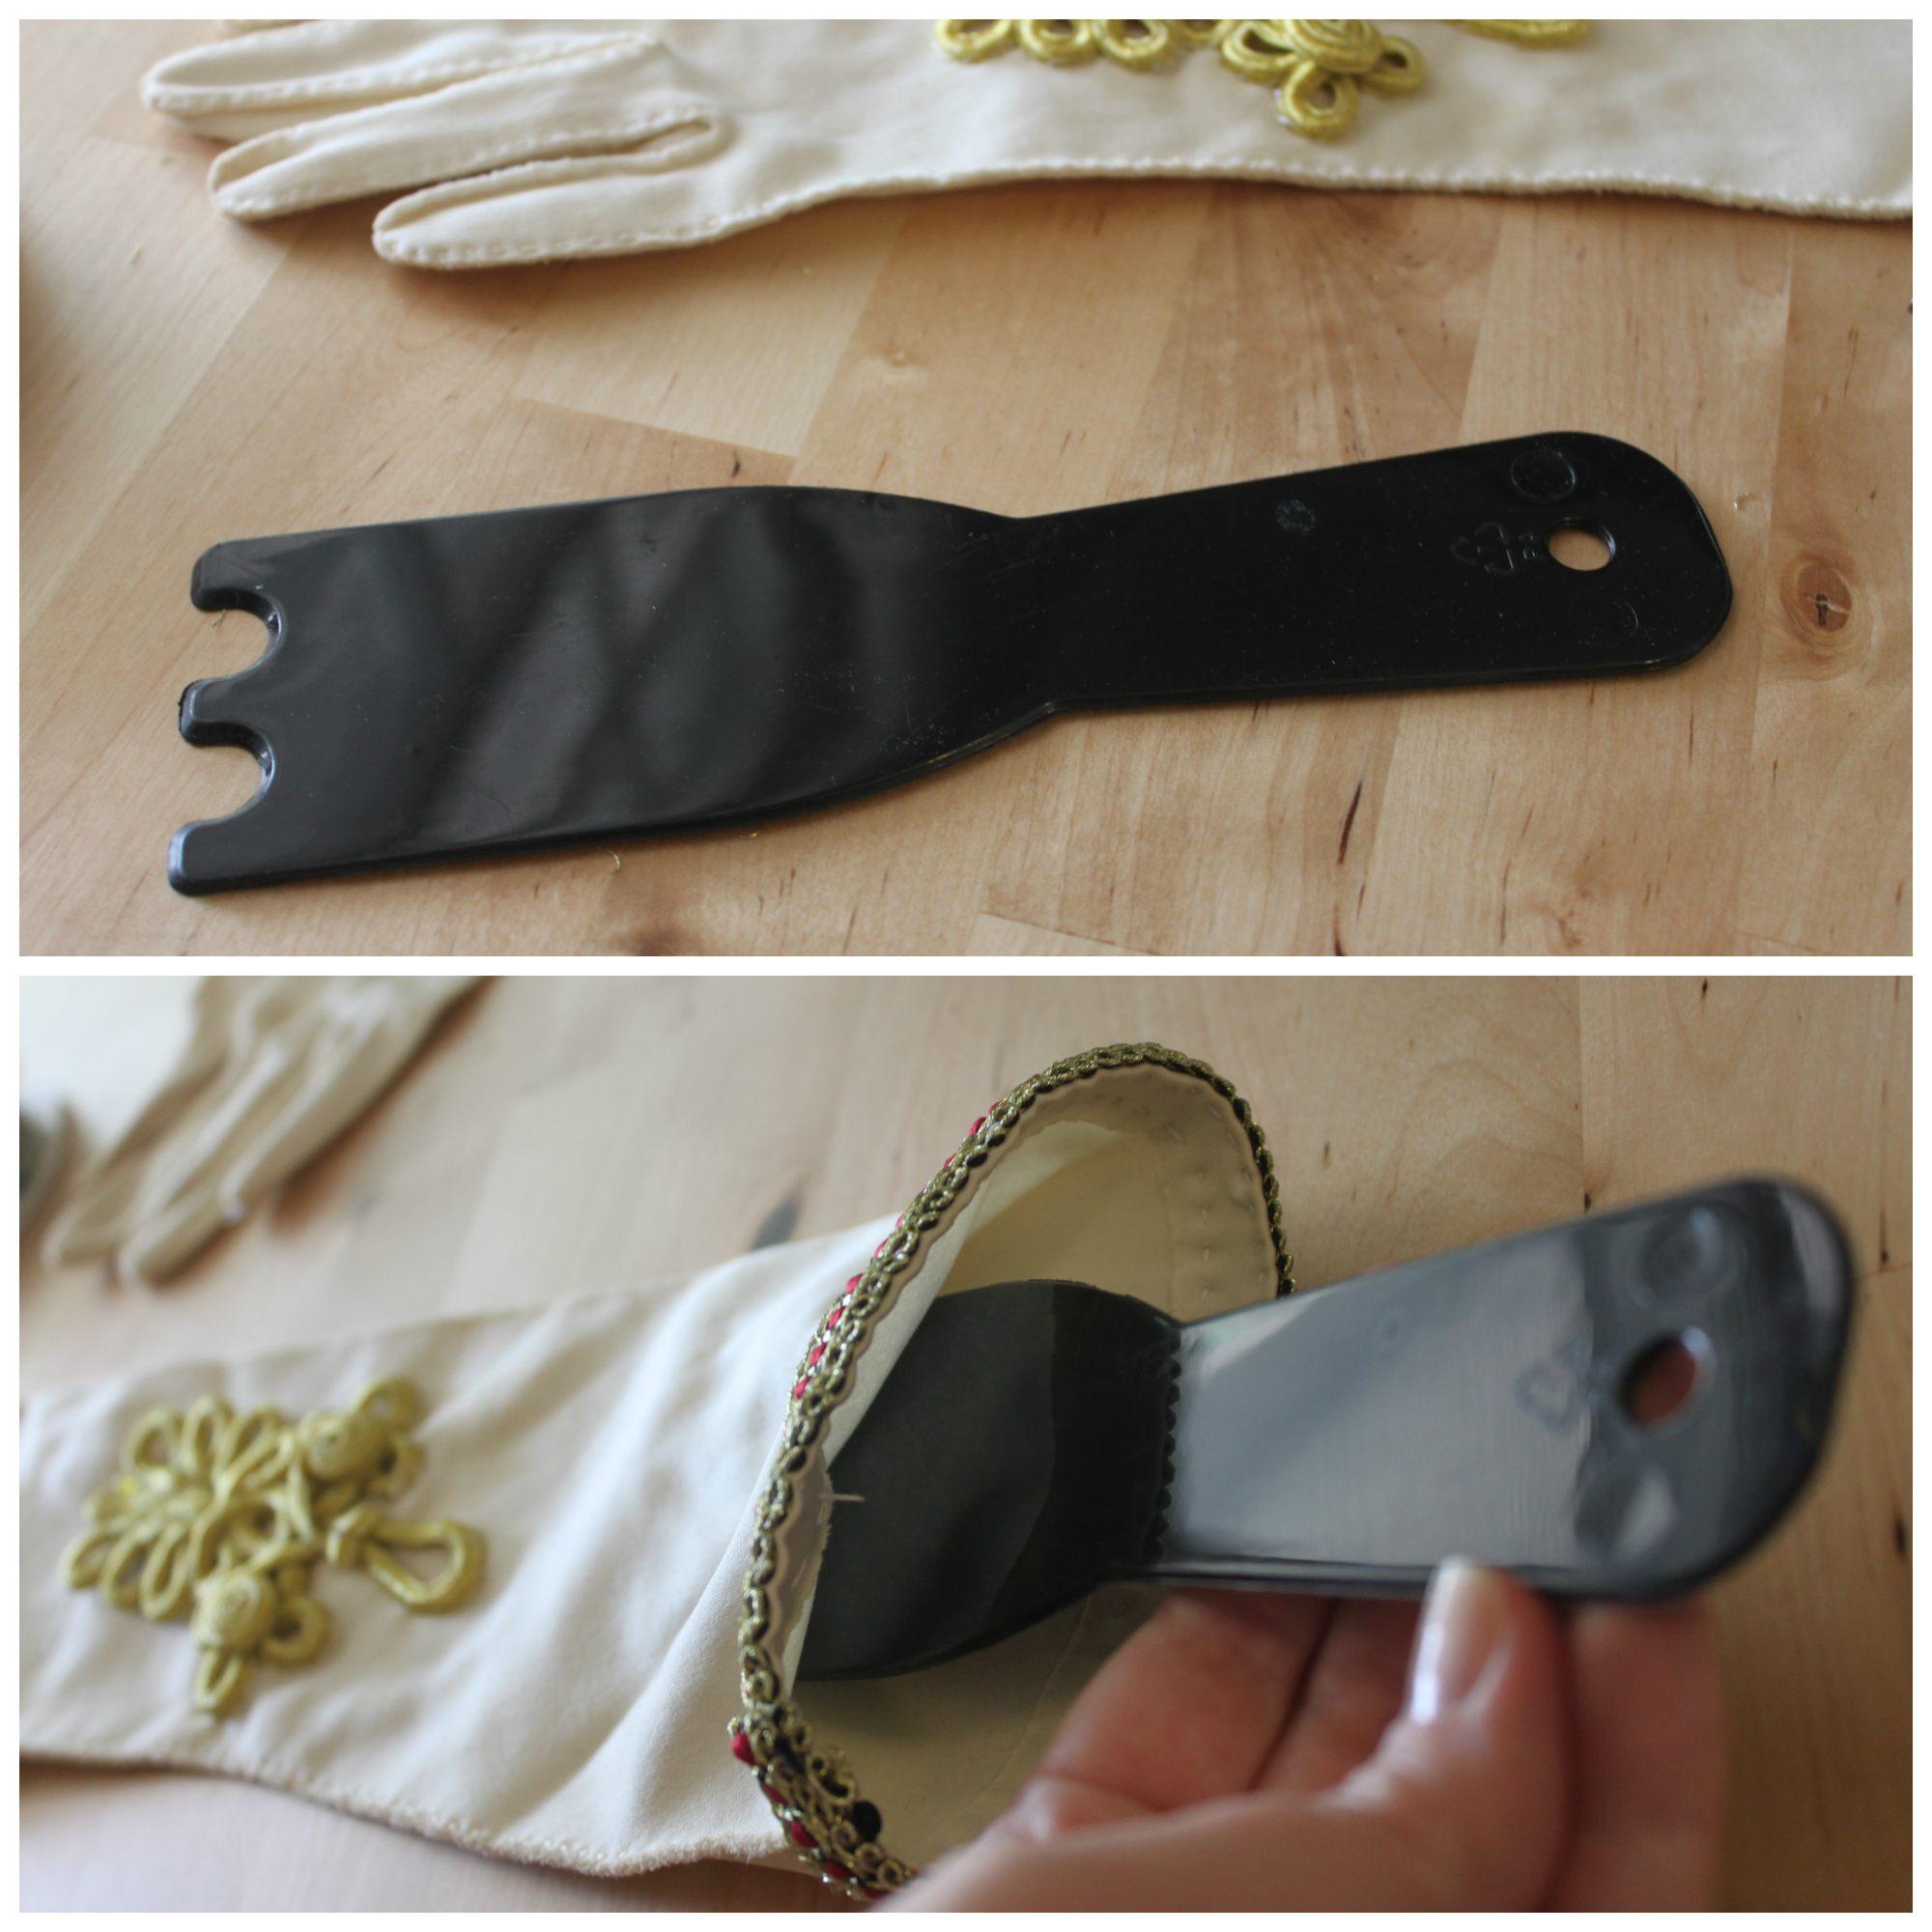
- Using your needle & thread, sew your toggle piece to your glove. The best stitches to use are: slip stitch, blanket stitch, or an oversewing stitch.

- Repeat Steps 4-7 for the other glove.

- Now your gloves are like new! Hope they'll keep you warm & feeling fancy this Halloween!

As always, Merry Making! Check back again soon for more Steampunk Halloween Costume DIYS--I have 3 already in the works on how to steampunk a mask! 
Carve Your Own Steampunkins! (Re-blogged)
D-I-Y-1 CommentAs promised, here are a few ideas & DIYs (3 different DIYS) on how to Steampunk your Pumpkin this Halloween! Happy Carving! 1) Kid Friendly Steampunkins, or the "Mr. Potato Head" Approach
What You'll Need:
- Pumpkin Carving Tools (You can purchase a kit or gather up the following: A large knife, paring knife, toothpicks, a corn-on-the-cob utensil (optional but it makes poking holes so much easier), small & large metal spoons, newspaper or trash bags to protect your table from all the pumpkin guts, and a bucket or big pot lined with a trash bag for pumpkin guts & seeds)
- 2 gears, or as many as you prefer your pumpkin can have many cog & gear eyeballs (salvaged is preferable but if you cannot find any you can purchase reproduction gears from Michaels. Just look for the "Industrial Chic" or "Found Objects" items).
- 3 springs (use 5-6 springs if you have a large pumpkin)
- Accessories, goggles, a top hat, a monocle, pocketwatch, eyepatch--get creative! Create your very own Steampunk Pumpkin Character!
Steps:
- (For adults only) Carve a lid, scoop out the pumpkin guts, and poke starter holes where the gear eyes & spring mouth will be inserted. The holes for the spring-mouth should be relatively small because your springs will be held in place by 2 toothpicks (as shown below). The toothpicks should stick out approximately 1/2-1 inch.

- (For kids) Stick the eyeball gears into their pumpkin sockets and give that steampunkin the ghoulish grin it's been waiting for! Link the springs and place them on the toothpicks.
- (For kids) Last but not least, dress up your pumpkin with a pair of googles & a hat, an eyepatch, or a monocle on chain! Whatever your heart desires!

2) Painting on the Punk! Another kid friendly approach to pumpkin decorating!
What You'll Need:
- Various Acrylic Paints (any colors you choose. I like black, white, red, & metallics)
- Paintbrushes (or various sizes, at least 1 small paintbrush for details & 1 large brush)
- Water & Jar & Paper plate (or cardboard) for mixing your paints
Steps:
- Paint some Steampunk scenes, objects, or faces onto your pumpkins!
- (Option 2 for tiny tinker-tykes ) Cut out some gear shapes or pocketwatch shapes from some sponges & give them to your tyke to dip in paint and place on their pumpkin! Download a template for gears below!
3) Classic Carving & Pumpkin Poking
What You'll Need:
- Pumpkin Carving Tools (You can purchase a kit or gather up the following: A large knife, paring knife, toothpicks, a corn-on-the-cob utensil (optional but it makes poking holes so much easier), small & large metal spoons, newspaper or trash bags to protect your table from all the pumpkin guts, and a bucket or big pot lined with a trash bag for pumpkin guts & seeds)
- Template or Design, to trace or draw freehand on your pumpkin (you can download Steampunk ones here)
- Tea candle (I prefer electric, but that's up to you!)
Steps (for tracing your design):
- Carve a lid & scoop out the pumpkin guts.
- Next, place your design over your pumpkin and trace using your special pumpkin poking tool (in your kit). I used a corn-on-the-cob utensil instead. It worked really well and had the added benefit of creating 2 holes instead of just one per punch so I was finished poking holes a lot sooner.
- Once you're done tracing your design, place your tea candle inside and affix your lid! Enjoy your steampunkin's ghoulish glow!

Steps (for carving your design):
- Carve a lid & scoop out the pumpkin guts.
- Next, free hand sketch the design or template of your choice onto your pumpkin. I recommend using a pencil as pen can smudge and show on the skin.
- Carve out your design!
- Once you're done carving, place your tea candle inside and affix your lid. Enjoy your steampunkin's eerie luminescence!
Templates: (Free to download, my gift to you! Happy Halloween!)
- To download Gears, click Steampunkins Template--Gears
- To download Bohemian Romance's Silhouette, click Steampunkin Template--BohemianRomanceSilhouette
- To download a Lady Promenading with a Parasol, click Steampunkin Template--LadywithParasol
- To download "Happy Halloween" (in Gear Letters), click Steampumpkin Template--Happy Halloween in Gear Letters
Don't forget to post pictures of your steampunkins! I'd love to see 'em! Happy Carving!
DIY Steampunk Gun Holster
D-I-Y-1 CommentFor those who know me, my fetish for hip holsters (regardless of who's wearing them--men & women alike are somehow more attractive to me with a hip holster strapped around their waist & leg-I blame Han Solo for this) but I digress. I've always wanted a hip holster and this Halloween I was determined to steampunk one of my very own.
 Steampunking on a budget can be tricky and oftentimes we have to sacrifice quality for fit. I found a really great holster for 9.99 at a local Halloween store. It was imitation leather, but that worked to my advantage. I was able to easily manipulate the fabric and sew on accessories.
  So let's get started! Here's what you'll need:
- Imitation leather gun holster (sourced from your local Halloween store; mine is a kid's Indiana Jones holster--very appropriate, since I seriously love both Solo & Dr. Jones!) Mine came with a gun too; if yours does not, then you will need to purchase a toy gun. Water guns make excellent steampunk guns when painted. Here is a DIY that I love on steampunking toy guns.
- Needle & Heavy thread (to match your leather and preferably, the kind used for coats)
- Long Springs (upcycled from a local flea market)--You can substitute any straight metal material here: wire, typewriter keys, or even chain
- Medium Grandfather clock gear (or reproduction gear)
- 2 large jump rings (and flat nosed pliers)
- 15-20 small Clothing Snaps (sourced from flea markets, but you can also go to any Fabric or Sewing store)--Mine are black, but you can also use silver
- 1 large Clothing Snap (optional)--I used mine to disguise the modern plastic snap on my holster. You could also substitute an ornate button here if you wish
- 1 Long metal pin (optional)--This gives your holster a little feminine flair. Choose any pin or brooch you like.
Steps:
- Before sewing, lay out your springs on your holster & figure out their placement. I wanted mine to create a striped pattern so I spaced them a 1/4 inch apart. Once you've got all of your springs placed, sew your springs onto your holster. Be sure to tie sturdy knots & cut off any excess thread. Hide all of your knots on the inside of your holster.
 (Side note: I wanted one of my springs to curve a bit, and so I placed a couple of stitches in the middle of the spring so that it would keep a curved shape.)
- Place your pin above your springs. A large, long pin works best because it covers the tops of your springs.


- Next, sew on your clothing snaps. Sew them in a pattern that you like. I alternated larger & smaller clothing snaps for a more textured look.


- If desired, sew on your large sewing snap or button (over the holster's plastic snap to hide it). This step is optional.

- Last, using your flat nosed pliers--attach your gear to your pin with your 2 jump rings.

 Now hook to your belt & rustle up some trouble like the airship cowgirl (or cowboy) you are!
 Have a Happy Halloween everyone!
DIY Steampunk Halloween Candelabra
D-I-Y-CommentI love Halloween! It's a great excuse to go over-the-top and get a little campy. This year I made a cool Steampunk Candelabra that you could easily make for yourself. It's easy to make, relatively inexpensive (if you're making only one), and you can use either re-purposed materials or reproduction materials and the outcome is still impressively spooky! Perfect for any Halloween decor!
Materials & Tools:
- 2 bike gears, cleaned (free)
- 1 candelabra (I purchased mine from Michaels for 24.99)
- 2 skeleton keys (mine are fake metal keys, also purchased from Michaels in the dollar section: 4.00)
- Chain (1 pkg., 2.99)
- 4 large swivel hooks (1 pkg. of 4, 1.99) *Be sure to purchase hooks that are: easy to open (like a partial split ring) and large enough to fit around your candelabra's arm with enough space leftover to dangle your skeleton key comfortably
- Ideology brand reproduction gears (2 pkgs., 4.99 ea.)
- Jump rings
- 4 candlesticks (1.00 ea.)
- Wire cutters
- Flat nosed pliers
Note on the materials: You can use actual gears & keys that your re-purpose, but for those looking for a cheaper version reproduction gears & keys are fine too.
Steps:
- Measure the amount of chain you need by taking a piece of string and configuring it to hang in between your candelabra's arms. Keep in mind how far down you'd like your chain to hang. Cut and then measure against a ruler. You may even want to bring the piece of string with you to the store to purchase your chain.
- Cut your chain pieces using your wire cutters. You want 4 total.
- Once you've cut your chain, decorate it with your gears. To fasten a gear to a chain link, use your flat nosed pliers. Open a jump ring, load the gear onto it, and then load the chain link onto the jump ring. Close your jump ring. Do the "shake test" to make sure your jump ring is firmly closed. Repeat for all chain pieces. (I put 6 gears on each chain piece.) Once you are finished, set your chain links aside.

- Next, attach your large swivel hooks onto your candelabra's arms.

- After all of your hooks are in place, load your skeleton keys onto your swivel hooks.

- Once your keys are in place, attach your decorated chain pieces to the swivel hook with a jump ring. You are connecting your chain to one hook as well as the hook across from it. Repeat for each chain piece.

- Next, place your bike gears onto your candelabra. Mine fit comfortably over the middle candelabra arm and pedestal. Place yours where you like.


- Last, affix your candlesticks in their holders.


DIY Halloween Mask
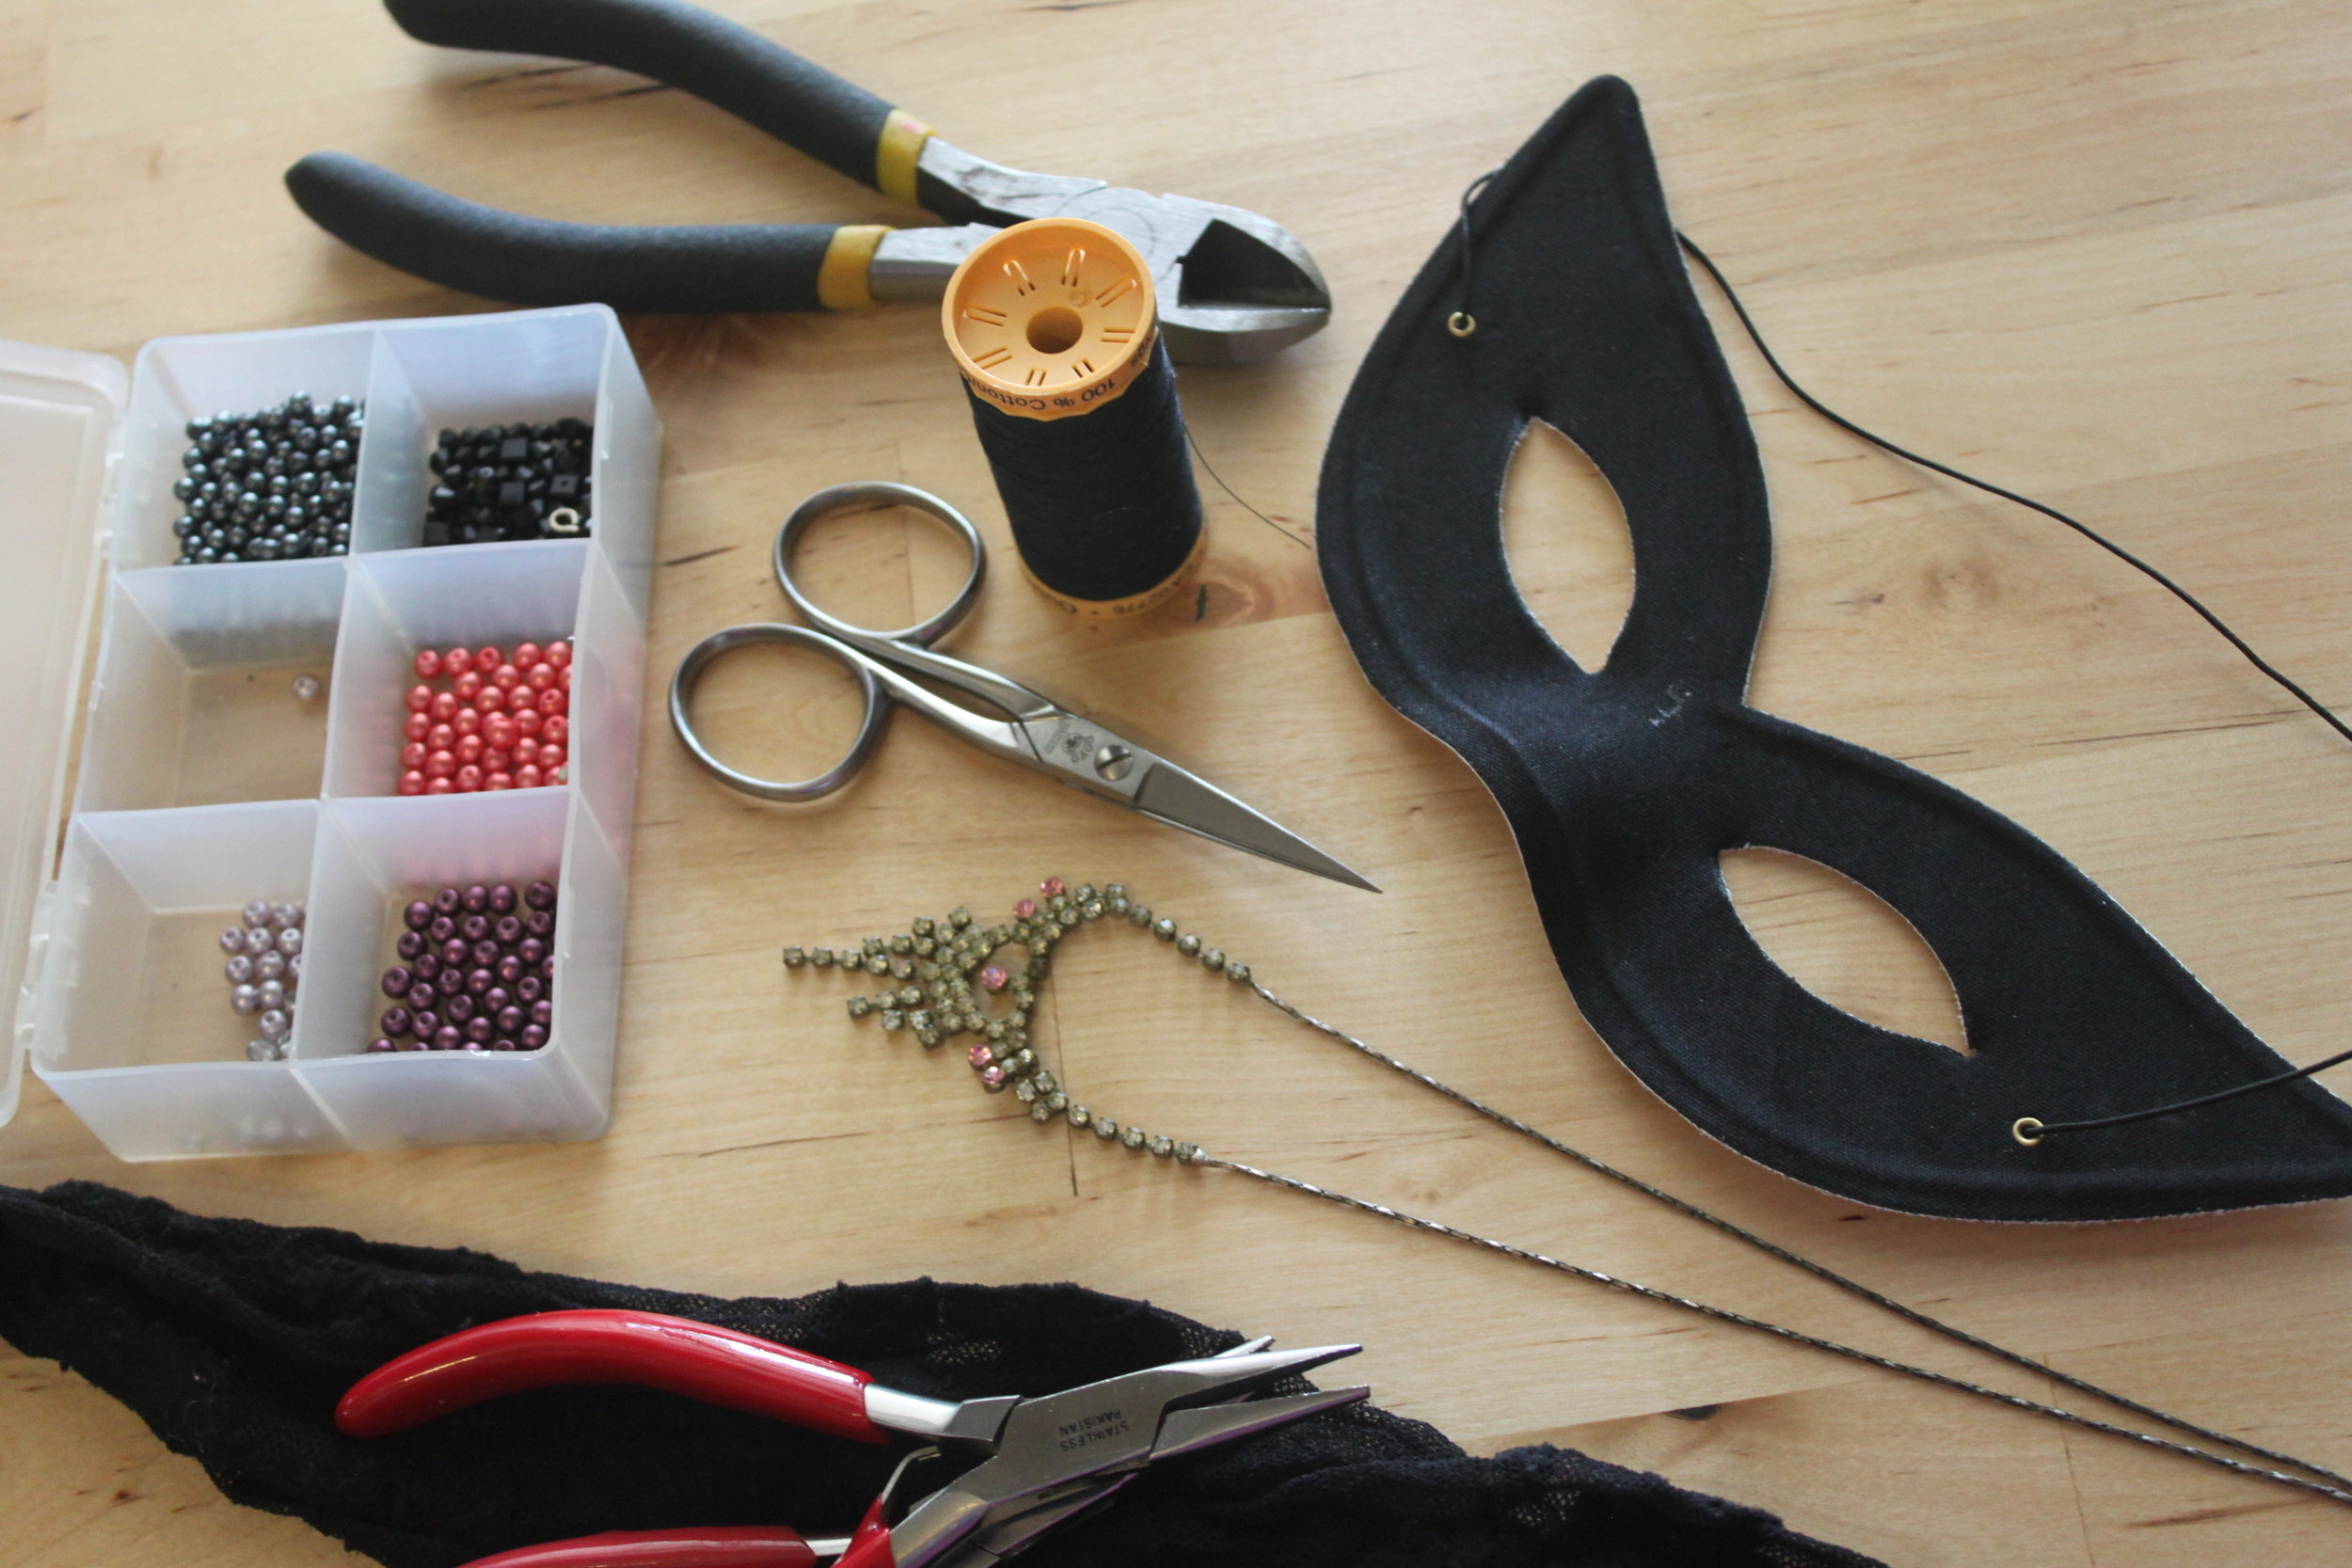
D-I-Y-CommentI love Halloween! I look forward to it every year because it is such a source of creative energy. Perhaps that is because Halloween is more transparently handmade. Here is the first of 3 Halloween mask DIYs that I have dreamed up for this year! It's elegant, inexpensive, and can be made with a majority of salvaged materials! 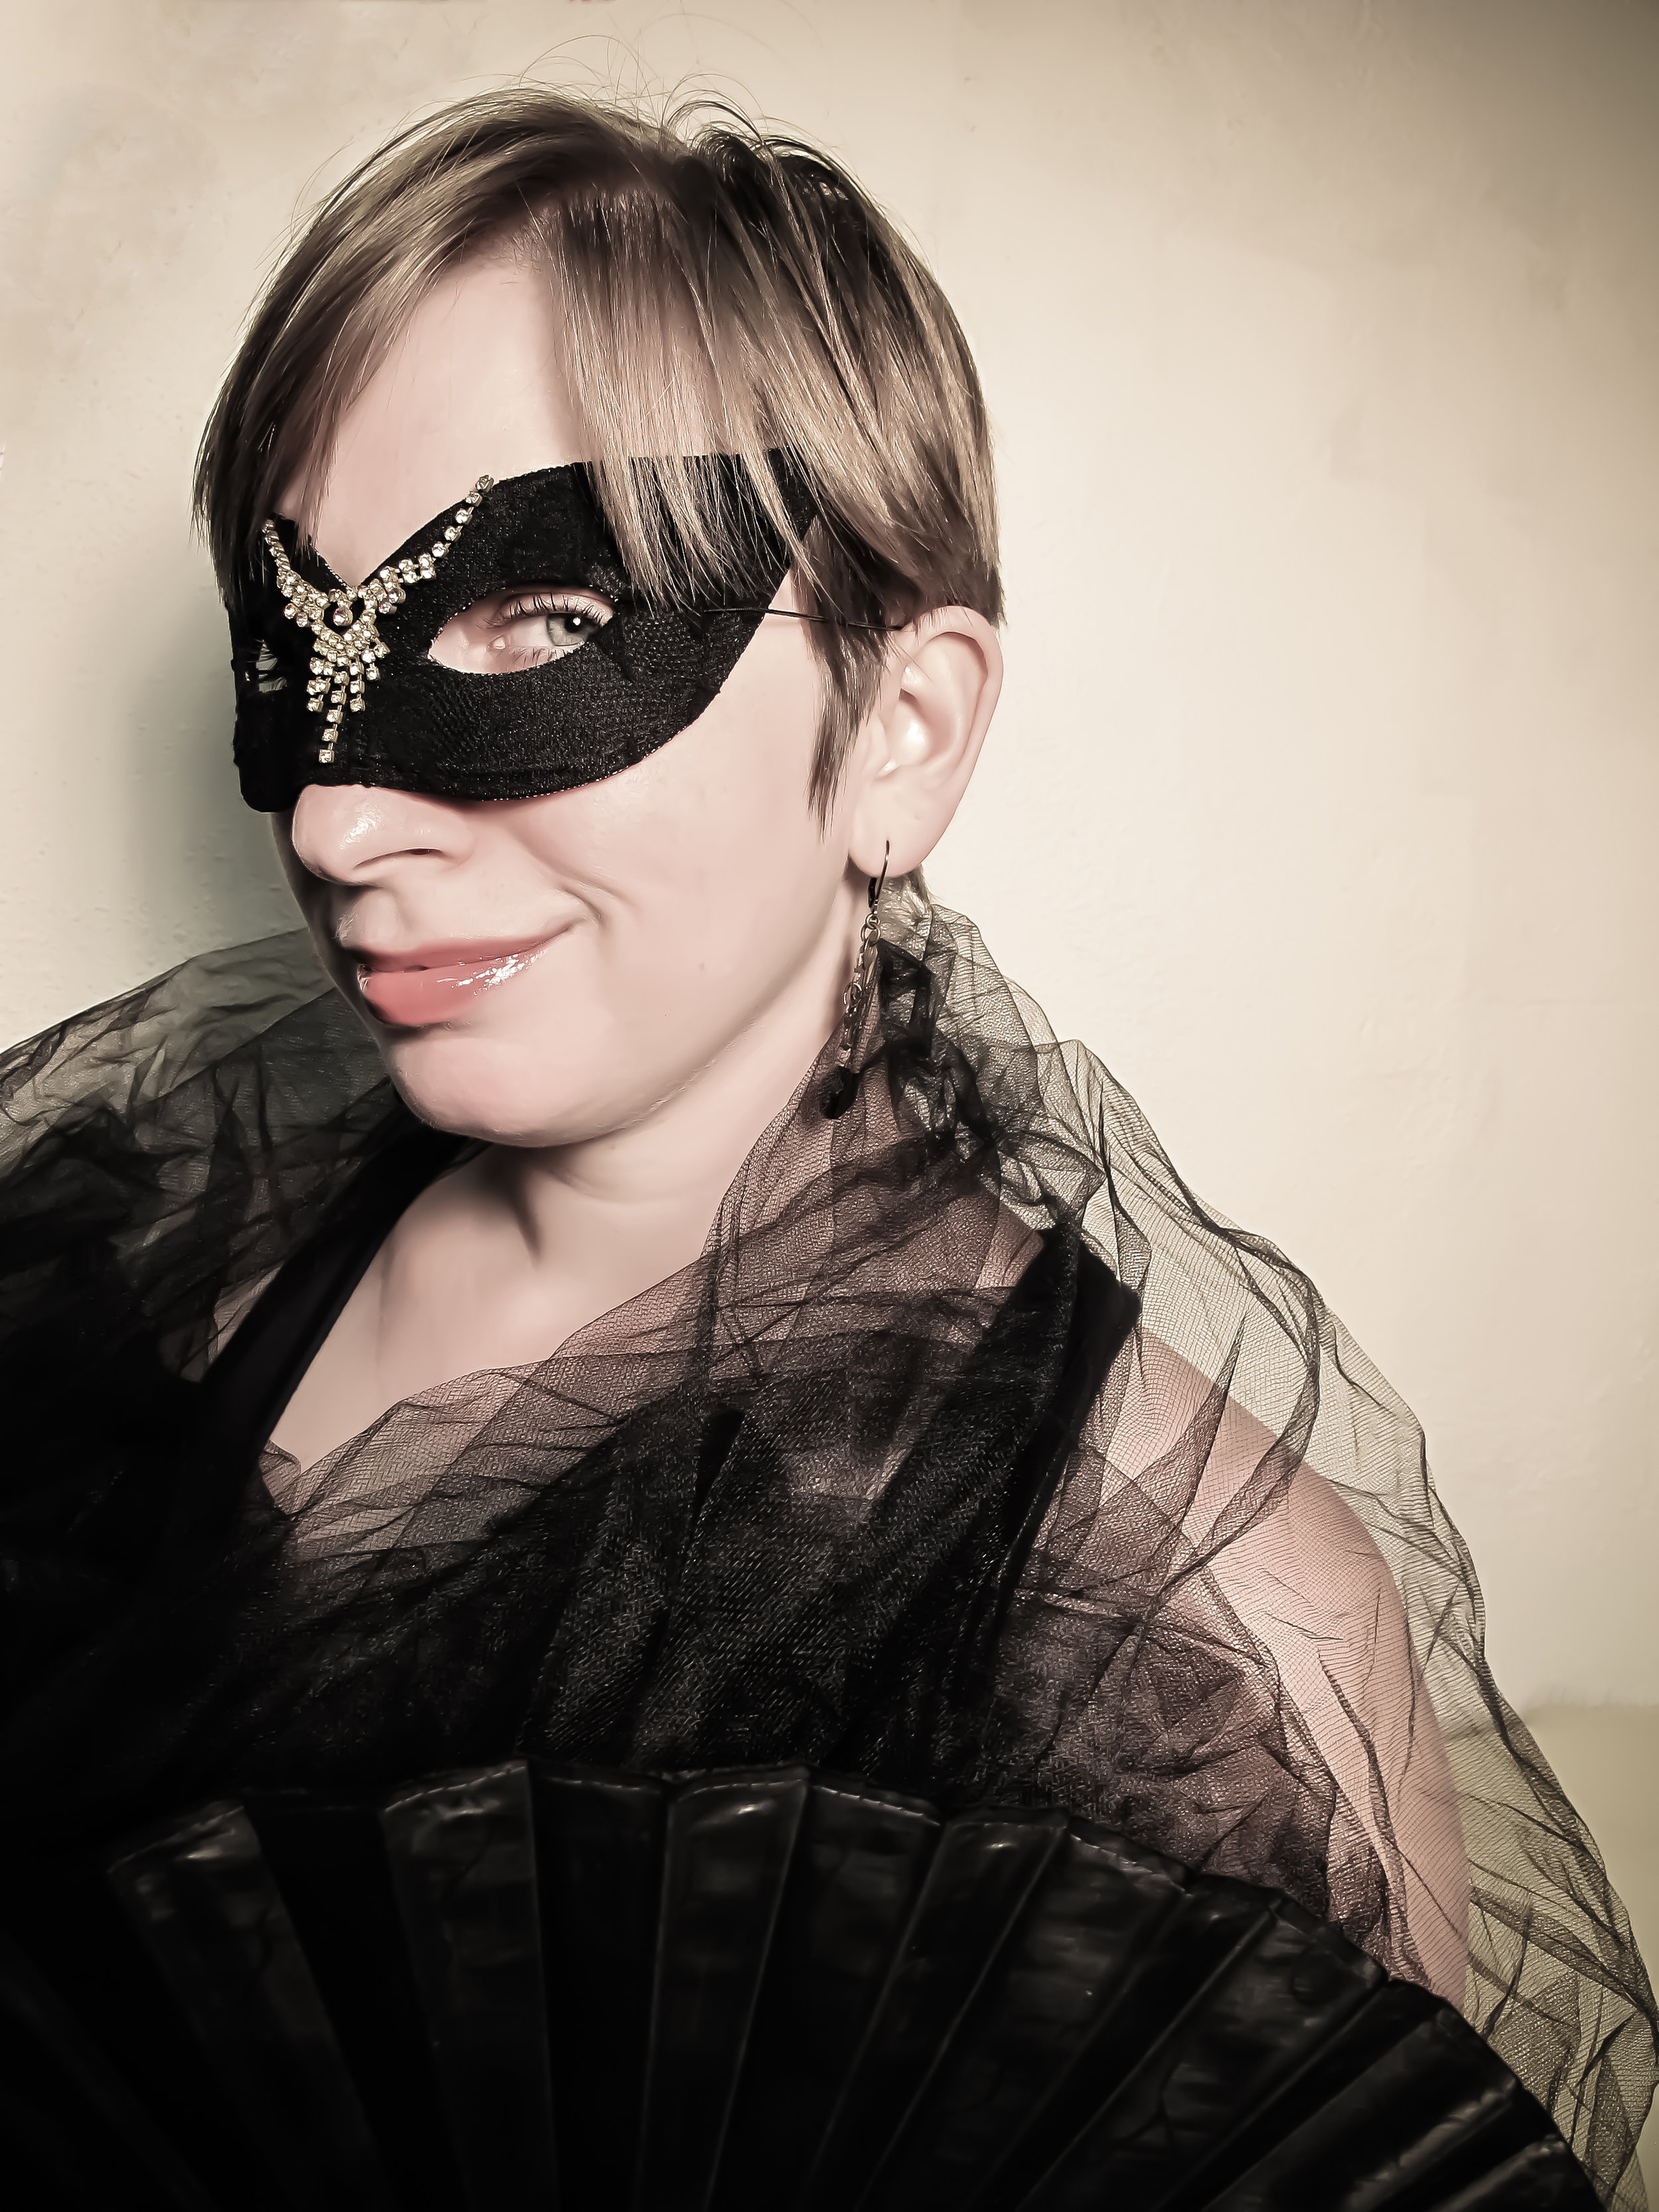 Here's what you'll need:
- Mask (mine was $2.99 from Party City)
- Lacy tights (mine were a pair that I had to stop wearing because of a huge tear--this is a great DIY for reusing ruined fancy/patterned tights)
- An old rhinestone necklace
- Needle & thread (in a color that matches)
- Wire cutters (or toenail clippers)
- Pliers (if needed)
- Embroidery needle
- Pins
- Scissors
- Beads (optional, if desired)
- Untie your elastic head strap from your mask. Set elastic aside for later.

- Next, cut a hole in the foot of your tights. The foot & lower leg areas are the best spots because they are smaller and less stretched out.
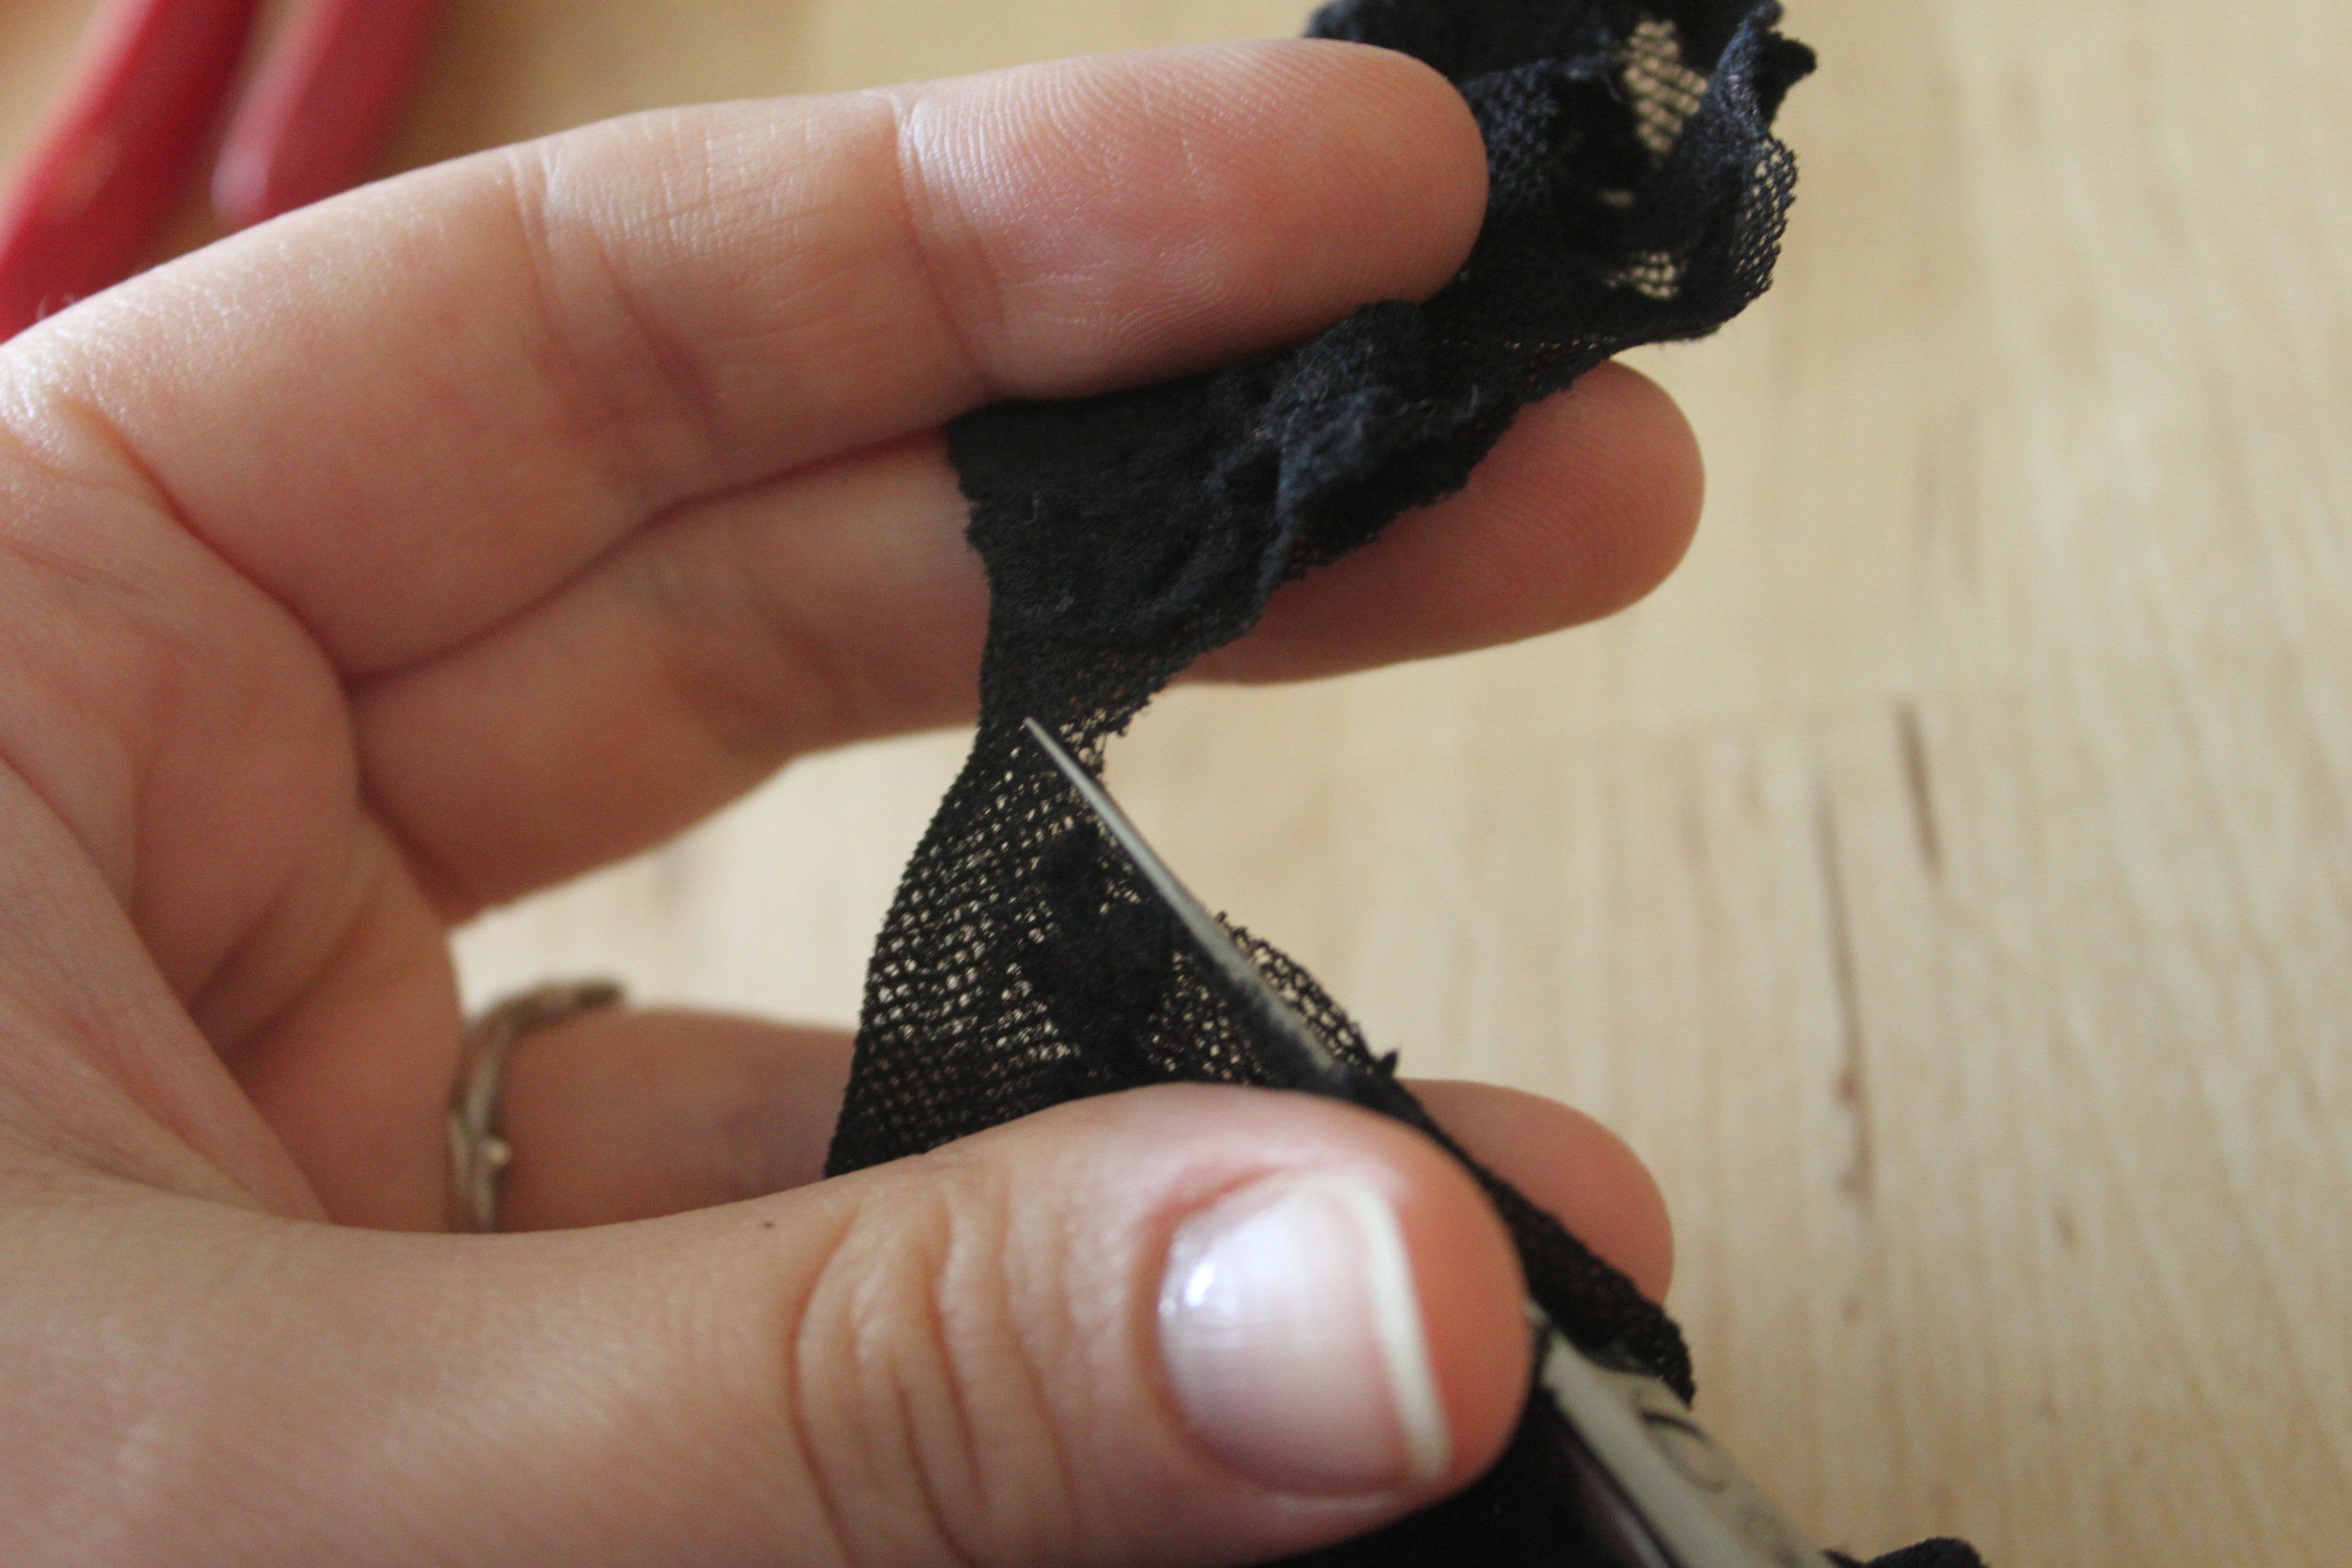
- Insert your mask into the tights. Once you've got your mask completely covered and the pattern/lace positioned as you like it, cut the other end of the tights (opposite your initial entry point detailed in Step 2). Then cut a slit in the back of your tights (and the back of your mask).

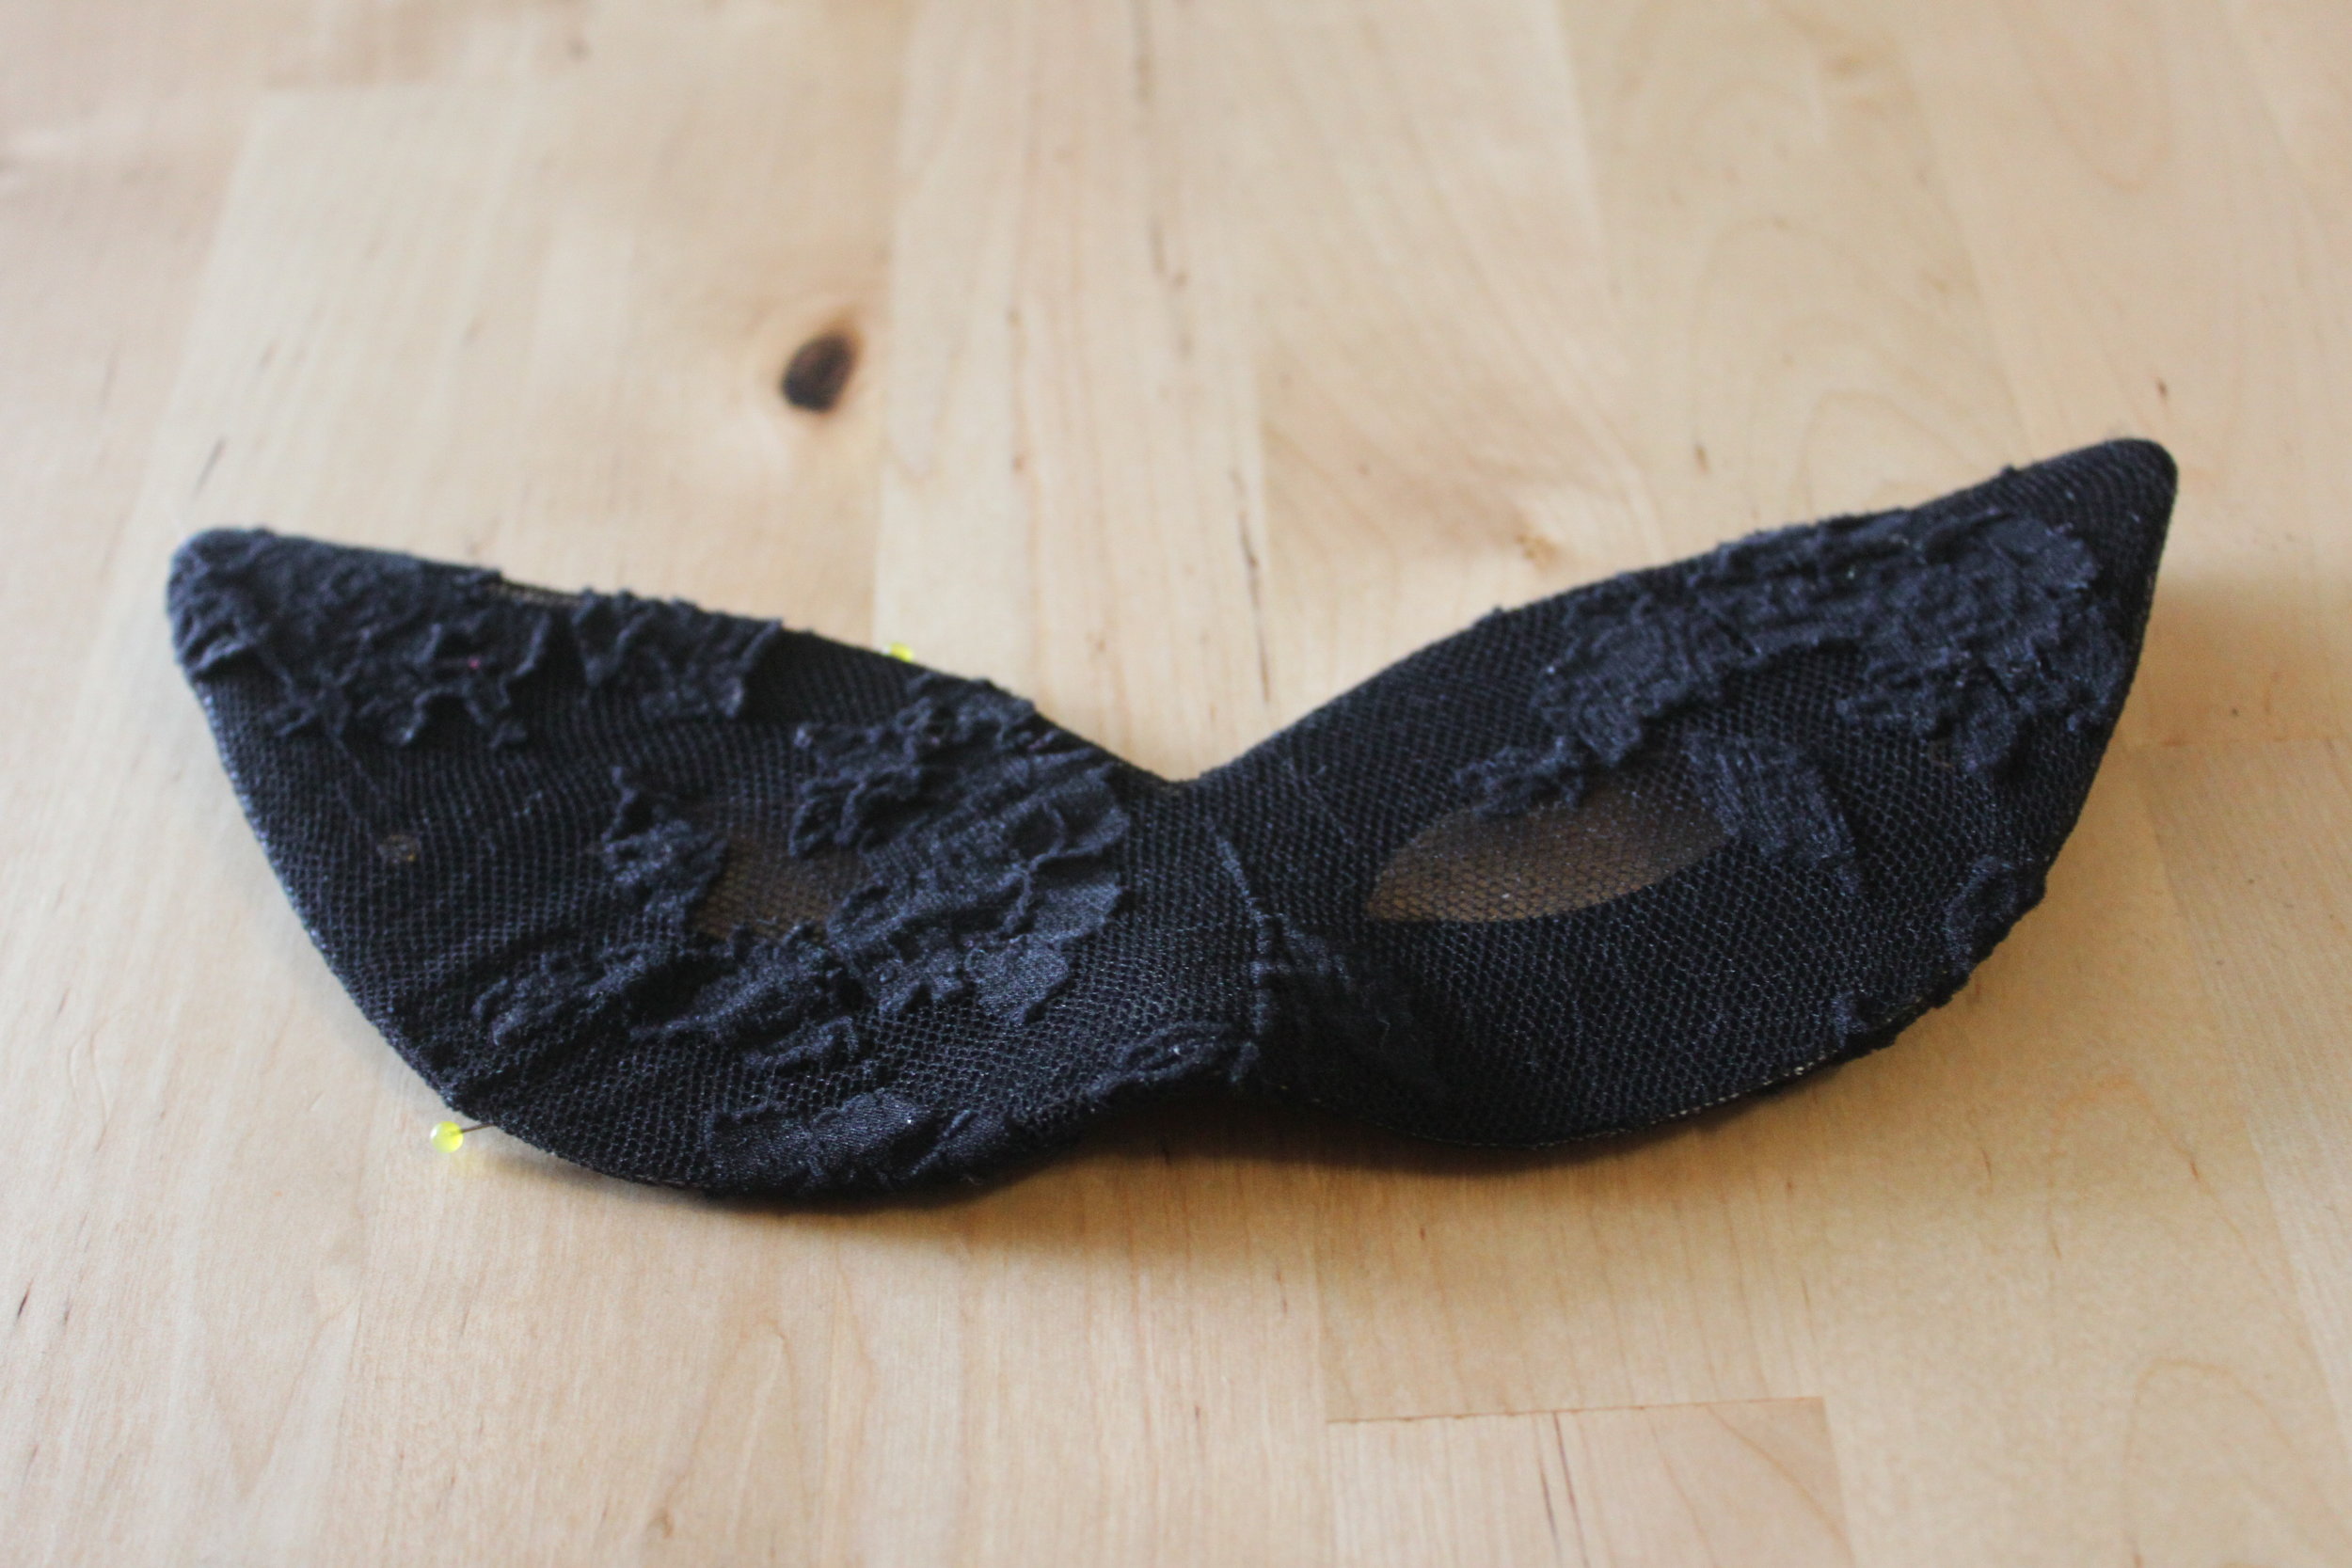
- Pin the tights in place. Be sure to pull the fabric taut over the front of your mask & over to the back of your mask.
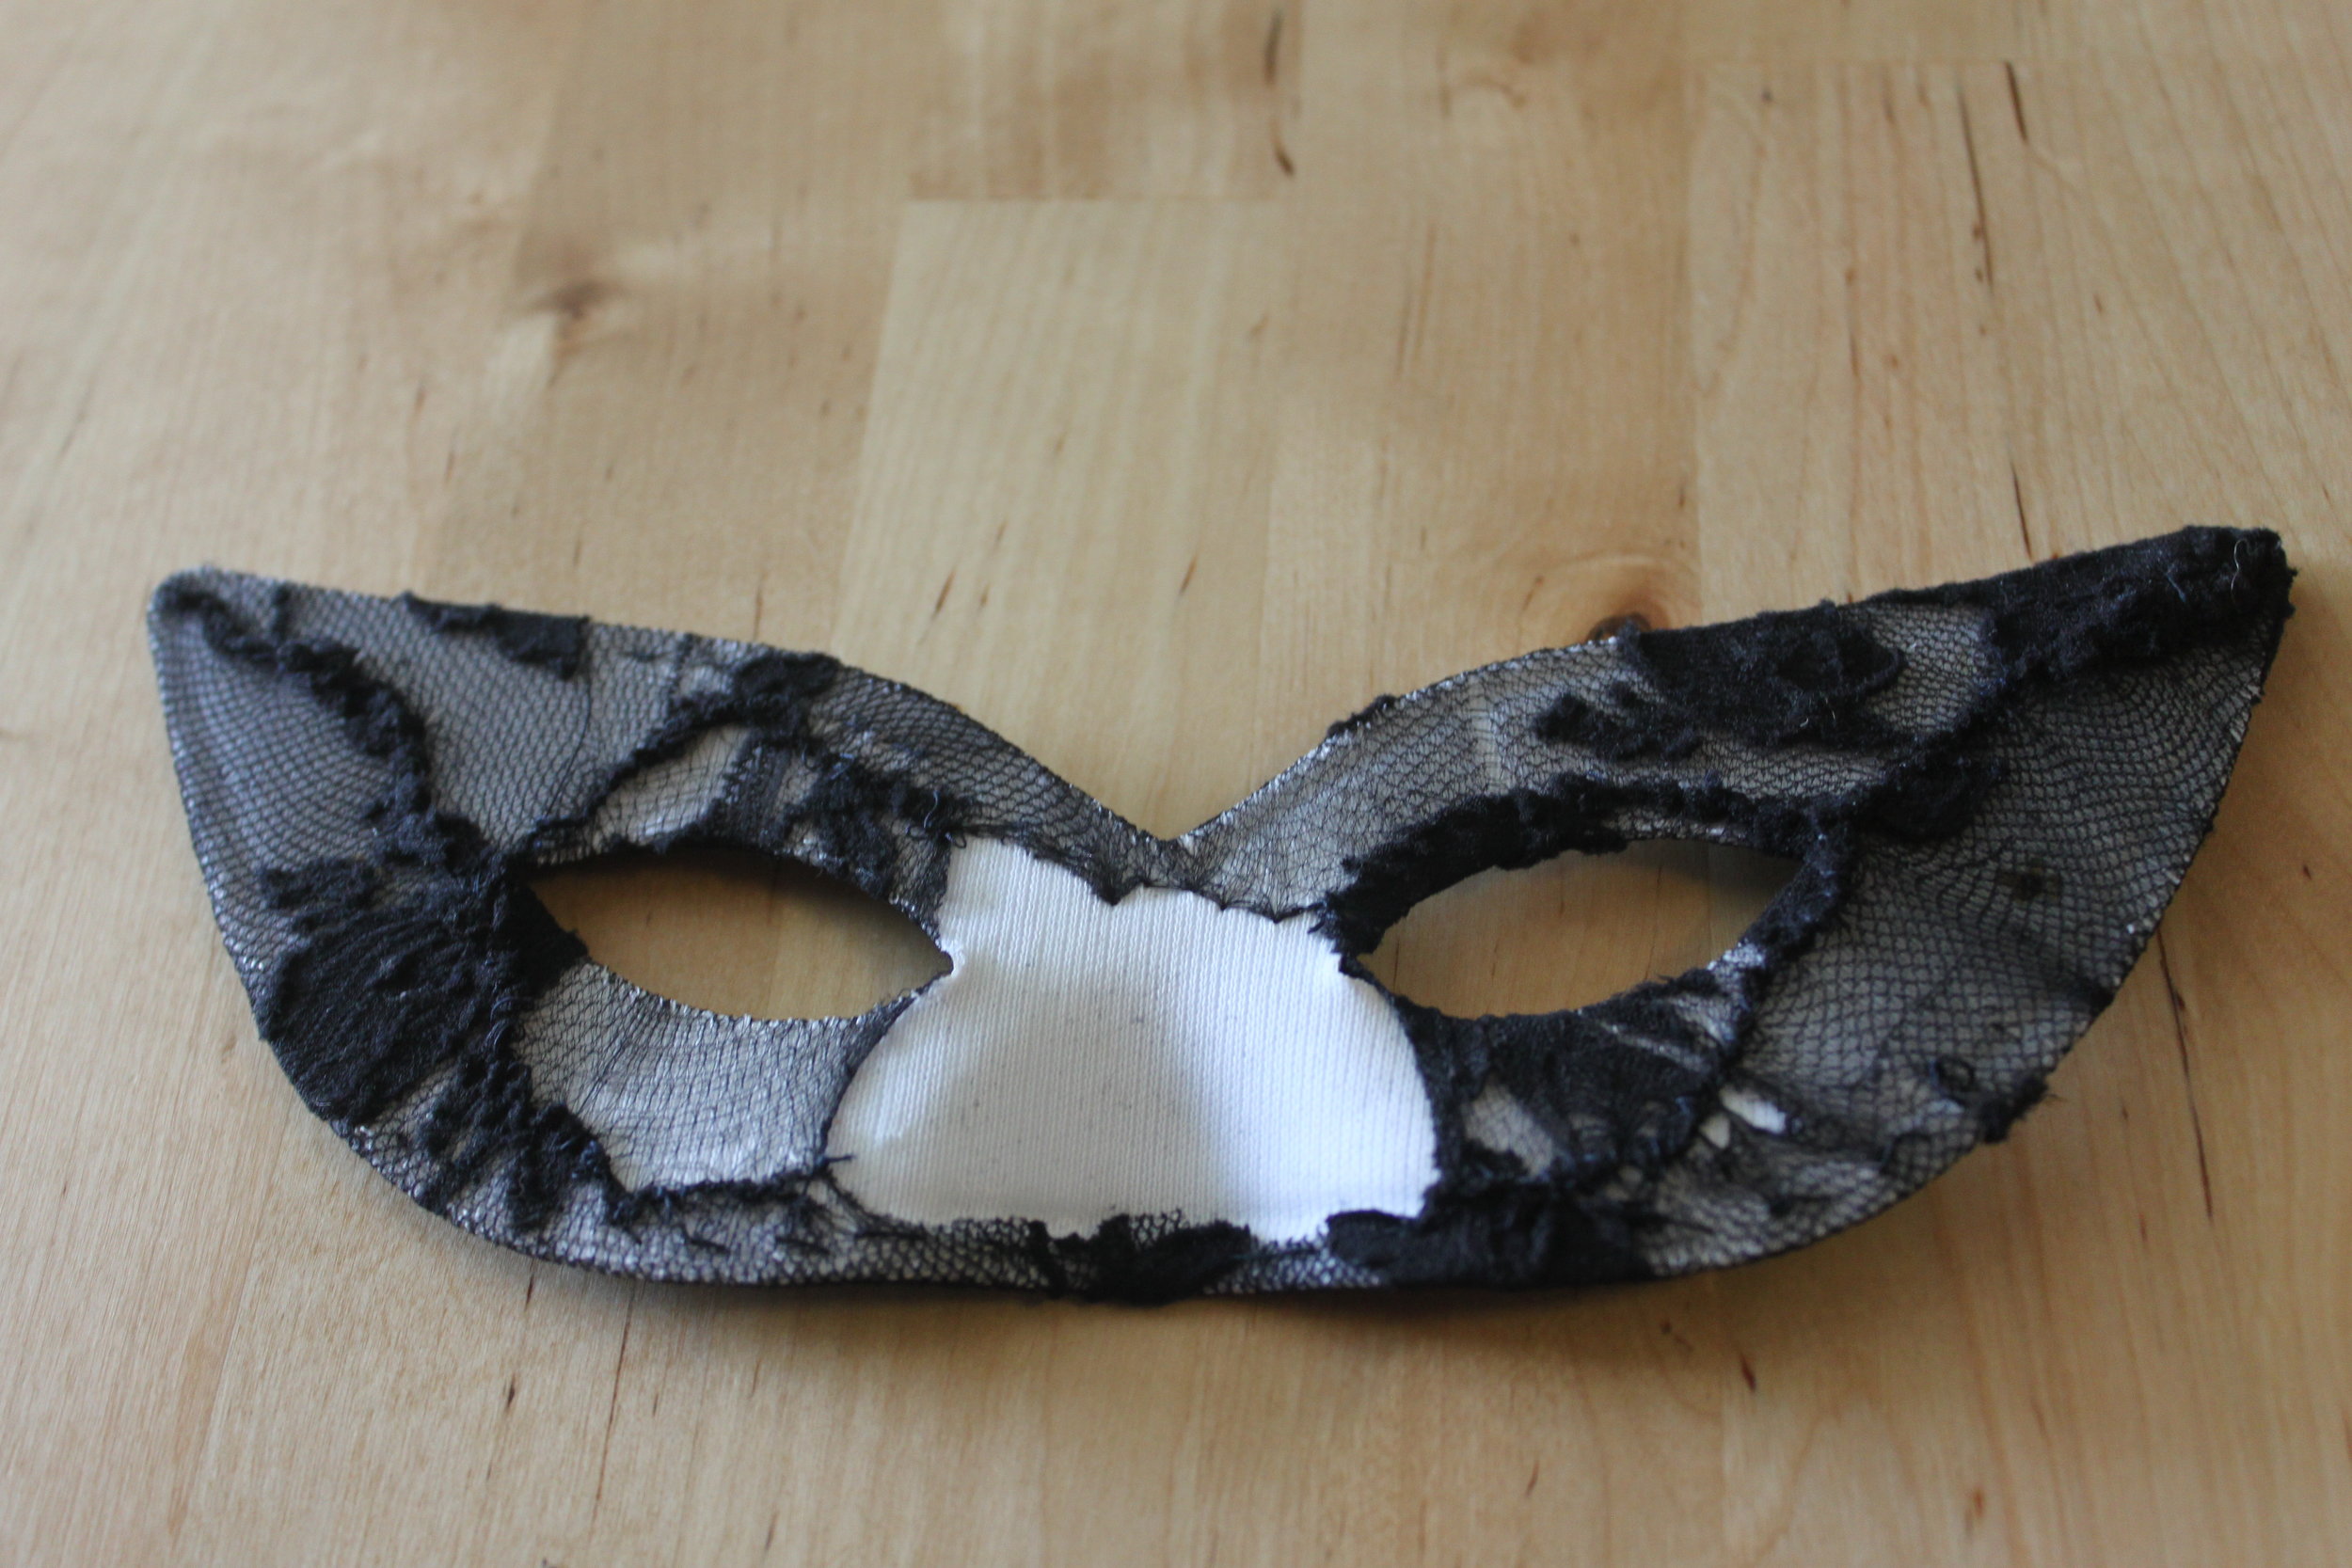
 When you've finished pinning, your tights should be firmly taut around your mask (as pictured below). If you have any loose fabric, re-pin that area.
- Next sew the tights in place by stitching around the perimeter of the mask. (If your mask is shaped, as this one is, be sure to hand stitch the tights in place otherwise your machine will crack the mask or break/ruin the molding & shaping. If you have a simple cloth mask without any shaping, you can use a machine for this step.) Be sure to keep all of your stitches even and small. Tie sturdy knots.
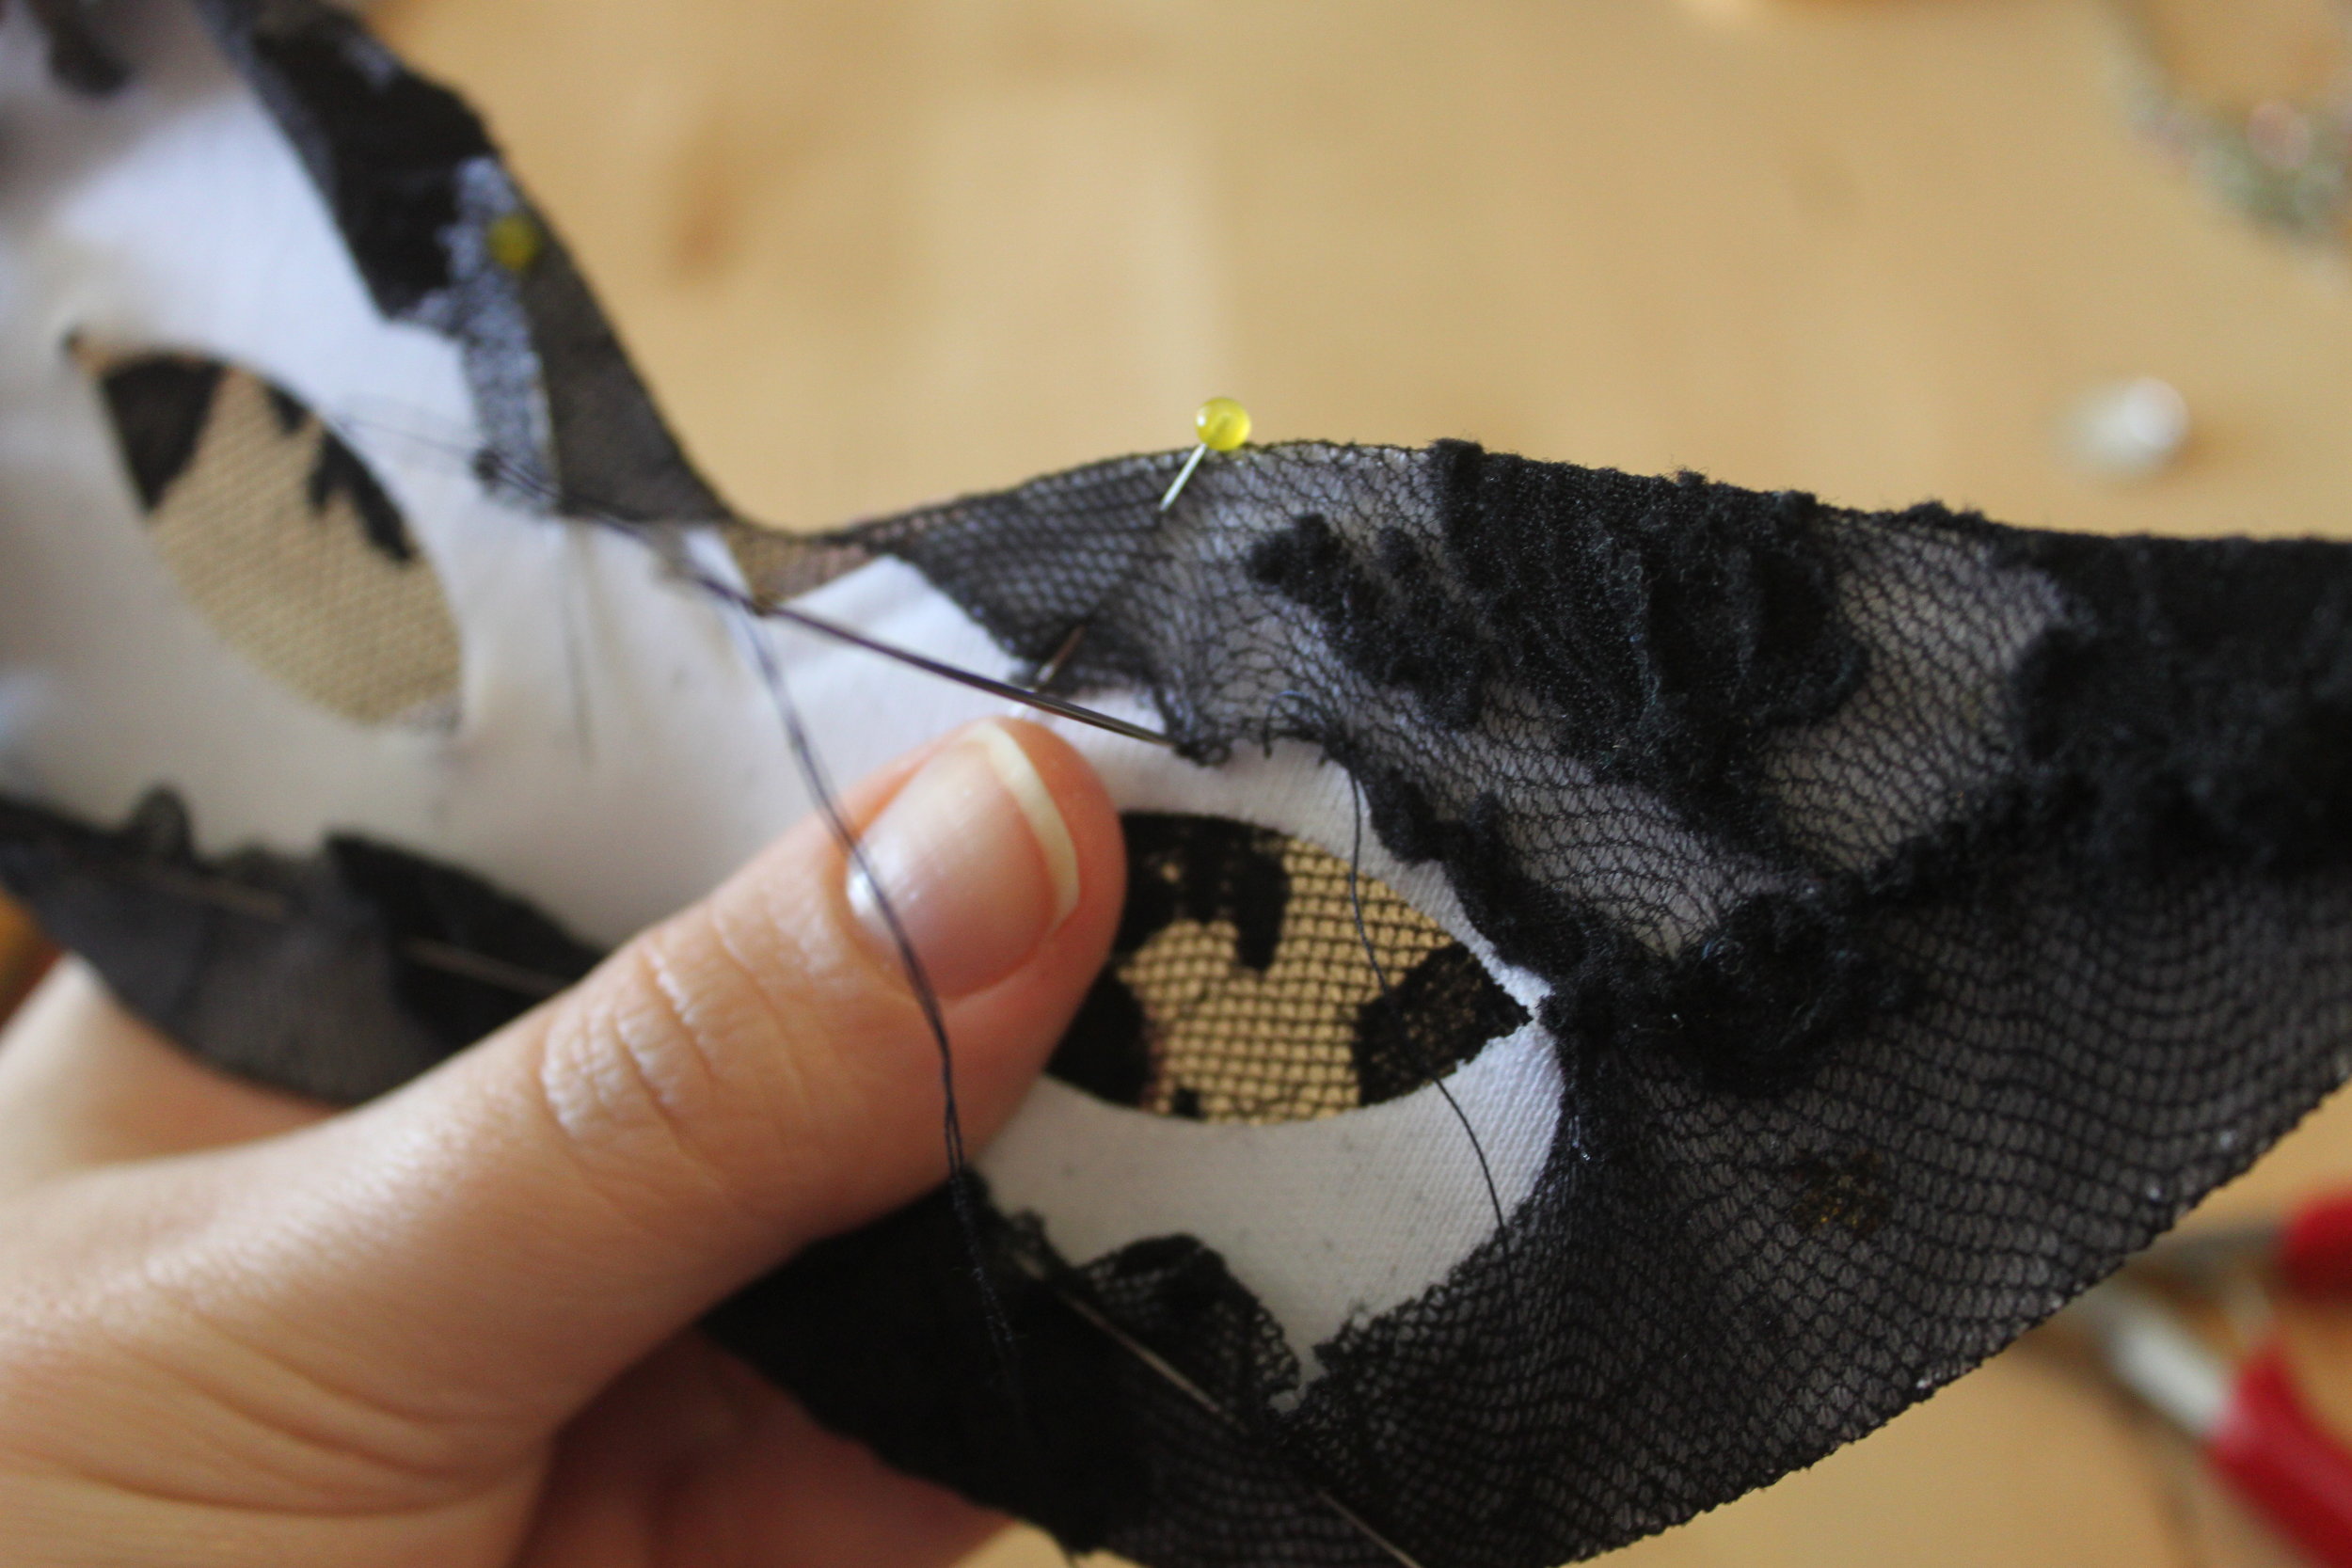 Be sure that as you go, you are continuing to pull the tights taut. As you sew, feel free to trim any excess fabric. You don't want too much fabric in one place or it will cause your mask to lay crooked on your face.
 - Next, cut slits in the fabric in the middle of the eye holes of your mask. Pull these taut around to the back of your mask. Pin if needed.

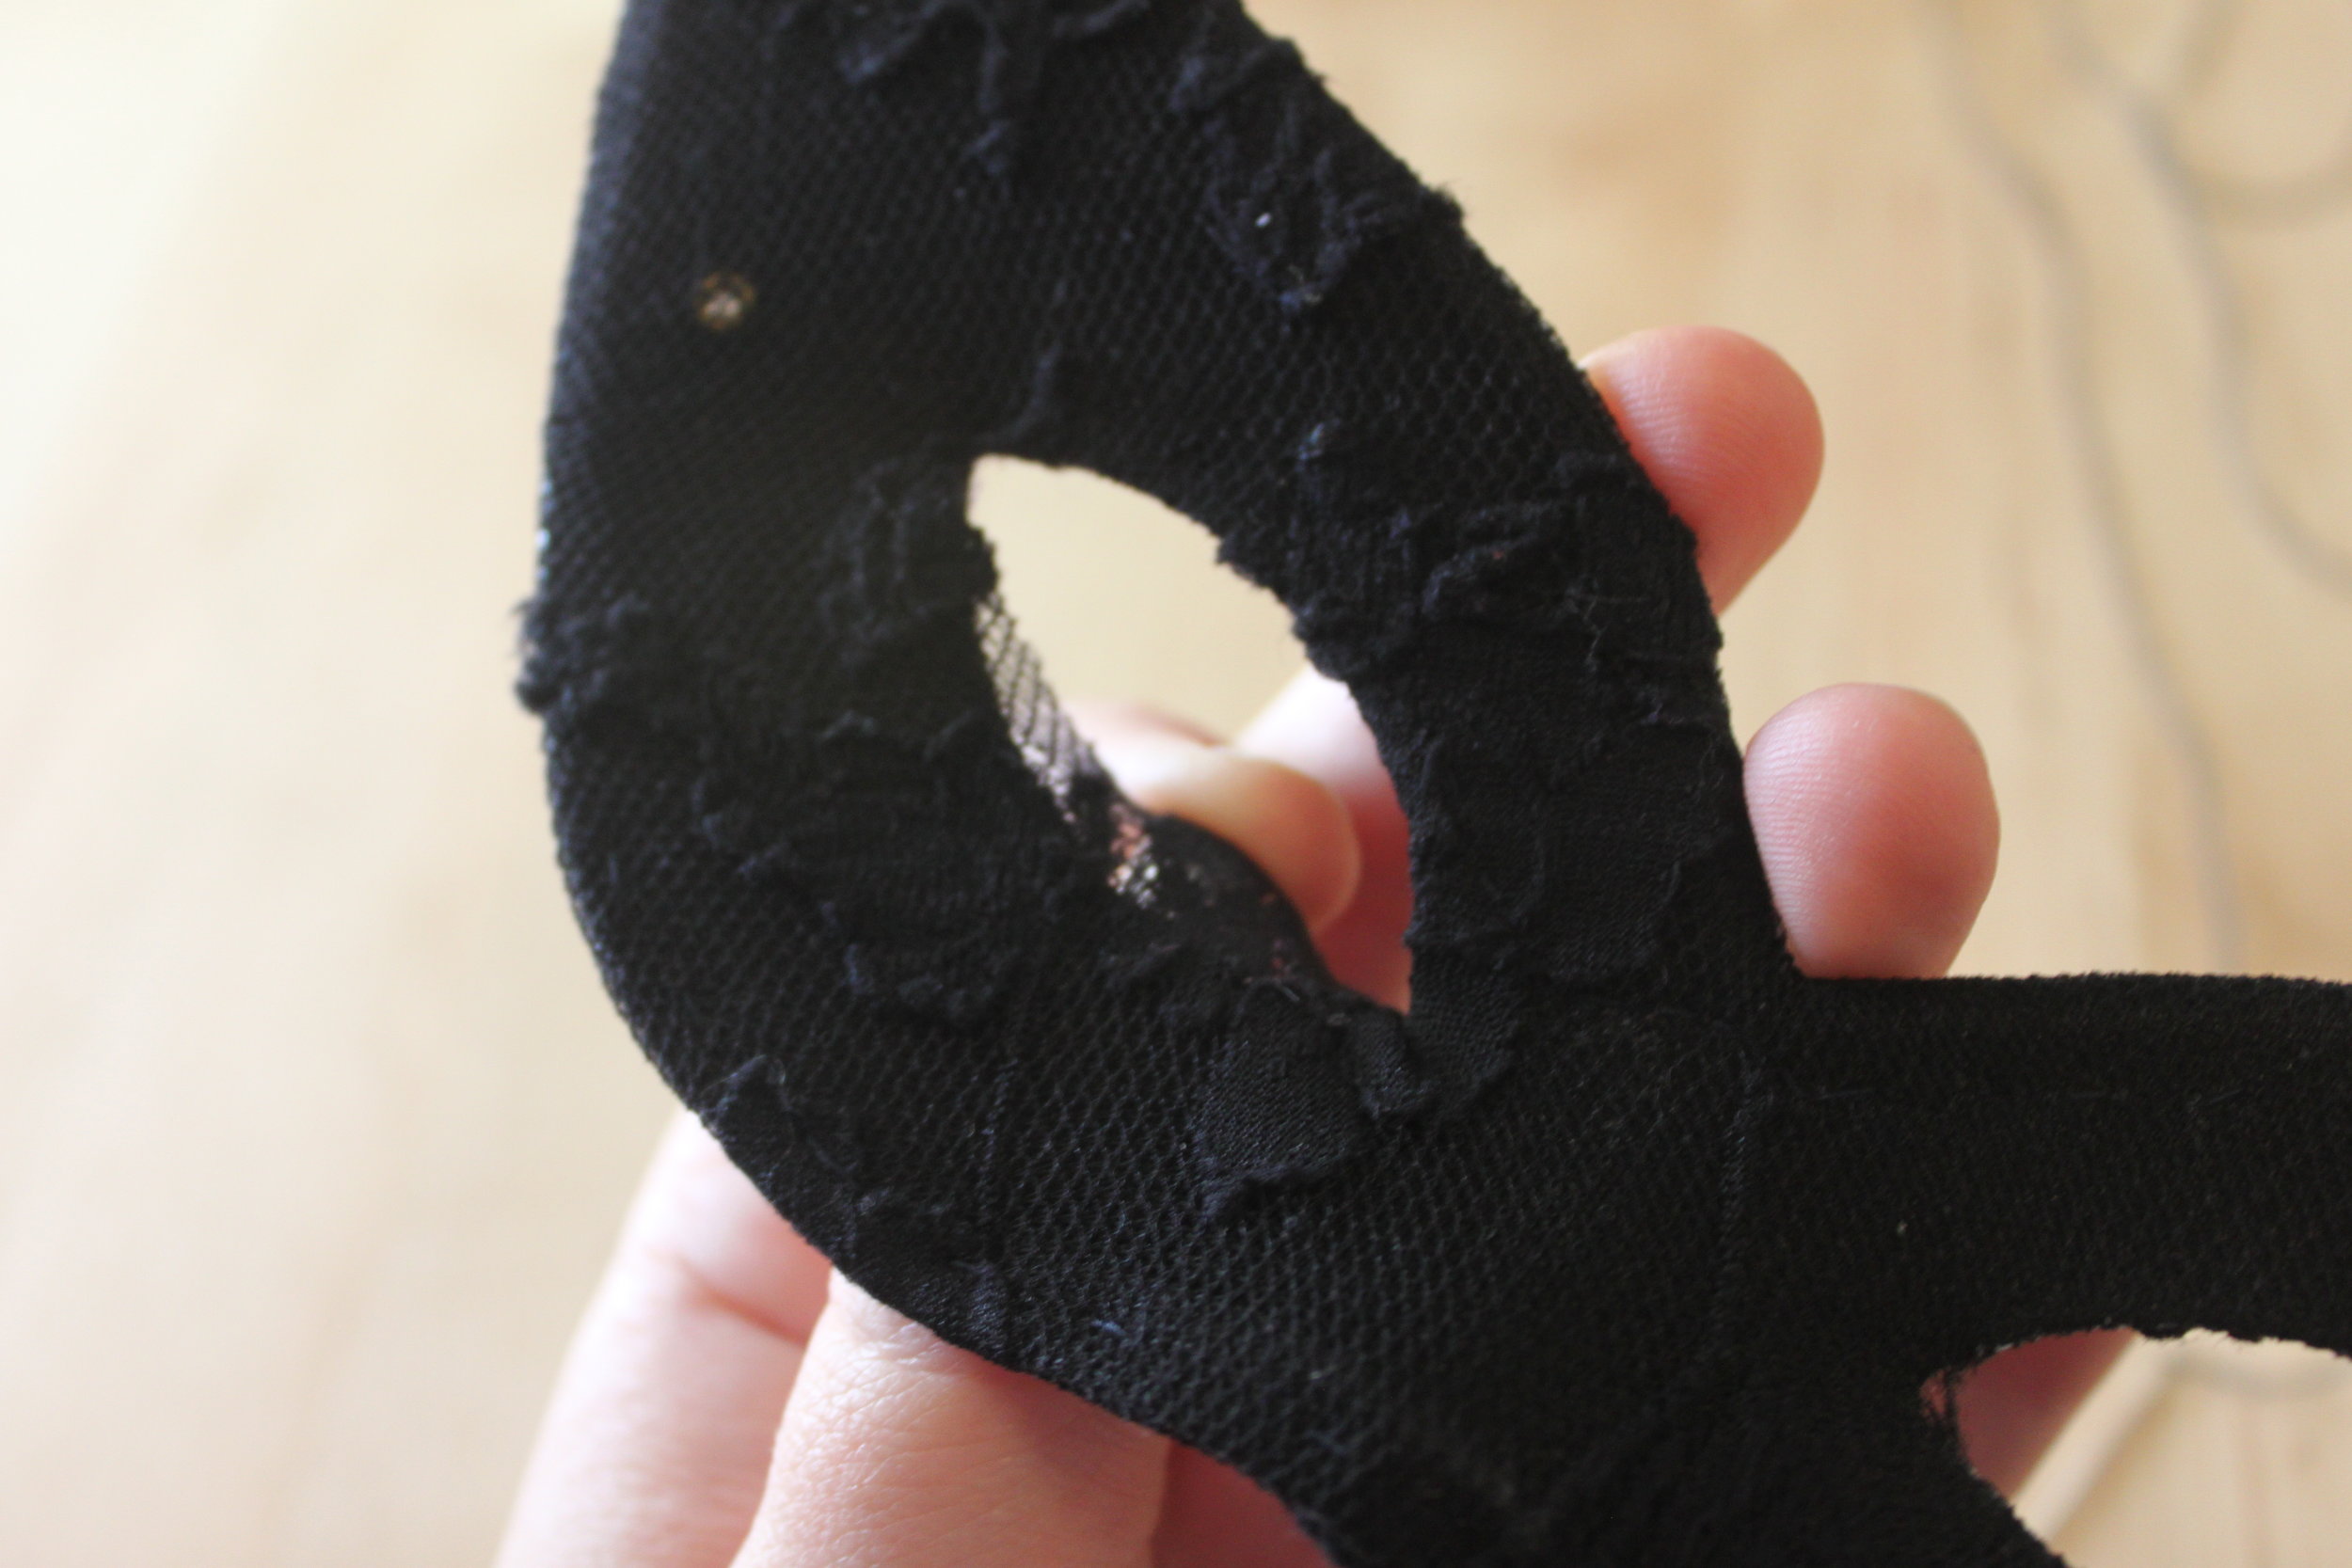
- Sew the tights in place by stitching the fabric you've pulled to the back of your mask (from the slit) to the fabric above it/below it (above, if stitching the top of the eye; below, if stitching the bottom of the eye).

- You've successfully covered your mask! On to the fun part, accessorizing it!
Adding fabric to a simple mask gives it texture & a bit of romance!
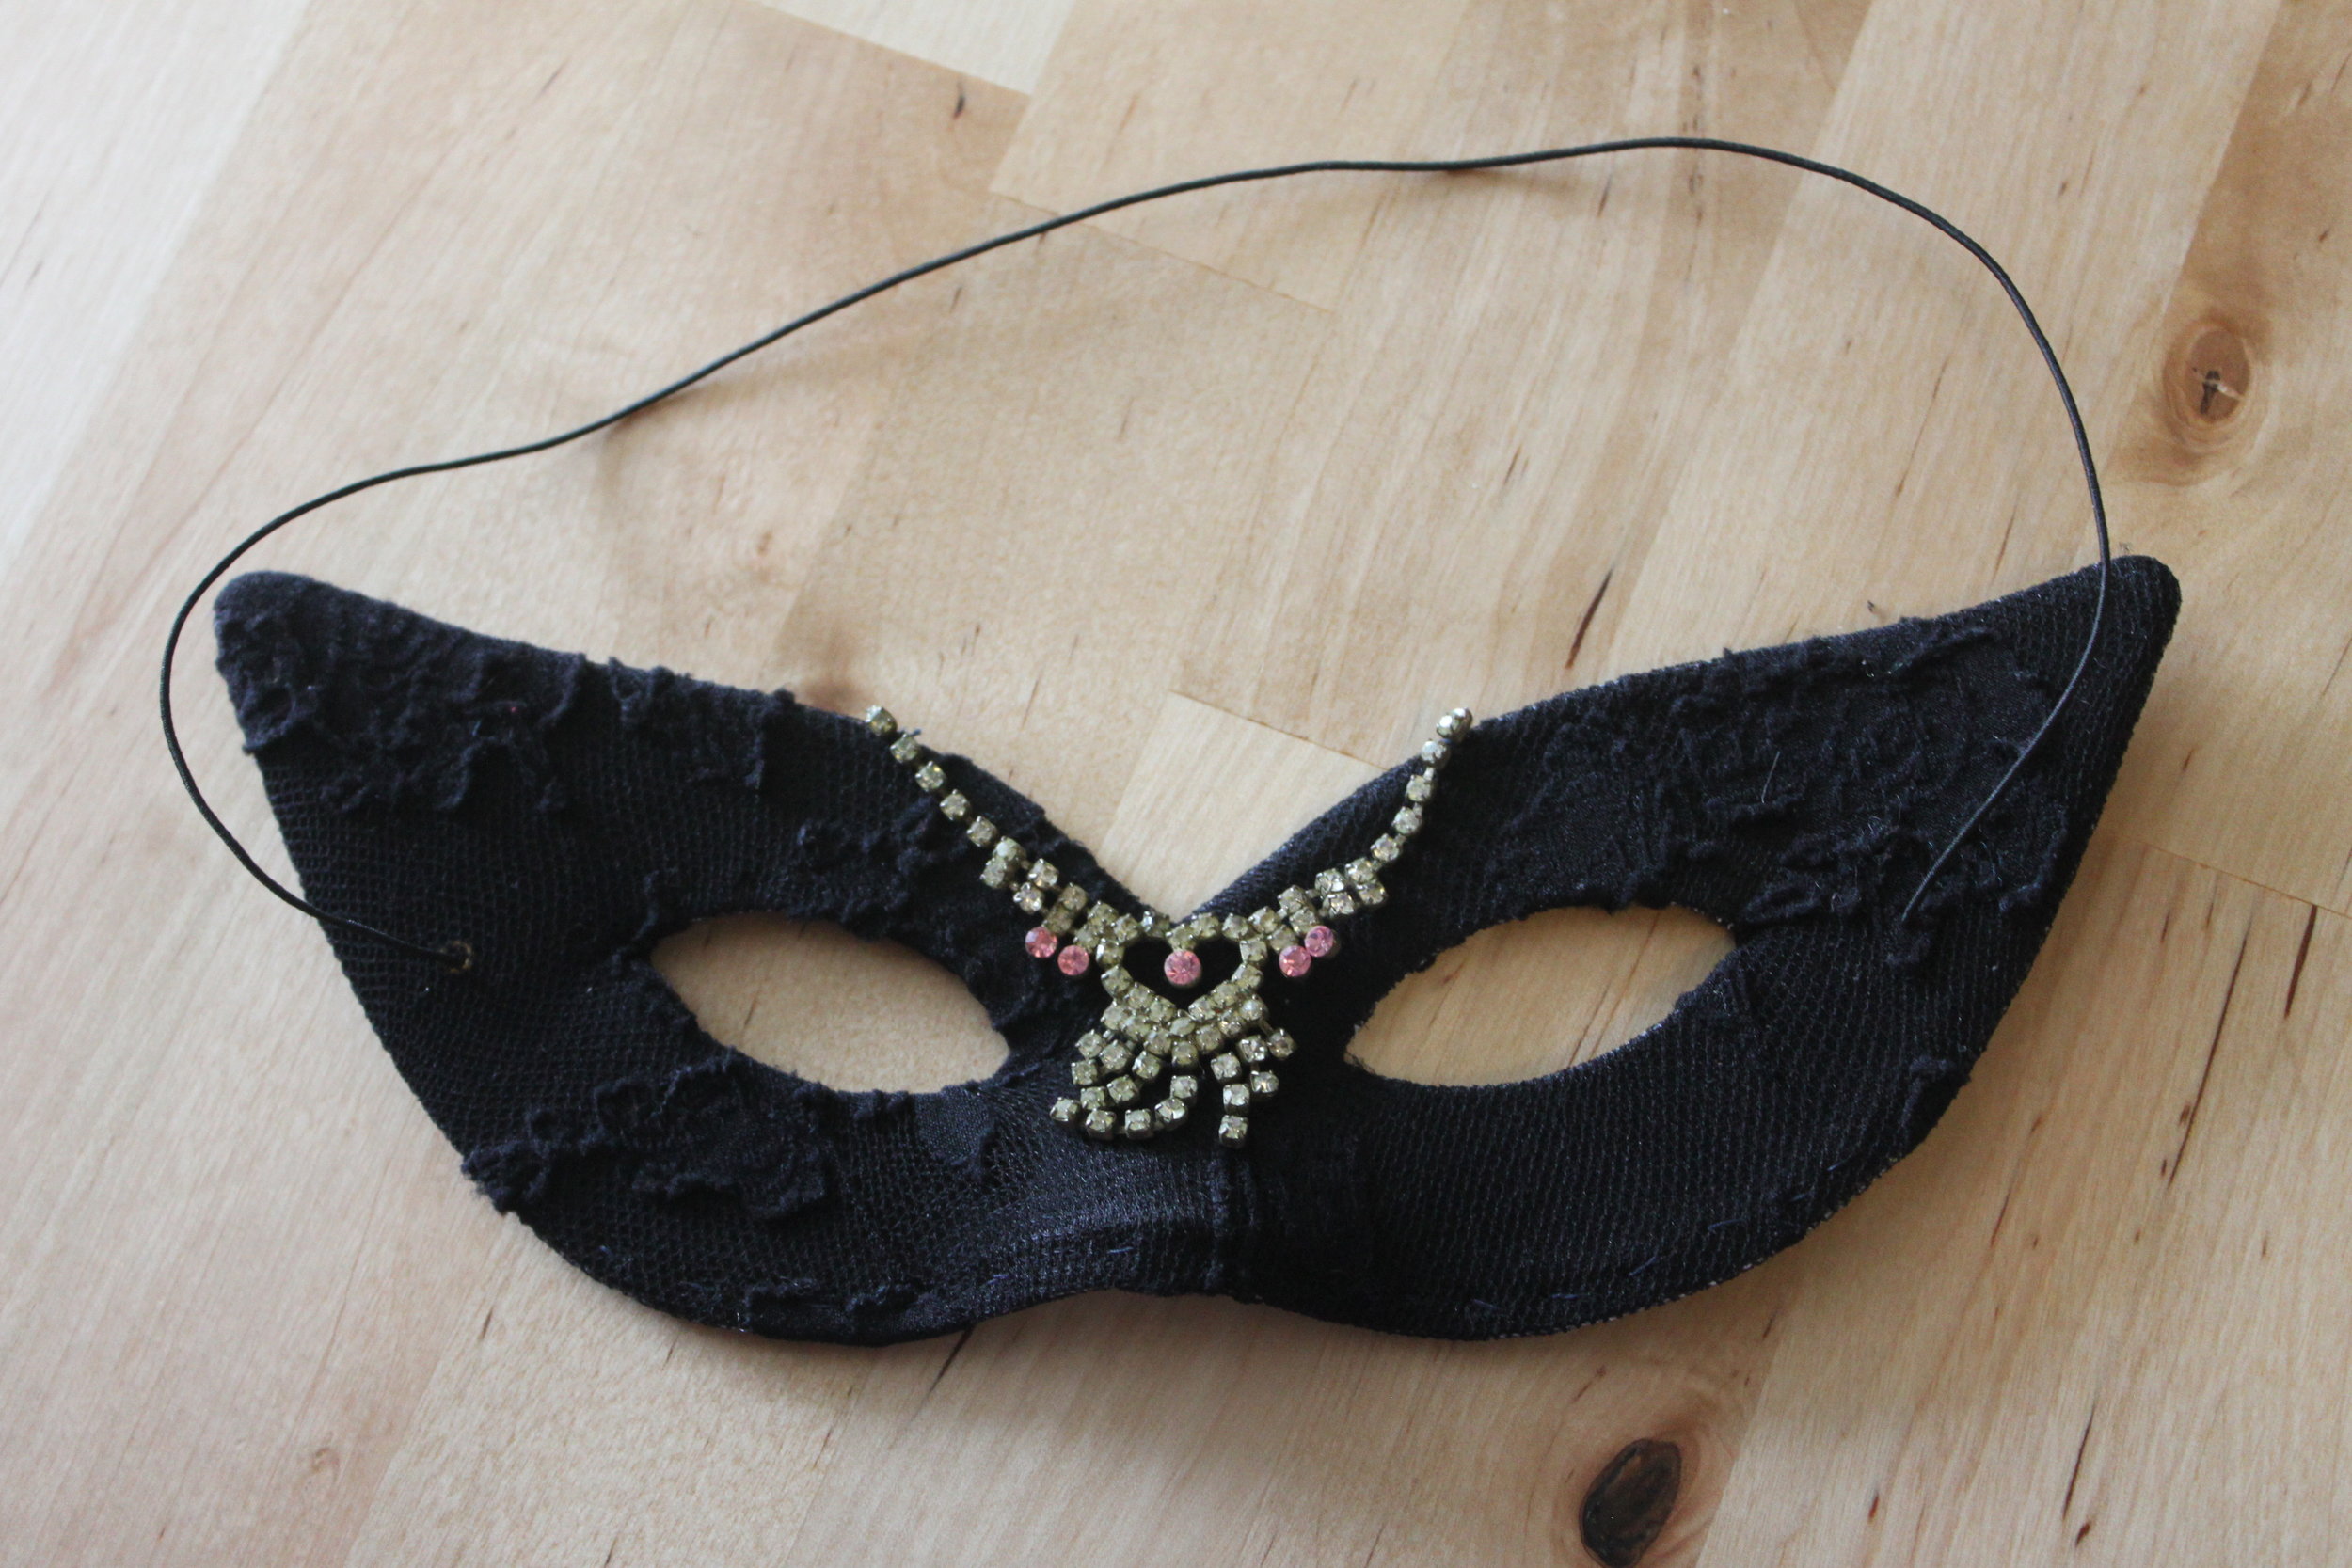
- Figure out the placement of your necklace piece & how much of the necklace you want to use on your mask. I liked mine just over the nose & at the start of the eyebrows on each side.

- Once you've figured out the placement, cut off any excess chain with your wire cutters (or toenail clippers, if you do not own a pair of wire cutters).
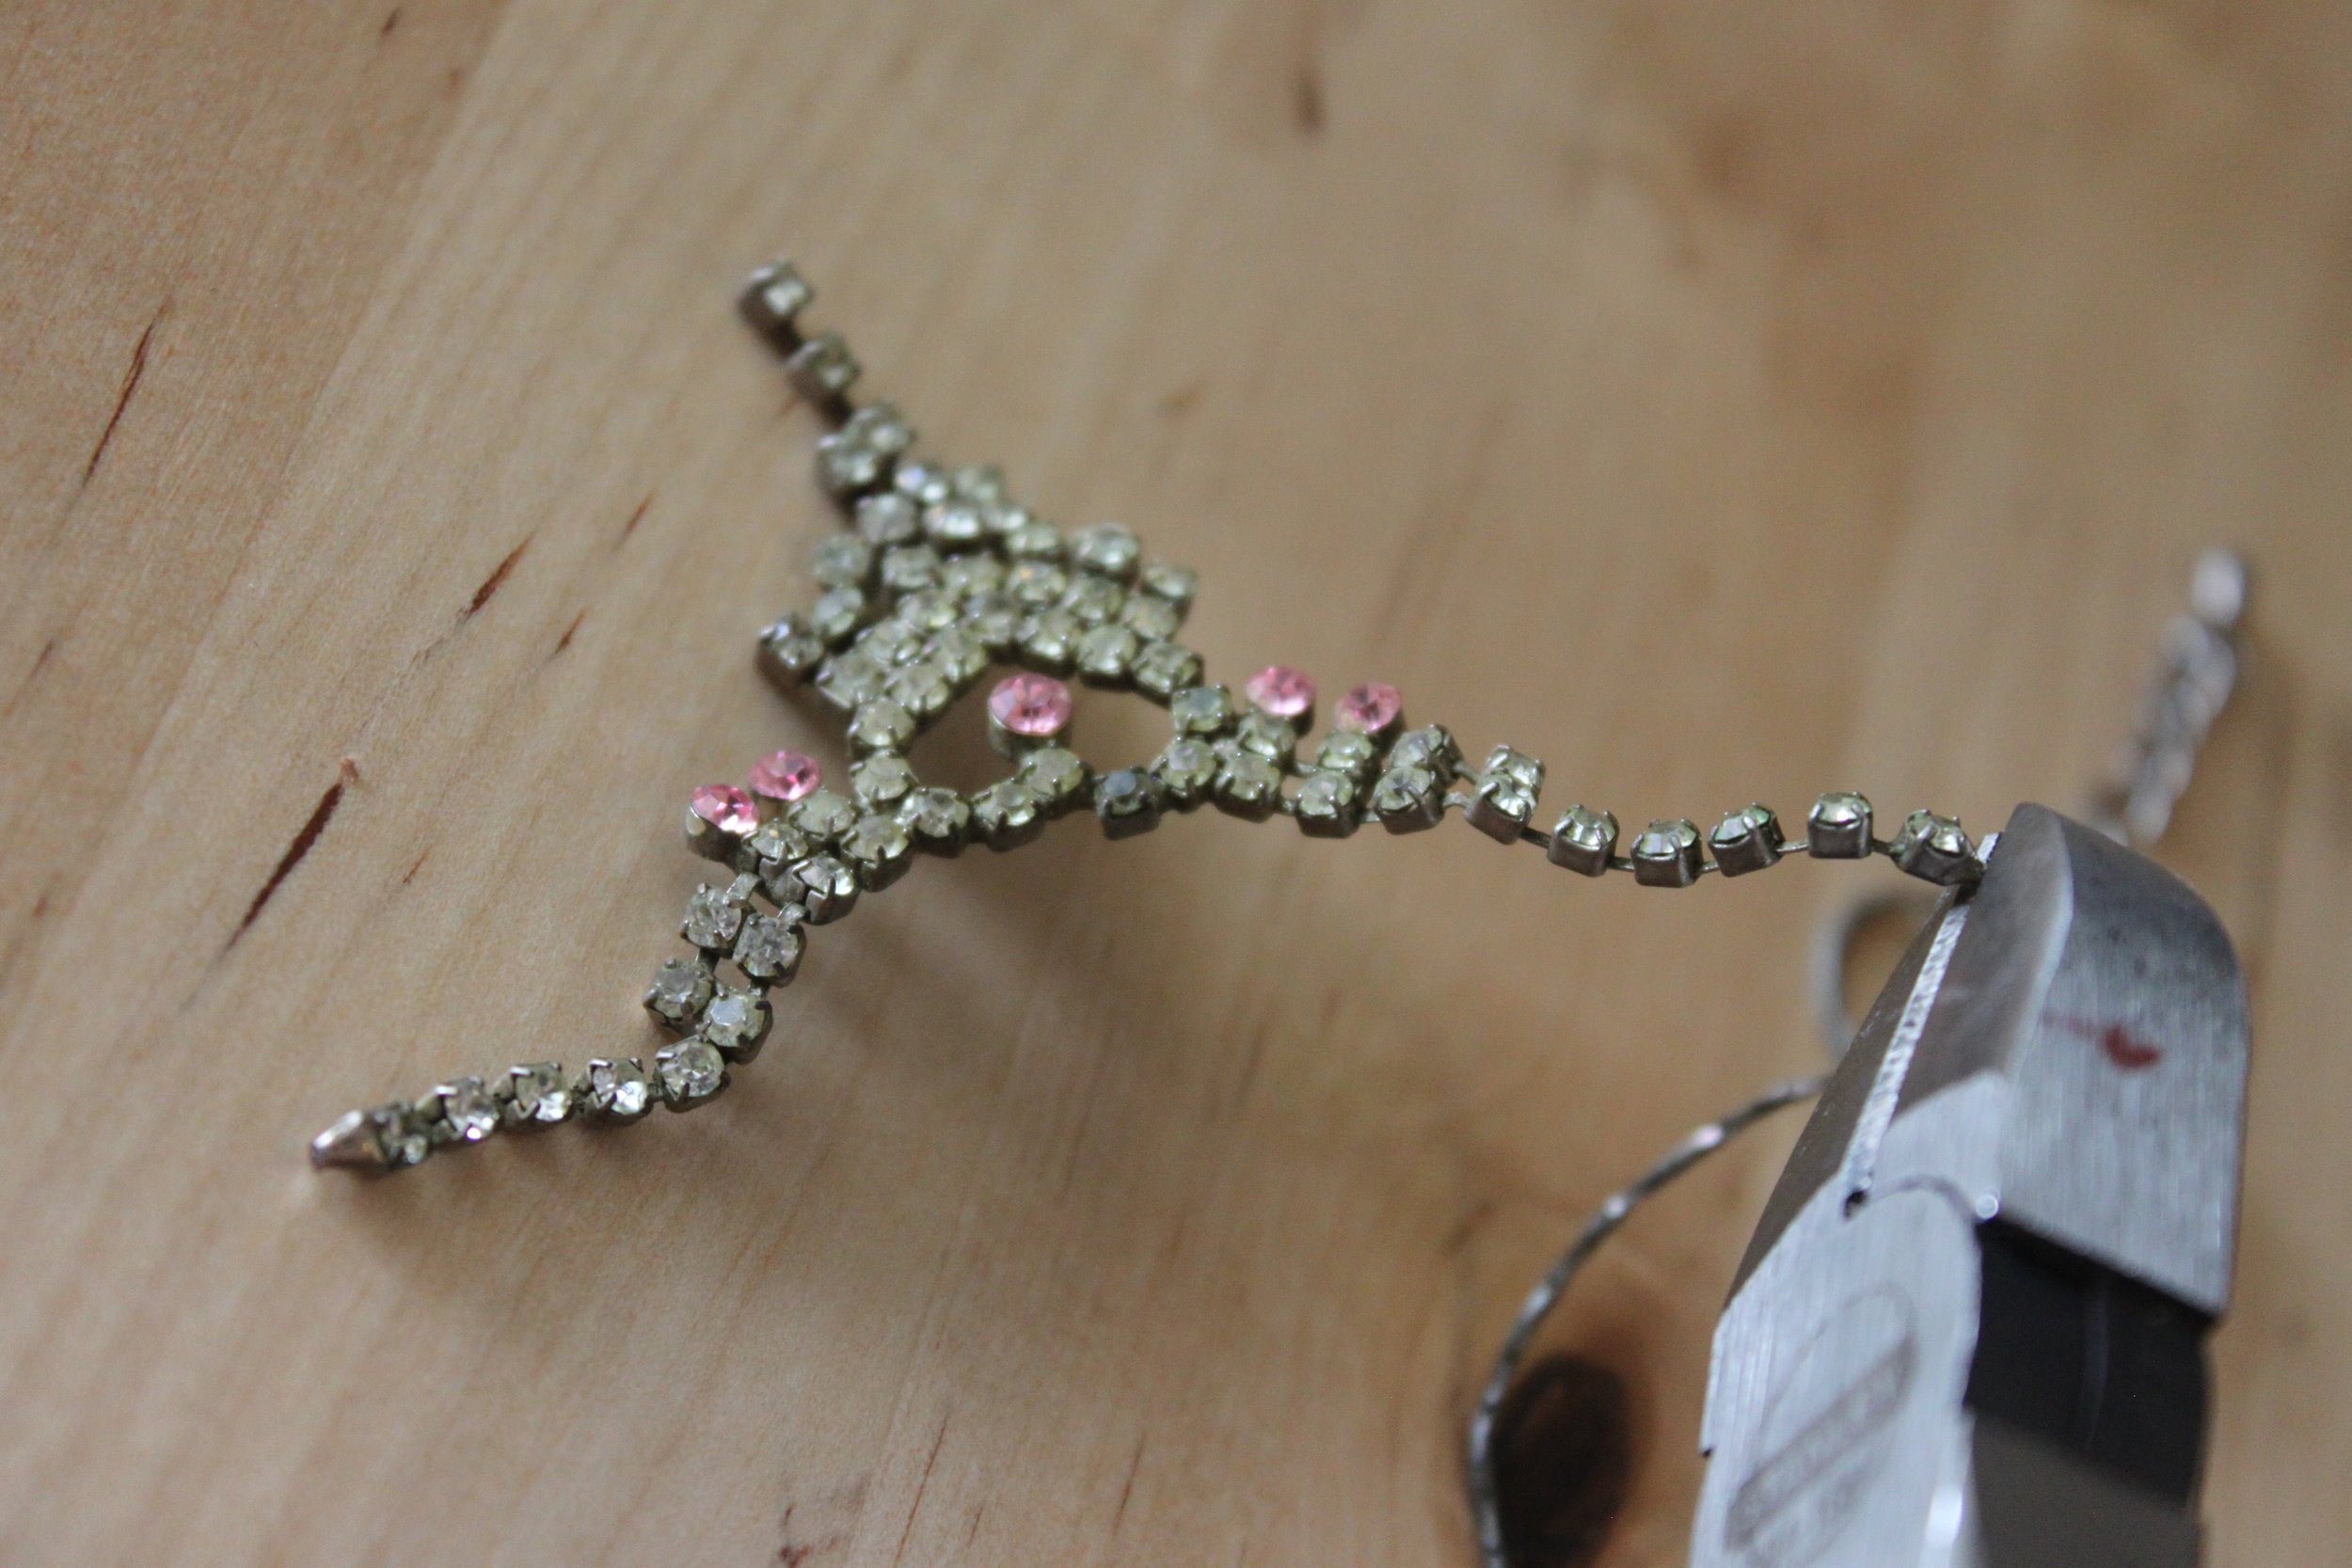
- Sew your necklace piece in place. Be sure to hide your knots on the back side of your mask. Sew between two rhinestone links; onto a jump ring; or onto a chain link.
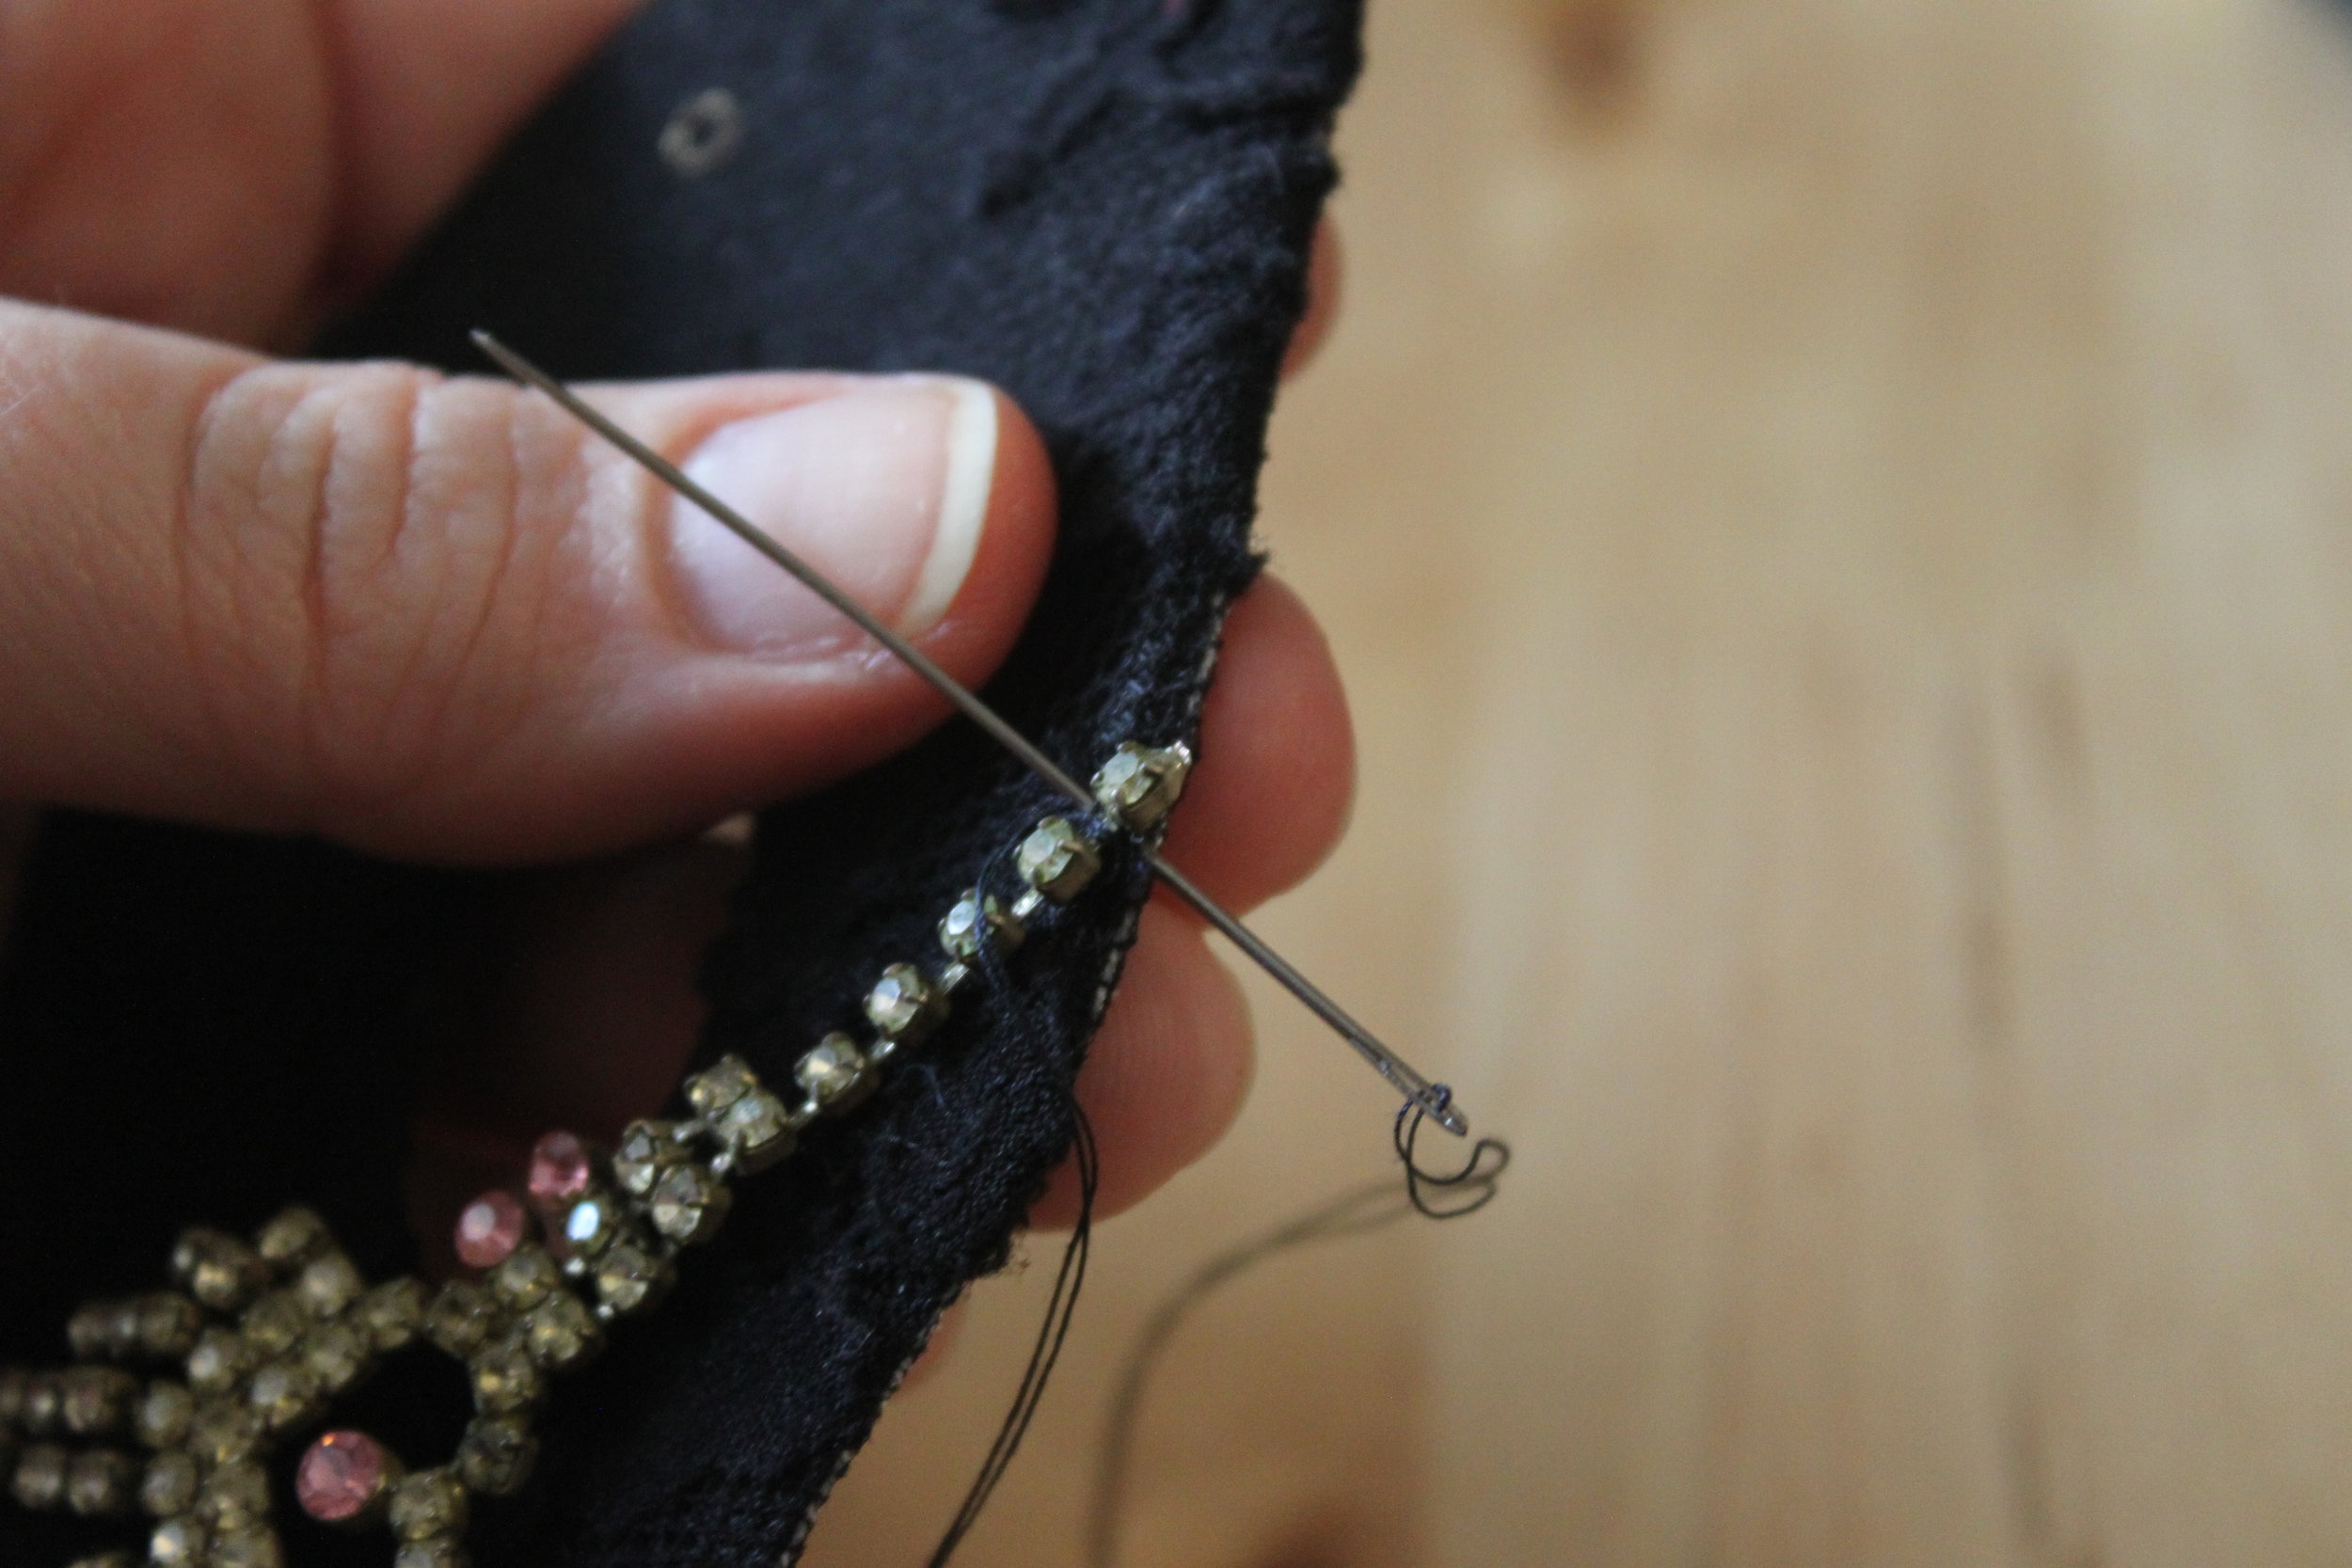
- If needed, also sew the middle of your necklace piece in place. (This is especially important if your piece moves a lot. You don't want it to hit you in the eye all night if you're dancing).

- Grab your elastic that you set aside earlier. To re-attach it, thread it onto an embroidery needle & pull it through the existing hole. Be sure to pull the elastic from the front of the mask to the back.

- Remove the elastic from the embroidery needle & knot it.

- Repeat Steps 13 & 14 for the other side.
- Wear proudly!
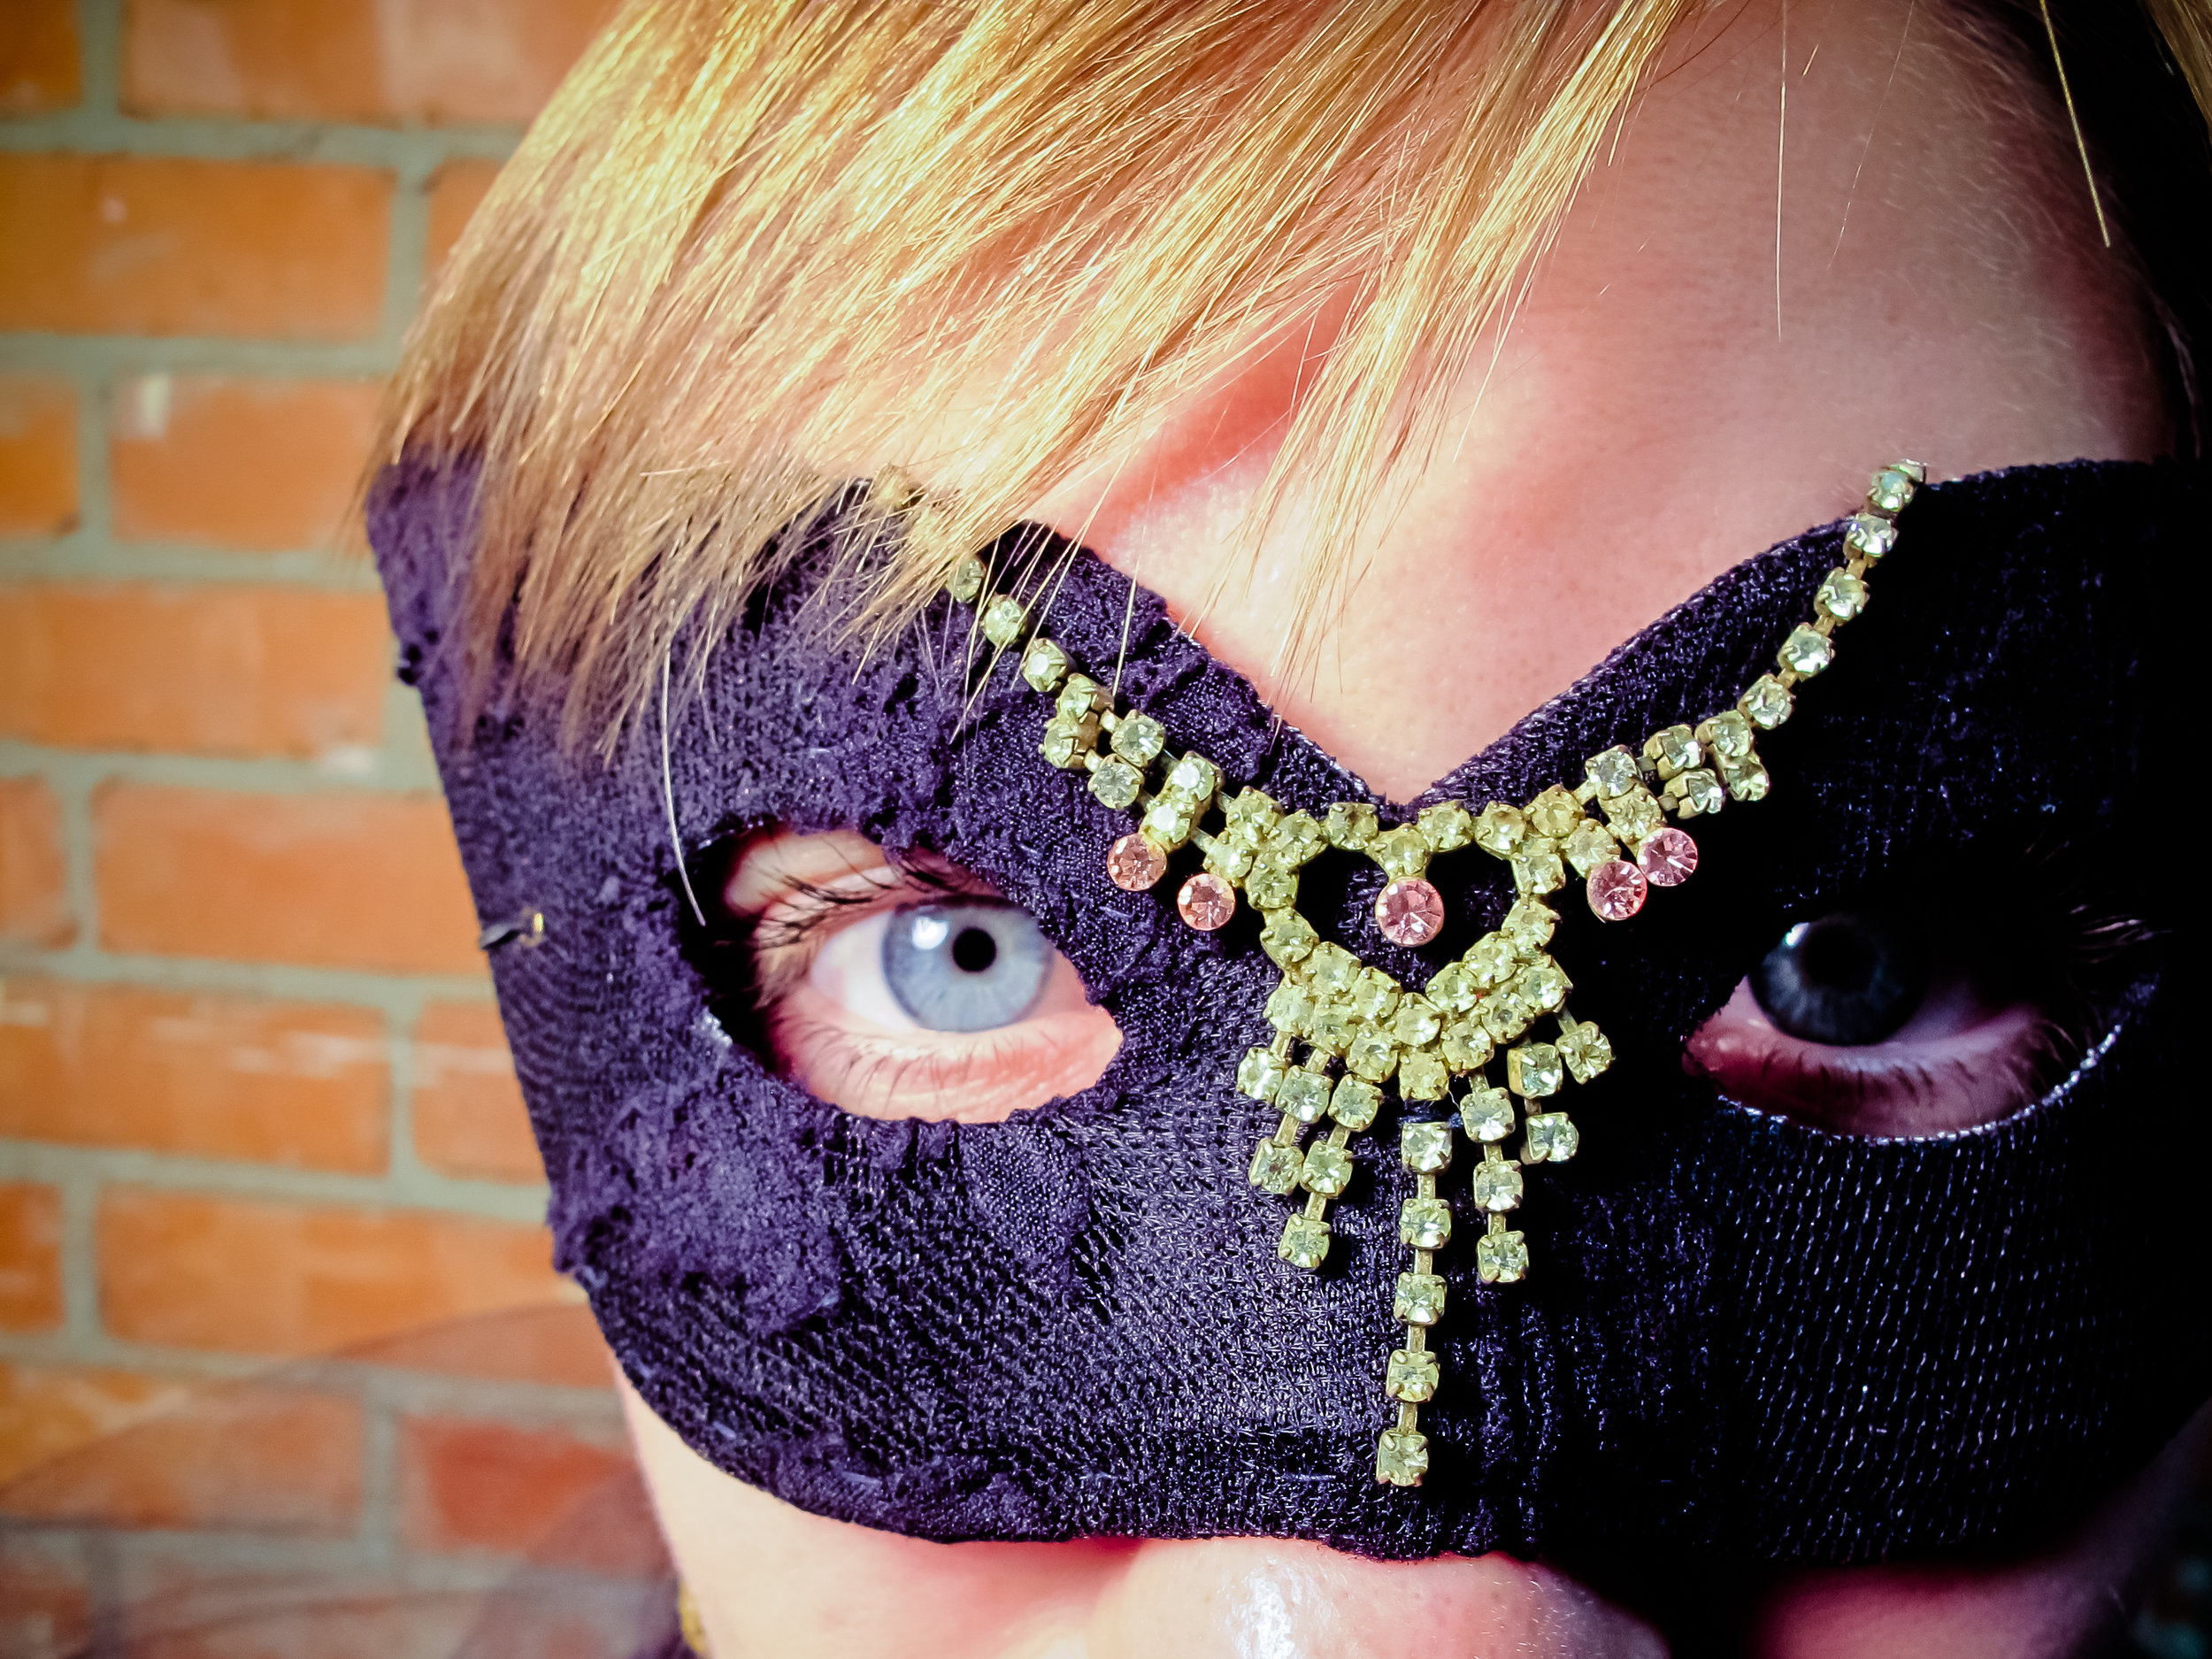 To Make this a Full Costume: Put on one of those fancy dresses you hardly get to wear, wrap some tulle around your shoulders, grab a fan, and don some femme fatale makeup! Perhaps you are a spy at a masquerade, or a jilted tango dancer, or even a princess incognito--whoever you are--Happy Halloween & as always, Merry Making!
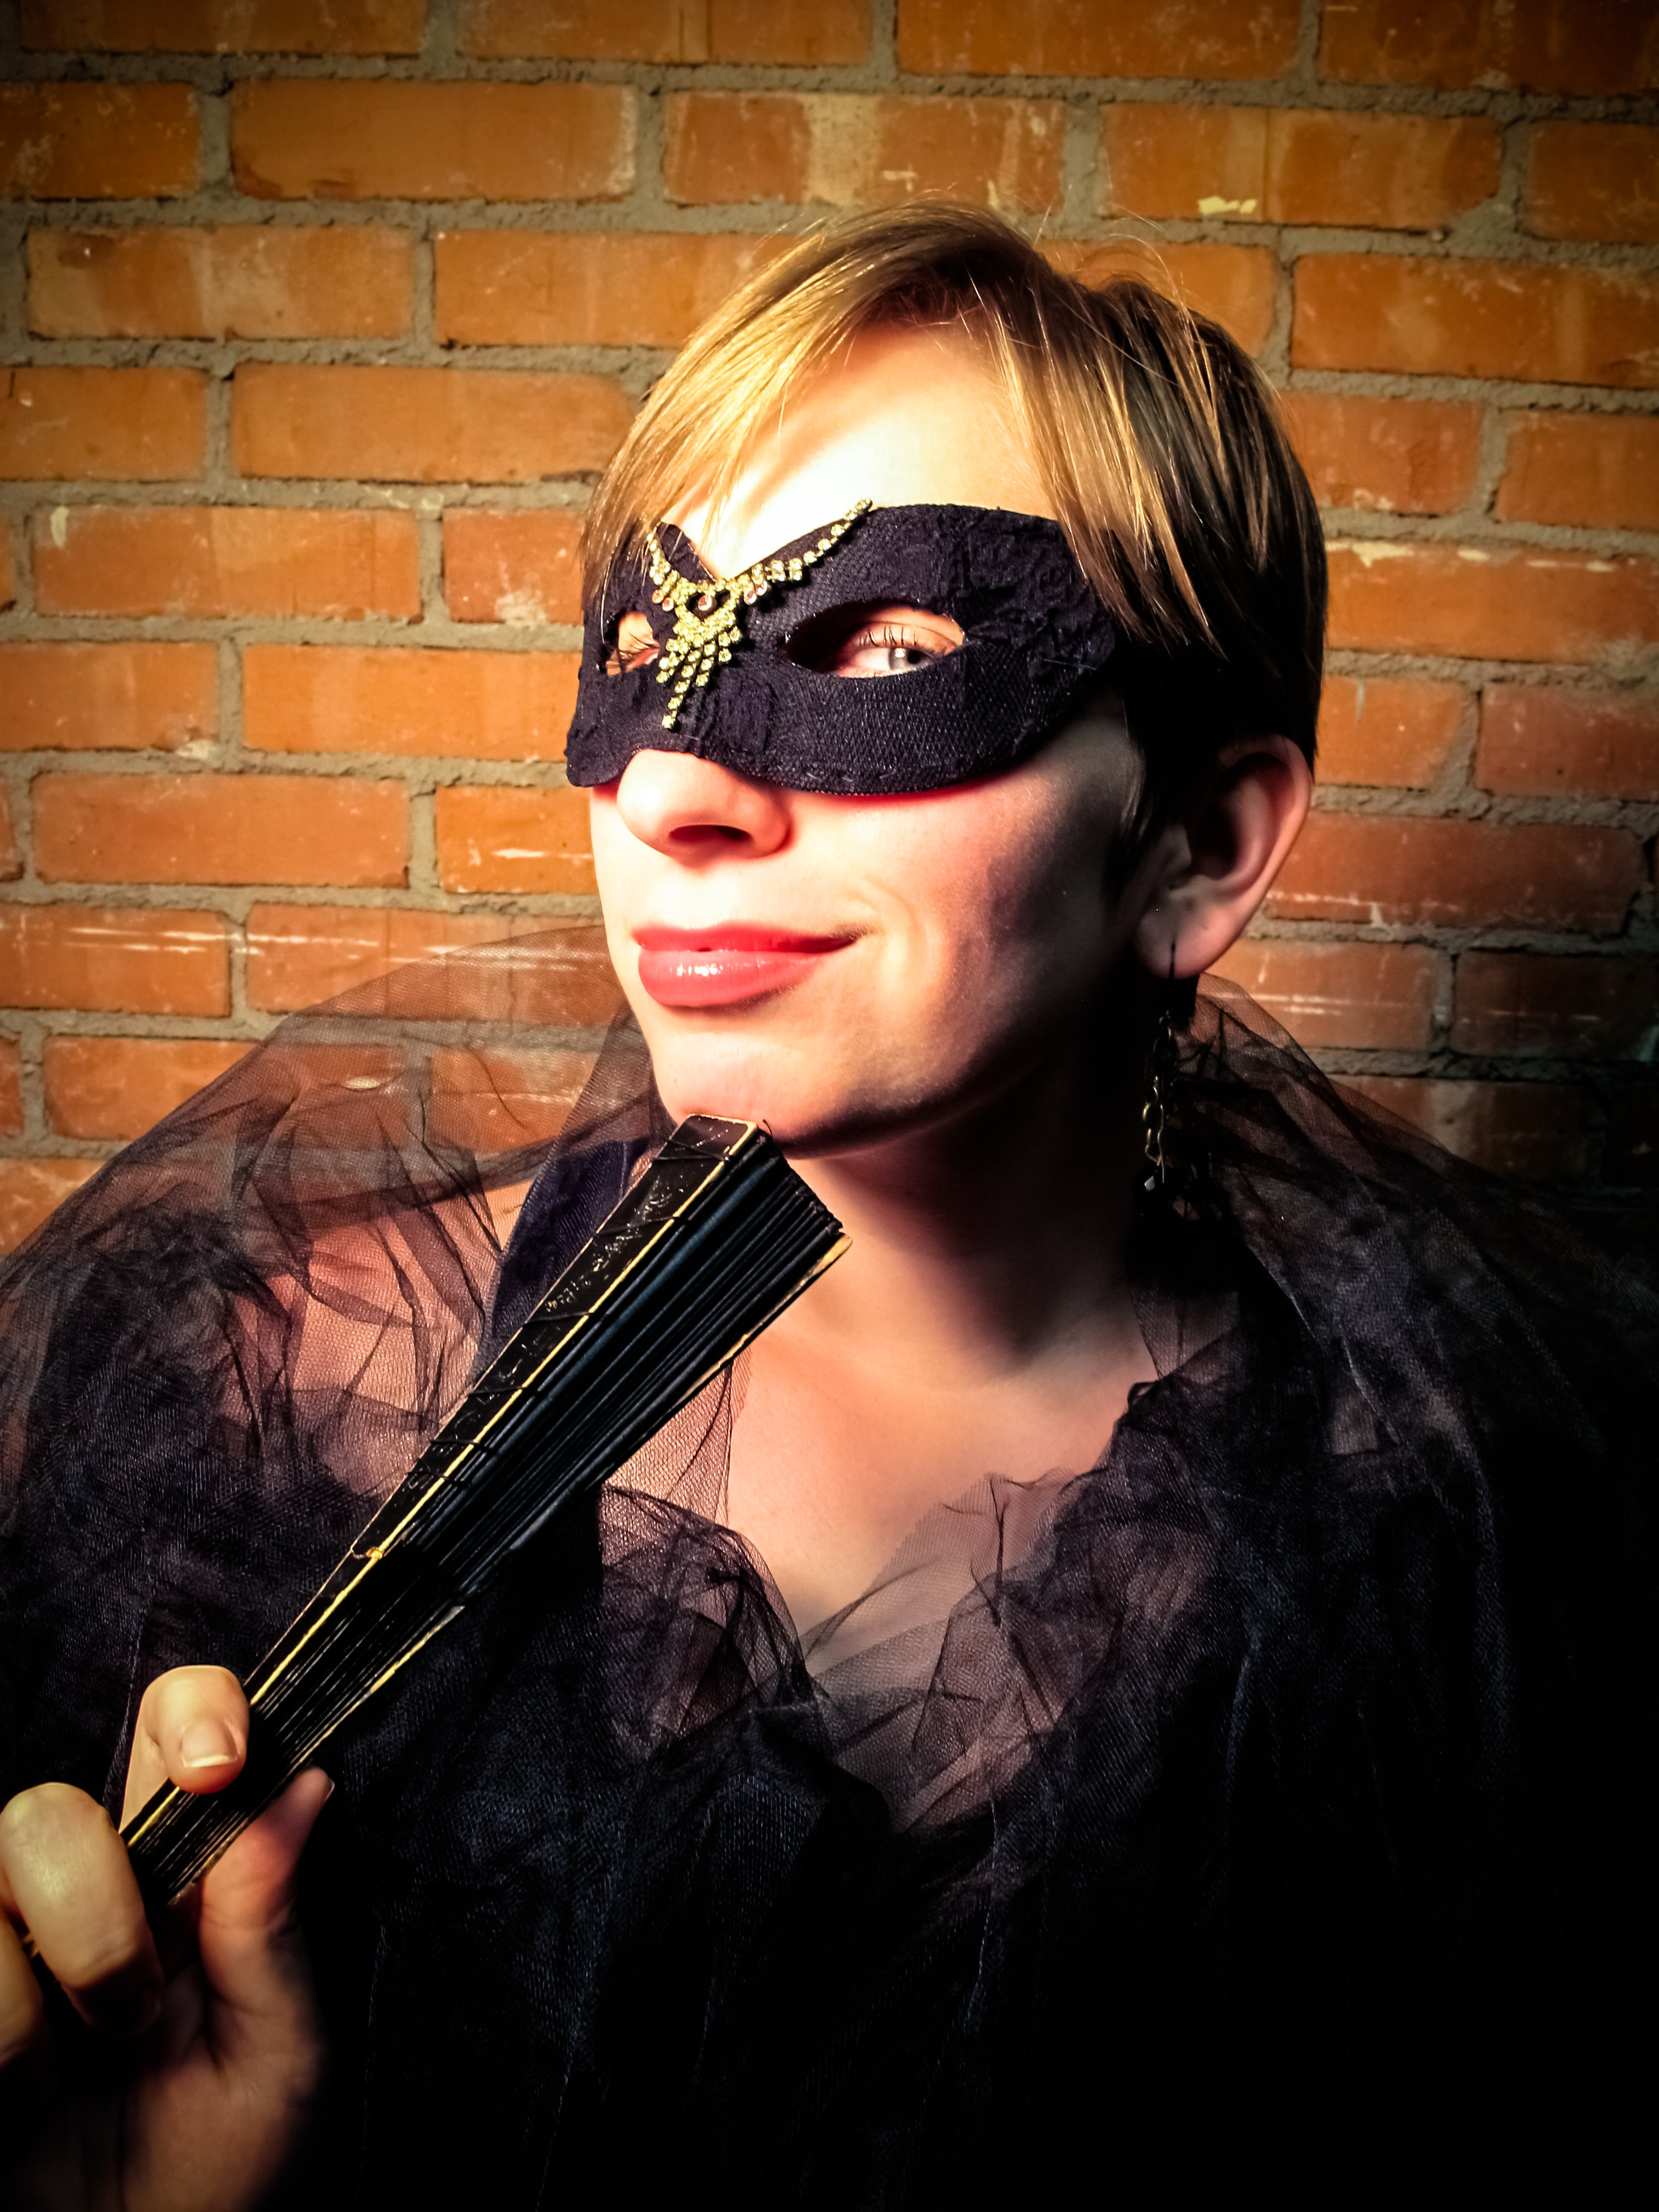
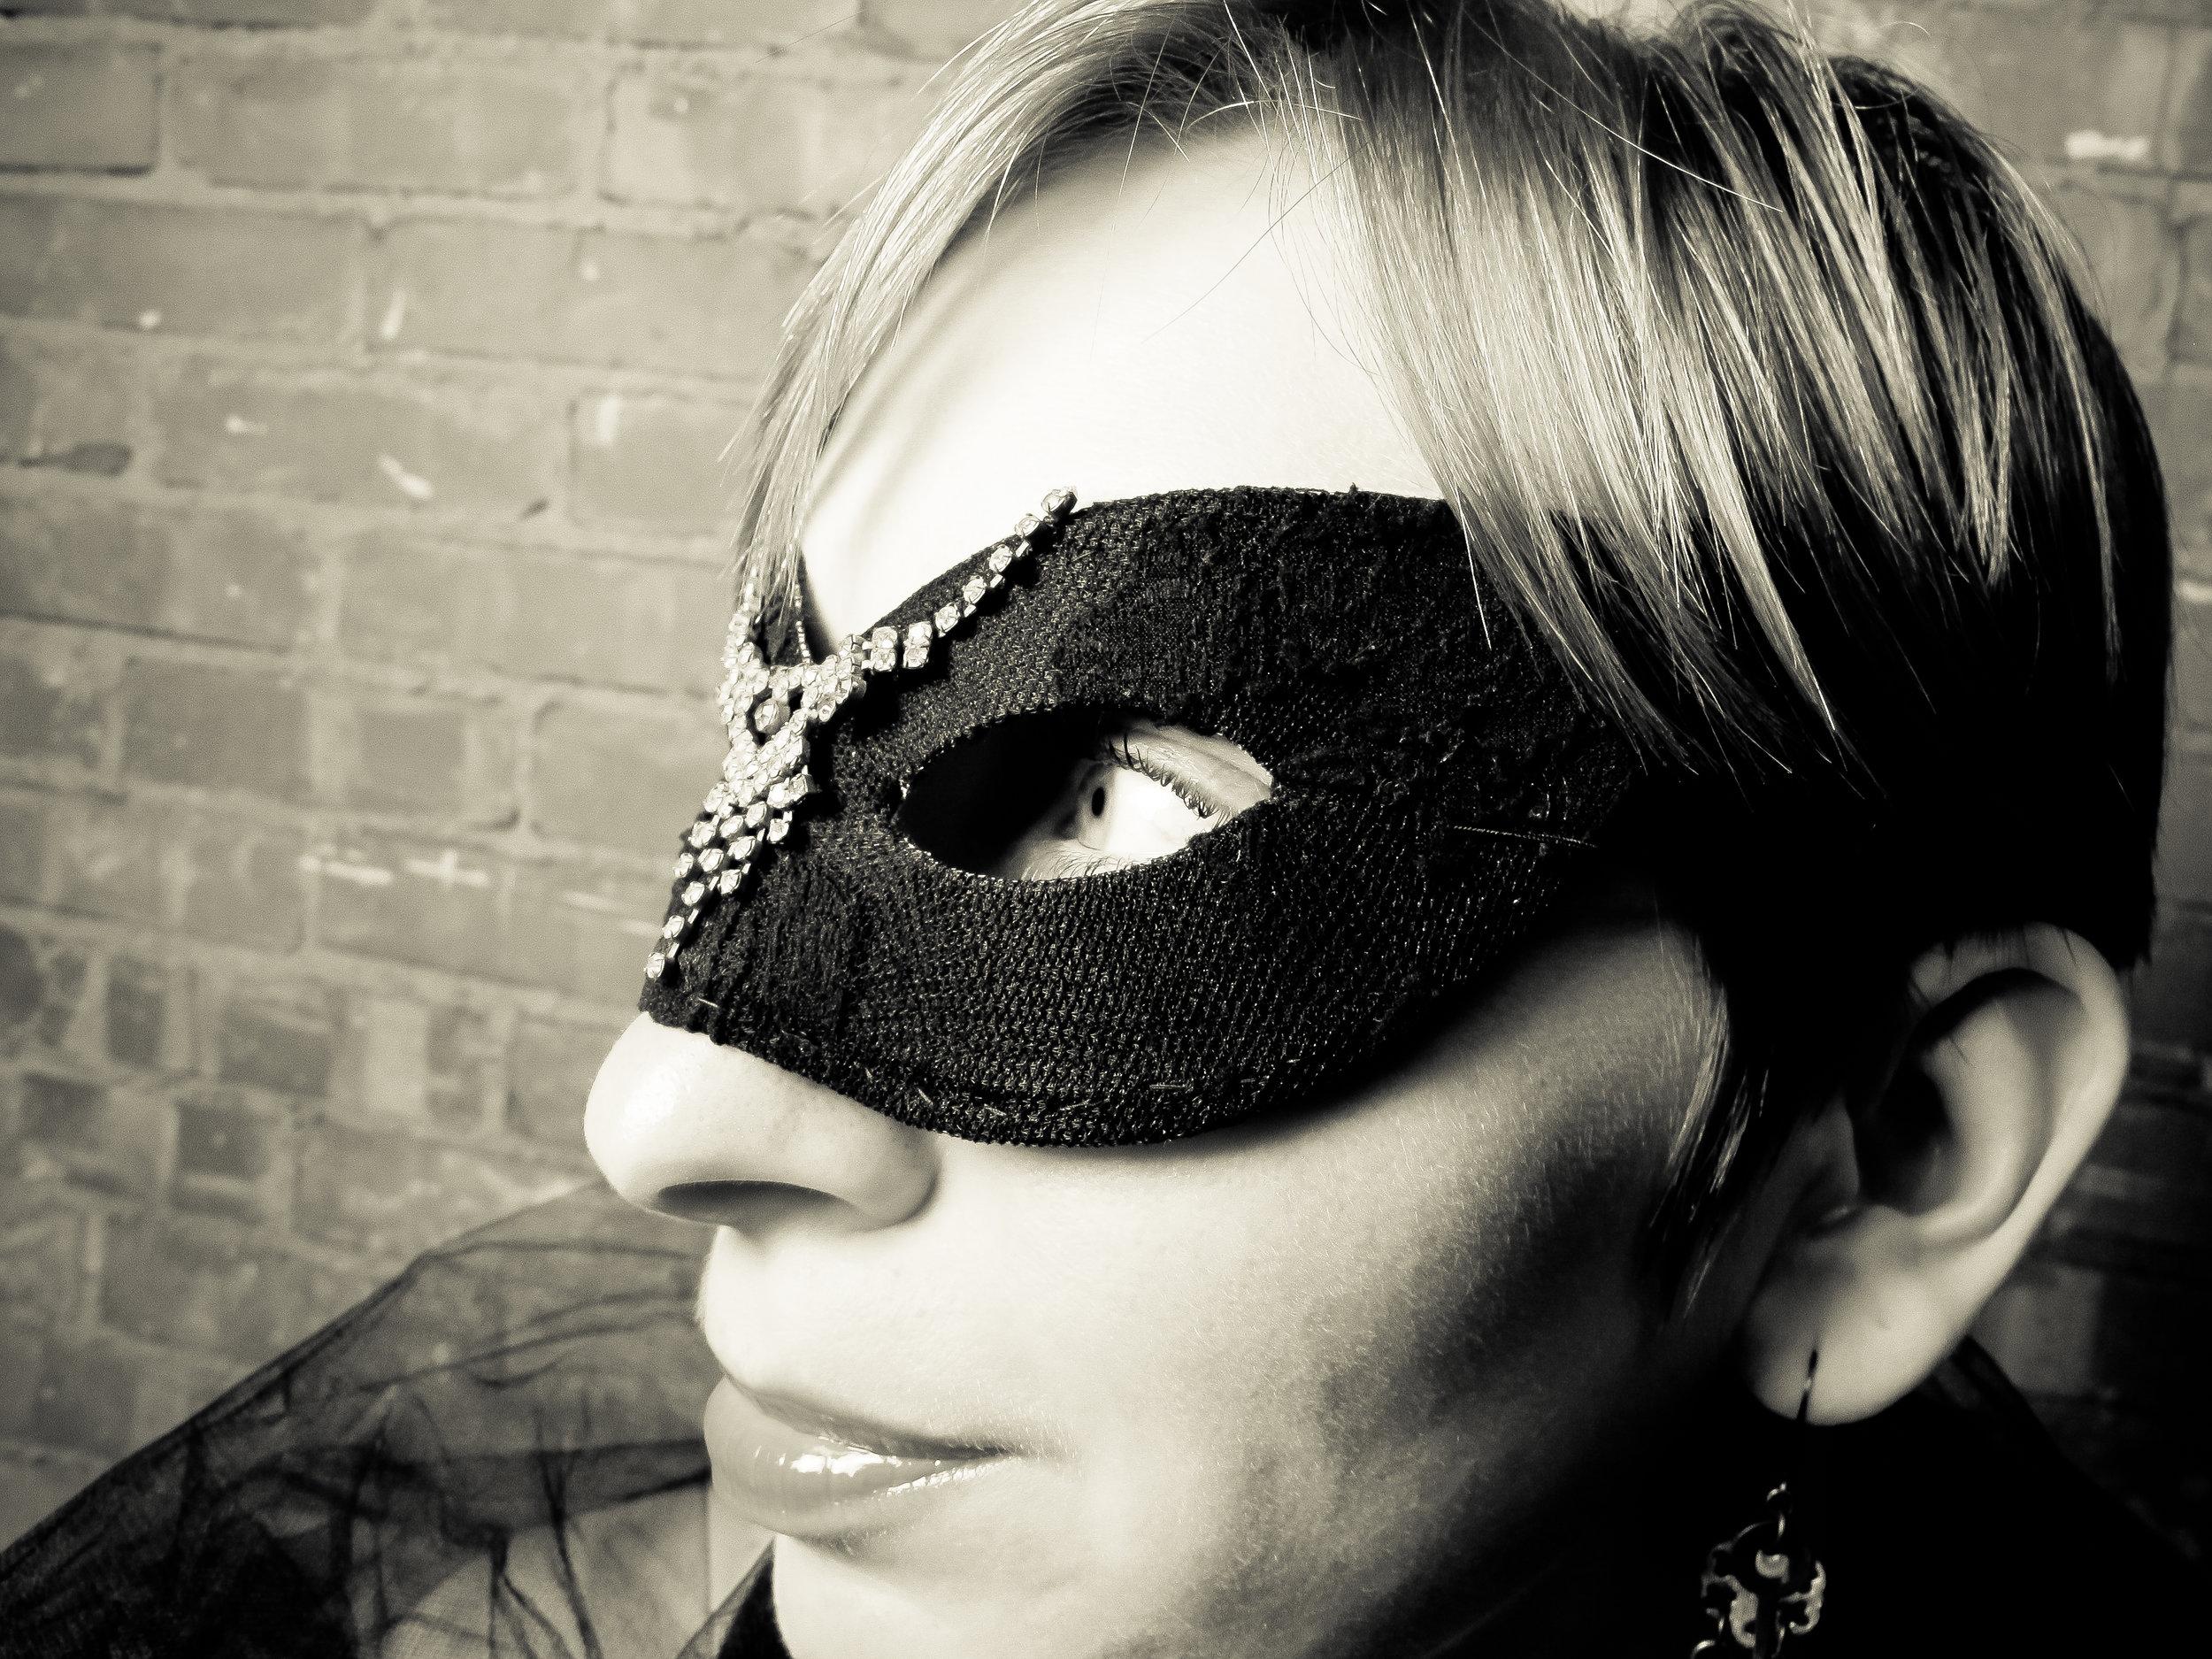 A special thanks to my lovely fiancee, Rhys, for the wonderful pictures of me wearing the mask I just made. Love you, shutterbug!
Hope Your Halloween was Spooktacular!
InspirationCommentIt has been a truly wonderful week! I met one of my very favorite Steampunk authors, Gail Carriger this past Saturday. Thanks to Nimrod International Journal for bringing Ms. Carriger to T-town. At her lecture, I learned what inspires and influences Carriger as an author (Gothic Romance, in particular Lewis's The Monk and Radcliffe's The Mysteries of Udolpho) and what Steampunk as a genre borrows from the Gothic.
 Carriger herself is as delightful and sincere a person you could expect. More often than not you wait with baited breath to meet an author you truly enjoy or admire only to discover that as a person, they're quite egotistical, terrible, etc. Carriger graciously allowed those in attendance to interrupt her talk with questions & comments. She generously (and preparedly, much like Alexia herself--armed & ready) gave advice to hopeful genre writers. After her talk, I waited in line for her to sign the manga version of Soulless and to give her some of my jewelry creations that she inspired.
I was so nervous--I hardly said anything (I get so tongue tied sometimes!) and while I didn't get to see her open my gift, she did blog about it so I know she liked it! Inspiring me as always, I had come up with an artful & steampunk way of wrapping her gift and as a result, I now have several ideas for steampunk gift wrapping. DIYS to follow soon in December!
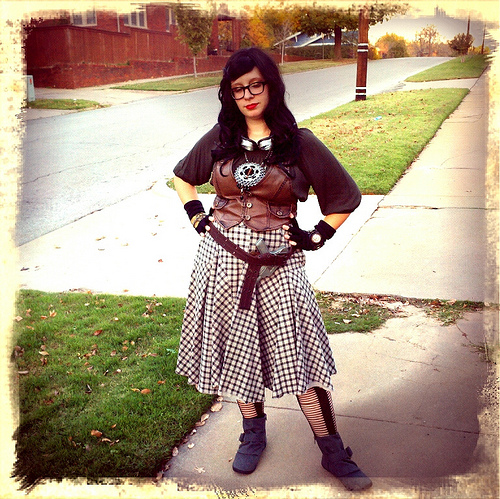 Halloween was fabulous! For the very first time ever, I had trick-or-treaters and boy was I ready! A couple of friends came over and we ate pizza on my stoop armed with 2 brimming bowlfuls of candy (the good stuff!). I had chalked the sidewalk, lit up the steampumkins, put on my steampunk costume (a space rustler) and decorated my door with ghoulish scenes! It was a blast!
Today, I've been sipping tea (tea cup pictured above--it has a square bottom! I have never seen one like that before, now I am obsessed. Must find a square bottomed tea cup to call my own!) and doing inventory. And I am proud to announce that you can now find Bohemian Romance Steampunk Jewelry in Oklahoma City at the OKC Dwelling Spaces!
I have another exciting announcement, I will be adding a new element to my blog--fashion. "Style Me Steampunk" is a series of blog posts about how to incorporate steampunk into your daily wardrobe! So stay tuned, lots of exciting DIYS and blog posts to come!
Hope your Halloween was spooktacular and to those of you in New York and New Jersey--stay safe! xo Sam
DIY Steampunk Crown & DIY Steampunk Pirate Queen Costume for Halloween
D-I-Y-CommentLike me I know a lot of you are making your own costumes not only for the fun of it but also because of your budget. Here is a DIY Steampunk Halloween costume that costs under $100 (and even less if you have some of these items already). Be a Steampunk Pirate Queen this Halloween (or Empress or Imperial Majesty...whichever title you prefer, after all you're the ruler).
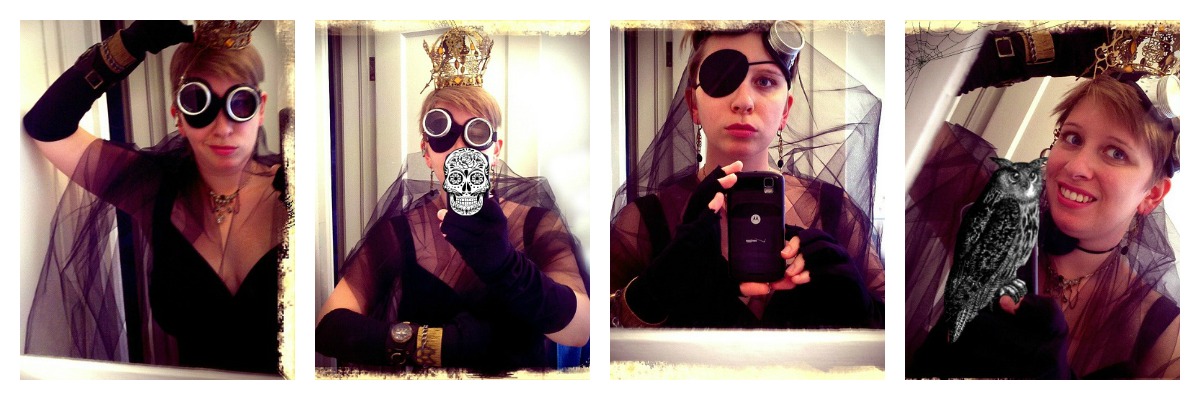
(Forgive the phone in the mirror shooting--I did cover the phone up with some spooky overlays--check out PicMonkey's Halloween themes to edit pictures with! It's super fun & festive!)
Here's what you'll need:
- A fancy dress (Now is the perfect time to dig up that unworn dress sitting lonely in the closet or that bridesmaids dress that you haven't put on since the wedding). If you don't have a dress, try pursing your local thrift stores for dresses. Steampunking it is easy with accessories and a little tulle! Don't worry if your dress is short--punk it up with your favorite pair of Fall/Winter boots! (Already Owned, hopefully)
- Tulle (approximately 2-3 yards, depending on your size and how long you'd like it to trail after you). I'm a size 14 and so I purchased 2 yards. Tulle is cheap at Joann Fabrics during Halloween (go when you have a coupon)! $2.00
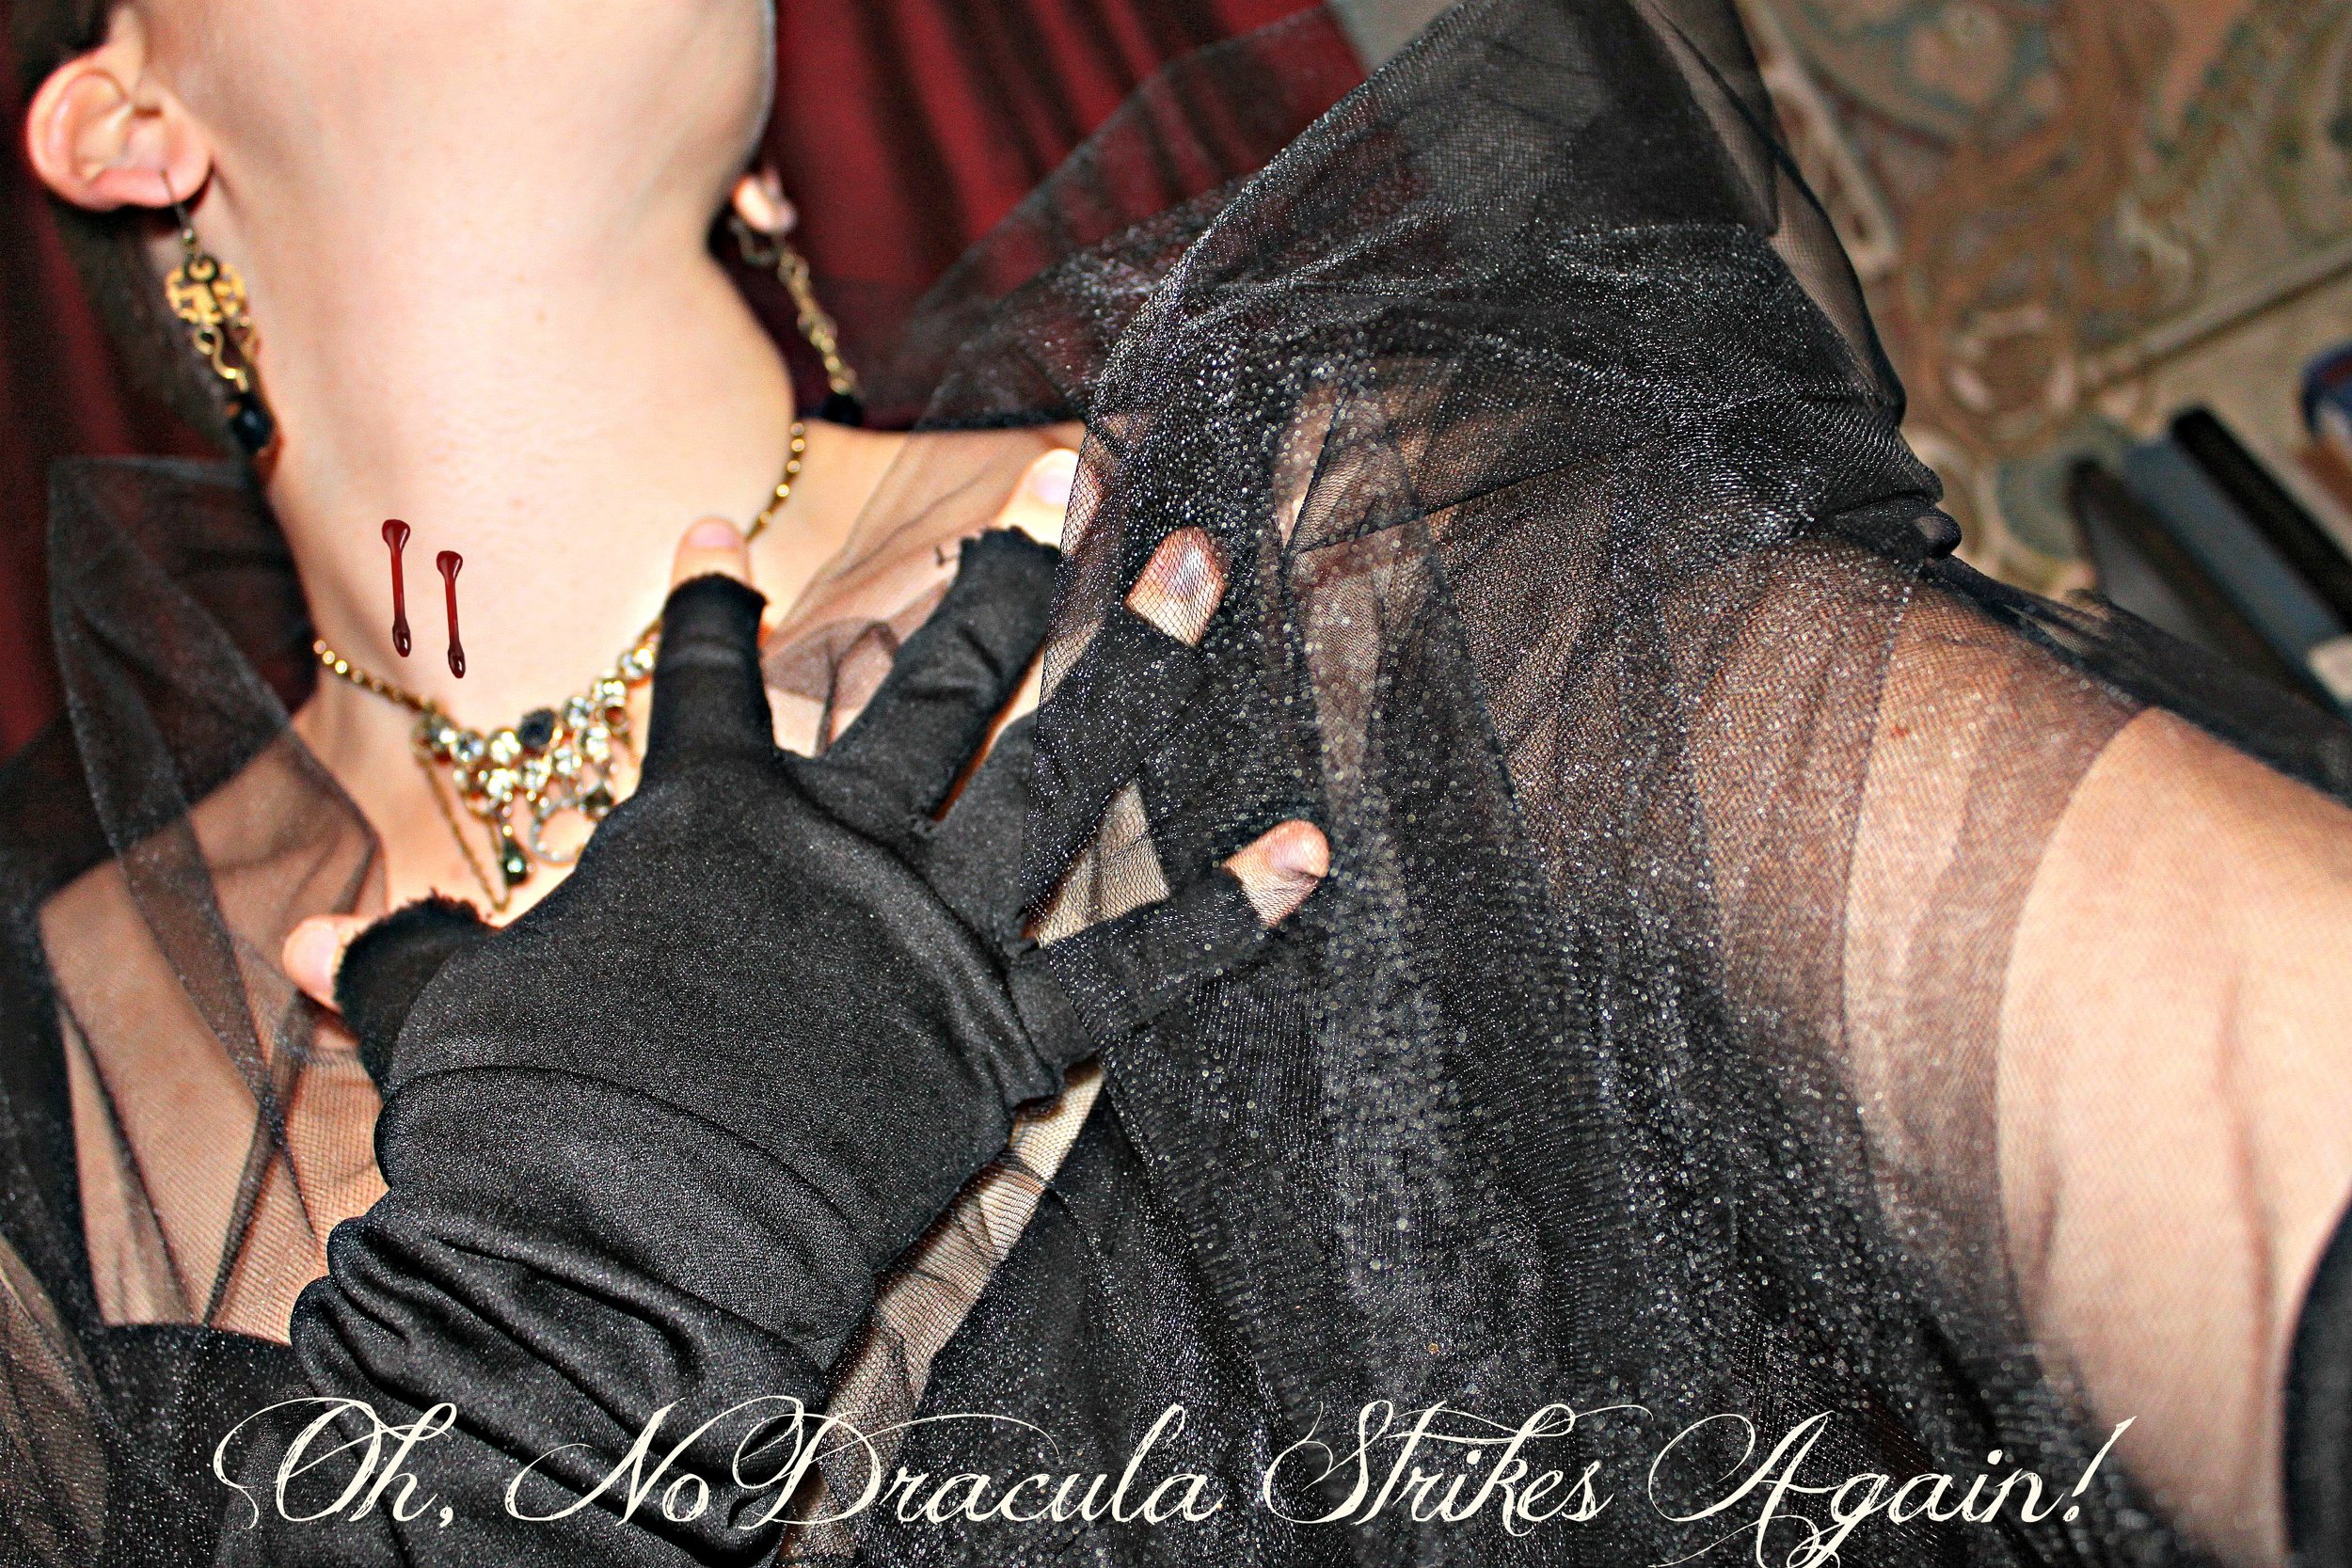
- Elbow-Length Gloves (you can source these from anywhere, thrift stores or a cheap Halloween shop). I made my gloves fingerless but cutting off the ends. $12.99
- Eye patch (any Halloween shop or Dollar Store has an eye patch you can purchase pretty cheaply) I bought mine at Party City where I also found my elbow length gloves. $1.99
- Goggles (This may be harder to find than other items but check your local flea markets, estate sales, & thrift stores--which may have goggles for lower prices). My favorite pair of reproduction goggles is made by Restoration Hardware, click here to purchase or view their "German Goggles" in the RH online catalog. These goggles are simple, elegant, and relatively inexpensive. $24.99
- Crown (or Large Christmas Tree Crown Ornament) The crown I am wearing is actually a Christmas Tree ornament that I purchased at a local shop, Garden Ridge (in their Gold Ornaments aisle). The DIY to make your own crown from a Christmas Tree ornament is below. Keep reading! $4.99 (Gears & Brads to adorn it with: approximately $14.99)
- Steampunk Jewelry (or any mismatched metal & chain jewelry that you own already) Some of you I know already own a few of my pieces (thanks!)--mix & match them with other rhinestone or bling-ish jewelry you own to add a little sparkle. (Already owned or you can click here for my Etsy shop and find something to go with your costume!)
Total Cost (excluding a dress & jewelry): $61.95
The most important part of your costume...airship pirate's attitude. A Queen still gives her mateys a mightly Argh!!
Materials & Tools:
- Crown Ornament (a filigree metal crown is best since it has many holes in it already) ($4.99)
- Brads ($4.99)
- 1-2 packages of reproduction metal gears ($5.99 each at Michaels--try their "Found Objects" or "Industrial Chic" brands) or salvaged machine or gear parts (preferable, sourced from local flea markets, estate sales & such)
- Light bulbs (optional)
- Rhinestone clip-on earrings (optional)
- 2 Grandfather clock hands (optional)
- Small magnifying glass & chain (optional)
- Wire (as close to the color of your crown) & wire cutters (for attaching light bulbs)
- Pair of flat nosed pliers
1) If your ornament has any hooks or ribbons for hanging on the Christmas tree, remove them or cut the ribbons. Here's what mine looks like: 
2) Next, lay out the items you wish to attach to your crown & begin placing them. Gears can be attached with brads through the holes in the crown's filigree. Secure them by prying apart the two ends of the brad so that they hold the gear in place. You may want to crimp the brad shut with a pair of flat nosed pliers (or any kind of flat pliers).
3) (Optional) To secure a light bulb to your crown, cut a length of wire (proportional to your bulb's size. For tiny bulbs, approx. 1 inch) & loop the wire around the bulb through the filigree and back through again & around (Like sewing stitches) until the bulb is secure. Another option is to secure the light bulb in place with glue & a glue gun.
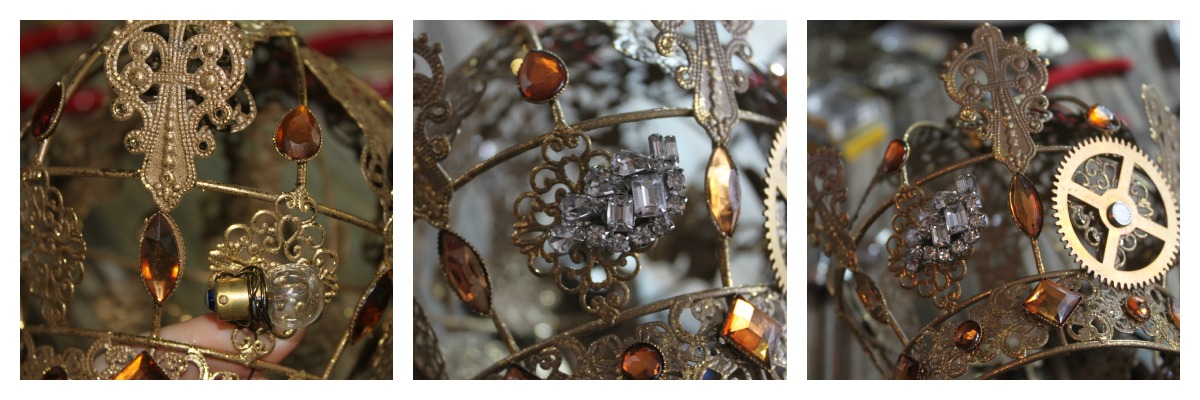 4) (Optional) For extra sparkle on your crown, add a rhinestone (or any sparkly gemstone) clip-on earring. The clip should hold, but if your earring is old and the fastener is loose you may want to secure it with a bit of wire (approximately 1/2 inch will suffice).
5) (Optional, but highly suggested) To attach your grandfather clock hands, use brads and secure in place with pliers as instructed in Step 2 above. If your grandfather clock hands are heavier and cannot be kept in place with brads, use a small screw, washer, & nut to hold it in place. A great selection can be found in the Science Projects section at Lowes or Home Depot in the Hardware section.
6) (Optional) To add a monocle, attach a length of chain (measure where you'd like it to fall--keep in mind it will whip you in the face so I'd advise to make it longer than eye-length. A good zone is between the bottom of your nose to your chin). Using a jump ring attach the chain to a small magnifying glass (available at some dollar stores & grocery stores; available at bead shops, like the Bead Merchant on 15th street & Delaware). Using another jump ring, attach the other end of the chain to your crown with your pliers. You can dress up your magnifying glass chain as I did above by adding crystal beads & a piece of filigree!
7) Once you have attached all of your embellishments to your crown, wear proudly!
Other Ideas for Accessories: Faux-fur, a Sceptor, A Sword (for Knighting your minions), a Queenly cape, & a dance card
Have fun crafting your costumes! If any of you decide to be a Steampunk Pirate Queen please post or email your pictures to bohemianromancejewelry@gmail.com I'd love to see them! Check in later this week to find out how to Steampunk your Pumpkins!
Dark Carnivale~Bohemian Romance & The Salvage Steamstress Fashion Show
Shows1 CommentSaturday, Sept. 29th, at Indie Emporium, was my very first fashion show! I styled the models myself and created unique jewelry pieces to compliment my mom's, the Salvage Steamstress, fantastical hats! We had a blast! I can certainly say that out of all the models & designers waiting backstage--we had to most fun! Playing with our props, tipping our hats to one another and just generally being goofy. This sense of playfulness carried over into the show (for which I am very glad). For those of you who missed it, here are a few photos that were taken n the runway!
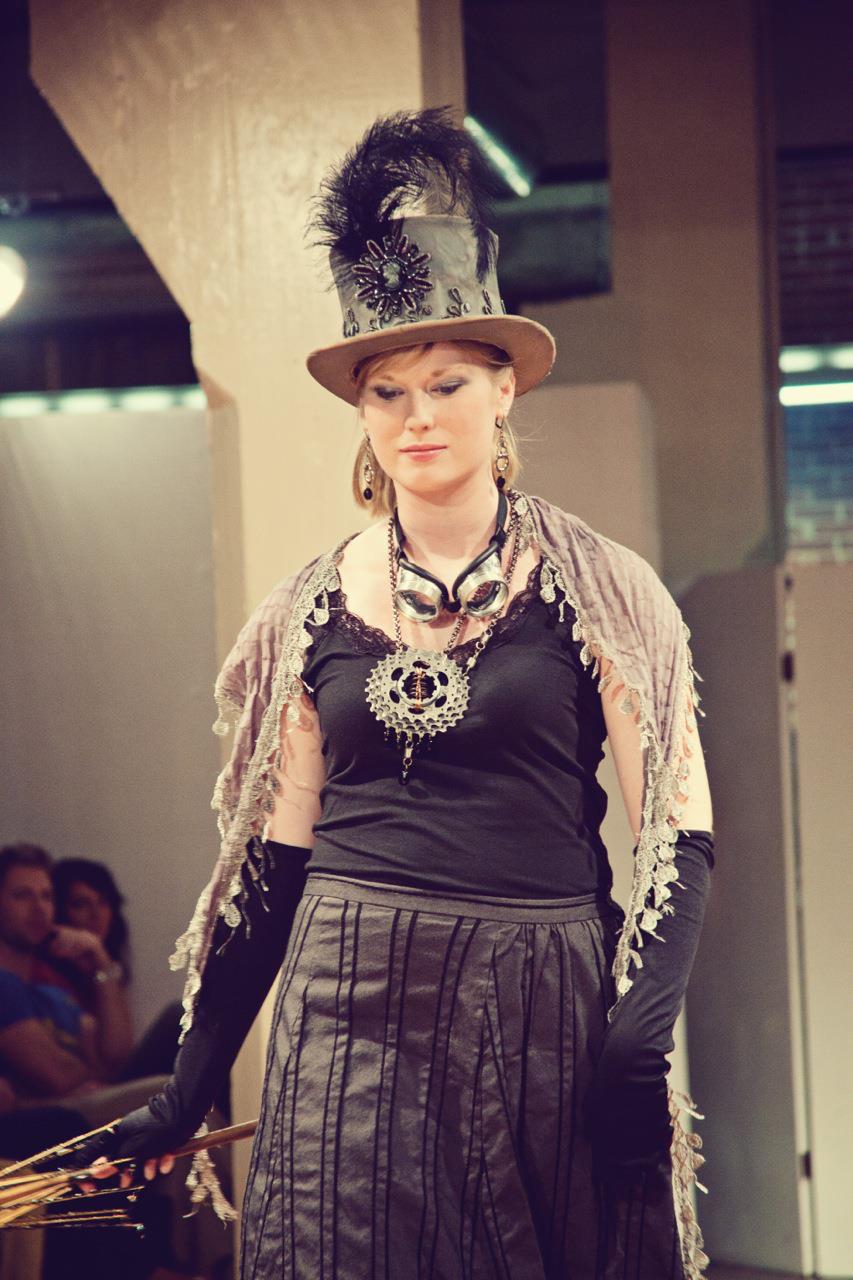
Here is Caroline wearing the Lady Hawke Top Hat, gearrings, and LadyIron Gear Necklace. At the end of the runway, Caroline activated her prop--a beaded skeleton parasol. 
Confidently, Caroline walked back up the runway, tipping her hat to Renee.
Renee modeled the Auntie Mame Bowler, gearrings, and the Amalia Popper Opera Necklace (for which I won honorable mention in Bead Magazine's steampunk contest).
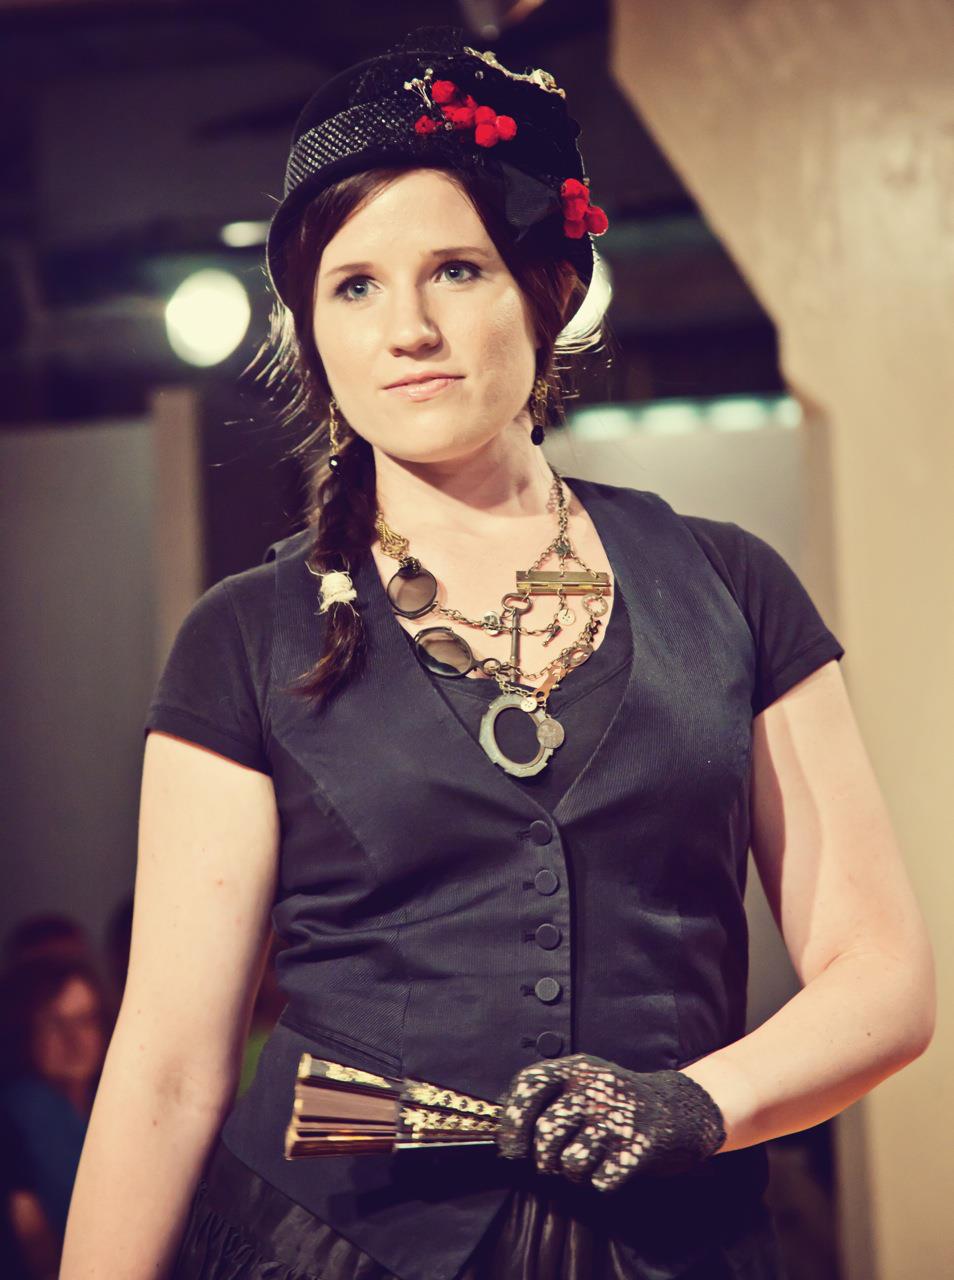 At the end of the runway, Renee activated her prop--a fan which she opened with a swift flick of her wrist!
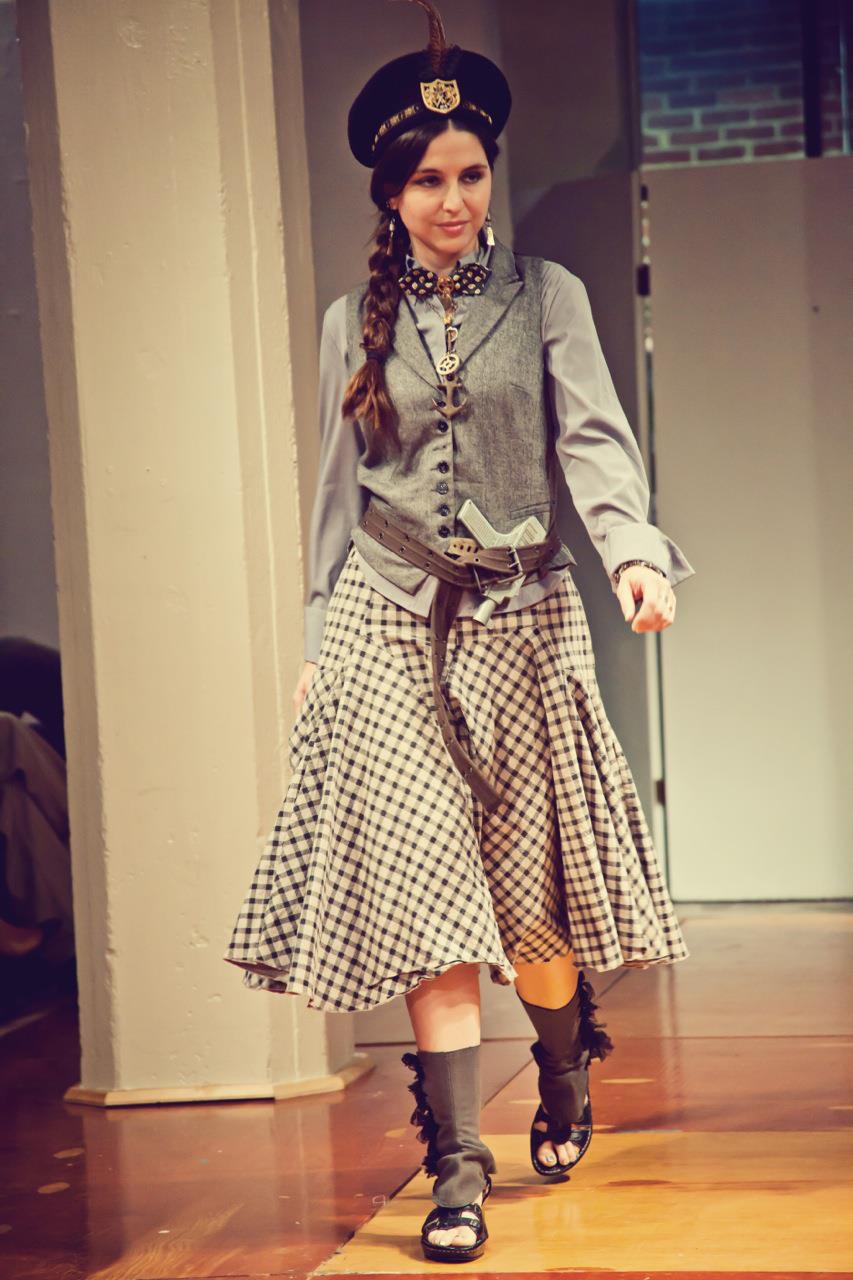
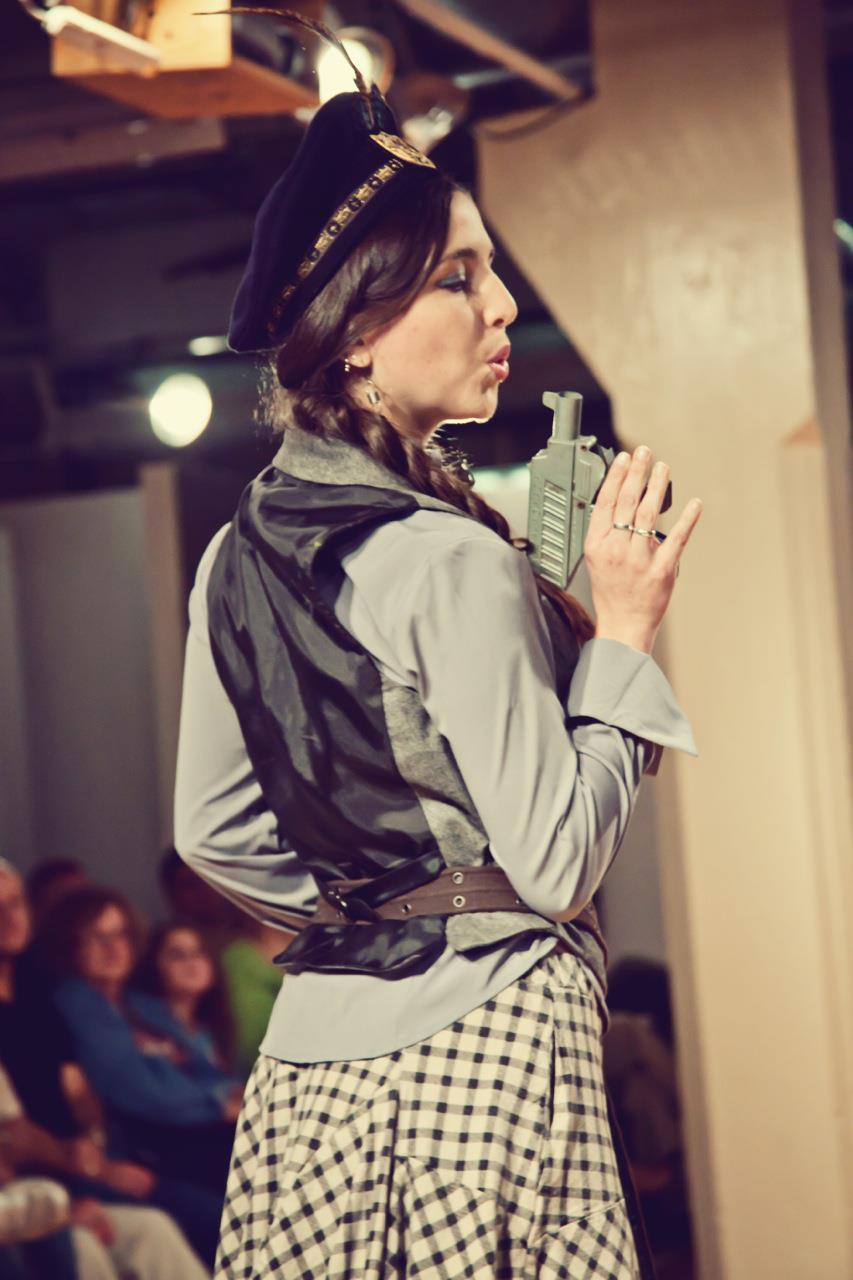
Next came Holly wearing a Steampunk Scottish Beret, gearrings, the No. 117 Steampunk bow tie, an electrical fuse bracelet, and the Seaside Girls Steampunk necklace (made for LiberateUlysses's Bloomsday Art Project in 2012).
At the end of the runway, Holly activated her prop--a gun (an vintage paper popper).
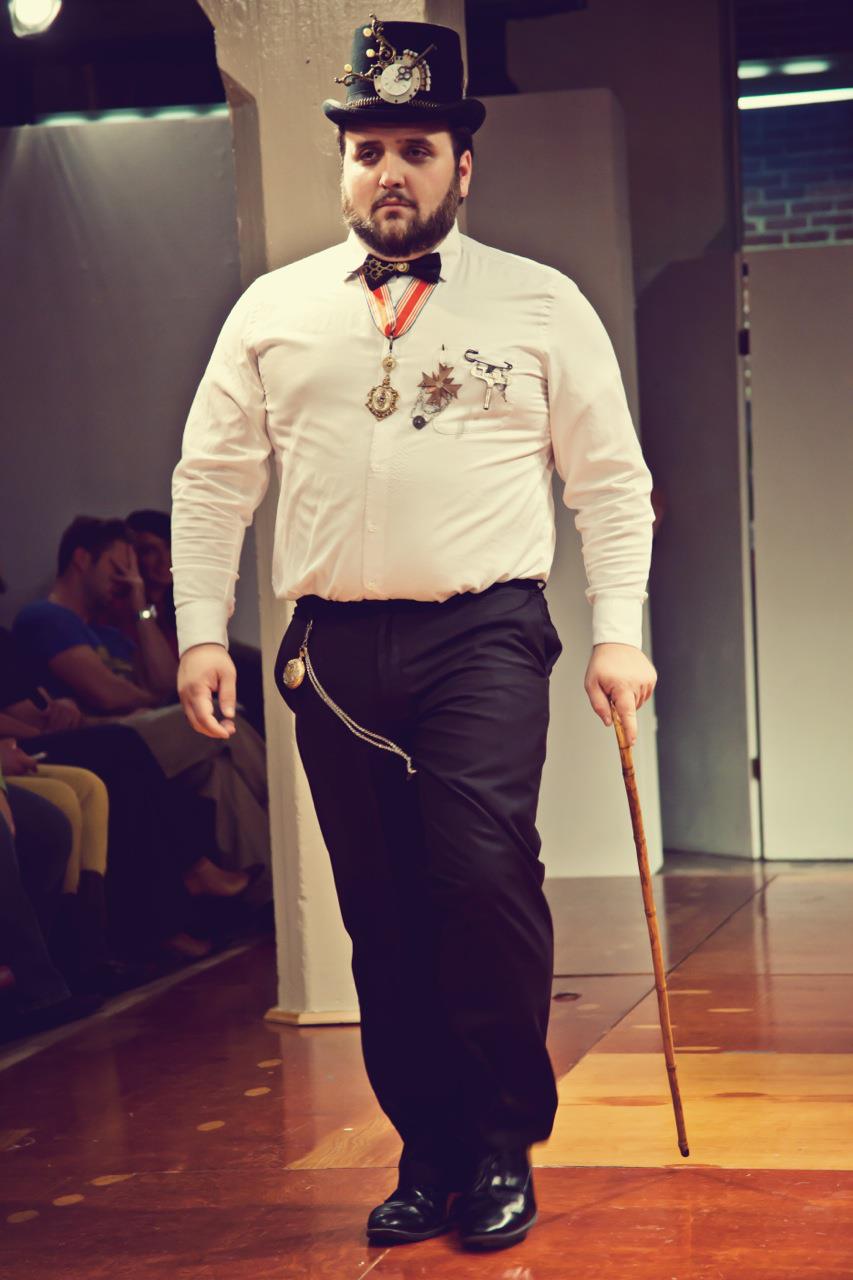
Doffing his tophat to Holly, Thom sauntered up the runway wearing the Tick Tock Top Hat, Imperial Steampunk medal (necklace), Steampunk General's medallion (pinned right), and Skeleton Key Kilt Pin (pinned left).
At the end of the runway, posing like the gentlemen he is--Thom paused and checked the time on his steam train pocket watch while leaning on his cane.
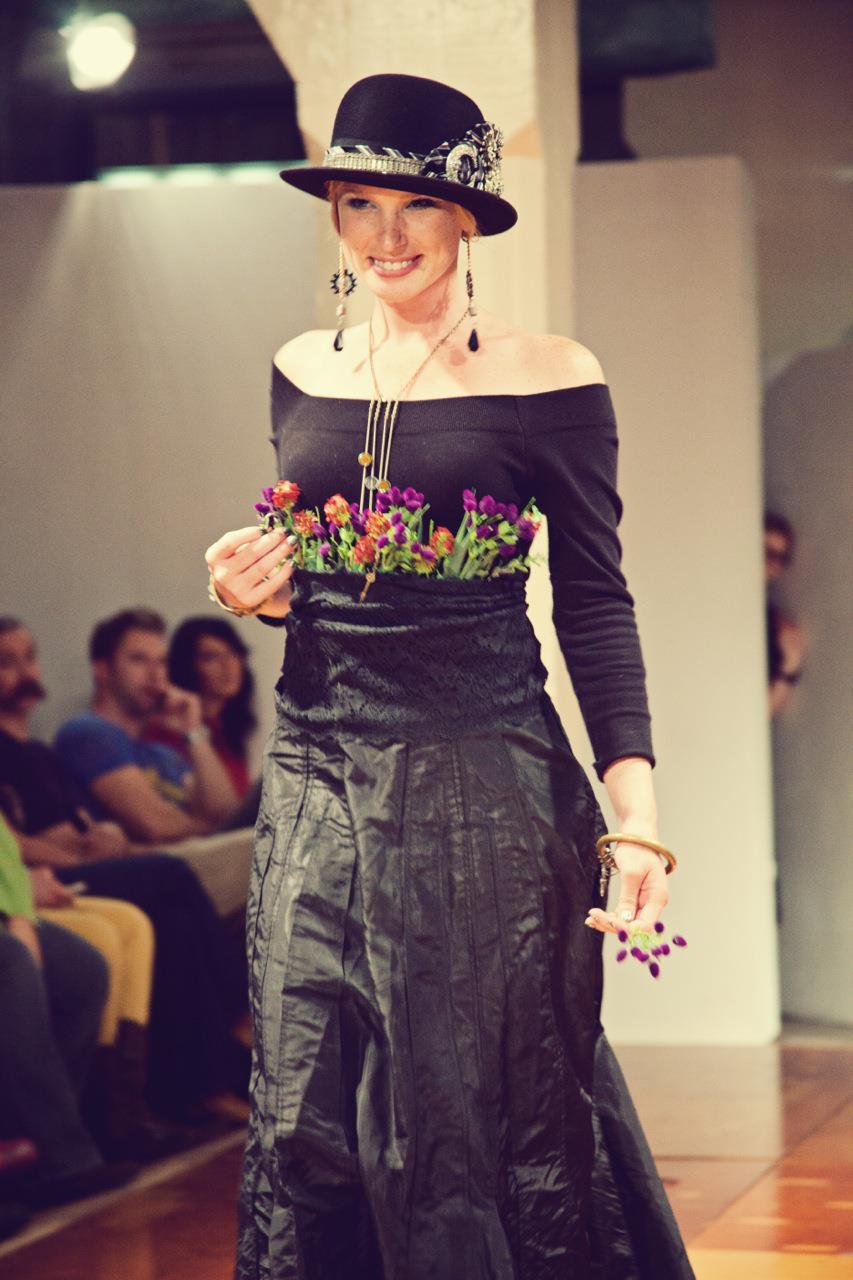
As Frenchy and the Punk's gypsy tune, "Dark Carnivale," played on, our next model, Kathleen wearing the Puttin' On the Ritz Steampunk Bowler, gearrings, gold gear cuff, spiral skeleton key cuff, and typewriter key necklace ripped flowers from her lace bodice and threw them out into the audience. Kathleen saved a bunch of violets for Melissa--our final model.
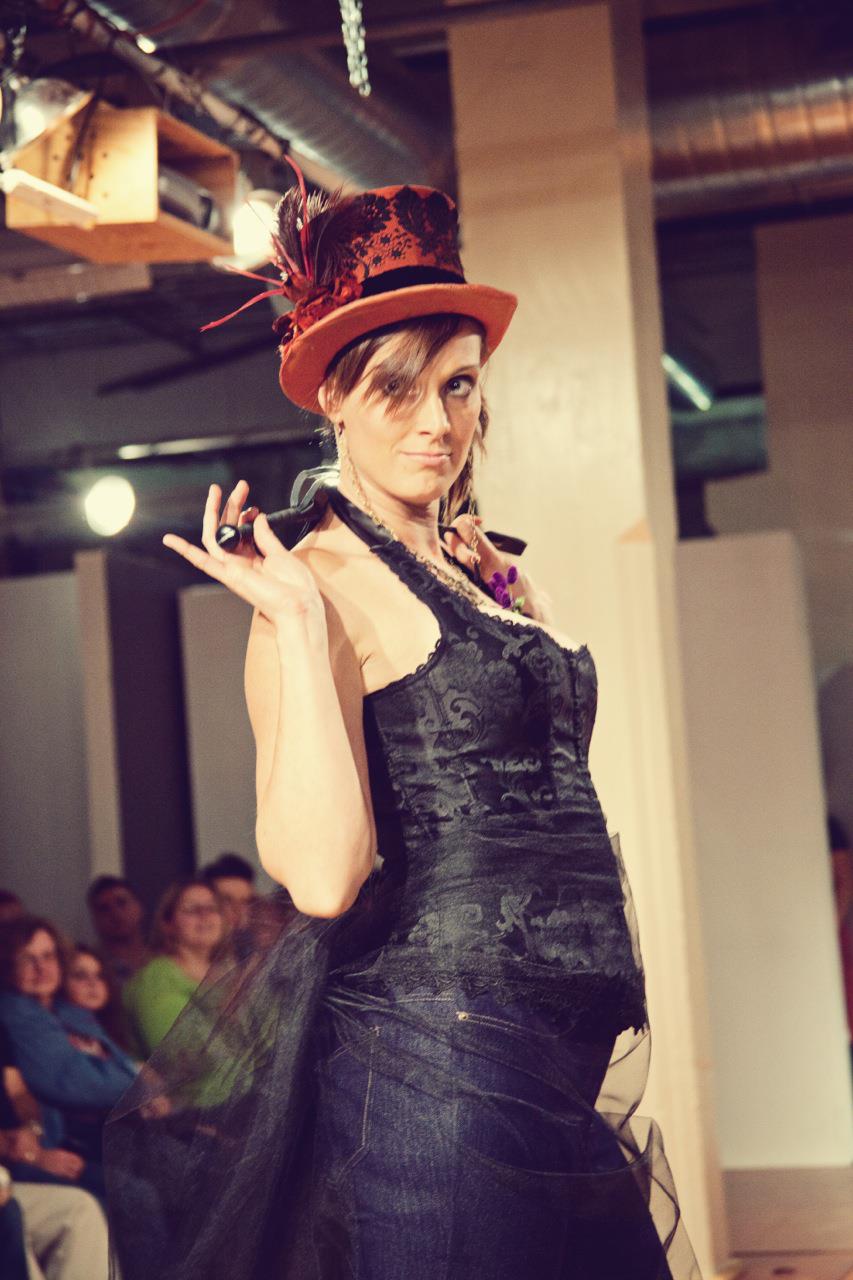 Melissa wore Frankly Scarlett Steampunk Top Hat, gearrings and a spiral cog necklace. Her prop, a riding crop, was activated all down the runway! The cattle call was so much fun--it was surreal being up there with my mom with everyone clapping. To see so many smiles, I knew we had pulled it off and transported them somewhere magical.
Thank You
First and foremost to my mom, for inspiring this collection of jewelry and for creating such beautiful hats. You keep challenging me & I am so grateful that you do! Second, thanks to Christine Crowe for insisting that I do the fashion show in the first place. Without that push, I would never have dreamed of doing this! Third, my wonderful models--Caroline, Renee, Holly, Thom, Kathleen, and Melissa! You were so wonderful and I couldn't have done it without you! To the volunteers at Indie Emporium who organized the music & helped us with a run-through. And last but not least, to Val Esparza for all of your help & support!
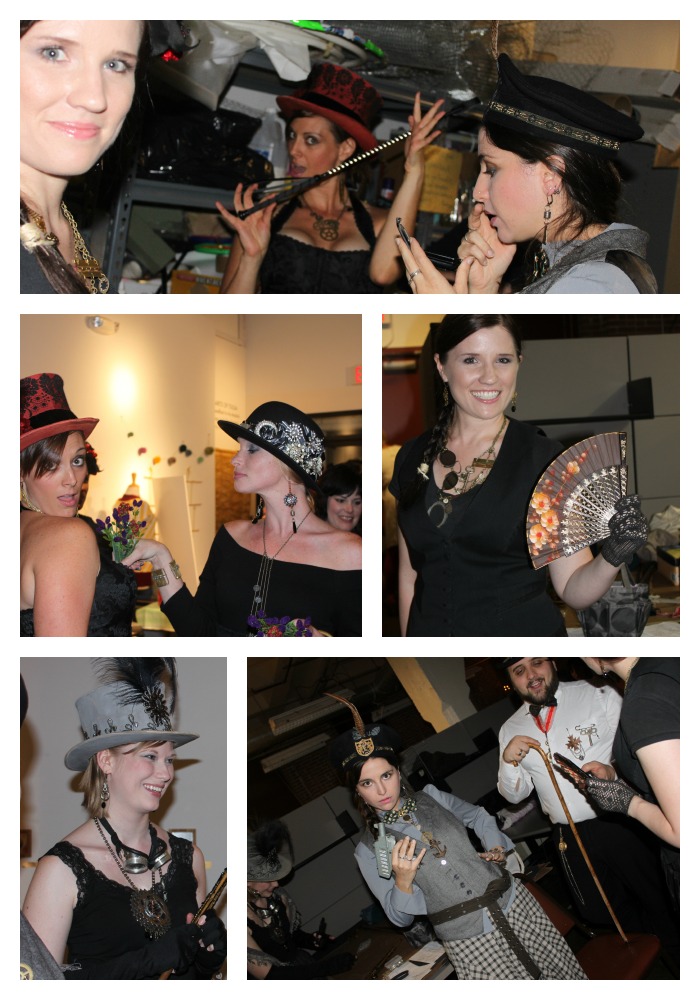 Here's a little of our behind the scenes madness/goofiness!
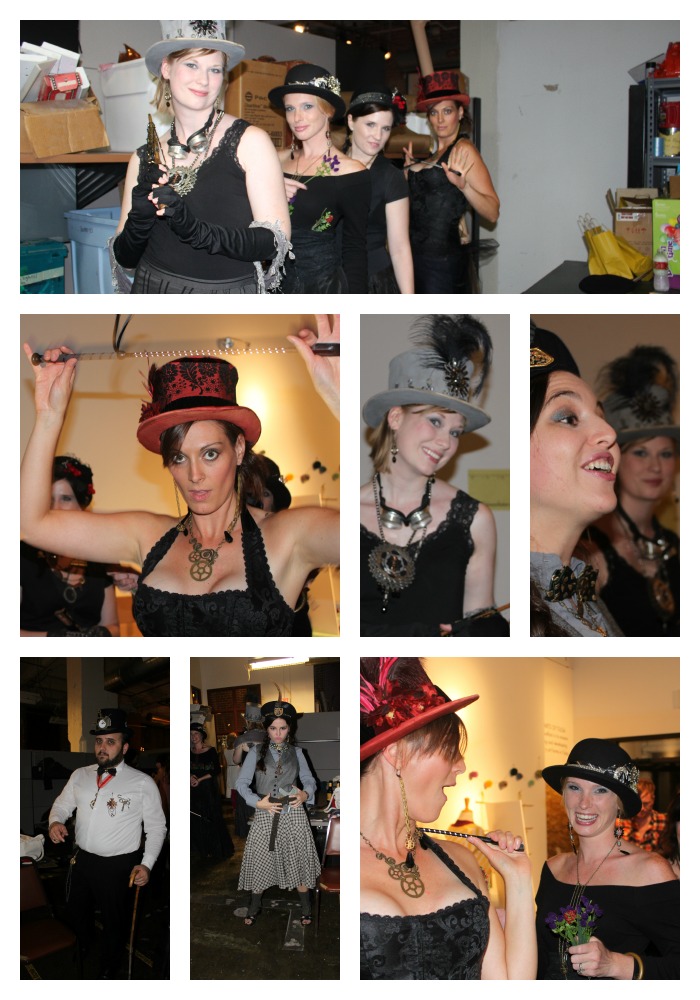 By the way--did I mention that Juliette Lewis loved Holly's outfit?!! She didn't stay for the show but she did snap a photo of Holly with her phone! Gleep! So freakin' cool! An outfit I styled is on Juliette Lewis's phone!
