Bohemian Romance Jewelry

ribbon

Update an Old Pair of Gloves

D-I-Y-Samantha ExtanceComment

With Halloween coming up soon, I've been dreaming up new steampunk costume DIYS.  The easiest way to create a Halloween costume is to simply update an older one. Many costumes include a pair of gloves. Gloves are a versatile accessory and easily updated. Here's what you'll need:IMG_3415
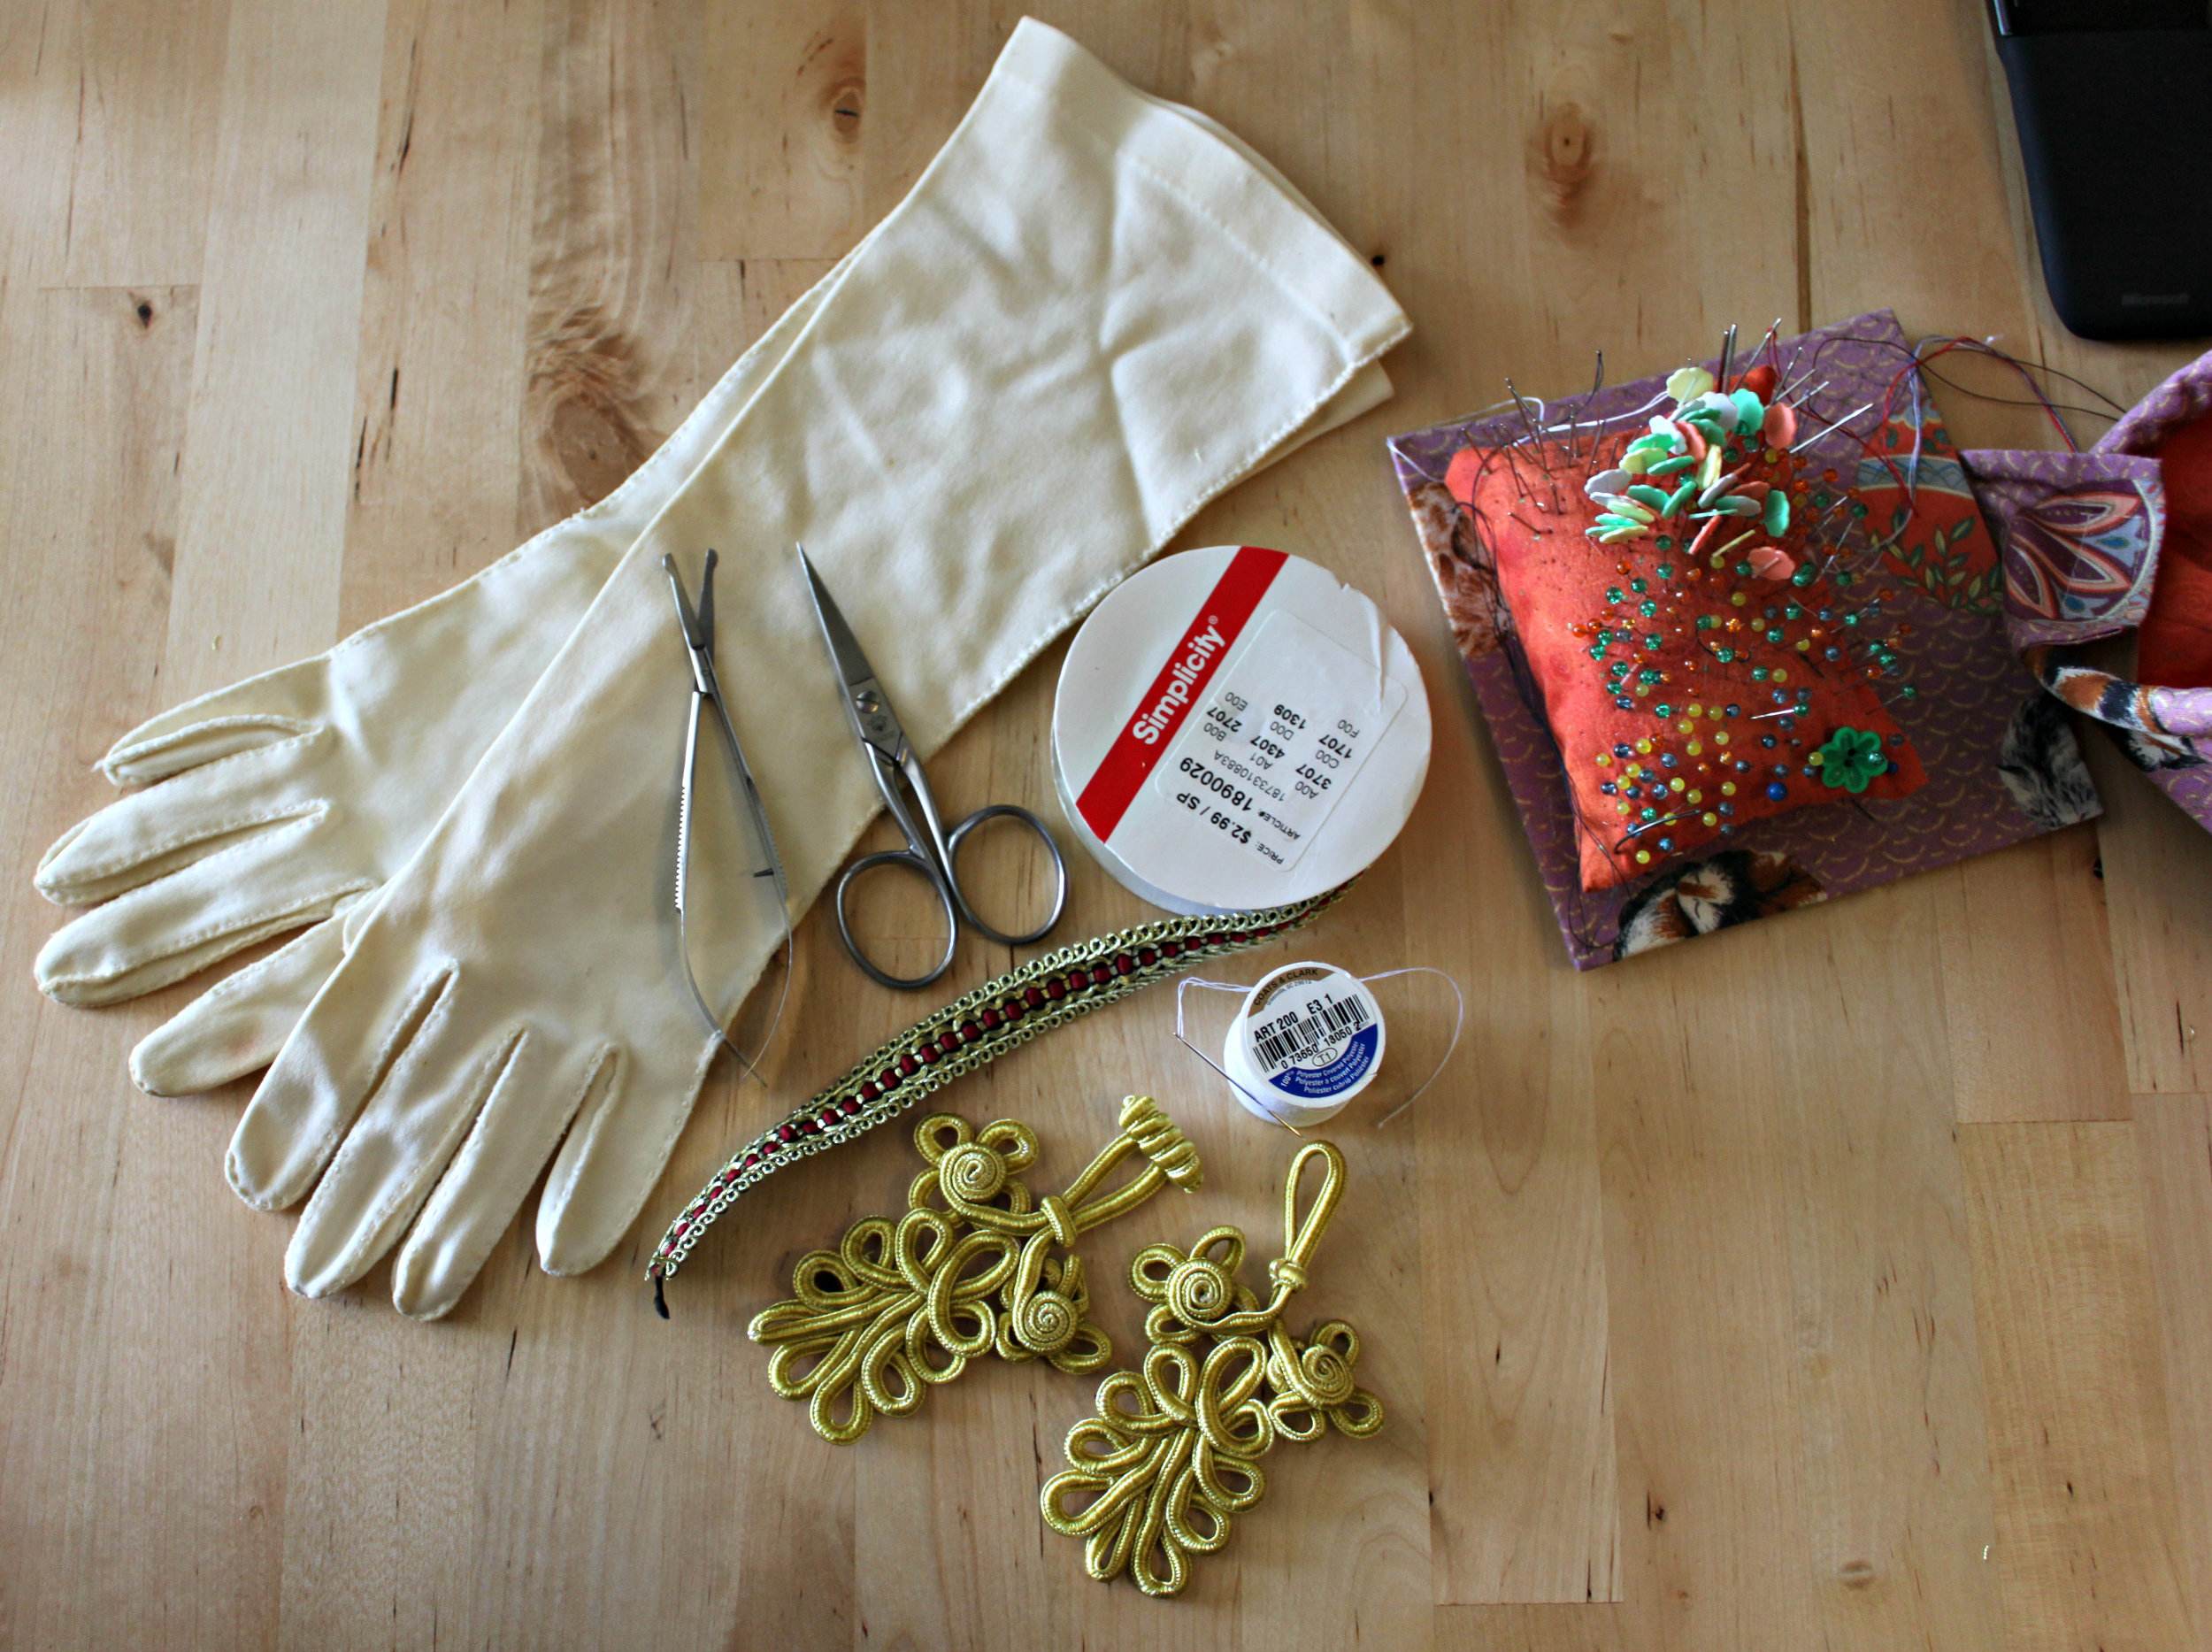
  • Pair of gloves
  • Scissors
  • Needle & Thread (the thread should match the color of your gloves)
  • Pins
  • Decorative ribbon (I purchased mine from JoAnn's for just $2.99)
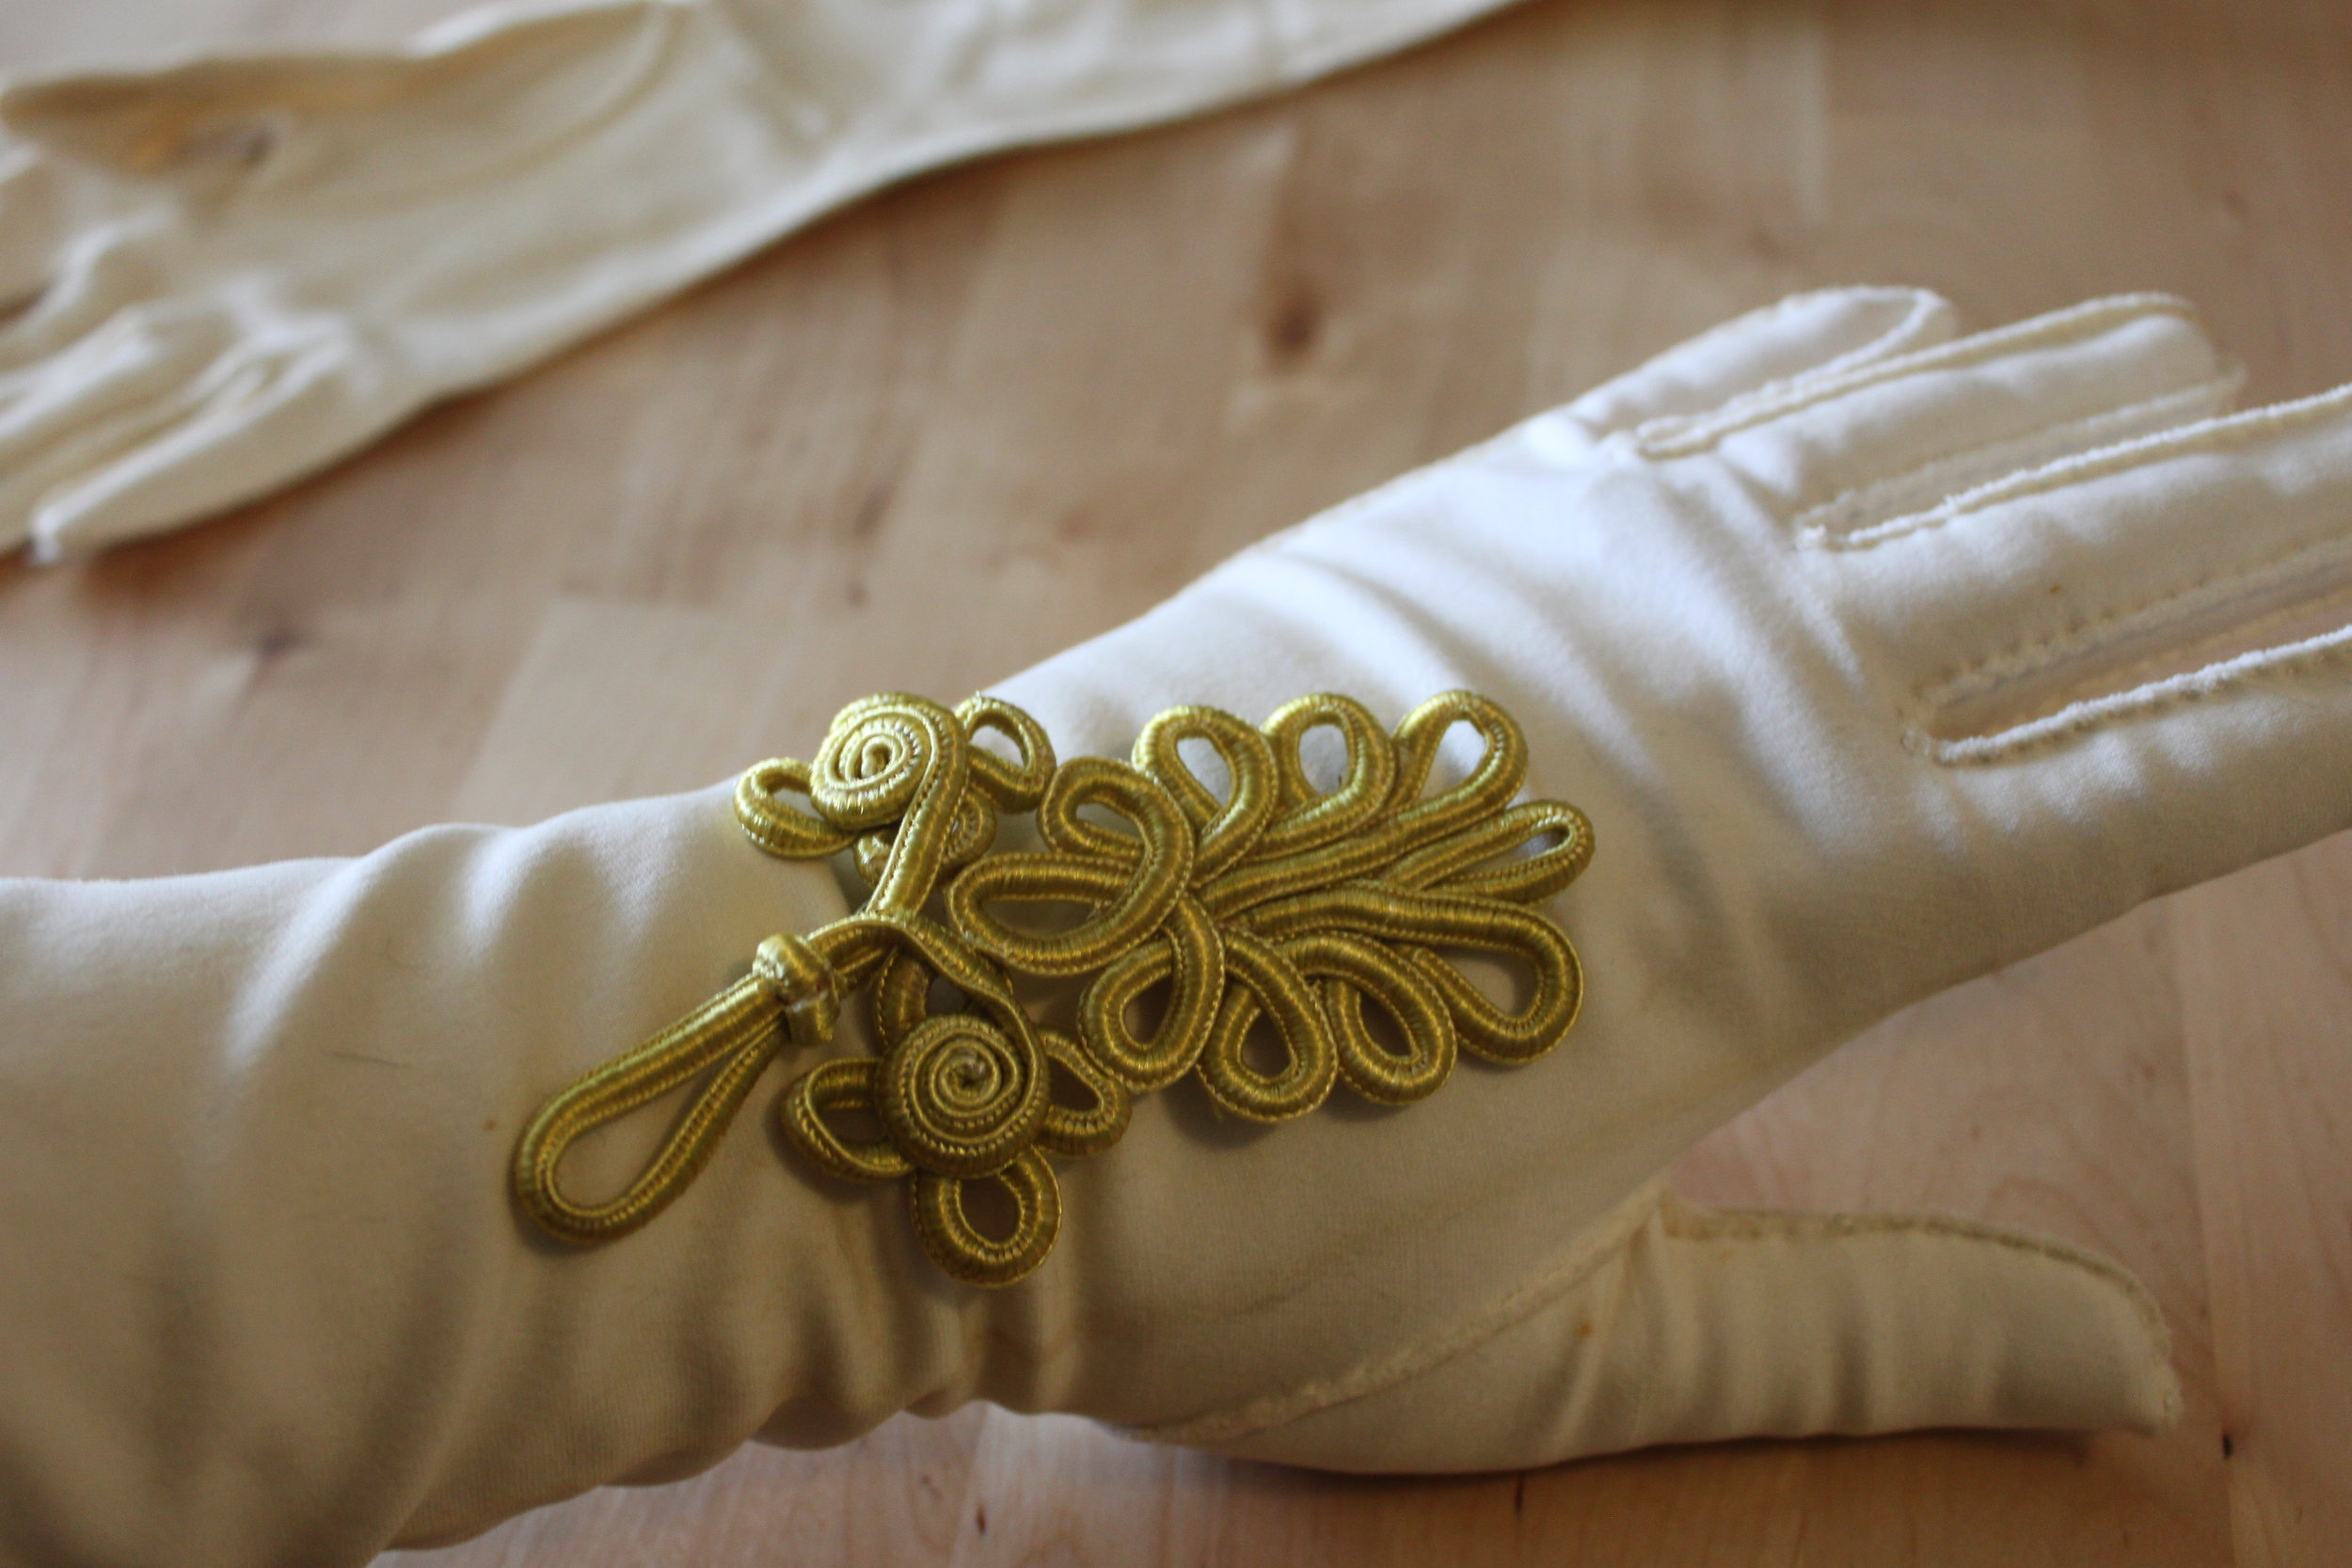
  • Embroidered Ribbon Clothing Toggle (you can find these in any sewing or fabric store in the belt & fasteners aisle)
  • Piece of plastic that fits inside your gloves (You may need to get creative with this supply--I used a kitchen utensil. You want something that will fit inside your glove & is preferably plastic so that you don't sew through both sides of your glove when attaching the clothing toggle. Plastic is smooth and so your needle will slide once it hits it)

Steps:

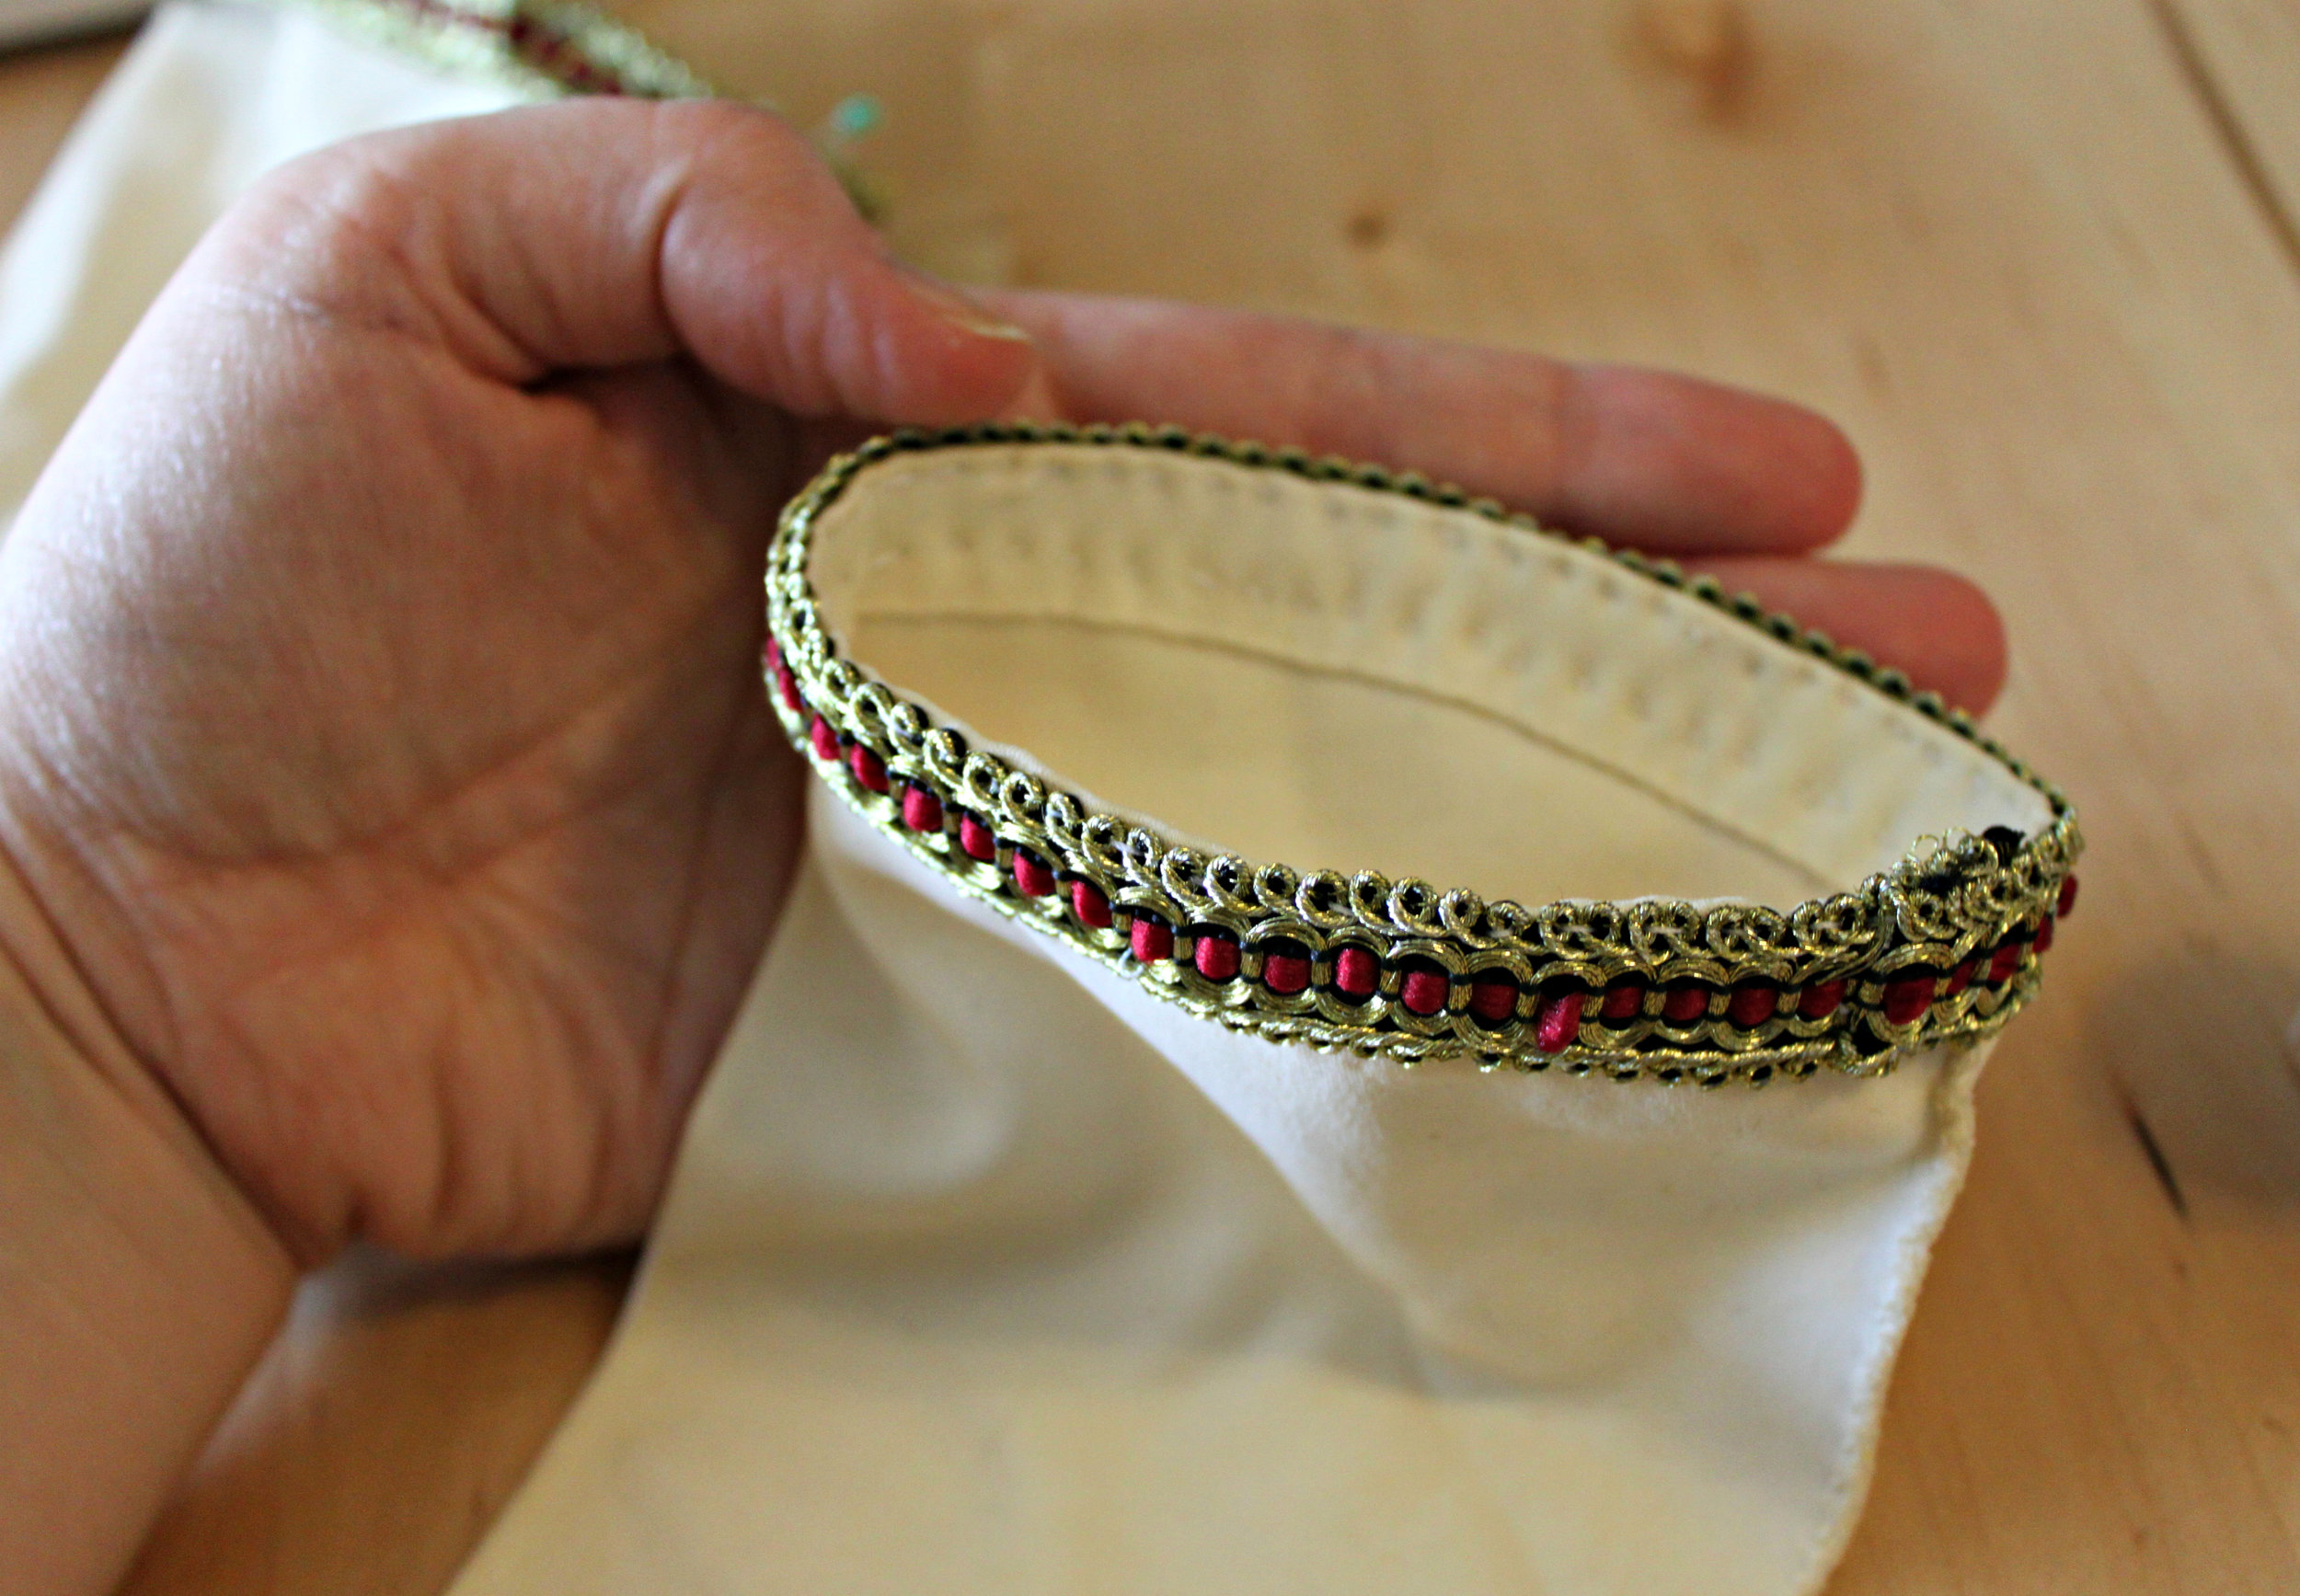
  1. Begin by pinning your decorative ribbon in place. To ensure that you place your ribbon evenly, line up the edge of your ribbon with the edge of your glove. Also, to hide your seam, begin pinning your ribbon on the part of the glove that will be closest to your body. Leave 1/4 inch of extra ribbon at the end. Fold this extra 1/4 inch of ribbon under & be sure that it covers up any raw edges. Pin in place.IMG_3416
  2. Using your needle & thread, sew your ribbon onto your glove. Any style of stitch will do. Be sure to keep your stitches neat & even. (Also, try to hide your stitches in the pattern of your ribbon or use a matching thread.) Remove the pins as you go.IMG_3419
  3. Repeat Steps 1 & 2 for the other glove. IMG_3421
  4. Next, put on the glove and determine where you would like to place your embroidered ribbon clothing toggle piece. (Do not pin the piece in place while you are wearing the glove...unless of course you want the Halloween gore to be real.)IMG_3422
  5. After removing the glove, pin the toggle piece in place.
  6. Before sewing, insert the piece of plastic into your glove. This will ensure that you do not sew your glove shut/together. PicMonkey Collage2
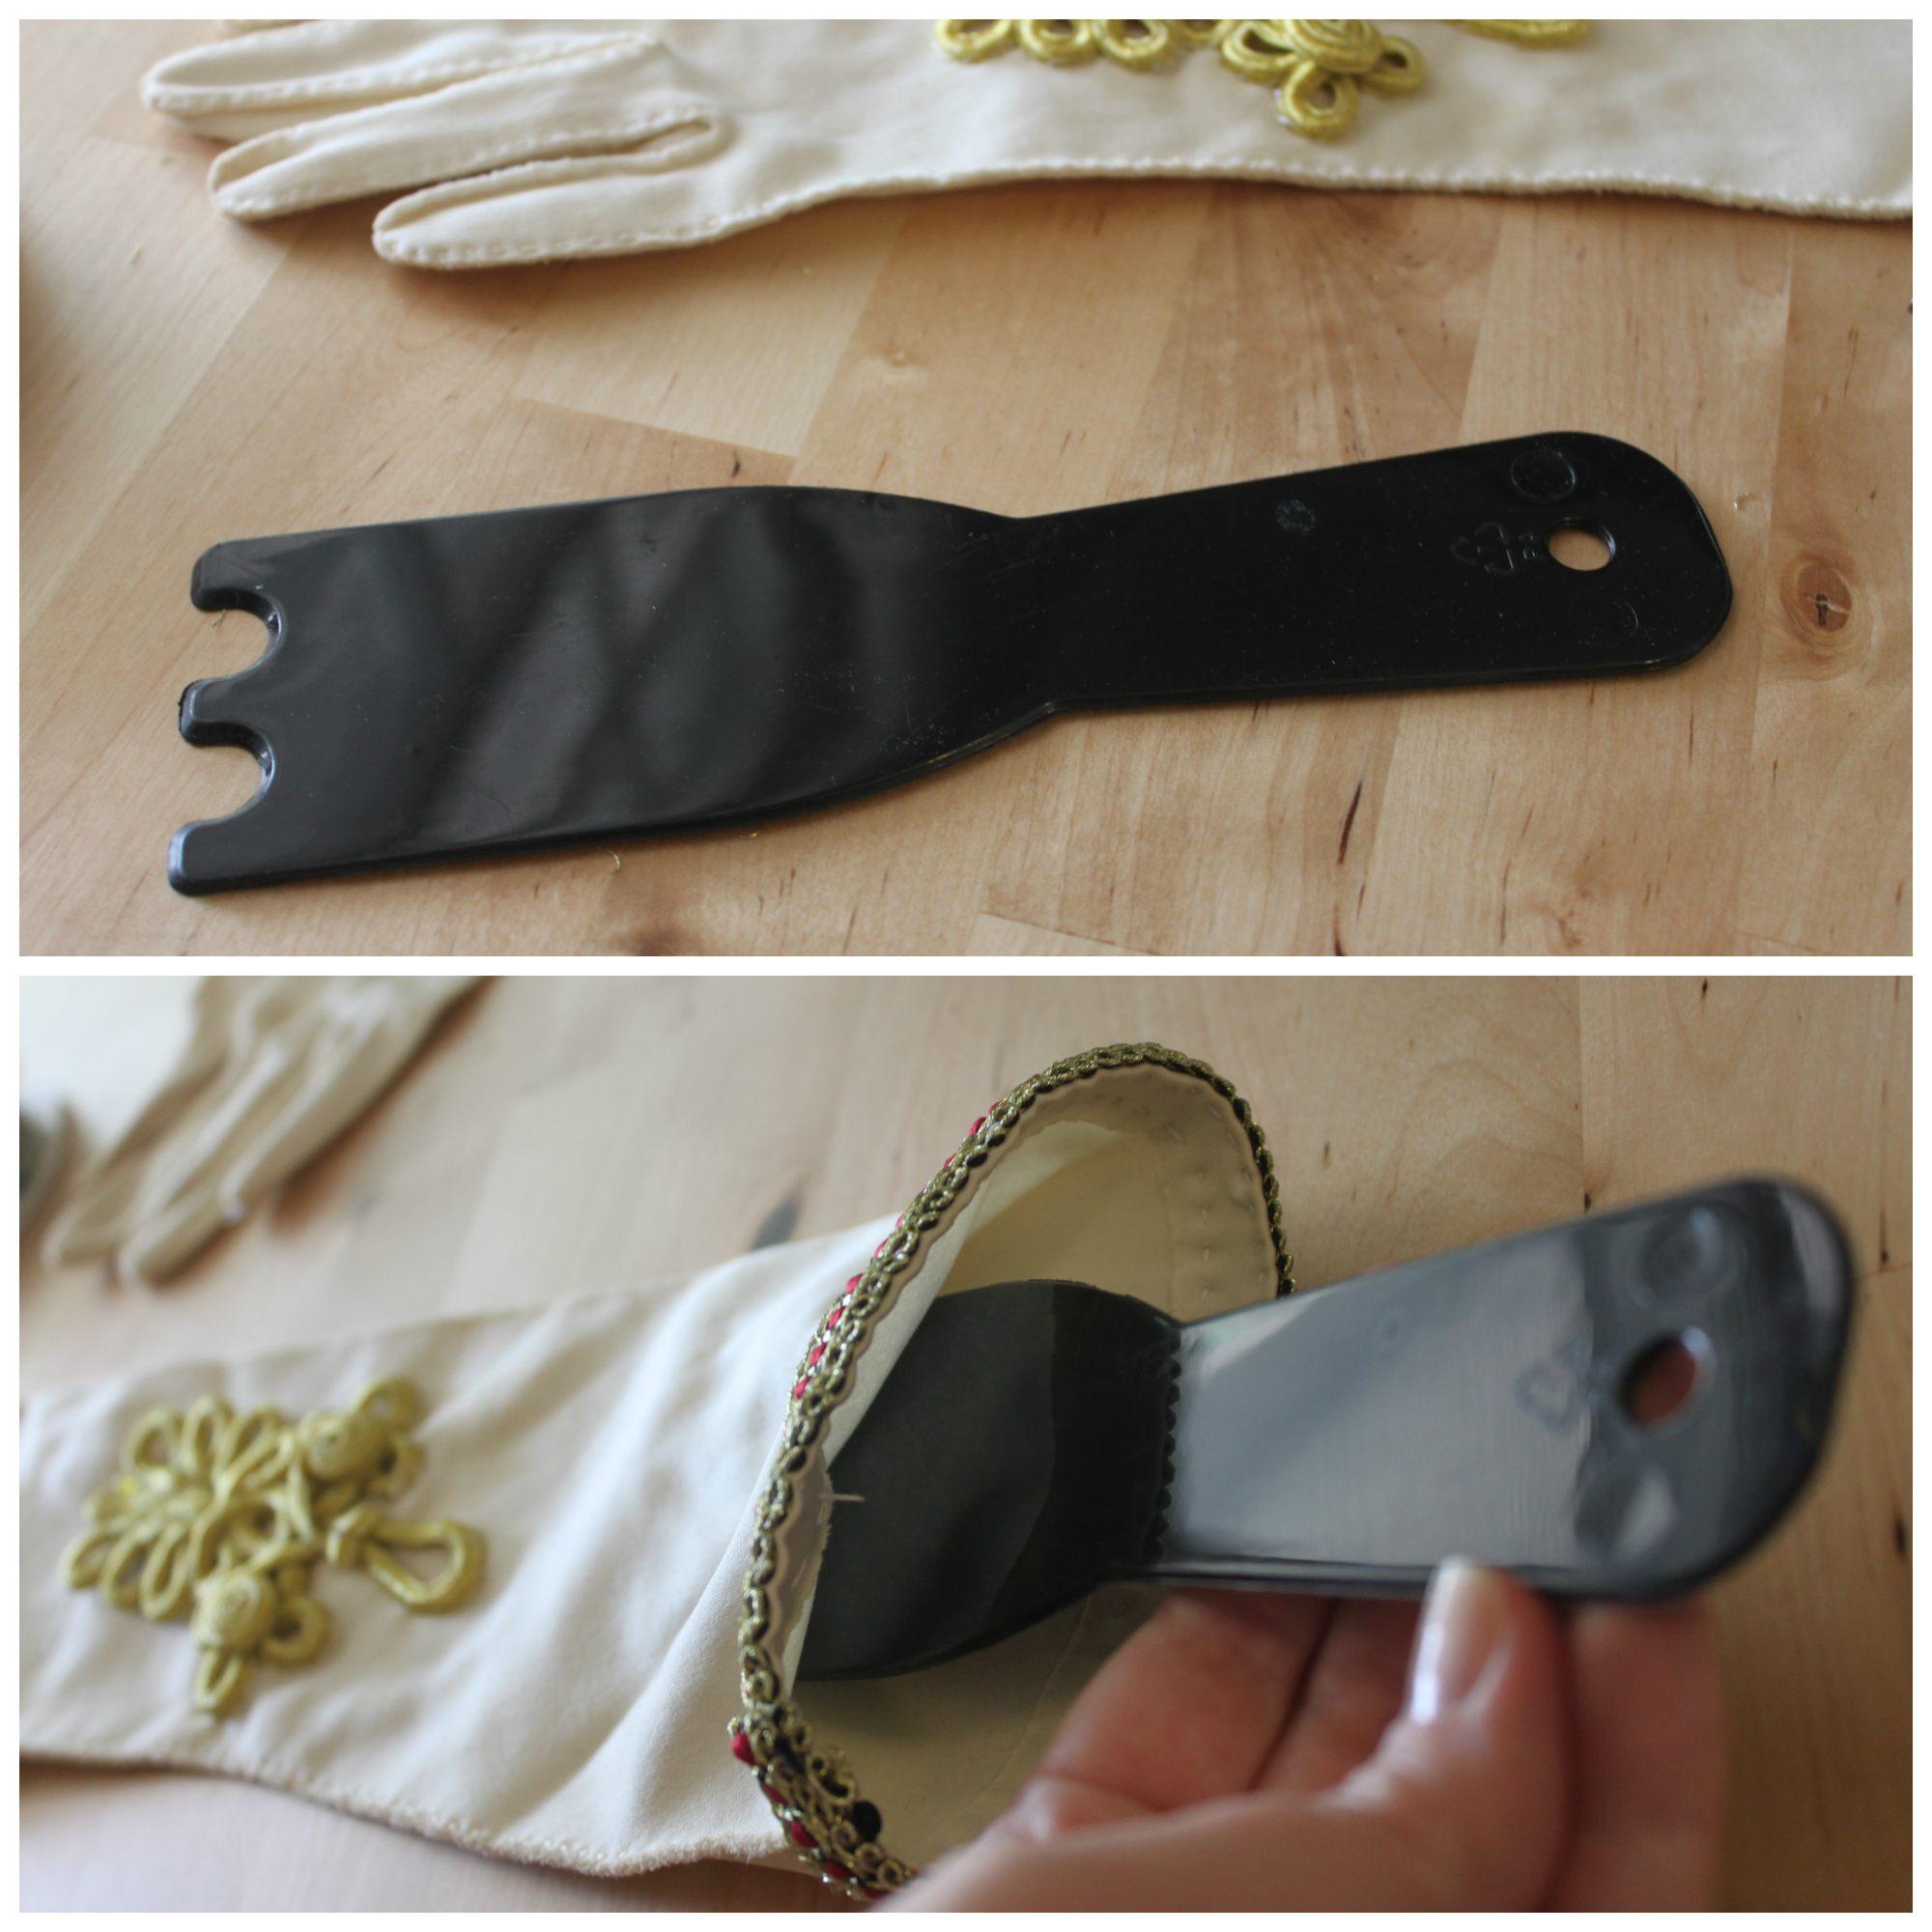
  7. Using your needle & thread, sew your toggle piece to your glove. The best stitches to use are: slip stitch, blanket stitch, or an oversewing stitch. PicMonkey Collage
  8. Repeat Steps 4-7 for the other glove. IMG_3430
  9. Now your gloves are like new! Hope they'll keep you warm & feeling fancy this Halloween! IMG_3444

As always, Merry Making! Check back again soon for more Steampunk Halloween Costume DIYS--I have 3 already in the works on how to steampunk a mask! IMG_3436

DIY Steampunk Home Decor: Clock Face Catch All

D-I-Y-Samantha ExtanceComment

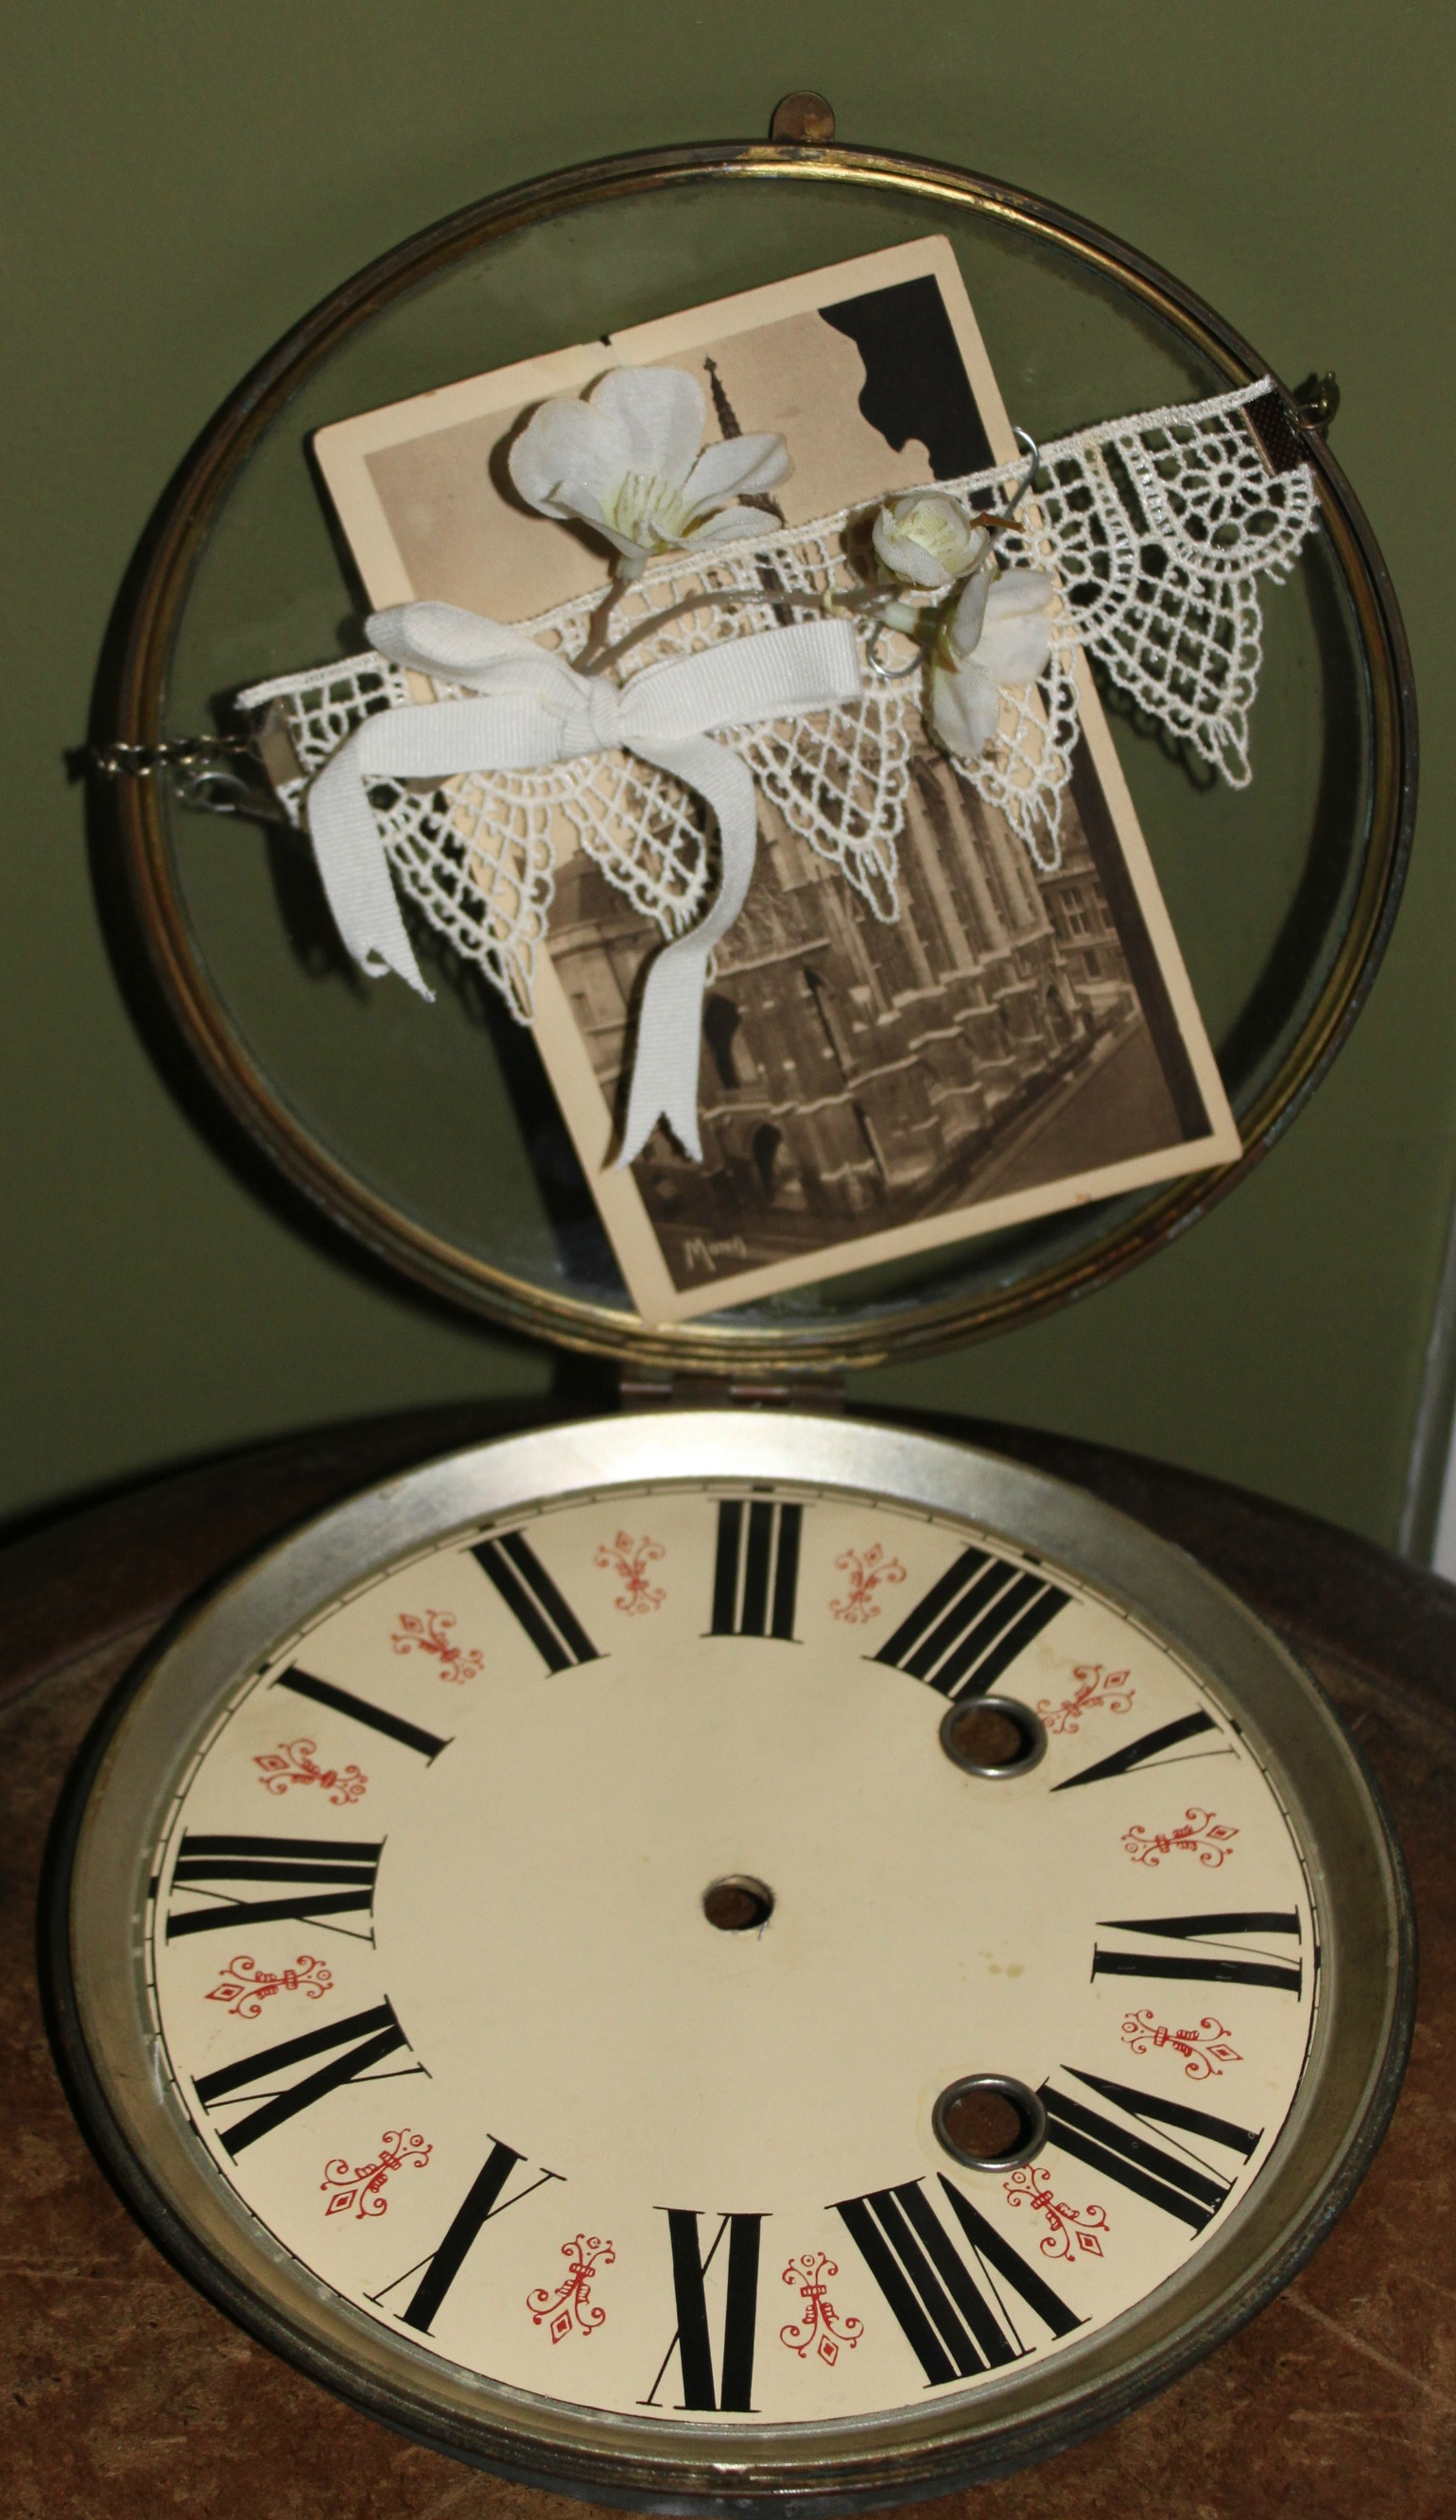
IMG_7284Steampunk your home with this simple & elegant clock face catch all. Perfect for holding your loose change, keys, sunglasses, stamps, or jewelry--your catch all will not only be beautiful, but also be another conversation piece to add to your home! Here's what you'll need: IMG_7279Materials & Tools:

  • Clock Face (oversize or large) that has a  protective covering. If you cannot find a clock face then try looking for a sundial instead.
  • Vintage Photograph or Postcard (that fits inside your covering)
  • Ribbon (any color of your choice)
  • Fake Flower (any kind of your choice)
  • Lace (the amount will depend on the size of your covering. Your lace should equal the length [circumference] of your covering)
  • Paperclip
  • Scissors
  • Needle & Thread (or glue gun)
  • Chain (also measured to equal the circumference of your covering)
  • Jewelry pliers & wire cutter
  • 2 Ribbon Crimps
  • 2 jump rings

Steps:

  1. Open up the covering of your clock face & leave open. Place your vintage photograph inside. Set aside.
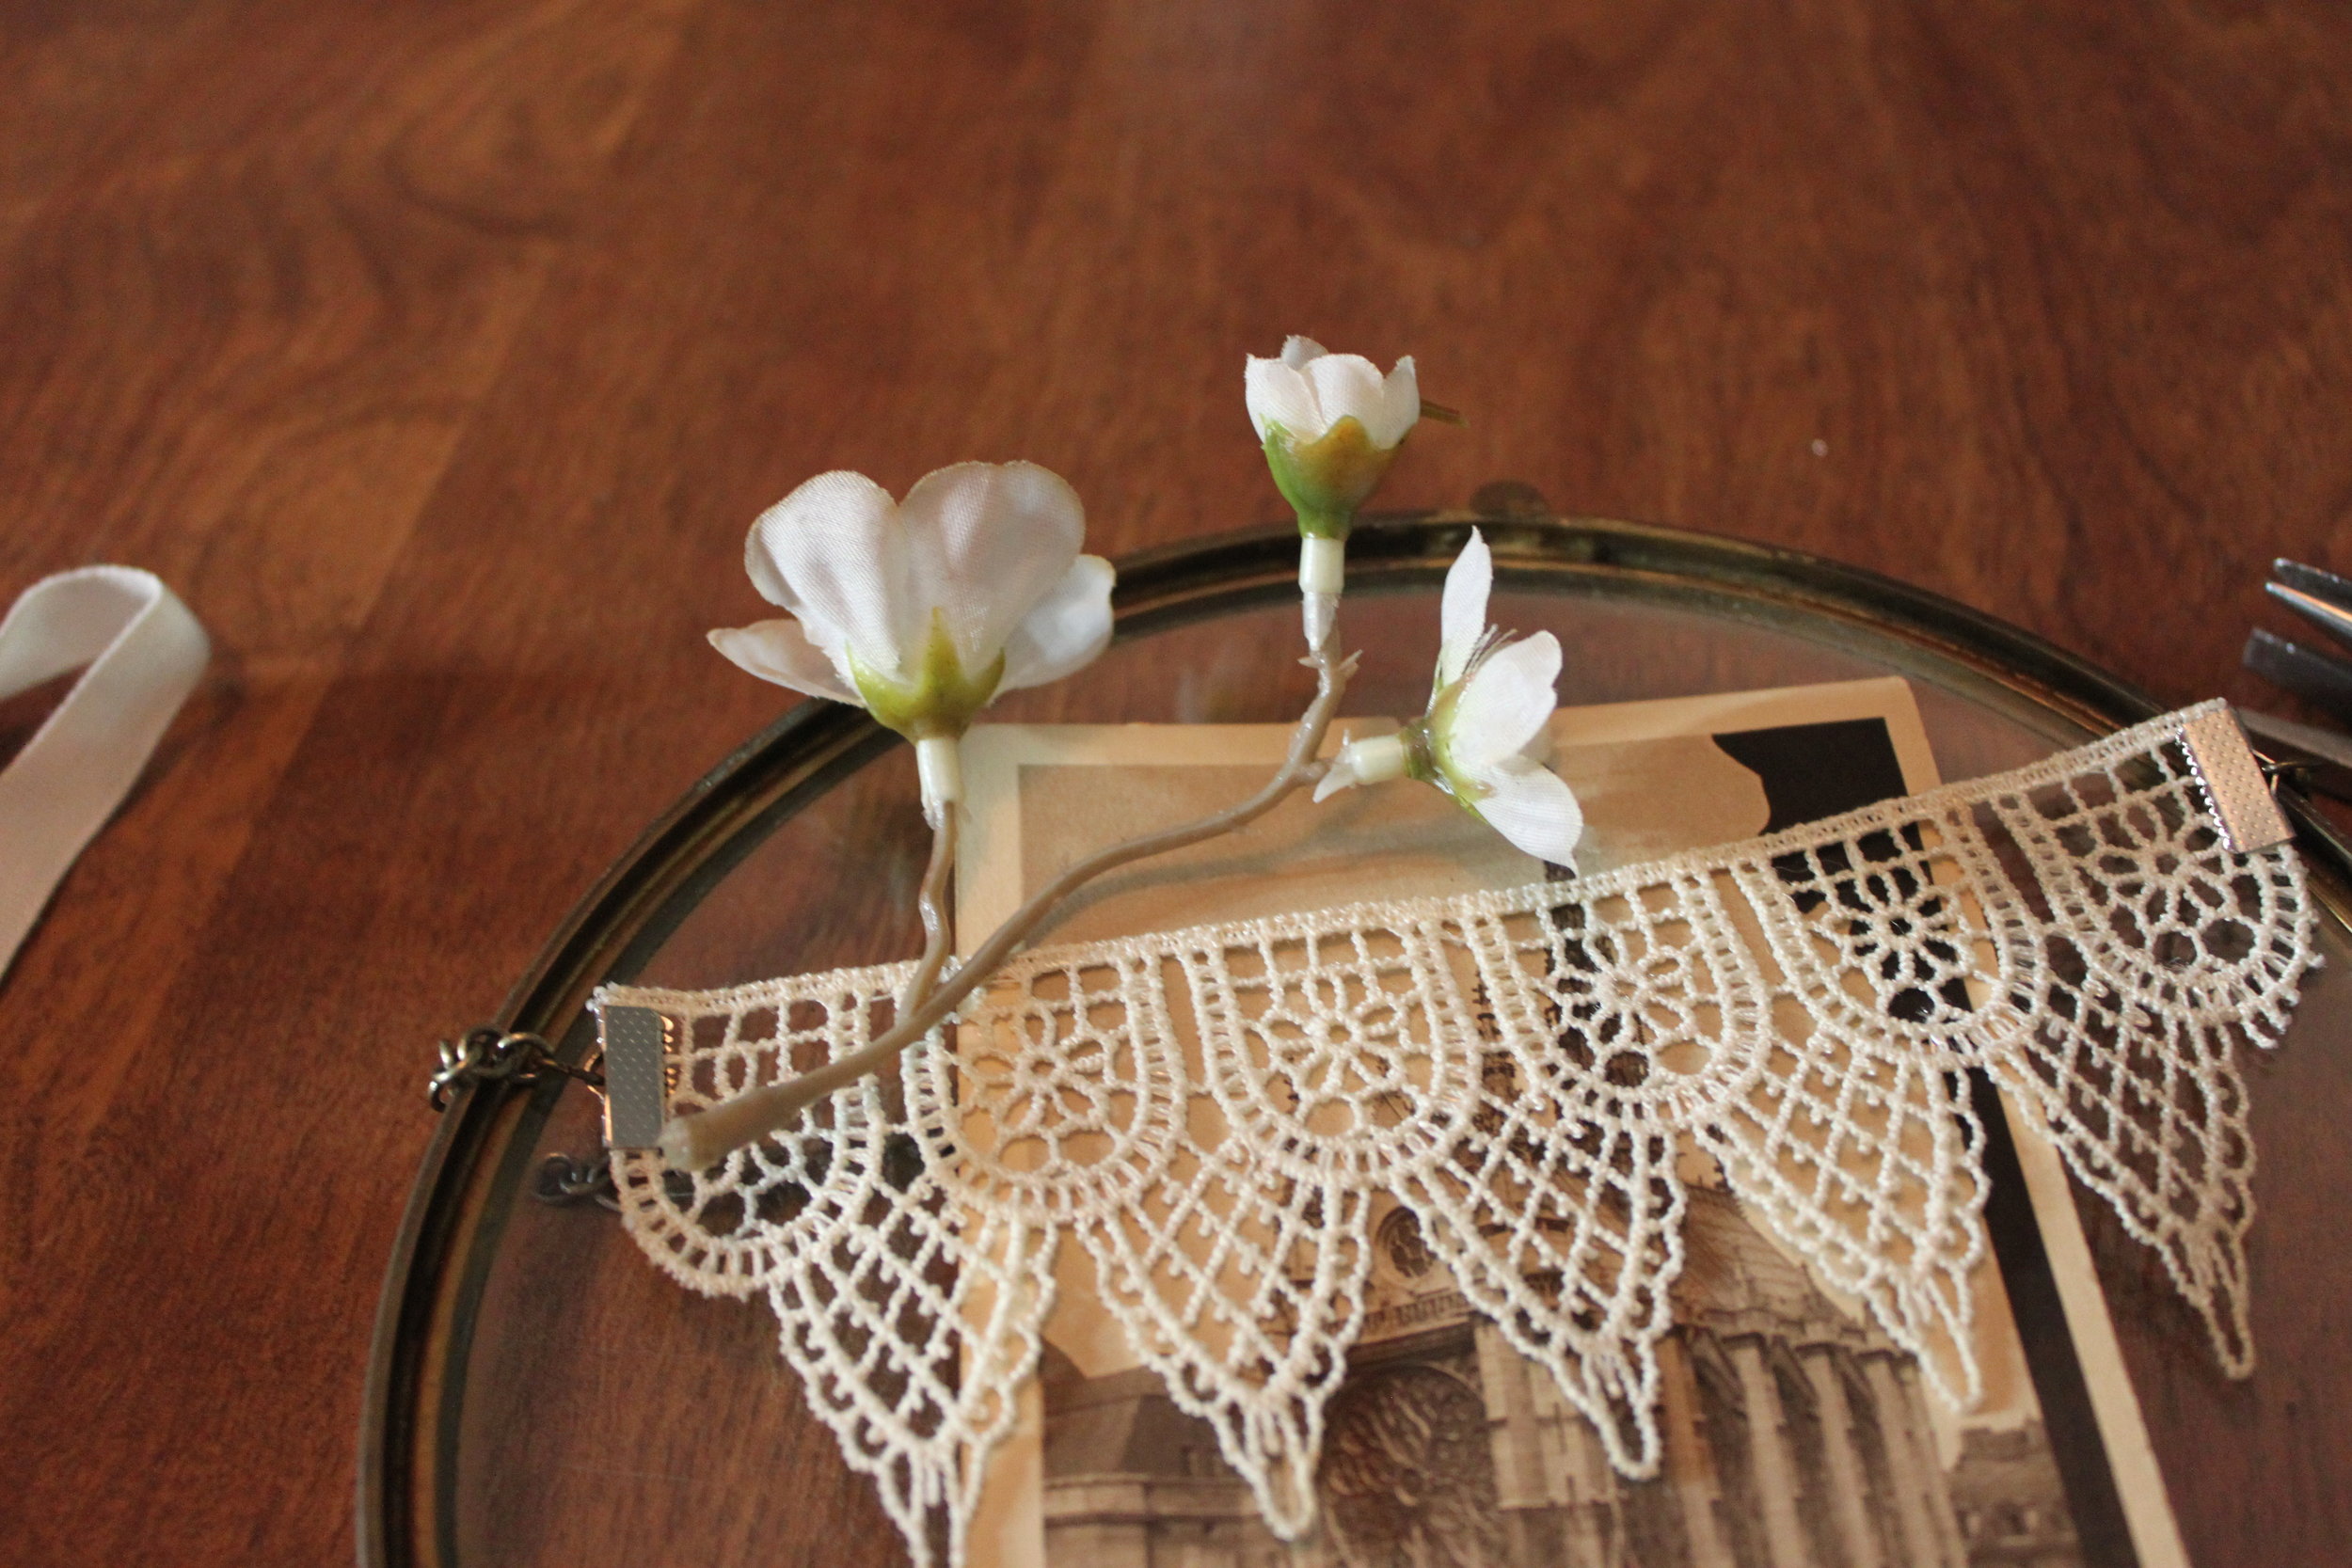
  2. Measure your lace (it should be the same length as your covering) and then cut. Next, place 1 ribbon crimp at the end of your lace and crimp in place with your jewelry pliers. Repeat for the other end. IMG_7283
  3. Now measure the amount of chain you need. (It should be the same length as your covering too.) Cut your chain with wire cutters, or toenail clippers if you do not own a pair of wire cutters. Next, using your jewelry pliers (2 flat nosed pliers are best) connect your chain to your lace by hooking the jump ring through the ribbon crimp. Repeat for the other side.
  4. Place your lace & chain over the covering--the lace should be placed in front over the photograph/postcard. You may have to adjust your chain if you don't like where it sits on your covering (by making it smaller or larger--respectively, removing chain links with wire cutters or adding jump rings or more chain with your pliers).IMG_7280
  5. Next, make a decorative bow out of your ribbon. IMG_7282
  6. Using your needle & thread, sew your bow and fake flower in place onto the lace. Be sure to tie a sturdy knot. (Another option for this step if you don't like sewing--glue the bow and fake flower in place with your glue gun.)
  7. Last, clip together your photograph and lace with your paperclip. This helps the lace remain taut across the photograph/postcard rather than sag across it.
  8. Proudly display in your lovely home!

Steampunk Home Decor Catch All CollageAs always, happy making!

DIY Steampunk Curtain Ties

D-I-Y-Samantha Extance1 Comment

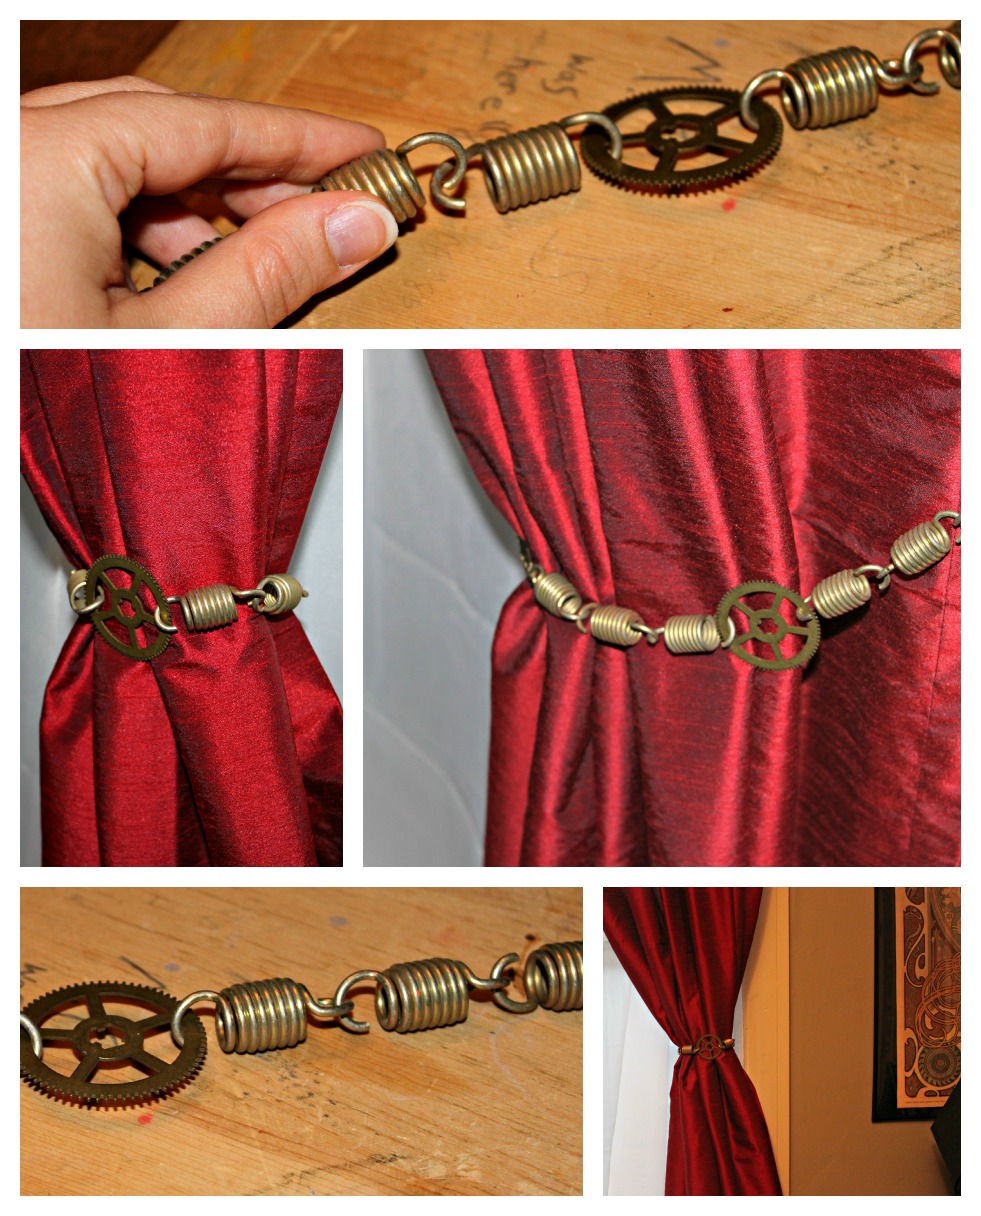
6 Different Steampunk Curtain Tie DIYS to subtly transform your decor! Materials & Tools are listed below by project. So let's get to makin'! Spring & Gear Steampunk Curtain Tie

  • 8-12 springs (depending on the thickness of your curtain)
  • Grandfather clock gear
  • Flat nosed pliers & jump rings

Steps:

  1. Link the springs together. (My springs are open ended, but if yours are closed ended connect your springs with a jump ring using your flat nosed pliers.) Link 4-6 springs together then add your grandfather clock gear.
  2. Next, add the remaining 4-6 springs to your gear & spring chain.
  3. Gather your curtain and place your spring & gear chain around it, connecting the two spring ends. (Again, mine are open ended so connecting them was simple; however, if your springs are closed ended, use a jump ring as detailed in Step 1.)

Skeleton Key & Chain Steampunk Curtain Tie

  • Skeleton key
  • Chain
  • 4 jump rings
  • Flat nosed pliers
  • Measuring tape
  • lobster claw or hook

Steps:

  1. Gather your curtain and measure out how much chain you need. Cut the amount needed.
  2. Add your lobster claw or hook to the end of your chain using a jump ring and your flat nosed pliers.
  3. Next, attach your skeleton key to your chain wherever you desire using your jump rings and your flat nosed pliers.
  4. Last, gather your curtain and place the chain around it and secure by connecting your lobster claw or hook to the last loop of your chain.

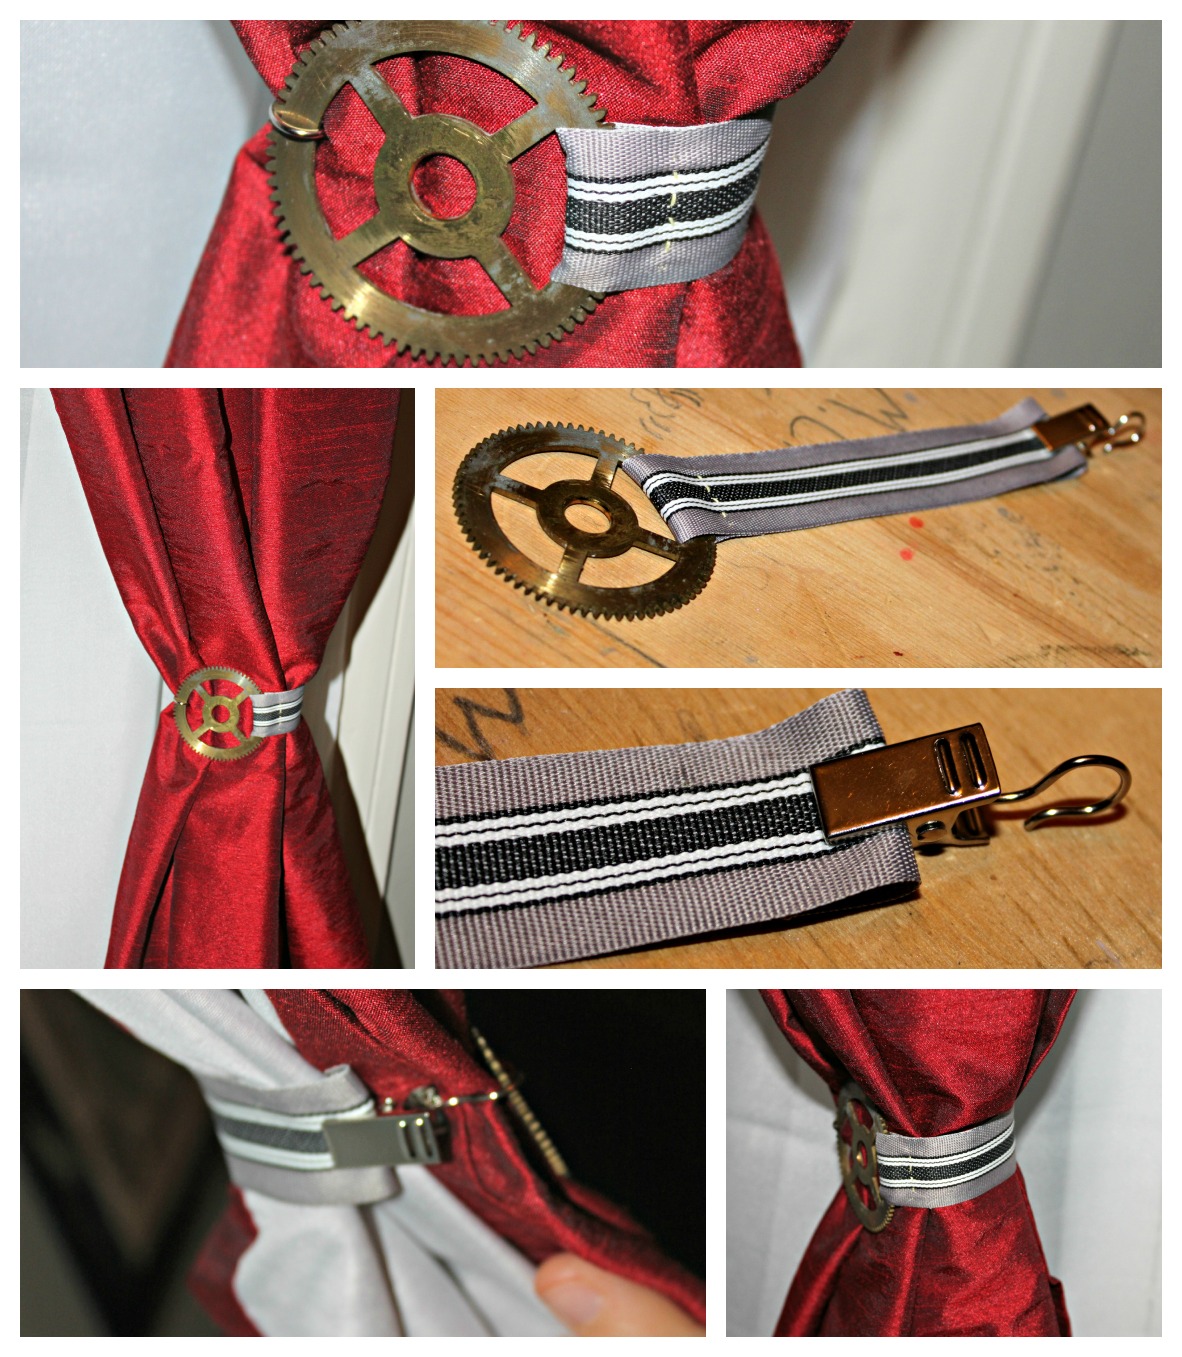
Ribbon & Gear Steampunk Curtain Tie

  • Ribbon
  • Grandfather clock gear
  • Needle & thread
  • Scissors
  • Clamp-hook
  • Measuring tape

Steps:

  1. Gather your curtain and measure its gathered width. Add a 1/2 inch. This width will equal the length of your ribbon.
  2. Cut your ribbon to your needed length.
  3. Next, fold one end of your ribbon around your grandfather clock gear. This is where your 1/2 inch allowance is used.
  4. With your needle & thread, sew the fold in place. Be sure to tie a sturdy knot. Cut off the excess thread.
  5. Place your clamp-hook on the other end of the ribbon.
  6. Gather your curtain once again and wrap the ribbon around it. Secure the tie in place by fishing the hook onto your gear.

Lightbulb, Velvet Ribbon & Gear Steampunk Curtain Tie

  • Velvet ribbon (or an old choker: if you do use an old choker you can skip ahead to Step 3)
  • Grandfather clock gear
  • Chain
  • Wire & wire cutters
  • Flat nosed pliers
  • Scissors
  • Measuring tape
  • Lightbulb or (lightbulbs)
  • 2 ribbon ends (or crimps)
  • 4 jump rings

Steps:

  1. Gather your curtain and measure its gathered width. Next measure your gear. Subtract your gear's width from your curtain width. This width is equal to the length of your ribbon.
  2. On each end of your velvet ribbon, place a ribbon end (or crimp) using your flat nosed pliers.
  3. Attach your gear to one end of your velvet ribbon with a jump ring using your flat nosed pliers. Set aside.
  4. For this step you'll need wire and wire cutters. Grab your lightbulb and begin wire wrapping its base. Be sure to create a loop so that you can connect the lightbulb (or lightbulbs) to your gear (and/or chain). Cut off excess wire.
  5. Connect your lightbulb to your gear using a jump ring and your flat nosed pliers (through the wire loop). Optional: you can attach another lightbulb to your gear. I suggest attaching the 2nd lightbulb to chain and then attaching the chain to your gear. It will give your curtain tie another added dimension.
  6. Last, wrap your velvet ribbon (or choker) around your gathered curtain and secure by connecting the loose end of your ribbon to the other side of your gear with a jump ring using your flat nosed pliers.

Clamp, Chain & Gear Steampunk Curtain Tie

  • C-Clamp
  • Grandfather clock gear
  • Chain (approximately 1-2 inches)
  • 2 jump rings
  • Flat nosed pliers

Steps:

  1. Attach your grandfather clock gear to the middle of your c-clamp with a jump ring and flat nosed pliers.
  2. Next, attach your chain to the bottom of the gear with a jump ring and flat nosed pliers.
  3. Attach the loose end of the chain to the hoop part of the c-clamp with a jump ring and pliers.
  4. Gather your curtain and hook your c-clamp around it. Last, clamp your curtain in place.

Clamp Simply Steampunk Curtain Tie

  • C-Clamp

Steps:

  1. Gather your curtain and position your c-clamp around it.
  2. Screw closed!

Enjoy your fabulous Steampunked Curtains!