Bohemian Romance Jewelry

Steampunk

Something Old, Something for Caroline

UncategorizedSamantha Extance2 Comments

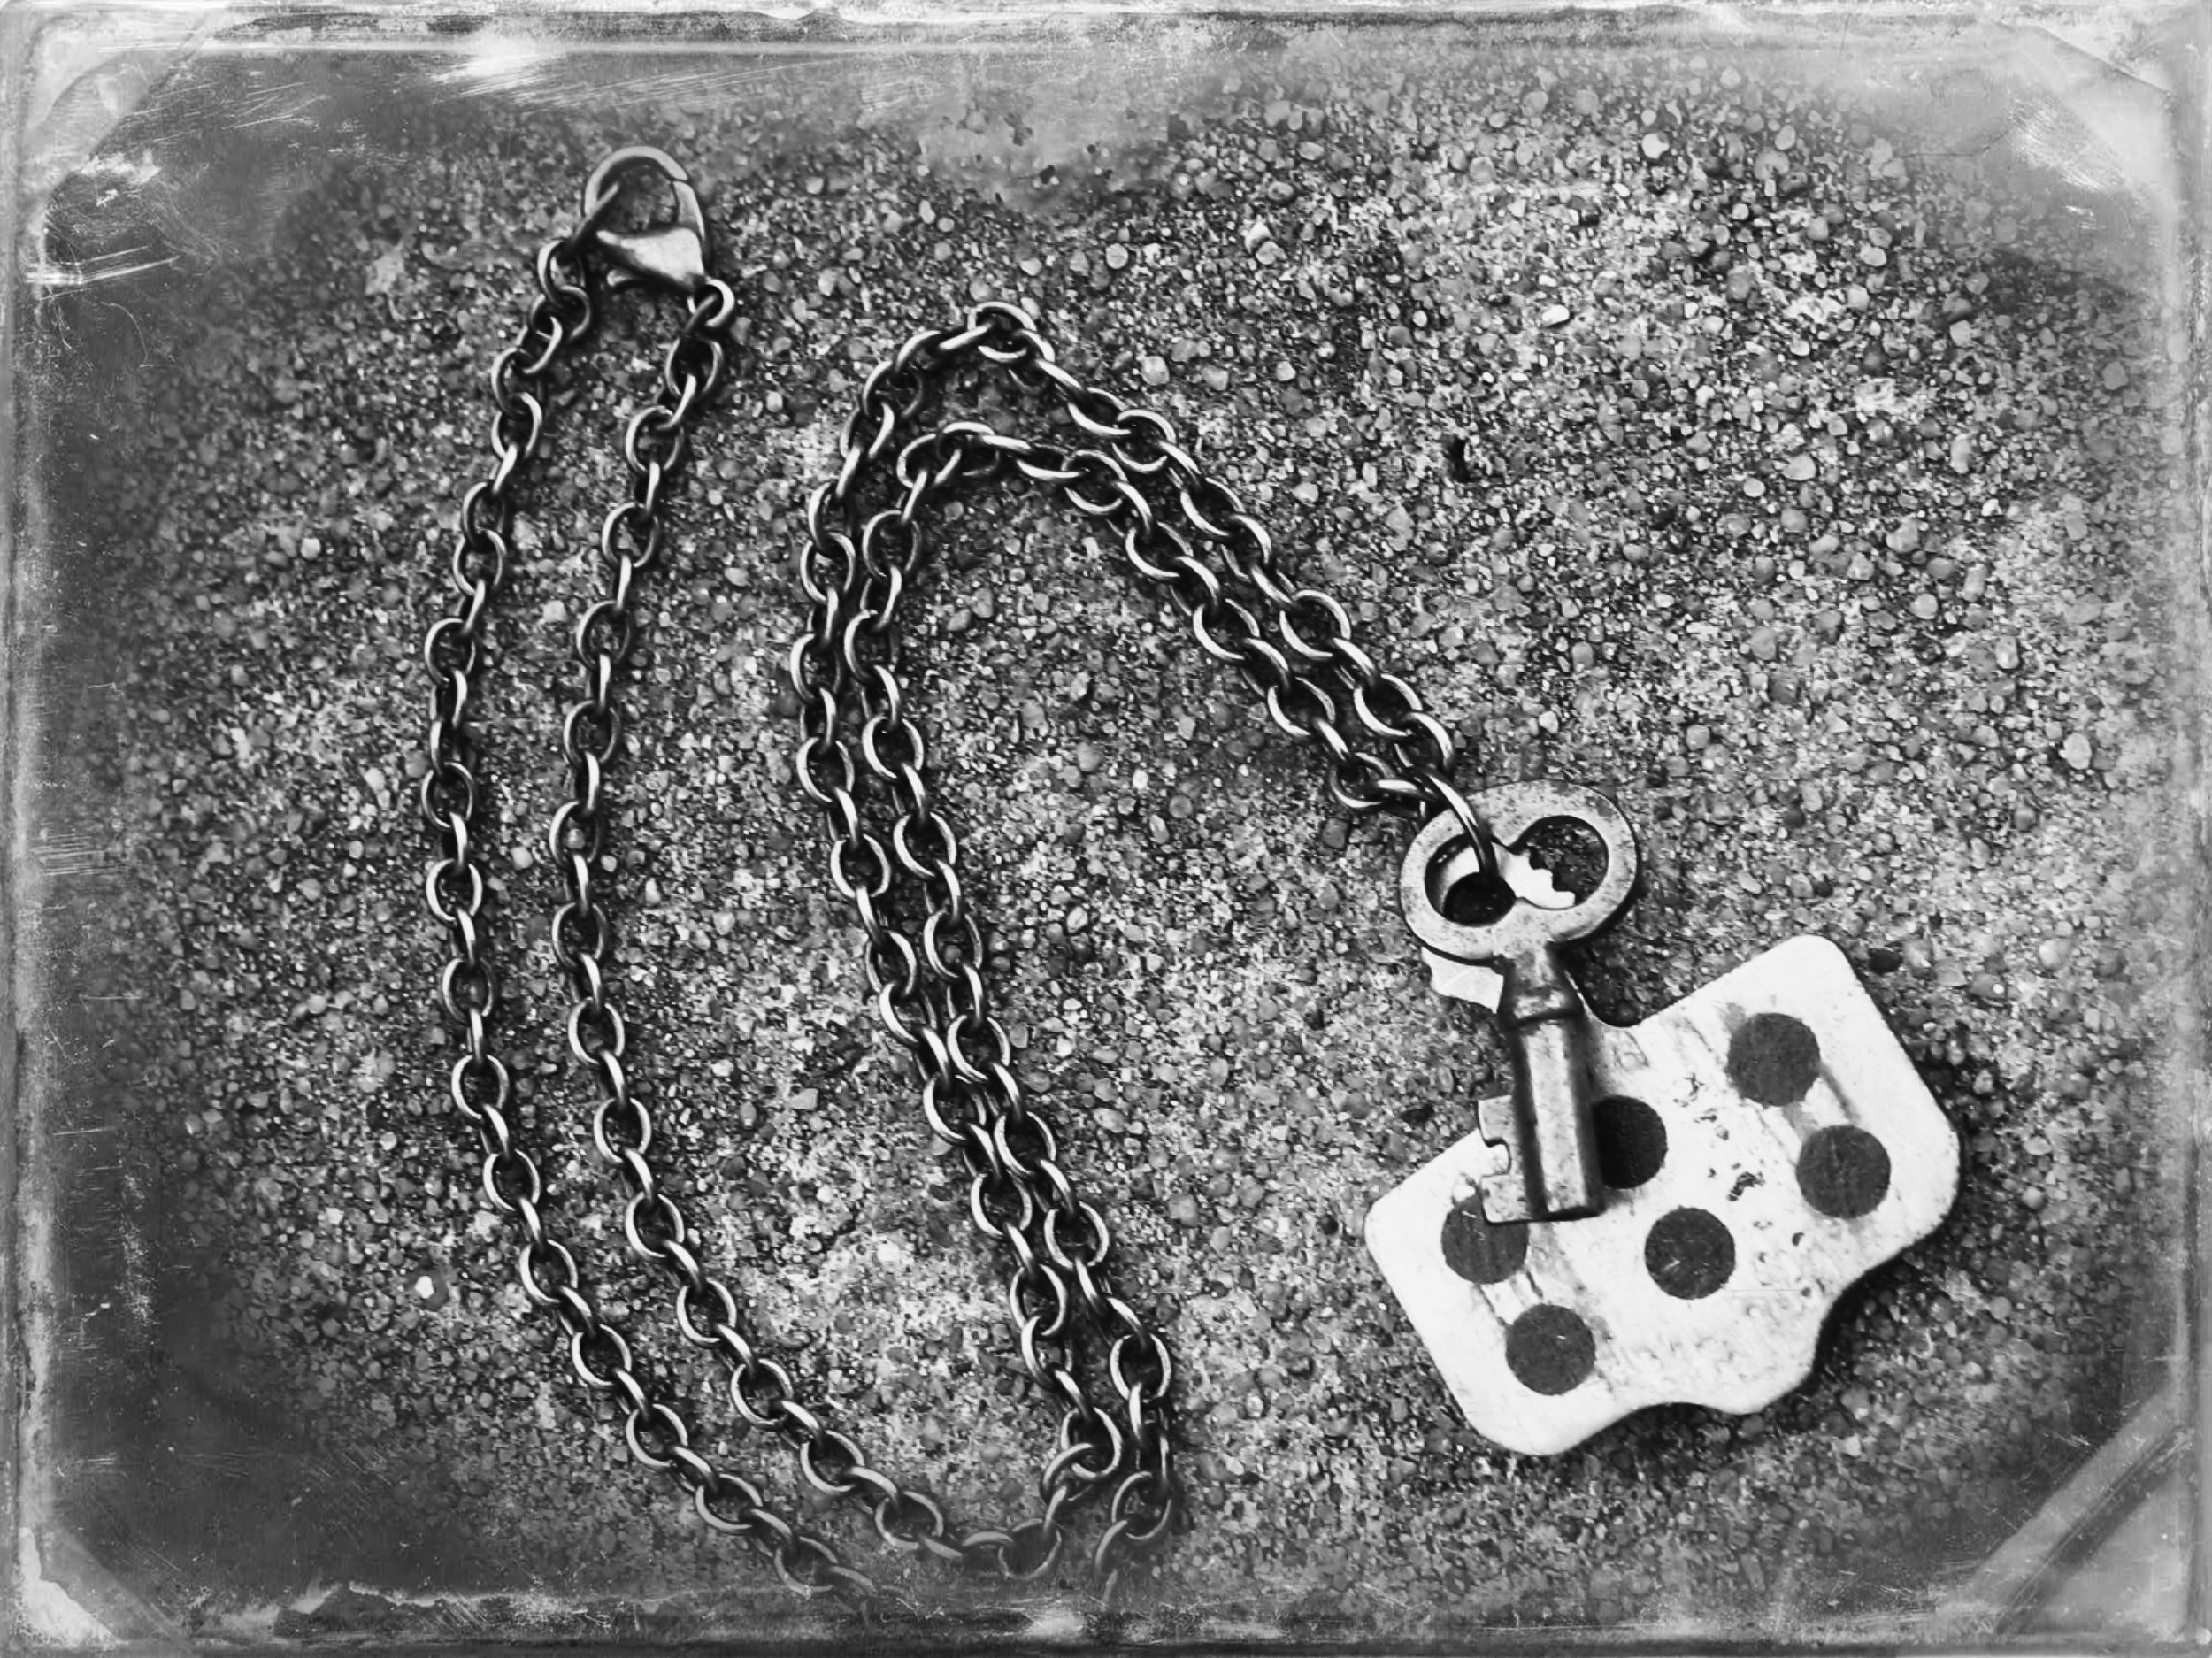
We all know the saying--a bride needs something borrowed, something blue, something old & something new-- When my friends Caroline and David announced that they were engaged, shortly thereafter Caroline asked me to make the jewelry for her bridesmaids & herself. I'm not sure I can ever quite express how deeply honored I feel when asked to make wedding jewelry. It's so important. It's in the pictures you'll have for years & for us gals, this is the outfit that we dream & scheme about for ages (more than half of the pins on Pinterest can attest to that!). The things I make come with little a lot of love--for the various pieces themselves and also for the enjoyment that afternoon (or more often, the wee hours of the night) have yielded. I truly enjoy what I do and on this occasion, it was pure bliss. I put more than a little love into this one--I put a piece of my heart. David & Caroline are both two good friends of mine and I wanted to make something special that she could have & wear long after their wedding. So I made her a necklace with a rare bit of Americana--an Art Deco W&H Co. Sweetheart Locket (which some of you may remember from a post from a few weeks ago).

Caroline's necklace is made entirely with vintage & antique pieces (her something old--apart from her stunning wedding dress & veil--her grandmother's). The chain is a combination of vintage brass chain & an antique gold watch chain. The button pictured in the middle of the above collage is also from that same watch chain. Above the locket rests the remnants of a clip-on pearl & rhinestone silver earring. The locket, I hope, will keep her loved ones & husband close to her heart.

I have a few more weddings coming up of friends & family (I know already that I am making more fabulous wedding accessories). And who knows, one day it might be my turn...I did catch the bouquet after all!

There's a Heart in Every Locket!

Flea Market FindsSamantha Extance13 Comments

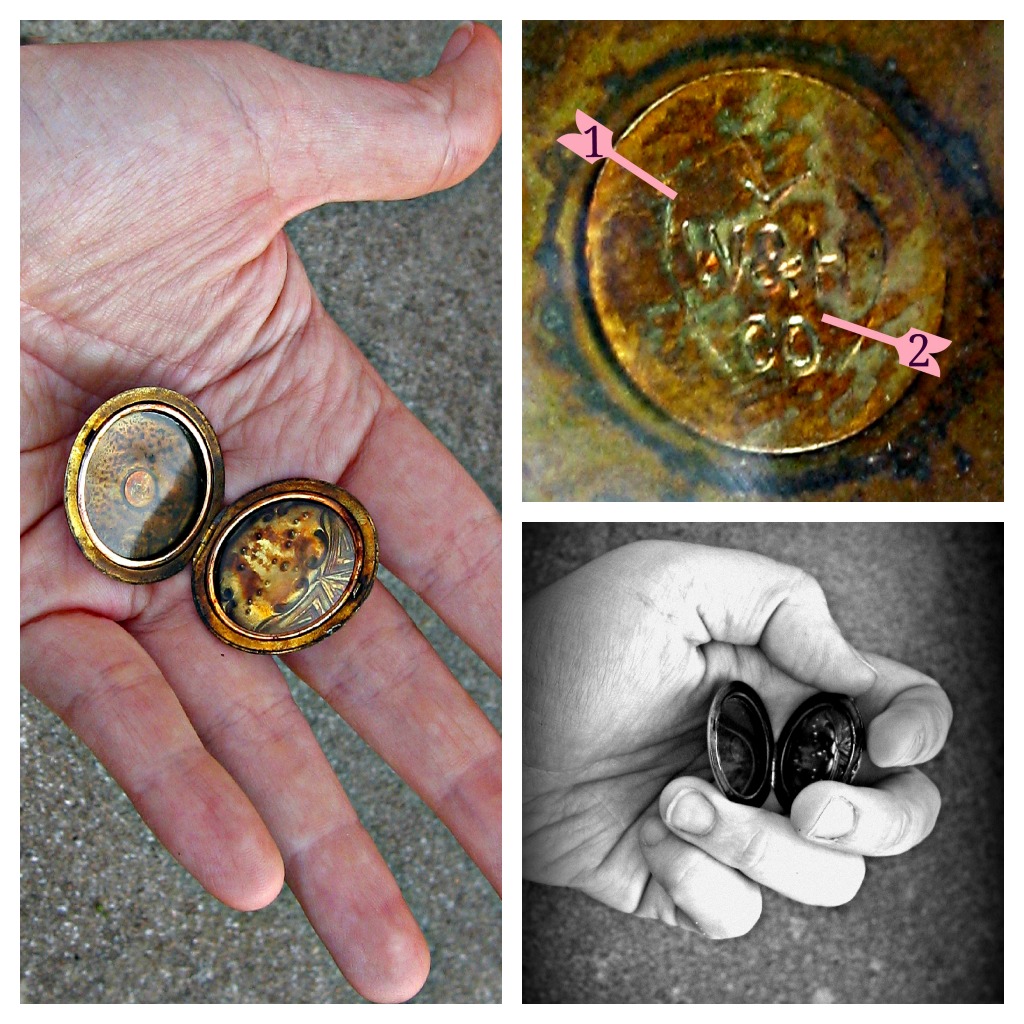
I love vintage & antique lockets! When I stumble across one at a flea market or estate sale I usually end up buying it. As jewelry, they are often intricate & beautiful and as nostalgic objects, they are both mysterious & romantic. I wonder what torrid love affairs the wearer had or unrequited loves they may have harbored. Lockets seem like they have secrets already inside. This particular locket came with a mystery--a trademark that eventually lead me to its history. I was able to track down information about W & H thanks to the New York Public Library's digital archives of advertisements and a few skilled Ebay auctioneers.

The trademark inside this locket, "W & H Co" (pictured below as 1) with a heart etched around it (pictured below as 2), belonged to Wightman & Hough Company who operated out of Providence, Rhode Island.

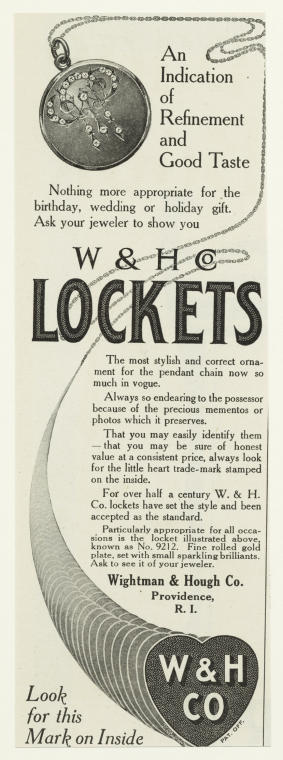
Wightman & Hough Company made sweetheart necklaces from 1856 until 1922. They were primarily renowned for their lockets. Their slogan, which I find to be quite amusing & sweet, was "There's a heart in every locket!" How true! Below are 3 of their advertisements:

Though I do not know the exact date of this locket as of yet (sadly, I must wait a long while for an inter-library loan to come through for a jewelry catalog from 1910 to verify thestyle & date of this locket)--I believe it is from the latter period of W & H Co.'s production. The design on the locket is an Art Deco pattern and the stones (which are all in tact) are sapphires which were popular at that time.  For now I know the approximate value of the locket is between $65.00-$250.00 (I paid $12.00 which makes me feel a bit like a Robber Baron).  You never know what you will find & what it is worth until you do a little digging--sometimes you've gotta trust your gut! Happy Flea Marketing everyone!

Liberate Ulysses: My Steampunk-Joyce Project

InspirationSamantha Extance4 Comments

Liberate Ulysses

Liberate Ulysses is a “global dialogue & multimedia celebration for Bloomsday,” a day that pays homage to Irish writer James Joyce’s masterwork Ulysses. My passion for Joyce extends beyond my scholarship & continued reading of his works. For the past three years I have challenged myself to create pieces inspired by his texts. This year I am fortunate to be a part of Liberate Ulysses’s celebration. Last year, Liberate Ulysses lauded the novel through Twitter (a call-to-arms was issued asking those around the world to tweet an aspect of an episode that they felt was representative of that chapter). This year, to commemorate Ulysses coming out of copyright, the novel is being lionized through various artistic projects inspired by the novel. For a list of the projects, click here.

My Liberate Ulysses Project: To Create Steampunk Jewelry Pieces Representative of Each Episode

Without further ado, here they are:

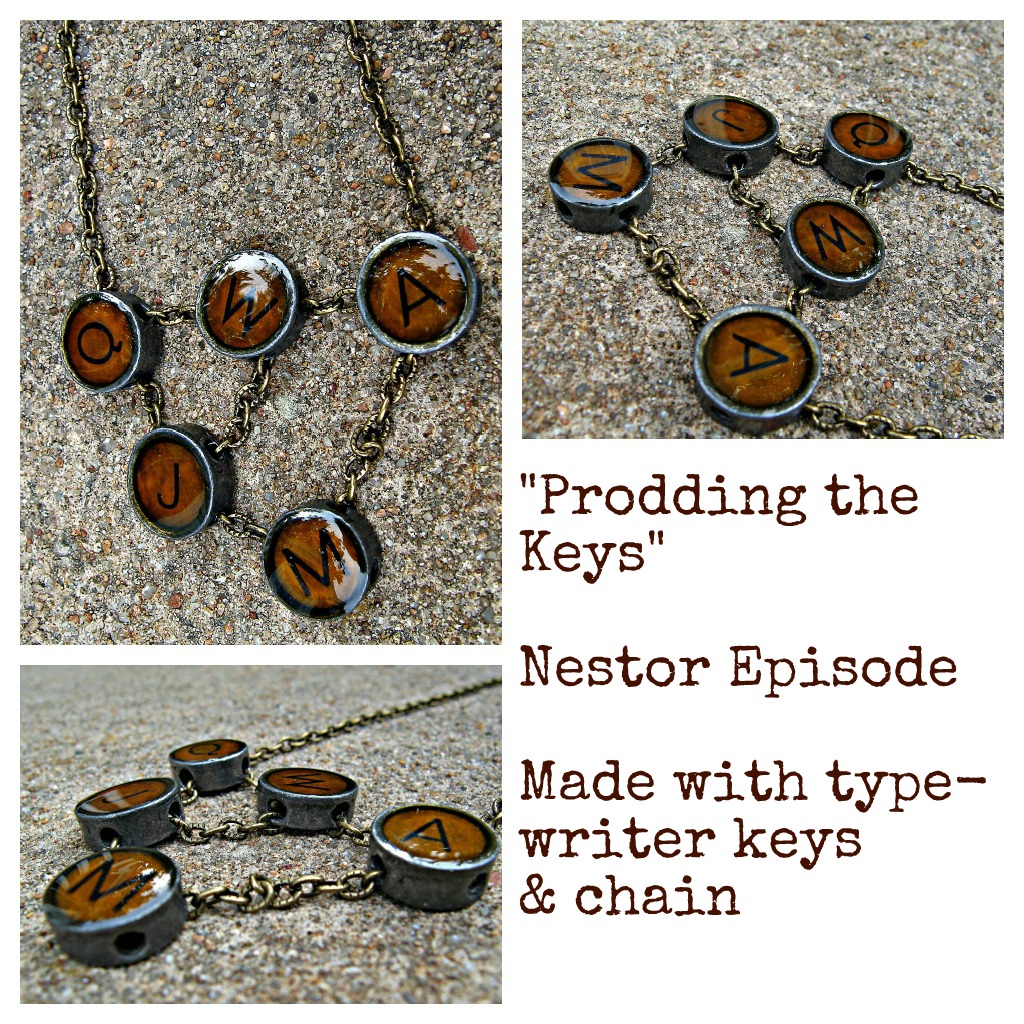
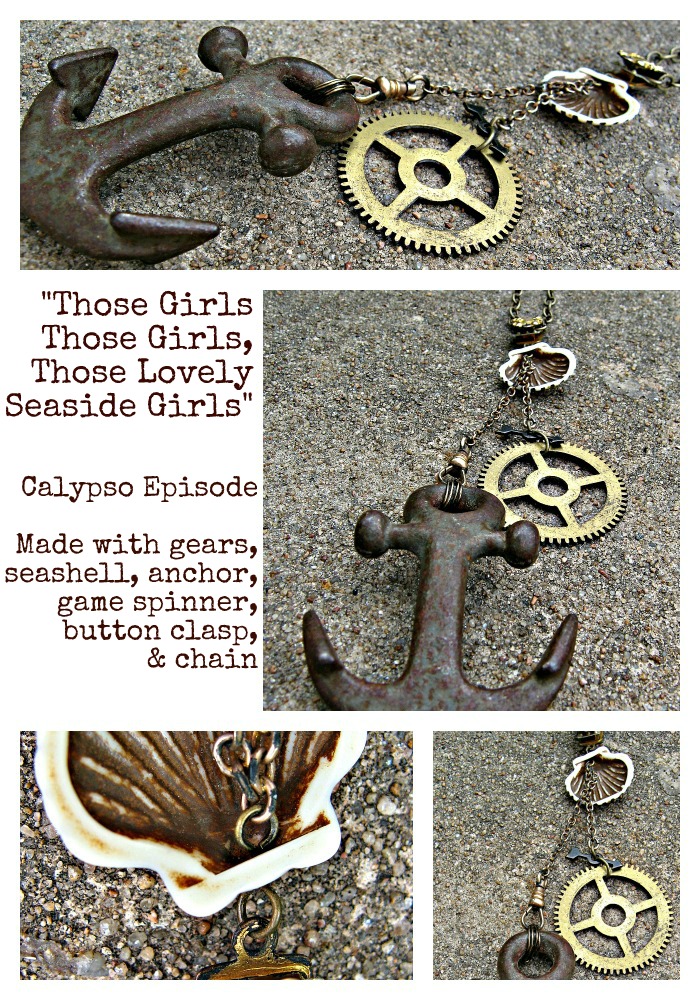
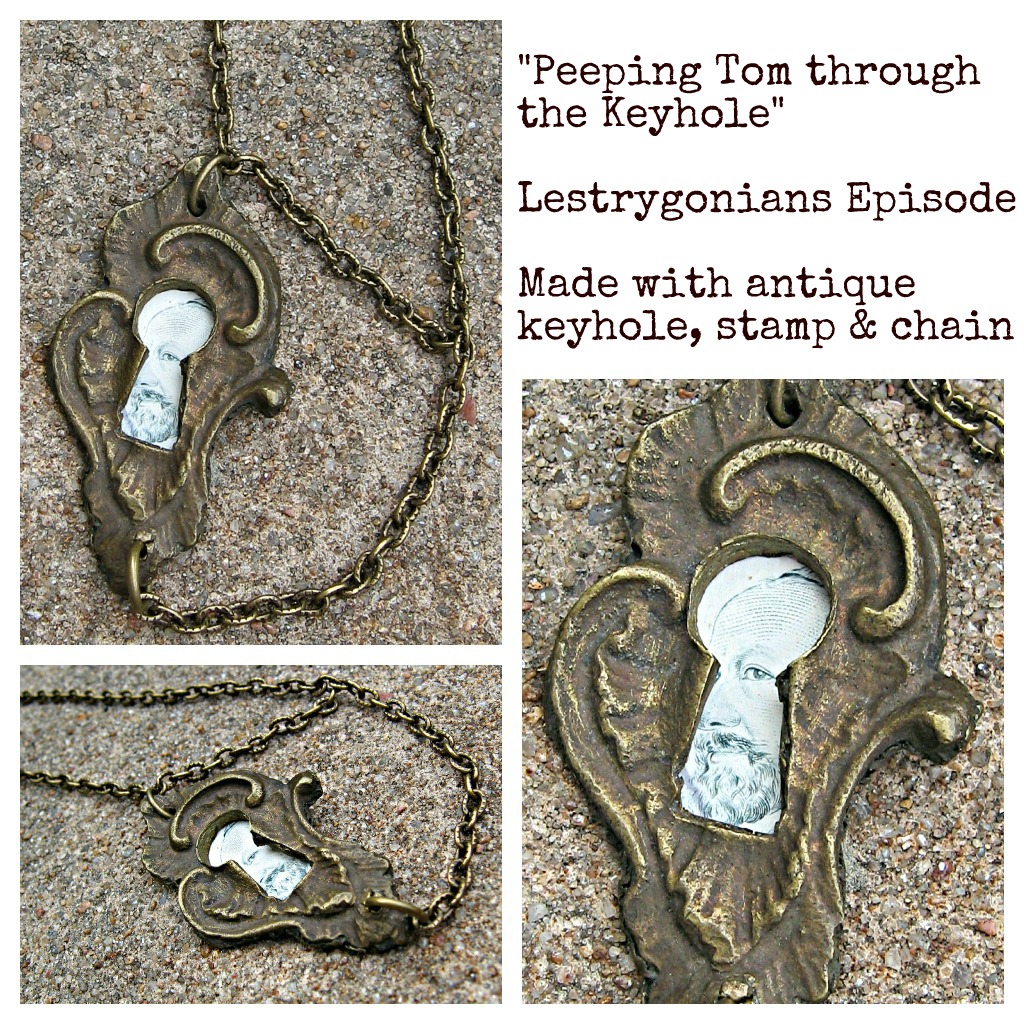
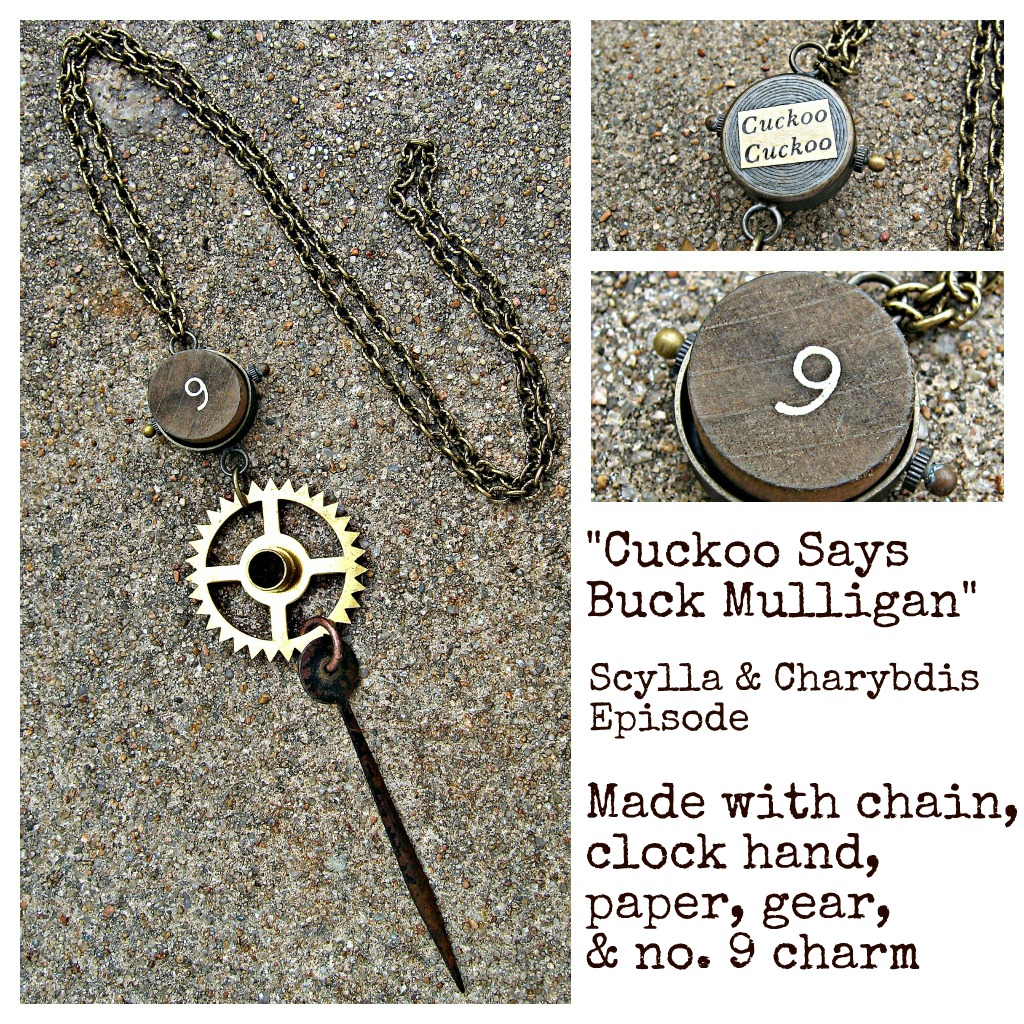
Stephen “peered from under his shaggy brows at the manuscript by his elbow and, muttering, began to prod the stiff buttons of the keyboard slowly”

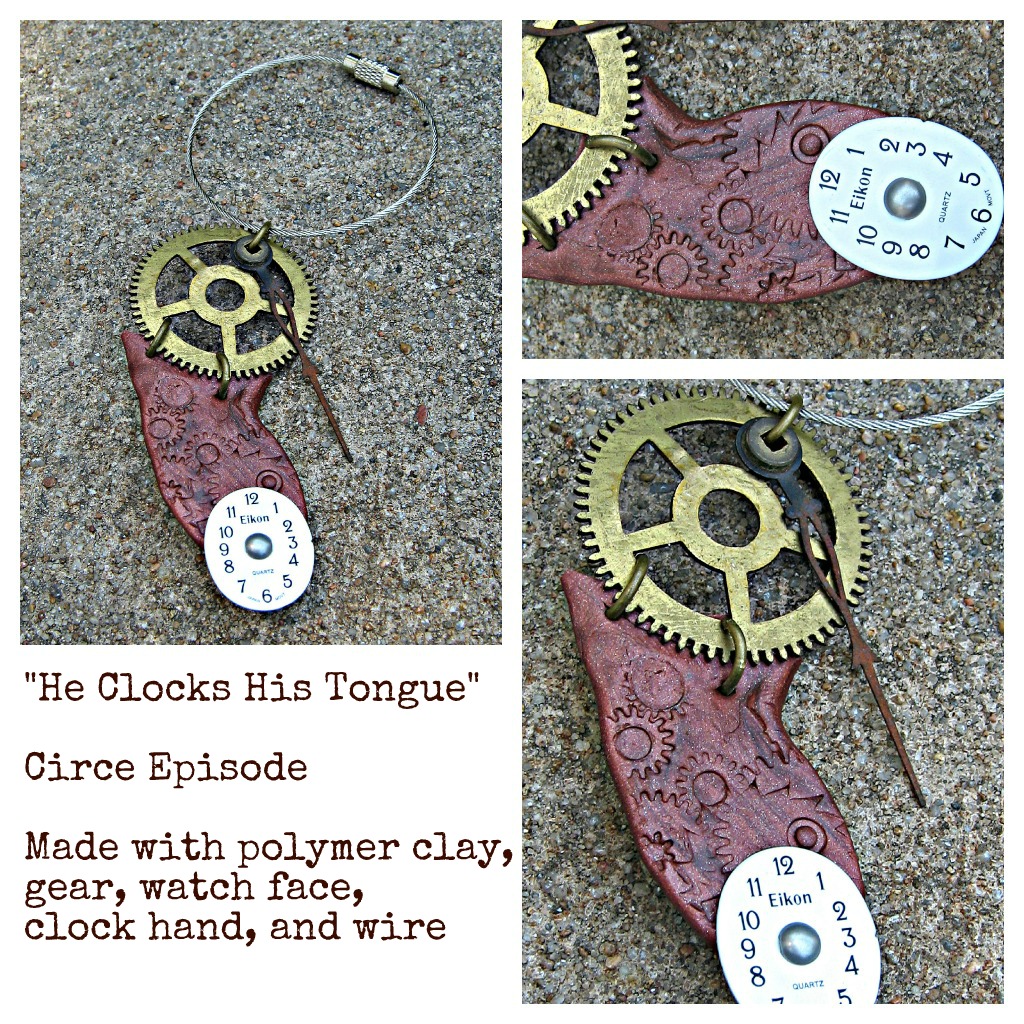
“He watched through peacocktwittering lashes the southing sun”

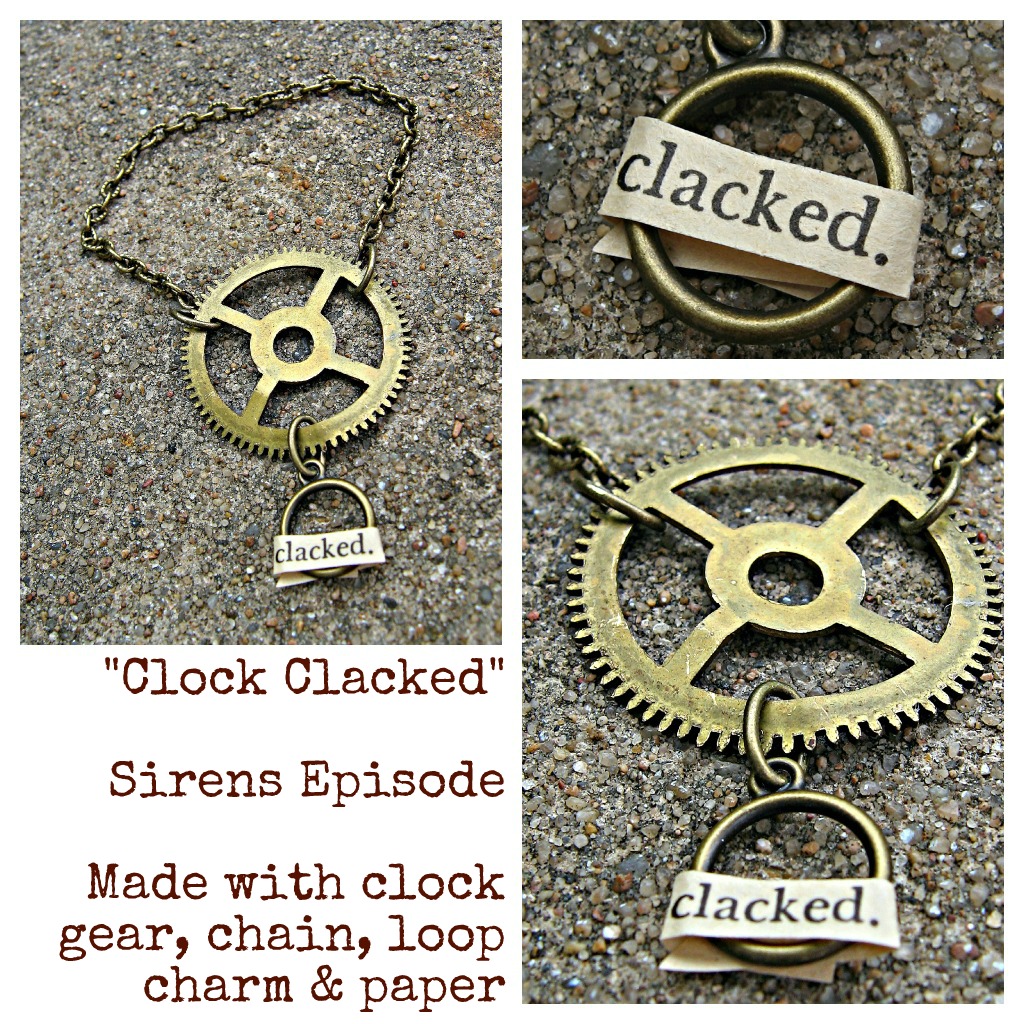
“Confession as clockwork” or as I like to think of this piece, “Agenbite of Inwit, Inwit’s Agenbite: Clockwork Confessions”

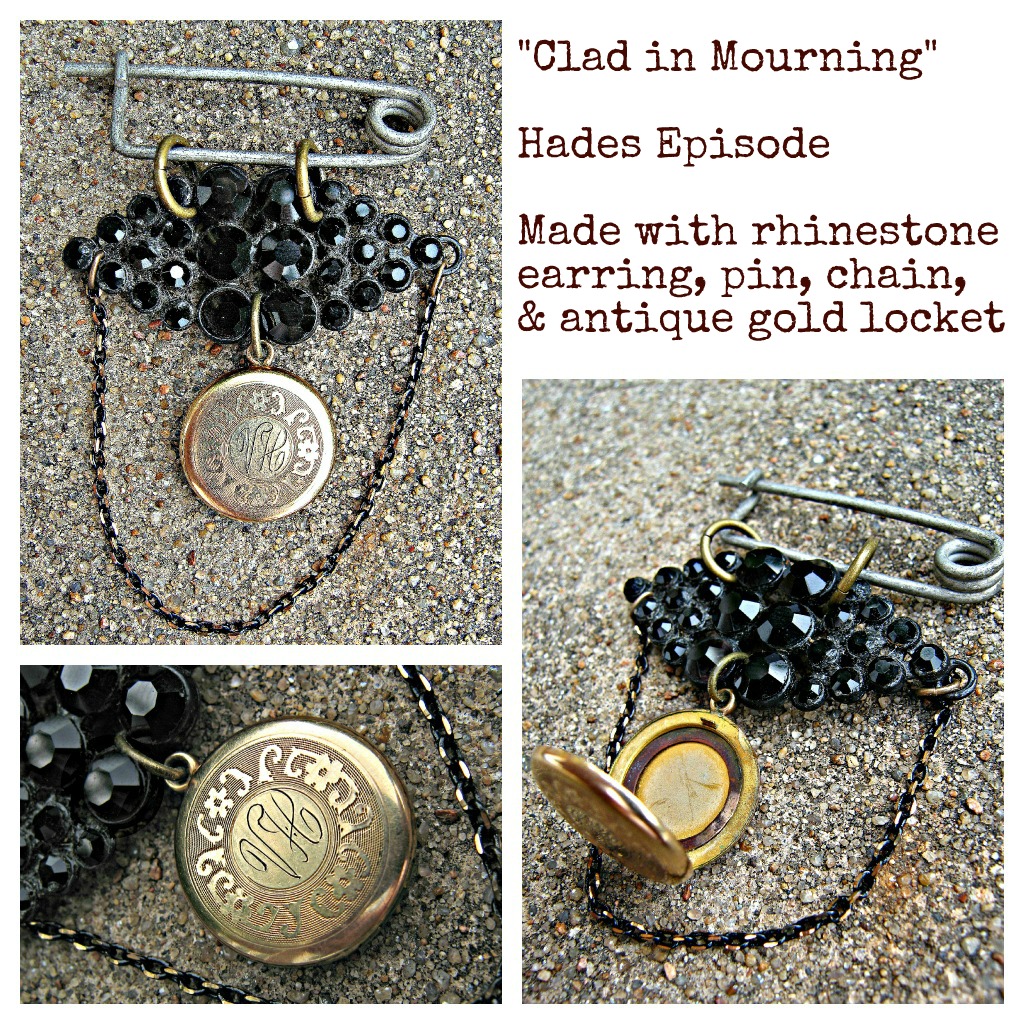
A Mourning Pin to Pine for Paddy Dignam

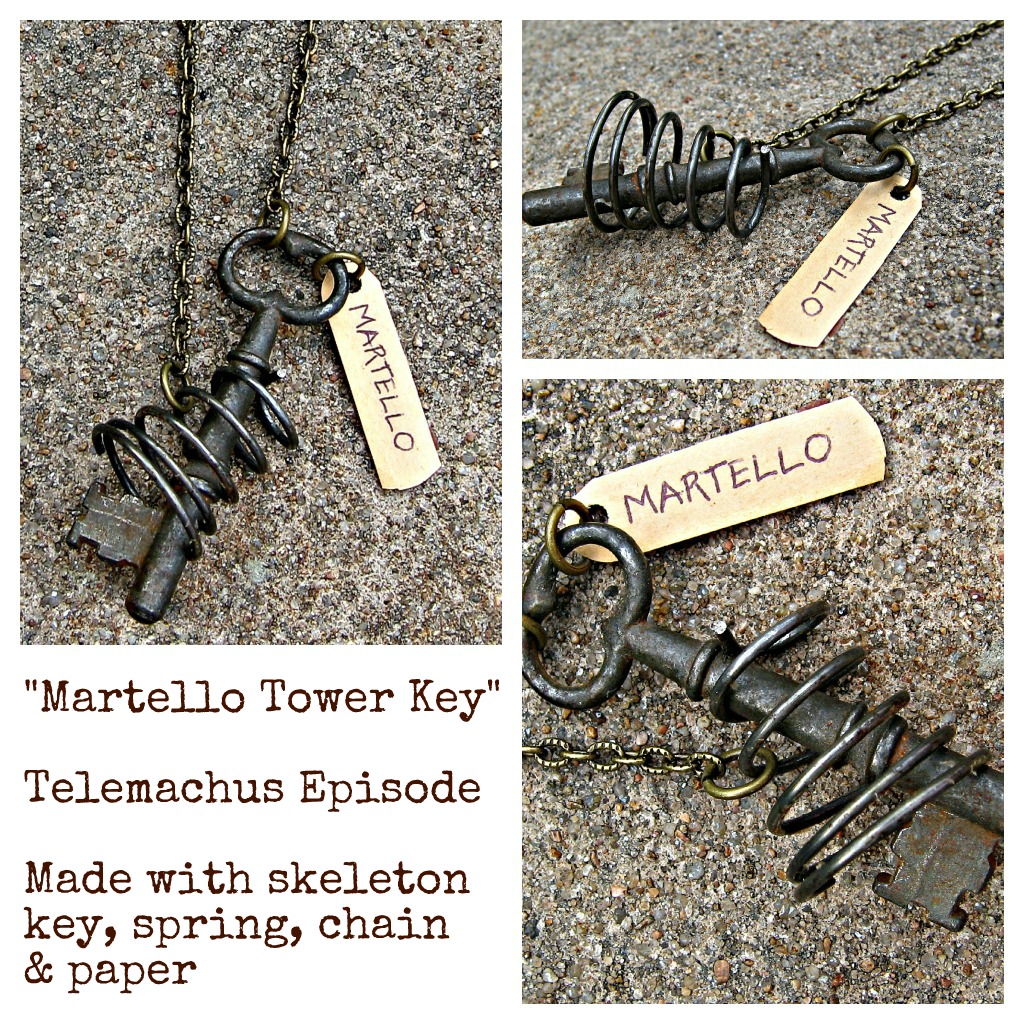
I found that of all the episodes, Nausicaa was the most interesting in terms of clock imagery & preoccupation. Both Bloom and Gerty ponder on & about clocks. Bloom fiddles with his watch chain and realizes that his clock has stopped (just after eight) and Gerty thinks of gifting Bloom a clock which reminds her of the one on the mantel: “white and gold with a canary bird that came out of a little house to tell the time of day.”

Not only is this a challenging episode to read, but it was difficult to try and represent it justly. I luckily happened upon an antique cigar cutter at the flea market which lead me to the idea of representing the episode through its simplest, and most central, action–birth.

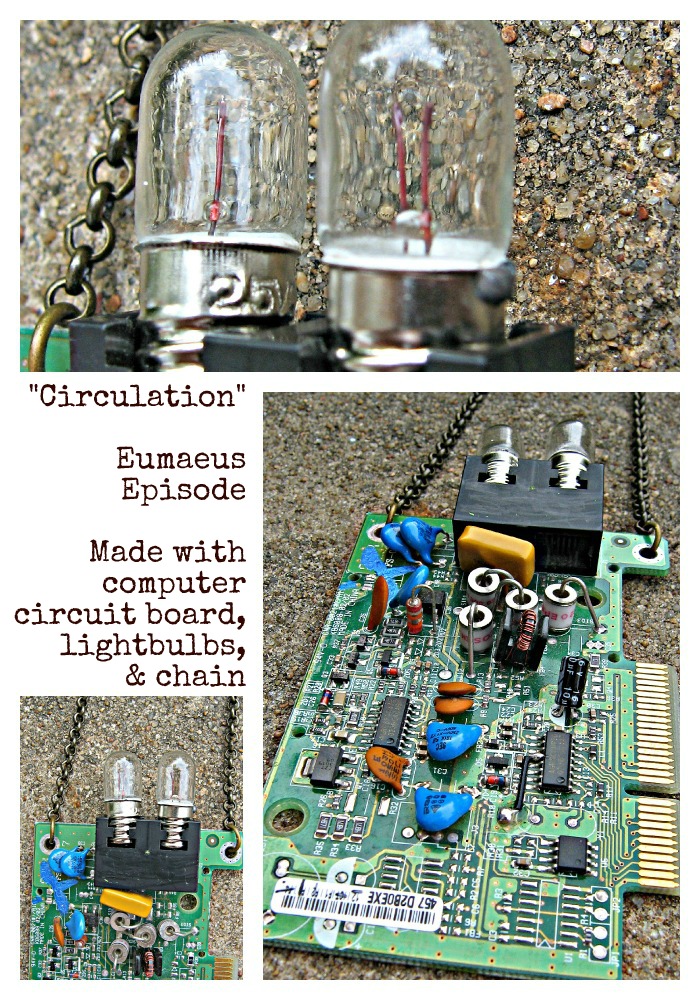
Eumaeus was another challenge for me. Its techne lent me many ideas, this was the first that I thought of. Circulation is not only about blood, but in a city–circulation is electricity (the wires literally connecting spaces) and a computer’s circuit board is the circulation of information.

In Calypso, we get the description of Molly’s garters: “Night sky moon, violet” and in Penelope we finally have Molly thinking: “Id let him see my garters the new ones”–which of coarse, Bloom already has.

I hope you enjoyed these pieces. It was both challenging and entertaining to make them. Check out my blog next Bloomsday, I create something new every year! Joycefully Yours, Sam.

Reflection, my Kind of Time Travel

ShowsSamantha ExtanceComment

Thank you to everyone who came out to support me at Blue Dome Arts Festival 2012! It was both affirming and wonderful to see so many people wearing jewelry that I made when they stopped by my little booth. Someone asked me this year why I was at Blue Dome and not Mayfest--a question I happily answered. I would like to share that answer with all of you. Blue Dome gave me a chance. In 2010, I applied to Mayfest and was respectfully rejected (and I would like to add, given valuable feedback on my application which I then used for later shows). But it was Blue Dome that offered me the opportunity to display my work for the first time. It was at that show that I realized that my Steampunk pieces were the ones that people enjoyed the most. Afterwhich I moved away from traditional beading and poured all of my energy into making only those pieces.

I met incredible people who told me about other shows, like Alliday Everyday & Indie Emporium that would later lead to other successes (becoming a member of Make:Tulsa and being carried in stores, the first shop of which was & is Dwelling Spaces). I consider myself very lucky because I met such kindred, crafty spirits who genuinely wished me success & helped me grow as an artist.

Though I cringe to show you what my booth looked like in 2010, here it is:

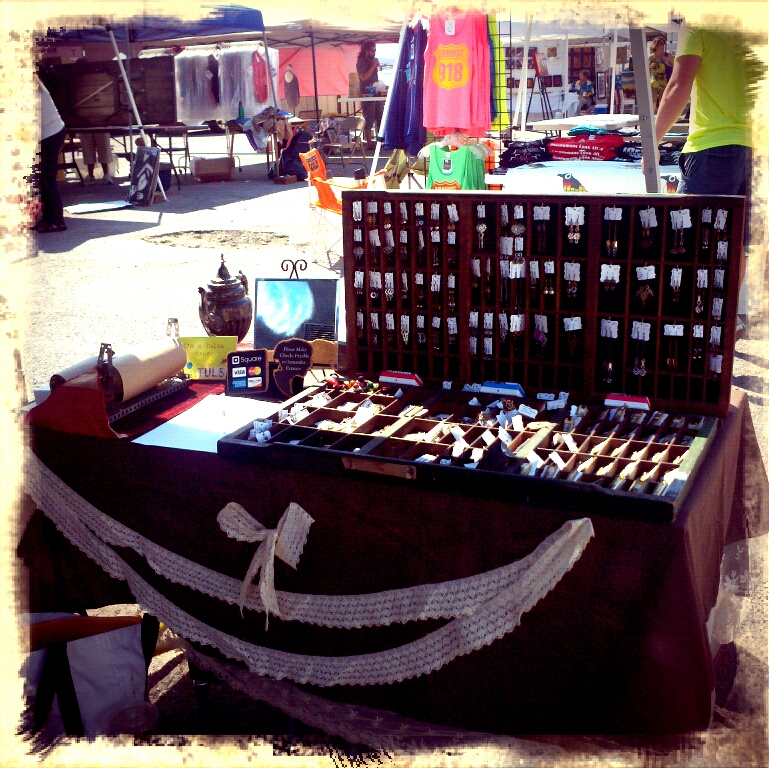
I cringe a little when I look at this picture but I'm proud too, because I have grown immensely. I moved away from general jewelry-making and indulged heartily in my love of Steampunk. Now, my booth reflects what I make:

The tie-dye is gone, the tomato plant has retired, and I finally have a sign! Now I am complimented often on (and offered twice as often as I'm complimented to buy) my display pieces. Old projector lightbulbs, antique books, printer drawers, vintage scale & weights, turn-of-the-century eyeglasses, ink well, diving bell helmet model, & old tools....

So I want to say Thank You Blue Dome for believing in me and giving young artists a fighting chance. Happy Tuesday everyone!

See you at Blue Dome!

ShowsSamantha Extance1 Comment

Stop by my booth this weekend at the Blue Dome Arts Festival in Downtown Tulsa's Blue Dome District & accessorize yourself for summer! The festival will be Friday (May 18th) & Saturday (May 19th) from 11 am to 8 pm and Sunday (May 20th) from 11 am to 5 pm! There will be food, tons of vendors selling amazing local art and handmade things, belly dancers, art cars, live music...I am getting so excited just typing! Here are a few new jewelry pieces you'll see at Blue Dome!

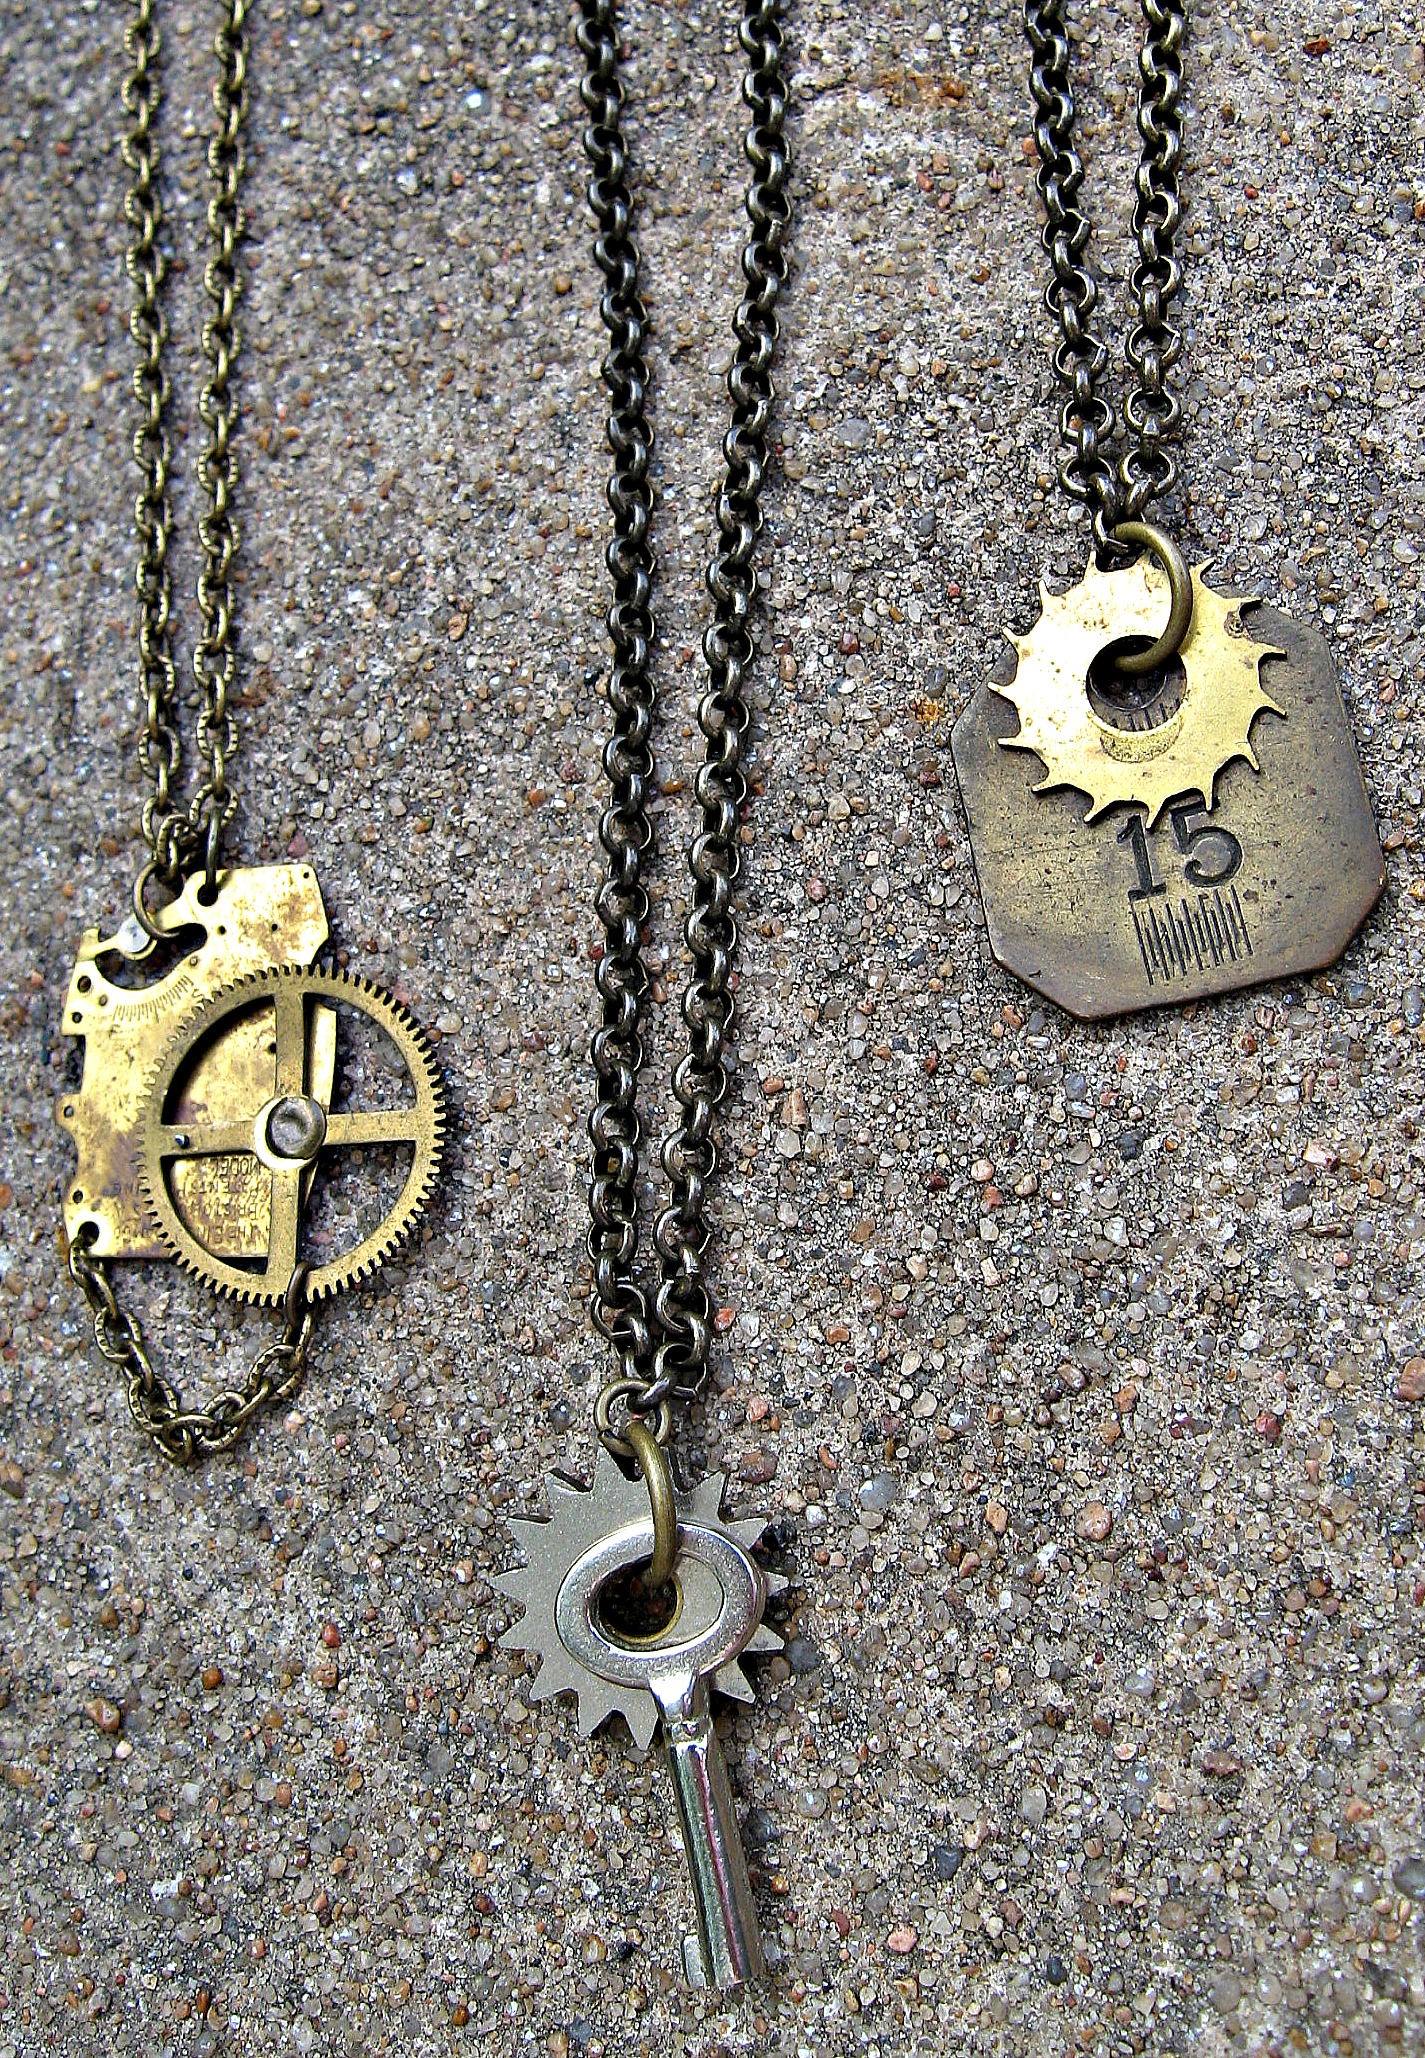
Simply Steampunk Necklaces

Convertible Pin & Necklace Rose Cameo

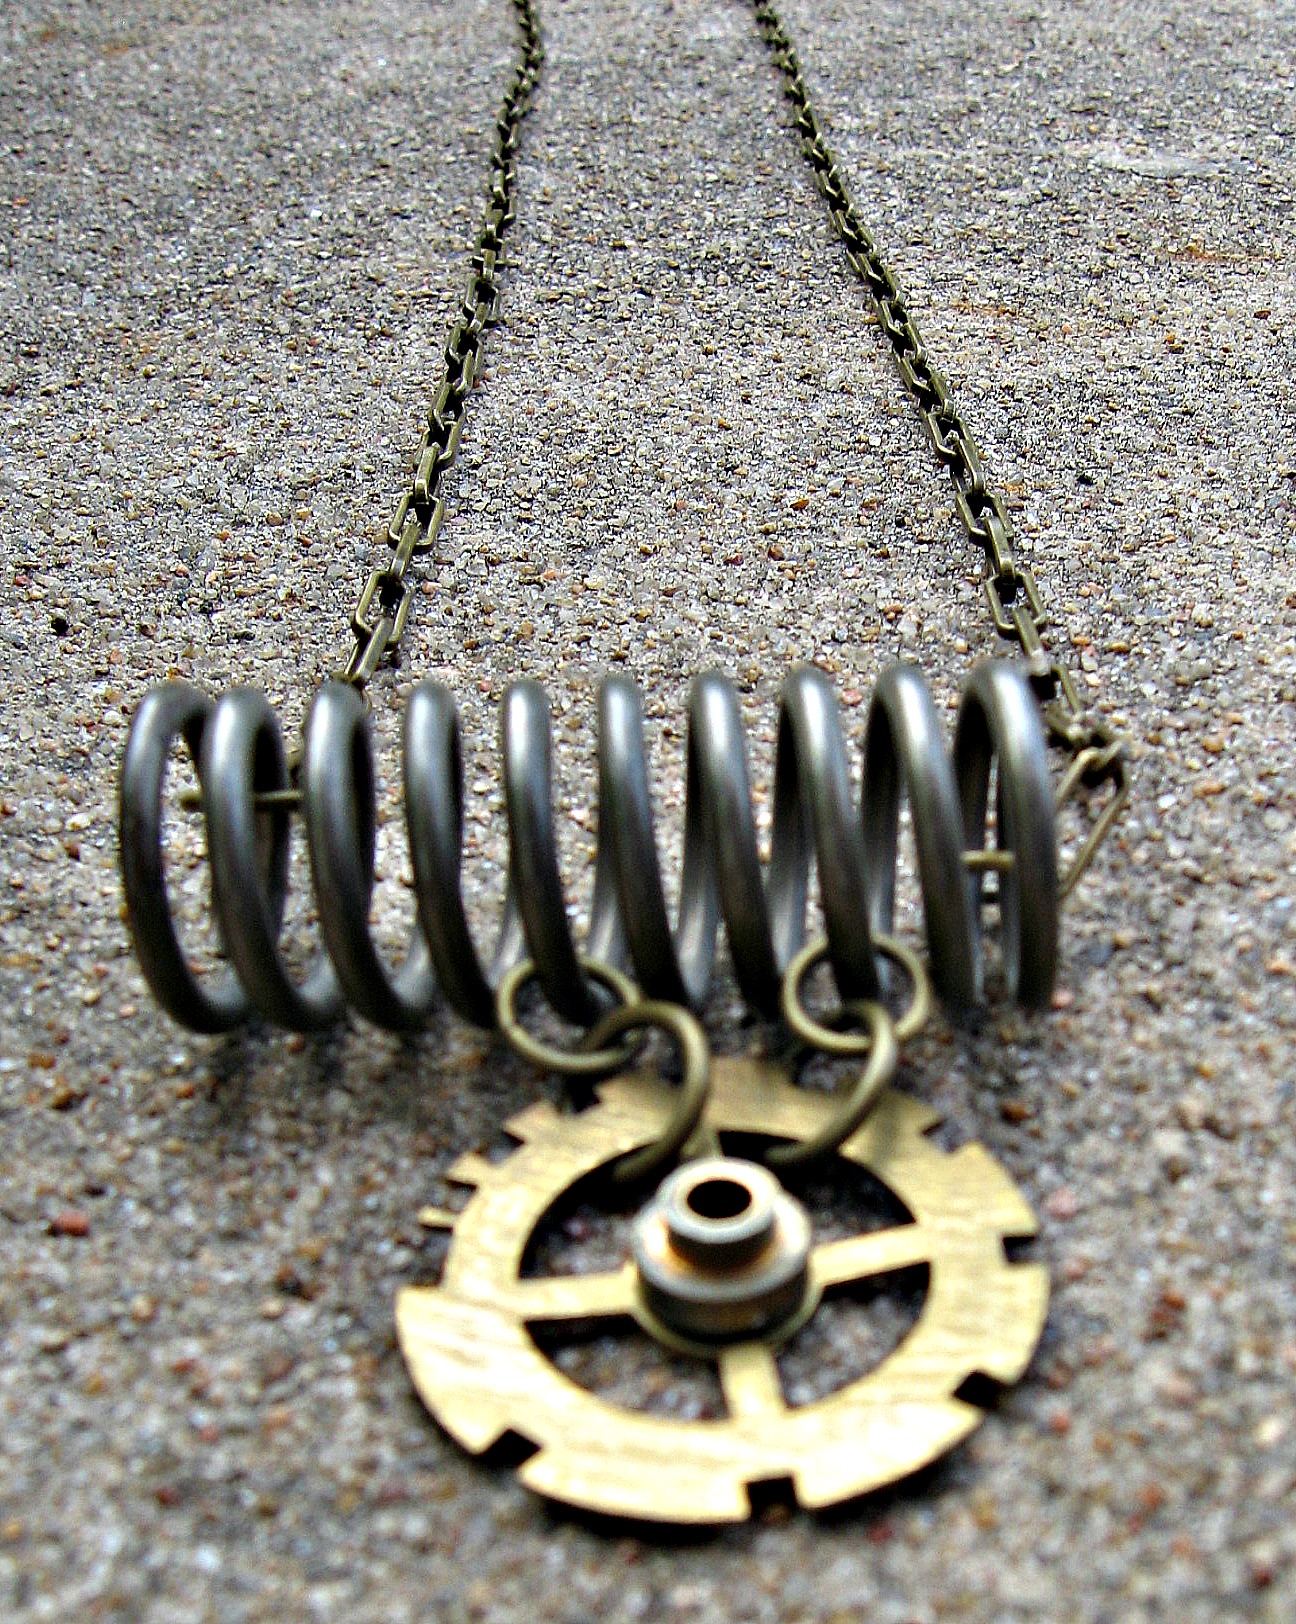
Spring & Gear Necklace

Steampunk Gold for Steampunk Royalty!

Pieces made with metal erector set parts

Hope to see you at Blue Dome!

Tribute to My Amazing (Steampunk) Mom!

InspirationSamantha ExtanceComment

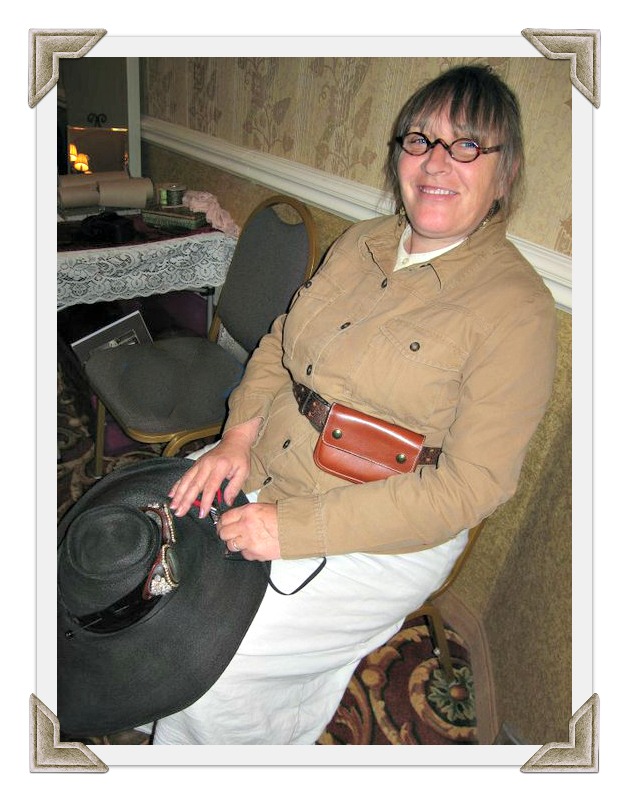
This is my mom, and she is also a Steampunker. Below you see her dressed up as an archeological explorer. She has a wide brimmed hat (good for those hot, sunny expeditions), antique pearl studded goggles (which she made herself), leather pouch (for collecting rare finds), and her fossil brush (attached on the other side of her belt). You can see where I get my imagination from!

I count myself lucky to have a mom that supports and nurtures my creativity and imagination. She taught me how to make jewelry & was the person who first introduced me to Steampunk. Just wanted to introduce you all to my biggest source of inspiration, my mom.

Go get mushy today & give your mommas some love! Happy Mother's day everyone! xo Sam

New From My Little Steampunk Workshop

UncategorizedSamantha ExtanceComment

I've been working on a bunch of new necklaces, bracelets, & earrings for the summer season of festivals & shows. (I'm gearing up for Dustbowl Arts Market in Norman OK next weekend!). Here is a preview of some of my new inventions!

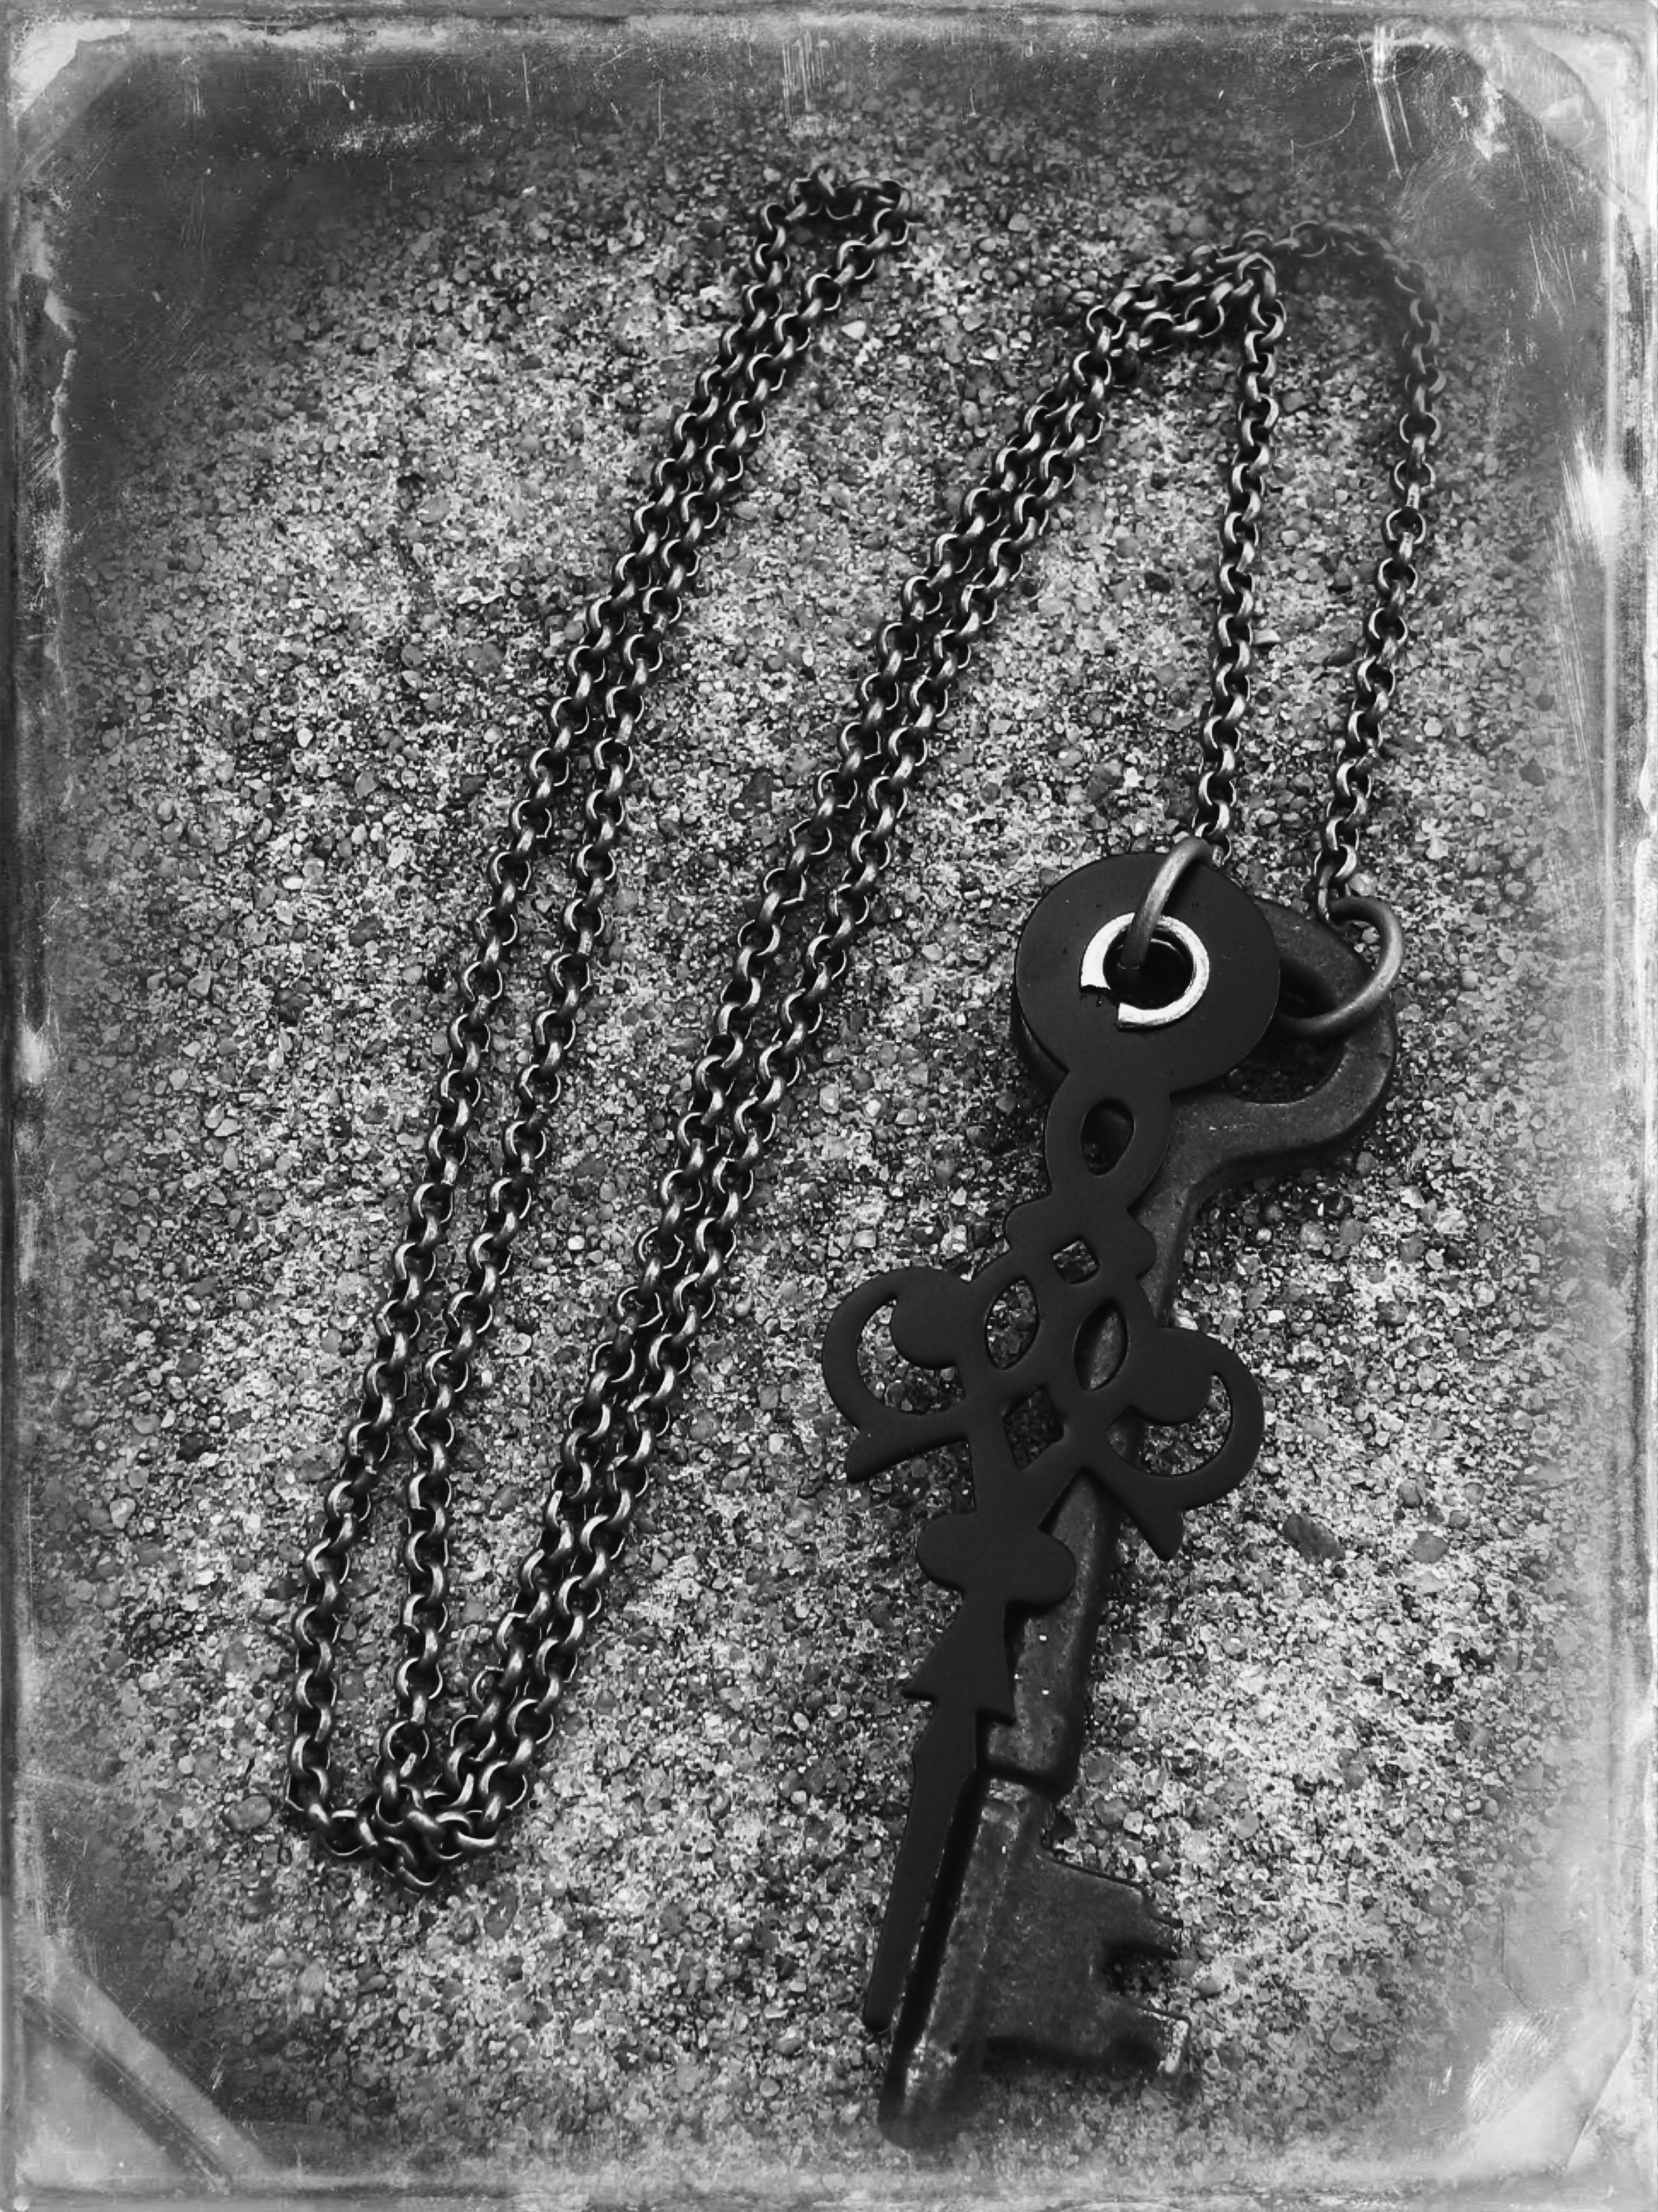
Duel Skeleton Key Necklace

Airship Captain's Amulet

Firefly Courtesan Gearrings

Bicycle Brake Pad & Skeleton Key Chain (thanks to Casey from Tom's Bicycles for these!)

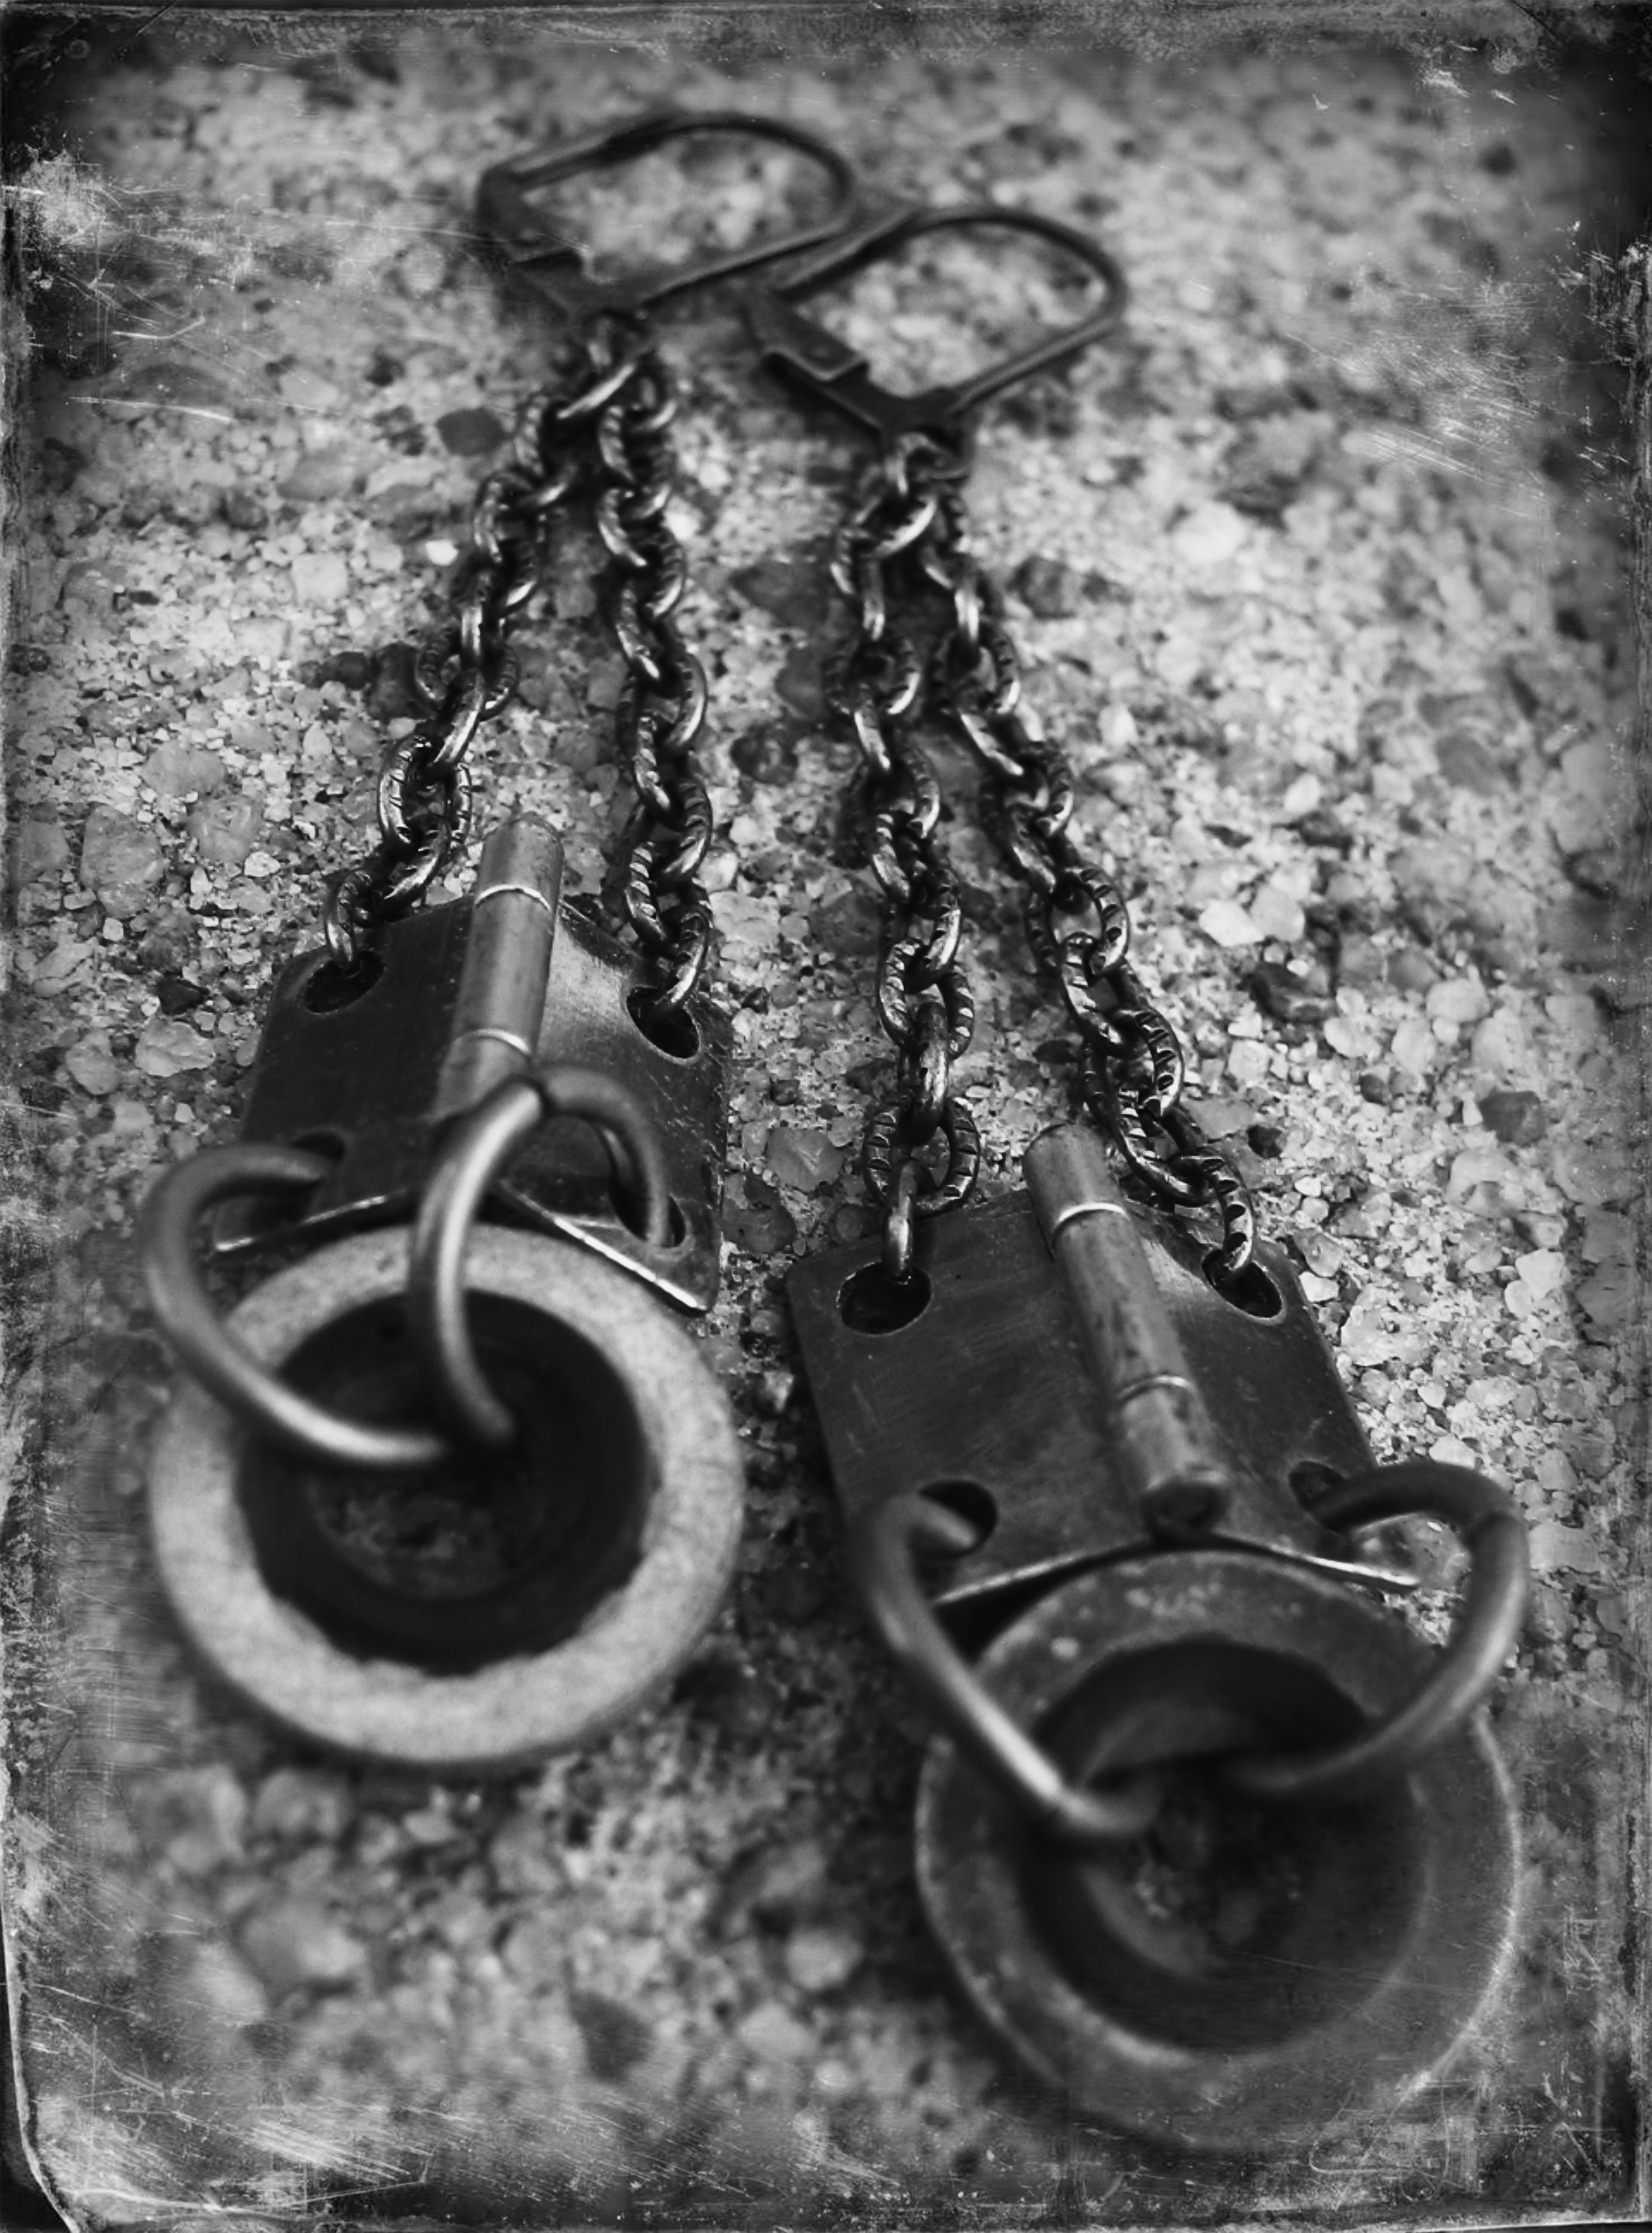
Unhinged Steampunk Earrings

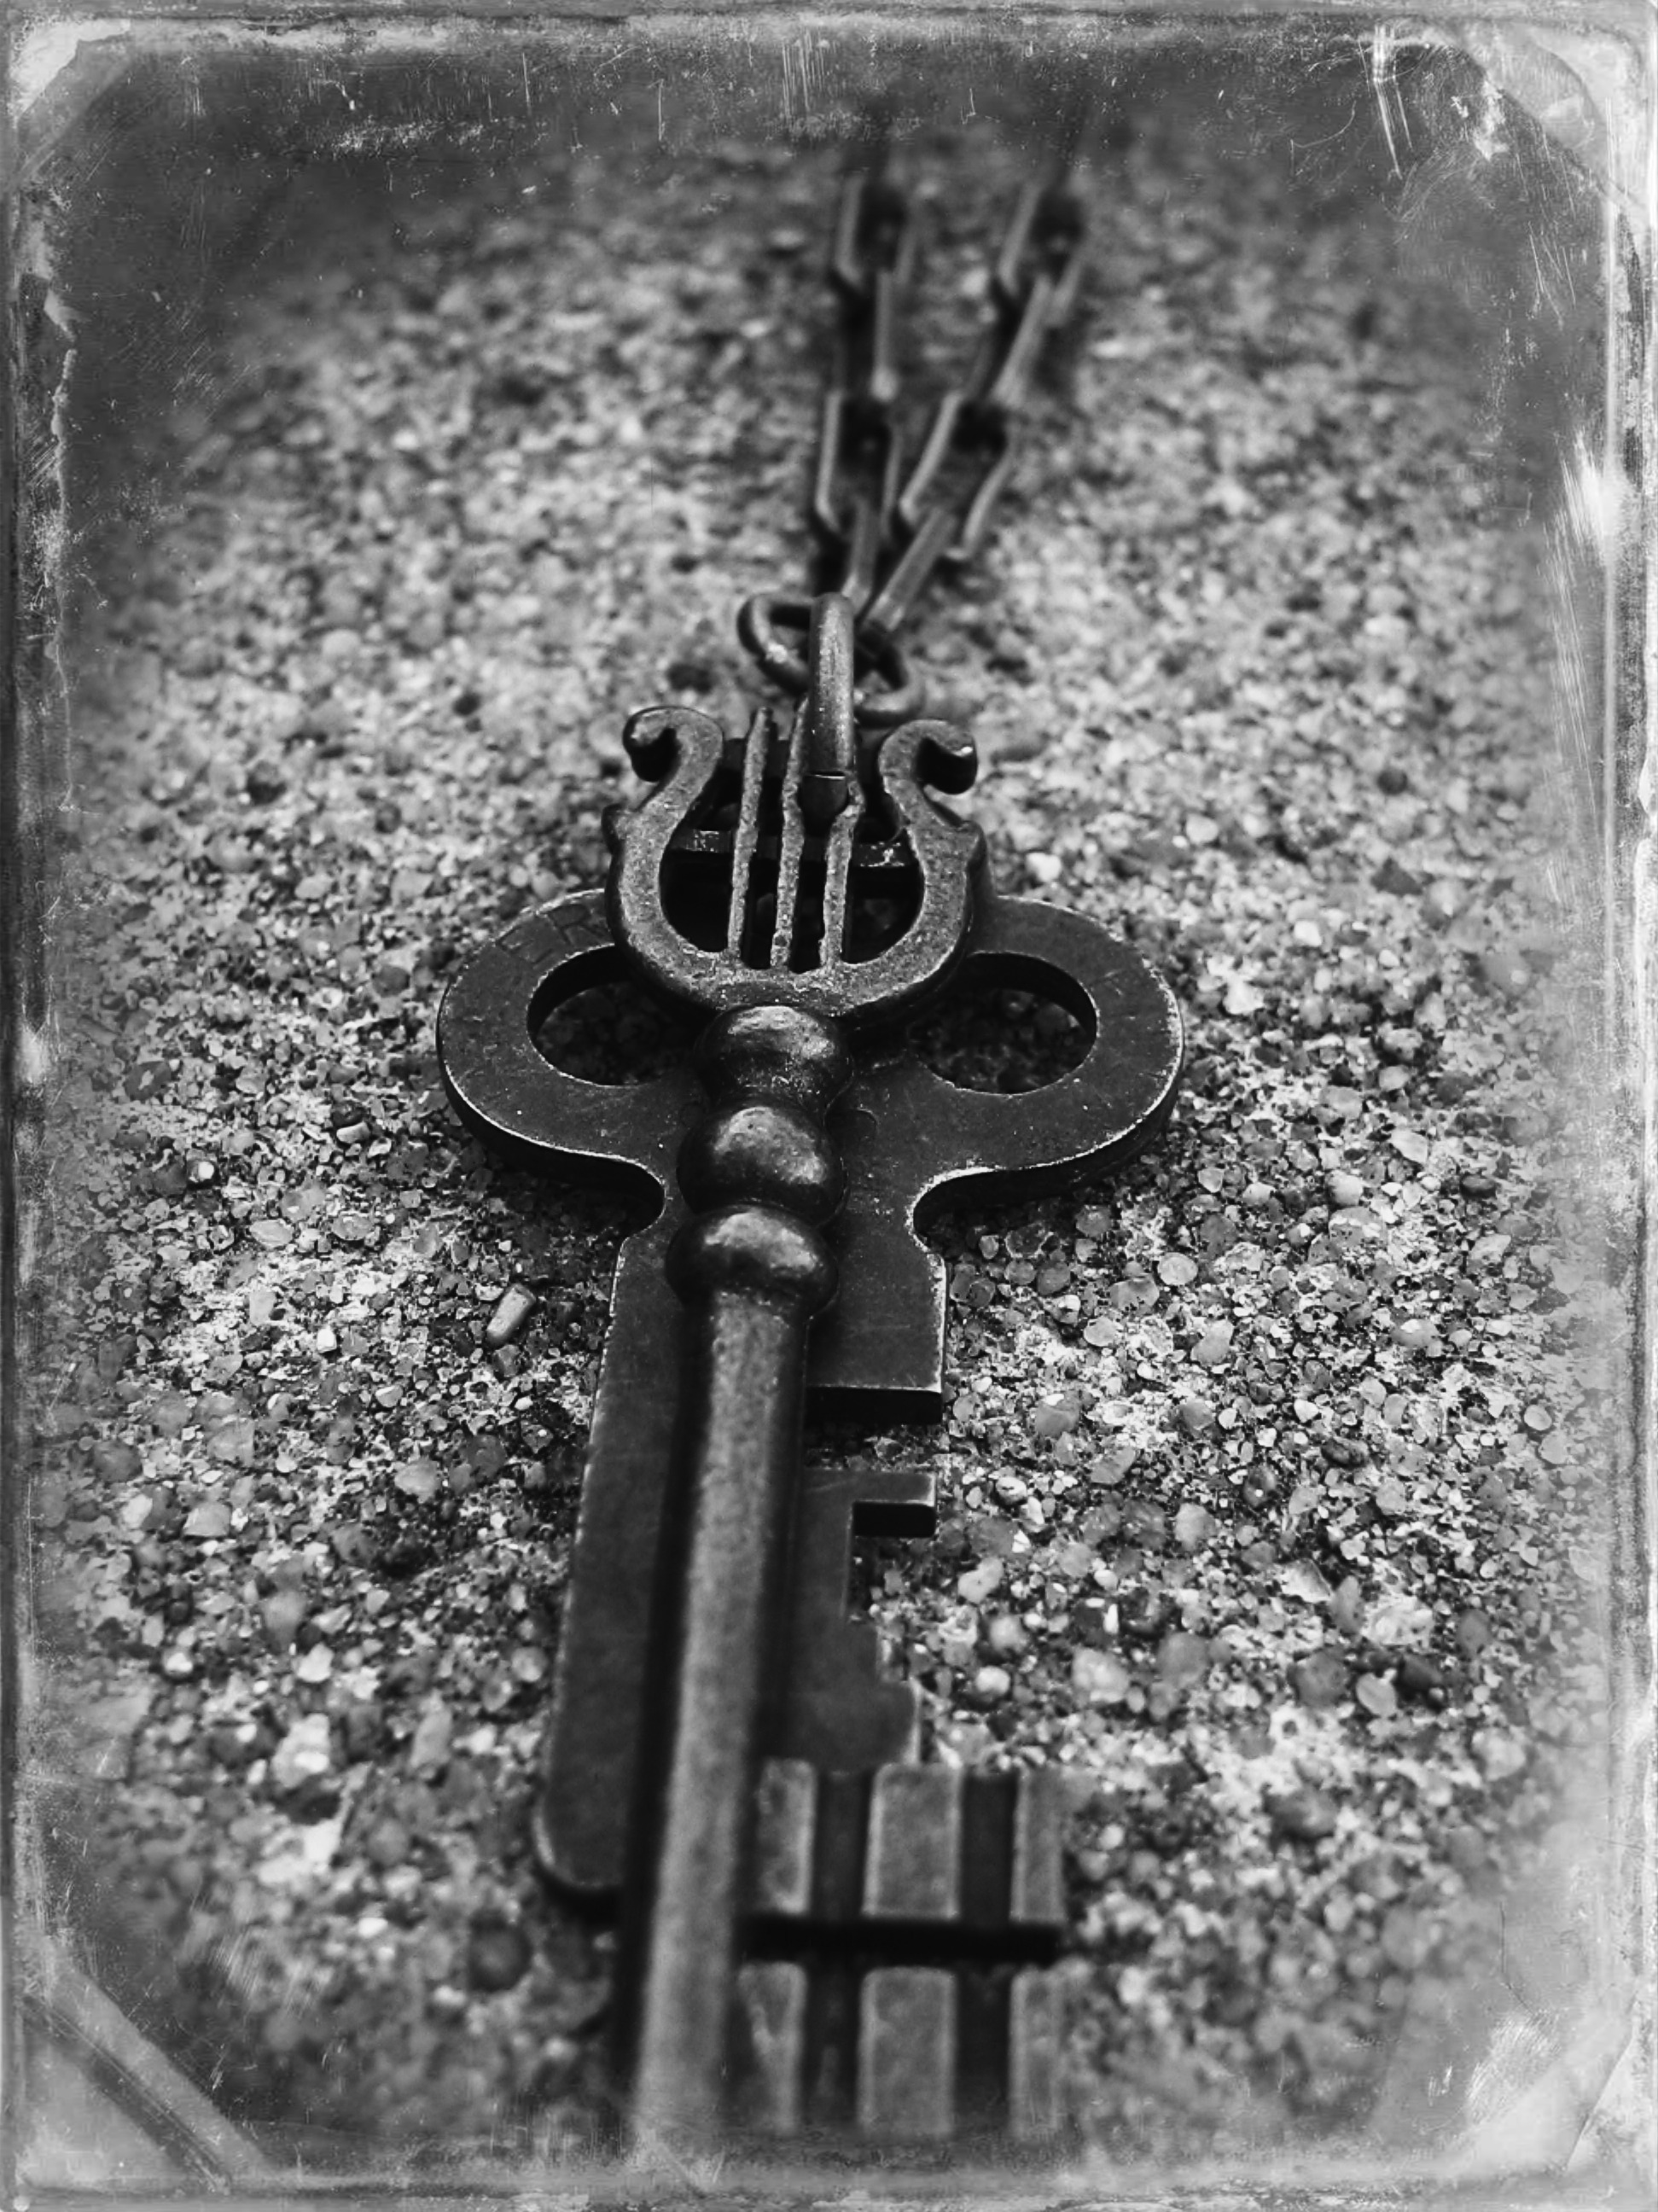
Tick-Tock Skeleton Key Necklace

Grandfather Clock Washer Earrings

Sky Captain Medallion

Steampunk Navigator Necklace

DIY Steampunk Stamps

D-I-Y-Samantha Extance1 Comment

Writing letters in this digital age makes it all that more important for letter writing to be more artistic & personal. Give your letters & stationary a steampunk flair with these 2 simple DIY stamps!

Geared Up! Stamp

Materials & Tools:

  • Square block of wood
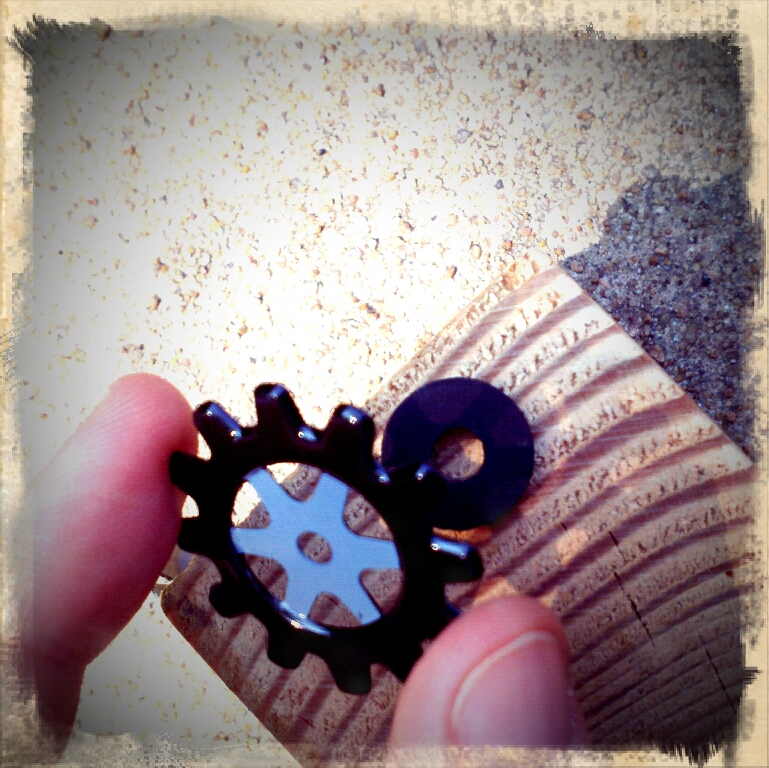
  • 3 gears (mine here are reproduction gears that you can purchase at Michaels--these work best because they are flat)
  • Hammer & 3 nails (the nail heads should be large enough so that they hold the gears in place)
  • 3 rubber washers (should be roughly the same width. See second picture below)

Steps:

1) Arrange your gears on your wooden block. Once you have them arranged as you desire, (using your nail) mark where you will hammer each gear into the wood.

2) Take a gear and place the rubber washer underneath it. Then hammer the gear in place with a nail. Be sure to hammer the nail straight so that the head is not crooked (because it makes stamping a little more difficult). Repeat for the other 2 gears.

3) Begin stamping!

Steampunk Spring Stamp

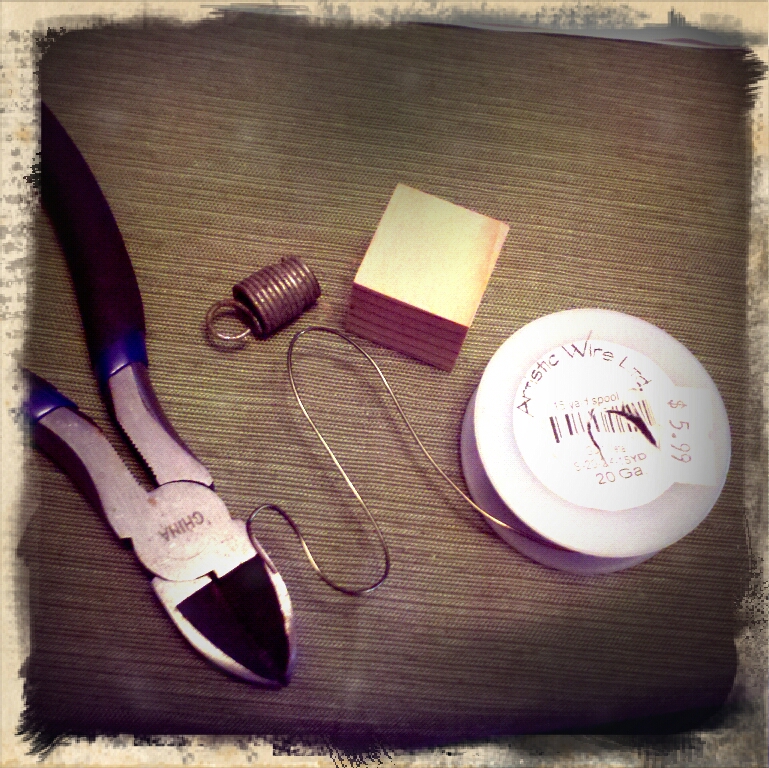
Materials & Tools:

  • Square wood block
  • Wire cutters
  • 20 gauge wire
  • Spring

Steps:

1) Cut a length of wire using your wire cutters (if you do not own a pair of wire cutters, use a pair of toenail clippers). I cut mine about arm's length.

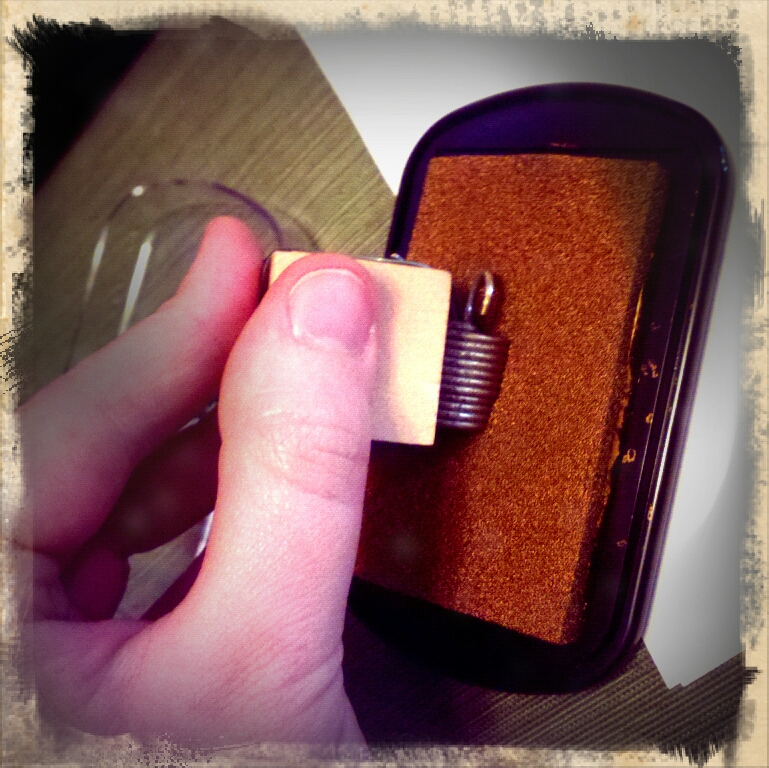
2) Thread the wire through the spring and around your wood block. Pinch the wire tight around the edges of the wood and pull the wire taut through the spring each time. 

3) Once you've wrapped all of the wire around your wood block & through your spring--wrap the loose end of wire to another piece of wire to secure it.

4) Being stamping!As always, Happy making!

D.I.Y. Antique Printer Drawer Jewelry Display

D-I-Y-Samantha Extance1 Comment

I am obsessed with antique printer drawers! They are perfect for displaying jewelry as well as other small bits and bobs you might collect and wish to show off. On Etsy there are several sellers who have upcycled printer drawers for the purpose of jewelry display. Most sellers' prices are steep but of course this depends entirely on the condition of the drawers and the amount of work that converting them requires. I bought all 4 of my drawers for $100 at a local antique shop (each drawer came with a complete set of letterpress letters, numerical signs, punctuation & symbols). If you're local to Tulsa, you should drop by Sidedoor Antiques (located on Harvard Avenue between 15th and 21st street). Be sure to tell William I said hello!

Once you have found your drawer, then comes the hard part--cleaning, decorating, and fitting your drawer with cup hooks. This D.I.Y. is broken down into 3 parts. (Believe me, you won't get it all done in 1 day!).

Part One: Cleaning Your Drawer

This part is the most time consuming. The older your drawer, the chances are the dirtier it is (after all--they do contain letterpress parts that were frequently used and slathered with ink).

Cleaning Supplies:

  • Method All-Purpose Disposable Wipes (Normally I would not suggest disposable anything, if you're like me you use rags for cleaning made from old socks and worn out clothing; however, cleaning each of the drawer's cubbies takes up a ton of rags (more than I had) and I did not want to just spread around dirt and ink--so just this once, use some wipes. Also with wipes, you do not run the risk of over-saturating your drawer with water.)
  • Vacuum cleaner
  • Razor blade
  • Wood polish & rag

Steps:

1) Using your vacuum cleaner, suck any loose dirt, dust, or lint from each cubby.

2) Once you are done, use a razor blade to scrape out the paper lining underneath each individual cubby. If your drawer does not have paper lining, then you can skip this step. If yours does, you should remove it. Each of my drawers had moldy paper lining because it had been wet at some time and not thoroughly dried out. If your drawer does have mold, please take care to cover your mouth and nose with a mask and wear gloves to protect yourself.

3) Once you've scraped away the paper lining, vacuum out the paper. Tweezers can be useful if you have paper that is stuck underneath the wood dividing the cubbies.

4) Wipe each individual cubby with a disposable wipe. Make sure to clean all four sides and the bottom of the drawer's cubby. Also wipe down the sides, bottom,  and back of the drawer.

5) After your drawer has dried a bit, wipe down each cubby and the drawer's back and sides with wood polish.

Part Two: Decorating Your Drawer

These are just a couple of suggestions on how to decorate your drawer! Have fun with it!

1) Paint the cubbies with chalkboard paint (or any other kind of paint you like). Two of mine are chalkboard painted (another obsession)--I have fun writing little messages in each of the cubbies.

2) Line each cubby with cut-outs from old magazines, books, postcards, or vintage fabric scraps using modge podge.

3) Keep it natural and seal your cubbies with modge podge wood sealant for a natural sheen that protects your wood! 

Part Three: Fitting Your Drawer

What is wonderful about converting your own drawer is customization. You can add cup hooks anywhere you wish. The drawer can be mounted on the wall or stand on your vanity table. Decide where you'd like to place your drawer and then begin to measure your drawer's dimensions so that you can fit it with the appropriate hardware.

Supplies You'll Need to Mount Your Drawer on the Wall:

  • flat brackets
  • screws (that fit into your bracket and do no exceed the depth of your drawer's wood)
  • screwdriver or drill
  • awl
  • measuring tape

Supplies You'll Need for a Freestanding Drawer (on the Vanity):

  • L-shaped brackets
  • screws (that fit into your bracket and do not exceed the depth of your drawer's wood)
  • screwdriver or drill
  • awl
  • measuring tape

For both kinds of drawer displays you will need cup hooks (or any other kind of hook you desire). Cup hooks are the easiest. The size depends entirely on your drawers dimensions.

Steps:

1) Measure your drawer's dimensions. Start first with its width (A) and height (B). Next measure its depth (C) and the width and height of each cubby (D). Not all of your cubbies are the same width and height so be sure to make note of that. Record each of your measurements.

2) Count how many cubbies your drawer has and record the number along with your other measurements. For the printer drawer I use as display for my business I only put one cup hook per cubby so that each pair of earrings or bracelet could be more easily seen. For my personal printer drawer (the one I use to hold and display all of my jewelry that I wear) I put 2 cup hooks per cubby where I could so that the drawer could increase its holding capacity. This is a choice that's up to you.

3) Using your screws and screwdriver, attach your brackets to the back of your printer drawer. I recommend attaching the bracket to a thicker part of your drawer for more stability. Obviously, if you are mounting your drawer on the wall--keep in mind how it will hang and likewise, if you are standing it up on your vanity, how it will stand when your brackets are in place. It's best to mark the spots where you'll want to screw in your brackets with pencil first before drilling. (You can also lean your drawer up against the wall if your prefer, as is pictured in BlueBirdHeaven's photo above).

4) Once your brackets are in place, use your awl and start a hole in each individual cubby and then screw in your cup hook. Repeat (many, many times). You may also want to use a pair of flat nosed pliers to help you screw in the cup hook.

Part Four: Enjoy!

Have fun putting all of your jewelry & tiny bric-a-brac in your new display! As always, Happy Making!

D.I.Y. Steampunk Flower Vase

D-I-Y-Samantha Extance1 Comment

Here is a simple & elegant way to steampunk your dinner table or wedding reception--a clock part vase!

Materials Needed: Bud vase (or any glass or metal vase that fits inside your clock's mechanism), flowers & clock (or machine) part.

1) Fit your bud vase inside of your clock mechanism. (If you want to conceal the vase, choose a metal one that blends in with your clock part's metal. Also for another variation, you can use test tubes too & fix them throughout your clock's mechanisms for a wilder, more overgrown look). Fill with water.

2) Arrange your flowers!

And for a completely different look for your wedding or dinner table, you can either make paper flowers or purchase beautiful fake bouquets and splay them across your clock mechanism.

As always, Happy Making!


D.I.Y. Steampunk Teddy Bear

D-I-Y-Samantha Extance1 Comment

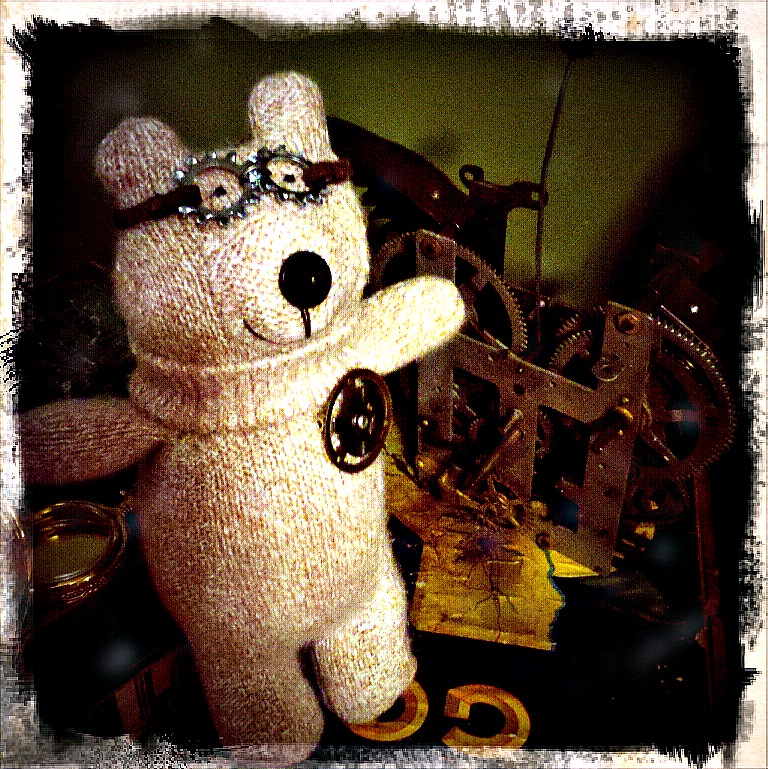
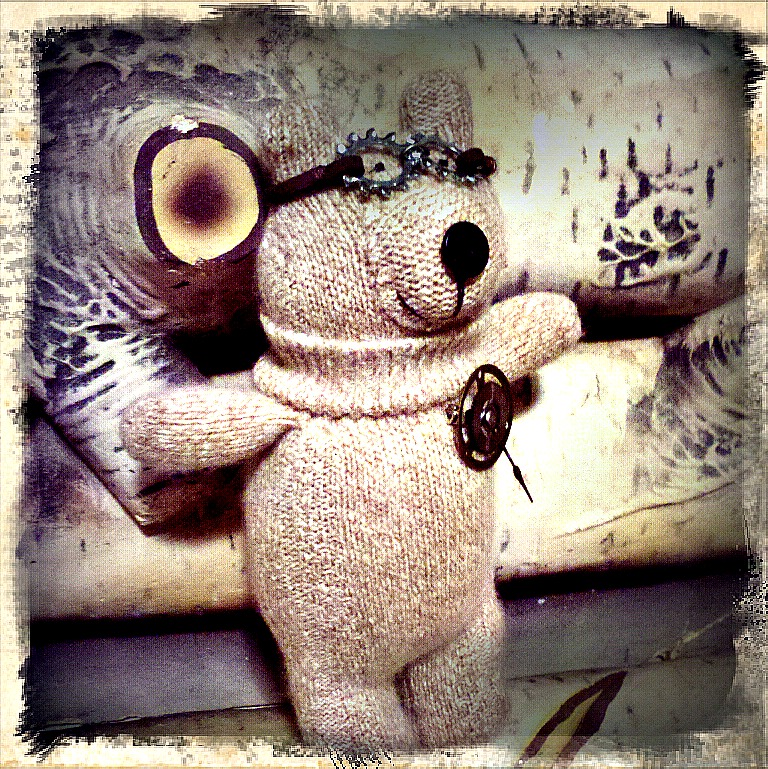
I made a friend today, quite literally! His name is Tinker Bear. My favorite part of being a kid was playing with stuffed animals and Barbie dolls--creating worlds for them and then getting lost in those worlds. Now that I'm grown up--though not really, ask anyone--I am a still a kid in many ways--I not only invent worlds, but the creatures that inhabit them. Here is a D.I.Y. on how to steampunk your teddy bear. As always, happy crafting!

Materials & Tools You Will Need:

Flat nosed pliers

1 pair of socks (your choice of color and texture)

Stuffing

Needle & thread (ideally you want black, brown, and whatever color thread matches your sock)

Brown or black embroidery thread (or another kind of heavy thread)

Scissors

2 small black seed beads (for the eyes)

1 button (for the nose)

1 pin back

2 clock cogs (or if you prefer, you can substitute 1 clock cog for a watch face or watch plate)

1 game spinner or clock hand

1 brad

Leather chord

2 lock washers

1 jump ring

Part One: To Make Your Teddy Bear:

You can certainly steampunk a teddy bear that you already have (& love) or you can make your own. I made mine according to a pattern in Daniel’s Stray Sock Sewing: Making One-of-a-Kind Creatures from Socks—a book I not only love, but highly recommend. There are ample pictures to guide you through the various stitches and steps and the instructions are easy to follow, particularly if you are new to sewing. The Teddy Bear pattern is on pages 122-131. Go buy it. It’s an amazing book and you will spend numerous hours fashioning things from the stray socks lying around your house.  

For this pattern, you need the following: 1 pair of socks (your choice of color and texture); Stuffing; Needle & thread (ideally you want black, brown, and whatever color thread matches your sock); Brown or black embroidery thread (or another kind of heavy thread); Scissors; 2 small black seed beads (for the eyes); 1 button (for the nose)

Alterations I Made to Daniel’s Pattern:

  • I skipped Step 26 because I think belly buttons on bears look weird.
  • I used a thicker sock (a cashmere woven one)
  • I slightly altered Step 25—while I did use the sock’s cuff around the neck, instead of rolling the sock cuff I fashioned it to look more like a turtleneck collar (by rolling under the rough edge)

Part Two: To Make Your Pin:

1)      Layer each of your elements with your pin at the back. My layers are as follows (from back to front): pin back, larger clock cog, clock hand/game spinner, smaller clock cog, and brad. If you are substituting one clock cog for a watch face or plate, place it where the smaller clock cog would be.

2)      Once you have your layers in place, close your brad by opening its ends. Squeeze the brad tightly—using your flat nosed pliers to ensure extra security.

3)      Pin to your bear!

Part Three: To Make Your Goggles:

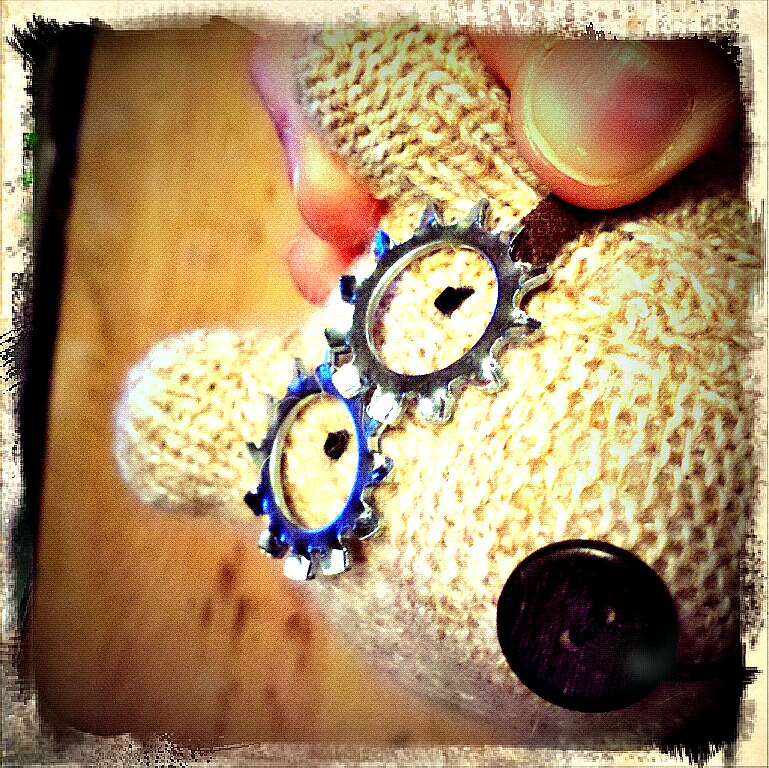
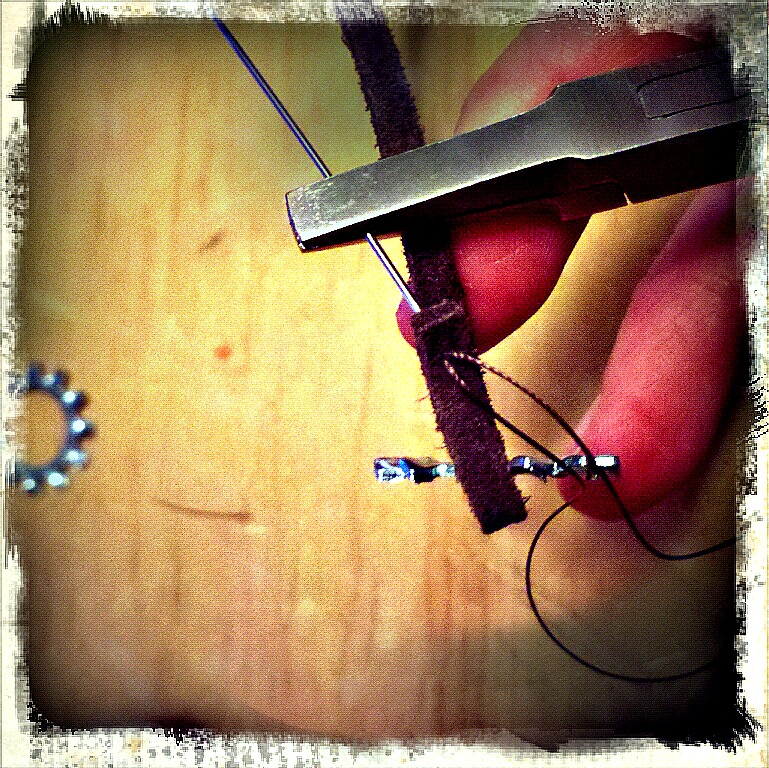
1)      Take your lock washers and place them over your bear’s eyes. Once you’re satisfied with their placement. Measure the amount of leather chord you will need to fit around your teddy bear’s head. Give yourself an extra ¼ inch to sew loops around each of the lock washers.

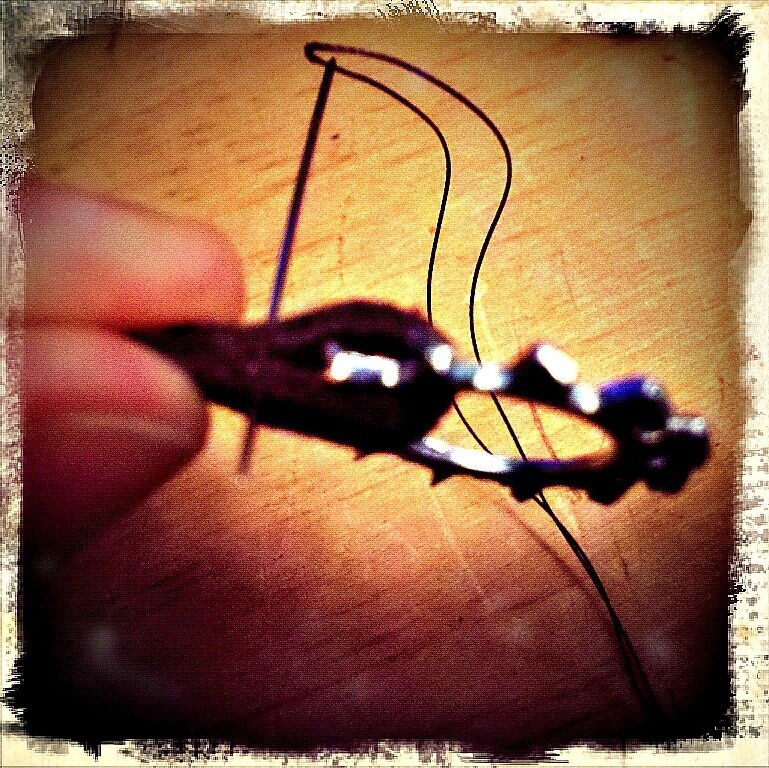
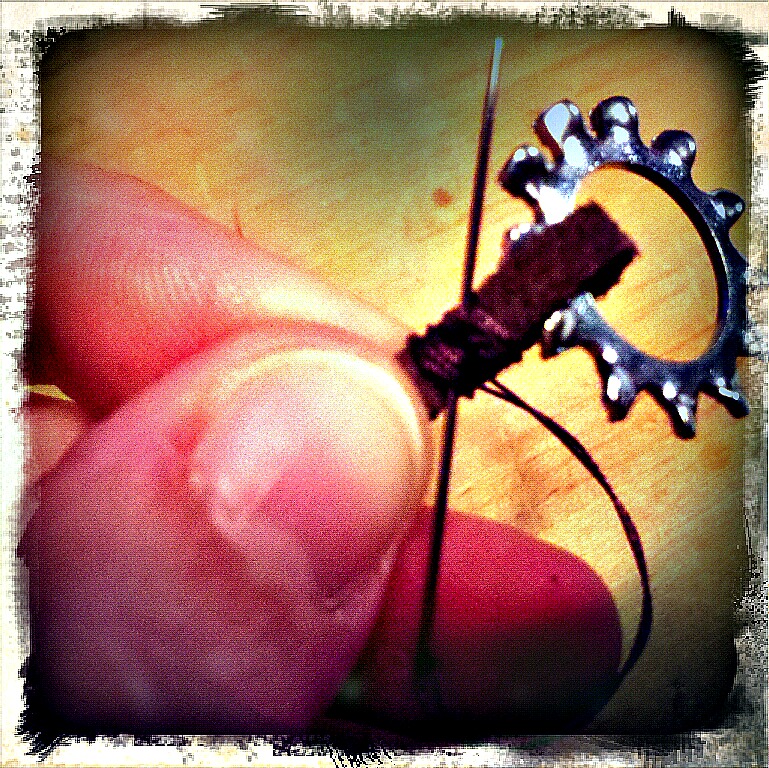
2)      Next, take one of your lock washers and loop your leather chord around it. Stitch in place. Stitching through leather can be difficult. If you are having trouble, you can make a small starter hole in the chord using an awl or you can use your flat nosed pliers to pull the needle through the leather. In the latter case, be sure not to place the pliers around the eye of your pin otherwise it will break or close shut.

Once you have stitched once through both pieces of your leather chord, wrap your thread around the chord to hold it together. Once you have wrapped it approximately 5-6 times, knot it and cut off any excess thread.

Repeat for the other lock washer, taking care to first measure the leather chord around your teddy bear’s head.

3)      Connect your lock washers together with your jump ring using your flat nosed pliers. If you do not have a jump ring or flat nosed pliers, you can either stitch the lock washers together (using embroidery thread or another kind of heaving sewing thread) or use of a bit of wire and wrap them together.

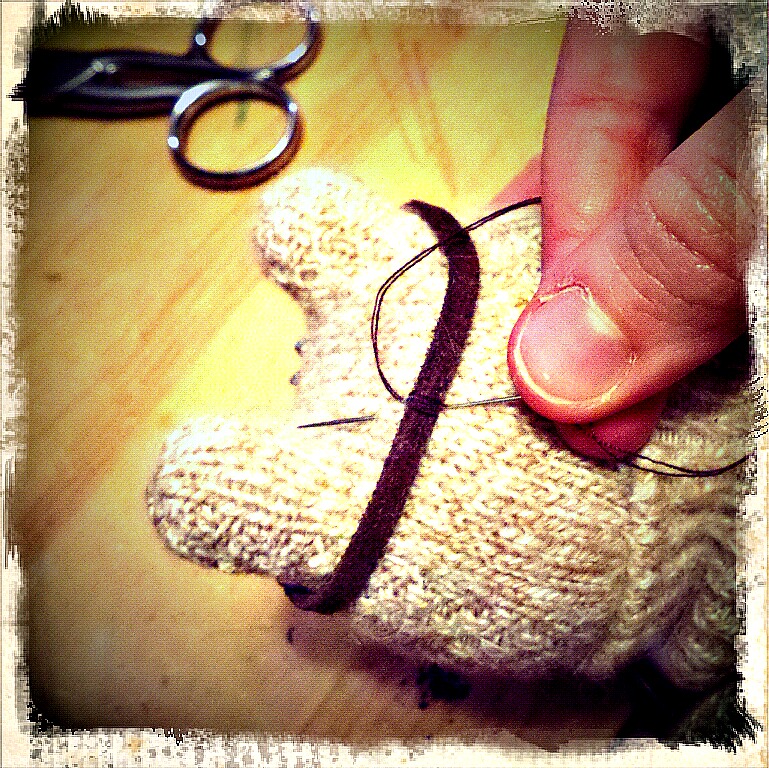
4)      Place your goggles on your teddy bear’s head and stitch the leather chord in place (using your brown thread) for extra security.

5)      And last, and most important, start adventuring!

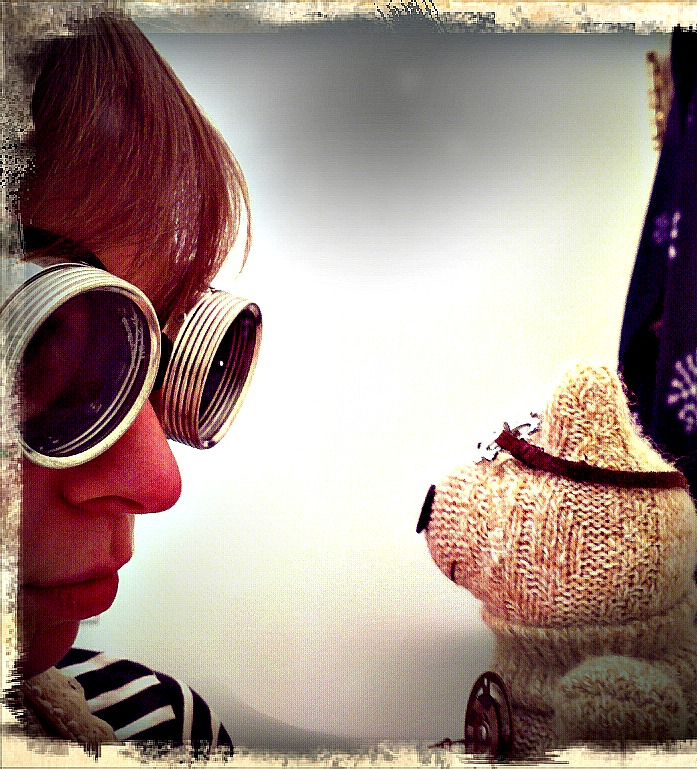
Shall we go on an adventure, Tinker Bear? “Yes!” Well away we go—perhaps our airship will bump into yours along the way!

P.S. If you are looking for other friends to "make" before you go off on your adventure--check out Sarah Skeate & Nicola Tedman's Steampunk Softies: Scientifically Minded Dolls from a Past that Never Was! Craftzine shared a project from their book--you can learn how to make Marveletta, a very Steampunk Lady!

D.I.Y. Book Display

D-I-Y-Samantha Extance1 Comment

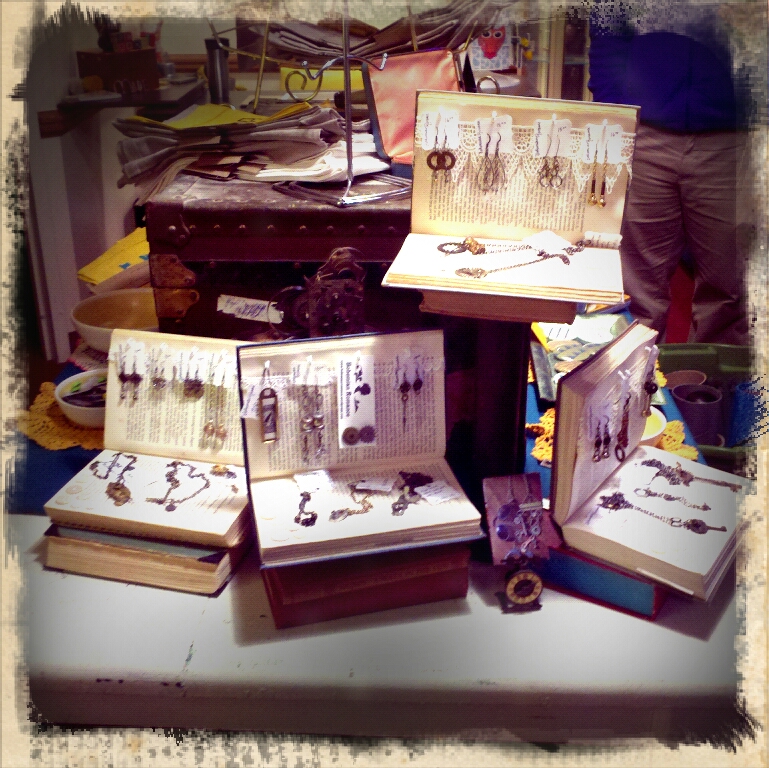
I like to use antiques and things I can upcycle and re-purpose to display my jewelry. As many of you probably already know if you have seen my booth at local craft shows--I have antique printer drawers, an old door that I use for a table, a shutter, and a wood kitchen drawer that I refurbished for display purposes. This display came about when I was thinking up creative ways to display my jewelry in a new shop that is opening up here in Tulsa. I am happy to be a part of Made; The Indie Emporium shop, located on the corner of 5th & Boston (the grand opening is February 1st & I hope to see you there!). I loved making these displays and I hope you will too!

Materials & Tools:

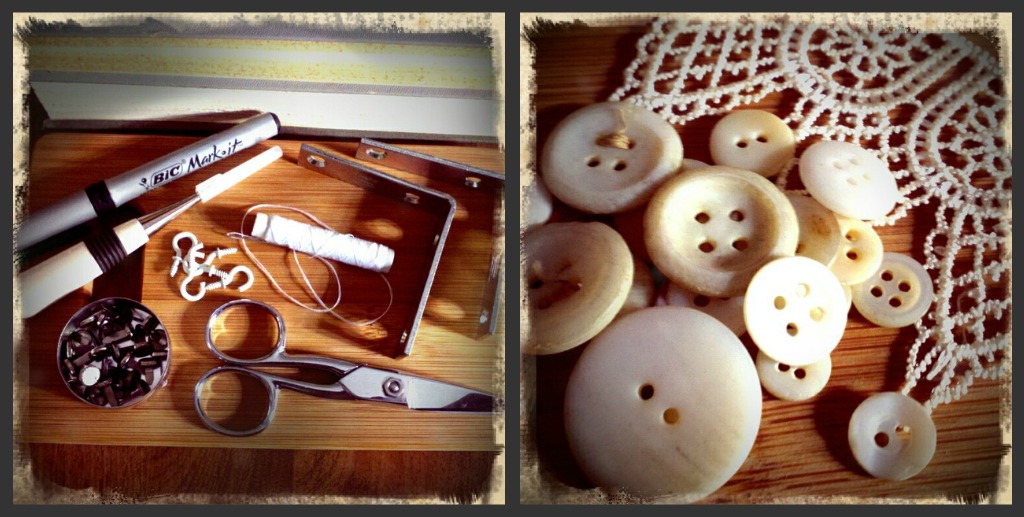
screwdriver; scissors; needle & thread; 2 books (1 to use as the display and the other to use as an anchor); cup hooks (white); Sharpie marker; awl; brads; lace; buttons; all-purpose glue; 1 pkg. of corner braces with screws (mine are 2 1/2" x 5/8") but really this just depends on the size of your book

What is great about this DIY is that it is simple and elegant while also being incredibly cheap to reproduce. I purchased the books for 50 cents each at a used bookstore, the lace was 50 cents in a bargain bin, the buttons were free! (I collect lost buttons, they are everywhere you look!), cup hooks 89 cents per pkg. of 5, and the corner braces came in a pkg. of 4 with the screws and only cost $3.95 at Lowes, and lastly a large pkg. of 20 brads were on sale for 76 cents--which brings me to a grand total of $7.10.

Steps:

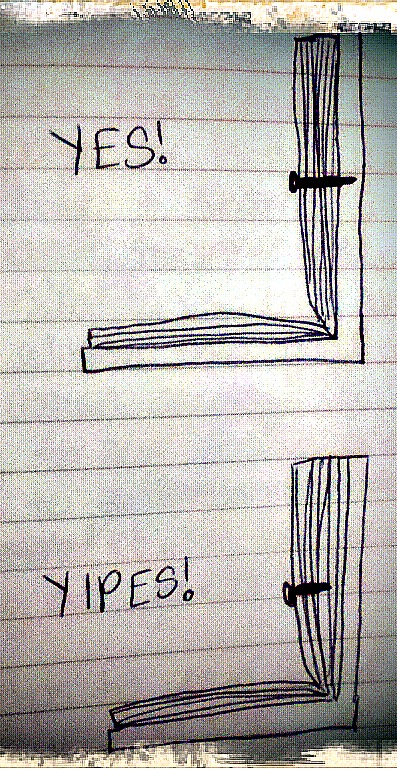
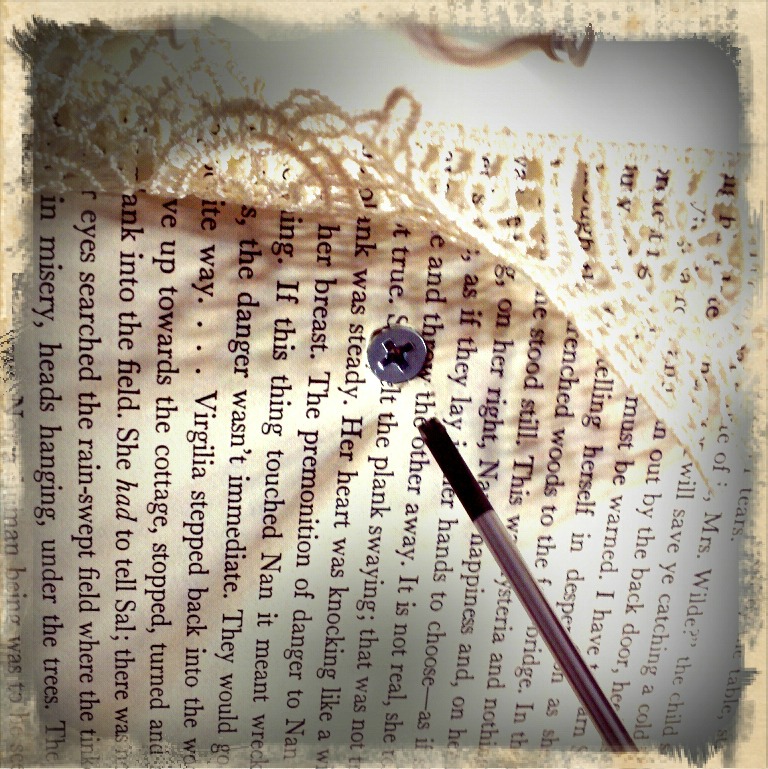
1) Before doing anything, first figure out which pages you would like to have your book display opened on. I read mine to make sure that there wasn't anything a potential customer might find offensive (like expletives, racy scenes, or racial/ethnic slurs). Also,  measure (eyeball it) to make sure that the screw (that you will fix in the middle of the top page of your book display to keep it securely open) can go through all of the pages that you have opened your book to. See figure below for clarification.

You want the screw to go into the book cover otherwise the book pages will fall down once you place jewelry on it.

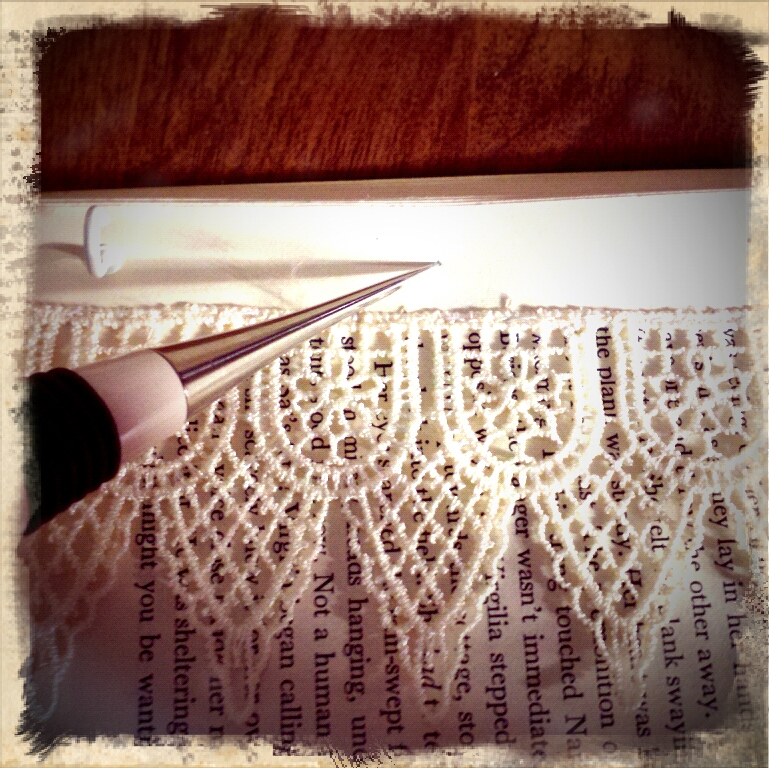
2) Once you have done this, measure and cut your lace to fit the top page of your book display. Your lace should wrap around to the other side of the book page to hide unsightly unraveling and seams. I suggest sewing 2-4 pages together (depending on your paper quality and its thickness) so that there is less of a chance of tearing the pages while you are sewing your lace in place. Too few pages and it's too flimsy to sew easily and too many pages leads to more paper tears because you are tugging at your stitches more.It helps to pin your lace in place on the book page.

3) Once you have your lace pinned in place, sew it. Try to keep your stitches small, even, and neat.

4) Next, place your buttons on the bottom book page of your display. I pinned mine in place (which is optional). You could sew as you go if you choose. Sew your buttons in place. Again, sew 2-4 pages together for maximum ease. 5) (Optional) Use your marker to write your business name or a cute phrase on the bottom page of your book display. You could also stamp a design on your page or doodle in the margins. Anything goes, have fun with it!

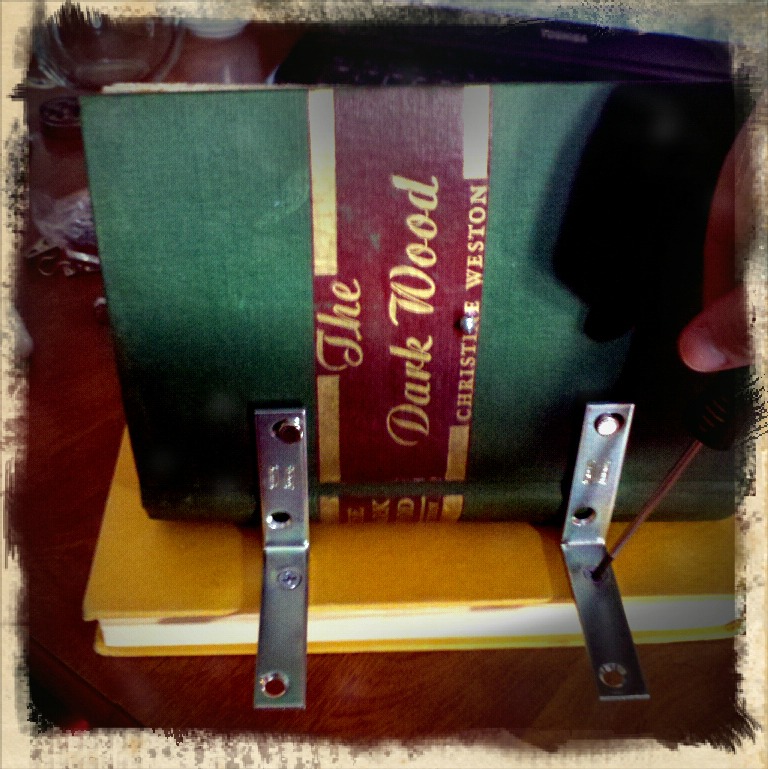
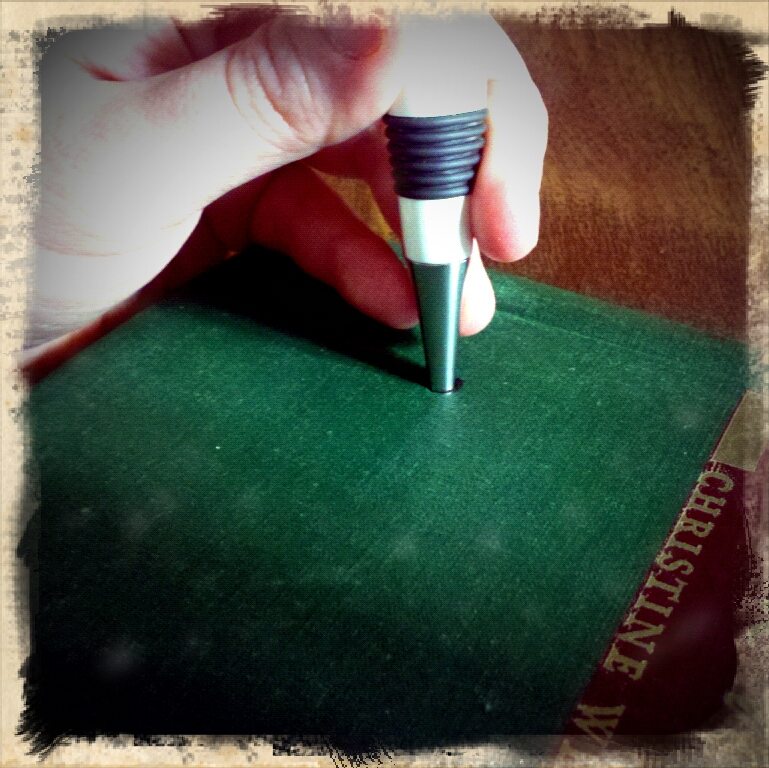
6) Once you are finished with decorating your display, it's time to fasten the display book to your anchor book. Place your anchor book underneath your display book. Grab one of your corner braces and place it up against the back cover of your display book situating the screw holes tightly against both the back cover of your display book and the top cover of your anchor book. See the image below for clarification. Once you have the corner brace places, take your Sharpie marker and mark each screw hole. Repeat for the other corner brace.7) Next, take your awl and poke a hole directly through the marks you made for your screw holes on both covers. When poking a hole in the display book cover, be sure not to go through your book pages--just the cover. 8) Once you have made all of your holes, take 2 brads and use them to fasten your corner braces to the display book. (You are putting the brad through the screw hole, book cover, and then opening the ends to hold the corner brace in place). The picture here is upside down, but you get the idea.

9) Next, take 2 screws and screw them in place (through the hole you poked through the anchor book cover). You know when you're done because the display book will feel more secure (essentially, it will no longer slide or fall closed but remain upright). 10) Turn your display book around so that it is facing you. Using your awl, poke tiny holes (starter holes) in your top book page for your cup hooks. And then, screw your cup hooks in place. I recommend alternating which cup hooks you screw in so that the page does not ripple or become uneven.  For instance, I had 5 total cup hooks so I screwed in the 1st hook and then the 3rd and 5th, and afterwards, the 2nd and 4th hooks.

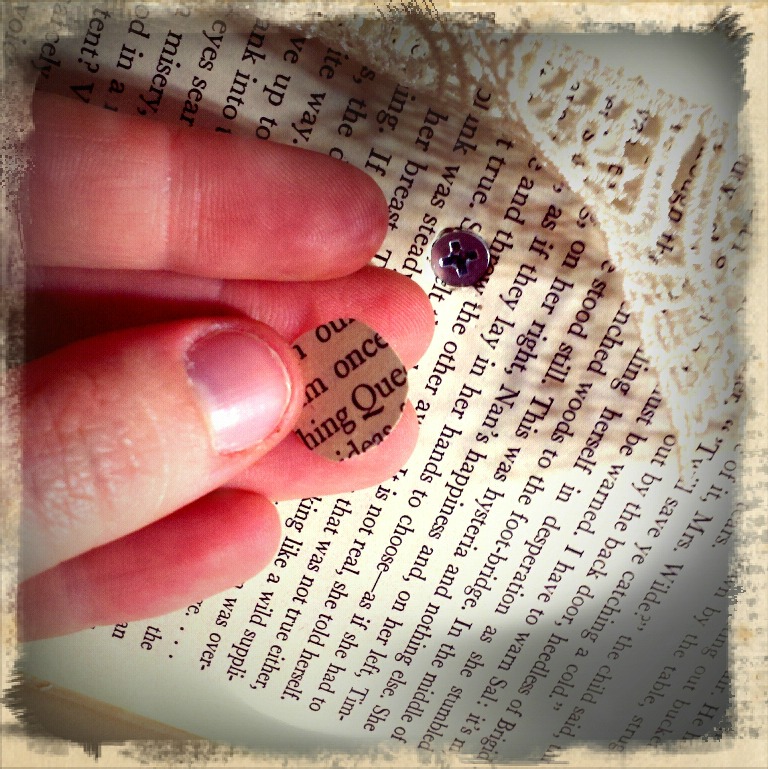
11) With the display book still facing me, I lifted up my lace, and using my awl made a starter hole in the very middle of the top page for my screw. Then I took a screw and secured it in place using my trusty screwdriver.12) Once I was  done, I cut a circle out of a scrap book page to cover the screw and glued it in place.13) Now comes the fun part--splaying your jewelry across the page and hanging it from the tiny cup hooks! For a layered look, stack books underneath your display to create height and use different angles.

As always, Happy Crafting! And please, do come visit Made; The Indie Emporium shop's grand opening on Feb. 1st!

My Furry Valentine Silent Auction Benefit

Contests & GiveawaysSamantha ExtanceComment

Bohemian Romance is proud to be a part of this year's Street Cat's "My Furry Valentine" silent auction. "My Furry Valentine" is a benefit to help Street Cats, Inc. (a non-profit organization here in Tulsa) fund their incredible work placing abandoned & lost cats with families. Among a simply Steampunk earring and bracelet set up for auction, you can find other items from local artists and enjoy a night of wine and desserts at the Tulsa Historical Society, 2445 South Peoria Avenue, on February 12th from 1:30 to 4:30 pm.

Good luck to those bidding, though with events like these--everyone kinda wins!

Handmade Illumination: D.I.Y. Steampunk Candlestick Holder (3 ways)

D-I-Y-Samantha Extance2 Comments

These candlesticks are perfect for hosting an intimate dinner party for fantastical inventors, airship tinkerers, clockmakers' sons & daughters, and bicycle enthusiasts everywhere! D.I.Y.s and Materials needed for each candlestick are written below under their respective name. Before you begin, I would like to note that in each of these photos a tea candle is pictured. I did not have a candlestick on hand and so I substituted a tea candle for a candlestick in order to show each step completely. As always, happy making!

Atomventor's Candlestick Holder

Materials Needed:

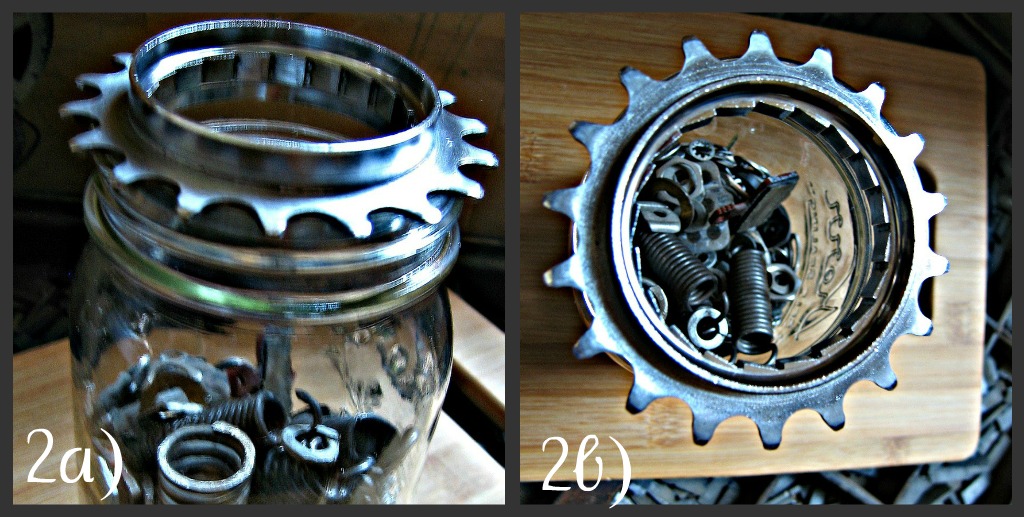
Mason jar, medium sized bicycle gear (from a cassette), glass candlestick holder, a candlestick, and various odds & ends of your choosing to place inside your jar.

I used washers, springs, bicycle brakes, clock parts & gears.

A note on your mason jar & glass candlestick holder: These items must be able to stack inside one another. When purchasing your jar and candlestick holder, you should bring your bicycle gear with you to the store to ensure that you purchase the correct sizes.

Steps:

1) Fill your jar with your assorted odds & ends (also known bric-a-brac, couch treasure, & dumpster delights). Fill your jar about halfway.

2) Place your bicycle gear atop your jar. See also figures 2a & 2b below.

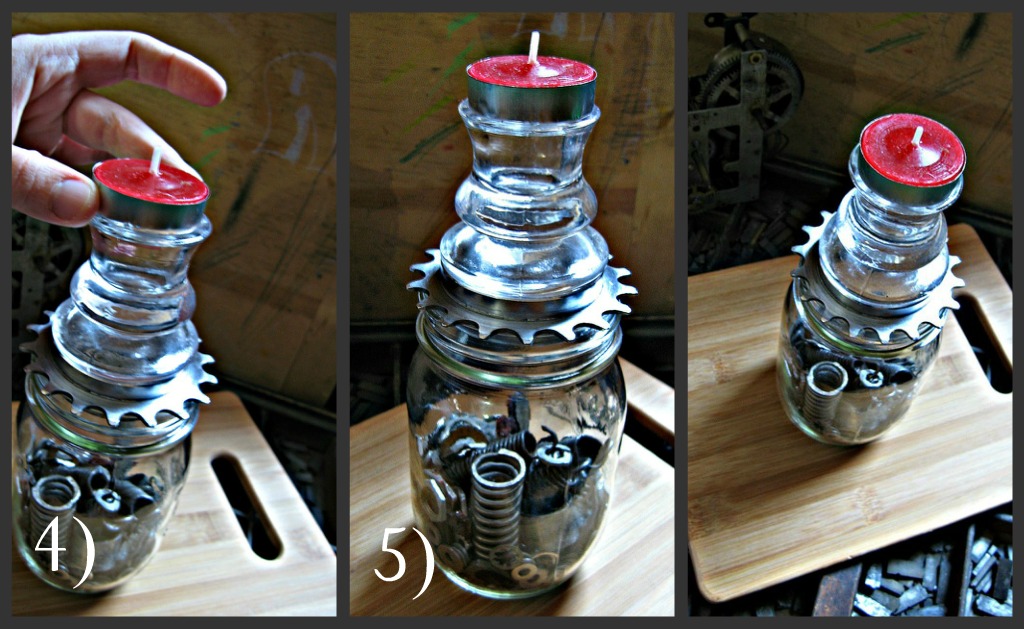
3) Place your glass candlestick holder on top of your bicycle gear. The candlestick I purchased (from Michaels) has a tiny "lip" on the bottom--this keeps the candlestick from falling off of the gear & sliding out.

4) Next, place your candlestick into the glass candlestick holder.

5) Enjoy your handmade illumination!

Simply Steampunk Candlestick Holder

Materials Needed:

Medium-sized bicycle gear, glass candlestick holder, and a candlestick.

A note on your glass candlestick holder: This item must be able to stack inside your gear. When purchasing your candlestick holder, you should bring your bicycle gear with you to the store to ensure that you purchase the correct size.

Steps:

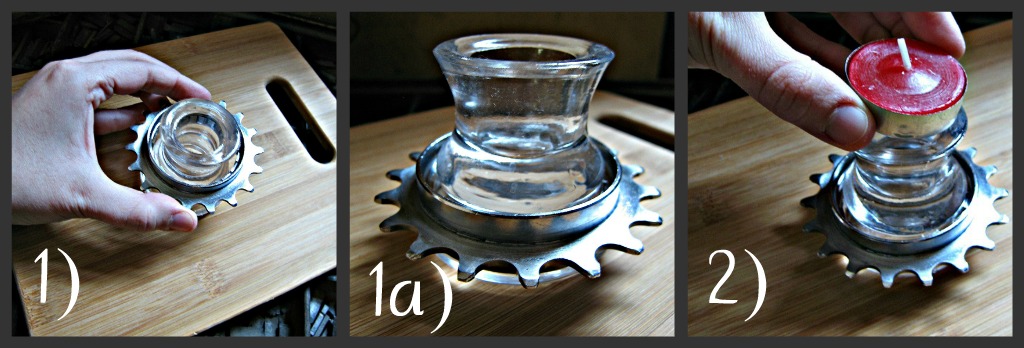
1) Place your bicycle gear over your glass candlestick holder. You can see in figure 1a that the candlestick's "lip" keeps the gear in place.

2) Next, place your candlestick into the glass candlestick holder.

3) Enjoy your handmade illumination!

Simply Steampunk Easy Candlestick Holder

Materials Needed:

Medium-sized bicycle gear, glass candlestick holder, and a candlestick.

A note on your glass candlestick holder: This item must be able to stack inside your gear. When purchasing your candlestick holder, you should bring your bicycle gear with you to the store to ensure that you purchase the correct size.

Steps:

1) Place your bicycle gear on your table and then stack your glass candlestick holder on top of it. Again, the "lip" of teh candlestick holder keeps the gear in place & from sliding. See figure 1a.

2) Next, place your candlestick into the glass candlestick holder.

3) Enjoy your handmade illumination!

This D.I.Y. is versatile--once you have the materials you will be able to make each of these candlesticks. Since the candlesticks are made by stacking pieces into one another, you will also be able to change them to fit the mood or theme of your table setting.

Inspiration Begins at Home

InspirationSamantha Extance1 Comment

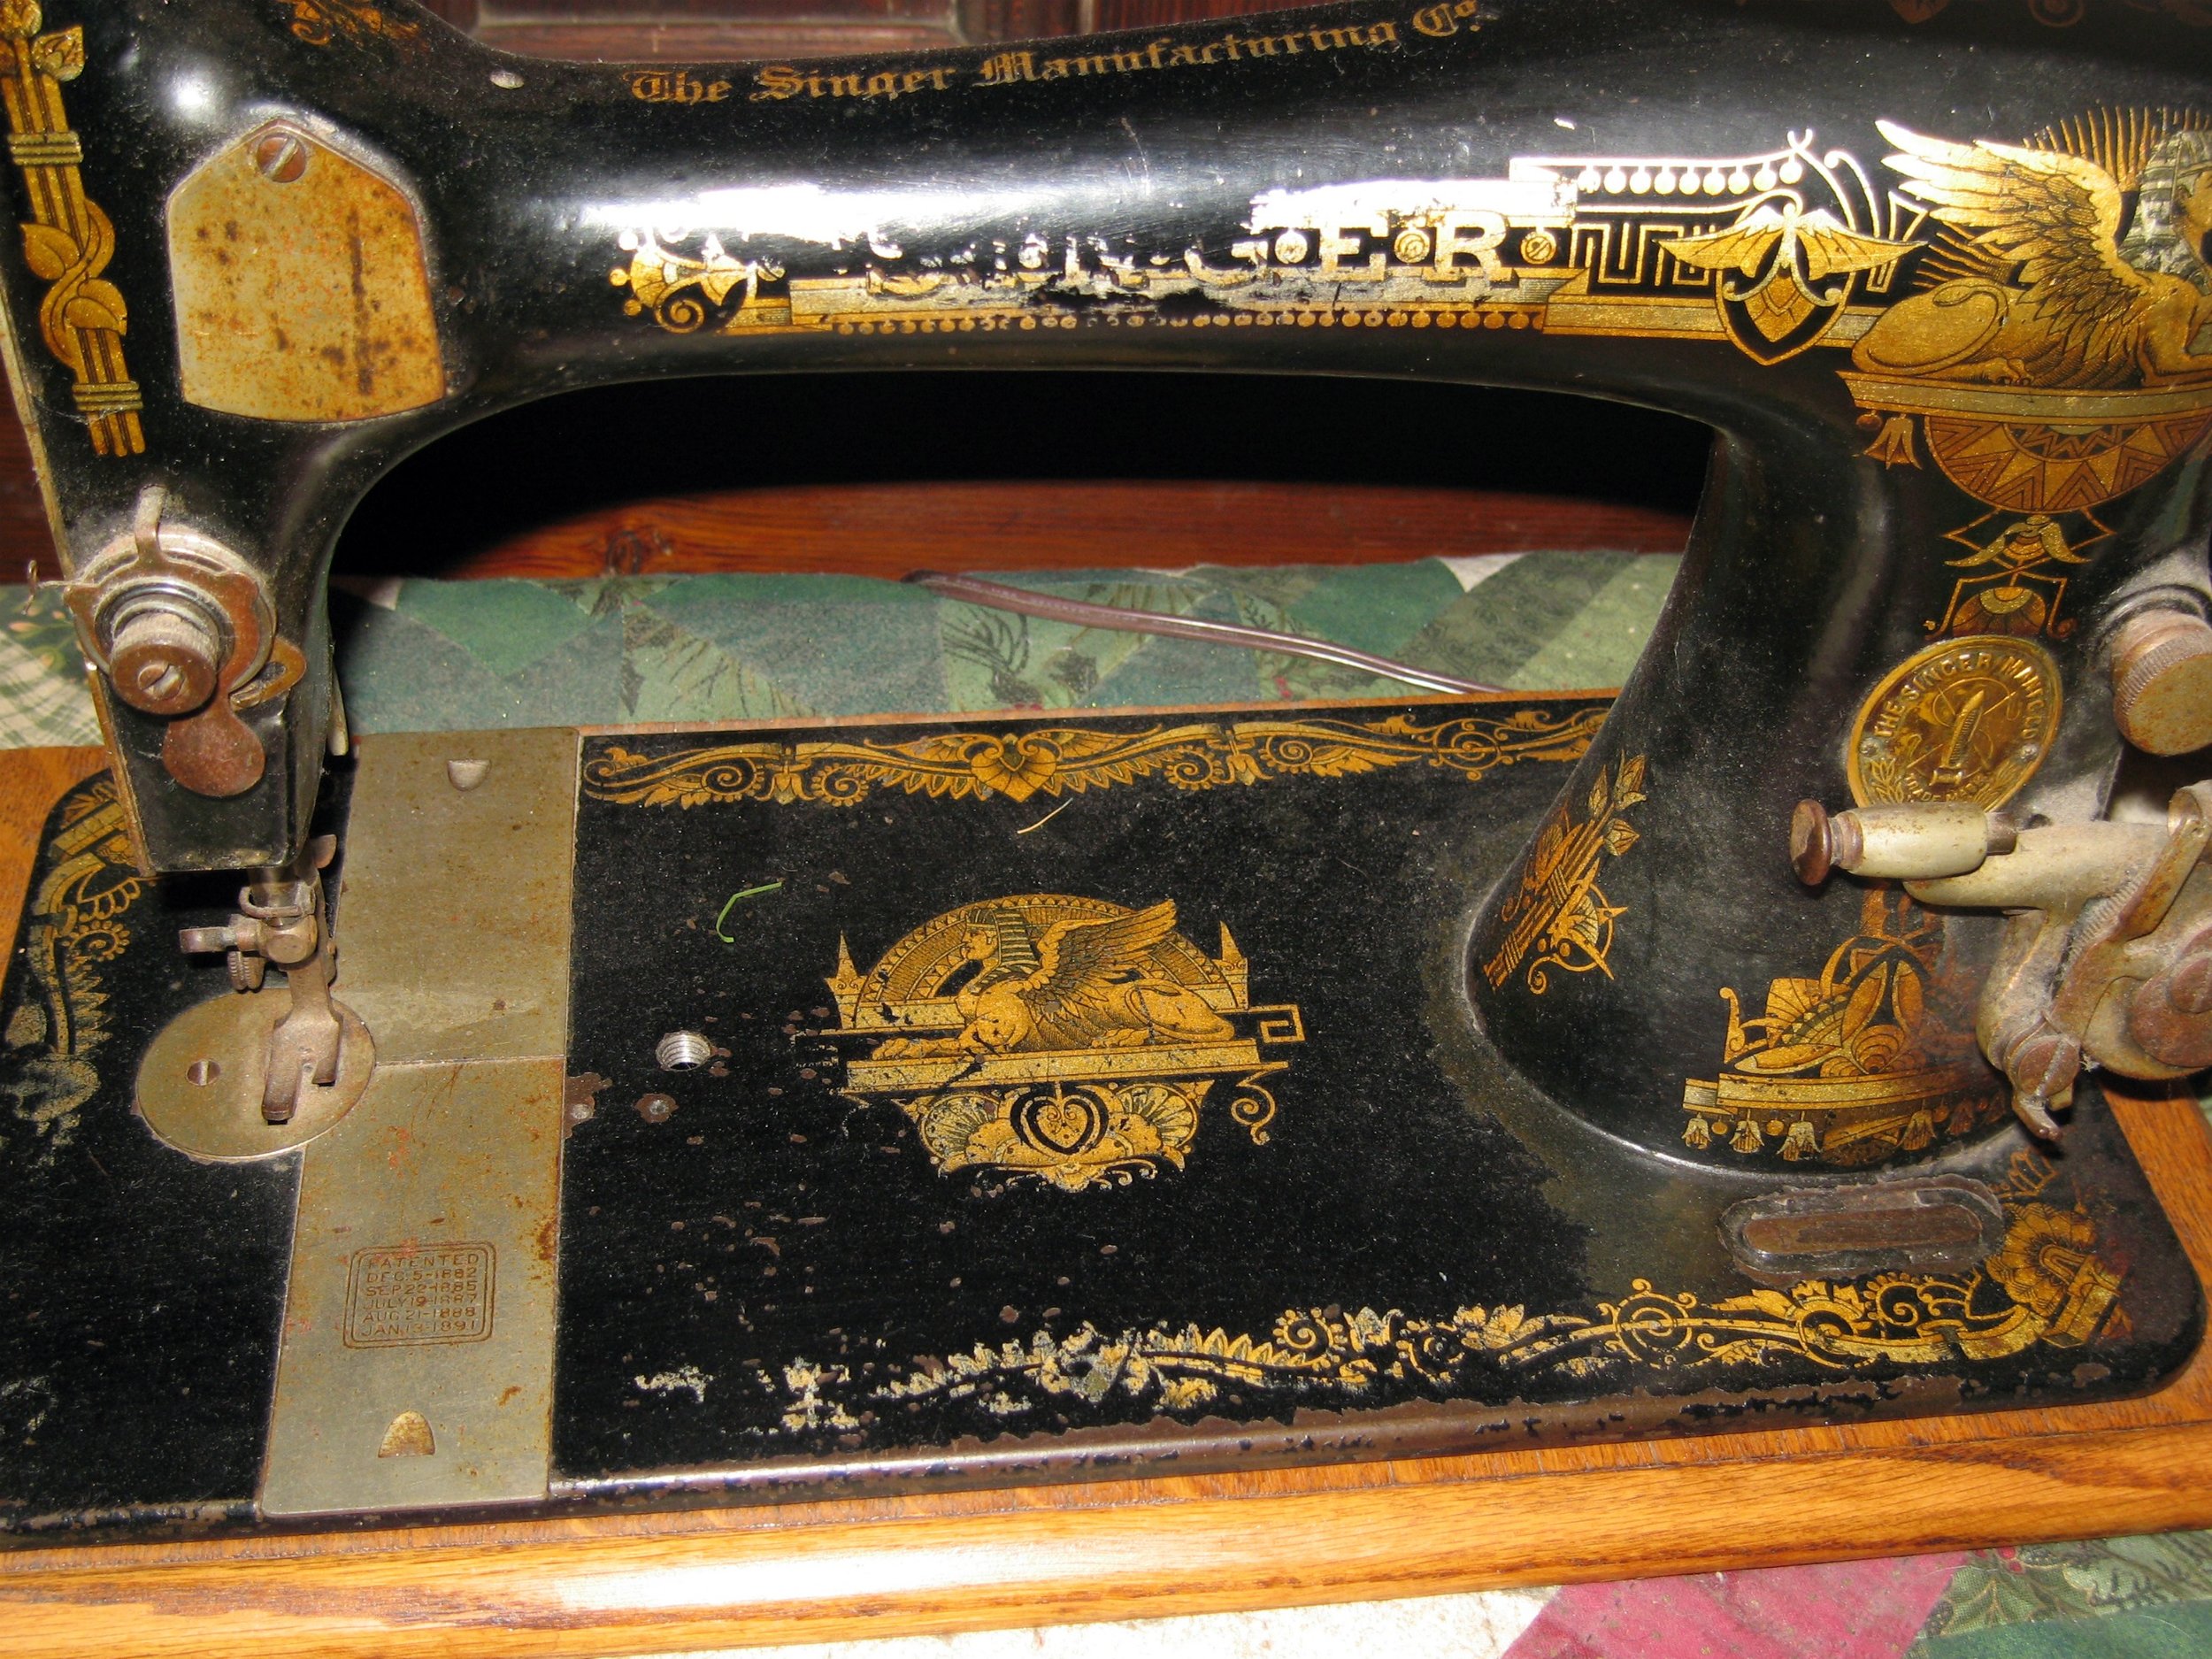
Happy New Year everyone! I would like to share a bit of my childhood home with you which I realized (over the holidays) is such a source of inspiration for my steampunk creations. So, welcome! One of the things everyone notices immediately is the vast number of antique sewing machines stashed in every corner of the house. I have never counted them, it would take a while, but my grams collects them. Some are encased in large, ornate wooden desks and others are tiny and fit on the fireplace mantle! Here is one of my favorite sewing machines--an 1882 Singer with gold embellishments. I grew up with the whirr of sewing machines and have (as some of you know from seeing it at Indie Emporium 2 years ago) an old Singer sewing machine of my own! Other antique sewing ephemera litter the house and among the most treasured are these crazy quilted pincushions (made by my mom).

In the living room hangs my mother's family crest (carved by my Uncle Jeff). The crest of the Crawfords--a shield with small trees (my family resided in Scotland and lived near the species of tree etched into the shield), a helmet, and adorned with looping scrolls. Below reads "Stant Innixa Deo," Latin for "They Stand Supported By God."

Upstairs you can find just as many old-world marvels, wooden ships, medicine jars, and water basins.

Scattered about the house are old clocks--ones whose chimes I can still hear if I close my eyes at the start of a new hour. Pictured left is a doll hand sewn by my mom. Her name is Cordelia, the Victorian Lady. She has a high collar and lace embellishments on her dress and a marvelous green sash. Her jet beads set of her jet hair amassed in a Gibson Girl bun atop her head.

The last treasure I will share with you is a painted picture of a ball. It rests in our living room. I can almost hear the rustling of the ladies' dresses as they are sashayed past by their beaus and the merry music of the orchestra.

These are just a few of the inspirations I have found around home. What are yours?

Living Arts Champagne & Chocolate Gala & Things Galore...

D-I-Y-, ShowsSamantha ExtanceComment

Hello everyone, I have been a bit M.I.A. on my blog lately. I've been busy trying to get everything together for a string holiday events. The first of which is Living Arts' Champagne & Chocolate Gala (Saturday, Nov. 19th from 7:00-10:00 pm). The event will include a silent auction where you can bid on two Bohemian Romance items: 1) a pair of Tick-Tock-Timepiece Earrings and 2) A earring & bracelet set made with pearl buttons, washers, and gunmetal chain! Both auction items come with a plum gift box and Steampunk holiday gift tag! Good luck to any bidders! I have also been working on a display for an Indie Emporium pop-up shop where you can find Bohemian Romance items for the holiday season! I love the holidays, mostly because I love giving gifts and this year I decided to include a small gift to anyone who purchases one of my items from the pop-up shop or on my Etsy shop--a Steampunk holiday gift tag! There are 3 choices: a gear evergreen Christmas tree, berry red gear scrolling holly & ivy, and a glittering gold light bulb invention! (All of which, are made with fantastic rubber stamps I purchased on 1-2-3 Stitch's website).

Also for the pop-up shop I made a giveaway D.I.Y. which I will post on my blog later this month on how to make your own holiday gift tags using salvaged or upcylced materials! I am super excited. Here's a preview of one of my gift tag creations with instructions!

Well, next week will not be any less busy--my brother is getting married & my mom and I are getting together to make the bridesmaids' jewelry and design the floral arrangements! I'll be sure & sneak a few minutes to post some picture

Sneak Peak: The Atomventures

UncategorizedSamantha Extance1 Comment

I am a bit of a dabbler, like most artsy folk and in addition to making Steampunk jewelry I am writing my first novel (tentatively titled, The Atomventures). I wanted to share a bit of my writing so that I can introduce you to some of the characters in my mind when I'm creating my jewelry pieces. You only need to peruse my Etsy shop to see all of the odd characters: airship pirates, courtesans, time travelers, time portal guardians, gatekeepers, imperial cartographers, steamstresses...the list goes on! So without further ado, here is the first chapter of my book and my favorite character, an atomventor.

Chapter One: Escape & Escapades

 “Many women keep secrets. Mine is rather a good one. I am what the Royal Society would call an Atomventor. I can read aether and particles, matter I think Newton classifies it. Everything is made up of aether or particles. Understanding aether is unquestionably the most prized skill in all the world. And the most dangerous to possess as possession of such a skill means one is under constant threat of abduction or attack. Not to mention the government’s control of Atomventors. My kind sought protection a century ago when our unique ability was discovered. I never knew my parents—only that they were gypsies from Ireland—would account for the red hair. I was found at Paddington Station in a worn carpetbag. Hmph, sounds an awful lot like a character out of some wild play of manners! Nevertheless, the family that took me in as their own named me Philomena Paddington—Philomena after their beloved matriarch and Paddington, of course, after the station in which they happened upon me.”

It was a short confession. Margaret did not have time. She had been wounded and the air was running out. Philomena did not find it appropriate to keep her in the dark any longer about her secret identity. Truthfully, Philomena was relieved that she finally had a confidante. Margaret, weak from the bullet lodged in her shoulder, spoke feebly: “Why are you telling me this now Mena?”

Philomena smiled and said, “Because I am going to transform the bullet in your shoulder into a shovel and when I do—I do not want you to be frightened.” Margaret laughed.

“Frightened? Oh my dear, I dare say being buried alive has already accomplished just that. If you can get us out of here I will be exhilarated!”

Philomena sighed, “Right, of course. Now I must concentrate.” Mena closed her eyes. Aether. Aristotle’s theory was only part right. Aether is the “quintessential element” and it does move in a circle; however, aether is in every other element as well—earth, water, fire, the heavens—and by concentrating on any object and its movement, Philomena could interrupt its particular motion and change it. She and other Atomventors were born with the ability to transform matter. Of course to do so Philomena had to follow natural laws. She could not simply transform the earth above them into air. Particles were malleable not exchangeable. Air could never be earth. But the earth could be stone or sand or grass. Mena had thought of a plan. “Margaret, I am going to transform the earth on top of us and this tomb into flowers, primroses.”

Margaret interrupted, “Primroses!” Philomena quipped back,

“Yes, we are in Devon after all and primroses are in season.”

Margaret asserted, “Mm, quite right. Then what?” Philomena continued,

“The flowers will be easy to dig a tunnel through and once that is done, I’ll atomvent us a rope ladder so we can climb out. But before any of this I’m afraid I must pull that bullet out of your shoulder. It’s going to hurt.”

“Mena—if I do not make it…” Philomena hushed Margaret angrily,

“None of that kind of talk now, Mag. You’ll get through this.” Margaret’s brown eyes filled with tears.

“Mena, just let me say this. Tell George I accept and I return his affection.”

“Finally! You’ve made up your mind! I cannot believe it took being buried alive to see it. Oh Mag, you will tell him yourself soon enough.” Margaret smiled weakly.

“I hope so.”

“Alright, brace yourself.” Philomena pulled out her knife and fished the bullet out of Margaret’s shoulder. Margaret groaned—the pain nearly caused her to faint. She buckled and slumped sideways in the tomb. Margaret lay there bleeding profusely though Mena had bandaged her shoulder. She needed a doctor, and soon. Philomena combined her knife and the bullet in her hands. She concentrated—sensing each object’s motion. The knife and bullet began to vibrate violently in Mena’s hand and emitted a sharp, loud sound. In a flash of silver light, the objects shifted form. A sturdy steel shovel lay in Mena’s hand. It was not over yet. She focused; this next transformation would be much harder. There was a ton of earth on top of them. The density and area was larger. Mena sat, closed her eyes once more, and began reading the earth’s very particles. There was dirt—heavy from rain, grass above, roots, larvae, centipedes, worms wriggling about, water trickling through the earth’s pores…it all began to vibrate. The earth above them quivered as it shifted from solid dirt to piles of beautiful white primroses—their stems green and leafy, rootless and loose. The tomb’s grainy stone tumbled into piles of flowers. Mena felt the soft petals fall against her face. The smell was overwhelming. She grasped the shovel and dug out Margaret and finally a tunnel upward. Last she changed one side of the primrose tunnel into a rope ladder. Clasping Margaret to her side, she helped her climb. Margaret inhaled the fragrant passageway deeply.

“Have we died? Is this heaven?” Mena smiled,

“No.”

“It’s so beautiful.” They were two steps from the top. Margaret slackened. Her body grew rigid. Philomena struggled to keep hold of Margaret and the ladder. She was losing grip.

“Margaret. Margaret.” Her voice grew desperate.

“Margaret!” howled a familiar gruff voice.

“George!” Philomena was relieved. George helped Mena and Margaret to the top.

“What in the bloody hell happened?”

“There’s no time for that now George, later. Margaret’s been shot.” George’s face was white with fear. “You have to heal her.” George nodded. Philomena politely turned around. George did not wait to remove his clothing before shifting. In his wolf form, he could heal Margaret’s wound. Werewolf saliva is a cure-all. Mena wanted to study its aetheric properties in the future to see if it might be synthesized in some way. The slim brindle wolf sweetly licked Margaret’s shoulder. The saliva coated her whole upper arm until it worked its way past her epidermis. Within minutes Margaret’s wound was completely healed. Margaret lay asleep. The only side effect of werewolf saliva—an intense R.E.M. cycle. She would be unconscious for a day or so. George shifted again and took out a spare set of clothes from his travel bag.

“Are you alright Mena? Do you need me to heal you?” Philomena shook her head, her back still respectfully turned.

“No, thank you George. We must get back. Margaret and I uncovered who is behind this most recent attempt on the Empire. We must warn Parliament.”

“Yes. Wesley is bringing the airship round. He is going to meet us at the rendezvous point in a quarter-of-an-hour.”

“Then we must hurry. Ivybridge is still a ways off.” George mounted his dispatch horse and pulled out a tiny leather parcel. The parcel had a large red tag sticking out from its center. George pulled the tag until a harness emerged and placed the harness round the horse’s neck. He dismounted and tapped the parcel thrice. Philomena could hear the parcel’s interior cogs turning and steam slowly emitted from inside. The cogs finally clicked into place and the parcel unfolded into a carriage large enough to convey them to Ivybridge. Though time was of the essence Mena could not help but marvel at the invention. “Extraordinary! Wesley has certainly outdone himself.”

“He seems to think so.” George scoffed. George gathered Margaret into his arms and got into the carriage. Philomena entered after them.

“Who is going to drive the horse?”

“That’s the best part.” George pushed a series of buttons on the side panel of the carriage and off they went. “The wheels will turn accordingly. I’ve entered our coordinates into the control panel. It will give us time to talk. What went wrong?”

“We were discovered but I have confirmed that the Earl of Devon has been colluding with the French. He has taken over the island of Eddystone and hidden munitions there. He also plans to launch an attack on Buckingham Palace with an army of French mercenaries. We must warn parliament and stop him.” George gasped.

“Treason. Well he will be the one to be buried alive when word gets out.”

“If we get there in time. He may move his plan ahead now that he’s been discovered. He cannot think Margaret and I were alone.”

“Yes, you’re very right.” The carriage jostled to and fro as they sped toward Ivybridge. Philomena poked her head out of the window. They weren’t followed, thank heavens. She’d had enough excitement for one trip. Up ahead, on the outskirts of Ivybridge, their airship awaited to transport the spies to London.

D.I.Y. Simply Steampunk Candle Holder

D-I-Y-Samantha Extance8 Comments

With so many holidays approaching, no doubt you have begun to think about decorations. My favorite part of Thanksgiving is dressing up the table. Here is a simple and beautiful way to steampunk your dinner table. Here's what you'll need: ~The light bulbs & gears can be substituted for other various machine parts that you desire. It is best to use a majority of clear items so that the flame will shine through them. Possible substitutes include: radio or vaccum tubes, broken glass or even bits of ornaments that have broken, & washers.
Making this candle holder is easy, finding your materials will take longer than assembly (which is great, because if you're entertaining last minute this is a quick table fix!). Here's what you do:

1) Place the tea candle inside the smaller candle holder. Then place the small candle holder inside of the larger one.

2) Arrange your light bulbs & gears (or what have you) and fill in the space surrounding the small candle holder. Be sure not to fill the (larger) candle holder over the height of the small candle holder.

3) Once your items are arranged, light your tea candle and enjoy its illumination!

Bohemian Romance now at Dwelling Spaces!

UncategorizedSamantha Extance1 Comment

I am delighted to say that you can now find my jewelry in Dwelling Spaces!  I am honored and proud to be among such crafty folks and fellow make:Tulsans (Gleeful Peacock & Weather & Noise)! I had tons of fun last week creating my display: another antique printer drawer upcycled, a vintage gardener's tray (which I fashioned with a pin cushion and filled with some tiny lightbulbs, various vintage buttons, a page from an old Japanese novel, & a bit of lace), and an Atomventor's Jar (pictured on the top right).

I will be posting a D.I.Y. on how to make your own Atomventor's Jar on Wednesday! So if you're going to a garage sale, flea market, or simply raiding your dad's barn or shed--be sure to snag a couple lightbulbs! Try and find ones that will fit through a Mason Jar's opening.