Bohemian Romance Jewelry

Meet Tulsa Author of Dangerous Fugitives, a Steampunk Novel

InspirationSamantha ExtanceComment

Steampunk fiction is exciting to me & inspiration when it comes to creating new pieces. Join me next Tuesday night, July 17th, at Youth Services in Tulsa (located 311 South Madison Avenue) from 7:00 to 9:00pm! Let's support Tulsa's very own Steampunk author, Emily Hedgecock! The information below is from the invitation I received: Emily will be on hand to give readings and personally sign copies of the book at Youth Services.  Be among the first to get a copy of one of the hippest debut novels of the year!

About the author: E. A. Hedgecock is actually  Emily "Danger" Hedgecock who was born and raised in Tulsa, Oklahoma. Dangerous Fugitives is her first published novel. Emily is a past recipient of multiple Tulsa City-County Young Author awards. Last October she traveled to Washington, D.C. to see her award-winning play, Handspeak, performed at the Kennedy Center for the Arts. More about the book: The artists in Dangerous Fugitives are all on the run from a government that wants to squelch unsanctioned creativity.  In a steam-powered universe where the combustion engine never caught on, the militaristic leaders of one continent, Erivale, have banned self-expression in all its forms and sent out monstrous machines to control the populace. When their artistic pursuits are discovered, Victoria the Writer, Nicola the Dancer, and Felix the Actor must escape into the vast desert of the Nothingness. After two years they are picked up by a rogue airship manned by the famous Frierson brothers, handsome Bernard, sour Alexander, and one-eyed Princeton.  The young rebels resolve to take down the machines and reinstate creative expression.

Busy that Night? No worries, you can purchase your copy of Dangerous Fugitives on Amazon in both print and kindle versions!

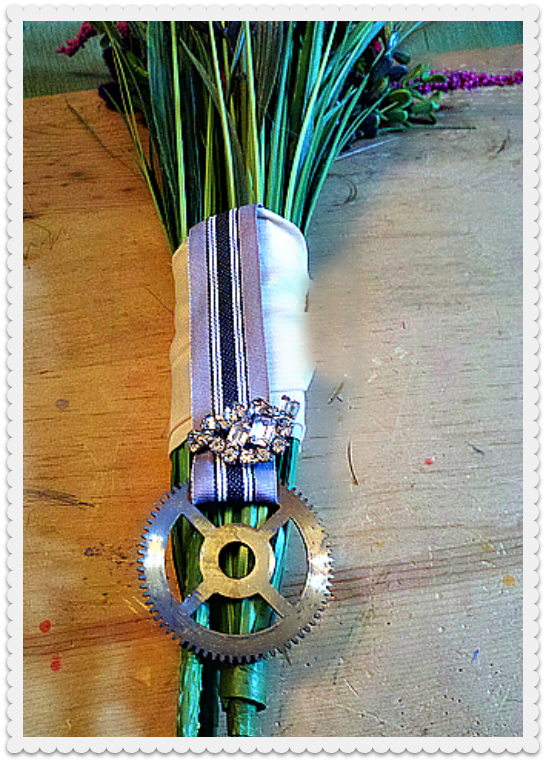
DIY Steampunk Wedding Bouquet

D-I-Y-Samantha ExtanceComment

Materials & Tools:

  • Flowers, real or synthetic (your choice)
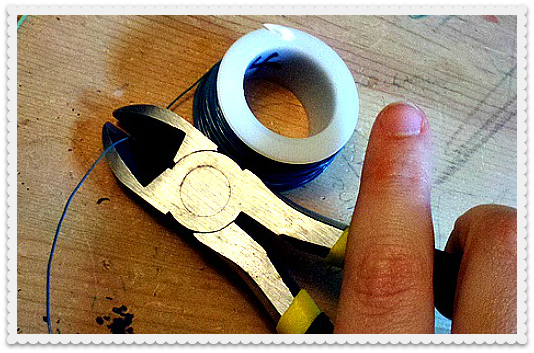
  • Floral wire (or any green colored wire) & wire cutters (or toenail clippers)
  • Needle & thread & scissors
  • Lace & ribbon (or you can choose any kind of fabric you'd like instead of lace)
  • clock gear
  • Pin


Steps:

  1. Arrange your flowers.
  2. Cut your floral wire using your wire cutters/toenail clippers. Wrap your flowers tightly with the wire to secure them.
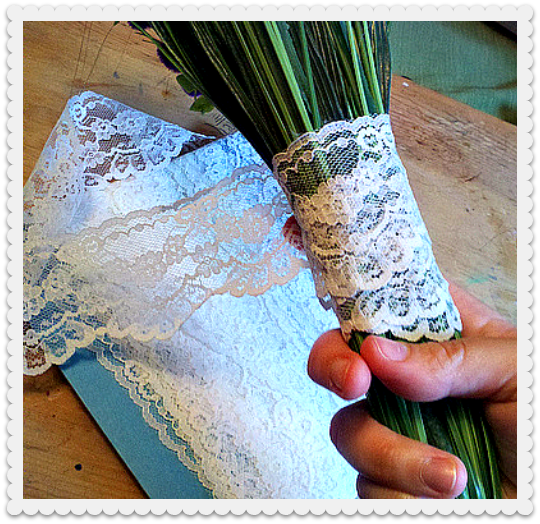
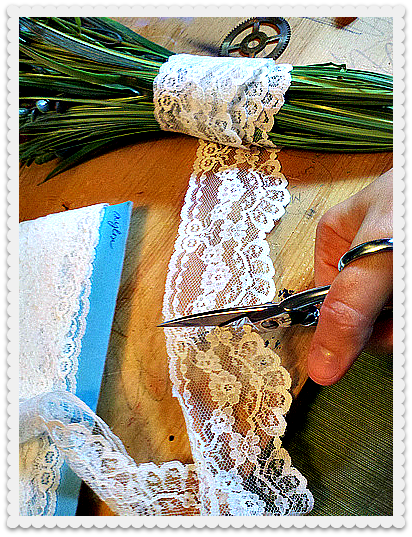
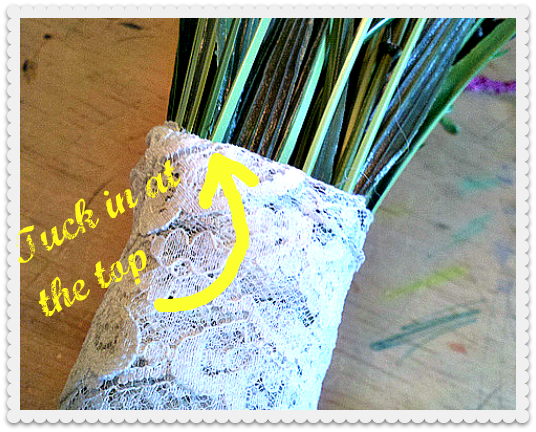
  3. Measure your lace by wrapping it around your flowers' stems for your desired width/look. I wrapped the lace 2-3 times around the stems. Once you are done wrapping your lace tuck the end into the top of your lace. 
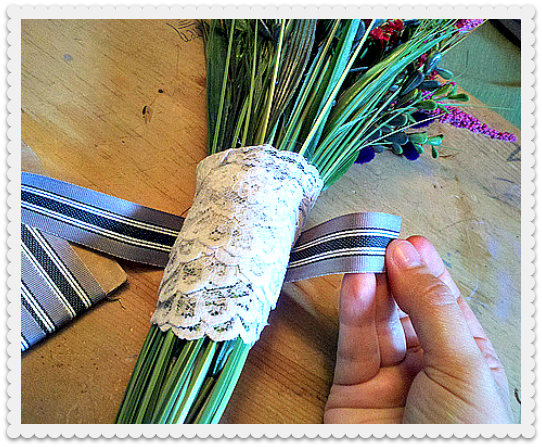
  4. Next, measure  the amount of ribbon you'll need to fit tightly around your bouquet. Be sure to leave yourself at least a 1/2 inch on one side for sewing the ribbon to your gear.
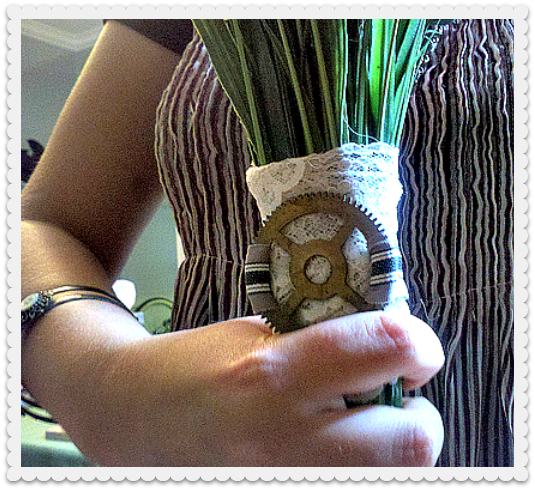
  5. Loop your ribbon through the gear. Sew your ribbon to your gear. Keep your stitches small and close. (You can also secure the ribbon to your gear with a hot glue gun.)
  6. Next, wrap the ribbon around your bouquet. Be sure to hold the gear in place in the front of your bouquet when you pull the loose end of the ribbon through the gear. Pin it in place with your pin (or hatpin). Cut off excess ribbon and tuck it under.
  7. Promenade proudly down the aisle!Variations:

Instead of a gear, maybe pin a cameo to your bridal bouquet. It's a romantic & nostalgic twist and yet is elegant & simple.

Or look for any other kinds of pins that you could attach to your fabric or lace that ties into your wedding's theme, your heritage, or your story as a couple. Here is another variation that combines both the cameo pin & clock gear, ribbon, and simple pastel pink fabric. It's more textured & intricate--offering a much more Stemapunk vibe.

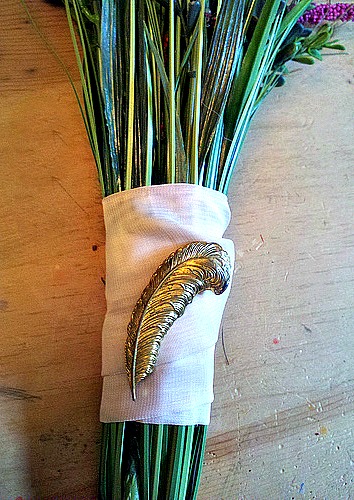
This last variation is more simple than the above pictured cameo & gear bouquet & offers a hint of sparkle. Clip-on earrings are easy enough to find at vintage stores, flea markets, & estate sales which makes them even more appealing as materials for your bridal bouquet.

Happy Wedding Planning (or day-dreaming)!

Something Old, Something for Caroline

UncategorizedSamantha Extance2 Comments

We all know the saying--a bride needs something borrowed, something blue, something old & something new-- When my friends Caroline and David announced that they were engaged, shortly thereafter Caroline asked me to make the jewelry for her bridesmaids & herself. I'm not sure I can ever quite express how deeply honored I feel when asked to make wedding jewelry. It's so important. It's in the pictures you'll have for years & for us gals, this is the outfit that we dream & scheme about for ages (more than half of the pins on Pinterest can attest to that!). The things I make come with little a lot of love--for the various pieces themselves and also for the enjoyment that afternoon (or more often, the wee hours of the night) have yielded. I truly enjoy what I do and on this occasion, it was pure bliss. I put more than a little love into this one--I put a piece of my heart. David & Caroline are both two good friends of mine and I wanted to make something special that she could have & wear long after their wedding. So I made her a necklace with a rare bit of Americana--an Art Deco W&H Co. Sweetheart Locket (which some of you may remember from a post from a few weeks ago).

Caroline's necklace is made entirely with vintage & antique pieces (her something old--apart from her stunning wedding dress & veil--her grandmother's). The chain is a combination of vintage brass chain & an antique gold watch chain. The button pictured in the middle of the above collage is also from that same watch chain. Above the locket rests the remnants of a clip-on pearl & rhinestone silver earring. The locket, I hope, will keep her loved ones & husband close to her heart.

I have a few more weddings coming up of friends & family (I know already that I am making more fabulous wedding accessories). And who knows, one day it might be my turn...I did catch the bouquet after all!

Up Close & Personal, Keeping it Real

UncategorizedSamantha ExtanceComment

What "Keep It Real" Means to Me: This is my niece. I want her to grow up and look just as she does now--happy, confident, & comfortable with herself. I know that together we'll weather adolescence and all of the insecurities that alone raises but one thing I do not want for her (and my children someday) is to grow up with an unattainable ideal (and ideas) of beauty.

The internet, while a wonderful & glorious thing that I cannot seem to remember life without, contributes to this problem. Today we are bombarded with unrealistic images of women & beauty that produce even more unrealistic expectations. We are rapidly becoming a more and more visual culture--television, movies, advertisements, & a plethora of social media are now a part of daily routine.

Because of this hyper-technological lifestyle, magazines & companies are competing to both capture & hold our attention by resorting  to creating content that is often violent (I'm thinking here of the recent  "Victim of Beauty" photo spread in Bulgarian Magazine),  hypersexualized (too many examples to cite!), and unrealistic (photo-shopping models who are already thin). The result is a generation of women who are conflicted and ashamed of how they look.

What we need are more representations of real women--of real beauty (warts & all!). People aren't perfect and often it is the imperfections that make people, faces, images, etc. so fascinating & memorable. This week, Miss Representation & women everywhere, are standing up for themselves & asking that magazines print at least one un-photoshopped image of a model per issue.  If you'd like to learn more, click here to download a poster & information on the "Keep it Real" social media movement.

What "Keep It Real" Means to My Business (the Handmade Movement & Small Businesses):

After seeing the Miss Representation documentary last October, I re-examined the way I presented my jewelry online & in advertisements I'd created. I also revisited my business's brand & mission. The handmade revolution to me is about environmental and cultural conscious consumerism (as well as an appreciation for craftsmanship and artistry, valued before the days of the industrial revolution).

Buying handmade means that I can support businesses that value the same things I do. As a salvage artist, the bulk of my jewelry is from upcycled or recycled things. And for the most part, I have seen a trend in that kind of production–environmentally friendly and conscious creation. What is not as widespread in the handmade movement is a cultural consciousness. What do I mean? Some handmade businesses use sexploitation as a means to promote their business. There are also a fair amount of handmade businesses that utilize thin models (and photoshop them to unrealistic proportions). You have probably seen these kinds of exploitative photos frequently featured on Etsy’s  front page, in fact Regretsy has parodied this very fact in a blog post, “Gratuity Included.” I asked myself, why are small, handmade businesses  perpetuating the same exploitative and damaging images of women as big business? Everyone knows and agrees that “sex sells,” but should it?

Furthermore, small business owners (like myself) need to also ask--what message we're attaching to our products. As handmade business owners & makers we put a lot of thought into our products–how we make them, what materials we use, how to display our products, & how to photograph them. We do a lot of that work ourselves. I think we should also be aware of what we are indirectly selling & what messages we are encoding with that cute hand stitched headband, necklace, or tea towel.

A Call to Arms!

As a handmade business owner and a woman, I think it is important to be culturally responsible. We (and this is an invitation to every handmade business owner, not just women) must be conscious of the ways in which we advertize on our Facebook pages, blogs, websites, Twitter, and Etsy shops. As Avandi Wallace astutely observes, “You can’t be what you can’t see.” So let’s show the next generation a more positive image of women–let’s lead by example. Join in and "Keep it Real!"

There's a Heart in Every Locket!

Flea Market FindsSamantha Extance13 Comments

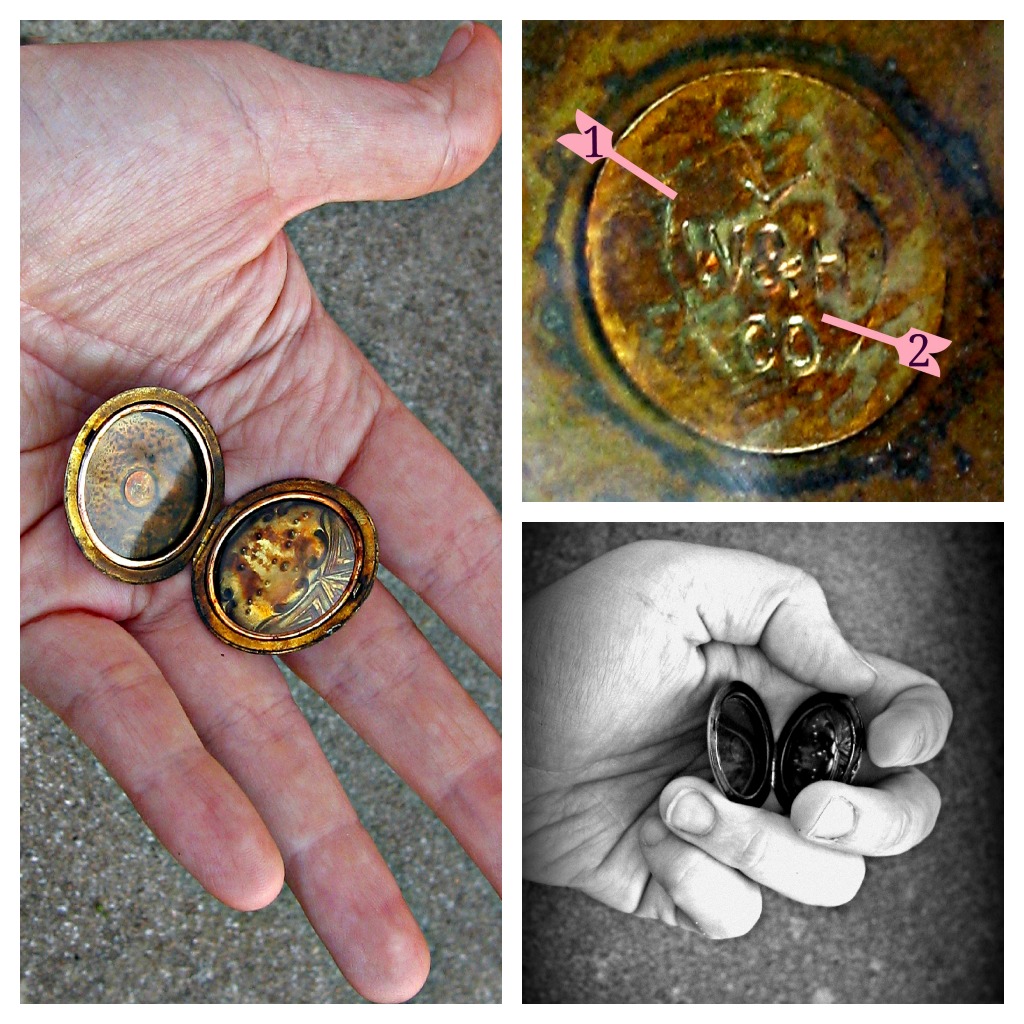
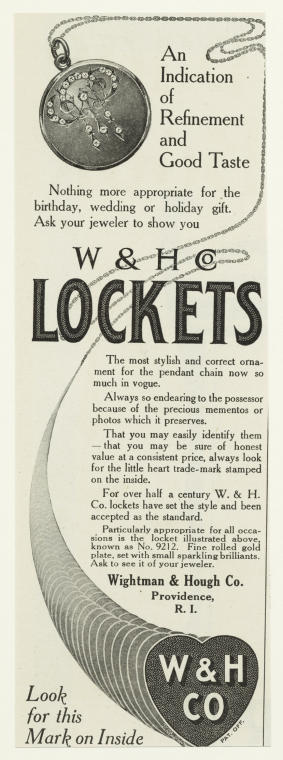
I love vintage & antique lockets! When I stumble across one at a flea market or estate sale I usually end up buying it. As jewelry, they are often intricate & beautiful and as nostalgic objects, they are both mysterious & romantic. I wonder what torrid love affairs the wearer had or unrequited loves they may have harbored. Lockets seem like they have secrets already inside. This particular locket came with a mystery--a trademark that eventually lead me to its history. I was able to track down information about W & H thanks to the New York Public Library's digital archives of advertisements and a few skilled Ebay auctioneers.

The trademark inside this locket, "W & H Co" (pictured below as 1) with a heart etched around it (pictured below as 2), belonged to Wightman & Hough Company who operated out of Providence, Rhode Island.

Wightman & Hough Company made sweetheart necklaces from 1856 until 1922. They were primarily renowned for their lockets. Their slogan, which I find to be quite amusing & sweet, was "There's a heart in every locket!" How true! Below are 3 of their advertisements:

Though I do not know the exact date of this locket as of yet (sadly, I must wait a long while for an inter-library loan to come through for a jewelry catalog from 1910 to verify thestyle & date of this locket)--I believe it is from the latter period of W & H Co.'s production. The design on the locket is an Art Deco pattern and the stones (which are all in tact) are sapphires which were popular at that time.  For now I know the approximate value of the locket is between $65.00-$250.00 (I paid $12.00 which makes me feel a bit like a Robber Baron).  You never know what you will find & what it is worth until you do a little digging--sometimes you've gotta trust your gut! Happy Flea Marketing everyone!

Steampunk Grandfather Clock

D-I-Y-, Flea Market Finds, ShowsSamantha Extance3 Comments

I had purchased a broken grandfather clock at a thrift store 2 months ago in the hope of making a display piece out of it. As a rule, I never upcycle anything that can be restored. This clock was in a sad state when I happened upon it--the wood panel in the back was entirely overtaken by mold & wood rot. Luckily, the majority of the clock was in tact. Though it is still a work-in-progress (I hope to fashion it with wheels & a working clock mechanism), the exterior is finally done! Here it is in its various stages. I used clock plates, bicycle gears, chain, metal erector set pieces, a clock spring, an old whisk, and lots of screws & nails.

Want to DIY?, here are a few tips! To make your own steampunk grandfather clock (out of an already broken one), you will need the following hardware: screws (of various sizes, fitting your collected pieces), chain & jump rings, metal brackets (for heavier pieces, like the bicycle gear pictured above), Gorilla brand wood glue, nails (for extra support at the base of your grandfather clock), and metal connector pieces (like the metal erector set pieces that I used--which are a rare find; however, at Lowes Home Improvement you can purchase similar metal pieces in their hardware section categorized under hardware designated for "Science Projects."). The tools I used are fairly common: hammers (one large & one small), an awl (for making starter holes for screws & nails), pliers (for opening jump rings & chain links), and screwdrivers (of various sizes depending on the type of screws that fit into your collected pieces).

After you have gutted your clock, I recommend cleaning it thoroughly before beginning to steampunk it. Murphy's oil is great for wood, soap & water, a wood-friendly scrub brush, & (if you are dealing with mold) rubber gloves & a protective mask. Once you have collected pieces that you would like to affix to your clock, I suggest laying everything out before beginning to screw & nail it in or sketching it out beforehand.

As a display, at RAW; Tulsa's Solstice event, it had the desired effect of drawing a lot of attention & foot traffic. In the home & at an event like this one, it certainly is a conversation piece.

Thank Yous Galore, I must take this moment to thank a fellow Make;Tulsan and graphic designer extraordinaire, Michael Chaplin, for helping me transport the grandfather clock to the show & back home again. Sadly, I was not able to affix the clock with teleportation capabilities (sigh, if only). Thanks to RAW; Tulsa for the opportunity to showcase my work, have professional photographs taken, & video--everyone was so nice & I had such an amazing night; Thanks to 33forty & their wonderful staff who helped me with lighting & moving furniture & last but not least, to all of you who came!

Gearing Up for Solstice!

ShowsSamantha Extance1 Comment

I am so excited for Solstice! It's just a week away! Purchase your ticket before June 18th online. Make sure to select "Bohemian Romance"! Here are a few things I've made especially for the show. Hope to see you there!

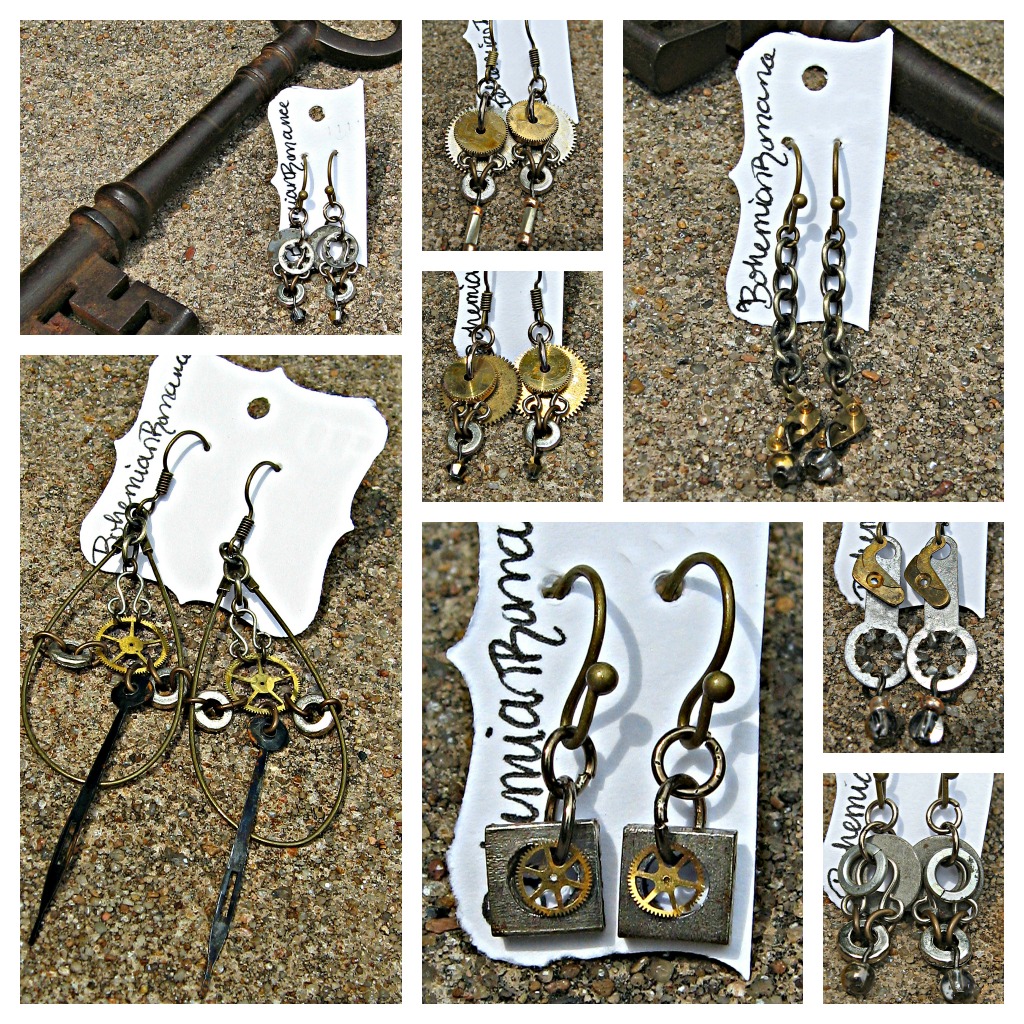
Gearrings Galore! Made with clock gears & cogs, washers, crystals, metal cameos, and clothing hooks!

Oodles & oodles of new earrings! But I've made some new necklaces too. Here is a sneak peek.

Solstice, a RAW; Artist Event

ShowsSamantha ExtanceComment

RAW; natural born artists is an organization that helps promote indie artists on both a local and national level. Tulsa is proud to be among RAW’s 65 locations in the U.S. and to be considered a trove of artistic talent. I am thrilled to have been selected to be a part of RAW’s launch event, Solstice. Solstice will be an evening of art, live music, & fashion. Tickets are $10.00 ($15.00 at the door). So join me in supporting local artists (for whom you can show your support by purchasing your ticket in their name.To support Bohemian Romance, click here.)

I hope you’ll join me, June 21st from 8:00 pm to Midnight at 33forty on Brookside for Solstice! I also hope that the Tulsa community will show continued support for RAW and its mission–to promote indie artists & help them achieve wider recognition.

Liberate Ulysses: My Steampunk-Joyce Project

InspirationSamantha Extance4 Comments

Liberate Ulysses

Liberate Ulysses is a “global dialogue & multimedia celebration for Bloomsday,” a day that pays homage to Irish writer James Joyce’s masterwork Ulysses. My passion for Joyce extends beyond my scholarship & continued reading of his works. For the past three years I have challenged myself to create pieces inspired by his texts. This year I am fortunate to be a part of Liberate Ulysses’s celebration. Last year, Liberate Ulysses lauded the novel through Twitter (a call-to-arms was issued asking those around the world to tweet an aspect of an episode that they felt was representative of that chapter). This year, to commemorate Ulysses coming out of copyright, the novel is being lionized through various artistic projects inspired by the novel. For a list of the projects, click here.

My Liberate Ulysses Project: To Create Steampunk Jewelry Pieces Representative of Each Episode

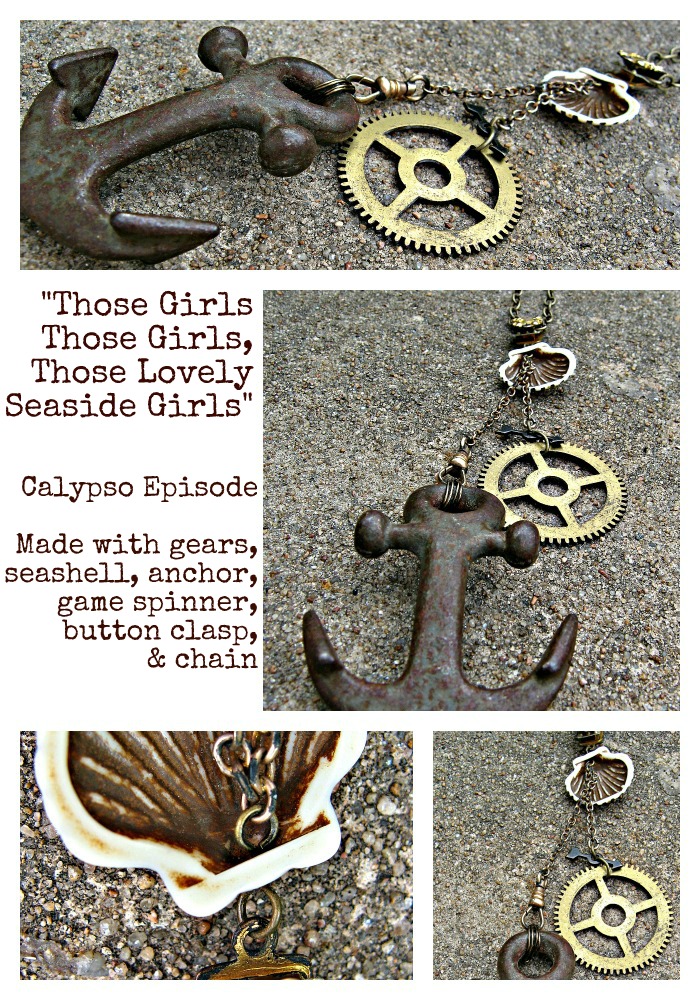
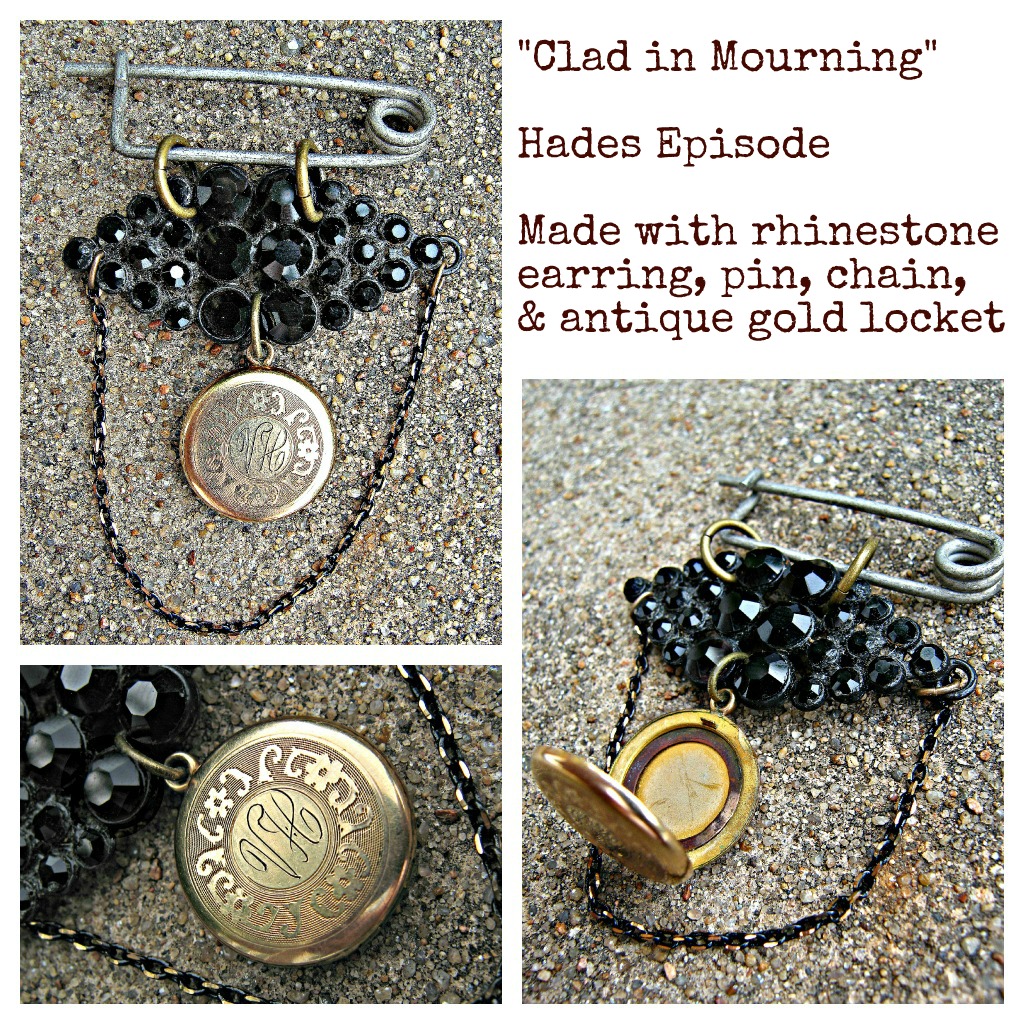
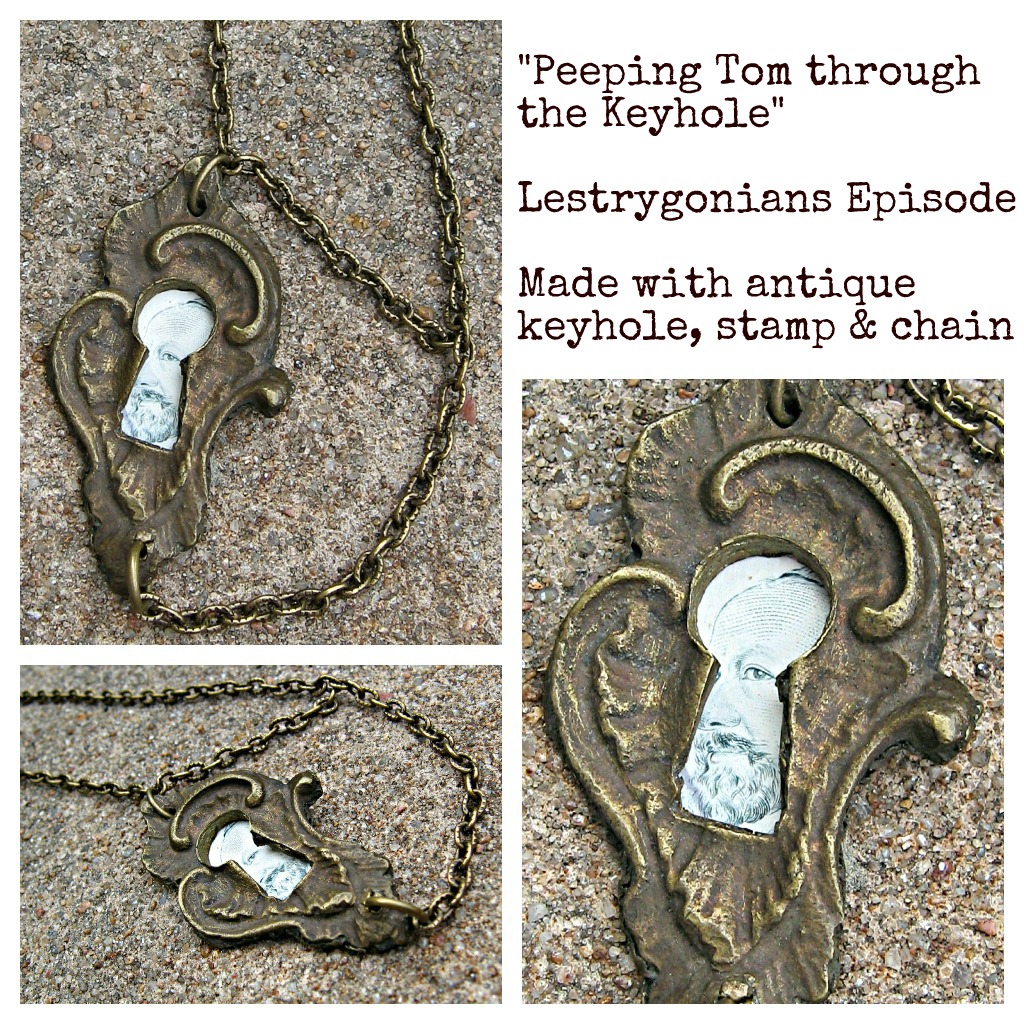
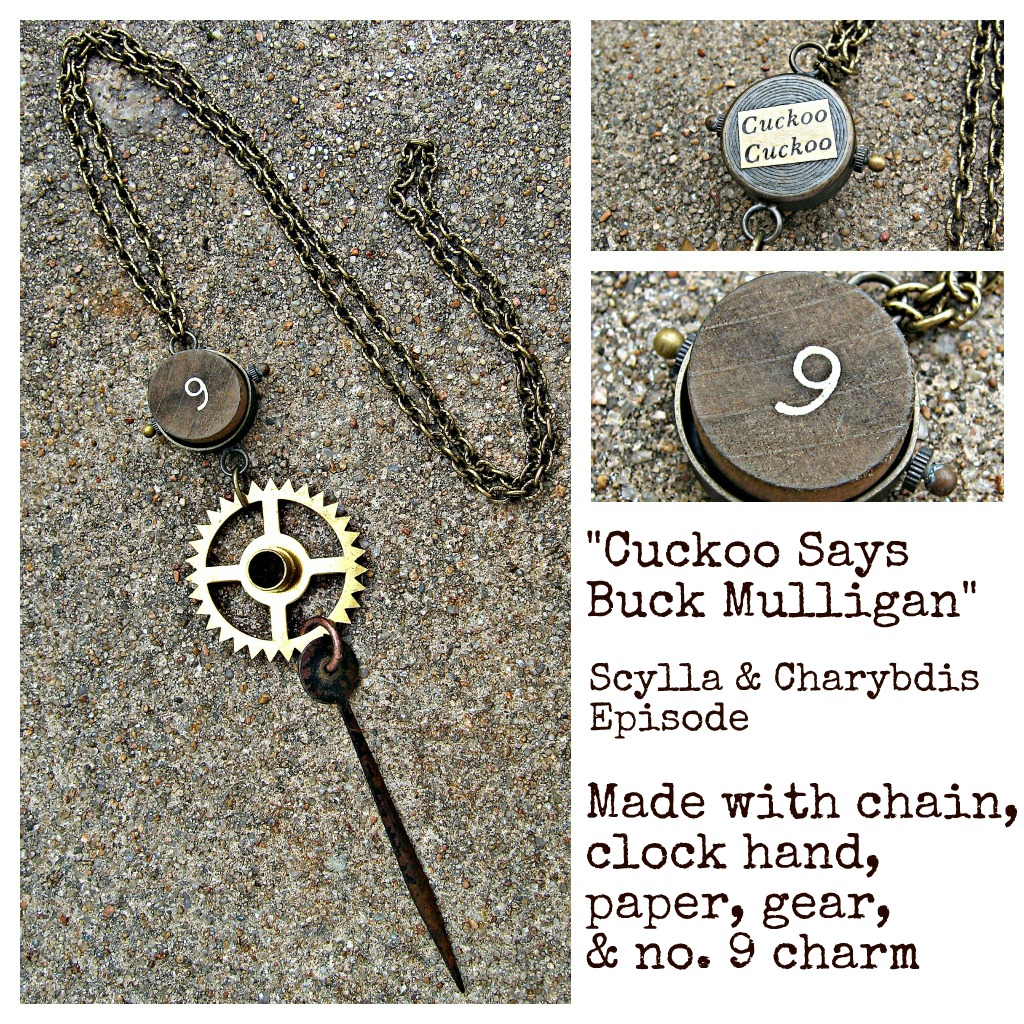
Without further ado, here they are:

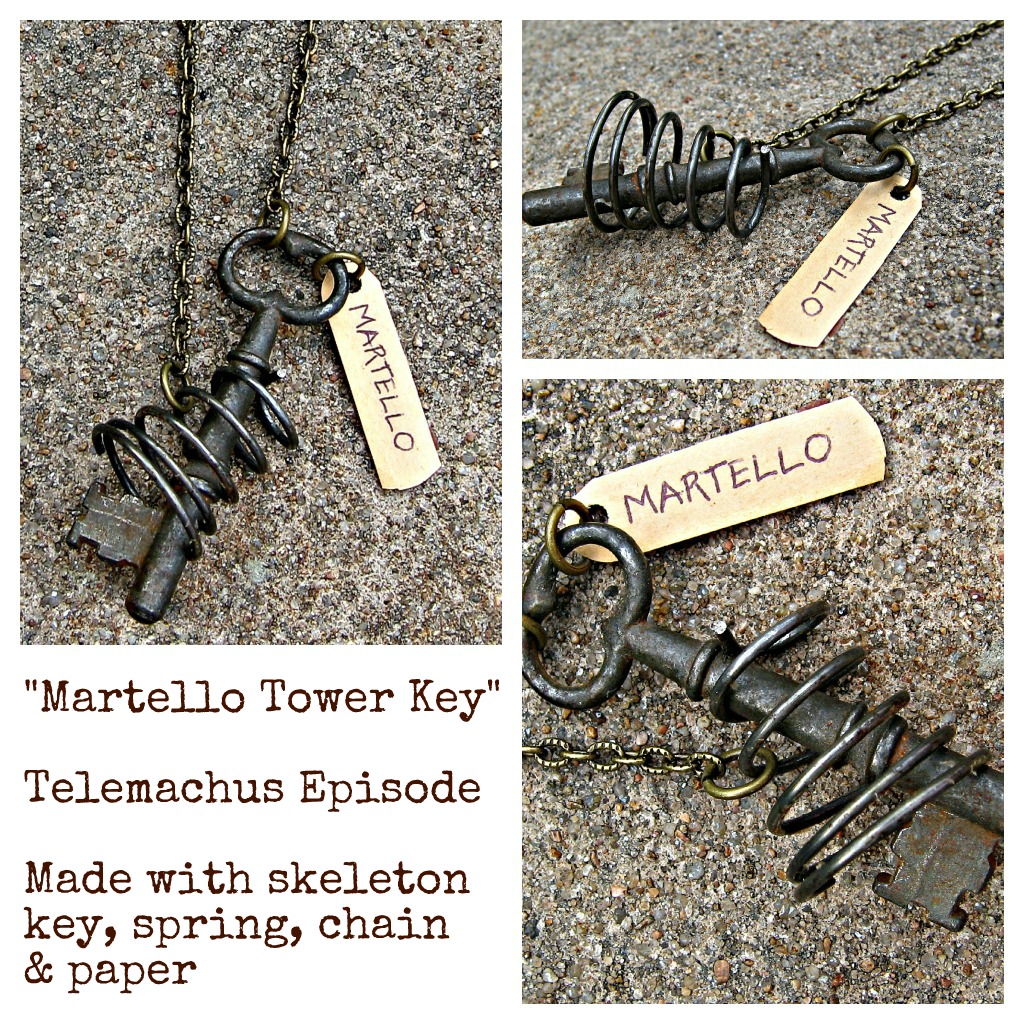
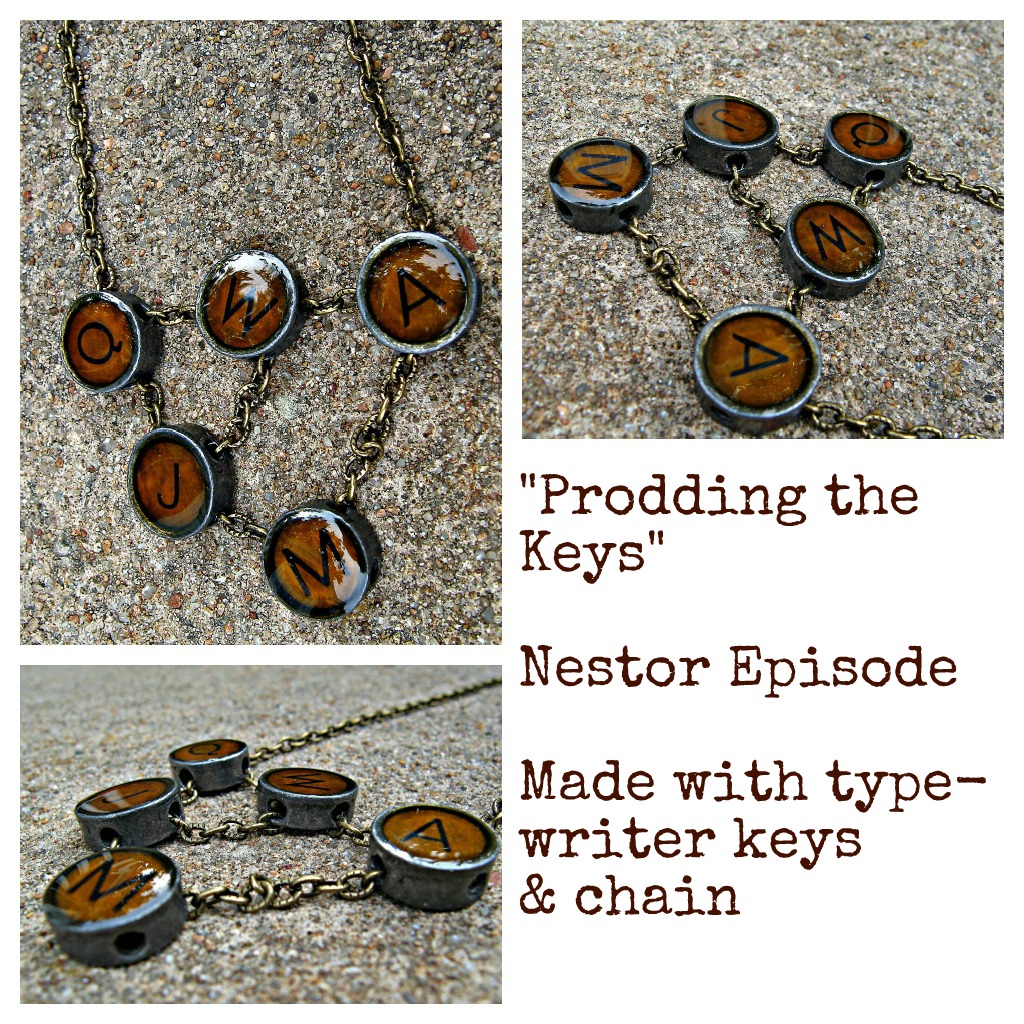
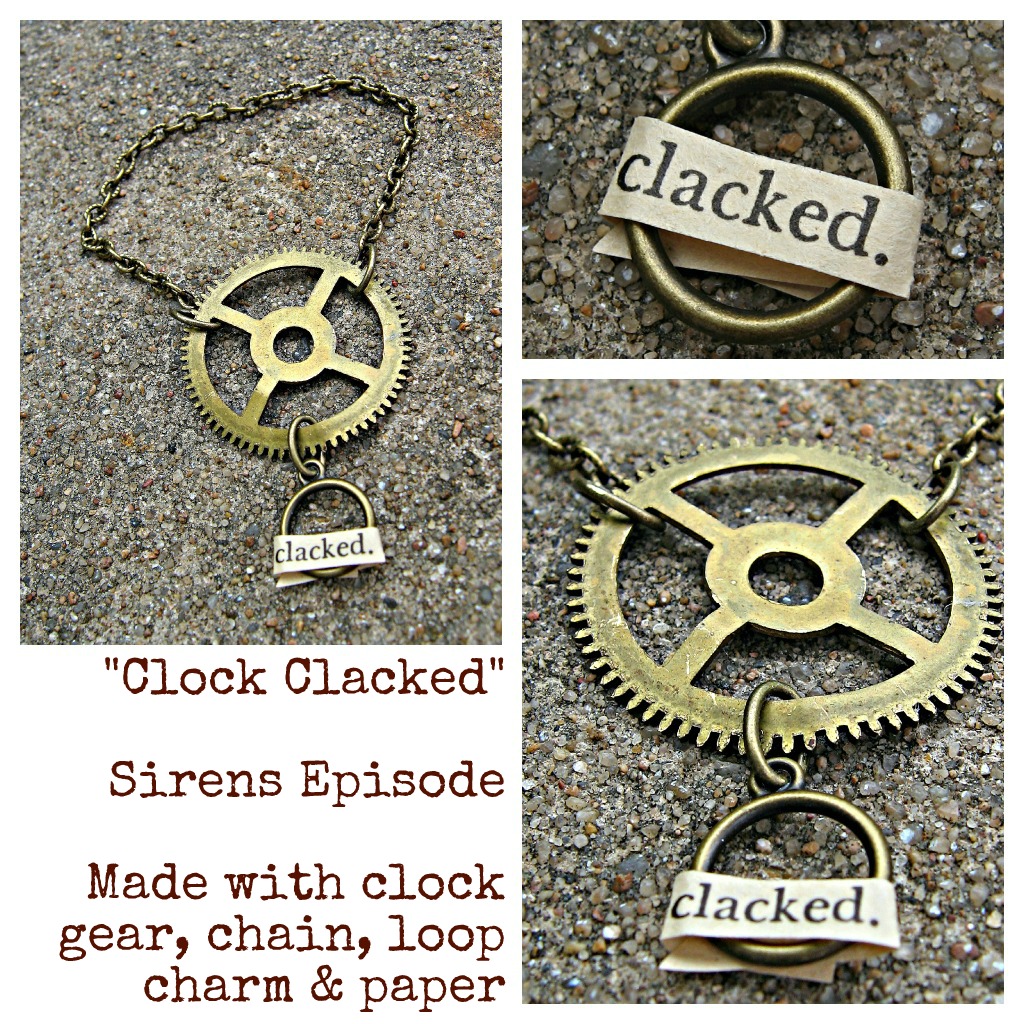
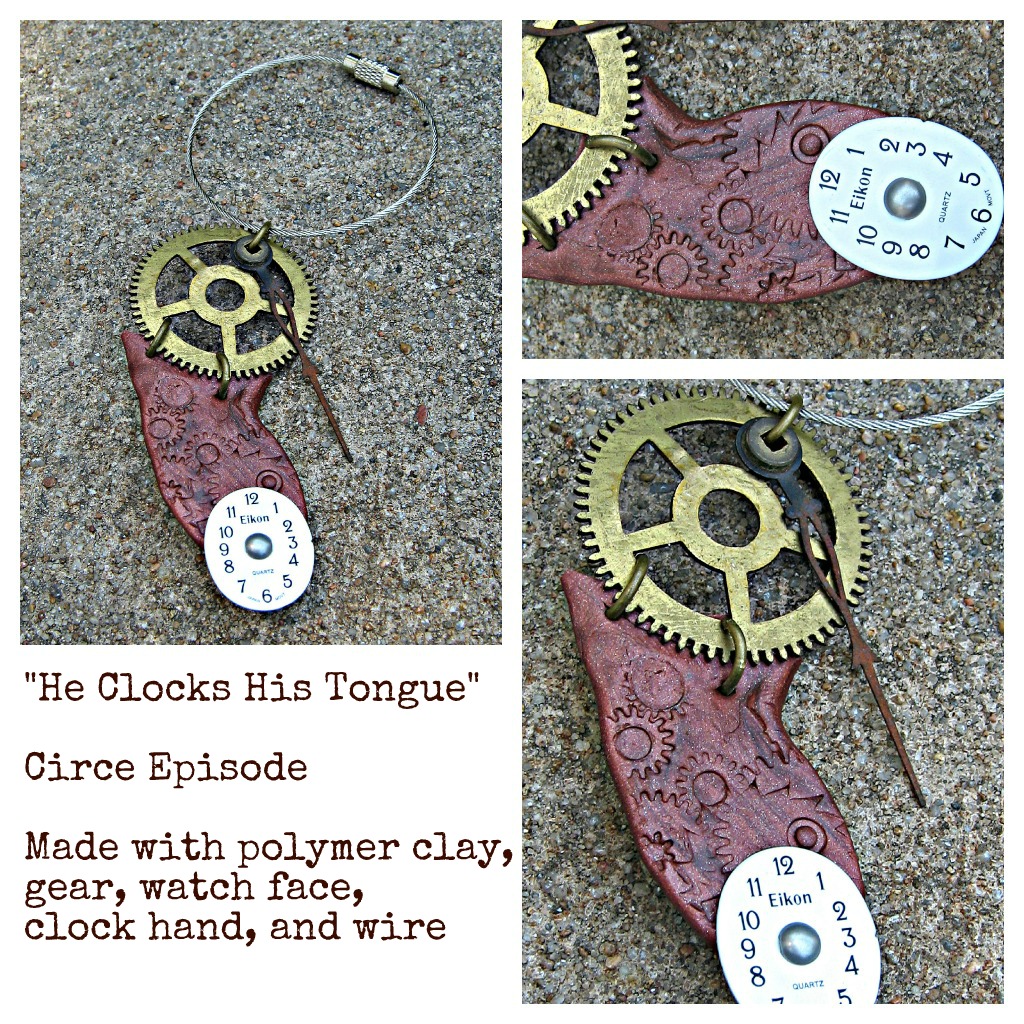
Stephen “peered from under his shaggy brows at the manuscript by his elbow and, muttering, began to prod the stiff buttons of the keyboard slowly”

“He watched through peacocktwittering lashes the southing sun”

“Confession as clockwork” or as I like to think of this piece, “Agenbite of Inwit, Inwit’s Agenbite: Clockwork Confessions”

A Mourning Pin to Pine for Paddy Dignam

I found that of all the episodes, Nausicaa was the most interesting in terms of clock imagery & preoccupation. Both Bloom and Gerty ponder on & about clocks. Bloom fiddles with his watch chain and realizes that his clock has stopped (just after eight) and Gerty thinks of gifting Bloom a clock which reminds her of the one on the mantel: “white and gold with a canary bird that came out of a little house to tell the time of day.”

Not only is this a challenging episode to read, but it was difficult to try and represent it justly. I luckily happened upon an antique cigar cutter at the flea market which lead me to the idea of representing the episode through its simplest, and most central, action–birth.

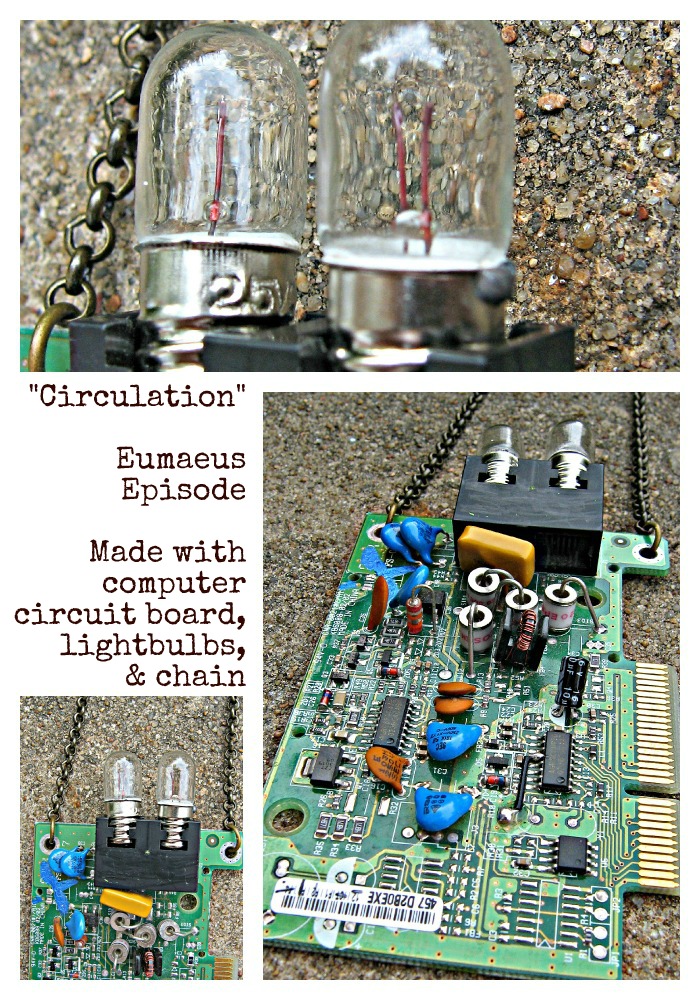
Eumaeus was another challenge for me. Its techne lent me many ideas, this was the first that I thought of. Circulation is not only about blood, but in a city–circulation is electricity (the wires literally connecting spaces) and a computer’s circuit board is the circulation of information.

In Calypso, we get the description of Molly’s garters: “Night sky moon, violet” and in Penelope we finally have Molly thinking: “Id let him see my garters the new ones”–which of coarse, Bloom already has.

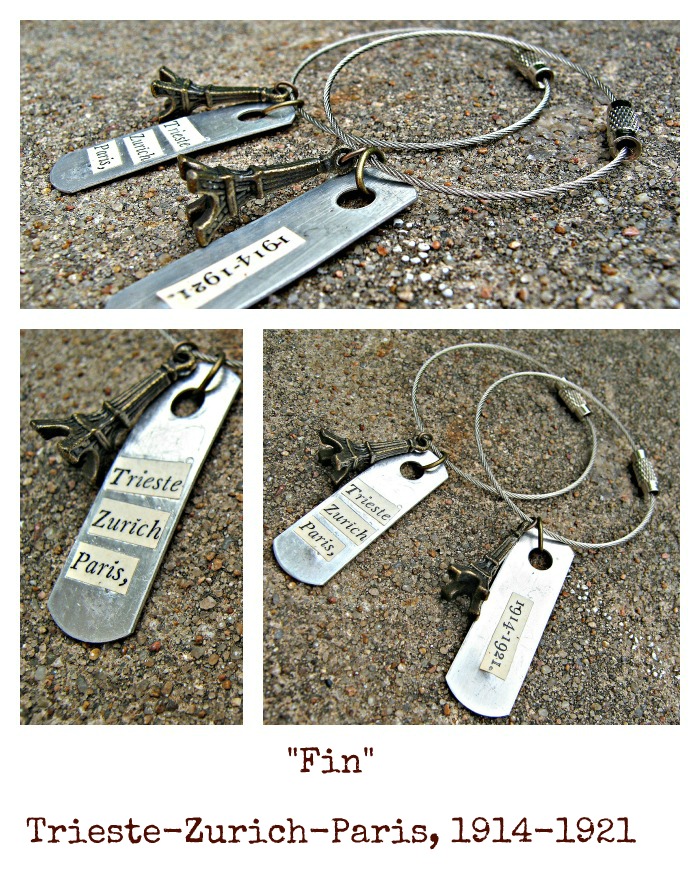
I hope you enjoyed these pieces. It was both challenging and entertaining to make them. Check out my blog next Bloomsday, I create something new every year! Joycefully Yours, Sam.

Reflection, my Kind of Time Travel

ShowsSamantha ExtanceComment

Thank you to everyone who came out to support me at Blue Dome Arts Festival 2012! It was both affirming and wonderful to see so many people wearing jewelry that I made when they stopped by my little booth. Someone asked me this year why I was at Blue Dome and not Mayfest--a question I happily answered. I would like to share that answer with all of you. Blue Dome gave me a chance. In 2010, I applied to Mayfest and was respectfully rejected (and I would like to add, given valuable feedback on my application which I then used for later shows). But it was Blue Dome that offered me the opportunity to display my work for the first time. It was at that show that I realized that my Steampunk pieces were the ones that people enjoyed the most. Afterwhich I moved away from traditional beading and poured all of my energy into making only those pieces.

I met incredible people who told me about other shows, like Alliday Everyday & Indie Emporium that would later lead to other successes (becoming a member of Make:Tulsa and being carried in stores, the first shop of which was & is Dwelling Spaces). I consider myself very lucky because I met such kindred, crafty spirits who genuinely wished me success & helped me grow as an artist.

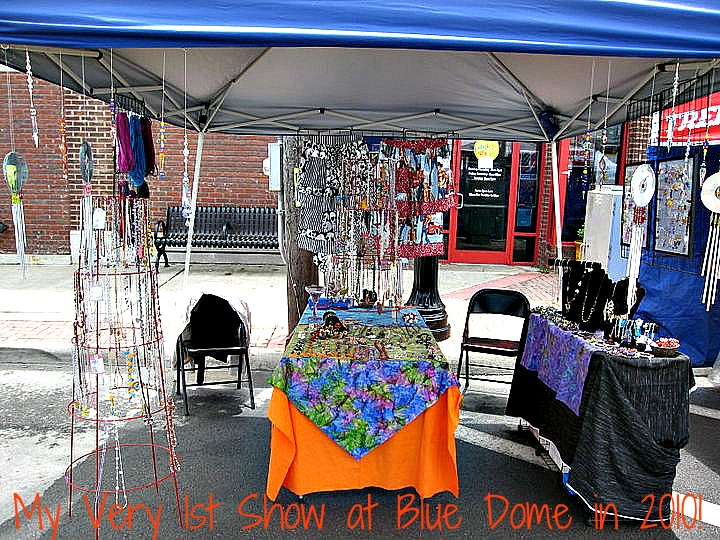
Though I cringe to show you what my booth looked like in 2010, here it is:

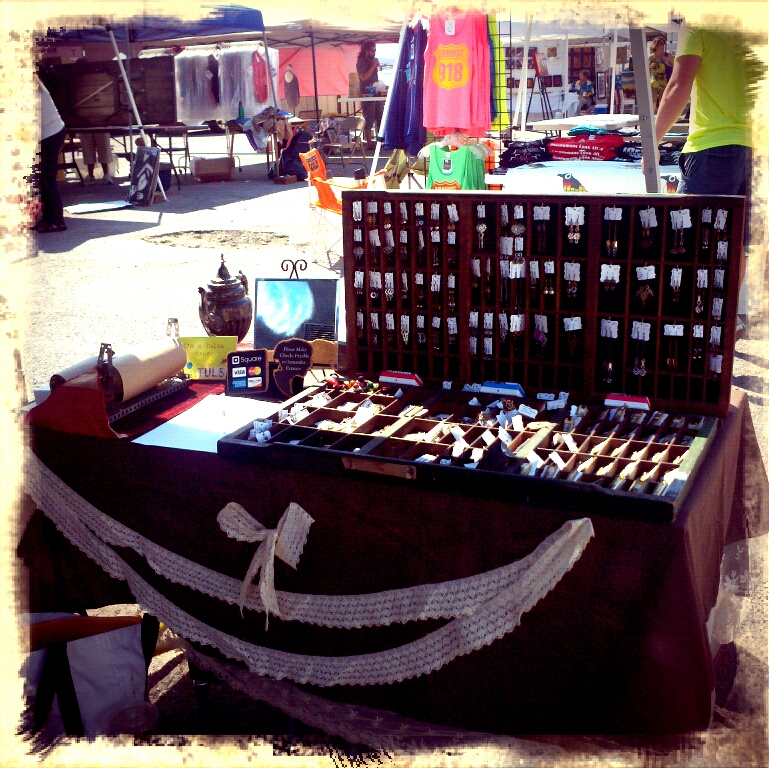
I cringe a little when I look at this picture but I'm proud too, because I have grown immensely. I moved away from general jewelry-making and indulged heartily in my love of Steampunk. Now, my booth reflects what I make:

The tie-dye is gone, the tomato plant has retired, and I finally have a sign! Now I am complimented often on (and offered twice as often as I'm complimented to buy) my display pieces. Old projector lightbulbs, antique books, printer drawers, vintage scale & weights, turn-of-the-century eyeglasses, ink well, diving bell helmet model, & old tools....

So I want to say Thank You Blue Dome for believing in me and giving young artists a fighting chance. Happy Tuesday everyone!

See you at Blue Dome!

ShowsSamantha Extance1 Comment

Stop by my booth this weekend at the Blue Dome Arts Festival in Downtown Tulsa's Blue Dome District & accessorize yourself for summer! The festival will be Friday (May 18th) & Saturday (May 19th) from 11 am to 8 pm and Sunday (May 20th) from 11 am to 5 pm! There will be food, tons of vendors selling amazing local art and handmade things, belly dancers, art cars, live music...I am getting so excited just typing! Here are a few new jewelry pieces you'll see at Blue Dome!

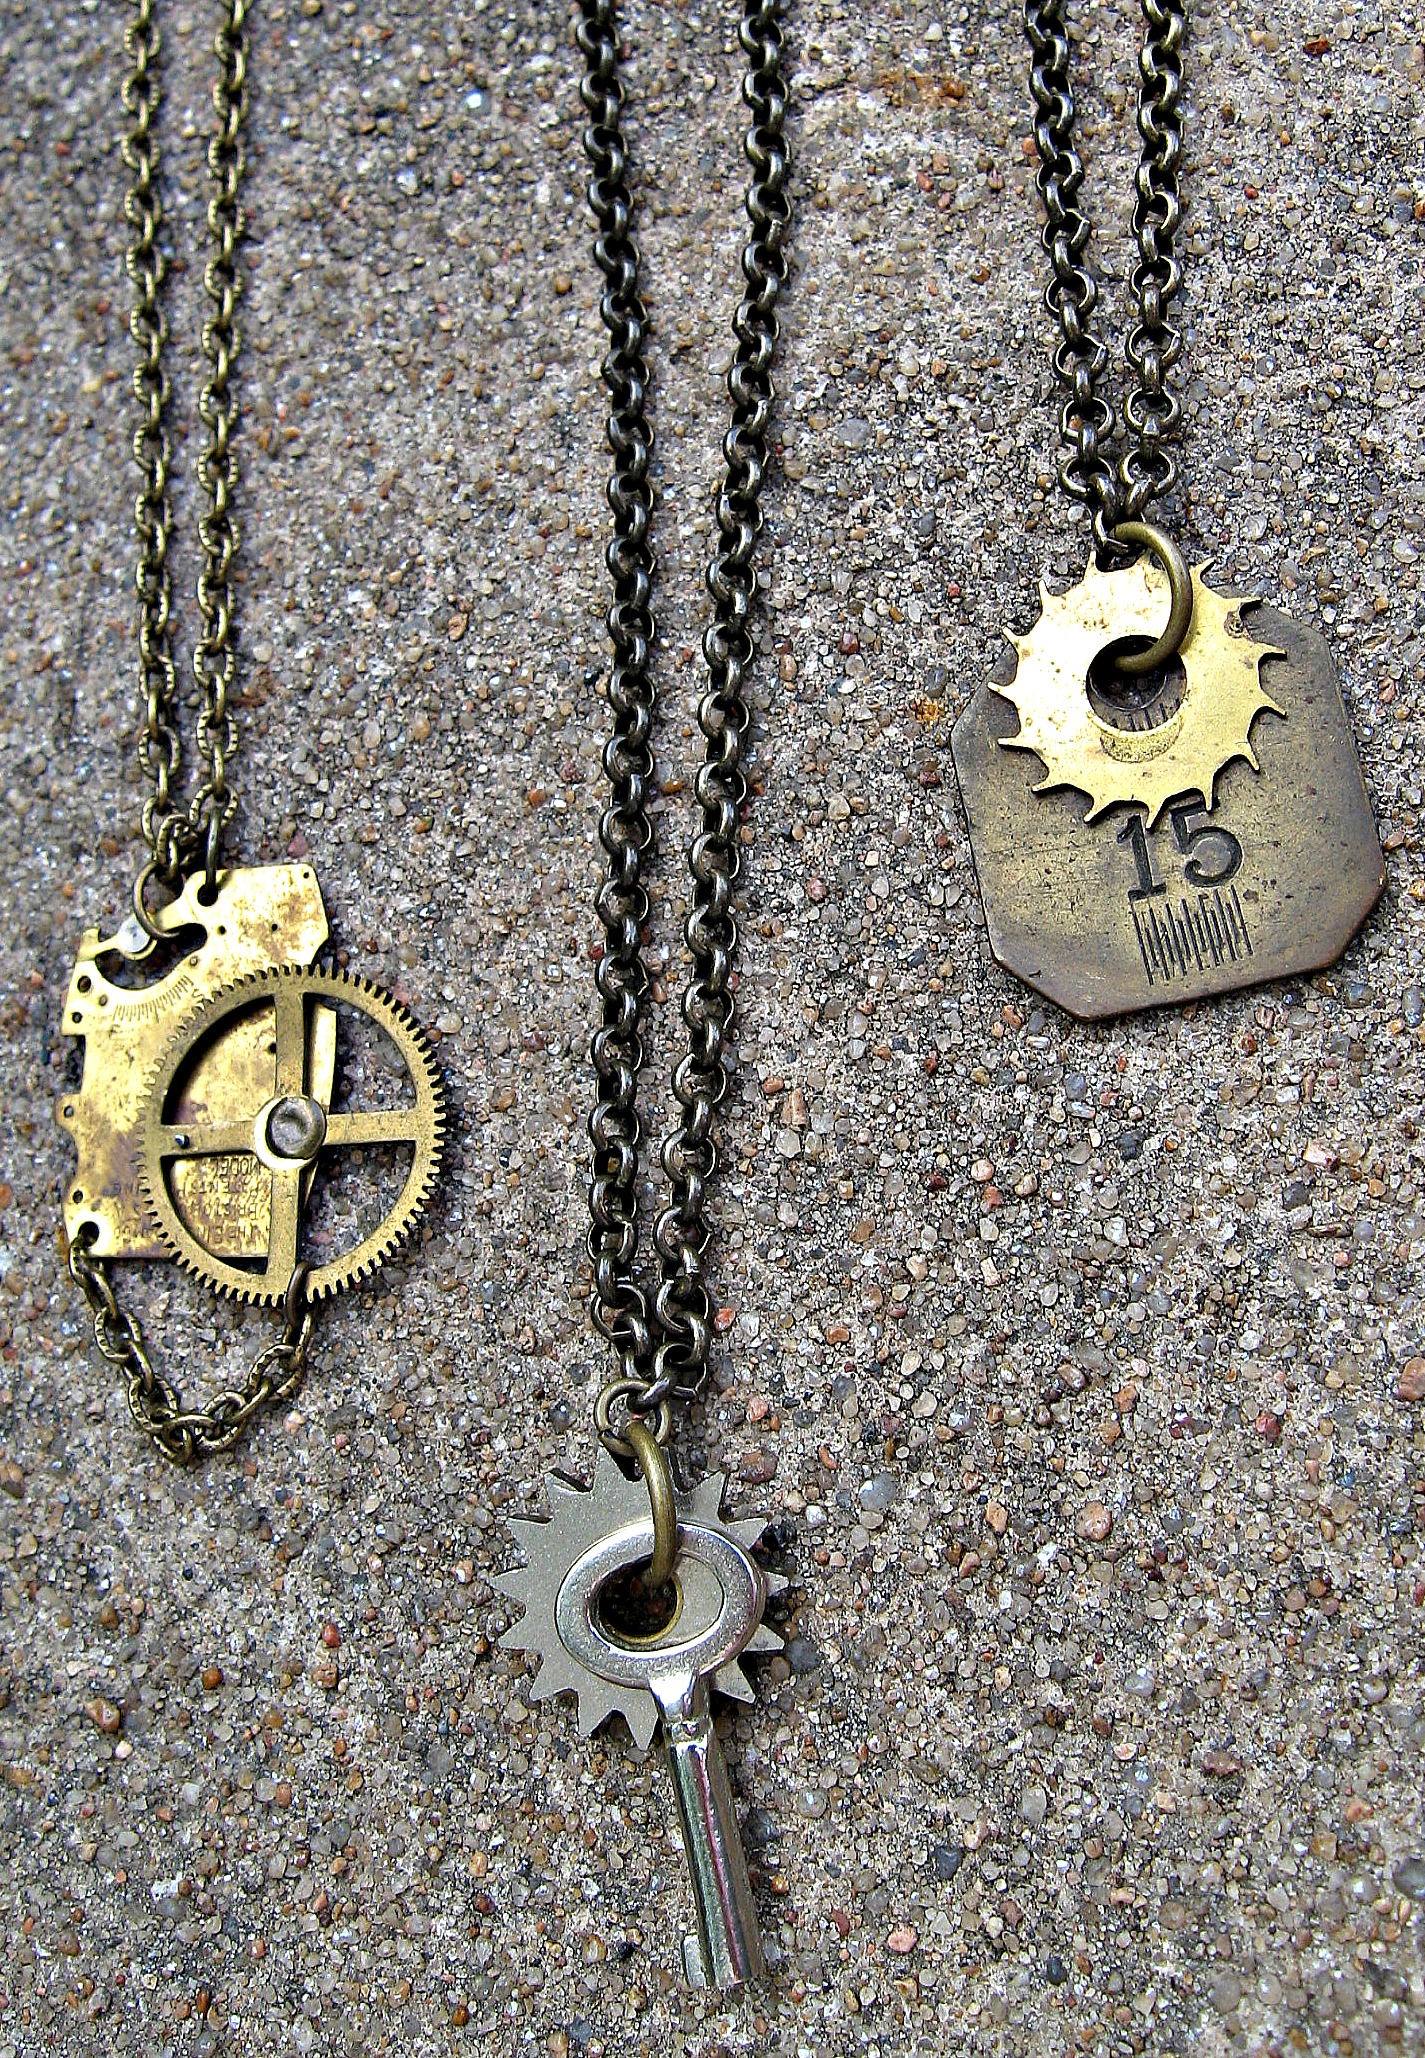
Simply Steampunk Necklaces

Convertible Pin & Necklace Rose Cameo

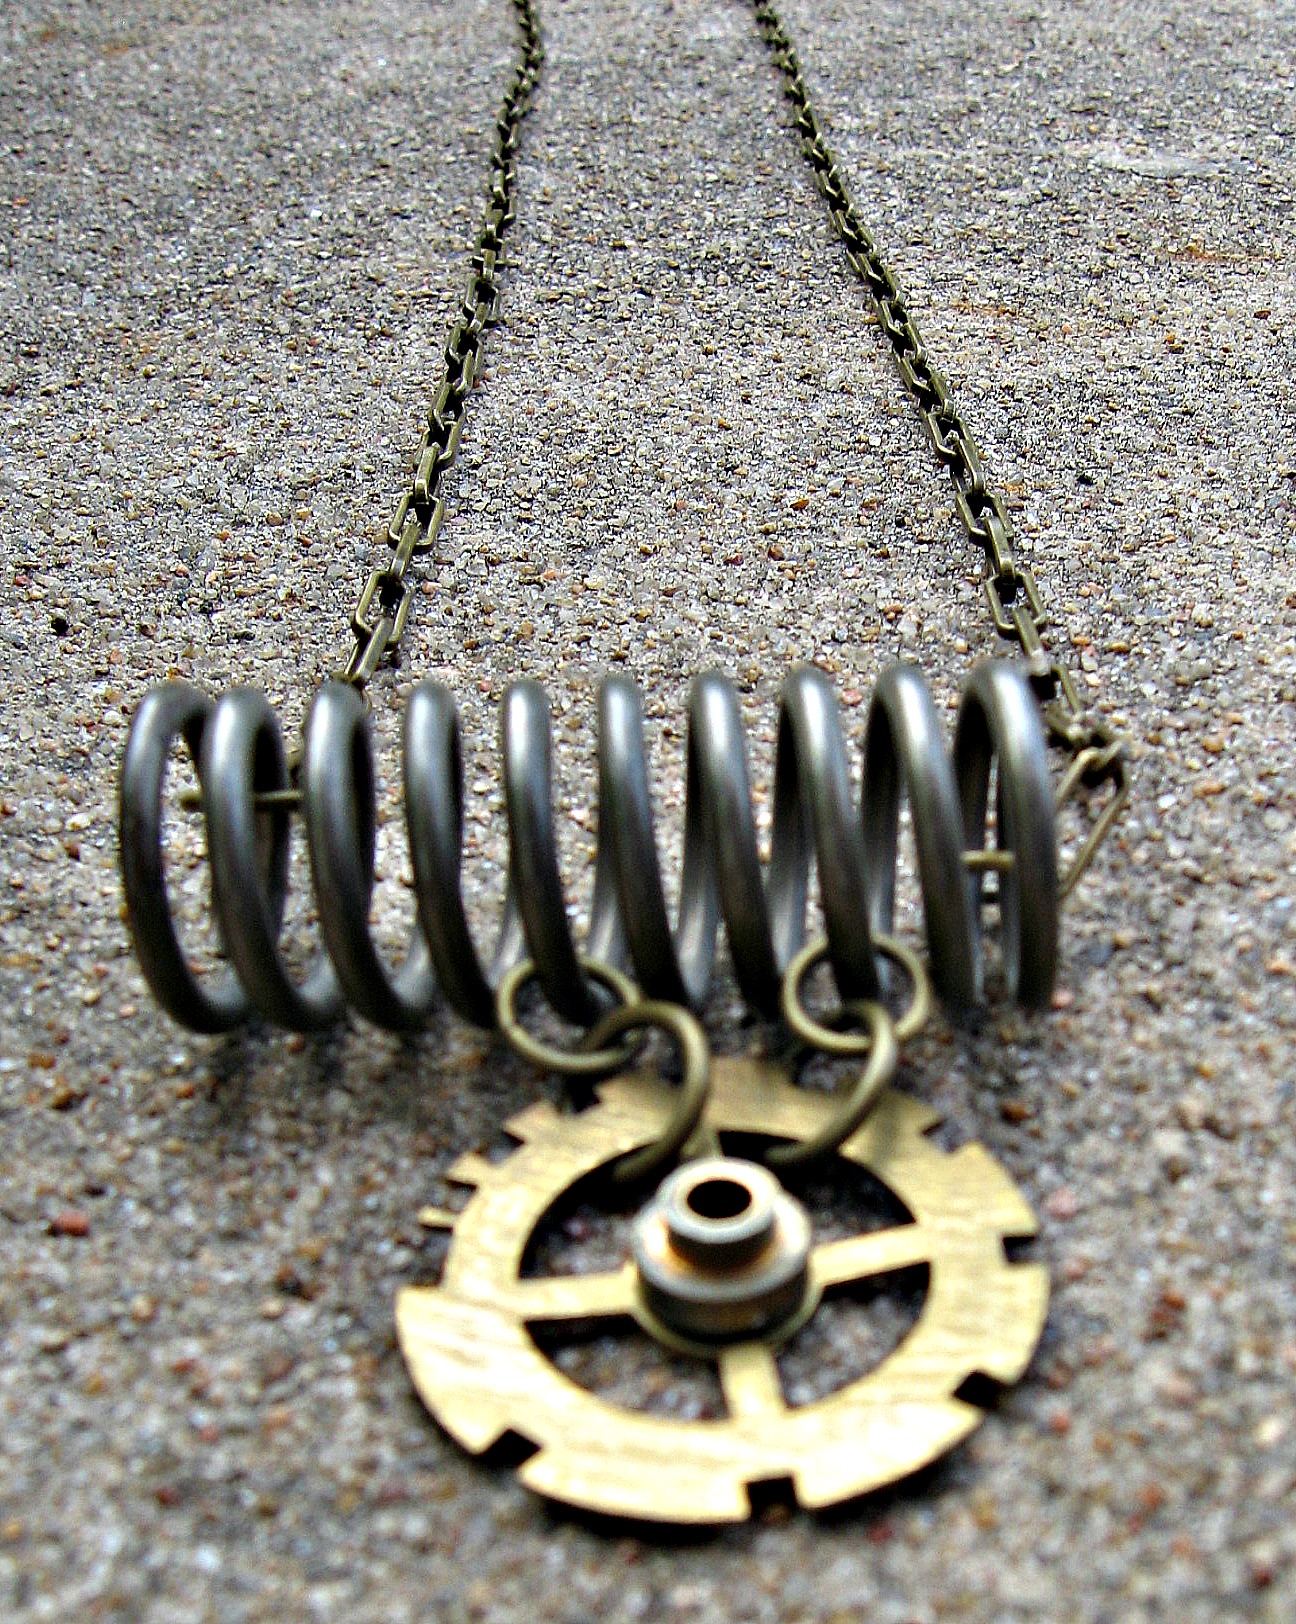
Spring & Gear Necklace

Steampunk Gold for Steampunk Royalty!

Pieces made with metal erector set parts

Hope to see you at Blue Dome!

Tribute to My Amazing (Steampunk) Mom!

InspirationSamantha ExtanceComment

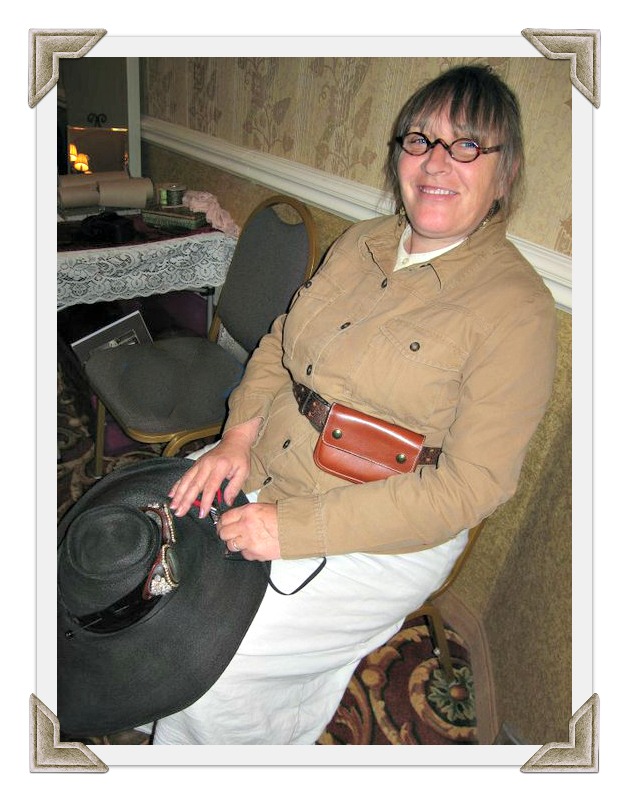
This is my mom, and she is also a Steampunker. Below you see her dressed up as an archeological explorer. She has a wide brimmed hat (good for those hot, sunny expeditions), antique pearl studded goggles (which she made herself), leather pouch (for collecting rare finds), and her fossil brush (attached on the other side of her belt). You can see where I get my imagination from!

I count myself lucky to have a mom that supports and nurtures my creativity and imagination. She taught me how to make jewelry & was the person who first introduced me to Steampunk. Just wanted to introduce you all to my biggest source of inspiration, my mom.

Go get mushy today & give your mommas some love! Happy Mother's day everyone! xo Sam

New From My Little Steampunk Workshop

UncategorizedSamantha ExtanceComment

I've been working on a bunch of new necklaces, bracelets, & earrings for the summer season of festivals & shows. (I'm gearing up for Dustbowl Arts Market in Norman OK next weekend!). Here is a preview of some of my new inventions!

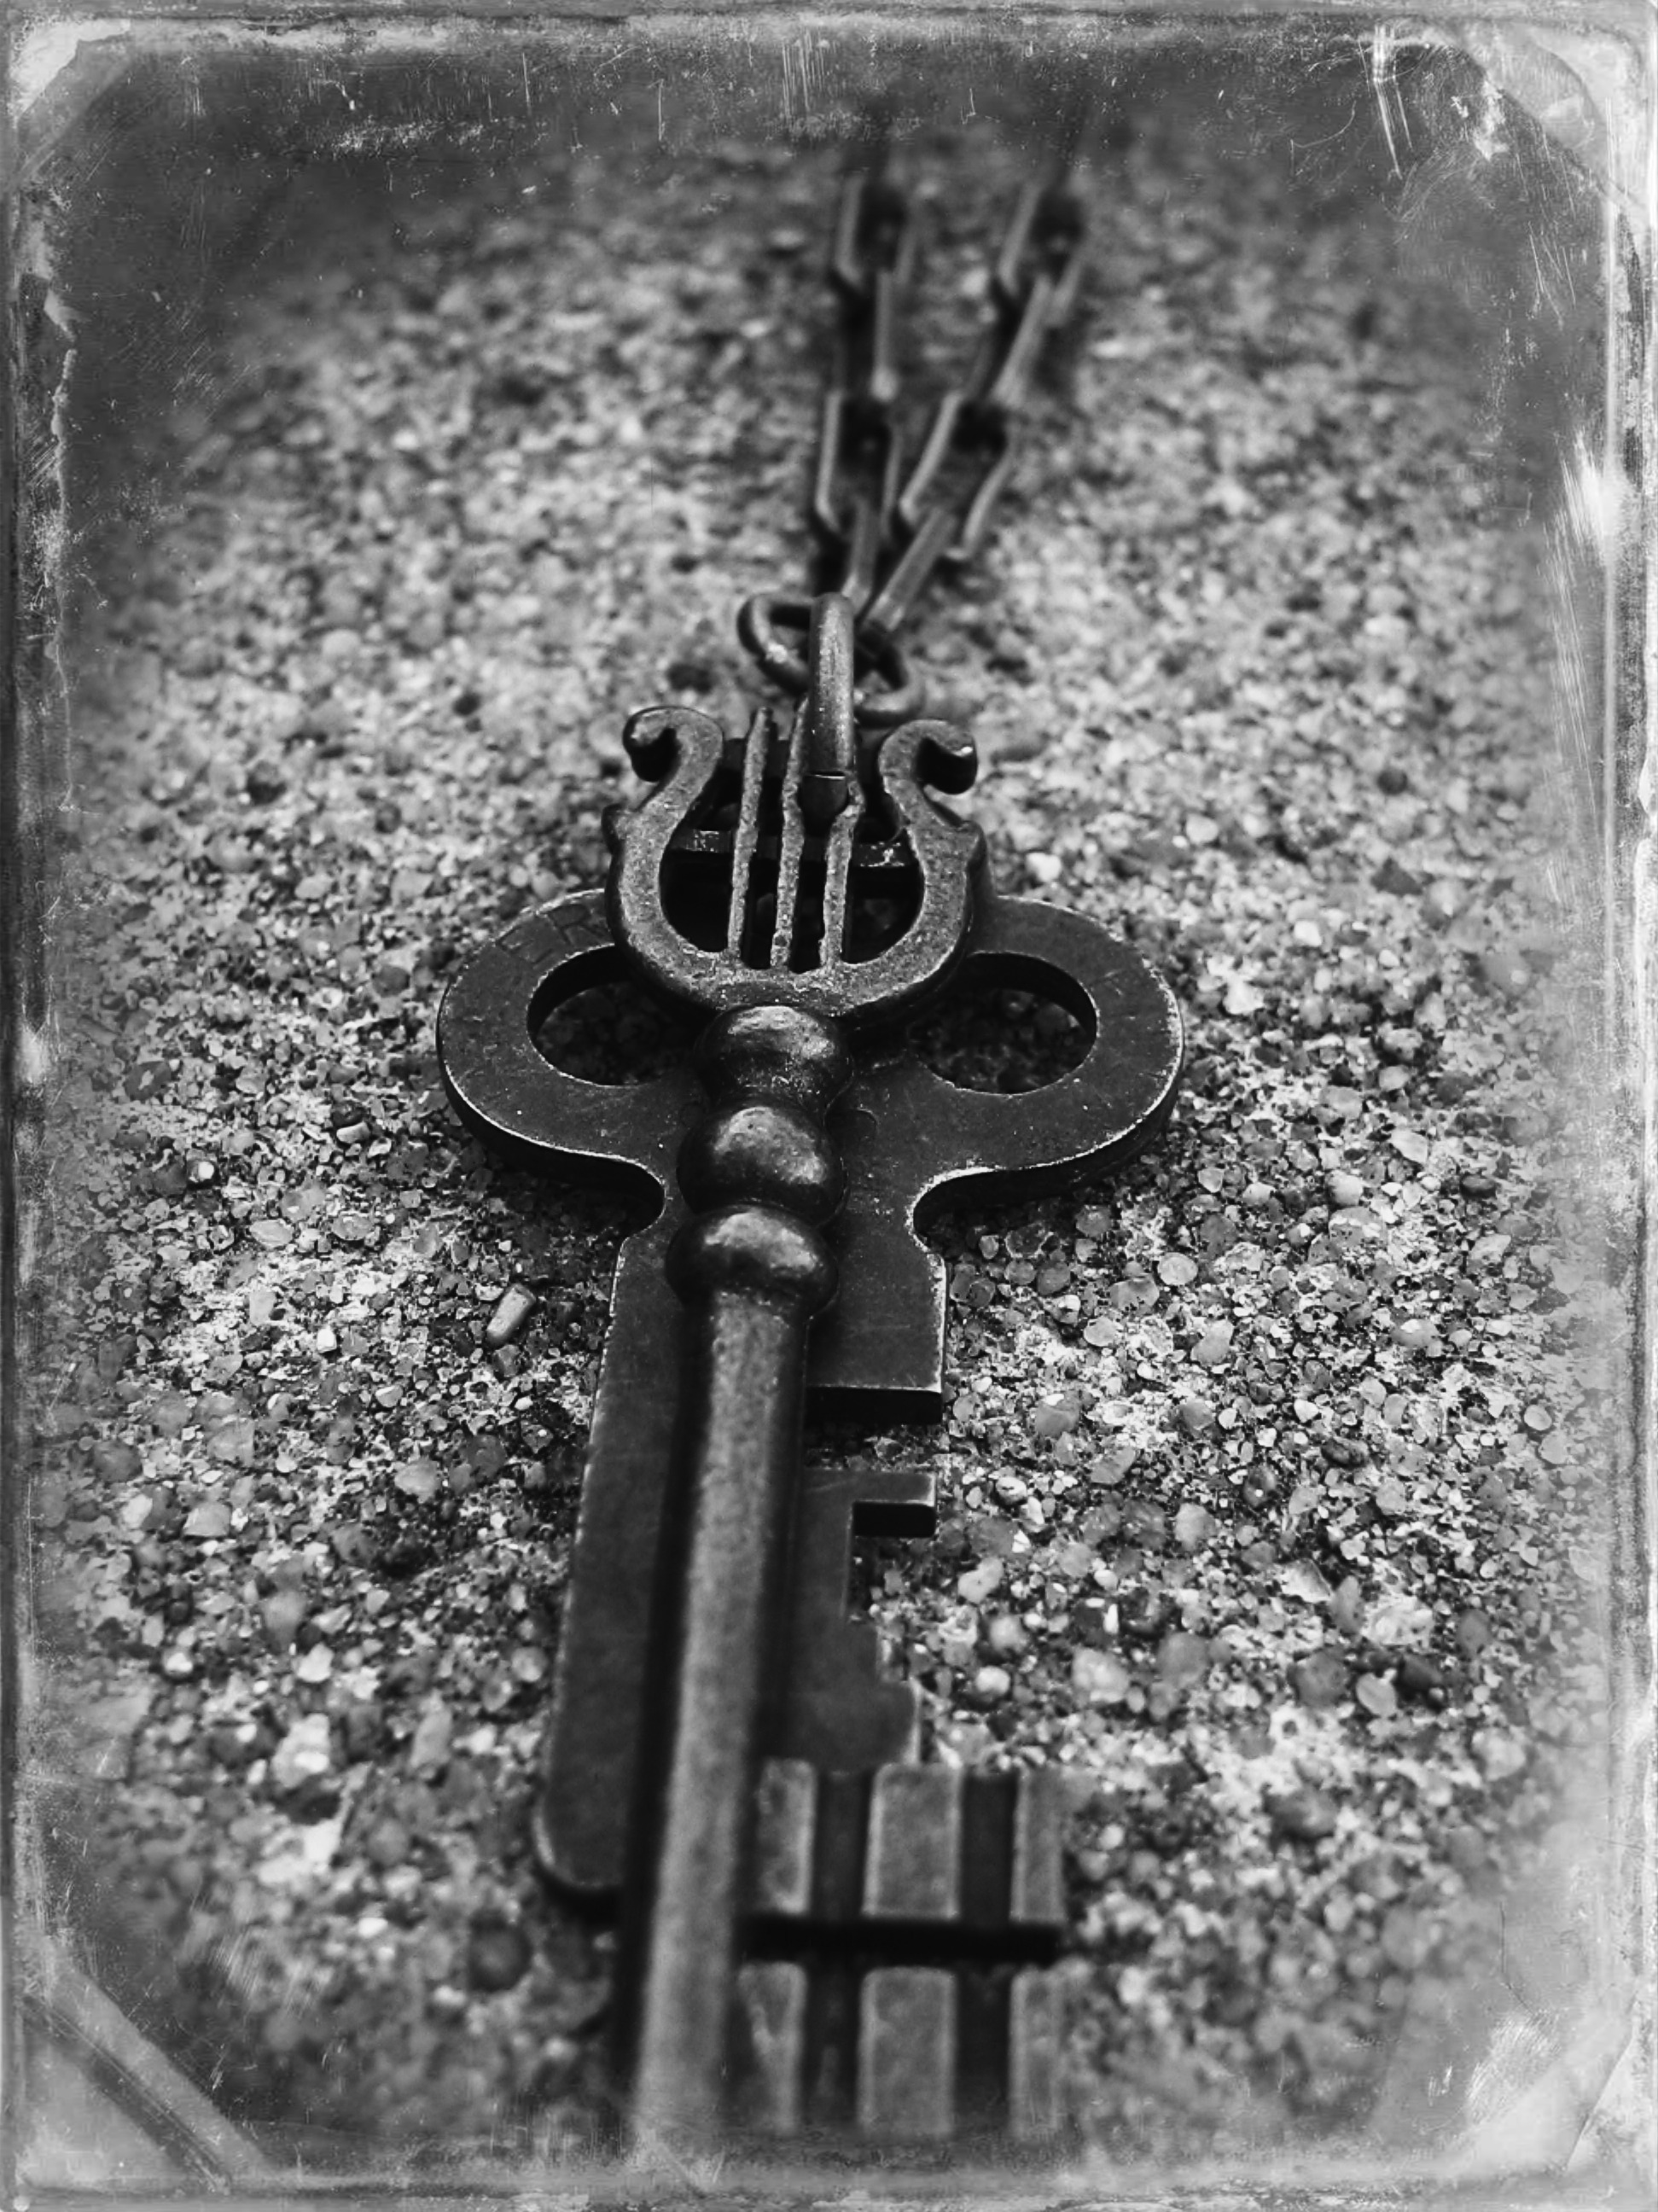
Duel Skeleton Key Necklace

Airship Captain's Amulet

Firefly Courtesan Gearrings

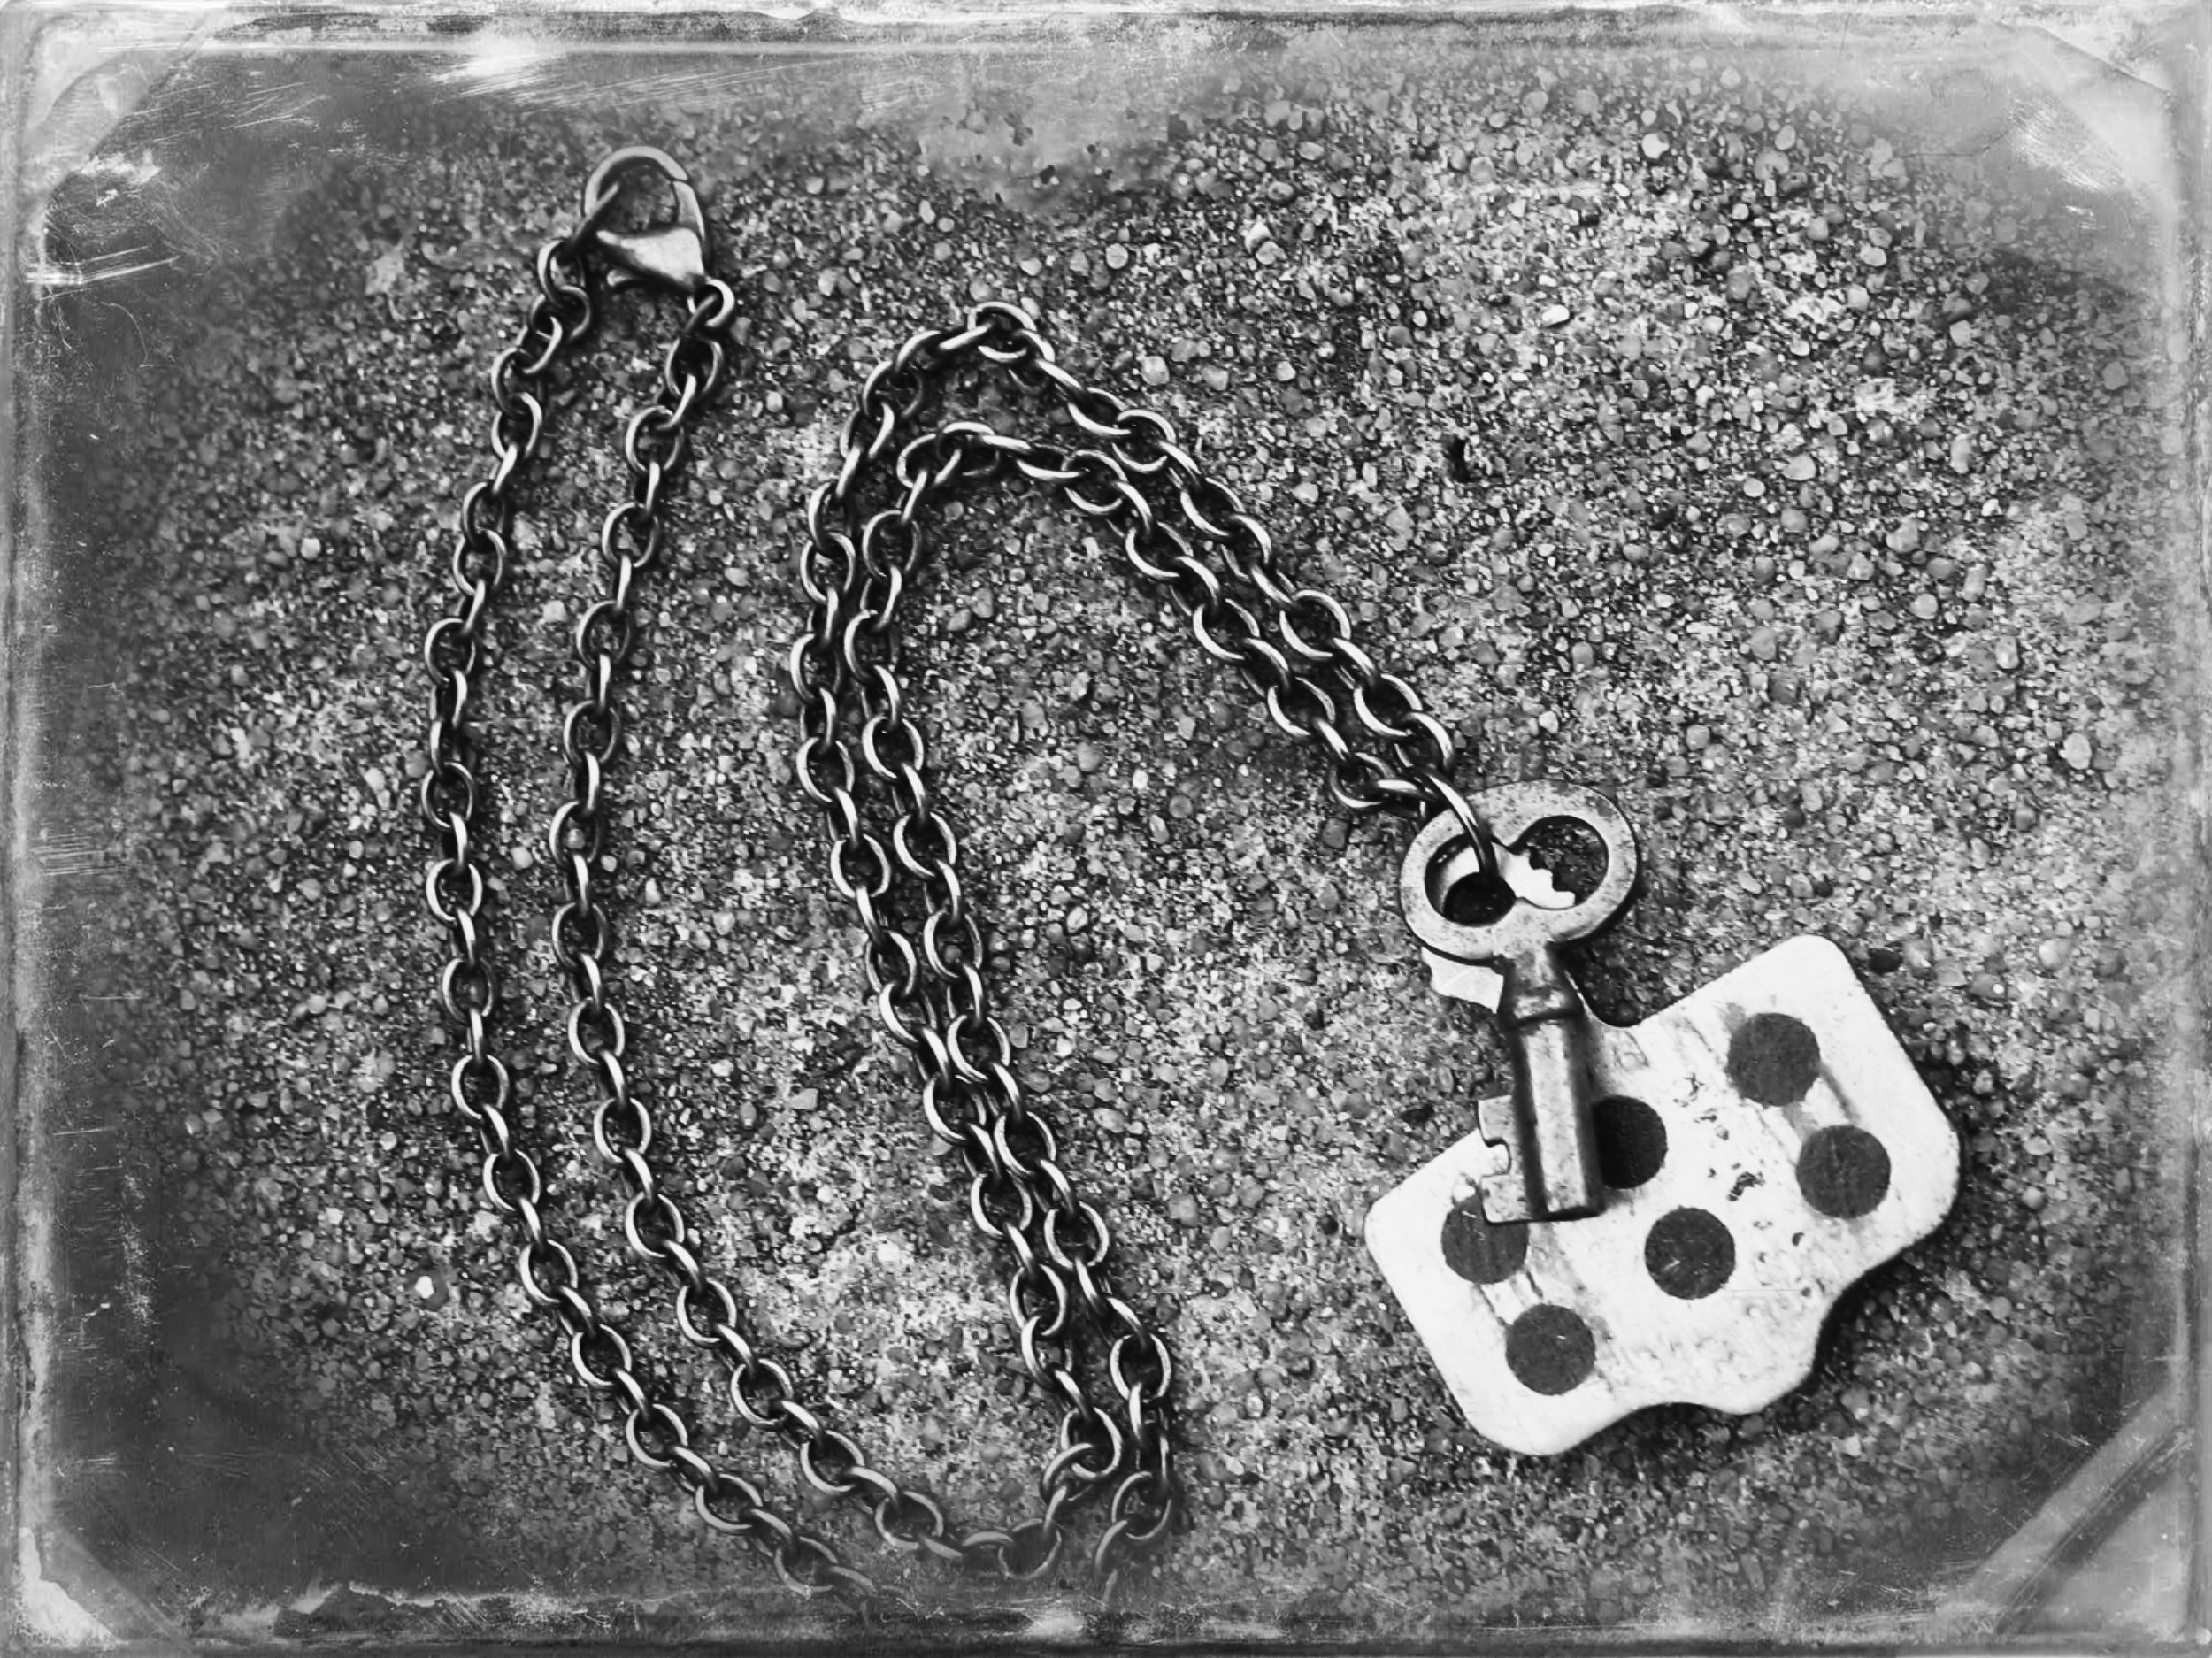
Bicycle Brake Pad & Skeleton Key Chain (thanks to Casey from Tom's Bicycles for these!)

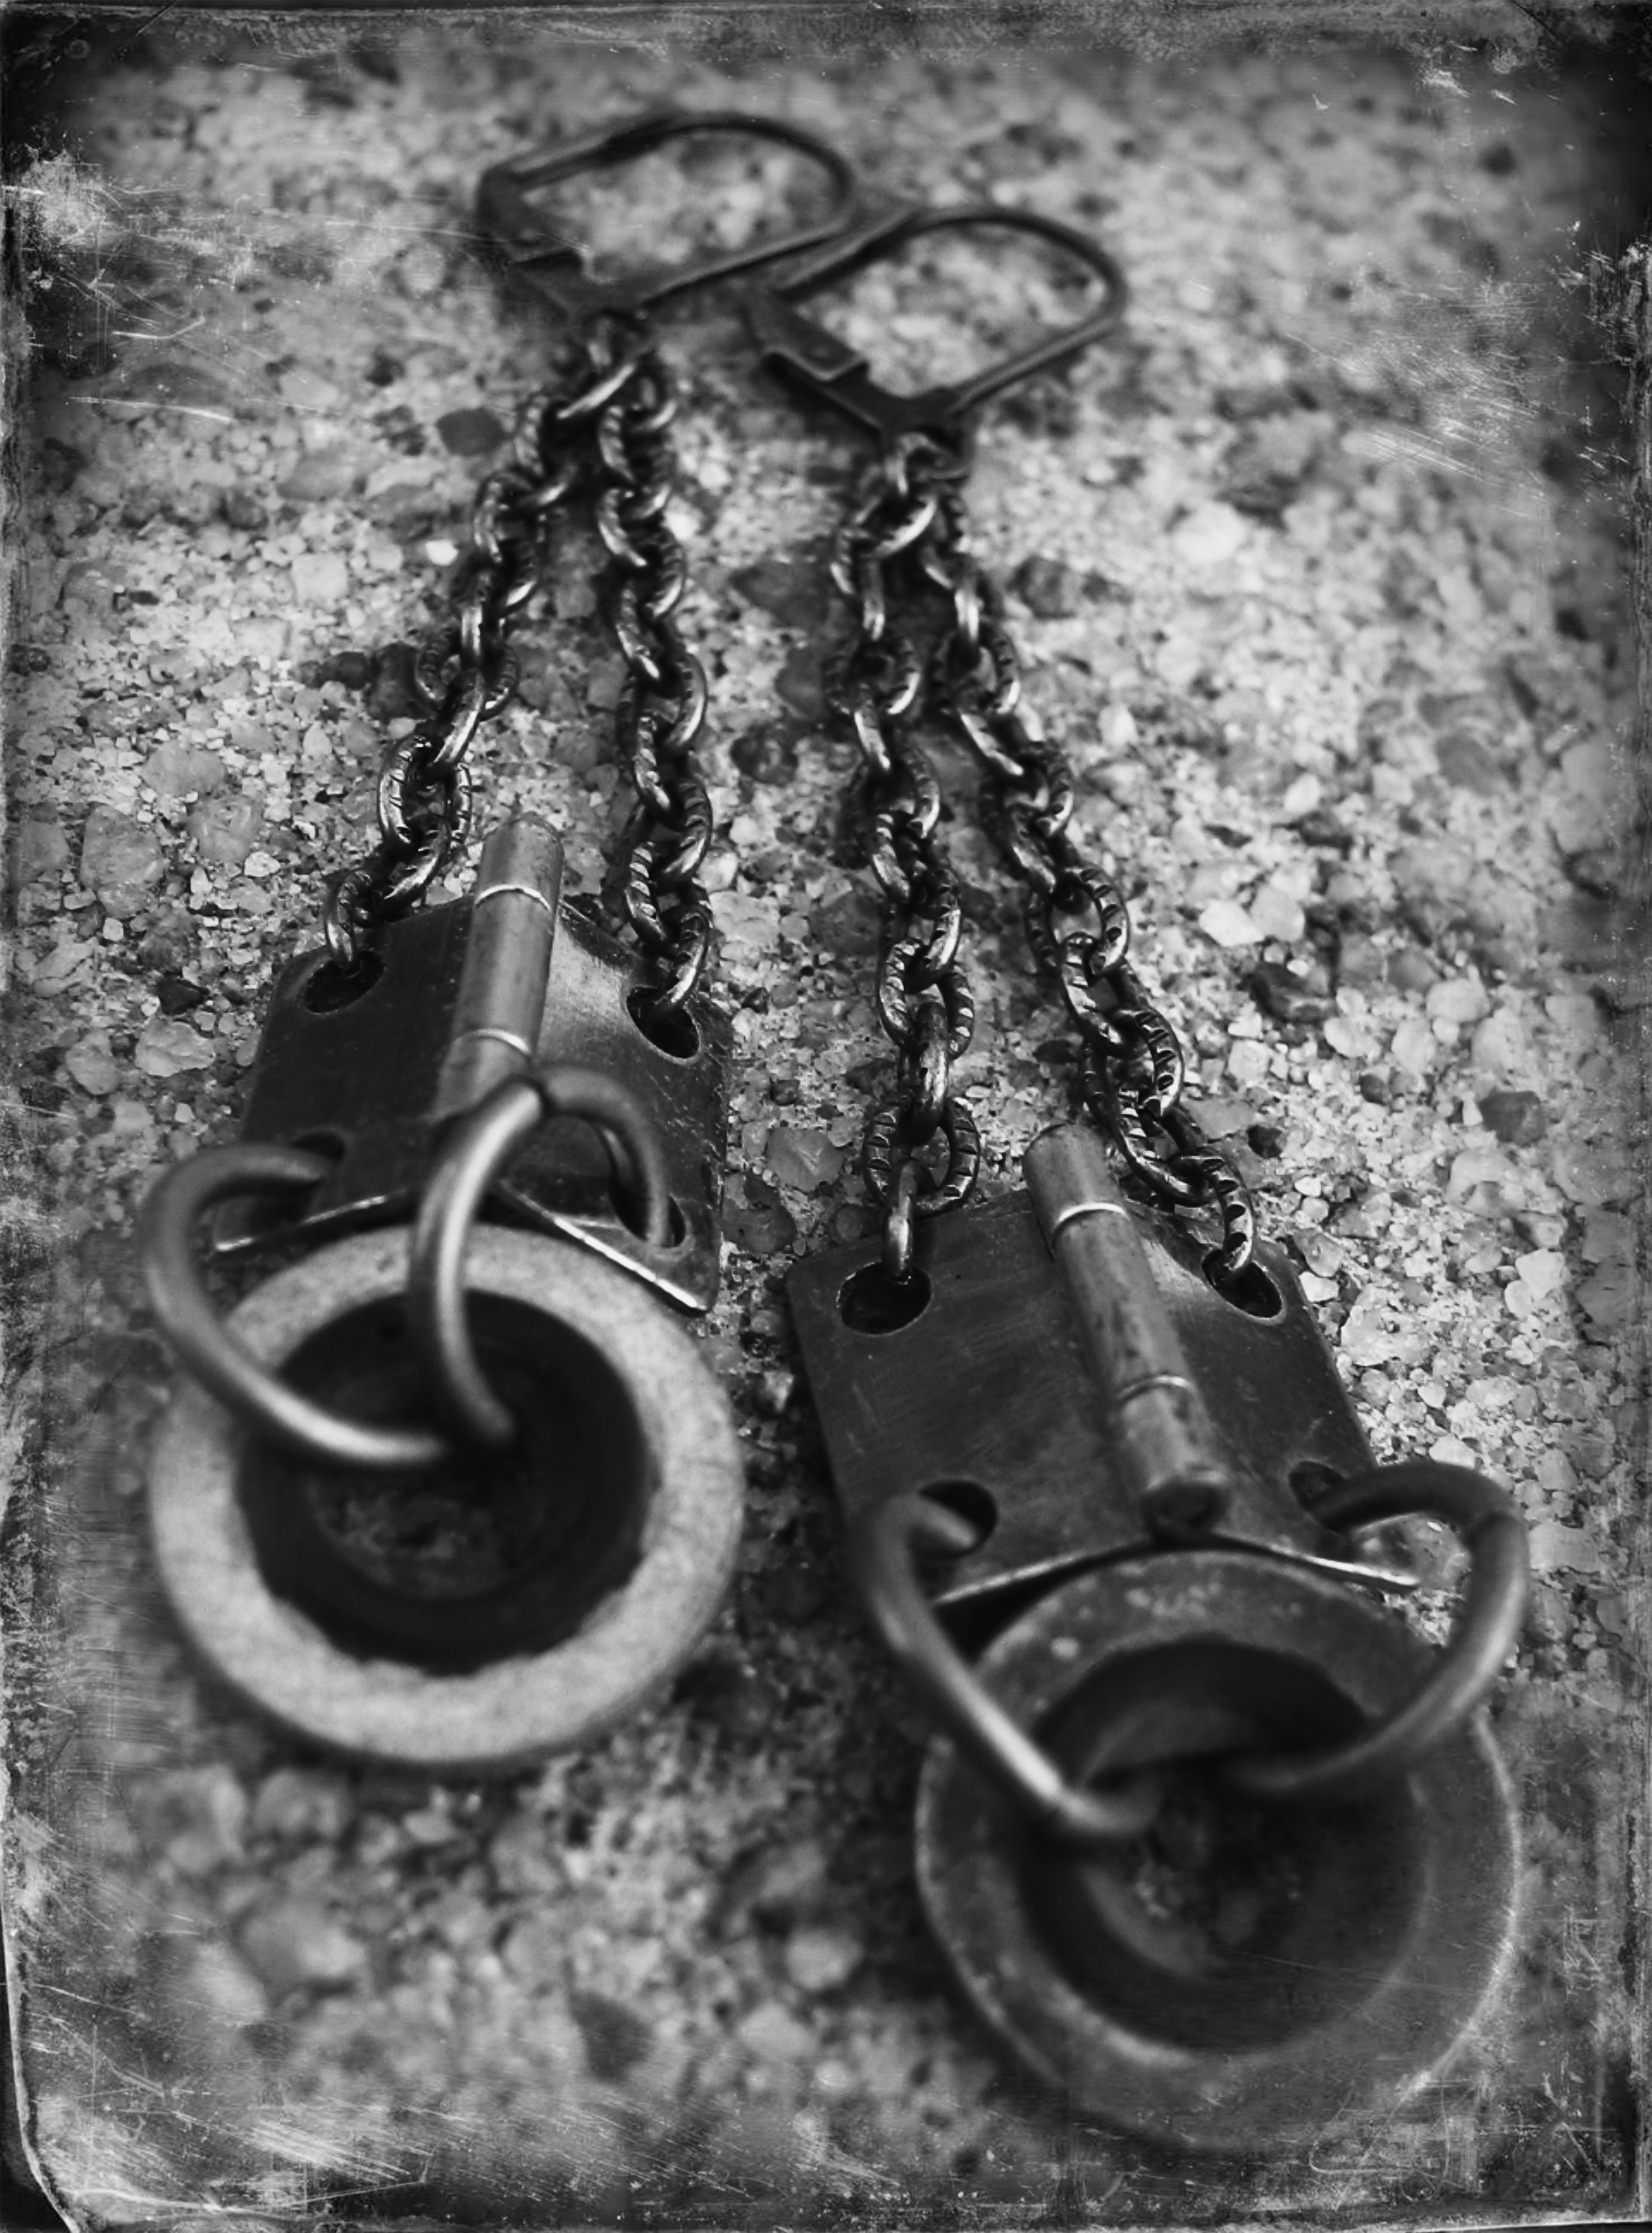
Unhinged Steampunk Earrings

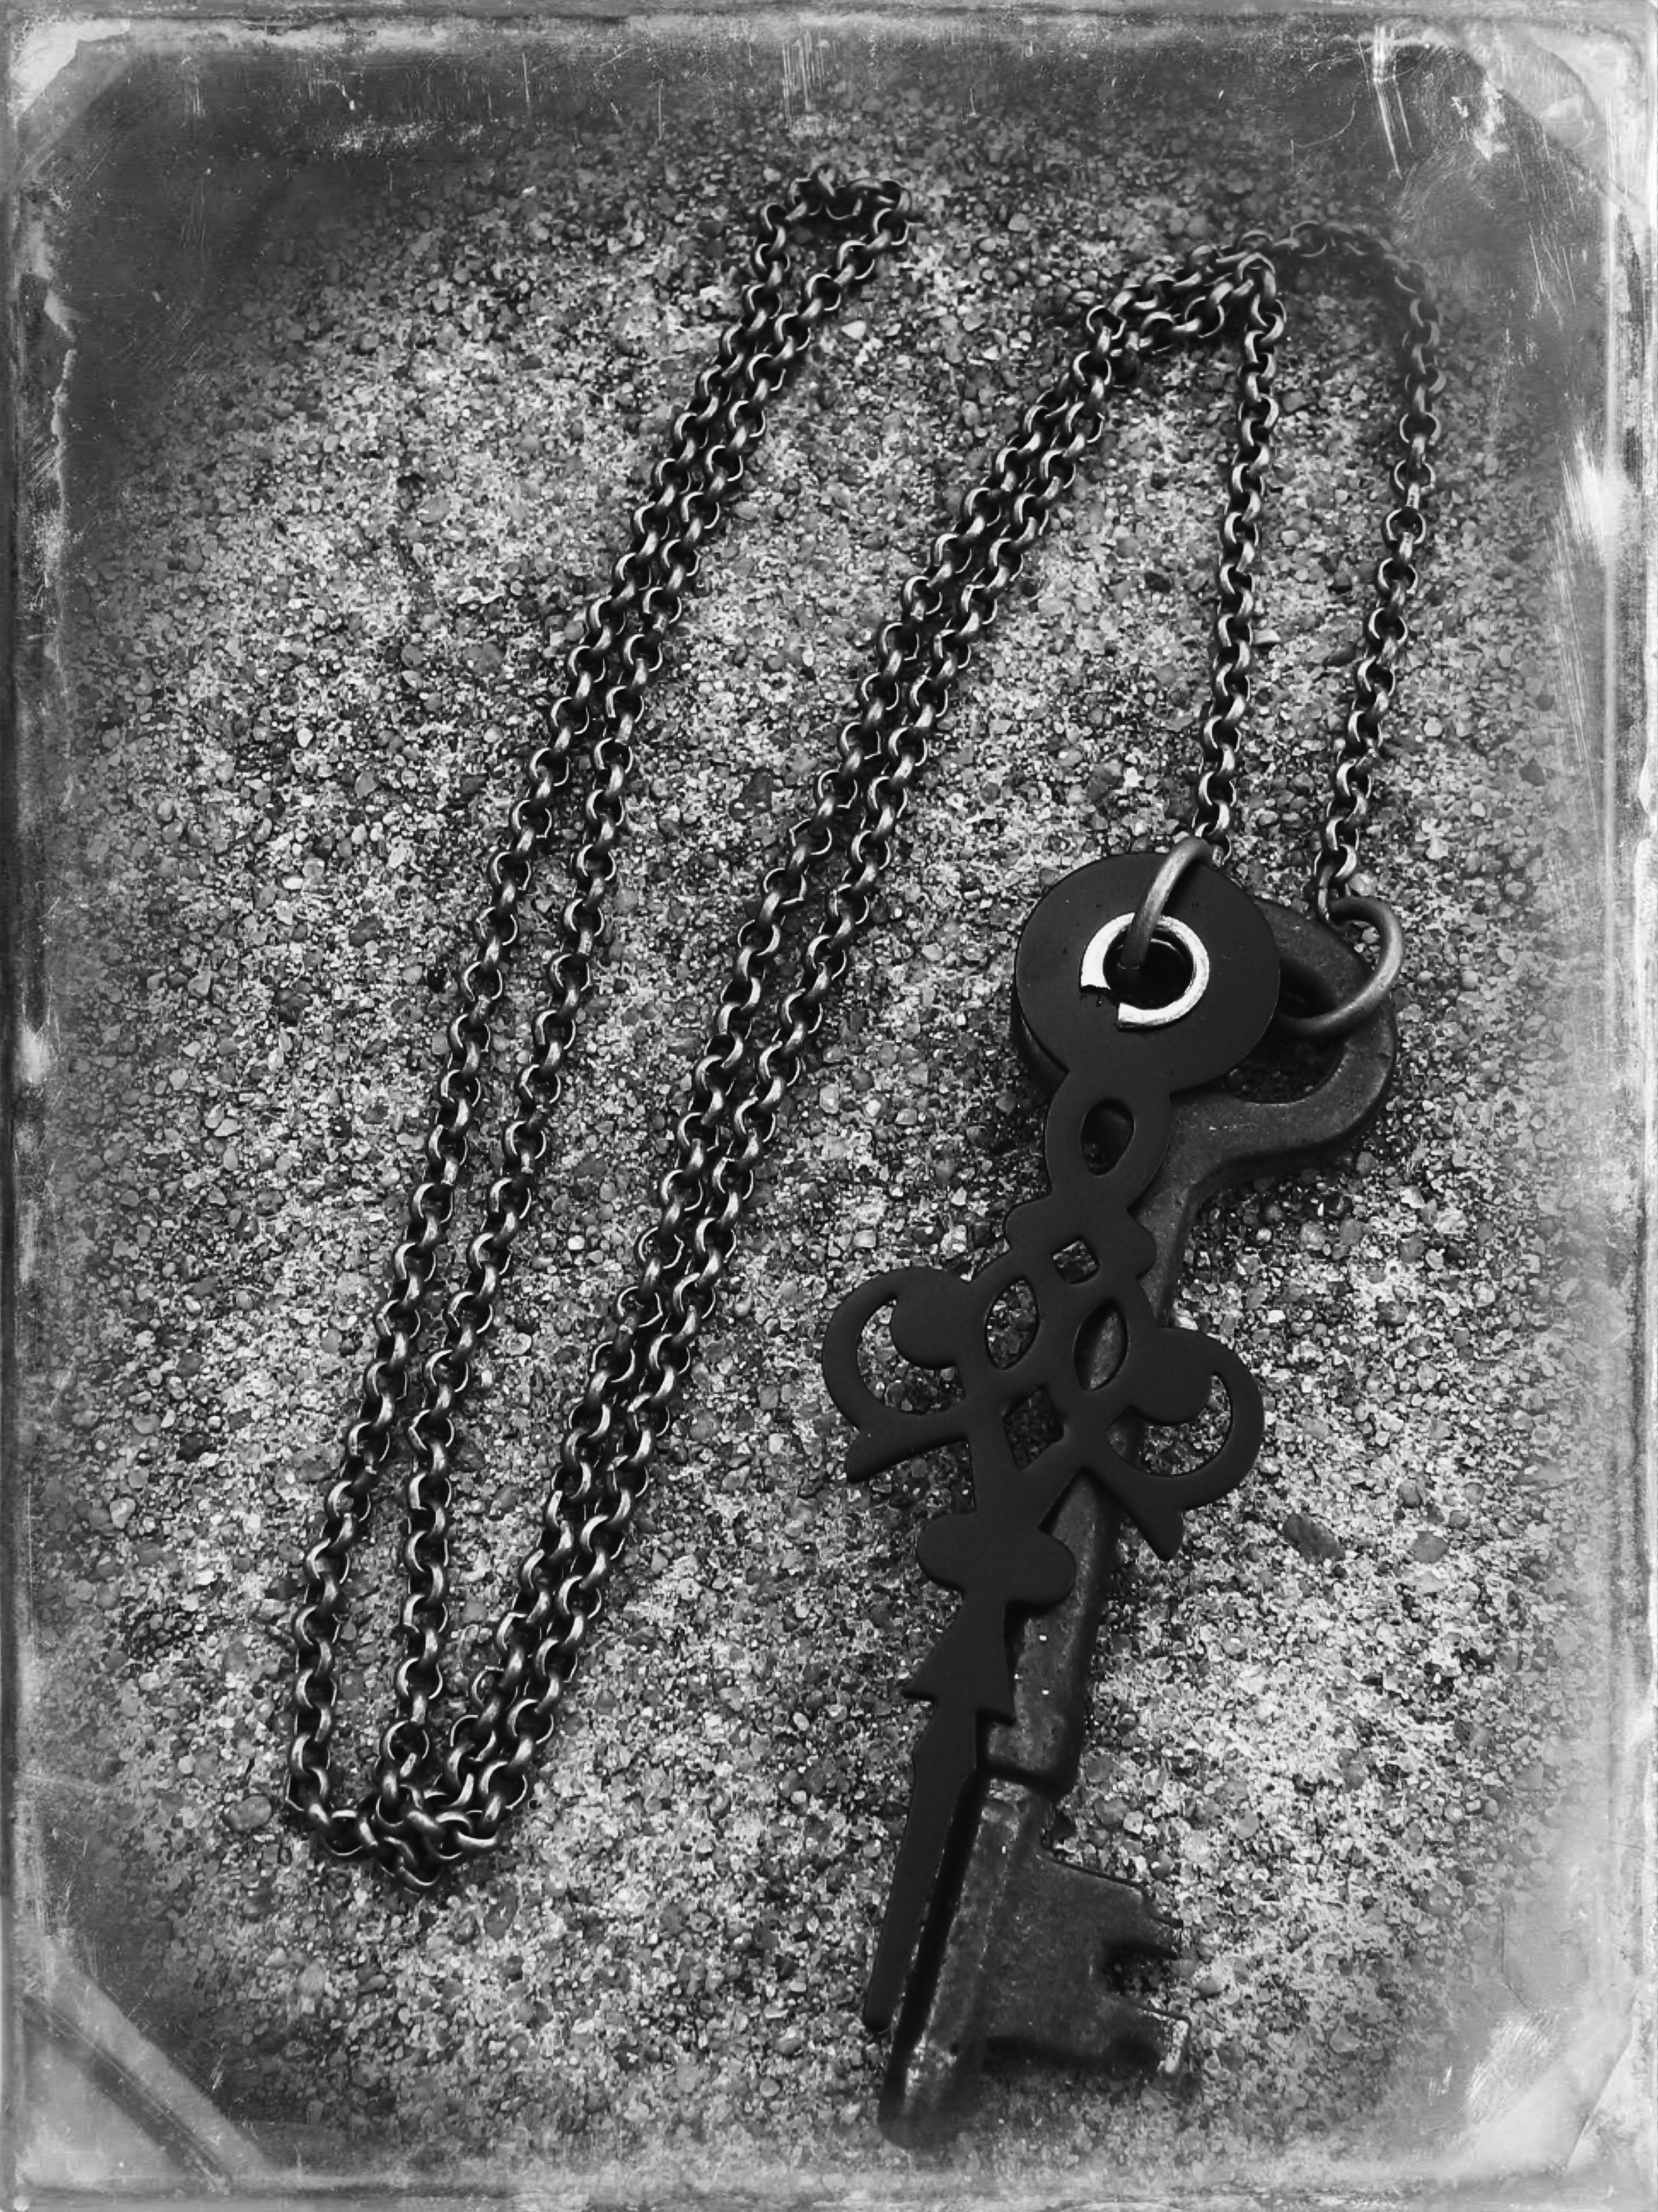
Tick-Tock Skeleton Key Necklace

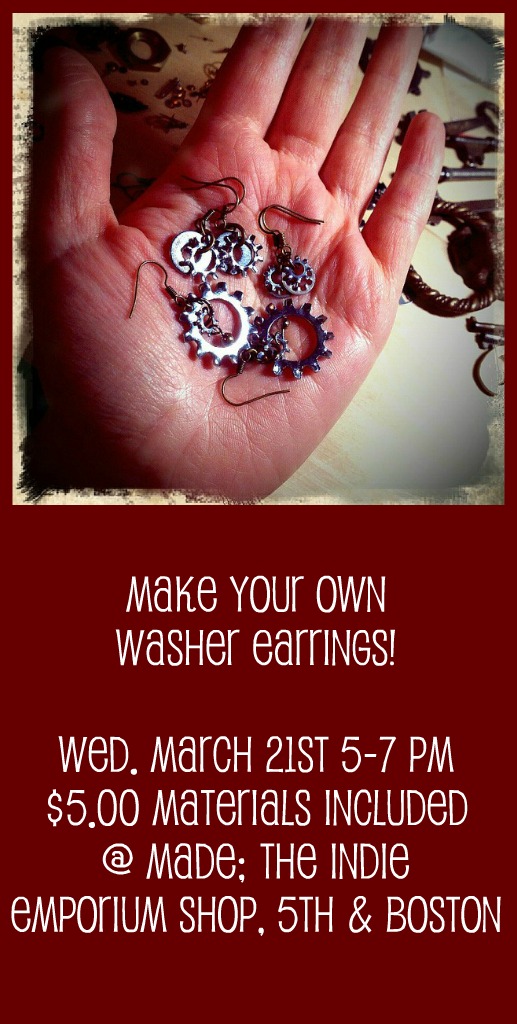
Grandfather Clock Washer Earrings

Sky Captain Medallion

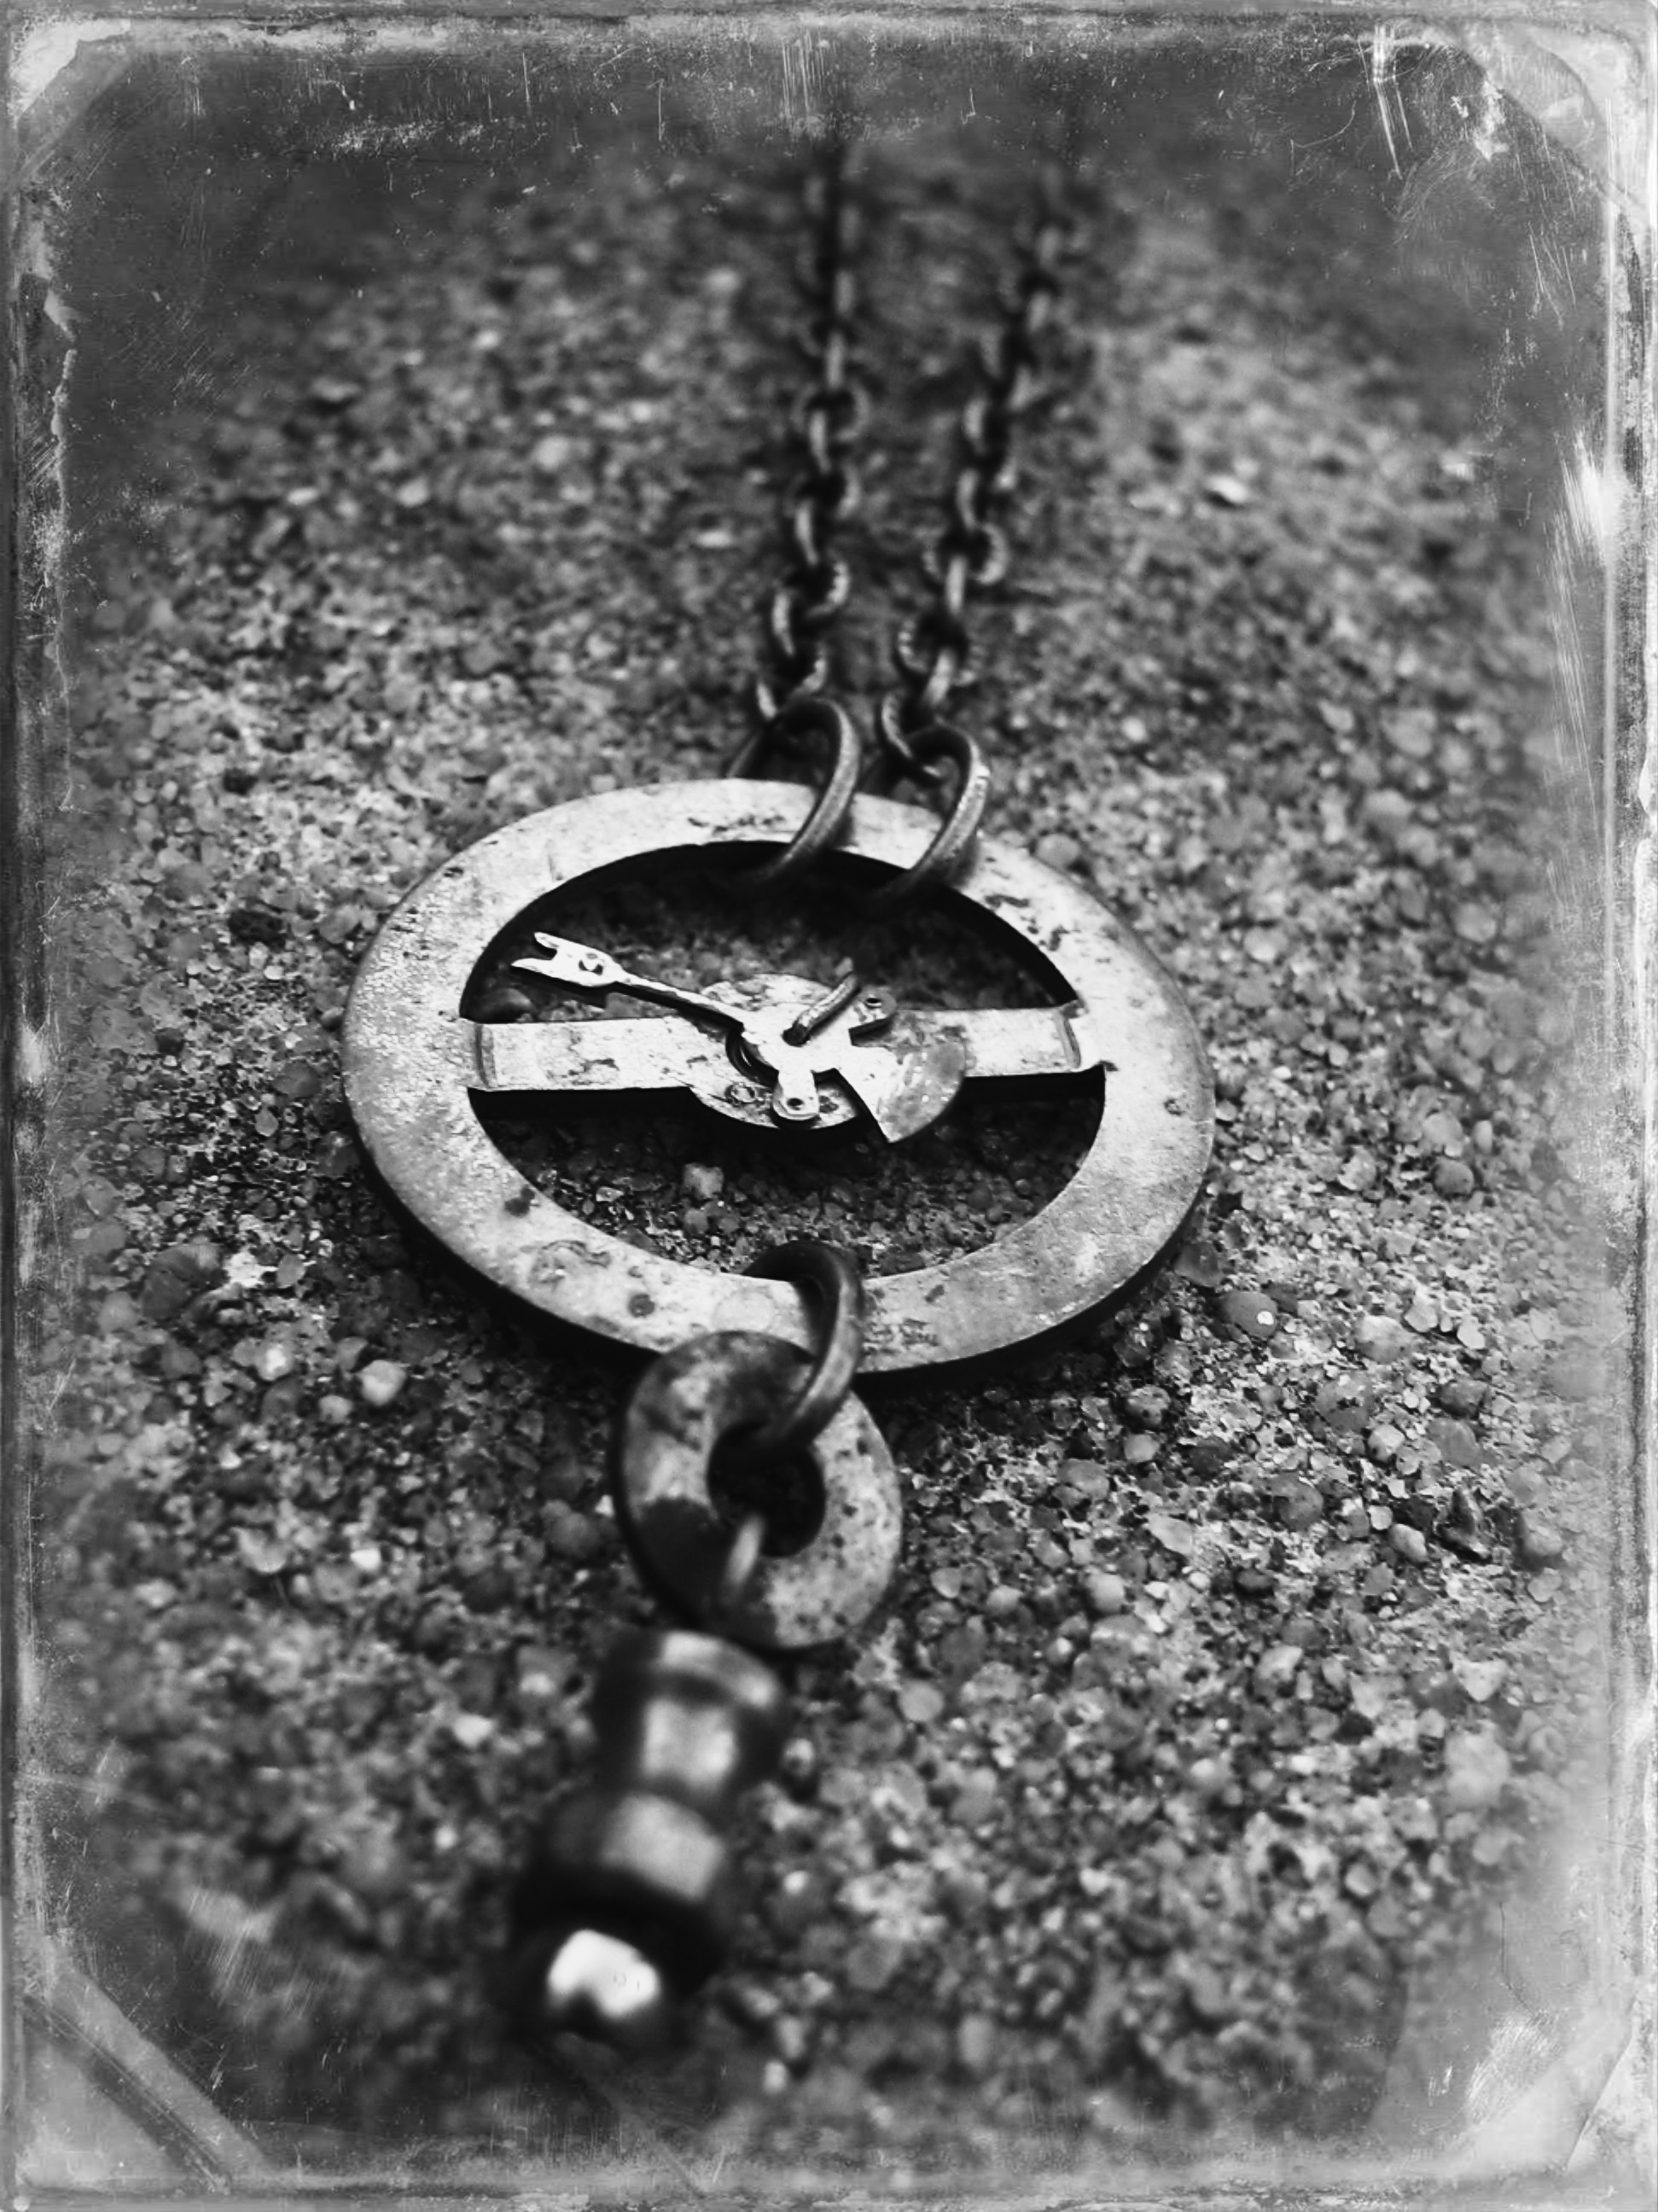
Steampunk Navigator Necklace

DIY Steampunk Stamps

D-I-Y-Samantha Extance1 Comment

Writing letters in this digital age makes it all that more important for letter writing to be more artistic & personal. Give your letters & stationary a steampunk flair with these 2 simple DIY stamps!

Geared Up! Stamp

Materials & Tools:

  • Square block of wood
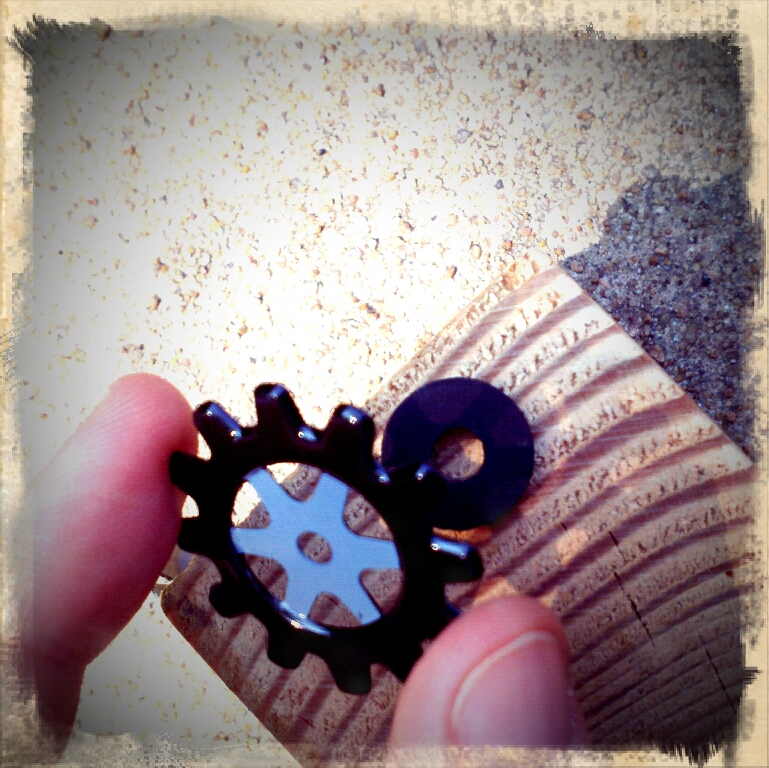
  • 3 gears (mine here are reproduction gears that you can purchase at Michaels--these work best because they are flat)
  • Hammer & 3 nails (the nail heads should be large enough so that they hold the gears in place)
  • 3 rubber washers (should be roughly the same width. See second picture below)

Steps:

1) Arrange your gears on your wooden block. Once you have them arranged as you desire, (using your nail) mark where you will hammer each gear into the wood.

2) Take a gear and place the rubber washer underneath it. Then hammer the gear in place with a nail. Be sure to hammer the nail straight so that the head is not crooked (because it makes stamping a little more difficult). Repeat for the other 2 gears.

3) Begin stamping!

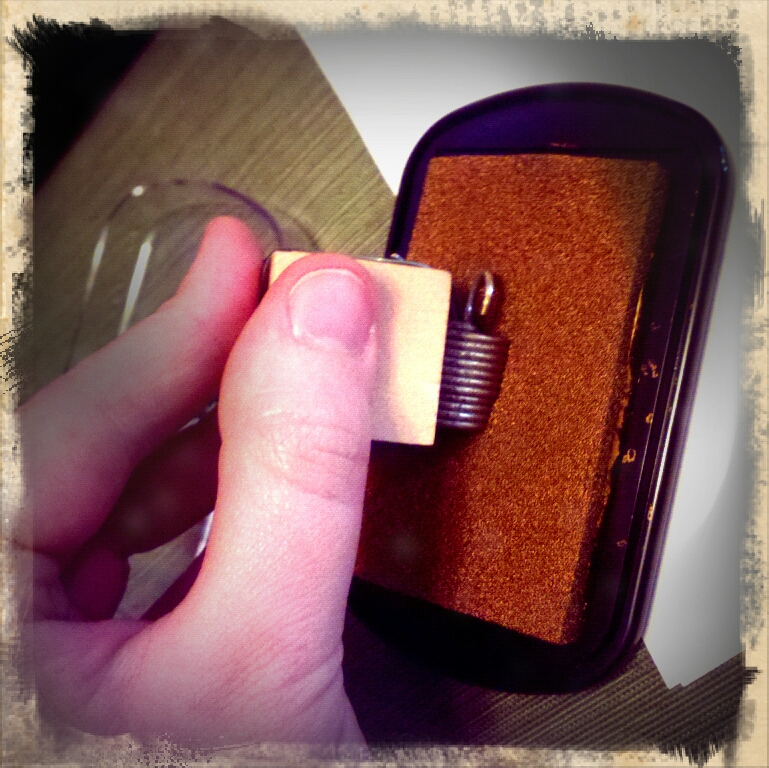
Steampunk Spring Stamp

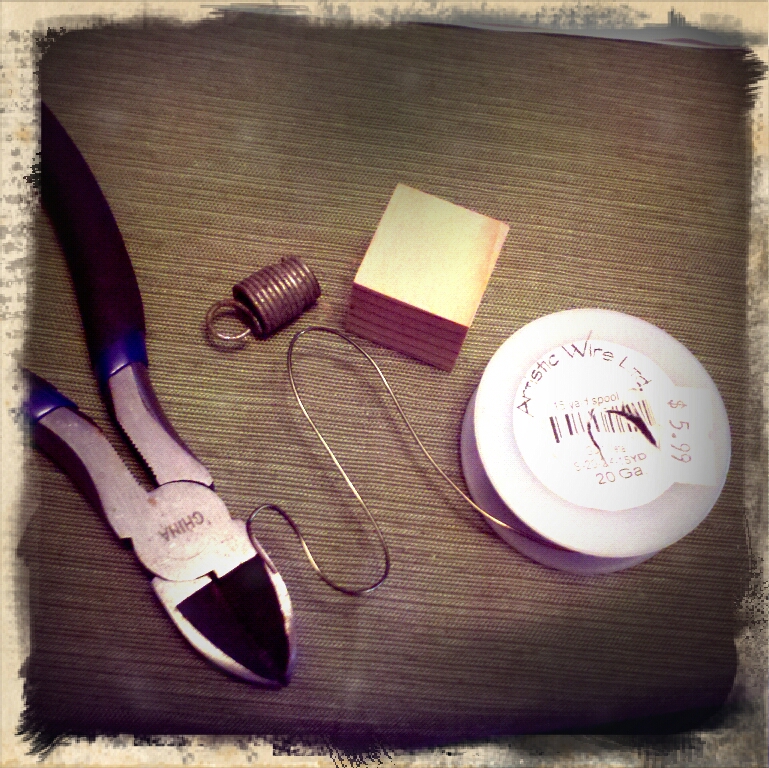
Materials & Tools:

  • Square wood block
  • Wire cutters
  • 20 gauge wire
  • Spring

Steps:

1) Cut a length of wire using your wire cutters (if you do not own a pair of wire cutters, use a pair of toenail clippers). I cut mine about arm's length.

2) Thread the wire through the spring and around your wood block. Pinch the wire tight around the edges of the wood and pull the wire taut through the spring each time. 

3) Once you've wrapped all of the wire around your wood block & through your spring--wrap the loose end of wire to another piece of wire to secure it.

4) Being stamping!As always, Happy making!

D.I.Y. Antique Printer Drawer Jewelry Display

D-I-Y-Samantha Extance1 Comment

I am obsessed with antique printer drawers! They are perfect for displaying jewelry as well as other small bits and bobs you might collect and wish to show off. On Etsy there are several sellers who have upcycled printer drawers for the purpose of jewelry display. Most sellers' prices are steep but of course this depends entirely on the condition of the drawers and the amount of work that converting them requires. I bought all 4 of my drawers for $100 at a local antique shop (each drawer came with a complete set of letterpress letters, numerical signs, punctuation & symbols). If you're local to Tulsa, you should drop by Sidedoor Antiques (located on Harvard Avenue between 15th and 21st street). Be sure to tell William I said hello!

Once you have found your drawer, then comes the hard part--cleaning, decorating, and fitting your drawer with cup hooks. This D.I.Y. is broken down into 3 parts. (Believe me, you won't get it all done in 1 day!).

Part One: Cleaning Your Drawer

This part is the most time consuming. The older your drawer, the chances are the dirtier it is (after all--they do contain letterpress parts that were frequently used and slathered with ink).

Cleaning Supplies:

  • Method All-Purpose Disposable Wipes (Normally I would not suggest disposable anything, if you're like me you use rags for cleaning made from old socks and worn out clothing; however, cleaning each of the drawer's cubbies takes up a ton of rags (more than I had) and I did not want to just spread around dirt and ink--so just this once, use some wipes. Also with wipes, you do not run the risk of over-saturating your drawer with water.)
  • Vacuum cleaner
  • Razor blade
  • Wood polish & rag

Steps:

1) Using your vacuum cleaner, suck any loose dirt, dust, or lint from each cubby.

2) Once you are done, use a razor blade to scrape out the paper lining underneath each individual cubby. If your drawer does not have paper lining, then you can skip this step. If yours does, you should remove it. Each of my drawers had moldy paper lining because it had been wet at some time and not thoroughly dried out. If your drawer does have mold, please take care to cover your mouth and nose with a mask and wear gloves to protect yourself.

3) Once you've scraped away the paper lining, vacuum out the paper. Tweezers can be useful if you have paper that is stuck underneath the wood dividing the cubbies.

4) Wipe each individual cubby with a disposable wipe. Make sure to clean all four sides and the bottom of the drawer's cubby. Also wipe down the sides, bottom,  and back of the drawer.

5) After your drawer has dried a bit, wipe down each cubby and the drawer's back and sides with wood polish.

Part Two: Decorating Your Drawer

These are just a couple of suggestions on how to decorate your drawer! Have fun with it!

1) Paint the cubbies with chalkboard paint (or any other kind of paint you like). Two of mine are chalkboard painted (another obsession)--I have fun writing little messages in each of the cubbies.

2) Line each cubby with cut-outs from old magazines, books, postcards, or vintage fabric scraps using modge podge.

3) Keep it natural and seal your cubbies with modge podge wood sealant for a natural sheen that protects your wood! 

Part Three: Fitting Your Drawer

What is wonderful about converting your own drawer is customization. You can add cup hooks anywhere you wish. The drawer can be mounted on the wall or stand on your vanity table. Decide where you'd like to place your drawer and then begin to measure your drawer's dimensions so that you can fit it with the appropriate hardware.

Supplies You'll Need to Mount Your Drawer on the Wall:

  • flat brackets
  • screws (that fit into your bracket and do no exceed the depth of your drawer's wood)
  • screwdriver or drill
  • awl
  • measuring tape

Supplies You'll Need for a Freestanding Drawer (on the Vanity):

  • L-shaped brackets
  • screws (that fit into your bracket and do not exceed the depth of your drawer's wood)
  • screwdriver or drill
  • awl
  • measuring tape

For both kinds of drawer displays you will need cup hooks (or any other kind of hook you desire). Cup hooks are the easiest. The size depends entirely on your drawers dimensions.

Steps:

1) Measure your drawer's dimensions. Start first with its width (A) and height (B). Next measure its depth (C) and the width and height of each cubby (D). Not all of your cubbies are the same width and height so be sure to make note of that. Record each of your measurements.

2) Count how many cubbies your drawer has and record the number along with your other measurements. For the printer drawer I use as display for my business I only put one cup hook per cubby so that each pair of earrings or bracelet could be more easily seen. For my personal printer drawer (the one I use to hold and display all of my jewelry that I wear) I put 2 cup hooks per cubby where I could so that the drawer could increase its holding capacity. This is a choice that's up to you.

3) Using your screws and screwdriver, attach your brackets to the back of your printer drawer. I recommend attaching the bracket to a thicker part of your drawer for more stability. Obviously, if you are mounting your drawer on the wall--keep in mind how it will hang and likewise, if you are standing it up on your vanity, how it will stand when your brackets are in place. It's best to mark the spots where you'll want to screw in your brackets with pencil first before drilling. (You can also lean your drawer up against the wall if your prefer, as is pictured in BlueBirdHeaven's photo above).

4) Once your brackets are in place, use your awl and start a hole in each individual cubby and then screw in your cup hook. Repeat (many, many times). You may also want to use a pair of flat nosed pliers to help you screw in the cup hook.

Part Four: Enjoy!

Have fun putting all of your jewelry & tiny bric-a-brac in your new display! As always, Happy Making!

D.I.Y. Steampunk Flower Vase

D-I-Y-Samantha Extance1 Comment

Here is a simple & elegant way to steampunk your dinner table or wedding reception--a clock part vase!

Materials Needed: Bud vase (or any glass or metal vase that fits inside your clock's mechanism), flowers & clock (or machine) part.

1) Fit your bud vase inside of your clock mechanism. (If you want to conceal the vase, choose a metal one that blends in with your clock part's metal. Also for another variation, you can use test tubes too & fix them throughout your clock's mechanisms for a wilder, more overgrown look). Fill with water.

2) Arrange your flowers!

And for a completely different look for your wedding or dinner table, you can either make paper flowers or purchase beautiful fake bouquets and splay them across your clock mechanism.

As always, Happy Making!


D.I.Y. Steampunk Teddy Bear

D-I-Y-Samantha Extance1 Comment

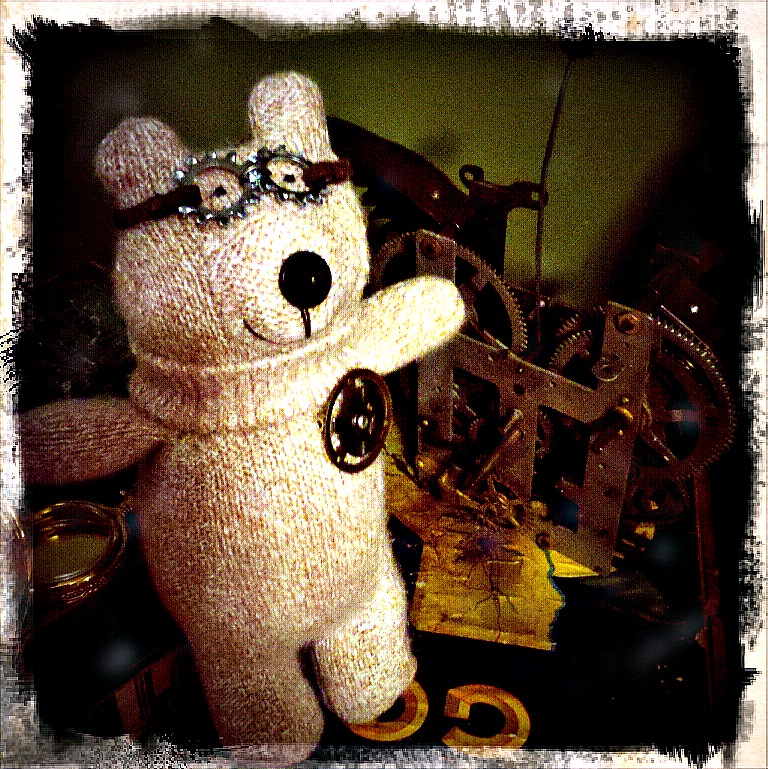
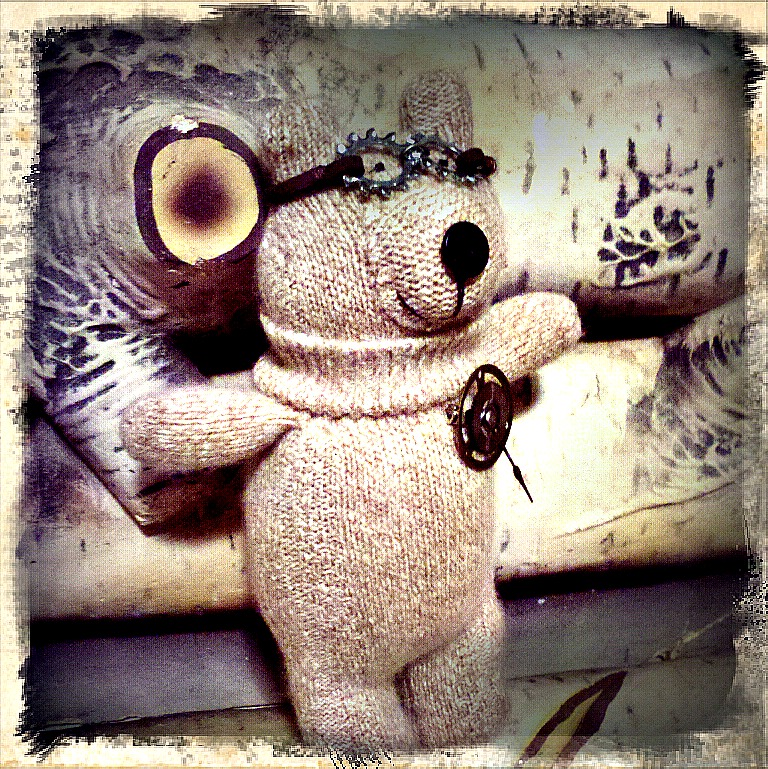
I made a friend today, quite literally! His name is Tinker Bear. My favorite part of being a kid was playing with stuffed animals and Barbie dolls--creating worlds for them and then getting lost in those worlds. Now that I'm grown up--though not really, ask anyone--I am a still a kid in many ways--I not only invent worlds, but the creatures that inhabit them. Here is a D.I.Y. on how to steampunk your teddy bear. As always, happy crafting!

Materials & Tools You Will Need:

Flat nosed pliers

1 pair of socks (your choice of color and texture)

Stuffing

Needle & thread (ideally you want black, brown, and whatever color thread matches your sock)

Brown or black embroidery thread (or another kind of heavy thread)

Scissors

2 small black seed beads (for the eyes)

1 button (for the nose)

1 pin back

2 clock cogs (or if you prefer, you can substitute 1 clock cog for a watch face or watch plate)

1 game spinner or clock hand

1 brad

Leather chord

2 lock washers

1 jump ring

Part One: To Make Your Teddy Bear:

You can certainly steampunk a teddy bear that you already have (& love) or you can make your own. I made mine according to a pattern in Daniel’s Stray Sock Sewing: Making One-of-a-Kind Creatures from Socks—a book I not only love, but highly recommend. There are ample pictures to guide you through the various stitches and steps and the instructions are easy to follow, particularly if you are new to sewing. The Teddy Bear pattern is on pages 122-131. Go buy it. It’s an amazing book and you will spend numerous hours fashioning things from the stray socks lying around your house.  

For this pattern, you need the following: 1 pair of socks (your choice of color and texture); Stuffing; Needle & thread (ideally you want black, brown, and whatever color thread matches your sock); Brown or black embroidery thread (or another kind of heavy thread); Scissors; 2 small black seed beads (for the eyes); 1 button (for the nose)

Alterations I Made to Daniel’s Pattern:

  • I skipped Step 26 because I think belly buttons on bears look weird.
  • I used a thicker sock (a cashmere woven one)
  • I slightly altered Step 25—while I did use the sock’s cuff around the neck, instead of rolling the sock cuff I fashioned it to look more like a turtleneck collar (by rolling under the rough edge)

Part Two: To Make Your Pin:

1)      Layer each of your elements with your pin at the back. My layers are as follows (from back to front): pin back, larger clock cog, clock hand/game spinner, smaller clock cog, and brad. If you are substituting one clock cog for a watch face or plate, place it where the smaller clock cog would be.

2)      Once you have your layers in place, close your brad by opening its ends. Squeeze the brad tightly—using your flat nosed pliers to ensure extra security.

3)      Pin to your bear!

Part Three: To Make Your Goggles:

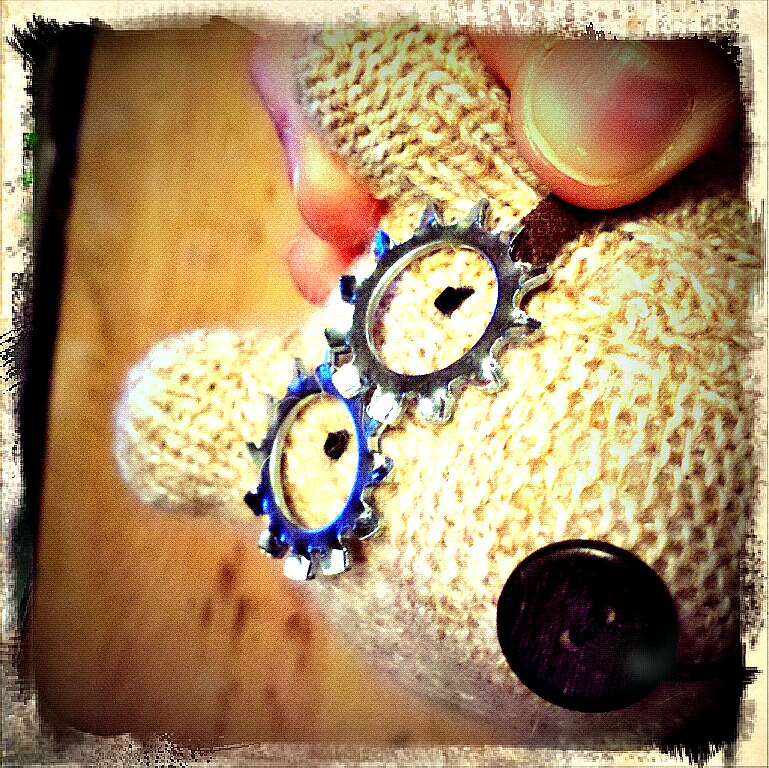
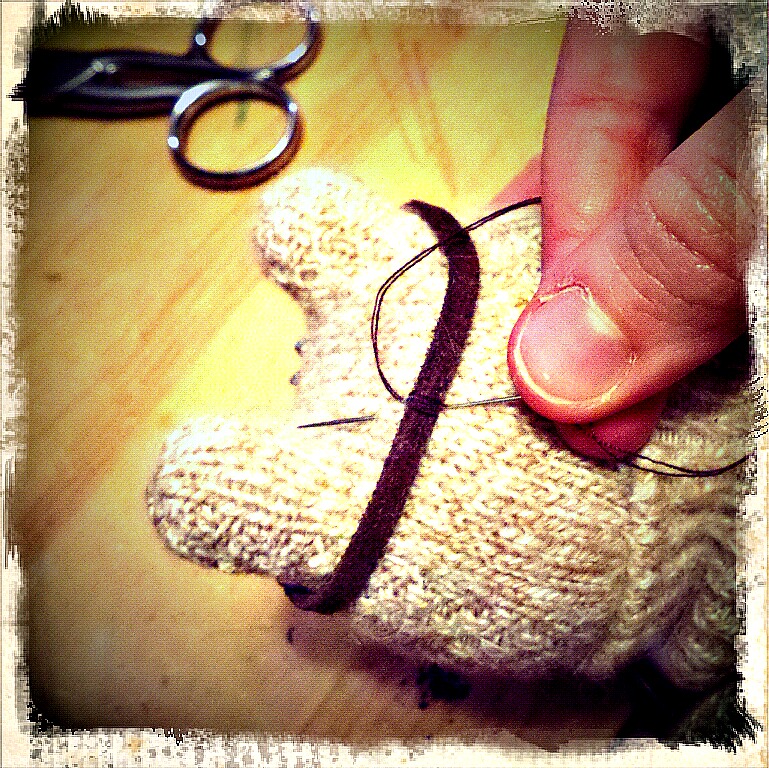
1)      Take your lock washers and place them over your bear’s eyes. Once you’re satisfied with their placement. Measure the amount of leather chord you will need to fit around your teddy bear’s head. Give yourself an extra ¼ inch to sew loops around each of the lock washers.

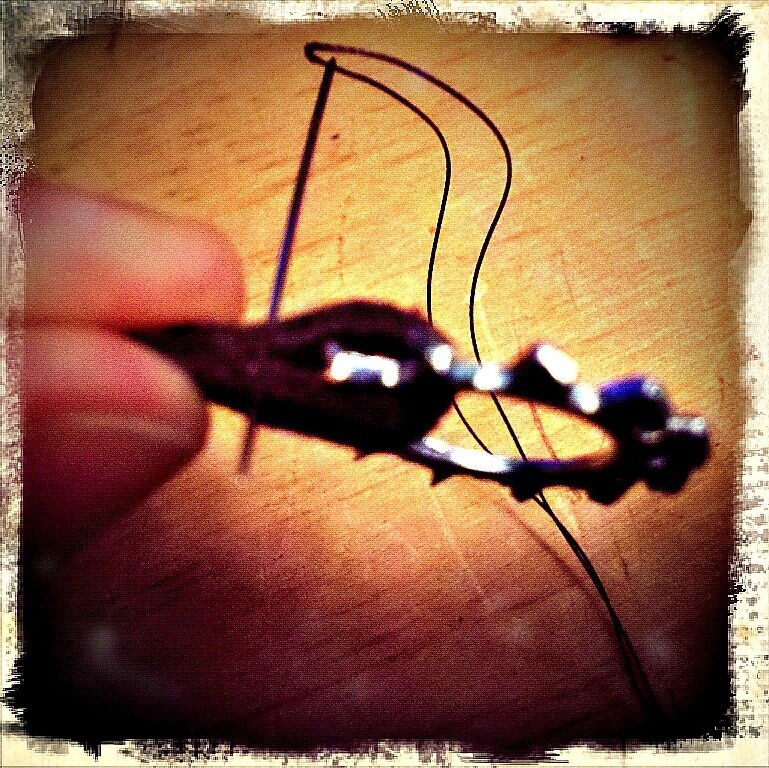
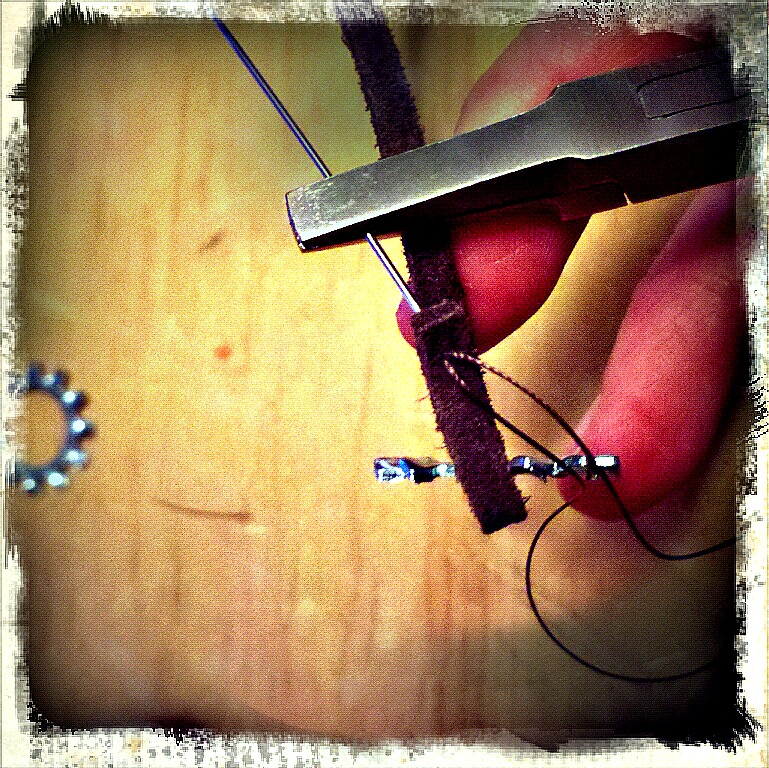
2)      Next, take one of your lock washers and loop your leather chord around it. Stitch in place. Stitching through leather can be difficult. If you are having trouble, you can make a small starter hole in the chord using an awl or you can use your flat nosed pliers to pull the needle through the leather. In the latter case, be sure not to place the pliers around the eye of your pin otherwise it will break or close shut.

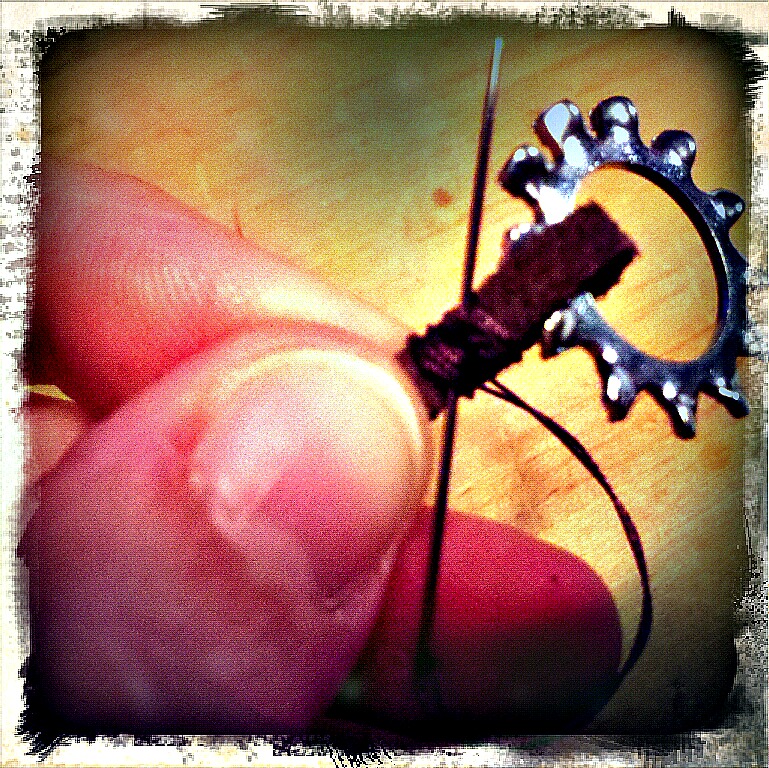
Once you have stitched once through both pieces of your leather chord, wrap your thread around the chord to hold it together. Once you have wrapped it approximately 5-6 times, knot it and cut off any excess thread.

Repeat for the other lock washer, taking care to first measure the leather chord around your teddy bear’s head.

3)      Connect your lock washers together with your jump ring using your flat nosed pliers. If you do not have a jump ring or flat nosed pliers, you can either stitch the lock washers together (using embroidery thread or another kind of heaving sewing thread) or use of a bit of wire and wrap them together.

4)      Place your goggles on your teddy bear’s head and stitch the leather chord in place (using your brown thread) for extra security.

5)      And last, and most important, start adventuring!

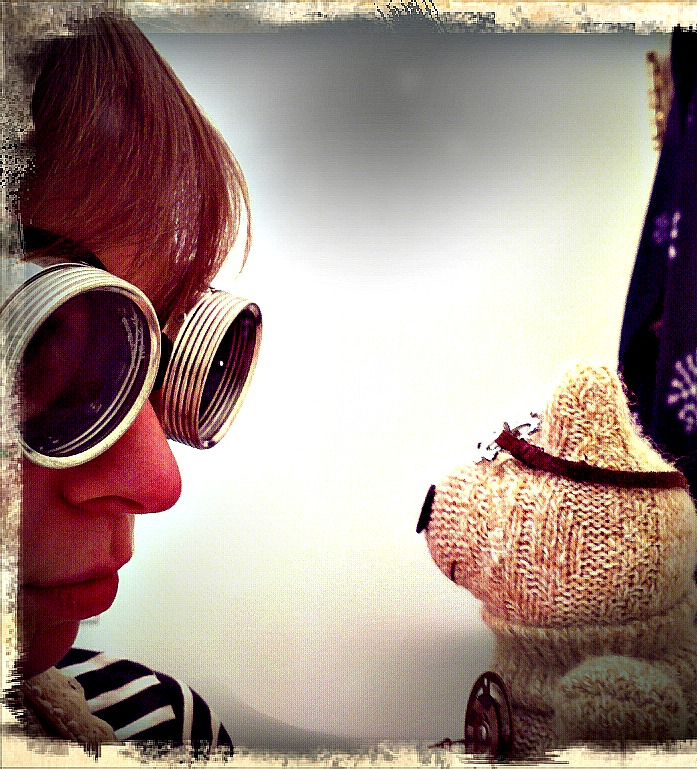
Shall we go on an adventure, Tinker Bear? “Yes!” Well away we go—perhaps our airship will bump into yours along the way!

P.S. If you are looking for other friends to "make" before you go off on your adventure--check out Sarah Skeate & Nicola Tedman's Steampunk Softies: Scientifically Minded Dolls from a Past that Never Was! Craftzine shared a project from their book--you can learn how to make Marveletta, a very Steampunk Lady!