Bohemian Romance Jewelry

2 Holiday Shows this Weekend

UncategorizedSamantha ExtanceComment

I'll be setting up a small table tomorrow, Black Friday, at Made; the Indie Emporium shop (located at 5th & Boston) from 3-8pm. You'll receive 20% off of your purchase in person at the shop or also online (just use my Etsy coupon code, "maketulsa" when you check out). In person, you do receive a little gift too! So stop on by, maybe grab a cocoa from Mod's and admire the beautiful holiday decorations of the Deco District before ambling into the shop! If, however, come Friday you're still in a turkey stupor drop on by Guthrie Green's Holiday Market! I'll be setting up my booth. The market is open from 4-7pm! With every purchase you'll still receive that free gift!

Hope to see you this weekend and I hope all of you had a lovely Thanksgiving!


DIY Steampunk Gift Wrap

D-I-Y-Samantha Extance1 Comment

There is nothing more wonderful than the sound of crinkling wrapping paper, the sharp tweet from the metal hinge of your scissors, and last the slide and crack of tape being measured & broken. I love gift wrapping (if you couldn't tell from my somewhat silly/poetic description above)! To me the wrapping is just as much of  a gift as the present itself. One of my favorite holiday pastimes--up there with baking cookies with all the lovely ladies in my family--I just pop in some holiday tunes, pile up all the treasures I have for my loved ones, (imbibe a little jolliness) and wrap away. Here are a few DIYS and ideas that are perfect (for more than  just your holiday gift wrapping) for that steampunker in your life! Happy Wrapping!
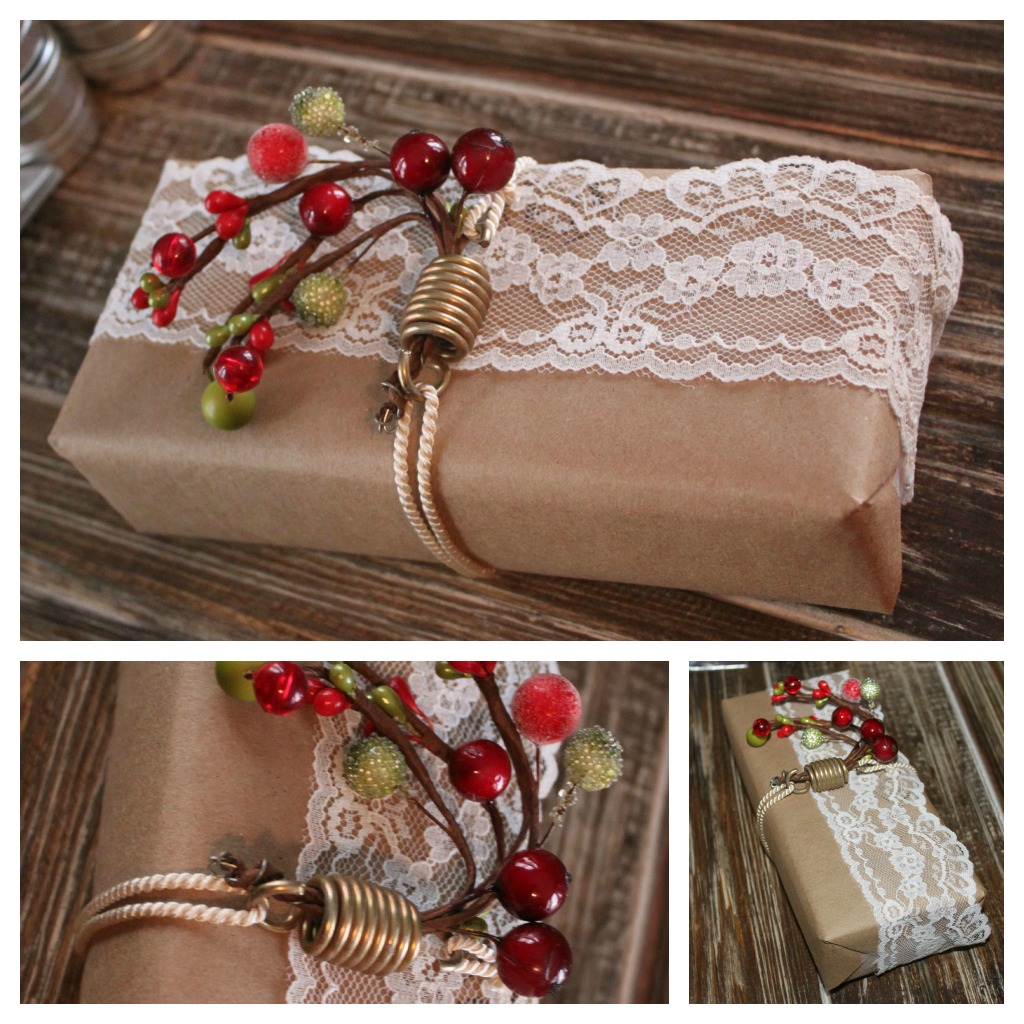
Jolly Spring Wrapping:(Materials: Wrapping paper, lace, ribbon, a spring, and a twig of berries; Tools: Scissors & tape) Wrap your present in your paper, taping it up. Next measure the amount of lace you'll need to fix around your box and cut. Then tape in place. Next thread your twig of berries through your spring and arrange your berries decoratively. And last, attach your spring to the top of your box with ribbon. (I made a knot in the back to hide it).

Frilly Girl Wrapping: (Materials: lace, thick ribbon, and mini doll's purse or coin purse; Tools: Scissors & tape) First, measure your lace and cut the length you need. Then tape it in place. Next measure your ribbon (remember to leave yourself room for a bow) and cut. Tie your ribbon over the lace. Before making your knot thread your purse through one of the ribbon ends. Then make your knot & bow!
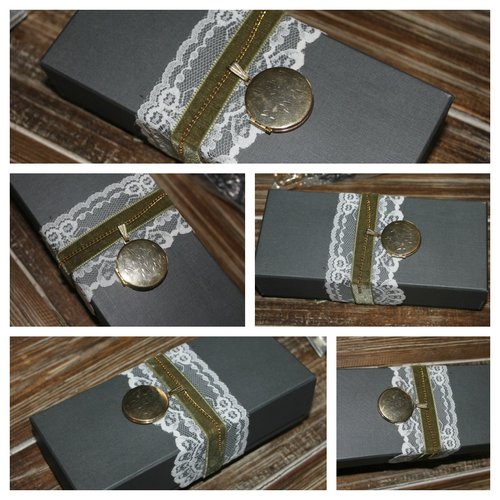
Sweetheart Locket Wrapping: (Materials: Lace, ribbon, a small safety pin and a locket on its chain; Tools: Scissors & tape) First, measure your lace and cut the length you need. Then tape it in place. Next measure your ribbon (remember to leave yourself room for a knot) and cut. Tie your ribbon over the lace and hide the knot in the back. Next affix your locket in place on the top. Flip over to the back (making sure not to lose the locket's place) and safety pin the locket in place. To do so thread through both side of your chain and then through both your lace and ribbon. Tuck any excess chain behind the lace (tape in place if desired).

My favorite aspect of this wrapping is that it's both a tag (if you have it engraved with your loved one's name or initials) and a present itself!
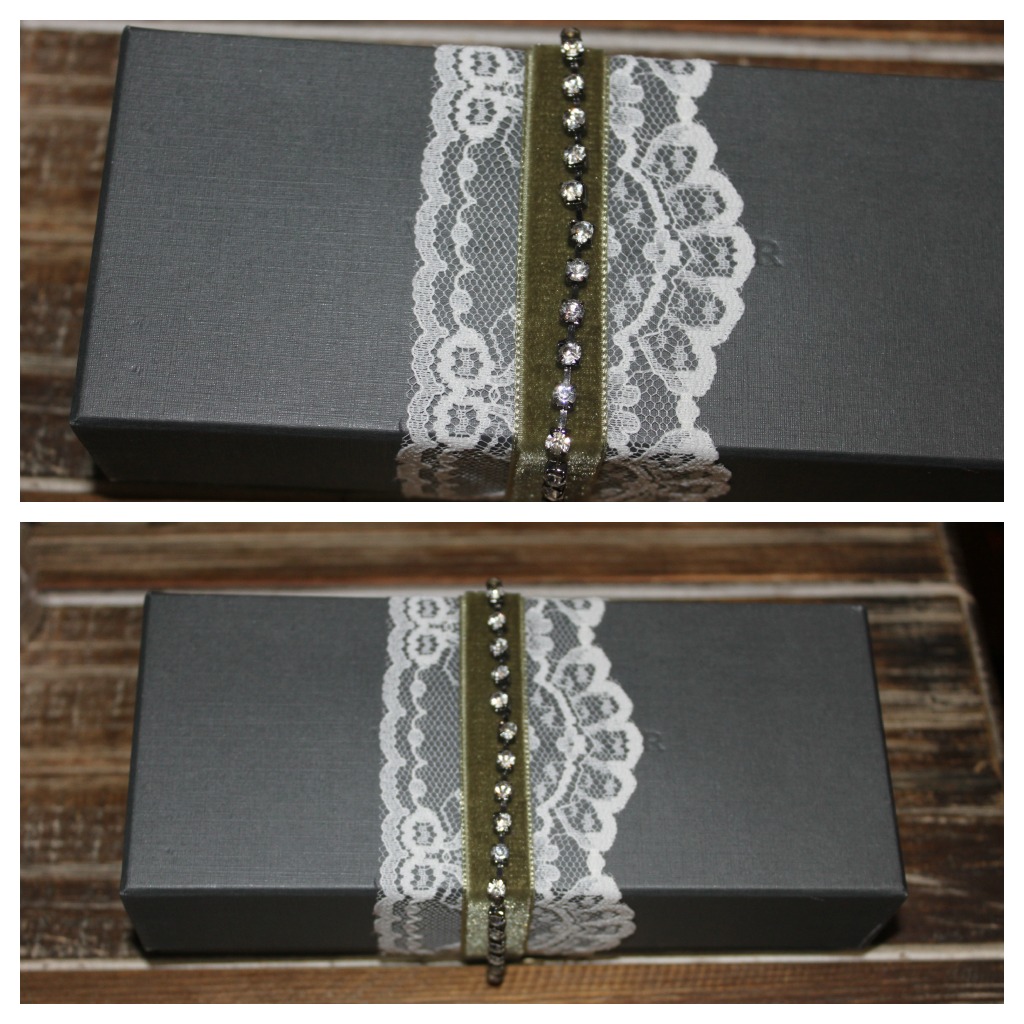
Sweetheart Bracelet Wrapping: (Materials: Lace, ribbon, a small safety pin--maybe 2, and a bracelet; Tools: Scissors & tape) First, measure your lace and cut the length you need. Then tape it in place. Next measure your ribbon (remember to leave yourself room for a knot) and cut. Tie your ribbon over the lace and hide the knot in the back. Next affix your bracelet in place on the top. Flip over to the back (making sure not to lose the bracelet's place) and safety pin in place. To do so thread one safety pin through one end of your bracelet and then through both your lace and ribbon. Repeat for the other side. (If your bracelet fits around your present, simply close shut as you would around your wrist but I'd advise still safety pinning in the back for extra security).

My favorite aspect of this wrapping is that it's also a present itself!

Flower & Spring Wrapping: (Materials: Ribbon or lace ribbon like I used, a fake flower, and a spring ; Tools: Scissors & tape) First, thread your flower through your spring. Next measure your lace ribbon and cut the length you need. Remember to leave yourself room to tie a bow and also tie onto your spring. After you've finished cutting, tie your lace ribbon onto the spring and then around your box. Make a big bow on the front!
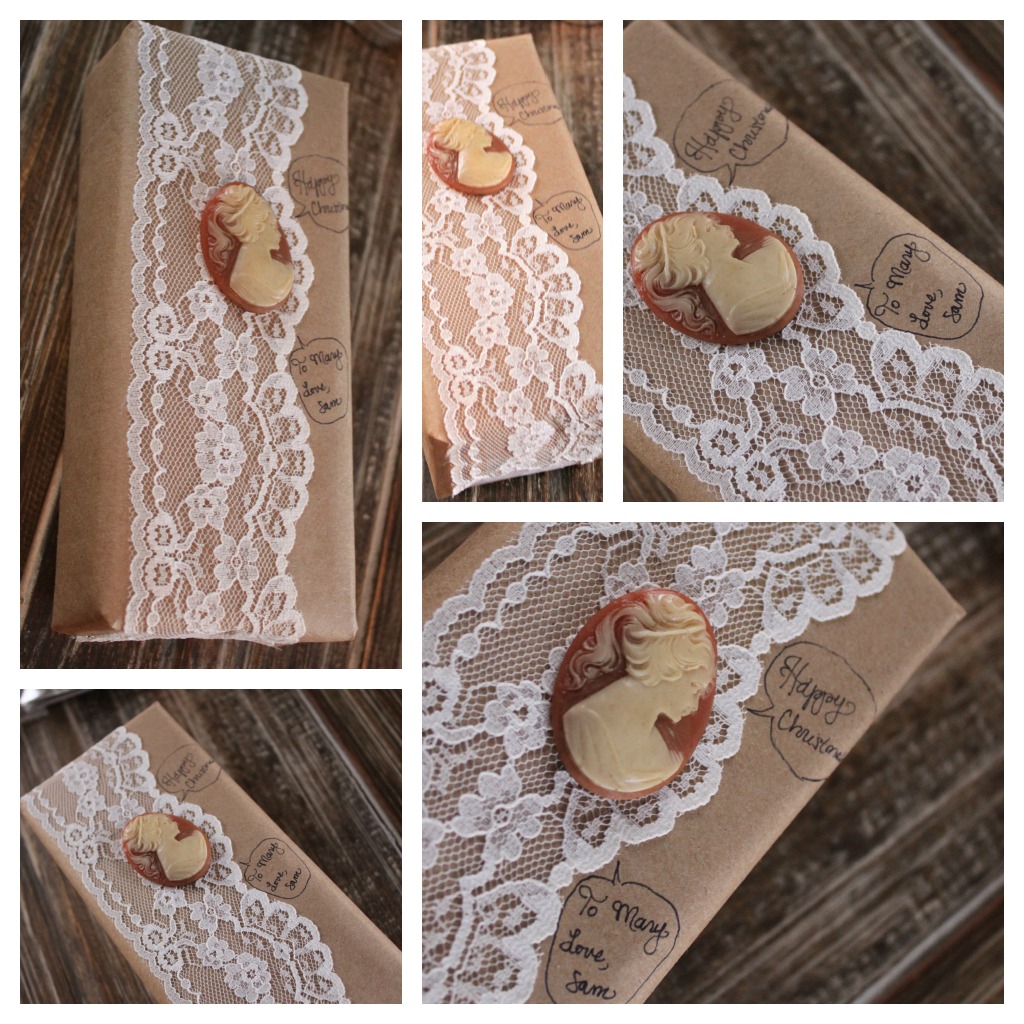
Cameo Comic Bubble Wrapping: (Materials: Lace, wrapping paper, tacky glue, plastic or cheap reproduction cameo, and a pen ; Tools: Scissors & tape) Wrap your present. Next measure the amount of lace you'll need to fix around your box and cut. Then tape in place. Using tacky glue (or any kind of all-purpose glue), affix your cameo onto the top of your present. Last, write your holiday message and/or tag onto the paper and draw a comic book/graphic novel style word bubble on your paper.

I love this gift wrap because you can really personalize it.
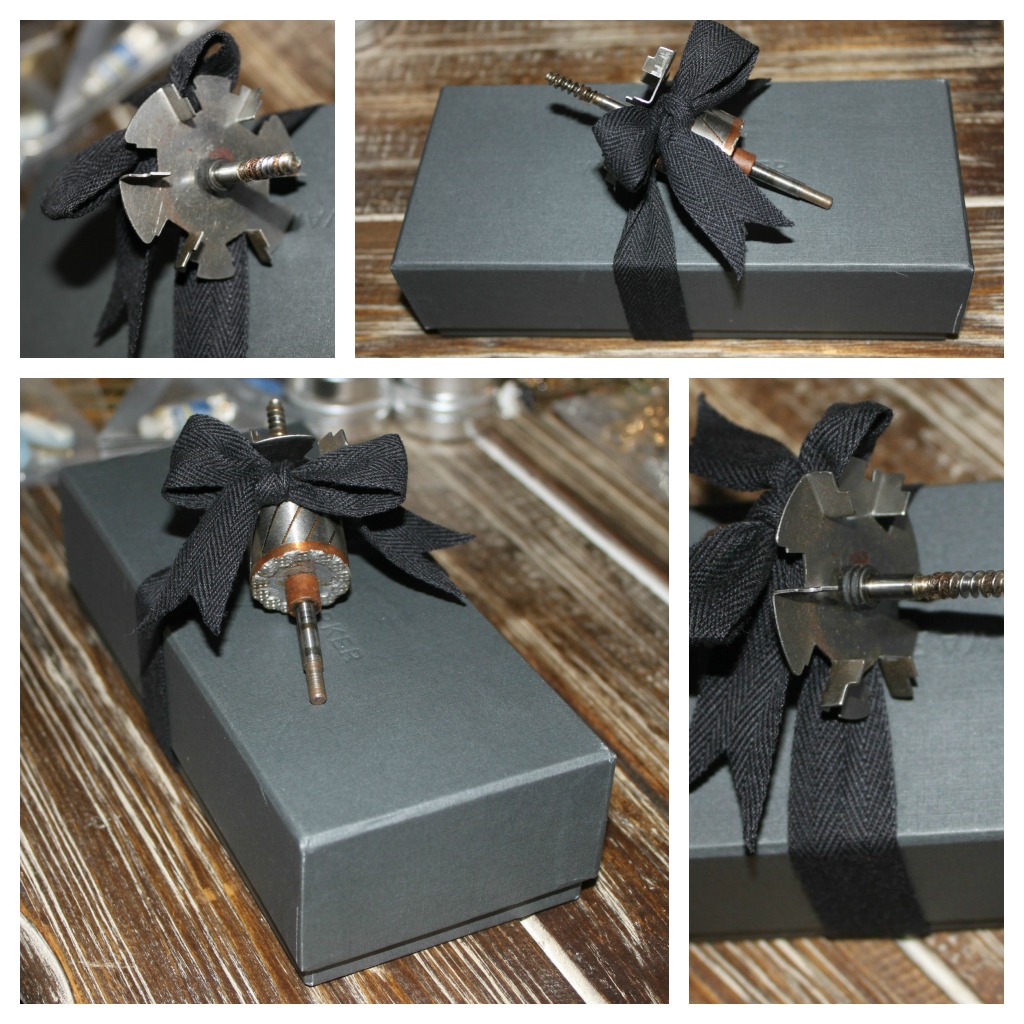
Clock Part Wrapping: (Materials: Ribbon and clock part/ or gear ; Tools: Scissors) Measure the amount of ribbon you'll need to fix around both your box and clock part. Remember to leave room for a bow and an extra knot. Cut. (Also, make your ribbon prettier by cutting an upside down V into each of the ends). Tie around ribbon around your box. Next, place your clock part on top and tie your ribbon around it. Knot. Then make a bow.

This wrapping is really great for guys, gear enthusiasts, tinker-types, or those friends who prefer a more gender neutral wrapped gift. I used a clock part that was big and bulky but you can simplify this wrapping idea by using a clock gear or other machine part.

Key to Wonderland Wrapping: (Materials: Lace, wrapping paper, and snowflake skeleton key ornament; Tools: Scissors & tape) Wrap your present. Next measure the amount of lace you'll need to fix around your box and cut. Then tape in place. Last, hook your snowflake skeleton key ornament through the lace (or if you prefer or are traveling with your wrapped gifts, safety pin it in place). I will be posting a DIY on how to make your own snowflake skeleton key tree ornament within the next week so stay tuned!

What I love about this wrapping is that it's also a present itself--you can take the key off your package and hang it on the tree!
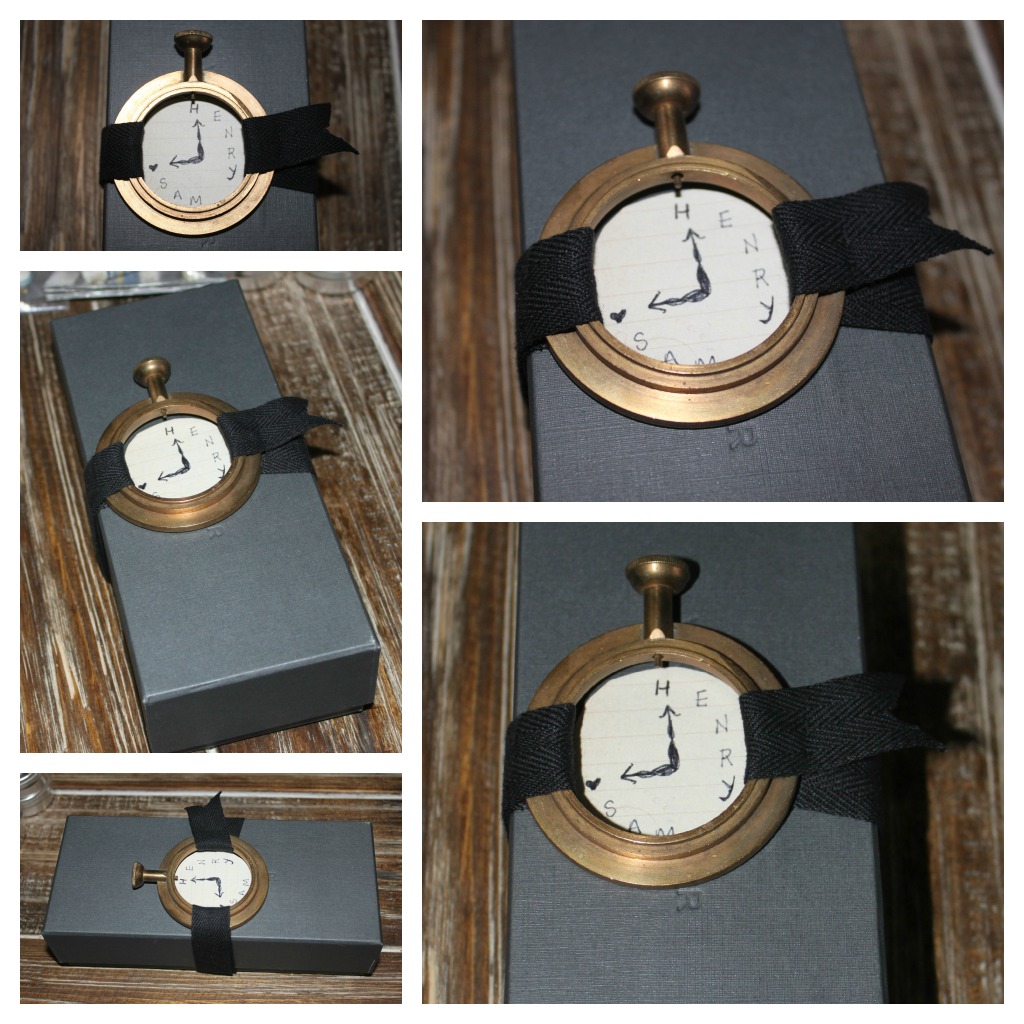
Pocket Watch Wrapping: (Materials: Wrapping paper, ribbon, and a pocket watch frame; Tools: Scissors, needle & thread--thread should match the color of your ribbon, a pen & tape) Wrap your present. Measure the amount of ribbon you'll need to fix around both your box and pocket watch frame (on both sides). Remember to leave room for a a length of ribbon to hang off (pictured on the far right) and to loop around to the back (on the opposite side of the pocket watch frame which has ribbon hanging off the side). Cut. (Make your ribbon prettier by cutting an upside down V into each of the ends). Now loop your ribbon around one side of the pocket watch frame and stitch in place. Leave a little ribbon hanging off to the side decoratively (pictured right). The decorative ribbon should be on top.

The ribbon looped around toward the bottom will be tied around the box and looped through the opposite side of  pocket watch frame. Pull tight and then bring the rest of the ribbon to the back. Flip over your present, and stitch the remaining length of ribbon in place. Cut off any excess. (You can also choose to tie the ribbon in the back but it often makes the frame look funny in the front which is why I suggest stitching it instead).

Last, write your holiday message inside the pocket watch frame on your wrapping paper.
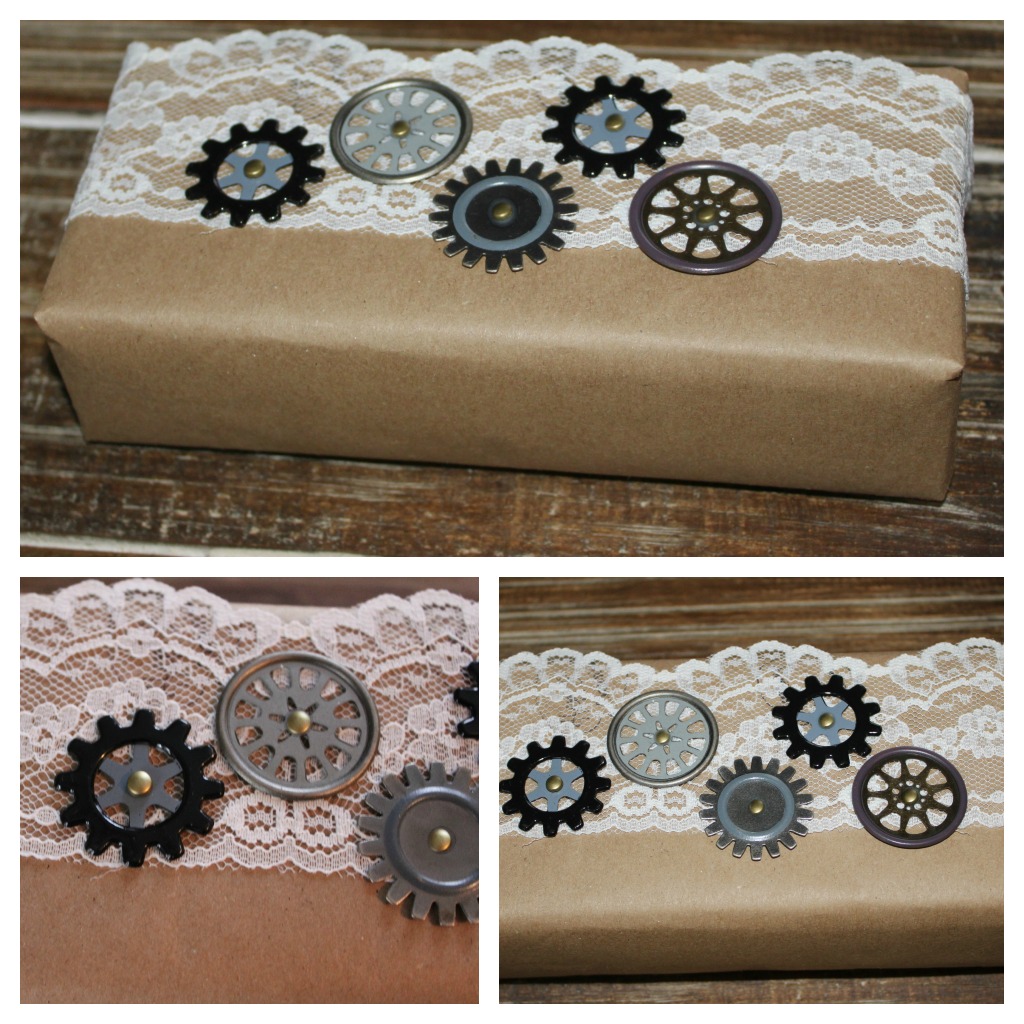
Gears & Lace Wrapping: (Materials: Lace, reproduction or real gears, and brads; Tools: Scissors & tape) Wrap your present. Next, measure your lace and cut the length you need. Then place your gears decoratively on your lace. Once you're happy with their positioning, attach them using a brad. Thread both the gear and the lace onto the brad and pull the brad closed. Repeat with your other gears. Once you've finished, tape your lace in place.

This is by far the easiest and cheapest gift wrap (if you purchase reproduction gears at your local craft store or Michaels).

Steampunk Stamp Wrapping Paper: (Materials: Plain wrapping paper or even recycled paper grocery bags which is what I use, stamp ink in holiday colors, and steampunk stamp; Tools: Scissors and tape) Lay out your paper. Load your stamp with ink and pound away! Create patterns (using a variety of stamps) or just repeat one stamp over & over. If you feel really ambitious you can even highlight the stamp after it's dried by coloring in the image with colored pencil or sketching in the negative space.

Also, you can create steampunk holiday gift tags with stamps--you'll need manilla shipping labels, steampunk stamps, and stamp ink. I purchased my stamps from 123stitch.com! Merry Wrapping to You all! Hope this post gave you lots of ideas! Stay tuned for more Christmas & Holiday Steampunk DIYs over the next month!
Style me Steampunk

FashionSamantha Extance1 Comment

I love steampunk fashion & accessories–in fact, I love these 2 things so much that I cannot relegate them solely to cons, shows, or Halloween. “Style me Steampunk” is a series of blog posts on how to infuse your everyday wardrobe with a steampunk flair. From dressy to casual, office appropriate attire to outfits you can wear when you paint the town red–I will offer up ideas for outfits that will hopefully inspire some of you to dip into your closet and get creative! Style me Steampunk: The Steampunk Ballerina

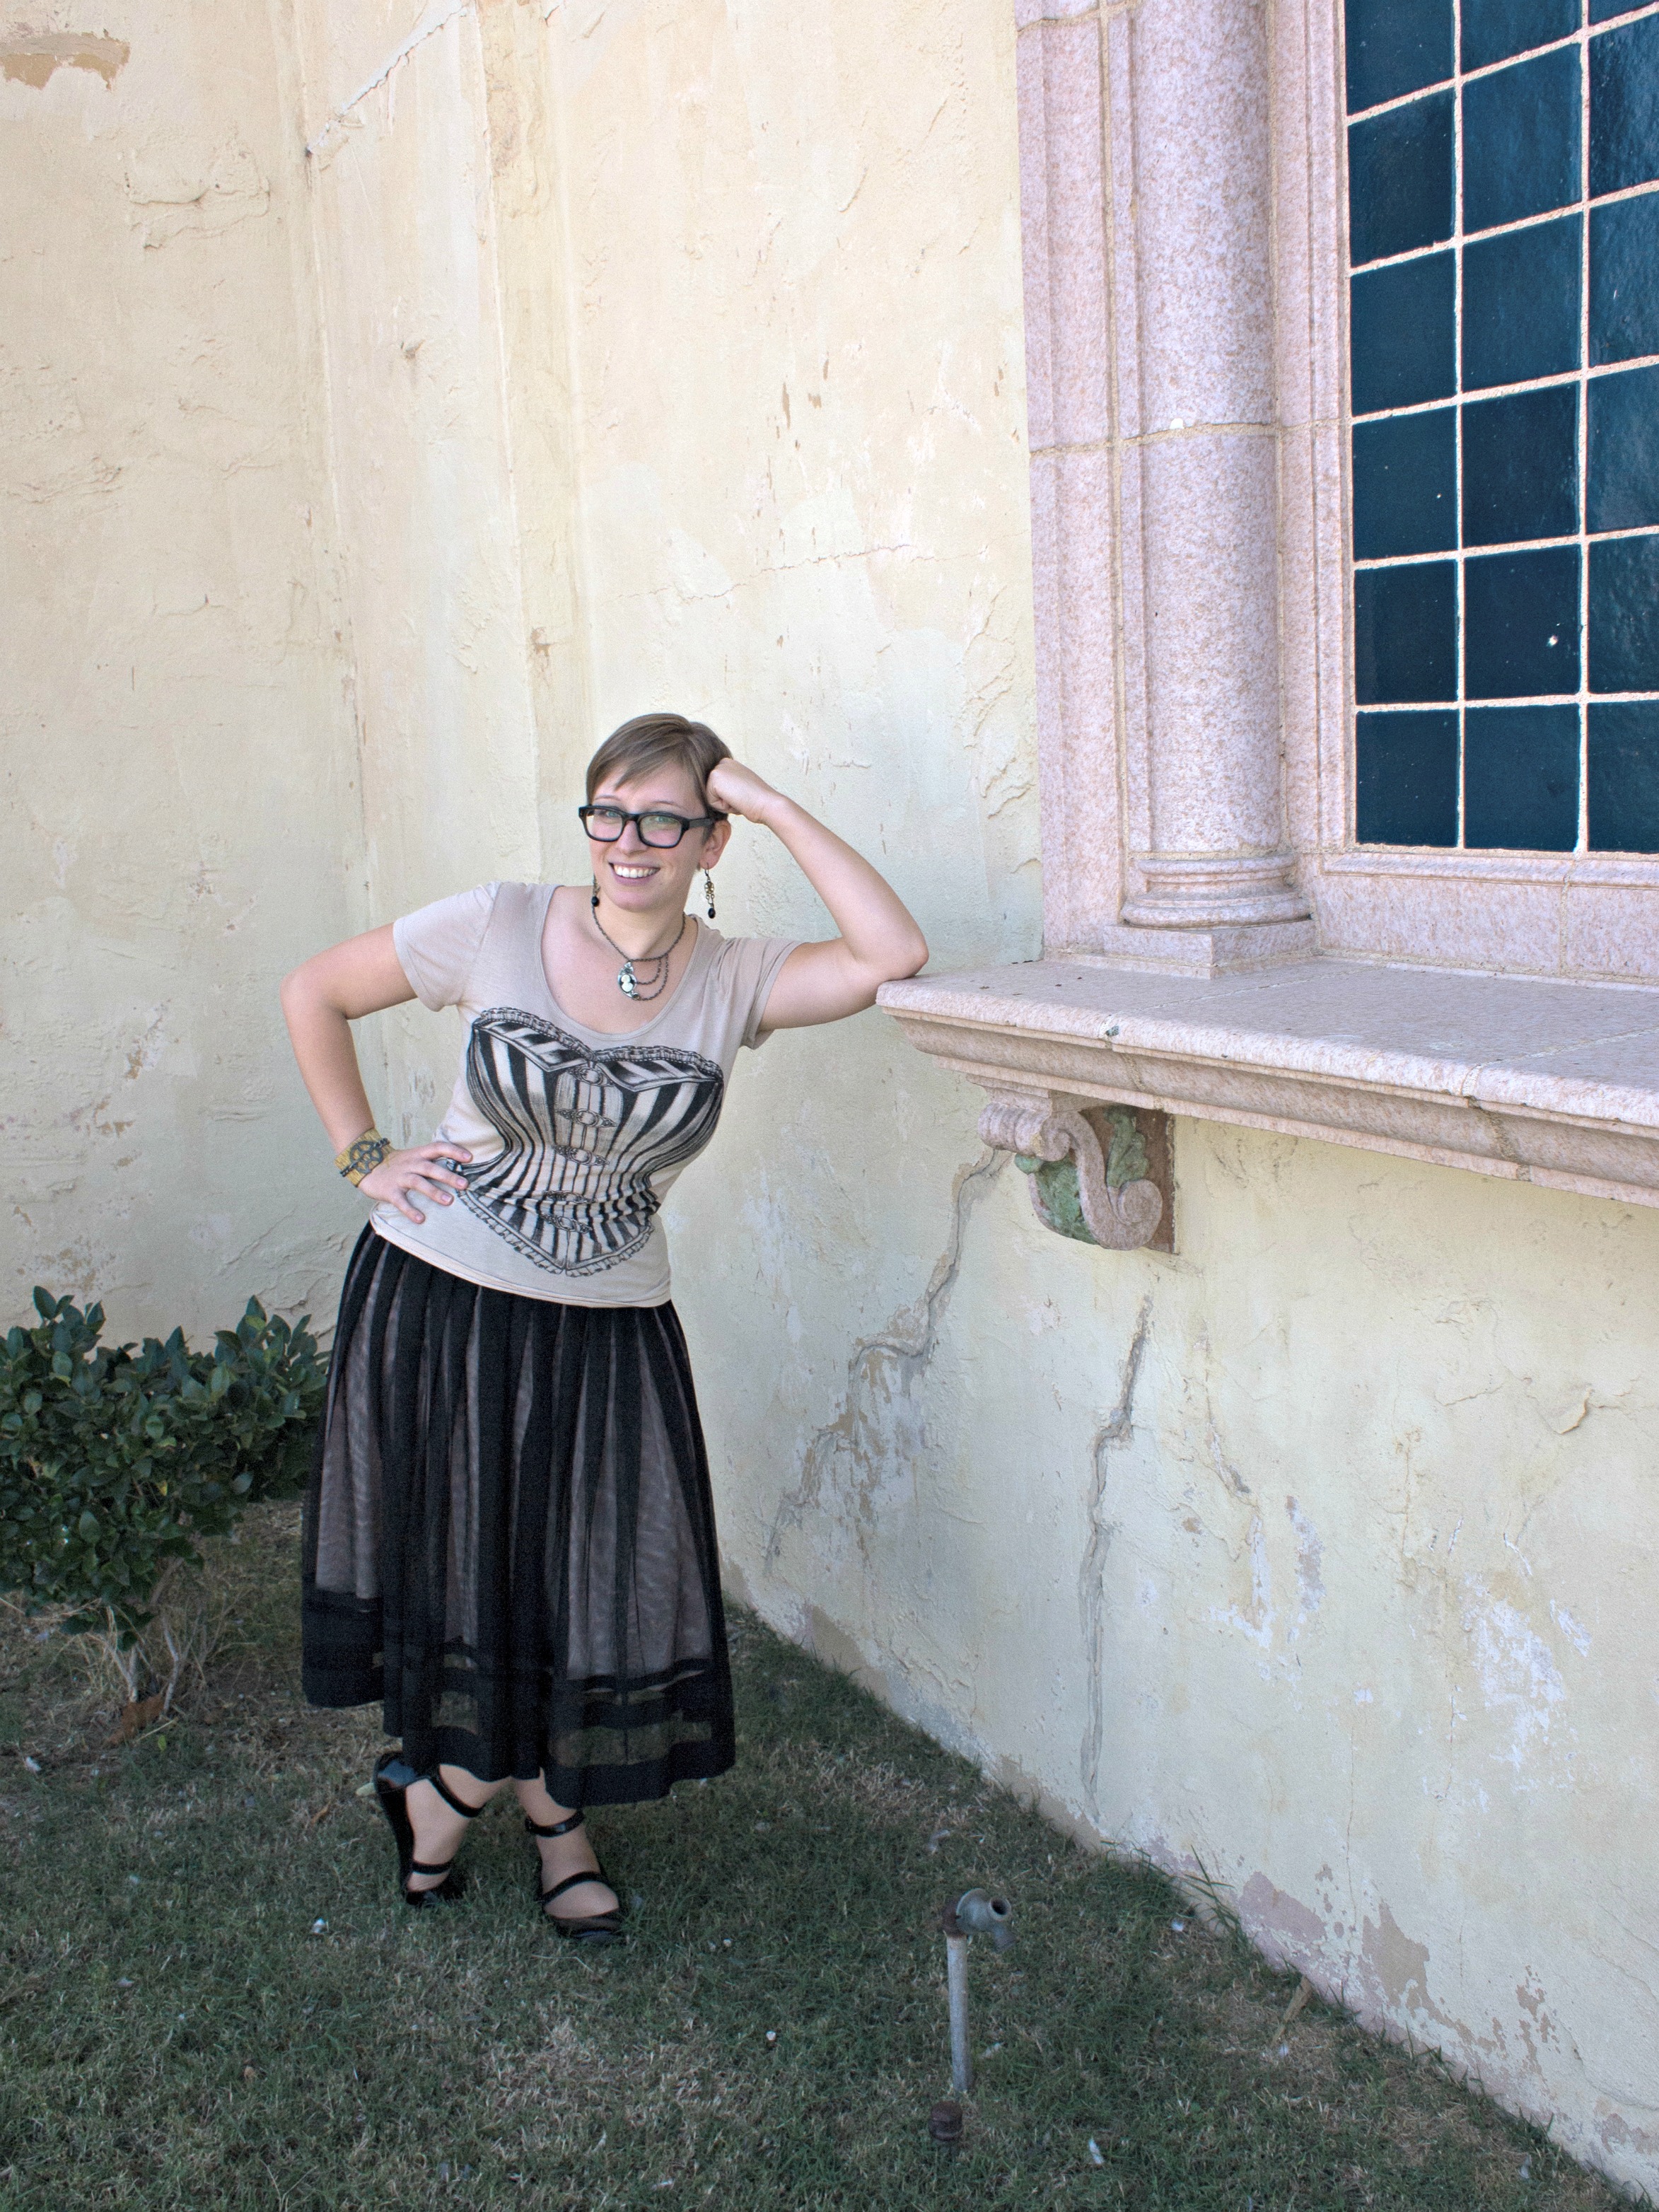
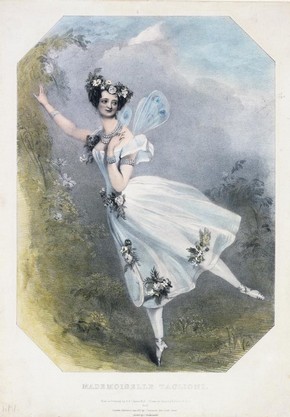
This is one of my favorite outfits--it's comfortable and easy to move around in while also not sacrificing style or a theatrical flair.  I call this look the steampunk ballerina because, to me, it resembles much of the dress that Victorian ballerinas donned on stage.

Victorian Ballerinas wore longer skirts than our modern day ballerinas (hitting roughly the shins, as depicted above) in addition they also wore corsets (or corset-resembling tops).

To re-create this look, you'll need:

  • Fossil Black Tulle Skirt (there are a number of clothing companies that have similar style skirts right now. They are en vogue this Winter)
  • Ballet flats (I particularly love ballet flats that have ankle straps or are a fusion of ballet flats and mary janes)

  • Corset t-shirt (I purchased mine from CarouselInk on Etsy--here's a link to the t-shirt. Side note on the t-shirt: it runs true to size and will not shrink when you wash it.)
  • Steampunk Jewelry (made mine! Check out my Etsy shop for bling of your own)

Costume Option: If you wanted to turn this look into a costume for a con or a party it's simple. Put on some elbow length gloves (preferably matching the color of your skirt & flats) and artfully weave flowers in your hair. Maybe even grab a fan for flirty good measure or like Marie Taglioni, you too can be a fairy with some cheap pantyhose wings (spruce 'em up and draw gears & cogs on them and then glue rhinestones over your drawn lines)!

You can't see it because it's covered by my other hand but when I entered The Girlie Show in OKC they marked my hand with an "X"--it perfectly matched the color of my cuff. I had a beautiful golden X and was serendipitously styled that day!  Have fun creating this look, wear it fiercely!

W.S. Rockwell Brass Valve Tags

Flea Market FindsSamantha ExtanceComment

In my flea market & thrift store travels I often happen upon little pieces of history. My mom and I picked up these brass tags, marked W.S. Rockwell, at a street fair & flea market in NYC in September. Yesterday was a deliciously rainy morning and afternoon so I curled up with some tea and did a little research. Here's what I discovered:

W.S. Rockwell Co. was established in 1880. The company made furnaces and was chartered in 1908. They owned many patents on their furnace innovations, like this one for a tilting crucible melting furnace. Their main office was located on 50 Church Street in New York City in the Hudson Terminal Building. Their company slogan was "Better Heating, Lower Cost." Their dedication to a quality furnace and thus quality heat lead them to write a book on their industrial craft in 1922 called The Elements of Industry. The book itself is fascinating--filled with diagrams and explanations of metal working.

I found little about the tags themselves, except that they were used to identify and differentiate between valves. I have a whole key ring of valve 29s. They are beautiful brass tags that certainly reflect the beauty of Rockwell's furnaces.

Steampunk Home Decor: Silhouette Pictures

D-I-Y-Samantha ExtanceComment

Steampunking your home can be a little pricey--especially if you are searching for antiques & oddities to display throughout; however, that doesn't have to be the case. Here is a simple DIY that can give your walls a little whimsy. Now, let's get creative! Here's what you'll need:

  • Oval picture frame & mat (I purchased mine from Michaels when they had a frame sale, full price this frame is $19.99)
  • Felt (1-2 pieces), the felt I choose had an ornate pattern which made it appear like leather. I recommend using a patterned felt to create your silhouette because it offers up another element of texture (.79 cents ea, $1.58)
  • 1 piece of Scrapbook paper (any color/pattern of your choosing) Personally, I love DCWV (they even have Steampunk scrapbook paper) (1 sheet, $1.00)
  • Tacky Glue
  • Scissors
  • Exacto Knife
  • Paper & Pencil (for tracing)
  • Black Sharpie Maker (optional)

Total Cost (excluding tools): $20.99 (per silhouette)

Steps:

  1. After you've purchased your supplies, download  the silhouette head (or feel free to draw your own). Re-size it to fit your frame. This is how I re-sized my silhouette: I eye-balled it and enlarged the image on my computer. I then pulled out the stock photo from the frame and placed it over the silhouette on the computer screen. If your silhouette fits inside of the stock photo's parameters (with a little room left over for the embellishments [the hat, bubble pipe, etc.] you'll be making), then you can print your image. (If the silhouette doesn't fit, keep re-sizing your image.) Here is the silhouette template:  Steampunkin Template--BohemianRomanceSilhouette
  2. Once you've printed your silhouette, trace her onto the wrong size of your felt with your pencil. Remember your silhouette will be flipped (facing the opposite direction once you've cut her out and flipped the silhouette over).
  3. Now it's time to draw her embellishments. Draw on a hat, or a pipe with bubbles, or anything else you fancy! For more intricate embellishments, for instance, the microscope, it's better drawn on paper. Keep that in mind as you are drawing on your felt.
  4. Once you are done drawing & tracing, use your scissors to cut out your silhouette & embellishments. Set aside.
  5. Grab your stock photo from the frame and your sheet of scrapbooking paper. On the wrong side of your scrapbooking paper, trace the stock photo's oval outline. Cut out and set aside. If your stock photo sheet fills the whole frame, and is not just a photo taped to the mat, be sure to trace lightly the photo's outline (on the right side of your scrapbooking paper) so you know where to place your silhouette and embellishments.
  6. Next, glue your silhouette and embellishments in place on your scrapbooking paper. Let it dry for 5-10 mins.
  7. Place your scrapbooking paper in your frame and close.
  8. Hang on the wall and brace yourself for the flood of compliments you'll be getting! (People love whimsy!)

To make the Microscope (or any other intricate embellishment or prop):

  1. Find an image of the object you desire, in this case a microscope. Be aware of copyright. I used an image of a microscope from The Graphics Fairy. Her images are free for creative use (and she has a steampunk collections of images).
  2. Re-size accordingly (as detailed in Step 1 above).
  3. Trace from your computer screen (or you can print it and cut it out). I choose to trace the image so that I could use heavy cardstock which jams in my printer.
  4. Once you've finished tracing, cut out the image.
  5. Color (optional). I colored my microscope with a sharpie marker so that it would also look like a silhouette.
  6. Glue in place.

If you don't want to make one of your own, you can also purchase a print of either of my silhouettes from me on my Etsy shop (coming soon). Then assemblage is super simple, 1. Purchase 2. Pull out of package 3. Place in frame! For all the rest of you, Happy Making!

Style me Steampunk

FashionSamantha ExtanceComment

I love steampunk fashion & accessories--in fact, I love these 2 things so much that I cannot relegate them solely to cons, shows, or Halloween. "Style me Steampunk" is a new series of blog posts that I'll be writing on how to infuse your everyday wardrobe with a steampunk flair. From dressy to casual, office appropriate attire to outfits you can wear when you paint the town red--I will offer up ideas for outfits that will hopefully inspire some of you to dip into your closet and get creative!

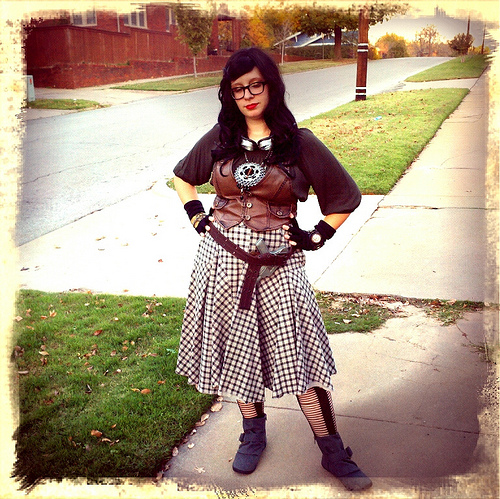
Style me Steampunk: Comfy & Casual, the Adventurer's Ensemble

  • Hiking pants, rolled up to accentuate the boots
  • Mossimo Supply Co. Wool Ankle Boots
  • Black Converse vest
  • Grey T-Shirt

This outfit alone would not be steampunk were it not for the accessories. Choose your accessories thoughtfully. The outfit I am wearing is ready for adventure. Accenting this aspect of the clothing, and further creating my outfit's character--the adventurer, I wore a black leather compass bracelet, simple black button & washer earrings, and a time traveler's necklace (on black chain).

Matching your accessories and jewelry (each of my pieces were either all black or had an element of black in them) to an article of clothing (in this case, the black Converse vest) can help make your outfit more cohesive.

Not all steampunk outfits have to be over-the-top, as this casual, comfortable (and travel friendly might I add) look proves.


Hope Your Halloween was Spooktacular!

InspirationSamantha ExtanceComment

It has been a truly wonderful week! I met one of my very favorite Steampunk authors, Gail Carriger this past Saturday. Thanks to Nimrod International Journal for bringing Ms. Carriger to T-town. At her lecture,  I learned what inspires and influences Carriger as an author (Gothic Romance, in particular Lewis's The Monk and Radcliffe's The Mysteries of Udolpho) and what Steampunk as a genre borrows from the Gothic. Carriger herself is as delightful and sincere a person you could expect. More often than not you wait with baited breath to meet an author you truly enjoy or admire only to discover that as a person, they're quite egotistical, terrible, etc.  Carriger graciously allowed those in attendance to interrupt her talk with questions & comments. She generously (and preparedly, much like Alexia herself--armed & ready) gave advice to hopeful genre writers. After her talk, I waited in line for her to sign the manga version of Soulless and to give her some of my jewelry creations that she inspired. I was so nervous--I hardly said anything (I get so tongue tied sometimes!) and while I didn't get to see her open my gift, she did blog about it so I know she liked it! Inspiring me as always, I had come up with an artful & steampunk way of wrapping her gift and as a result, I now have several ideas for steampunk gift wrapping. DIYS to follow soon in December!

Halloween was fabulous! For the very first time ever, I had trick-or-treaters and boy was I ready! A couple of friends came over and we ate pizza on my stoop armed with 2 brimming bowlfuls of candy (the good stuff!). I had chalked the sidewalk, lit up the steampumkins, put on my steampunk costume (a space rustler) and decorated my door with ghoulish scenes! It was a blast!

Today, I've been sipping tea (tea cup pictured above--it has a square bottom! I have never seen one like that before, now I am obsessed. Must find a square bottomed tea cup to call my own!) and doing inventory. And I am proud to announce that you can now find Bohemian Romance Steampunk Jewelry in Oklahoma City at the OKC Dwelling Spaces!

I have another exciting announcement, I will be adding a new element to my blog--fashion. "Style Me Steampunk" is a series of blog posts about how to incorporate steampunk into your daily wardrobe! So stay tuned, lots of exciting DIYS and blog posts to come!

Hope your Halloween was spooktacular and to those of you in New York and New Jersey--stay safe! xo Sam


Meeting Gail Carriger, NY Times Bestselling Author Tomorrow!

UncategorizedSamantha ExtanceComment

So, I am nerding out about meeting Gail Carriger tomorrow at Nimrod International Journal's 34th Annual Conference! Carriger is one of my favorite steampunk authors and her Parasol Protectorate series has sparked many a creation for me. Come hear her talk, "Queen of Airships, Ace of Goggles: Gothic Tropes in Steampunk," being given from 1:35 to 2:50 pm in the Allen Chapman Activity Center on the University of Tulsa's campus. Gail will also be reading from one of her works from 3:00 to 4:00 pm.

To learn more about Gail Carriger, click here. For more on the Parasol Protectorate series, click here. To pre-order her next book (which I am anxiously awaiting!! C'mon February!), Etiquette & Espionage, click here. See you there!

DIY Steampunk Crown & DIY Steampunk Pirate Queen Costume for Halloween

D-I-Y-Samantha ExtanceComment

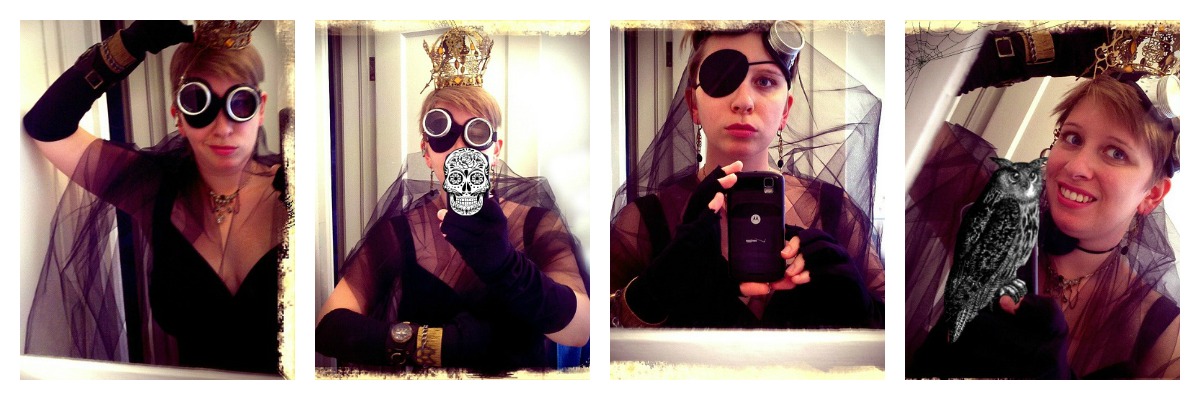
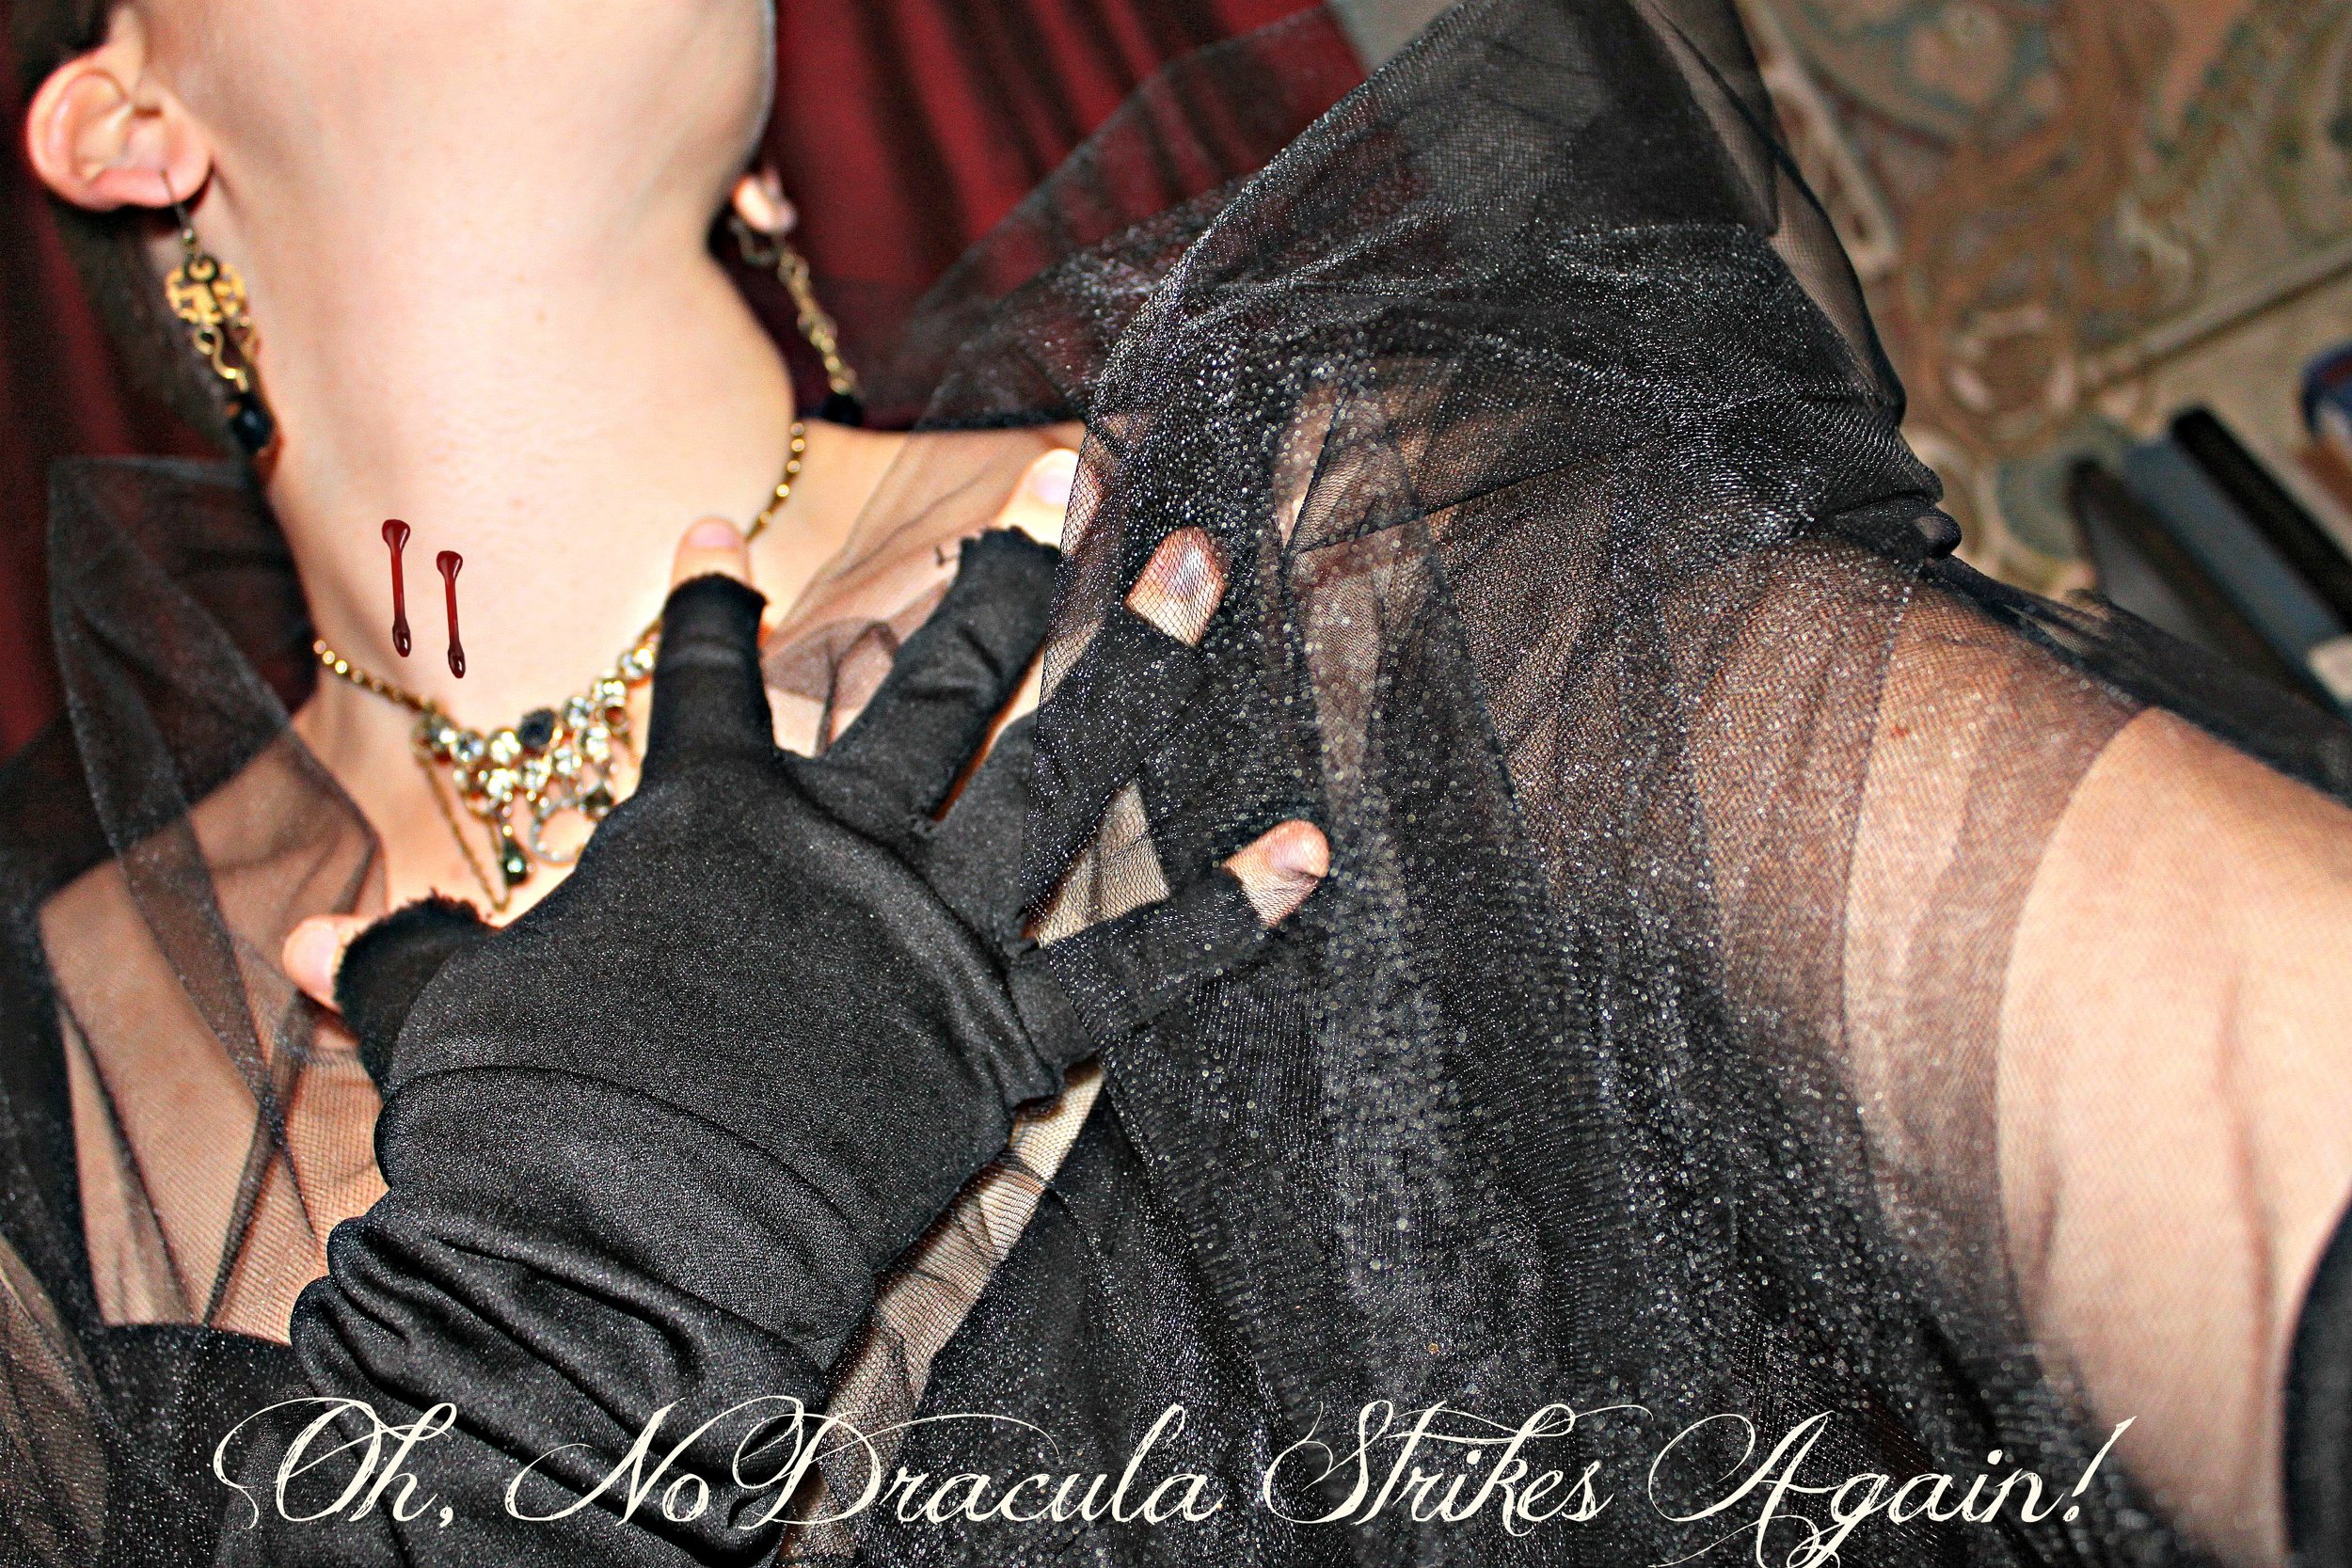
Like me I know a lot of you are making your own costumes not only for the fun of it but also because of your budget. Here is a DIY Steampunk Halloween costume that costs under $100 (and even less if you have some of these items already). Be a Steampunk Pirate Queen this Halloween (or Empress or Imperial Majesty...whichever title you prefer, after all you're the ruler).

(Forgive the phone in the mirror shooting--I did cover the phone up with some spooky overlays--check out PicMonkey's Halloween themes to edit pictures with! It's super fun & festive!)

Here's what you'll need:

  • A fancy dress (Now is the perfect time to dig up that unworn dress sitting lonely in the closet or that bridesmaids dress that you haven't put on since the wedding). If you don't have a dress, try pursing your local thrift stores for dresses. Steampunking it is easy with accessories and a little tulle! Don't worry if your dress is short--punk it up with your favorite pair of Fall/Winter boots! (Already Owned, hopefully)
  • Tulle (approximately 2-3 yards, depending on your size and how long you'd like it to trail after you). I'm a size 14 and so I purchased 2 yards. Tulle is cheap at Joann Fabrics during Halloween (go when you have a coupon)! $2.00
  • Elbow-Length Gloves (you can source these from anywhere, thrift stores or a cheap Halloween shop). I made my gloves fingerless but cutting off the ends. $12.99
  • Eye patch (any Halloween shop or Dollar Store has an eye patch you can purchase pretty cheaply) I bought mine at Party City where I also found my elbow length gloves. $1.99
  • Goggles (This may be harder to find than other items but check your local flea markets, estate sales, & thrift stores--which may have goggles for lower prices). My favorite pair of reproduction goggles is made by Restoration Hardware, click here to purchase or view their "German Goggles" in the RH online catalog. These goggles are simple, elegant, and relatively inexpensive. $24.99
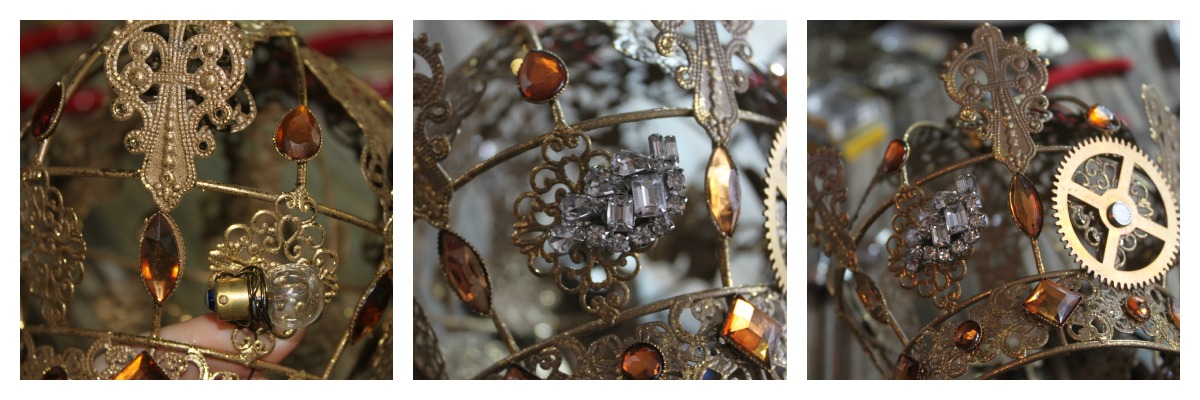
  • Crown (or Large Christmas Tree Crown Ornament) The crown I am wearing is actually a Christmas Tree ornament that I purchased at a local shop, Garden Ridge (in their Gold Ornaments aisle). The DIY to make your own crown from a Christmas Tree ornament is below. Keep reading! $4.99 (Gears & Brads to adorn it with: approximately $14.99)
  • Steampunk Jewelry (or any mismatched metal & chain jewelry that you own already) Some of you I know already own a few of my pieces (thanks!)--mix & match them with other rhinestone or bling-ish jewelry you own to add a little sparkle. (Already owned or you can click here for my Etsy shop and find something to go with your costume!)

Total Cost (excluding a dress & jewelry): $61.95

The most important part of your costume...airship pirate's attitude. A Queen still gives her mateys a mightly Argh!!

DIY Steampunk Crown

Materials & Tools:

  • Crown Ornament (a filigree metal crown is best since it has many holes in it already) ($4.99)
  • Brads ($4.99)
  • 1-2 packages of reproduction metal gears ($5.99 each at Michaels--try their "Found Objects" or "Industrial Chic" brands) or salvaged machine or gear parts (preferable, sourced from local flea markets, estate sales & such)
  • Light bulbs (optional)
  • Rhinestone clip-on earrings (optional)
  • 2 Grandfather clock hands (optional)
  • Small magnifying glass & chain (optional)
  • Wire (as close to the color of your crown) & wire cutters (for attaching light bulbs)
  • Pair of flat nosed pliers

Steps:

1) If your ornament has any hooks or ribbons for hanging on the Christmas tree, remove them or cut the ribbons. Here's what mine looks like:

2) Next, lay out the items you wish to attach to your crown & begin placing them. Gears can be attached with brads through the holes in the crown's filigree. Secure them by prying apart the two ends of the brad so that they hold the gear in place. You may want to crimp the brad shut with a pair of flat nosed pliers (or any kind of flat pliers).

3) (Optional) To secure a light bulb to your crown, cut a length of wire (proportional to your bulb's size. For  tiny bulbs, approx. 1 inch) & loop the wire around the bulb through the filigree and back through again & around (Like sewing stitches) until the bulb is secure. Another option is to secure the light bulb in place with glue & a glue gun.

4) (Optional) For extra sparkle on your crown, add a rhinestone (or any sparkly gemstone) clip-on earring. The clip should hold, but if your earring is old and the fastener is loose you may want to secure it with a bit of wire (approximately 1/2 inch will suffice).

5) (Optional, but highly suggested) To attach your grandfather clock hands, use brads and secure in place with pliers as instructed in Step 2 above. If your grandfather clock hands are heavier and cannot be kept in place with brads, use a small screw, washer, & nut to hold it in place. A great selection can be found in the Science Projects section at Lowes or Home Depot in the Hardware section.

6) (Optional) To add a monocle, attach a length of chain (measure where you'd like it to fall--keep in mind it will whip you in the face so I'd advise to make it longer than eye-length. A good zone is between the bottom of your nose to your chin). Using a jump ring  attach the chain to a small magnifying glass (available at some dollar stores & grocery stores; available at bead shops, like the Bead Merchant on 15th street & Delaware). Using another jump ring, attach the other end of the chain to your crown with your pliers. You can dress up your magnifying glass chain as I did above by adding crystal beads & a piece of filigree!

7) Once you have attached all of your embellishments to your crown, wear proudly!

Other Ideas for Accessories: Faux-fur, a Sceptor, A Sword (for Knighting your minions), a Queenly cape, & a dance card

Have fun crafting your costumes! If any of you decide to be a Steampunk Pirate Queen please post or email your pictures to bohemianromancejewelry@gmail.com I'd love to see them! Check in later this week to find out how to Steampunk your Pumpkins!

Dark Carnivale~Bohemian Romance & The Salvage Steamstress Fashion Show

ShowsSamantha Extance1 Comment

Saturday, Sept. 29th, at Indie Emporium, was my very first fashion show! I styled the models myself and created unique jewelry pieces to compliment my mom's, the Salvage Steamstress, fantastical hats! We had a blast! I can certainly say that out of all the models & designers waiting backstage--we had to most fun! Playing with our props, tipping our hats to one another and just generally being goofy. This sense of playfulness carried over into the show (for which I am very glad). For those of you who missed it, here are a few photos that were taken n the runway!

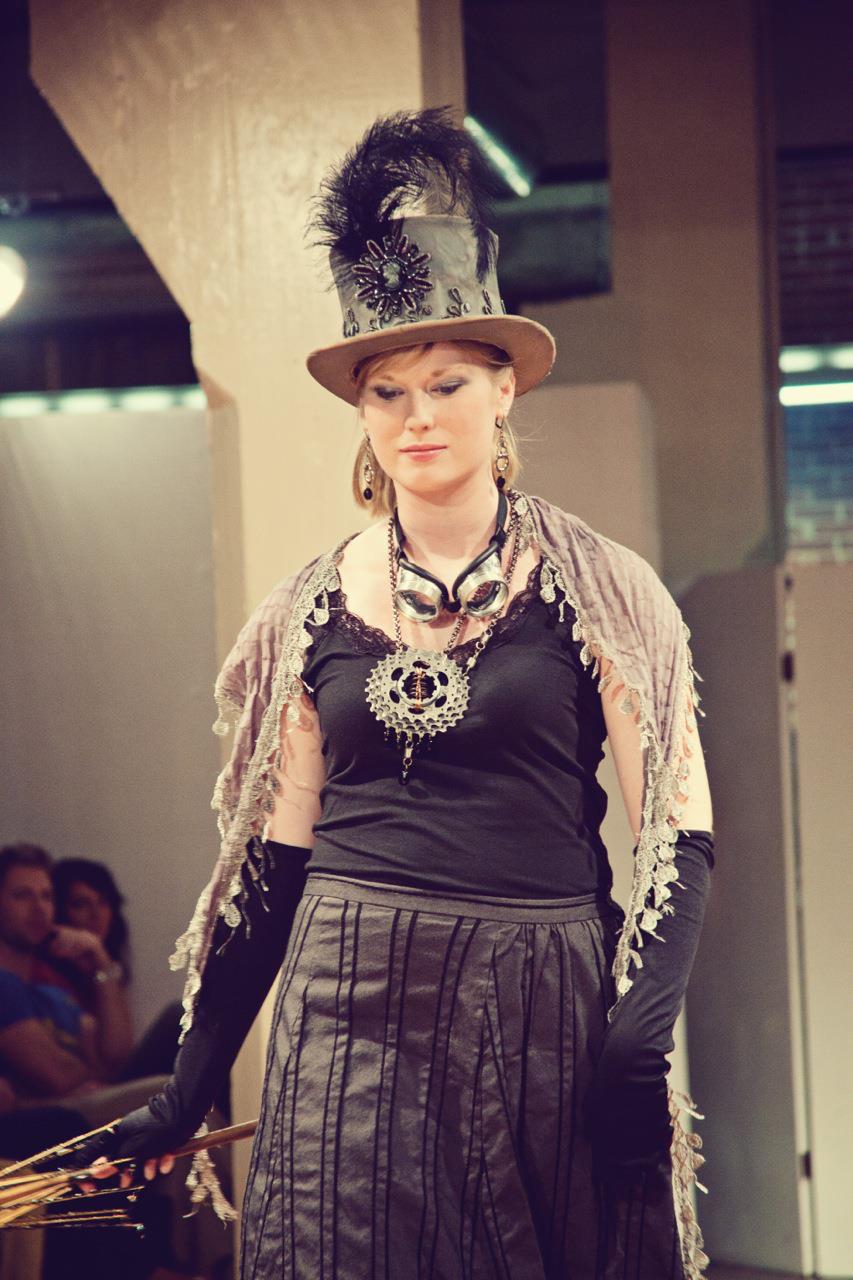
Here is Caroline wearing the Lady Hawke Top Hat, gearrings, and LadyIron Gear Necklace. At the end of the runway, Caroline activated her prop--a beaded skeleton parasol.

Confidently, Caroline walked back up the runway, tipping her hat to Renee.

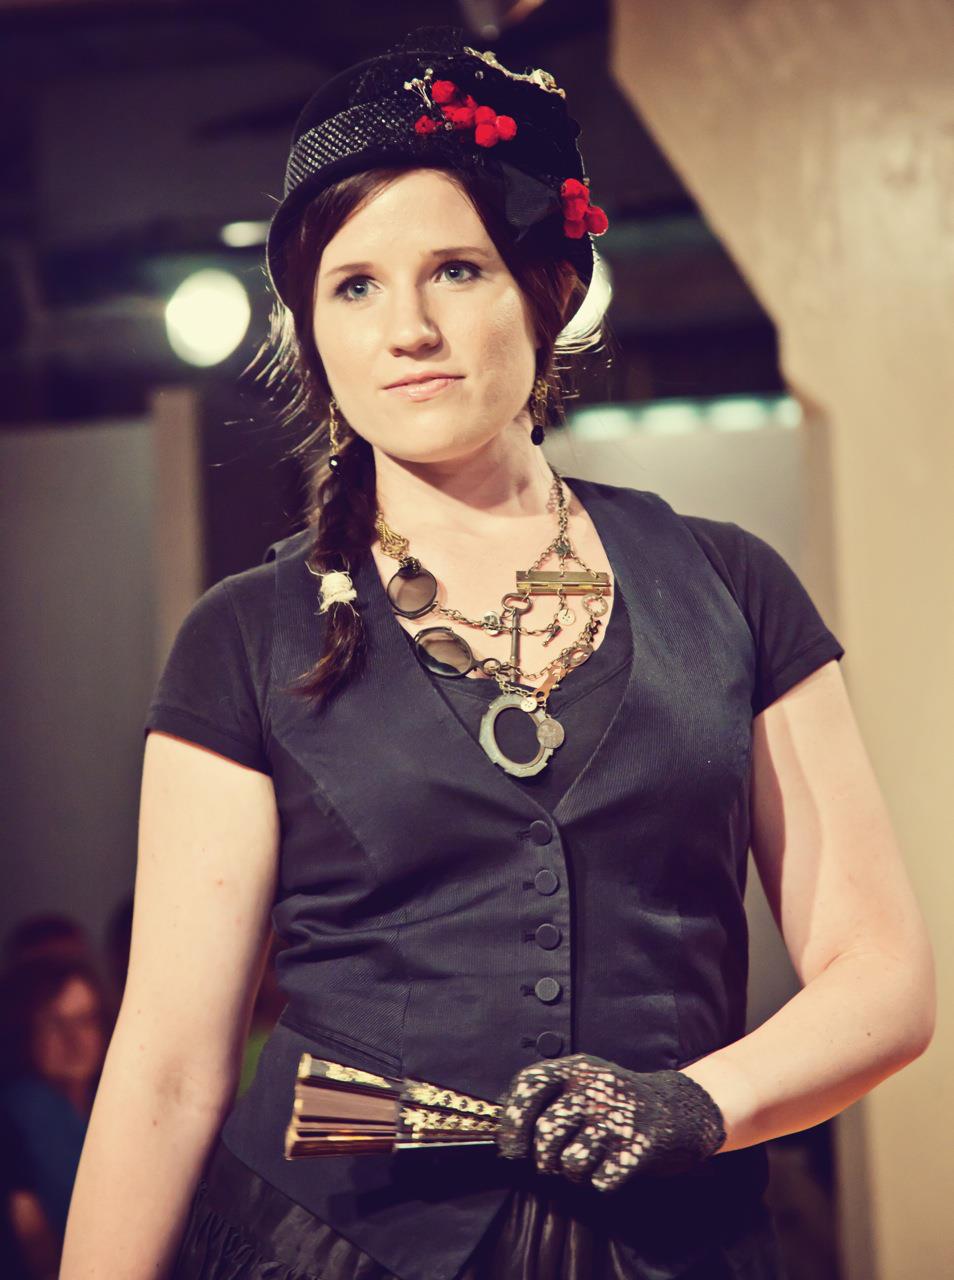
Renee modeled the Auntie Mame Bowler, gearrings, and the Amalia Popper Opera Necklace (for which I won honorable mention in Bead Magazine's steampunk contest).

At the end of the runway, Renee activated her prop--a fan which she opened with a swift flick of her wrist!

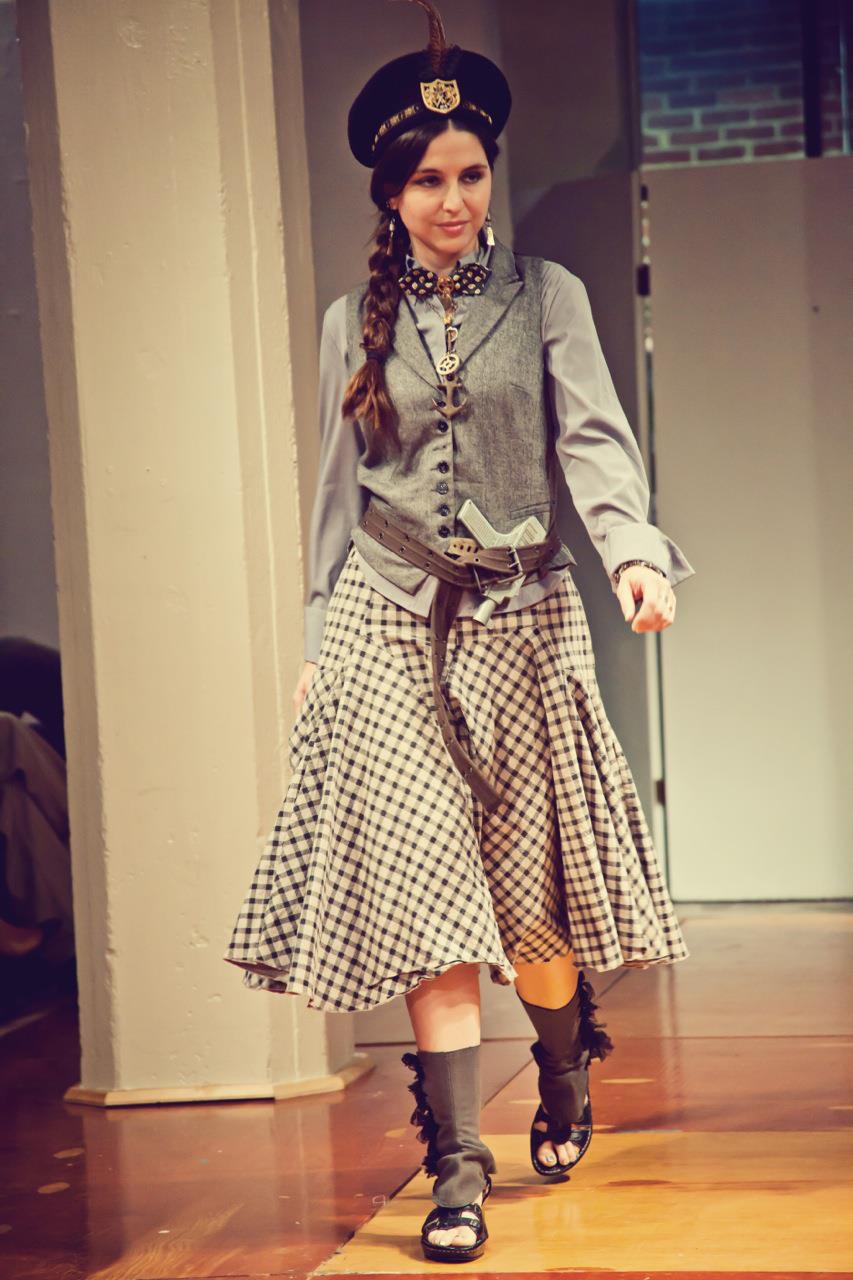
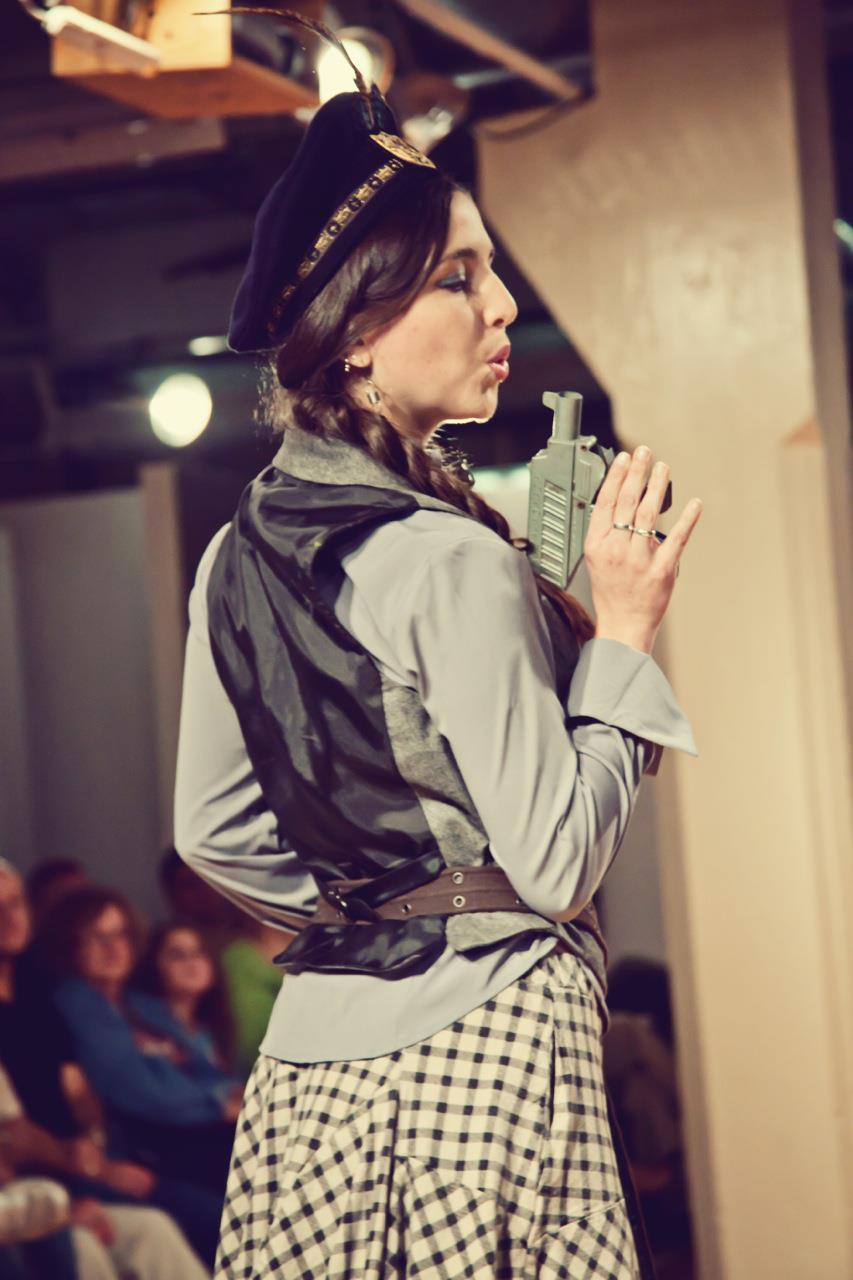
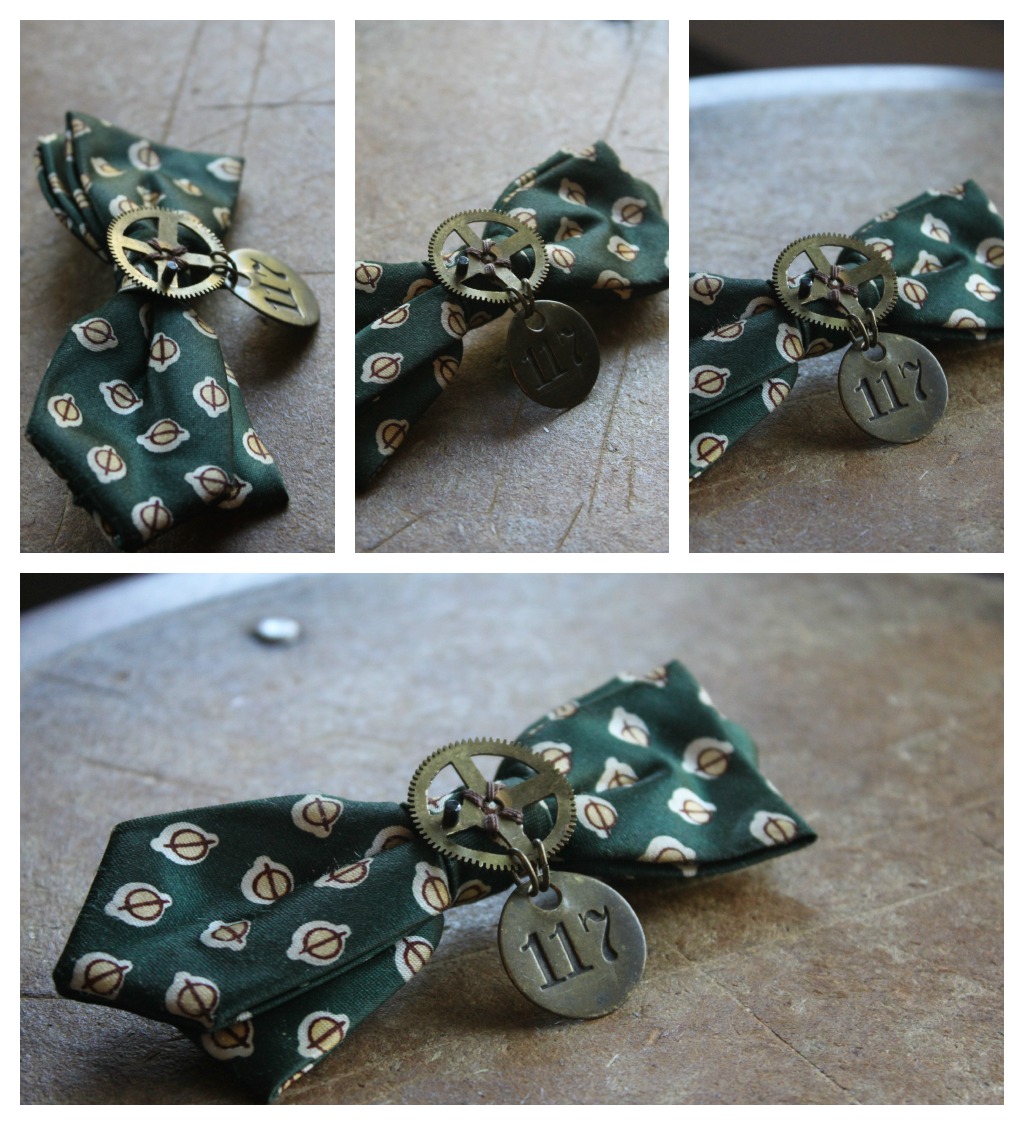
Next came Holly wearing a Steampunk Scottish Beret, gearrings, the No. 117 Steampunk bow tie, an electrical fuse bracelet, and the Seaside Girls Steampunk necklace (made for LiberateUlysses's Bloomsday Art Project in 2012).

At the end of the runway, Holly activated her prop--a gun (an vintage paper popper).

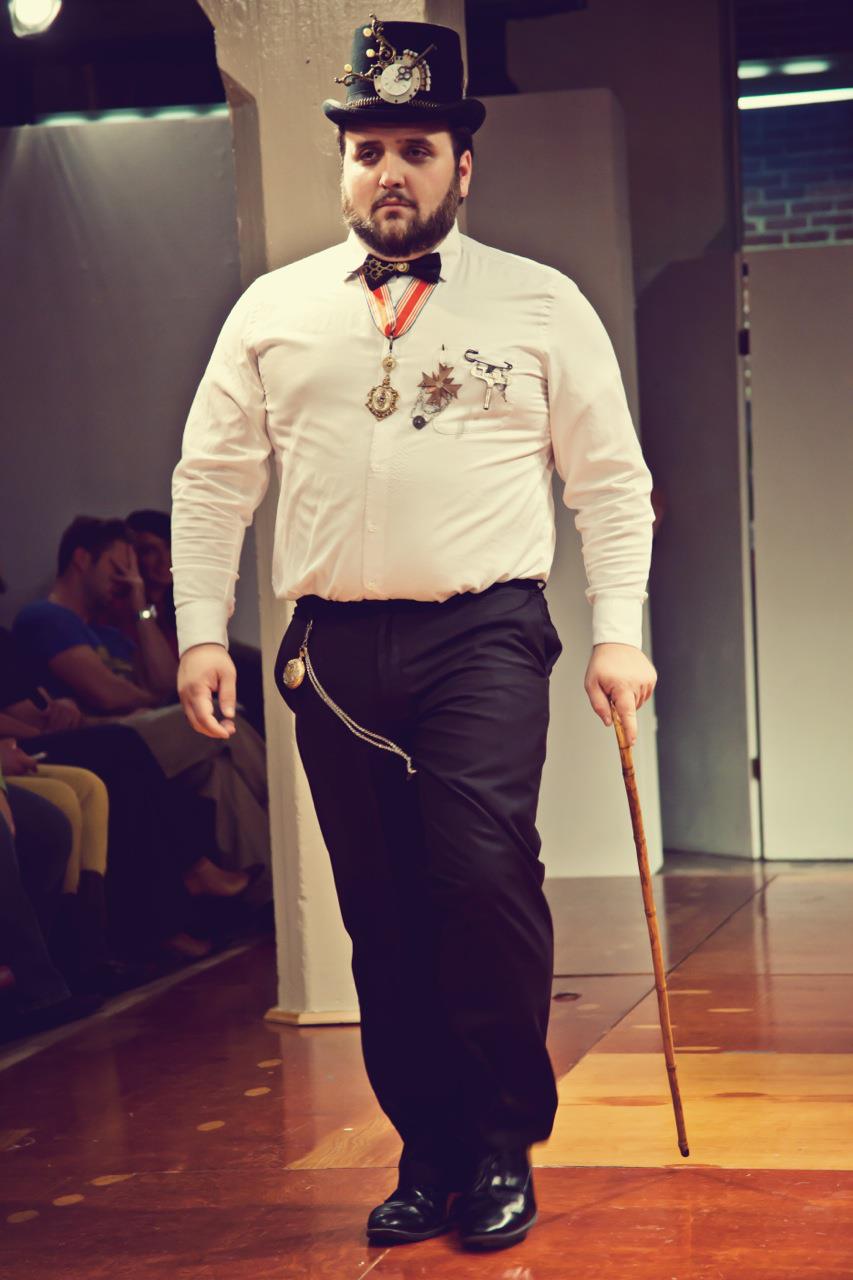
Doffing his tophat to Holly, Thom sauntered up the runway wearing the Tick Tock Top Hat, Imperial Steampunk medal (necklace), Steampunk General's medallion (pinned right), and Skeleton Key Kilt Pin (pinned left).

At the end of the runway, posing like the gentlemen he is--Thom paused and checked the time on his steam train pocket watch while leaning on his cane.

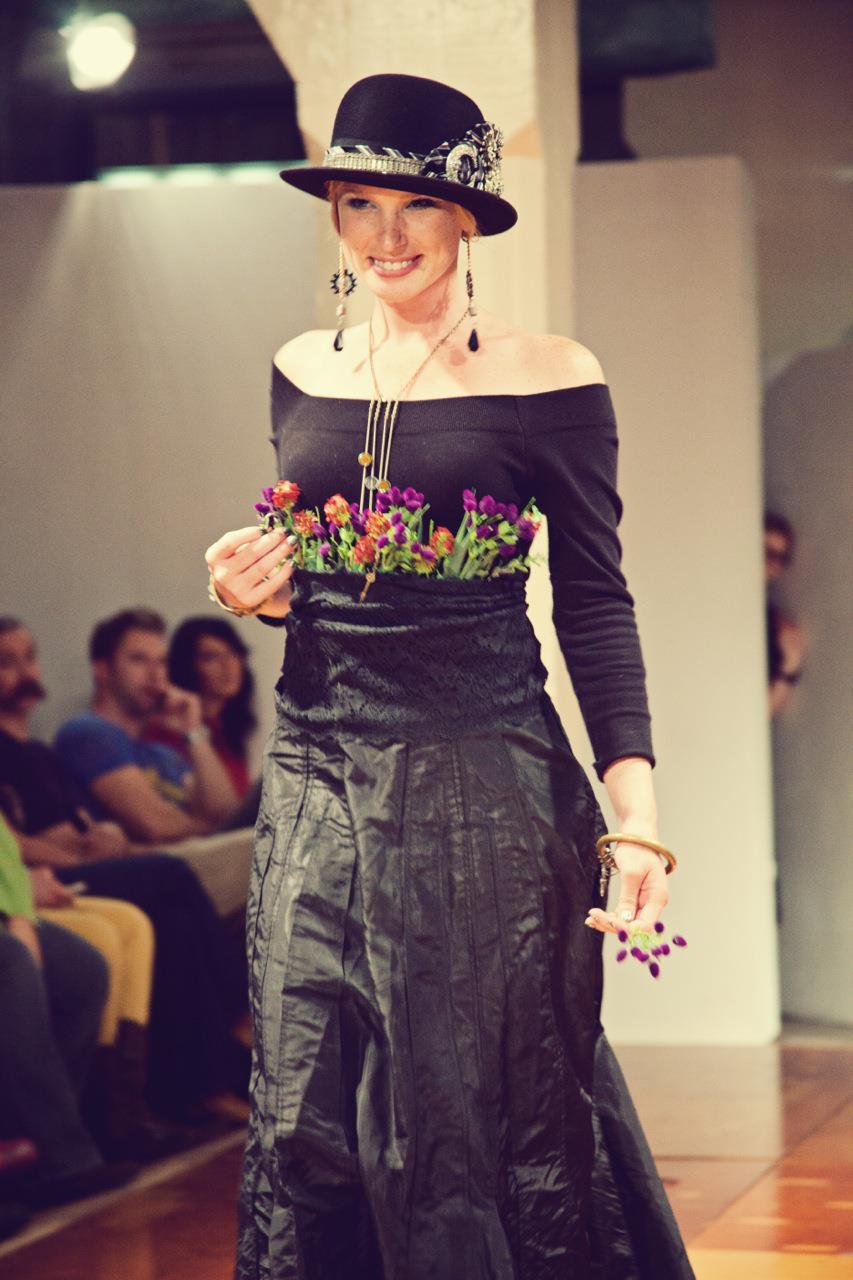
As Frenchy and the Punk's gypsy tune, "Dark Carnivale," played on, our next model, Kathleen wearing the Puttin' On the Ritz Steampunk Bowler, gearrings, gold gear cuff, spiral skeleton key cuff, and typewriter key necklace ripped flowers from her lace bodice and threw them out into the audience. Kathleen saved a bunch of violets for Melissa--our final model.

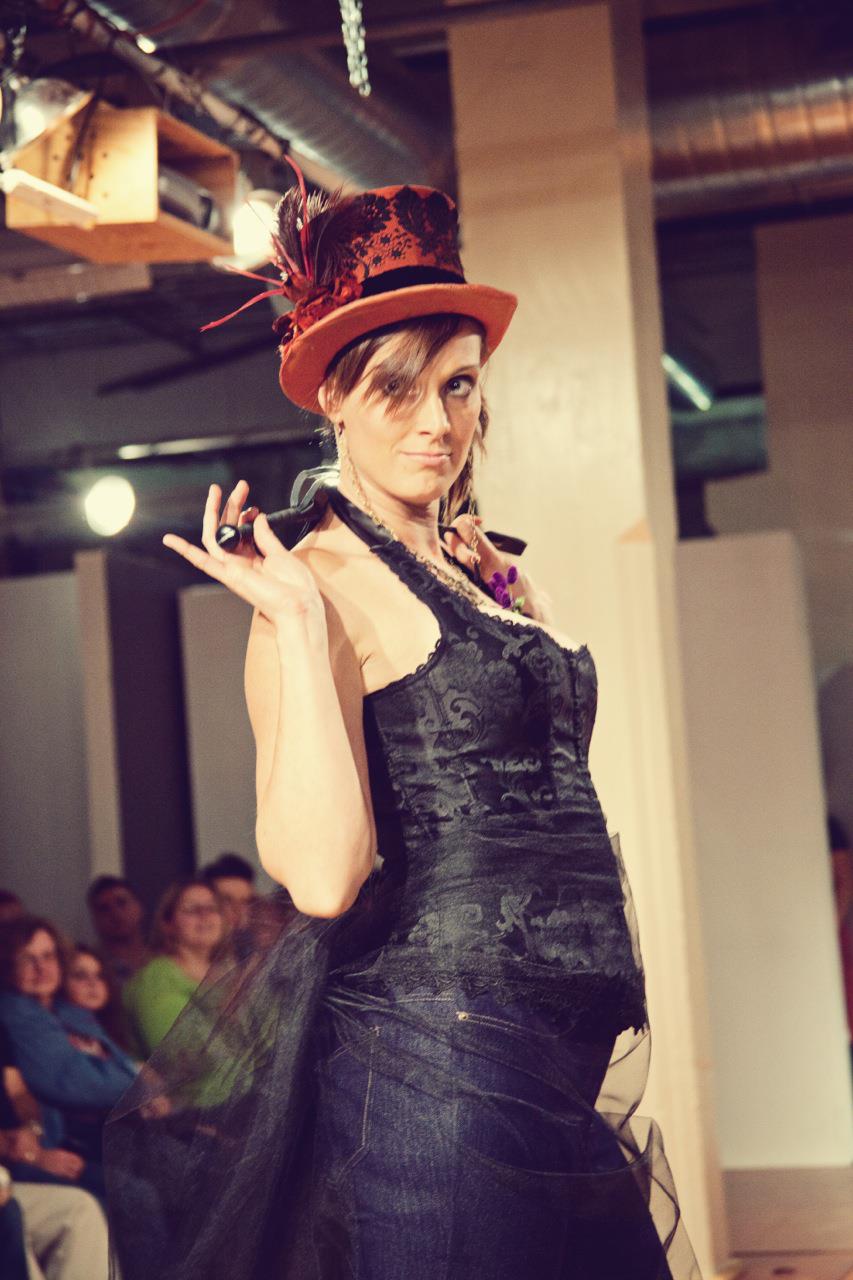
Melissa wore Frankly Scarlett Steampunk Top Hat, gearrings and a spiral cog necklace. Her prop, a riding crop, was activated all down the runway! The cattle call was so much fun--it was surreal being up there with my mom with everyone clapping. To see so many smiles, I knew we had pulled it off and transported them somewhere magical.

Thank You

First and foremost to my mom, for inspiring this collection of jewelry and for creating such beautiful hats. You keep challenging me & I am so grateful that you do! Second, thanks to Christine Crowe for insisting that I do the fashion show in the first place. Without that push, I would never have dreamed of doing this! Third, my wonderful models--Caroline, Renee, Holly, Thom, Kathleen, and Melissa! You were so wonderful and I couldn't have done it without you! To the volunteers at Indie Emporium who organized the music & helped us with a run-through. And last but not least, to Val Esparza for all of your help & support!

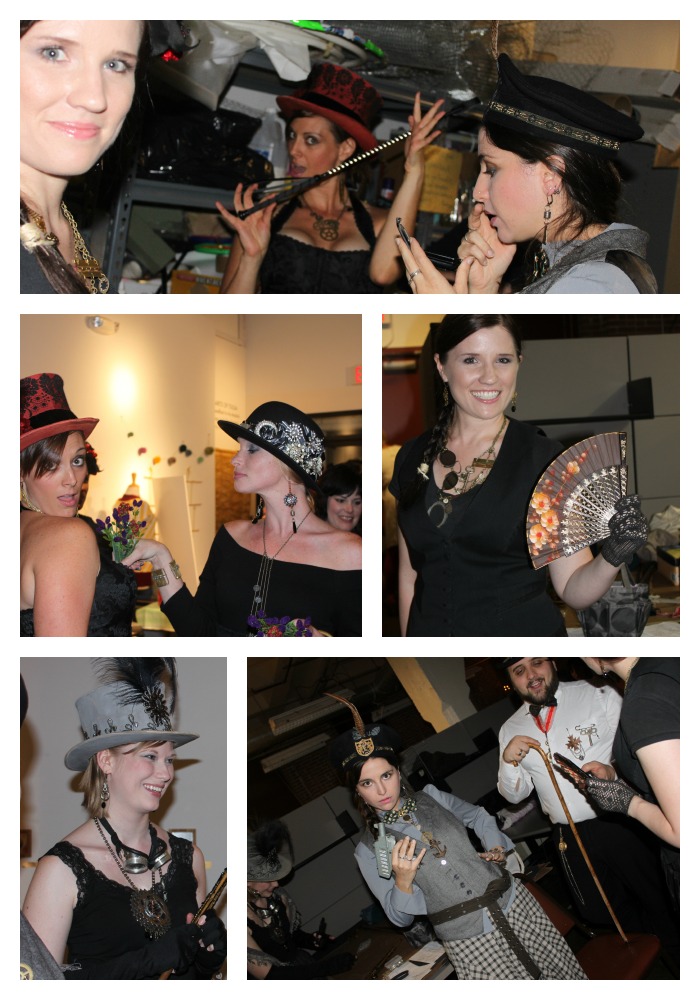
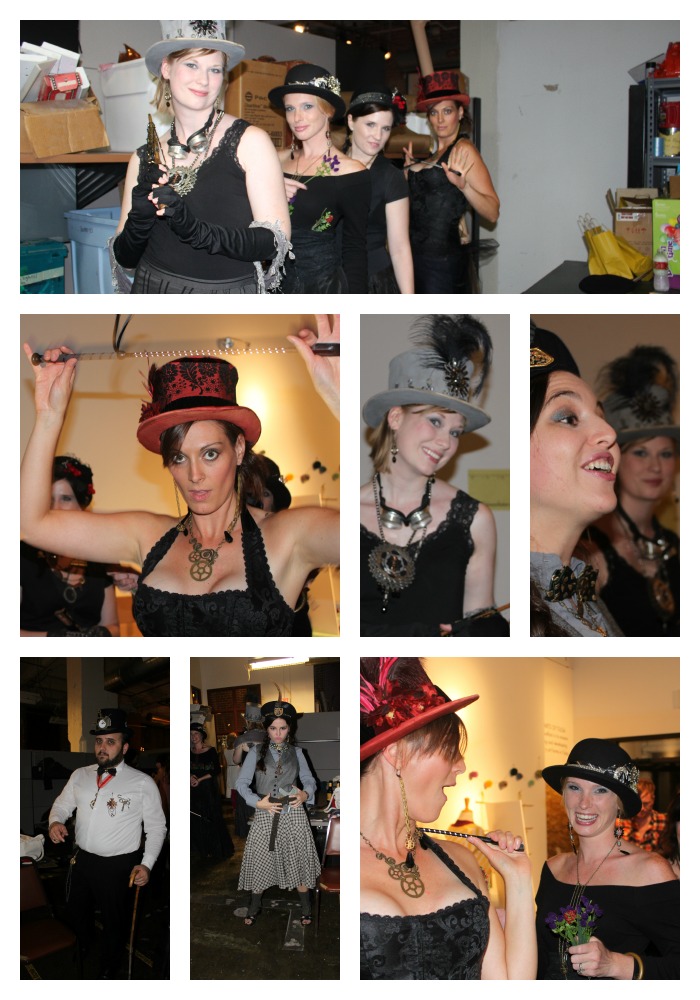
Here's a little of our behind the scenes madness/goofiness!

By the way--did I mention that Juliette Lewis loved Holly's outfit?!! She didn't stay for the show but she did snap a photo of Holly with her phone! Gleep! So freakin' cool! An outfit I styled is on Juliette Lewis's phone!

A Sneak Peek at Bohemian Romance's Fashion Show at Indie Emporium on Saturday

ShowsSamantha Extance1 Comment

I'll be doing my first fashion show this Saturday at Indie Emporium! The collection is called Dark Carnivale and is a collaboration between me and my mom, Cindy. Cindy created fantastical steampunk hats and I created pieces to accompany them. Here is a little preview of what you'll see on Saturday at the show!

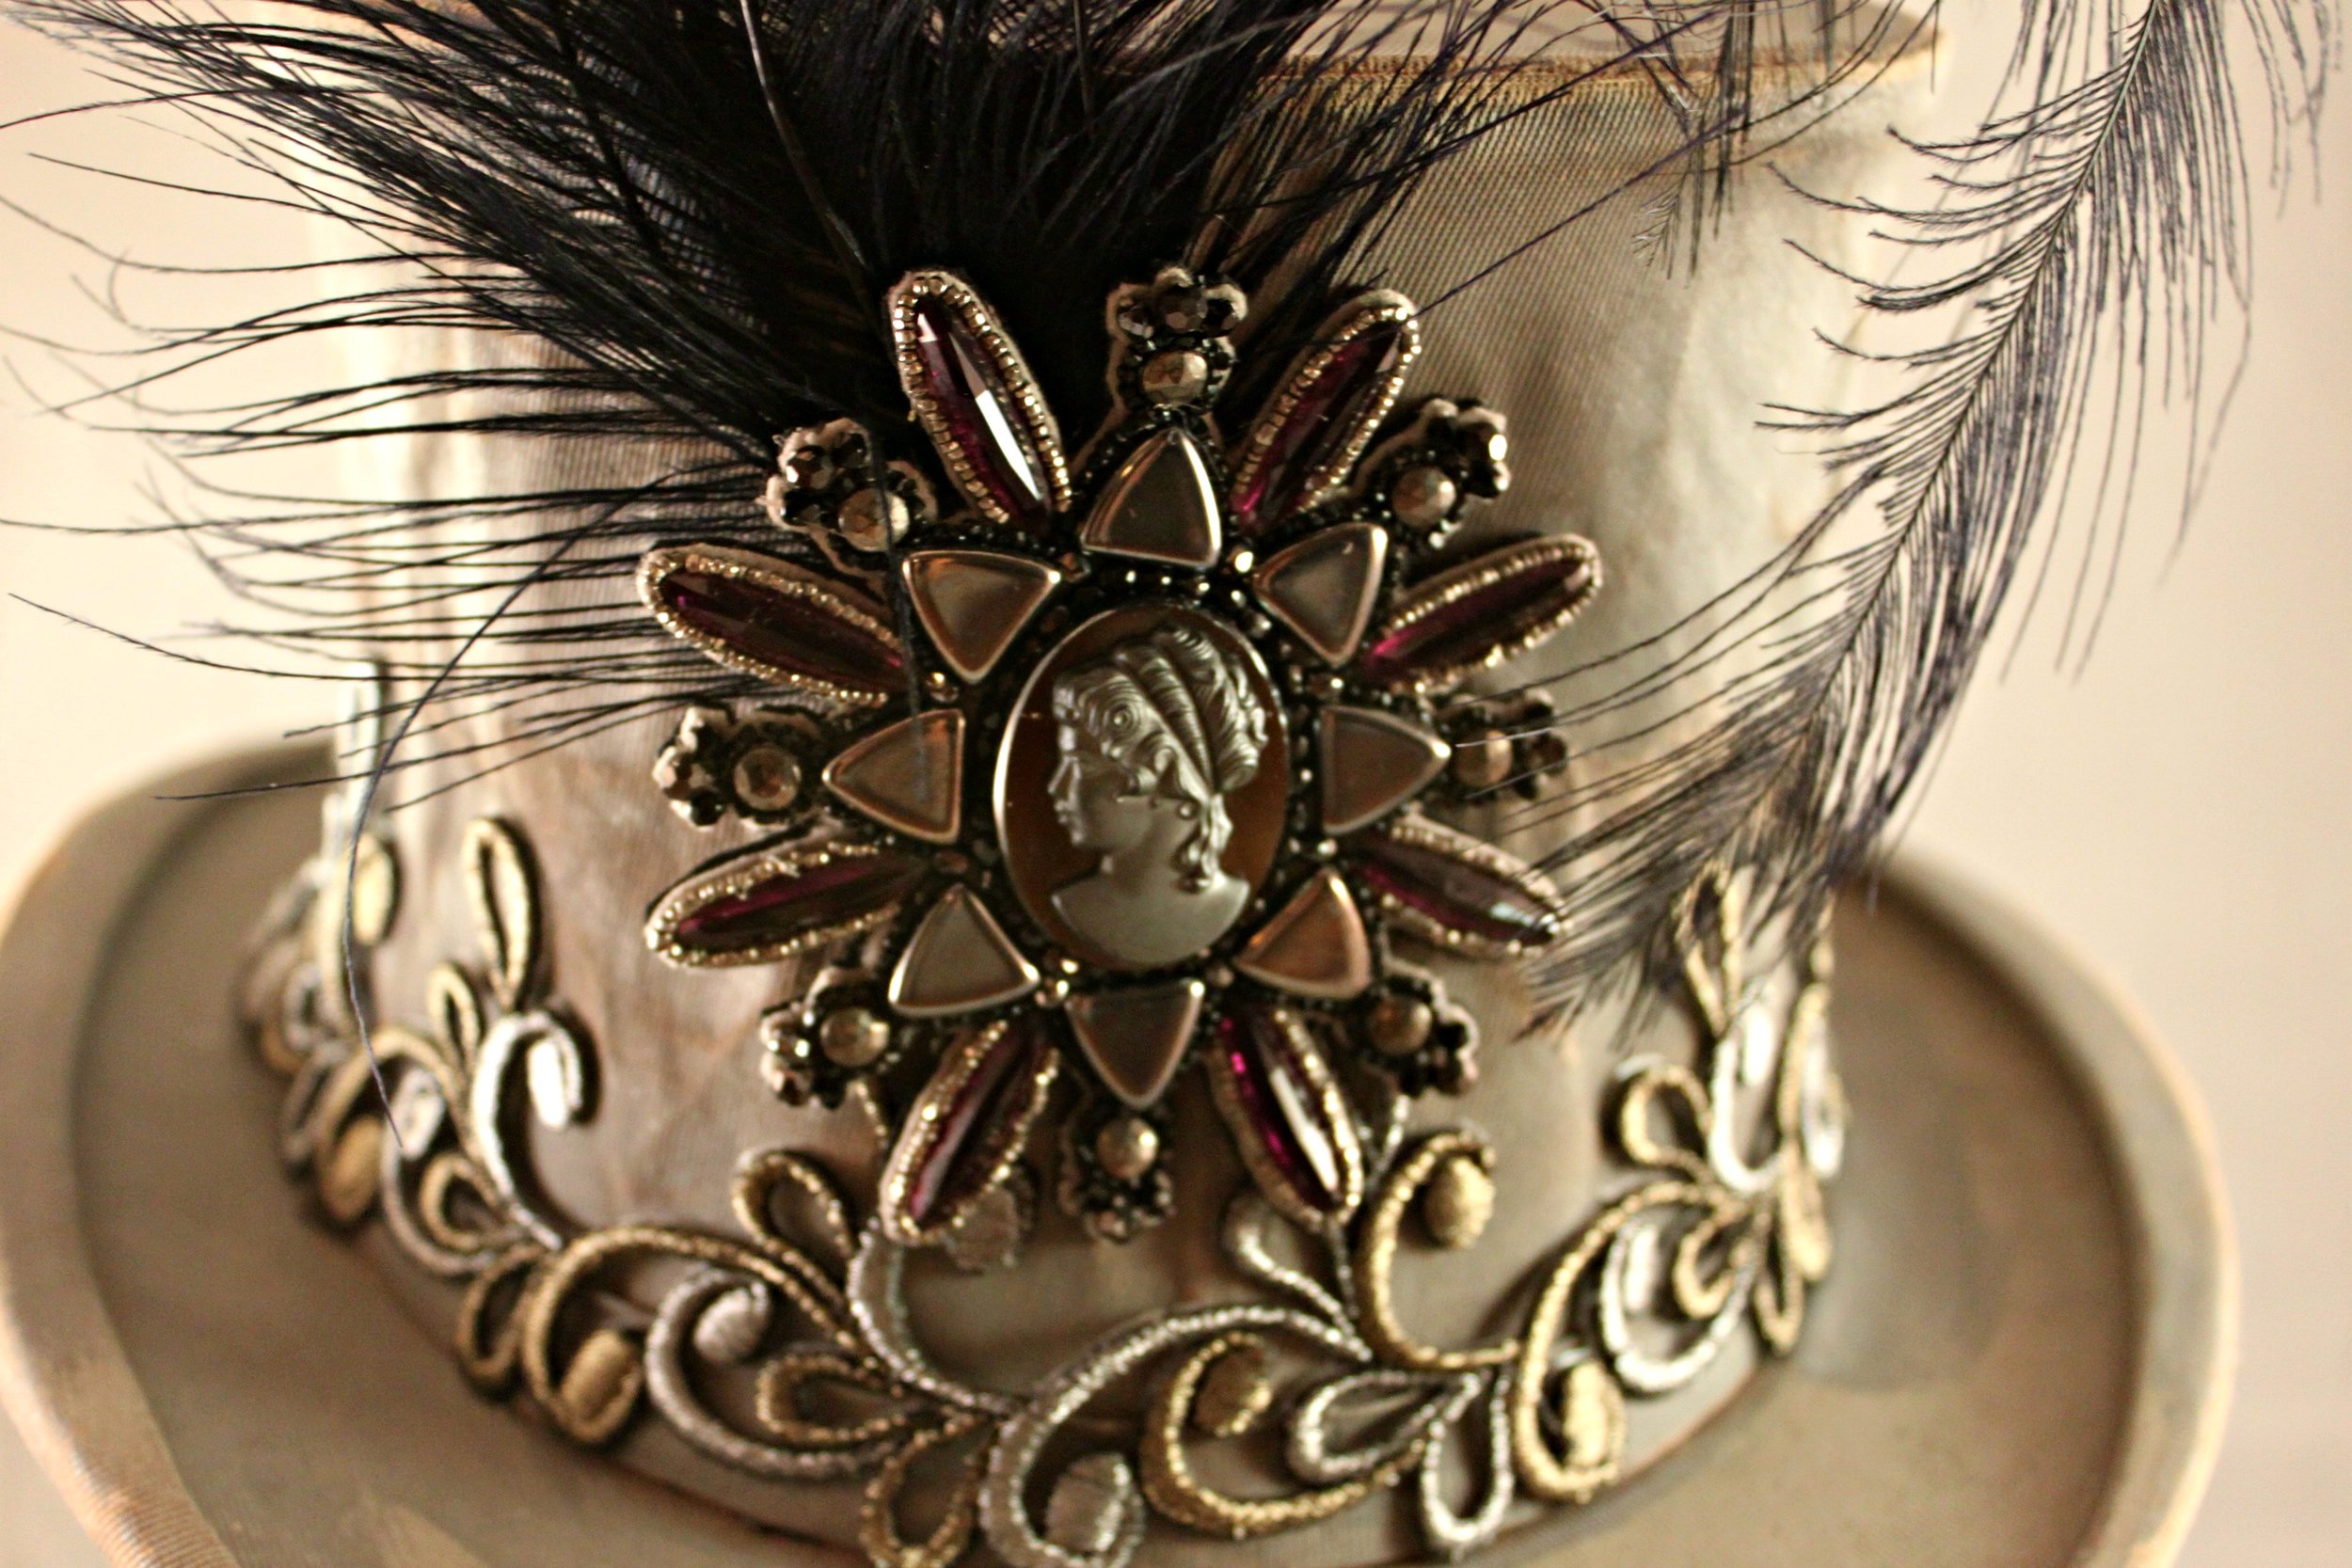
My mom calls this hat--Puttin' on the Ritz! The collage of vintage rhinestone pins are accented by a salvaged tie, refashioned around the brim of the bowler hat. At the back, a tiny red feather gives just a pop of color. Just one more sneak peek--got to save something for the show right? This gray top hat is festooned with black feathers the spiral and cascade back down toward the brim. A fancy embroidered ribbon hugs the base of the top hat and accompanies the focal point of this piece--a cameo which has been beaded around to highlight its startling silver tone with pearl, gray, and crystal beads.

You can see the other creations we have in store for you on Saturday. Hope to see you there, 8:00 pm sharp!

Steampunk Temporary Tattoos

ShowsSamantha ExtanceComment

The Indie Emporium grab bags are going to be EPIC this year! Tee shirts from Darby & Dash, buttons galore, mini prints, coupons for money off your purchases at the show, and....(drumroll please) Steampunk Temporary Tattoos! I designed these 2 tattoos myself. One is a sketch of the Diving Bell Helmet that I have in my booth display and the other is the silhouette I use as my logo--the lovely Lady Gears! I couldn't have done this without Buttonhead on Etsy. Check out her shop, she makes buttons & custom tattoos. Grab bags go to the first 50 people so get there early! Can't wait to see you all at the show!

The Pocket Watch Bow Tie

Inspiration, ShowsSamantha Extance1 Comment

I am bursting with pride right now--I have made what I consider one of my best creations--The Pocket Watch Bow Tie. Even though my fingers are riddled with pinpricks and sore from fiddling with metal for the majority of today; and even though my back and neck feel as if they will remain craned over horizontal surfaces forever & never straighten out again...I am so unbelievably happy.

It's moments like these that I am grateful for the people in my life that helped me develop my imagination (seriously,  thanks Mom & Grams). I love what I do and I love what I make--which is often why it is so hard to sell certain pieces. This one has a a little bit of my soul in it, a whole lotta love & whimsy, and a touch of what makes great art--joy.

Hope everyone has a lovely Sunday. Drop by my booth at Indie Emporium this Friday and Saturday (and remember the fashion show is on Saturday @ 8pm, get there early)--there's a ton of new jewelry and accessories--esp. for you gents.

Well, I am heading to bed where I will certainly be dreaming up more fantastical creations!


Gearing Up for Indie Emporium!

ShowsSamantha Extance2 Comments

Indie Emporium is 10 days away and I am so excited for it this year! In addition to having a booth at the show, I am showcasing some of my more hardcore Steampunk jewelry pieces alongside my mom's fantastical Steampunk top hats, berets, & bowlers!  It is not an event to miss! (The fashion show takes place on Sat. Sept. 29th at 8:00pm--space fills up quickly so get there early). I've been working like a mad scientist in his lab so much lately that I have neglected my blog a bit. So here are some things I've been cooking up--Gearrings Galore!

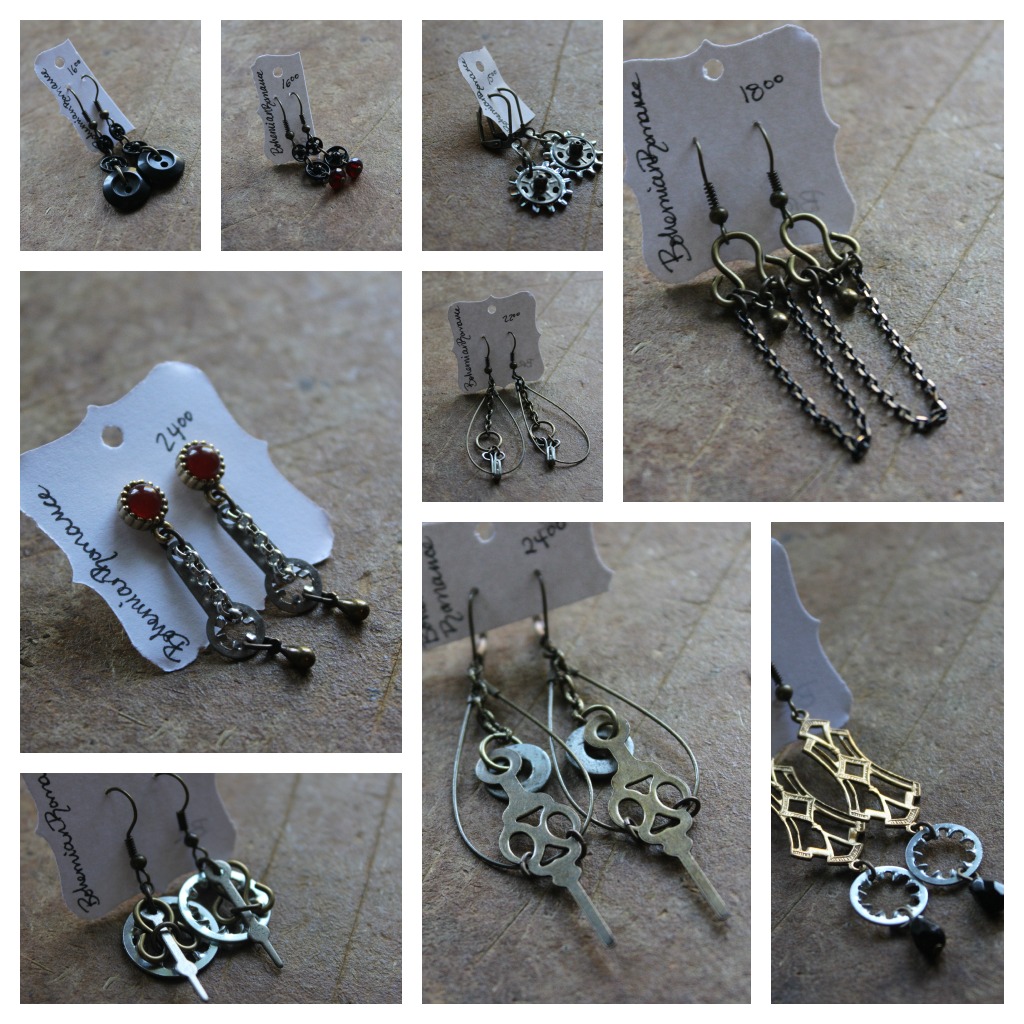
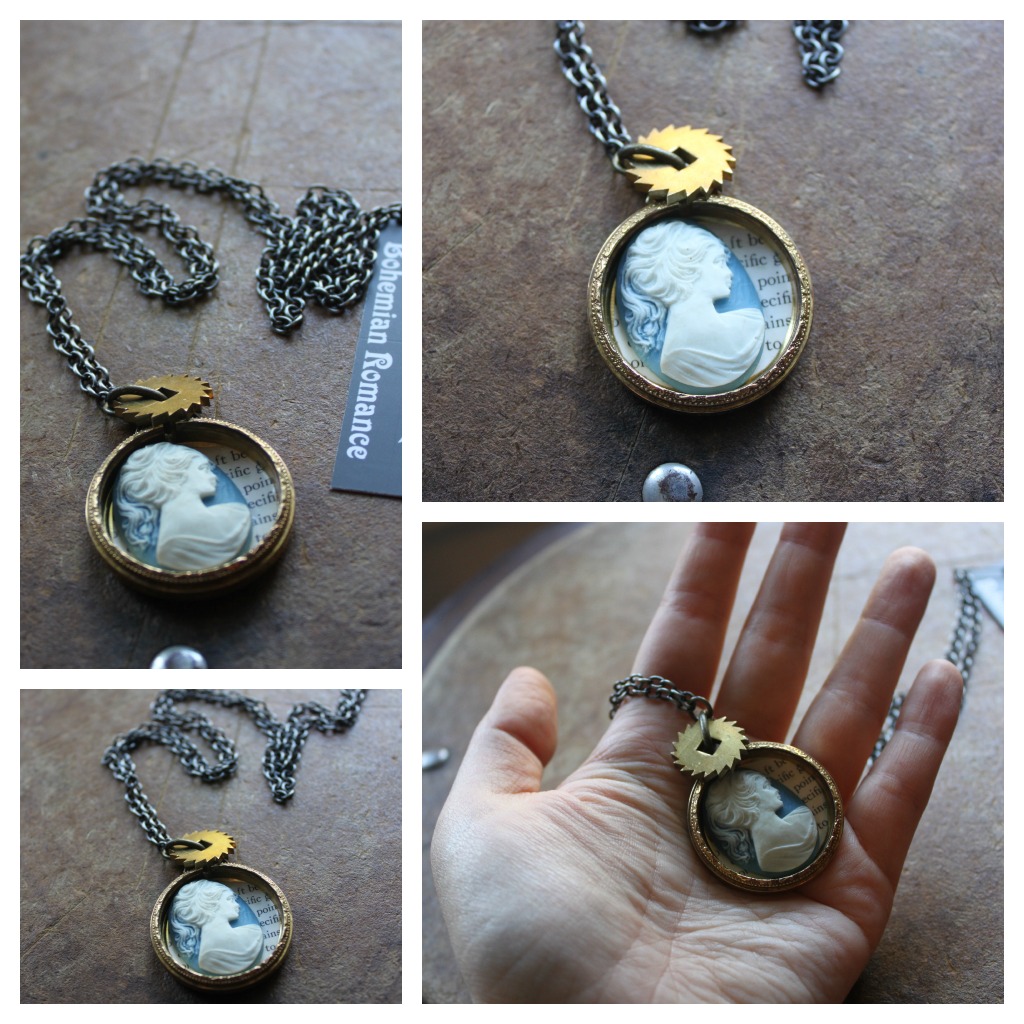
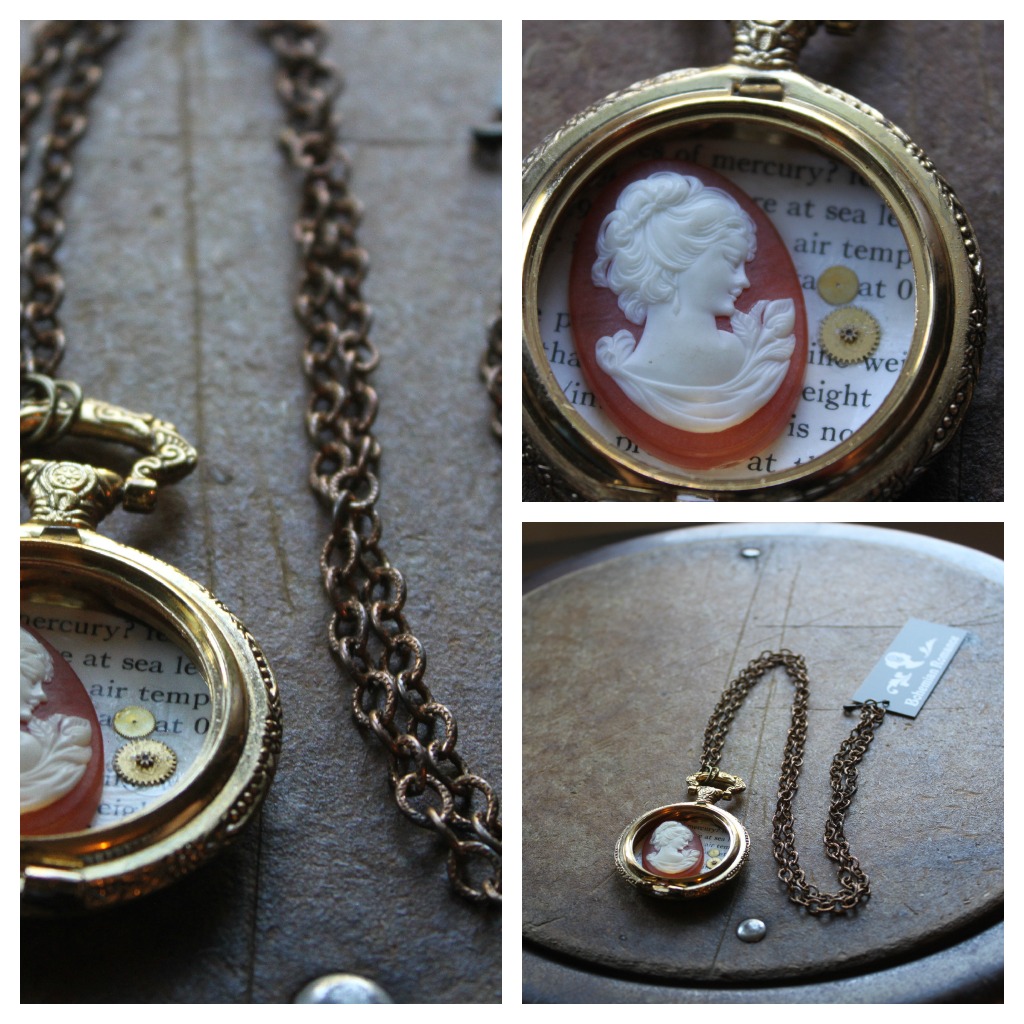
I've made so many earrings I will not even be able to put them all out at the same time! Unless I get extra creative with my display (which may just happen in 10 days). I've been on a button-kick lately. Pearl buttons lend a daintiness and femininity to harsh metals--one of the reasons I use them so often in my jewelry. A main staple of my gearrings are clothing snaps--you can see them in the earrings in the above collage on the left. My favorite pair I've recently made is pictured on the left (in the middle). A new development is my use of black buttons which I think add just a touch a dark romance.I've been asked to make more cameo necklaces and here are 2 of the latest! I've nestled them in pocket watches and paired each cameo with a background of book print. Gents, now don't go thinking that I forgot about you--I have some extra special men's Steampunk pieces this year. I have a line of Steampunked bow ties. And of course, man-bling like necklaces, leather cuffs, and jacket pins. There will also be a male model in the fashion show--donning a top hat, pocket watch, cuff, and steampunk medal (pictured below).And I'll also have something for you explorers and adventurers--compasses!

Phew! Well, back to my cluttered workshop table. Hope to see you at Indie Emporium and I really hope you come by for the fashion show!

Bohemian Romance Model Casting Call

ShowsSamantha ExtanceComment

Bohemian Romance Model Casting Call!

Who I am Looking For:

Looking for 5 female models aged 20 and up, of various body types and builds. I would like to have some diversity with models and represent a range of healthy body types and ages in the show if possible. My only prerequisite is that all models must have pierced ears.

Please provide 2 photos (one of your lovely face & one that includes you from head to toe), and your name to the following email address: bohemianromancejewelrycasting@gmail.com

More about Me & the Event:

Bohemian Romance will be in this year’s Indie Emporium Fashion Show! Indie Emporium is in its 6th year and offers plenty of exposure & opportunities for artists. The fashion show takes place at Living Arts on Saturday, September 29th at 8:00 pm. Models must arrive at 4:00 pm that day for hair & makeup.

Products to be Modeled:

You will be modeling Steampunk accessories (mainly hats and jewelry). Most of you who read this blog are familiar with Steampunk but for those of you who were referred here—it is “Jane Austen meets Mad Max,” or in simpler terms it is a subculture that fuses science fiction & fantasy with Victorian culture, sensibility, and steam technology. Think clock gears, corsets, goggles, and ray guns and you’re halfway there.

What You’ll Get from Me:

Unfortunately I cannot pay for models but each will receive a free ticket to Indie Emporium, digital photography of themselves for their portfolio, exposure & networking with other designers, and a steampunk jewelry set that I will custom design for each individual model.

Again, those interested please email me, Sam, at bohemianromancejewelrycasting@gmail.com Thanks!

DIY Steampunk Curtain Ties

D-I-Y-Samantha Extance1 Comment

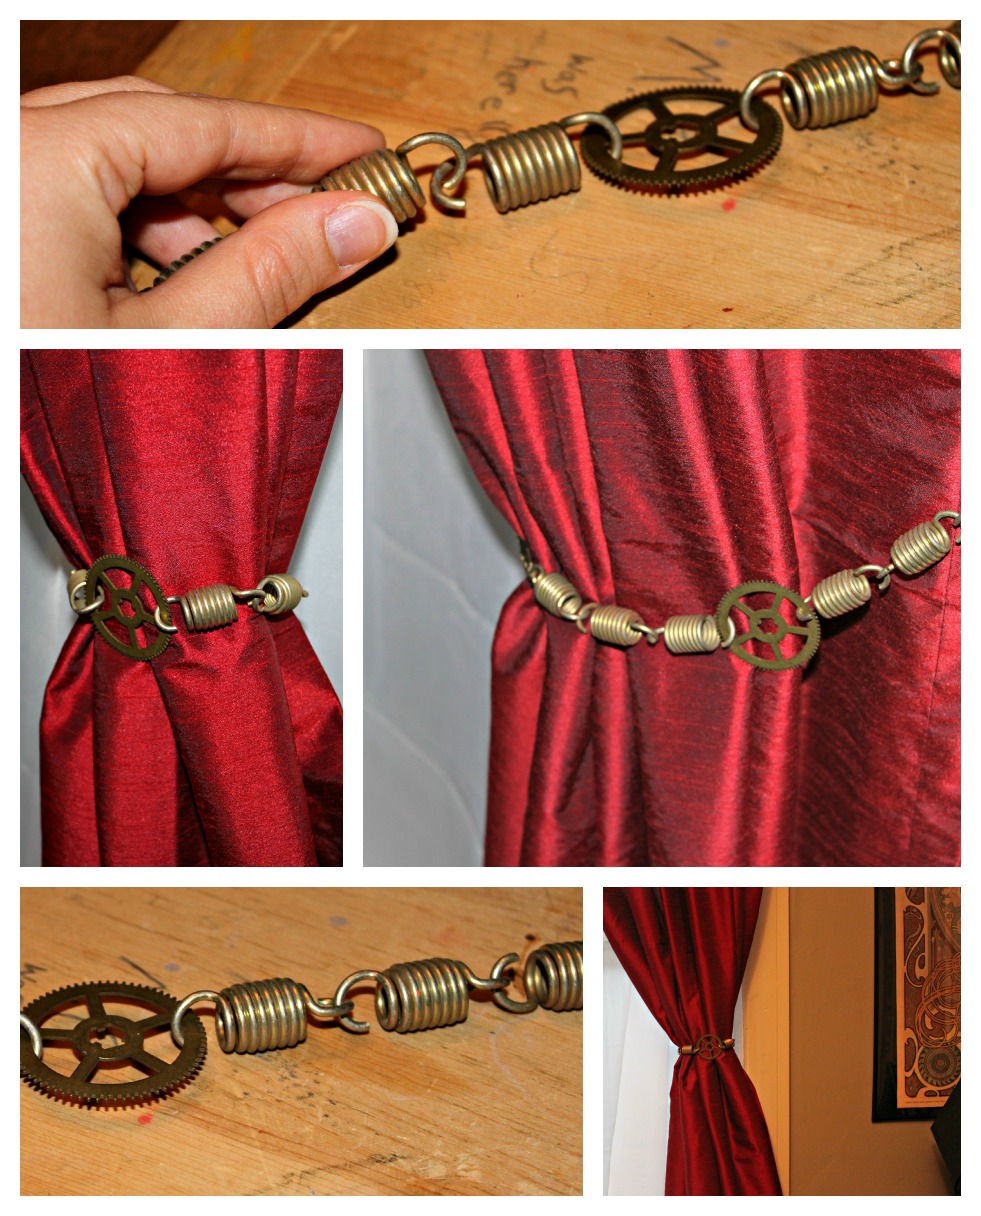
6 Different Steampunk Curtain Tie DIYS to subtly transform your decor! Materials & Tools are listed below by project. So let's get to makin'! Spring & Gear Steampunk Curtain Tie

  • 8-12 springs (depending on the thickness of your curtain)
  • Grandfather clock gear
  • Flat nosed pliers & jump rings

Steps:

  1. Link the springs together. (My springs are open ended, but if yours are closed ended connect your springs with a jump ring using your flat nosed pliers.) Link 4-6 springs together then add your grandfather clock gear.
  2. Next, add the remaining 4-6 springs to your gear & spring chain.
  3. Gather your curtain and place your spring & gear chain around it, connecting the two spring ends. (Again, mine are open ended so connecting them was simple; however, if your springs are closed ended, use a jump ring as detailed in Step 1.)

Skeleton Key & Chain Steampunk Curtain Tie

  • Skeleton key
  • Chain
  • 4 jump rings
  • Flat nosed pliers
  • Measuring tape
  • lobster claw or hook

Steps:

  1. Gather your curtain and measure out how much chain you need. Cut the amount needed.
  2. Add your lobster claw or hook to the end of your chain using a jump ring and your flat nosed pliers.
  3. Next, attach your skeleton key to your chain wherever you desire using your jump rings and your flat nosed pliers.
  4. Last, gather your curtain and place the chain around it and secure by connecting your lobster claw or hook to the last loop of your chain.

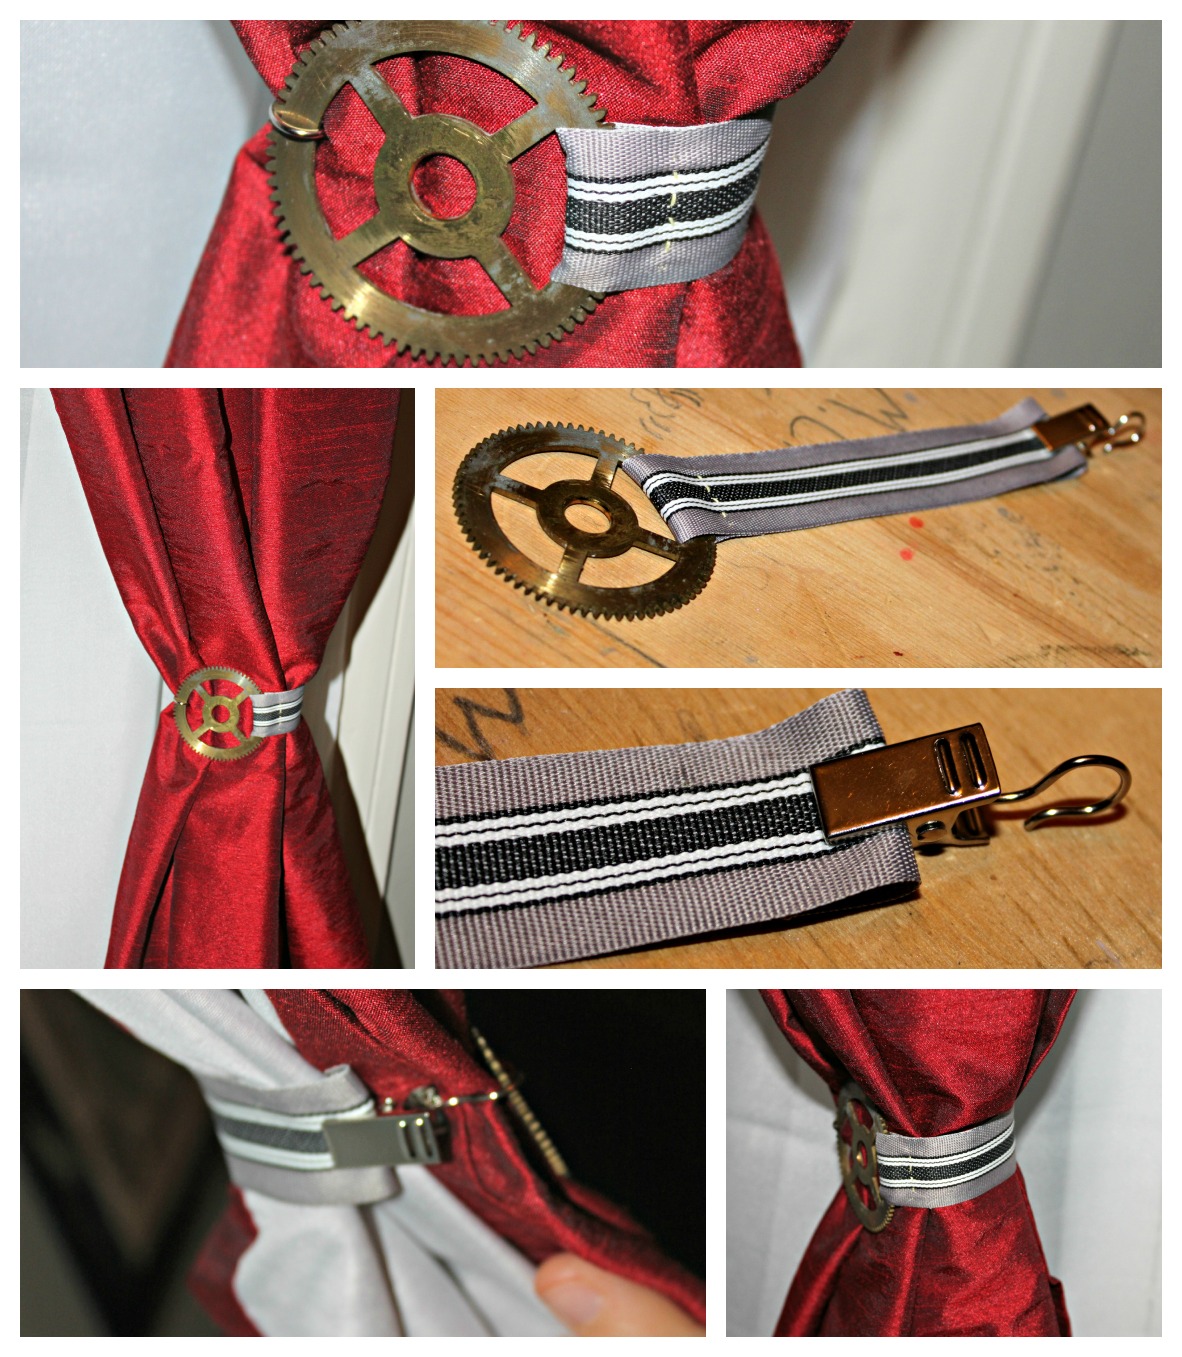
Ribbon & Gear Steampunk Curtain Tie

  • Ribbon
  • Grandfather clock gear
  • Needle & thread
  • Scissors
  • Clamp-hook
  • Measuring tape

Steps:

  1. Gather your curtain and measure its gathered width. Add a 1/2 inch. This width will equal the length of your ribbon.
  2. Cut your ribbon to your needed length.
  3. Next, fold one end of your ribbon around your grandfather clock gear. This is where your 1/2 inch allowance is used.
  4. With your needle & thread, sew the fold in place. Be sure to tie a sturdy knot. Cut off the excess thread.
  5. Place your clamp-hook on the other end of the ribbon.
  6. Gather your curtain once again and wrap the ribbon around it. Secure the tie in place by fishing the hook onto your gear.

Lightbulb, Velvet Ribbon & Gear Steampunk Curtain Tie

  • Velvet ribbon (or an old choker: if you do use an old choker you can skip ahead to Step 3)
  • Grandfather clock gear
  • Chain
  • Wire & wire cutters
  • Flat nosed pliers
  • Scissors
  • Measuring tape
  • Lightbulb or (lightbulbs)
  • 2 ribbon ends (or crimps)
  • 4 jump rings

Steps:

  1. Gather your curtain and measure its gathered width. Next measure your gear. Subtract your gear's width from your curtain width. This width is equal to the length of your ribbon.
  2. On each end of your velvet ribbon, place a ribbon end (or crimp) using your flat nosed pliers.
  3. Attach your gear to one end of your velvet ribbon with a jump ring using your flat nosed pliers. Set aside.
  4. For this step you'll need wire and wire cutters. Grab your lightbulb and begin wire wrapping its base. Be sure to create a loop so that you can connect the lightbulb (or lightbulbs) to your gear (and/or chain). Cut off excess wire.
  5. Connect your lightbulb to your gear using a jump ring and your flat nosed pliers (through the wire loop). Optional: you can attach another lightbulb to your gear. I suggest attaching the 2nd lightbulb to chain and then attaching the chain to your gear. It will give your curtain tie another added dimension.
  6. Last, wrap your velvet ribbon (or choker) around your gathered curtain and secure by connecting the loose end of your ribbon to the other side of your gear with a jump ring using your flat nosed pliers.

Clamp, Chain & Gear Steampunk Curtain Tie

  • C-Clamp
  • Grandfather clock gear
  • Chain (approximately 1-2 inches)
  • 2 jump rings
  • Flat nosed pliers

Steps:

  1. Attach your grandfather clock gear to the middle of your c-clamp with a jump ring and flat nosed pliers.
  2. Next, attach your chain to the bottom of the gear with a jump ring and flat nosed pliers.
  3. Attach the loose end of the chain to the hoop part of the c-clamp with a jump ring and pliers.
  4. Gather your curtain and hook your c-clamp around it. Last, clamp your curtain in place.

Clamp Simply Steampunk Curtain Tie

  • C-Clamp

Steps:

  1. Gather your curtain and position your c-clamp around it.
  2. Screw closed!

Enjoy your fabulous Steampunked Curtains!


Flea Market Find: Bradley & Hubbard Inkwell

Flea Market Finds, UncategorizedSamantha Extance2 Comments

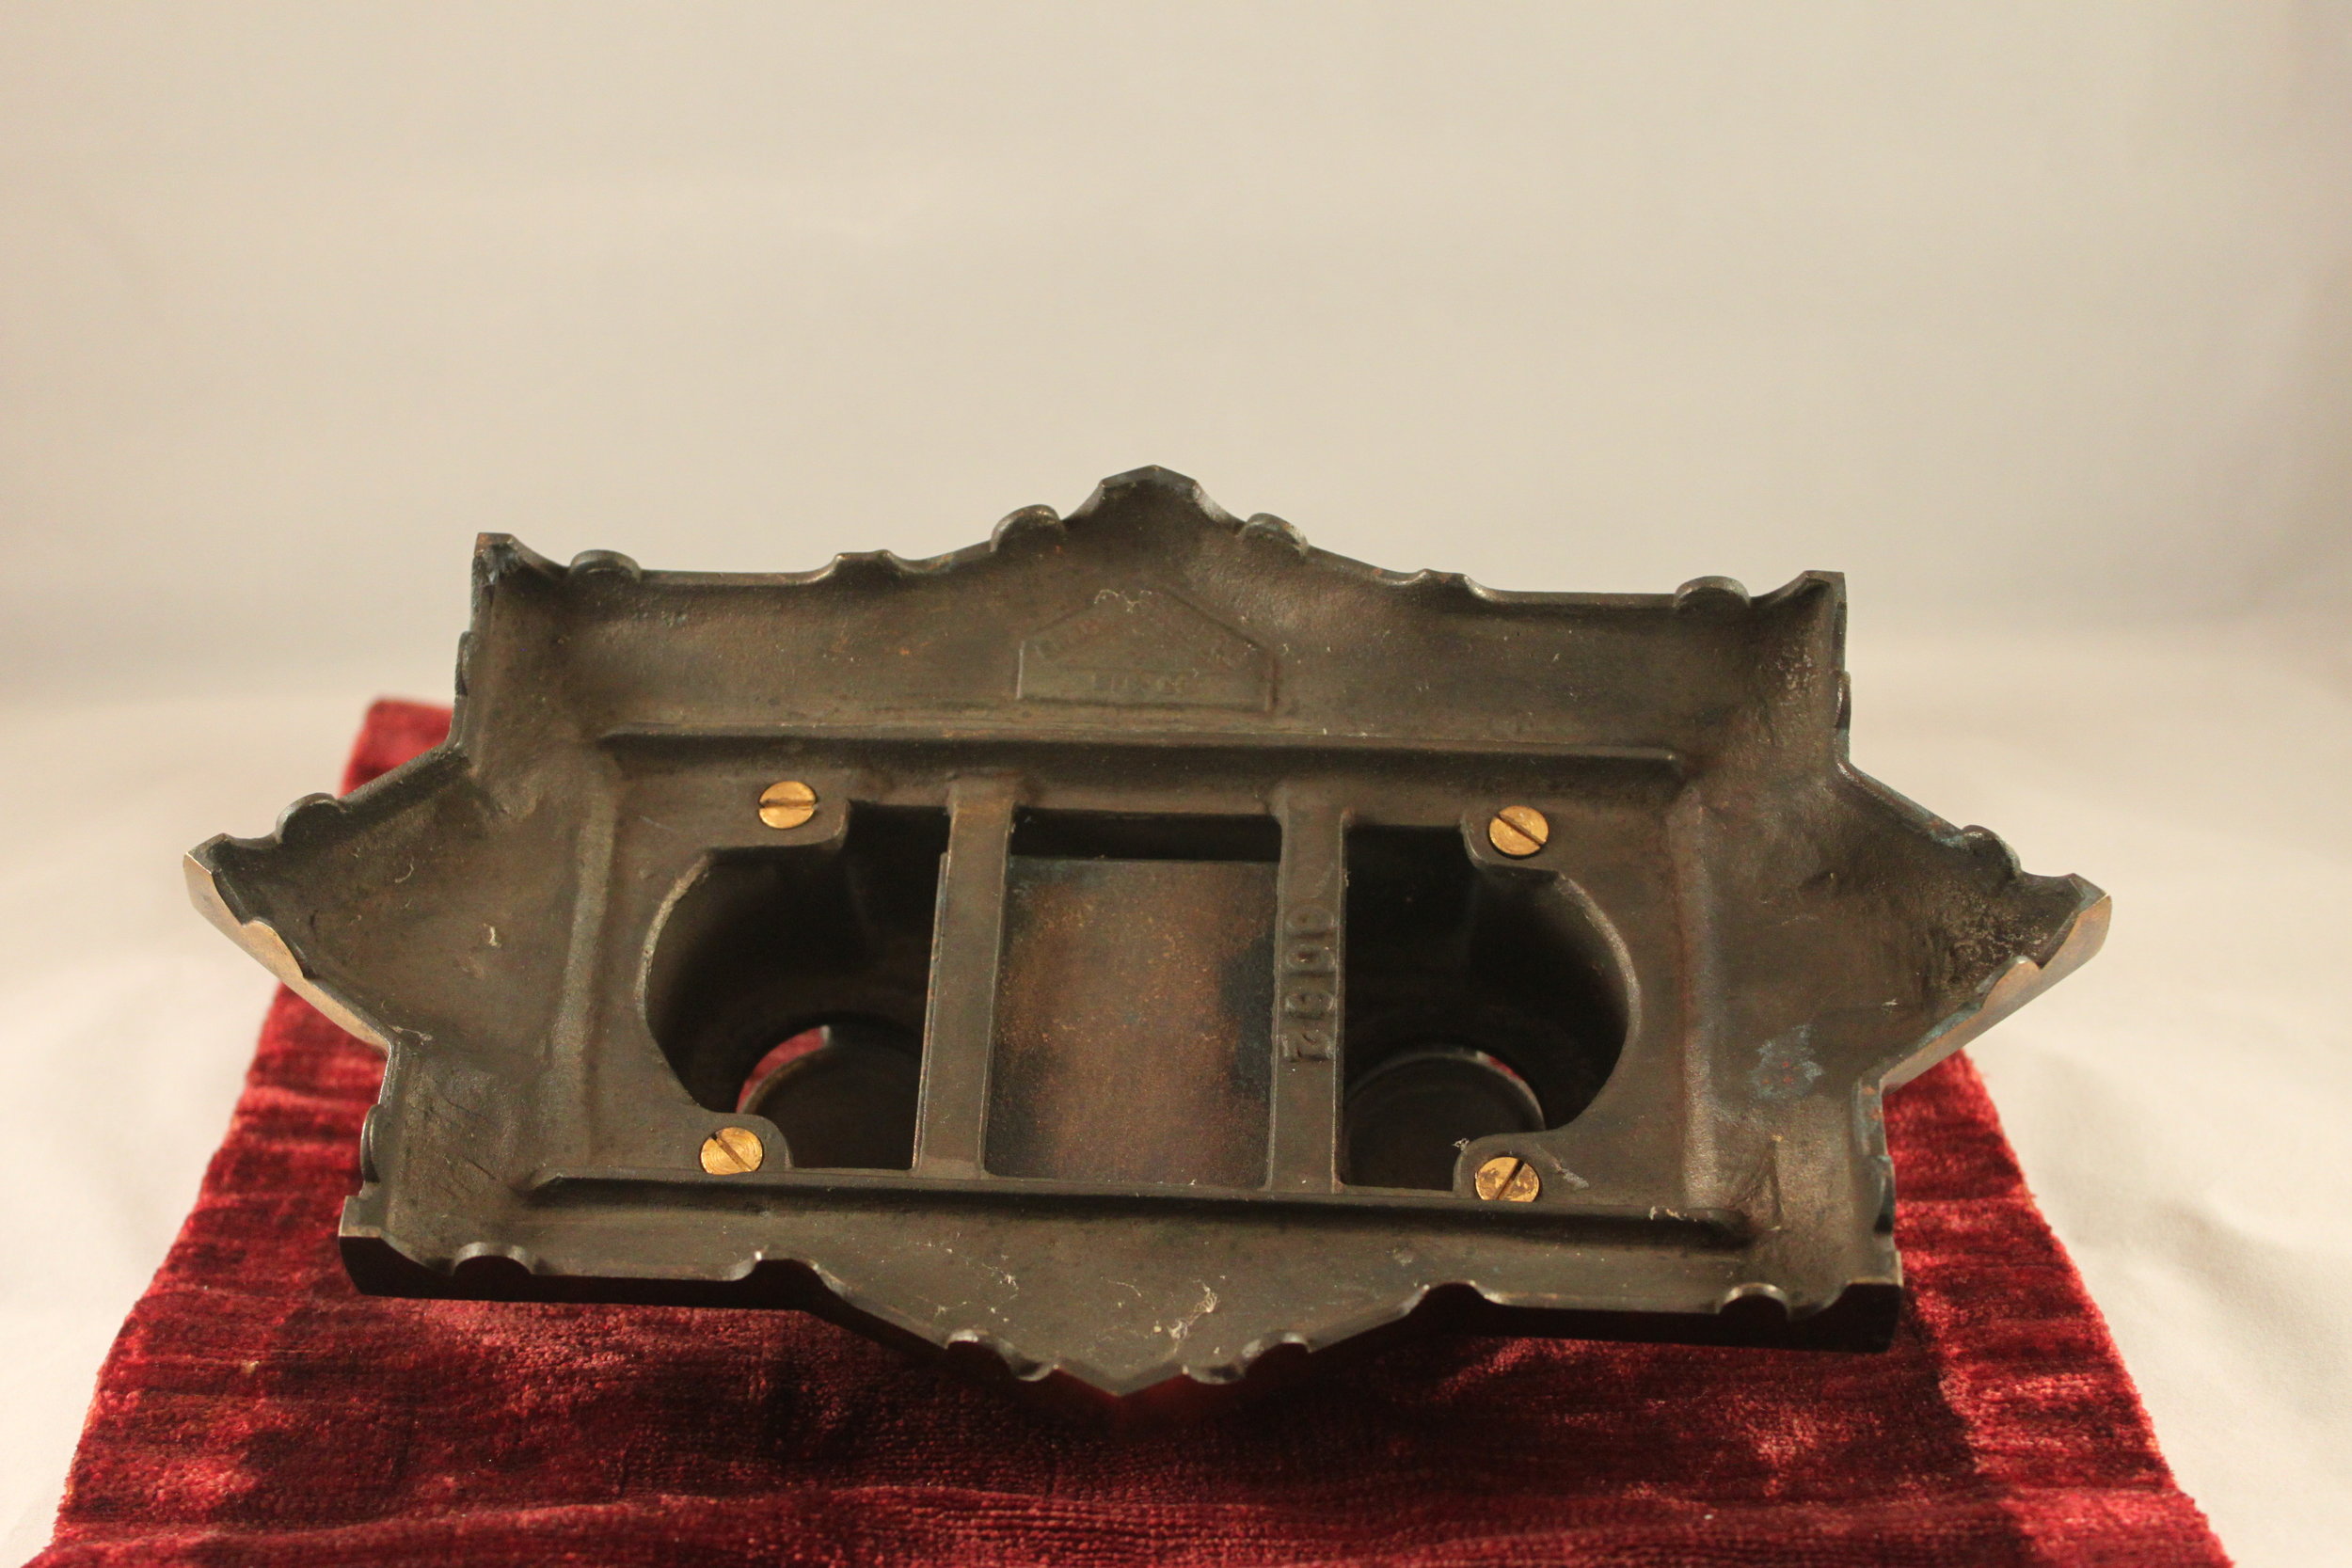
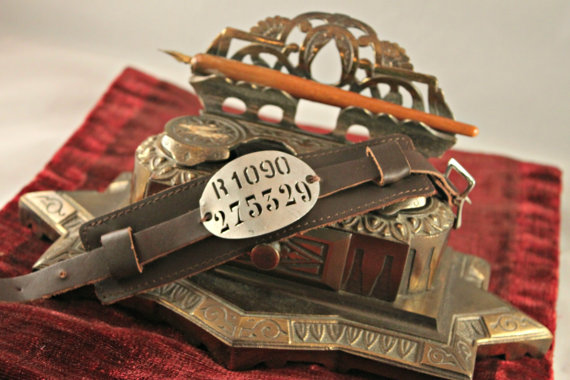
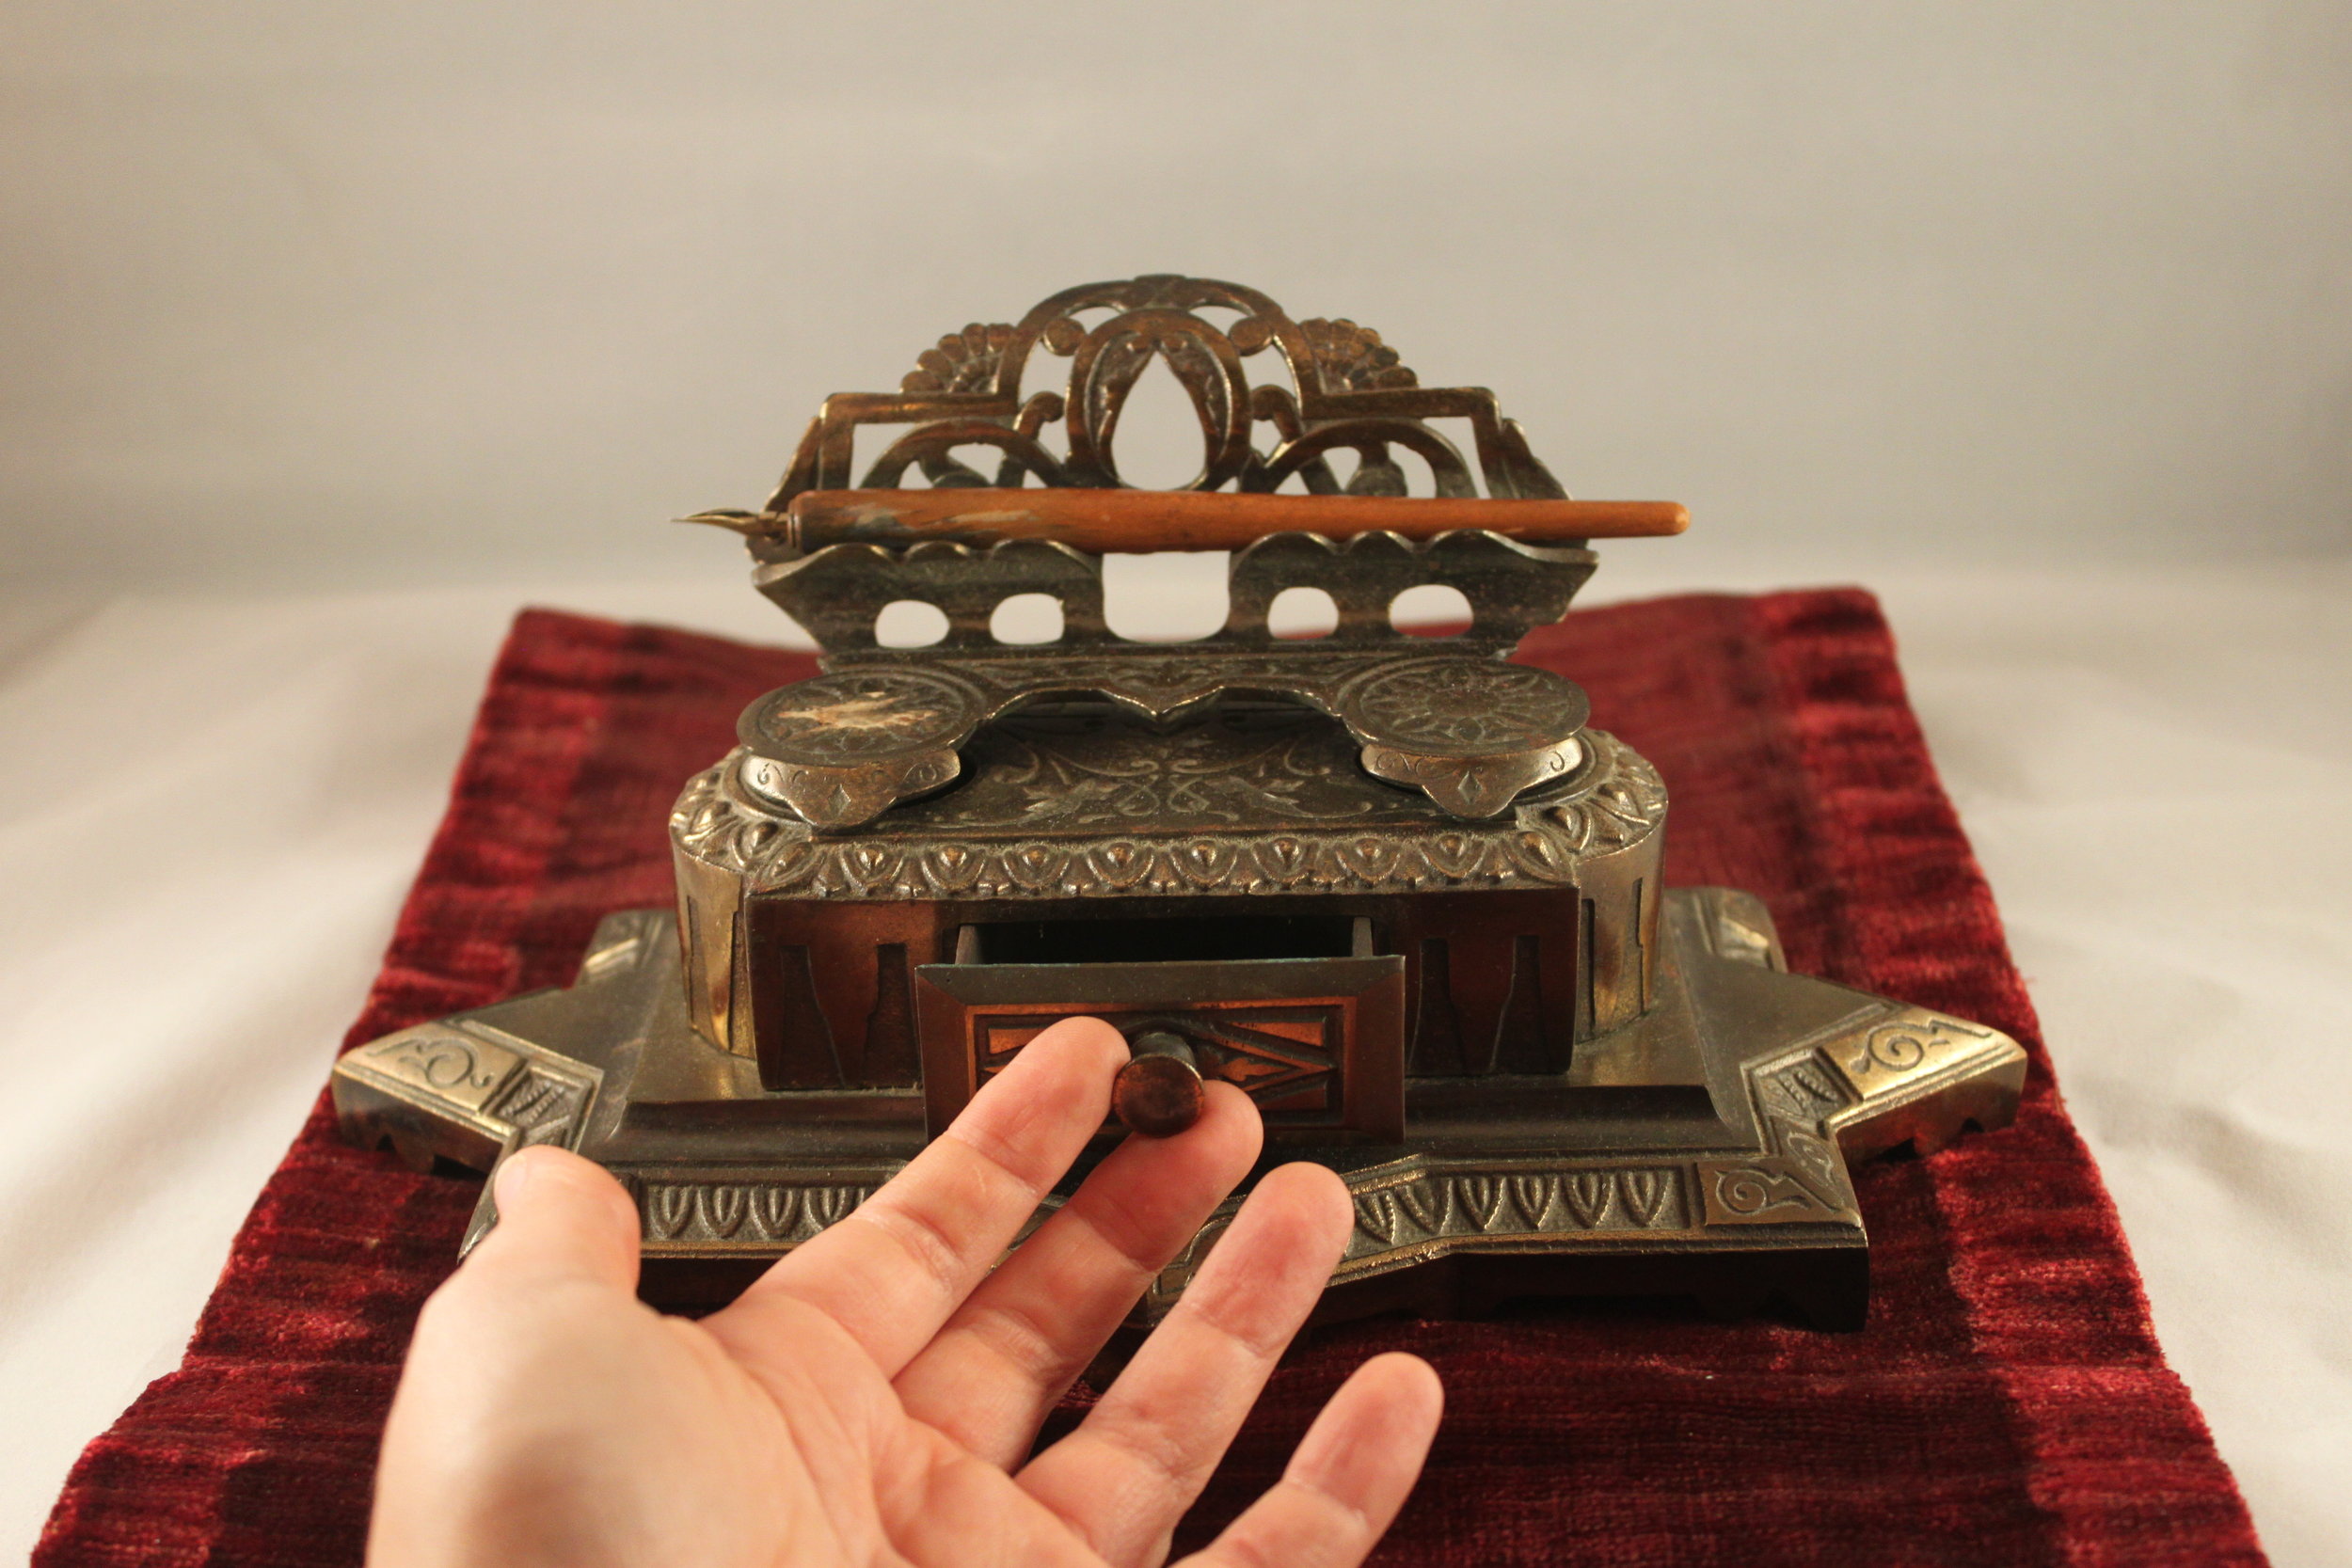
I love typography and anything that makes print & type and so I find myself collecting letterpress drawers, vintage stamps & pens, and antique inkwells among other things. My mom happened upon this inkwell a month ago at a flea market and I have just now had time to sit down and research more about it. My only clue was its (very difficult to read) makers’ stamp and model no. on the bottom (pictured below). I have found that when a stamp or brand is difficult to decipher 2 tricks work best: 1) rubbing the stamp with chalk (a trick that worked well here because I could not tell whether or not the Bs in Hubbard were in fact Bs and not Rs.) or 2) paper and crayon (which you would use as you would a grave rubbing).

Here is what I have discovered: This inkwell is in fact a Bradley & Hubbard Bronze Mission Style (or Arts & Crafts) Double Inkwell, model no. 6062.  The company began in Meriden, Connecticut in 1852. Their primary products were clocks; however, they prospered during the Civil War and came to manufacture a vast number of oddities: hoop skirts, measuring tapes, match safes, kerosene lamps, desk accessories (like the inkwell), and hearth necessities (andirons and the like). Their products were carried in many stores, including Sears & Roebuck. To learn more about Bradley & Hubbard, click here.

If you are looking for a Bradley & Hubbard inkwell yourself, make sure you check for their brand: a triangle with a lantern inside. Along the three sides of the triangle is stamped their name: “Bradley & Hubbard MFC. Co.”

A google search for a Bradley & Hubbard Co. Mission Inkwell will reveal several Ebay auctions and antique dealers’ listings. There are a number of these inkwells out there and for a wide range of prices. I have found nearly immaculate inkwells for $450.00 and ones that need a little TLC and elbow grease for $75.00. My mom found mine for a steal—a whopping $45.00. It is one of my favorite flea market finds & acts as both a conversation piece in my home, inspiration for my writing, & a prop for photographing my Steampunk jewelry.

Have you had any lucky finds at your local flea market this summer?

Take a Stroll through a Steampunk Garden

D-I-Y-, InspirationSamantha Extance3 Comments

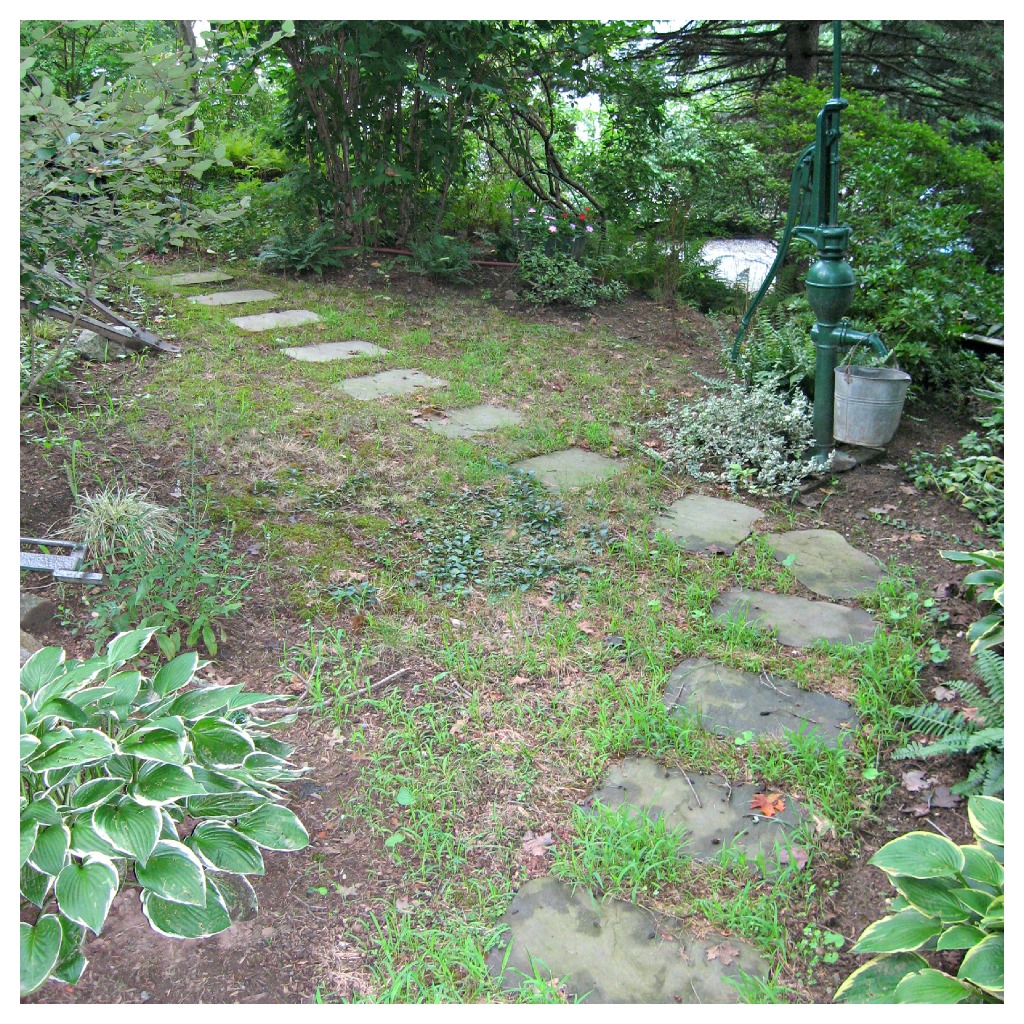
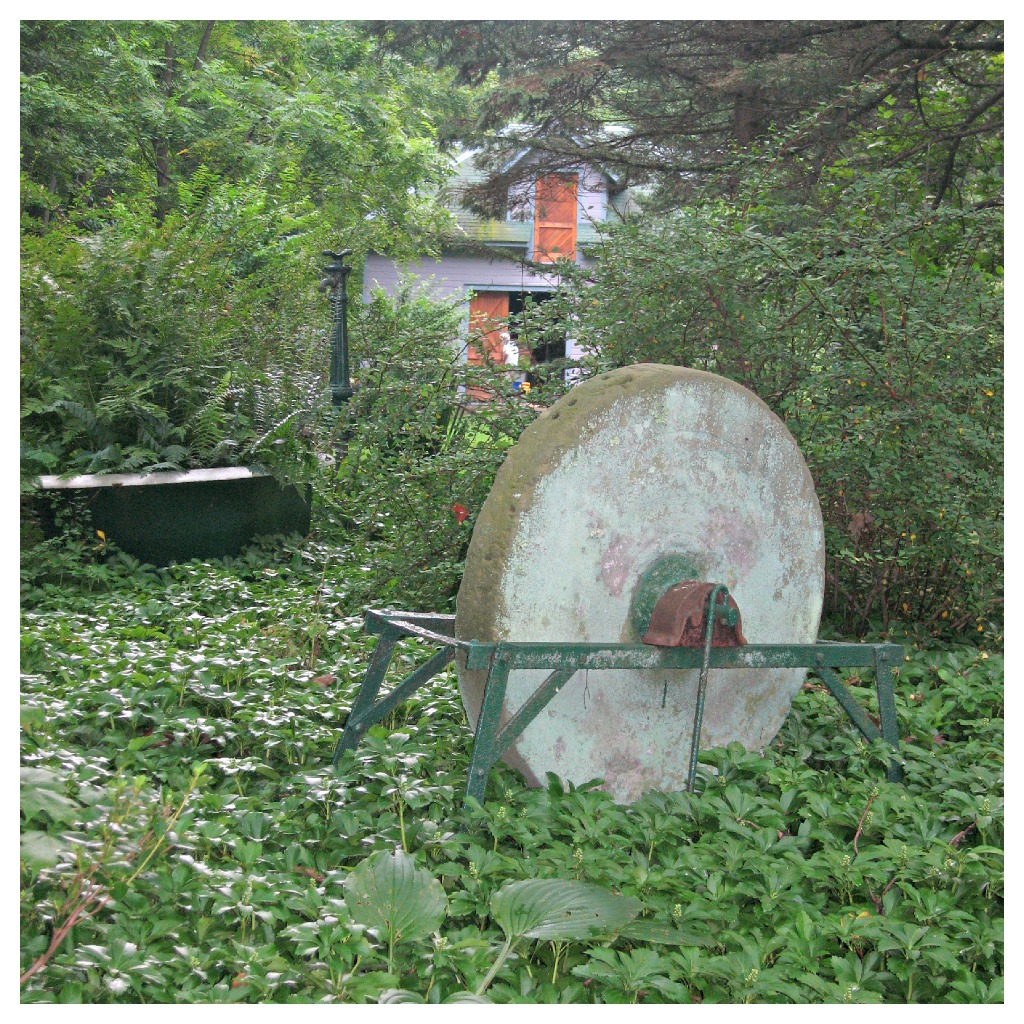
Take a stroll with me in my family's garden. There are subtle steampunk elements infused throughout the lush pachysandra and fragrant  lily-of-the-valley and get some ideas for your own steampunk garden! Here is the house, sheltered from the summer sun by large trees. Stones line a path along to the driveway off to the left which takes you past an antique water pump (painted forest green) with a tin milking pail hanging from its spout. Water pumps are a frequent fixture in our garden & yard--and are painted a variety of colors, from forest green to deep purple. Old farm equipment is also good for decorating your garden--the piece on the left was used for pulling tractor chains. You can leave the old equipment rusty for a more vintage look or finish it with a coat of paint to complement the colors of your flowers or other flora. Another great piece is the metal sphere inside of (or sometimes on the outside of) a globe (pictured bottom right). Birdbaths are also a must!

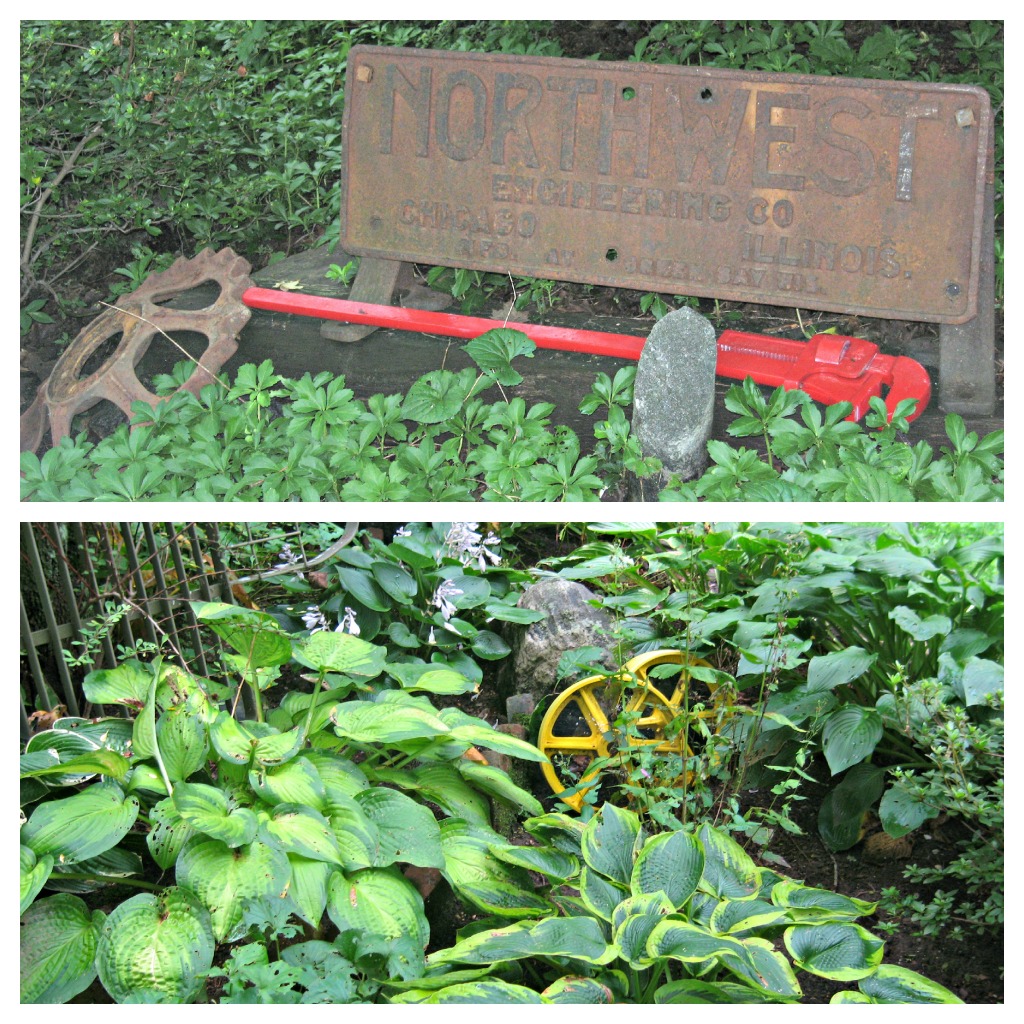
No steampunk garden would be complete without gears! Pictured on the bottom below are two large gears painted mustard yellow and hidden in the deep foliage. Painted, they offer a hint of color that accents the yellow of the leaves. Above is another gear, unpainted, to match the Northwest Engineering Company metal sign. Antique metal signs & business plates are another great way of giving your garden a steampunk feel. Here you can see the placement of the birdbath, globe sphere, and water pump in relationship to the landscape. Also, antique bathroom fixtures make wonderful planters. Worn out tools are another fantastic source for garden decoration. Here we've used an anvil and a large rusted-out wrench. It's perfect to place along steps. Among my favorite parts of our garden is the birdhouse structure my uncle made for my grams. He constructed it out of an old hayrake (the top) and a wagon wheel--both painted forest green. From the old blades hangs grams's many birdhouses & feeders. Pictured right is an important feature, every garden should have its own magical creature for the kiddos! Ours is an Ent. What I love about our garden & lawn is the variety of flowers, plants, and trees. My Uncle John is the landscaper & gardener in the family and if you are looking for gardening tips to recreate a Victorian-style garden, check out Old House Journal's summer & spring issues for gardening tips. This OHJ article offers some advice on planting Victorian flower beds. Thanks for taking a stroll with me! I am certainly enjoying a reprieve from the desert-heat of Oklahoma here in New York. Hope you are staying cool wherever you are!

Thanks Stranger!

InspirationSamantha ExtanceComment

Thanks to the stranger (a Dwelling Spaces shopper) who gifted me two wrist watches. You brought a smile to my face and truly touched my heart. I am not able to thank you in person so I hope  this will do. Thank You. Thanks to you, and many others who have found me at shows and dropped off bags of broken watches & wayward bits-n-bobs. I have been shown such kindness & support as an artist and it keeps me going. New from my little Steampunk Workshop:

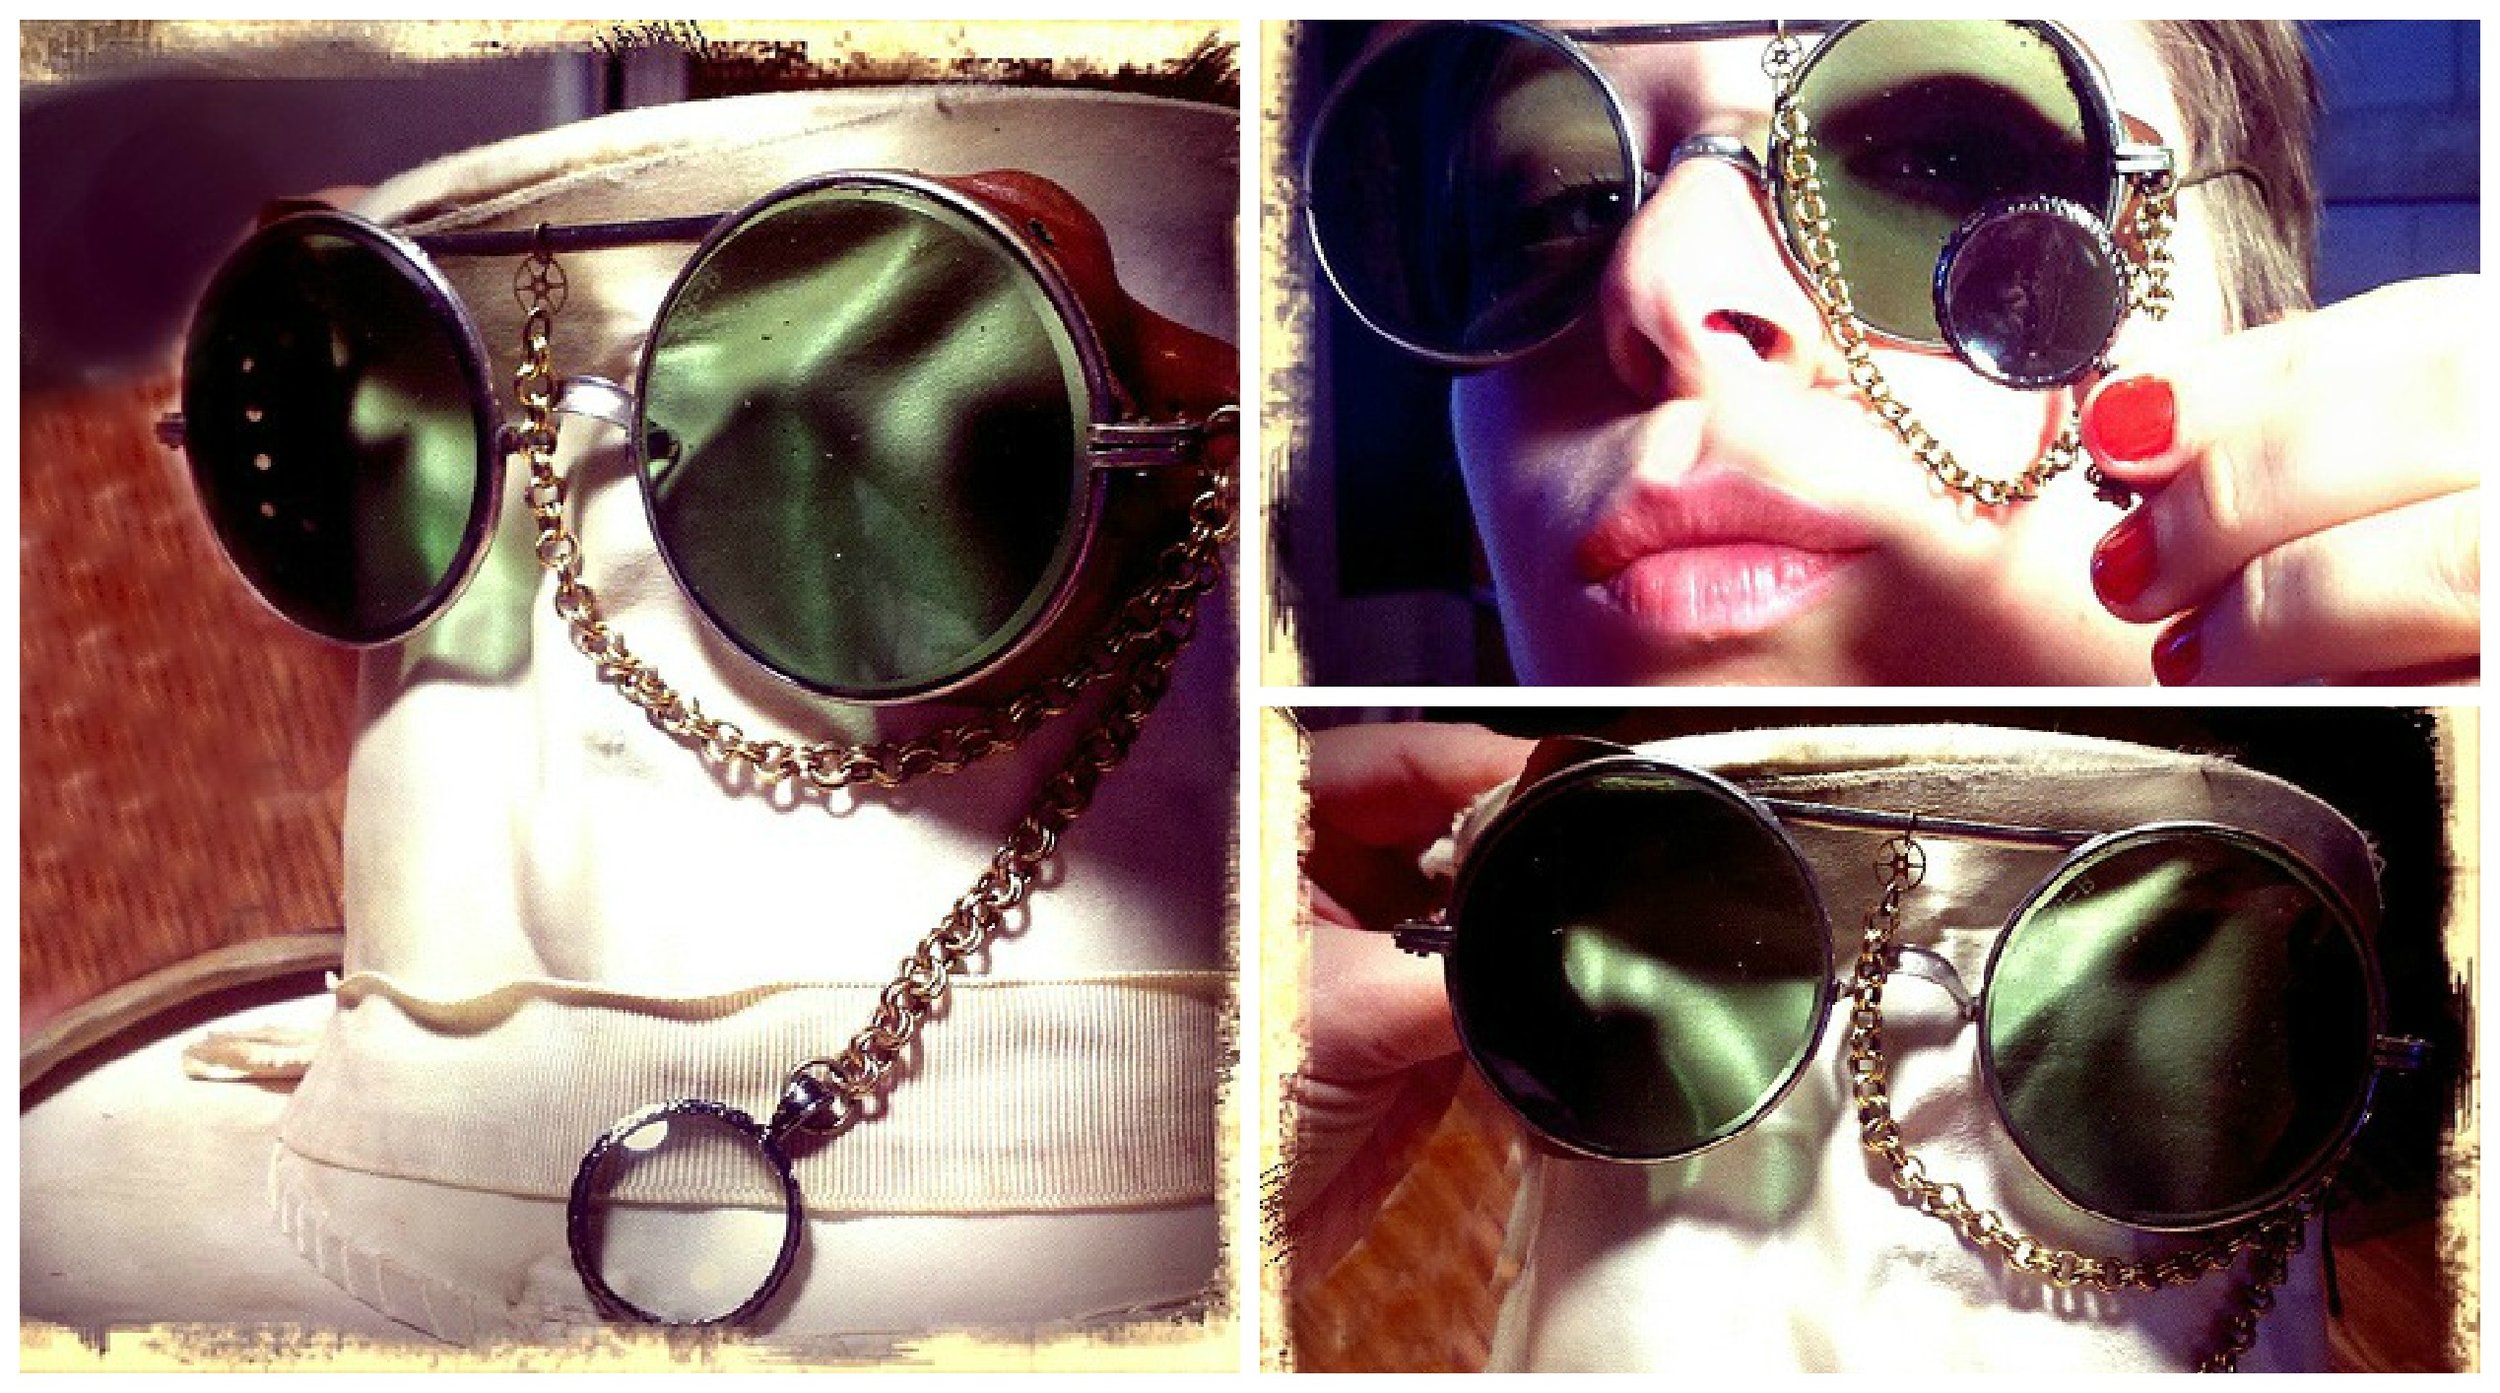
Monocle-Goggles for the Traveling-Reader among you!

Steampunk Countess's Emerald Monocle-Pin.

To fashion to your evening gown or vest, and the monocle unhooked when needed.

I've been on a bit of a monocle kick lately, more inventions are in the works. Of course that does mean I will have to put down Dead Iron at some point...very difficult to do. I recommend it highly though I am still mid-way through its pages.