Bohemian Romance Jewelry

DIY Steampunk & Upcycled Valentines!

UncategorizedSamantha ExtanceComment

Valentine's Day is just next week! Time to get started on making those valentines and handmade is the way to go! Here are 3 DIY Valentine's Day cards you can make easily, quickly, and economically. For the first DIY Valentine's Day Card, here's what you'll need:

IMG_9583Bakers Twine, blank card & envelope, scissors, pen, glue stick, an awl, an old stamp, and a printer.

Steps:

  1. First, glue your stamp onto the front of your card (if you are using only 1 stamp it is best to center it). Be sure to press your stamp firmly down onto the card. Wipe away any glue that creeps out of the edges. step 1
  2. Next, open up your card and on a work surface, poke 2 holes in your card using your awl (also centered). Then thread your Bakers Twine through the holes and tie in a cute bow. Cut off any excess twine. step 2
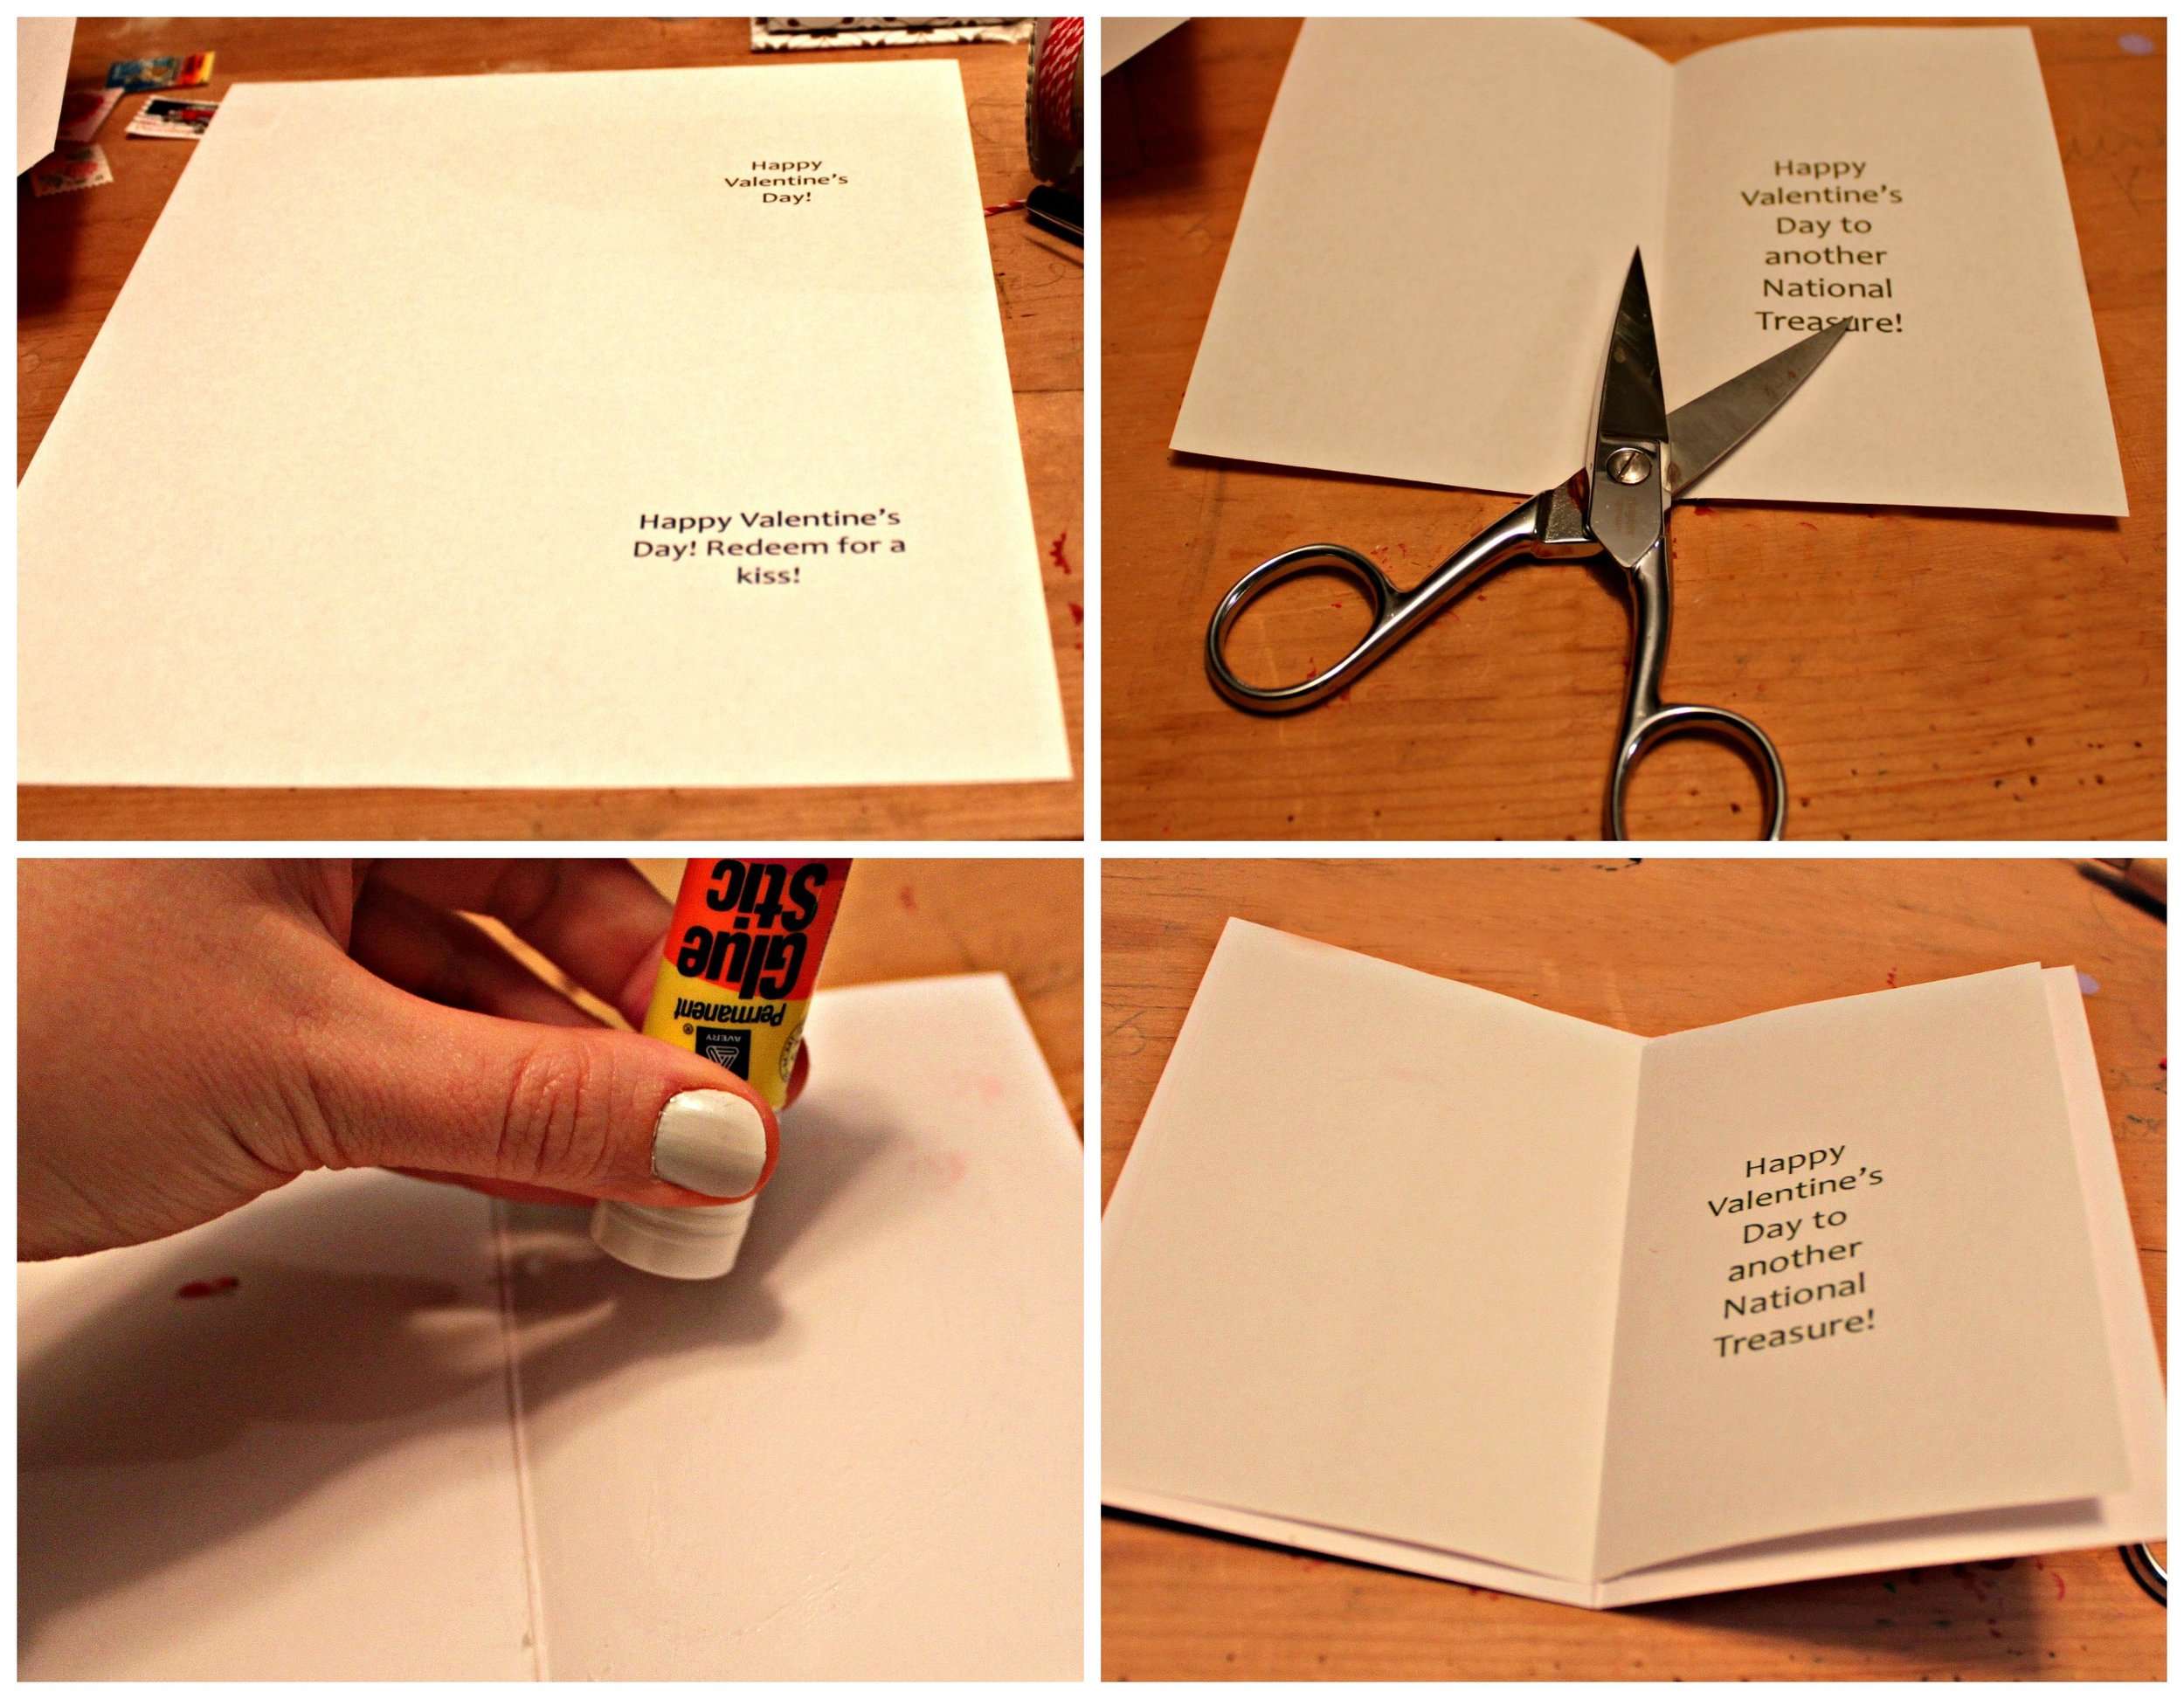
  3. For this next step you will need a computer & a printer. Open up a word document, download a free card template, and type in a message that you want to appear on the inside of your card. Cut down your inside page so that it fits neatly inside your card. step 3 Glue your message to the inside of the card. Be sure to place an even amount of glue on the card & smooth out from the center to the edges to avoid bubbles & creases. And voila, your valentine is complete!
Here are a few variations that you might also try if you are upcycling stamps:

variations

  • Instead of adding a bow to your card, you could draw a decorative border around your card or embellish lines already stamped or drawn on the individual stamps.
  • You could embellish the edges of the inside of your card (the message page) with a paper punch.
  • Instead of gluing the inside message to the card, you could also sew it into the crease.

Token of My Love Valentine's Day Card

For this DIY valentine all you need is the following: Bakers Twine, blank card & envelope, scissors, pen, glue stick, an awl, a token coin with a hole in it, and a printer.token of love diy

  1. Open the card and place it face up on a work surface. Poke 2 parallel holes in the center of your card using your awl.
  2. Next, thread Bakers Twine through the holes.
  3. Place your token coin onto the Bakers Twine. Tie a cute bow. Cut off any excess twine.
  4. For this next step you will need a computer & a printer. Open up a word document, download a free card template, and type in a message that you want to appear on the inside of your card. Cut down your inside page so that it fits neatly inside your card. Glue your message to the inside of the card. Be sure to place an even amount of glue on the card & smooth out from the center to the edges to avoid bubbles & creases.
  5. With your valentine completed, give it to your loved one as a token of your affection!

Redeem for A...Valentine's Day Card
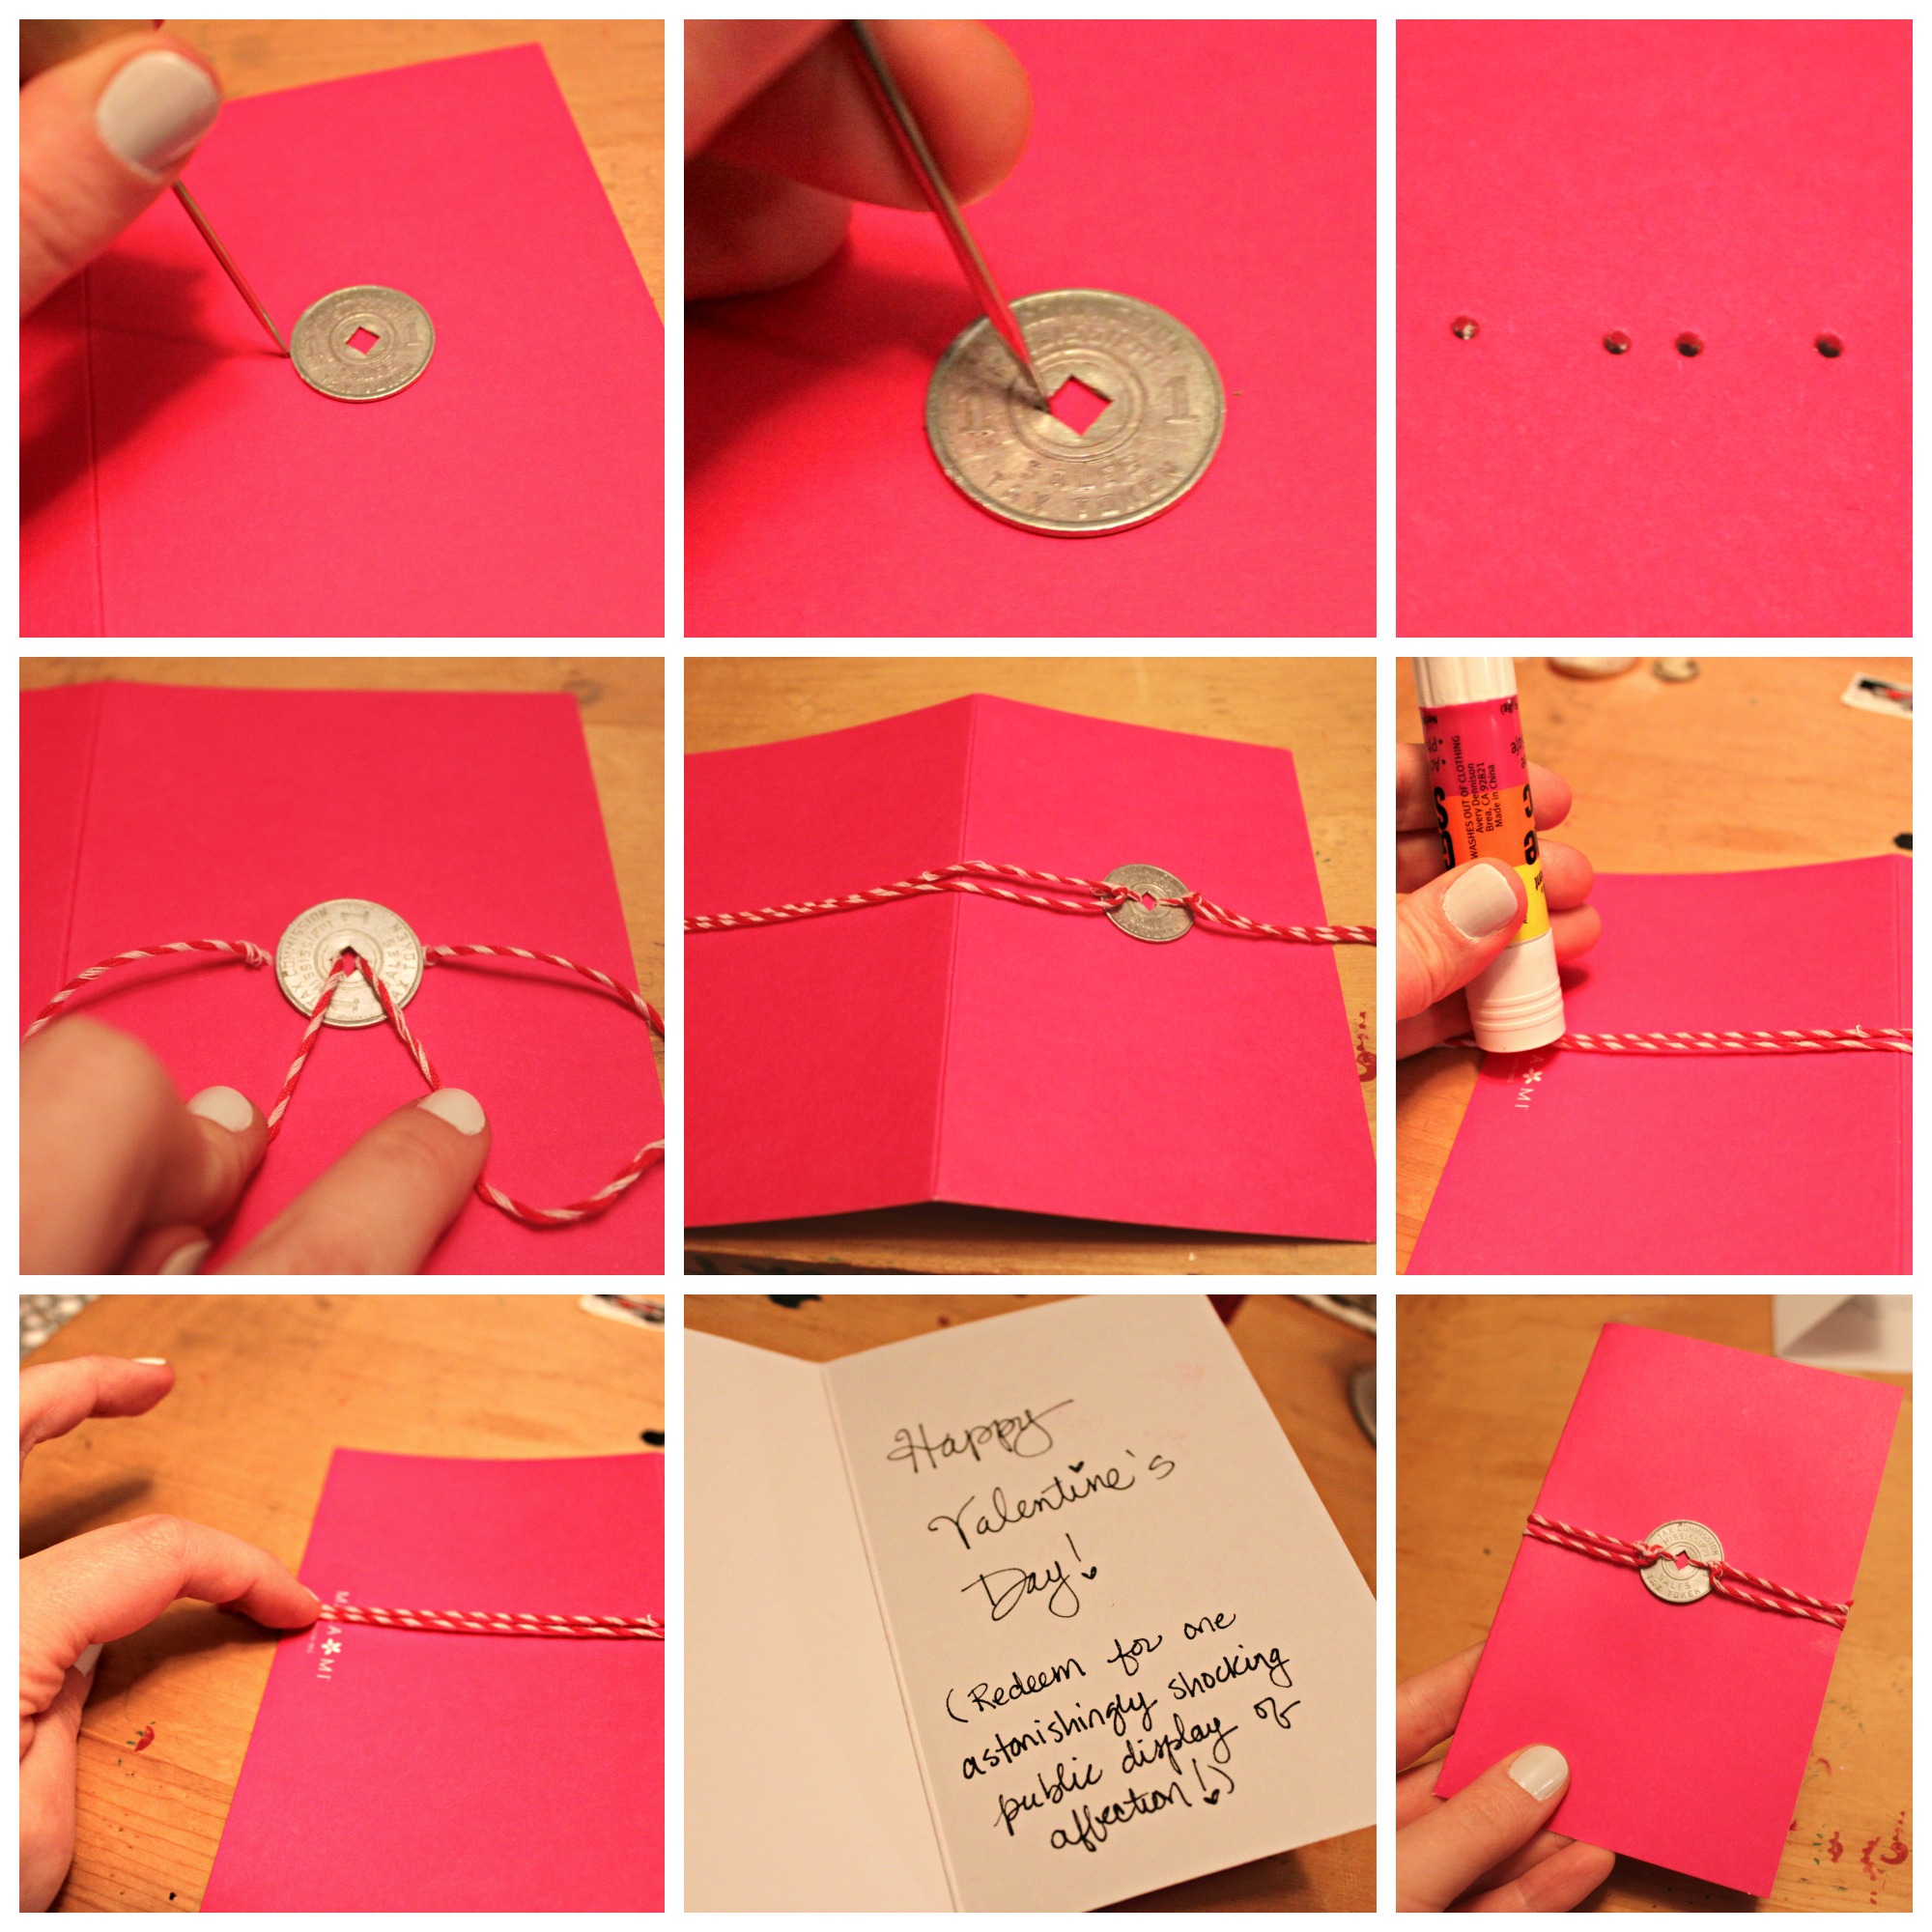
redeem card diySimilar to the last card, this DIY valentine you need: Bakers Twine, blank card & envelope, scissors, pen, glue stick, an awl, a token coin with a hole in it(preferably a large hole in the middle), and a printer.

  1. Open the card and place it face up on a work surface. Poke 4 parallel holes in the center of your card using your awl (along your token coin's outer edges and inner edges as shown above).
  2. Next, cut two separate pieces of Bakers Twine. You pieces should be long enough to extend past the edge of your card at least 1/4 inch. when doubled. Thread one piece through the holes on the right only and vice verse on the left.
  3. Place your token coin onto the Bakers Twine (threading the left side of the coin with the left piece of Bakers Twine and vice verse). Tie a sturdy knot on each side.
  4. Next, pull out the Bakers Twine on each side of your card so that the ends extend off of the card's edges. Glue in place and then once dry, cut off the excess twine.
  5. For this next step you will need a computer & a printer. Open up a word document, download a free card template, and type in a message that you want to appear on the inside of your card. Cut down your inside page so that it fits neatly inside your card. Glue your message to the inside of the card. Be sure to place an even amount of glue on the card & smooth out from the center to the edges to avoid bubbles & creases. You could also hand write your message for a more personal touch.
  6. With your valentine completed, give it to your loved one so that they may redeem...!

Also, check out my DIY Valentines from last year: on the Make Tulsa blog and for more steampunk valentines! As always, merry making!
Day Trip to Guthrie, Oklahoma

UncategorizedSamantha Extance4 Comments

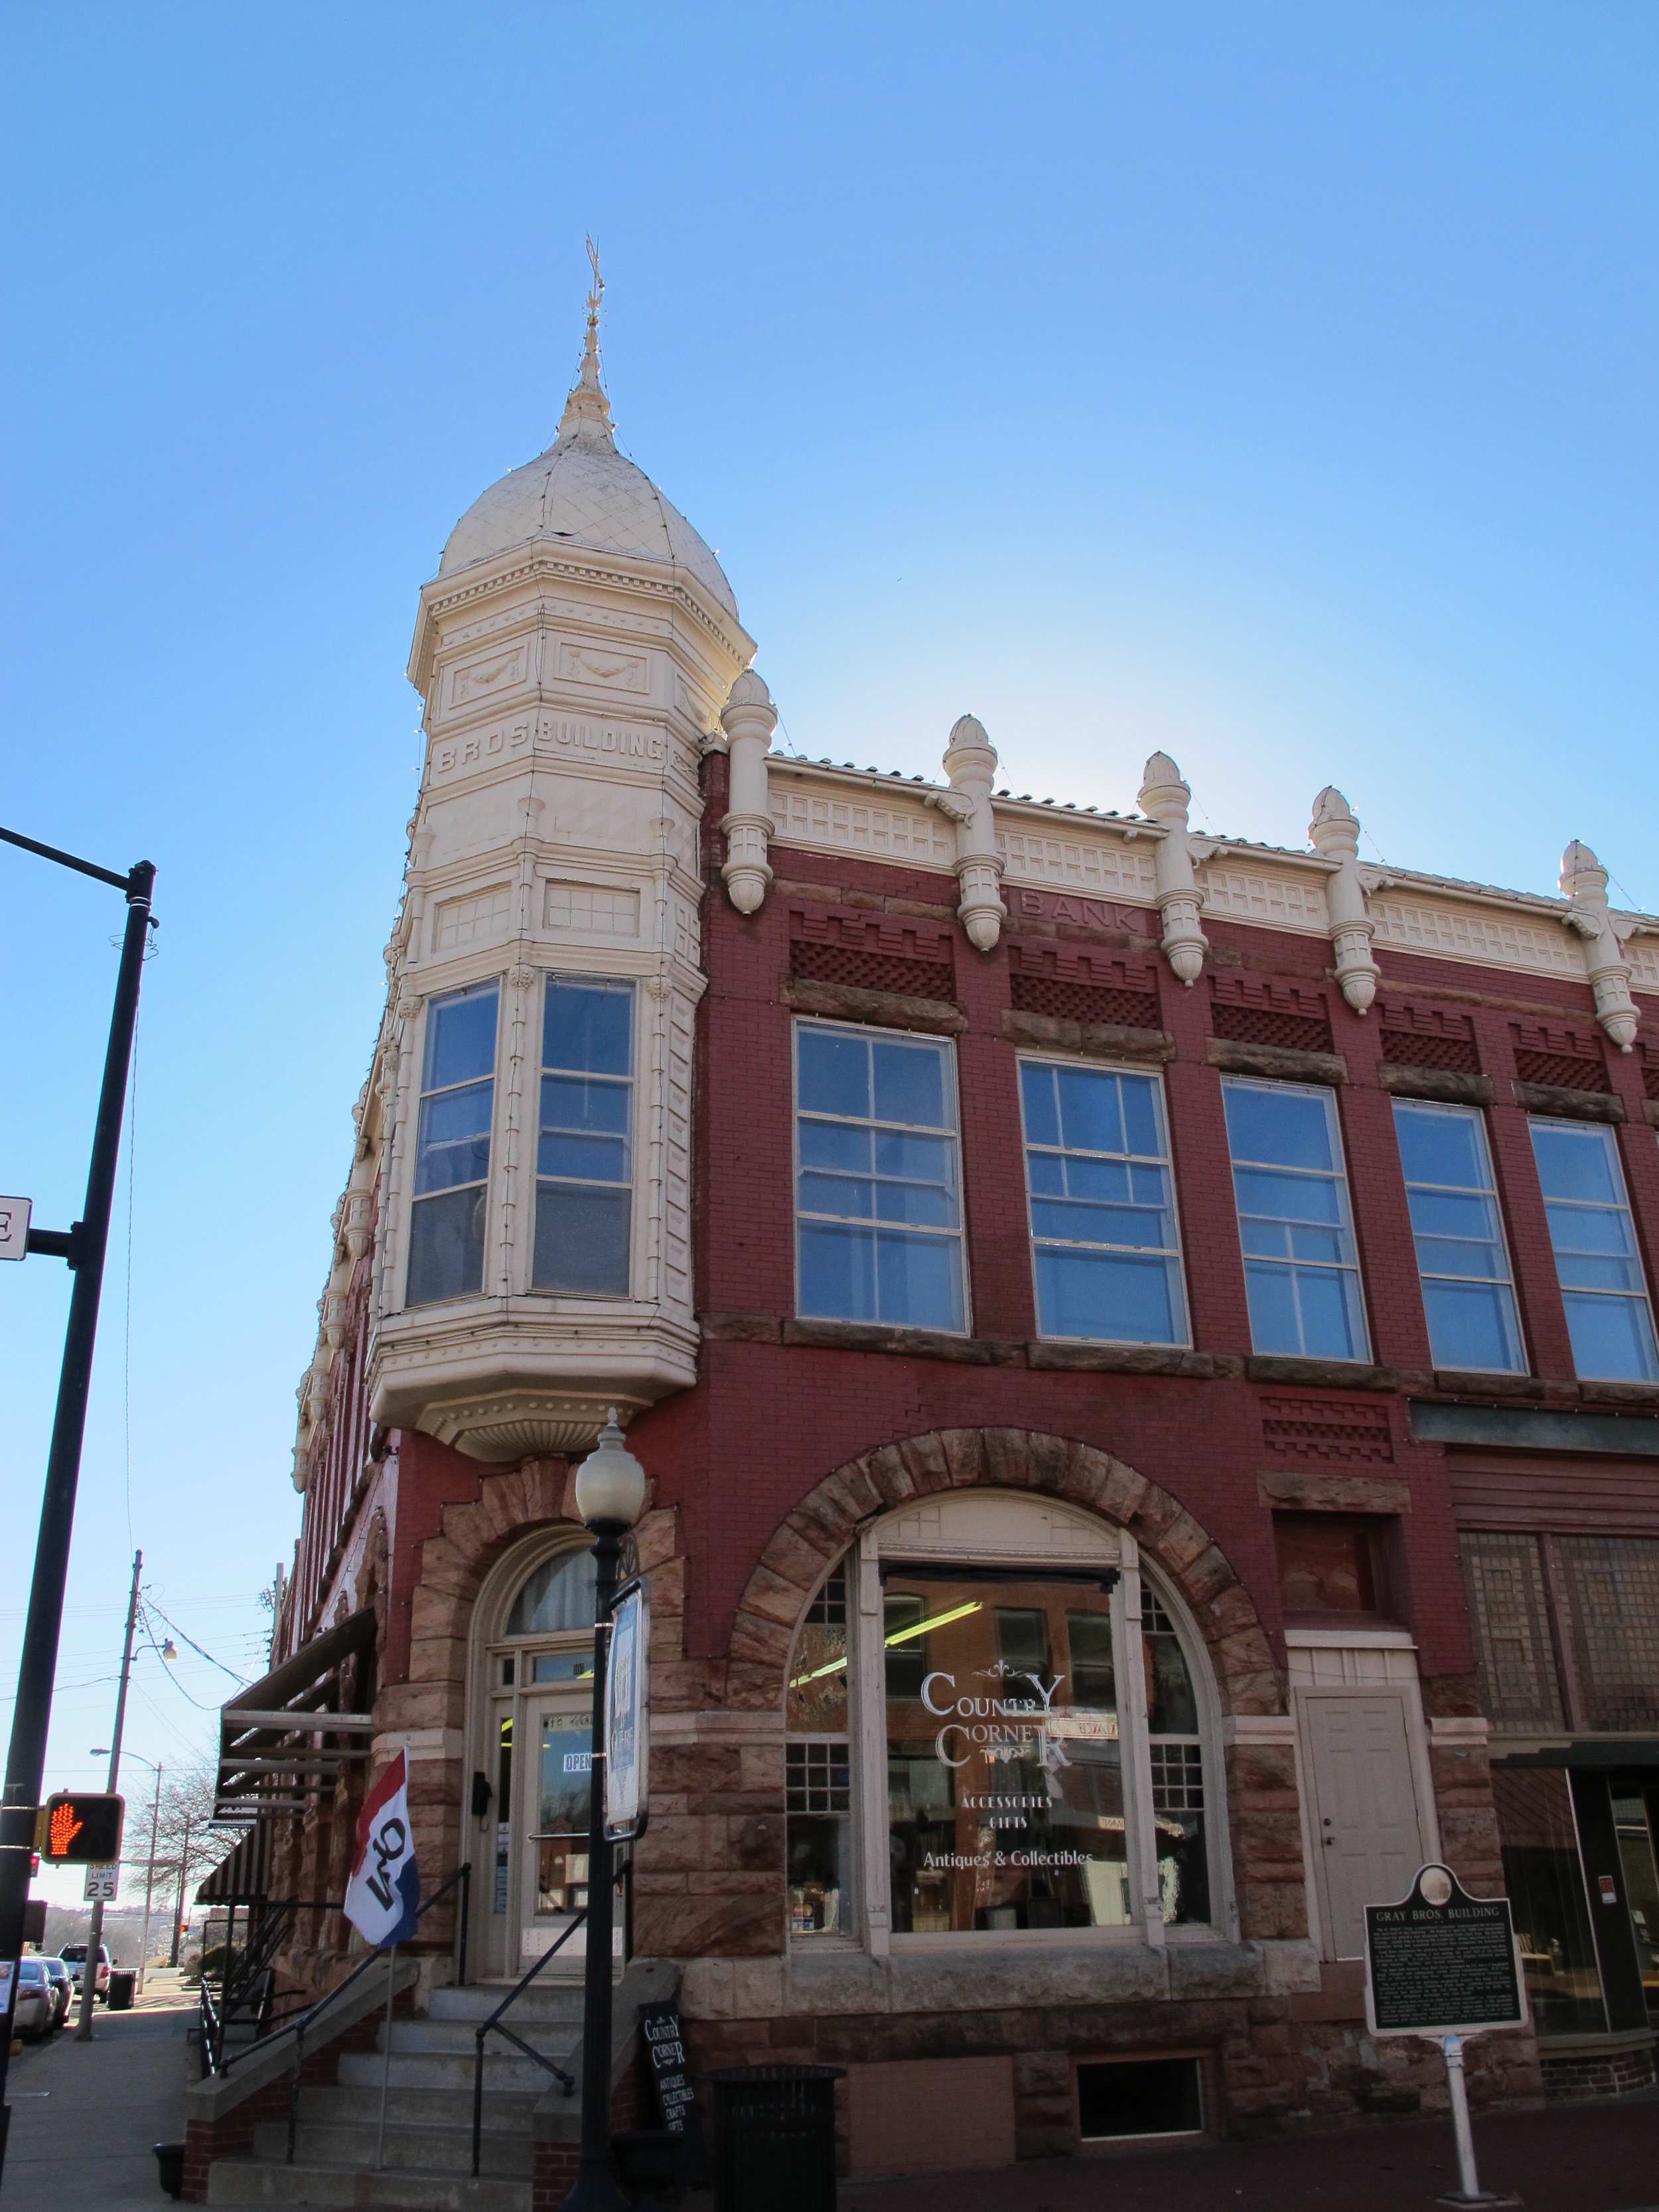
There are so many things still to see in Oklahoma since I moved here. Last weekend's trip to Oklahoma's original capital, the town of Guthrie, yielded a great many surprises. Guthrie itself was a breathtaking city to explore--its many Victorian buildings are real treasures. I happily gawked and marveled at the elegant brick work, rounded windows, and elaborate moldings. (I also developed a new architectural love for the work of Joseph Pierre Foucart). Guthrie II 075 I also learned something new & exciting: that every Christmas in Guthrie there is a Victorian Walk with carolers and horse drawn carriage rides where everyone dons Victorian clothing! I will be sure to make a trip next December!

Rhys, whose itch to take a road trip & photograph sites of urban decay lead us to Guthrie, was so wonderfully patient with me when I discovered several antique & junk shops in and around Guthrie. I wanted to share my two favorite stops with you all: Country Corner (located at the intersection of Division St. & Oklahoma St.) and Kokopelli Village Antiques & Collectibles (located on Harrison St.).

Country Corner: I was was so excited to step inside because the antique shop is actually a Joseph Foucart building! I got to take a peek inside one of his architectural gems so that in itself was a real treat! There were so many excellent pieces, but Country Corner is a must-see for anyone looking to purchase antique furniture, books, or kitchen ware. Their greatest trove of treasures lies in their basement: a huge row of shelves filled with Kitschy, retro kitchen sets (mainly from the 40s, 50s, and 60s). Although not steampunk, the sets were all complete and in dazzling shape! It was wonderful to see over 50 kitchen sets totally complete & in near-mint condition.

Here are some of my fave finds from Country Corner:

Guthrie II 064Tubes galoreGuthrie II 067Glass Doorknob Hatstands! (So unbelievably fabulous)Guthrie II 065Working Grandfather clocks (Sadly, there were no broken ones for me to take home. I never break my golden rule: to only re-purpose broken or irreparably damaged clocks & watches.)Guthrie II 066Hi Nipper! Country Corner had an impressive selection of radios, phonographs, & records.Guthrie II 068

Kokopelli Village: This antique shop was my favorite stop. By far, it has the most interesting antiques--especially if you are looking for Victoriana & steampunk. Their collection of sewing machines is impressive. I saw a late 1800s child's sewing machine with a painted scene from Little Red Riding Hood on it that was truly breathtaking. (I may wind up purchasing it for my grams; in her entire sewing machine collection, she has nothing like it.) In fact, there were several sewing machine notions throughout Kokopelli.Guthrie II 077Among their massive collection of furniture and jewelry, I also discovered typewriters, shoe-stands, and hats!

Guthrie II 078Looks like my type! (Rhys's affinity for puns is rubbing off on me!)Guthrie II 079

What I was very happy to find among their collectibles was a variety of antique tools. Their tool selection is broad--they have a number of wrenches, screwdrivers, awls, hammers, saws, etc. from a broad age range. I was especially excited to find tools with wood handles. At my last show, unfortunately someone stole my pipe wrench with the wood handle. It had been a gift from my grandfather (he knew I loved to display tools among my jewelry and had parted with it so that I could use it). Now I am saddened that I will never see it again, but I did find a wood handle screwdriver that has lessened the sting of my dear wrench's absence. Nevertheless, I love old tools and now have a new place to find them!

And last, but definitely not least, Kokopelli Village has Victorian-style dresses! They are reproductions of Victorian patterns & very well made. When I inquired about their price, I was happily surprised: only $150.00! The fabric alone would be close to that price not to mention the time & energy it takes to sew following older patterns (Just ask my mom about plackets!). I will certainly be making another trip to Guthrie, and Kokopelli Village will be my first stop! Guthrie II 081Guthrie II 083Hope you are all cozy & warm wherever you are. Now I am going to curl up with some tea and my latest steampunk book, David Barnett's Gideon Smith & the Mechanical Girl , which is hard to tear myself away from already (only on Chap. 2).


DIY Steampunk Wreath

UncategorizedSamantha ExtanceComment

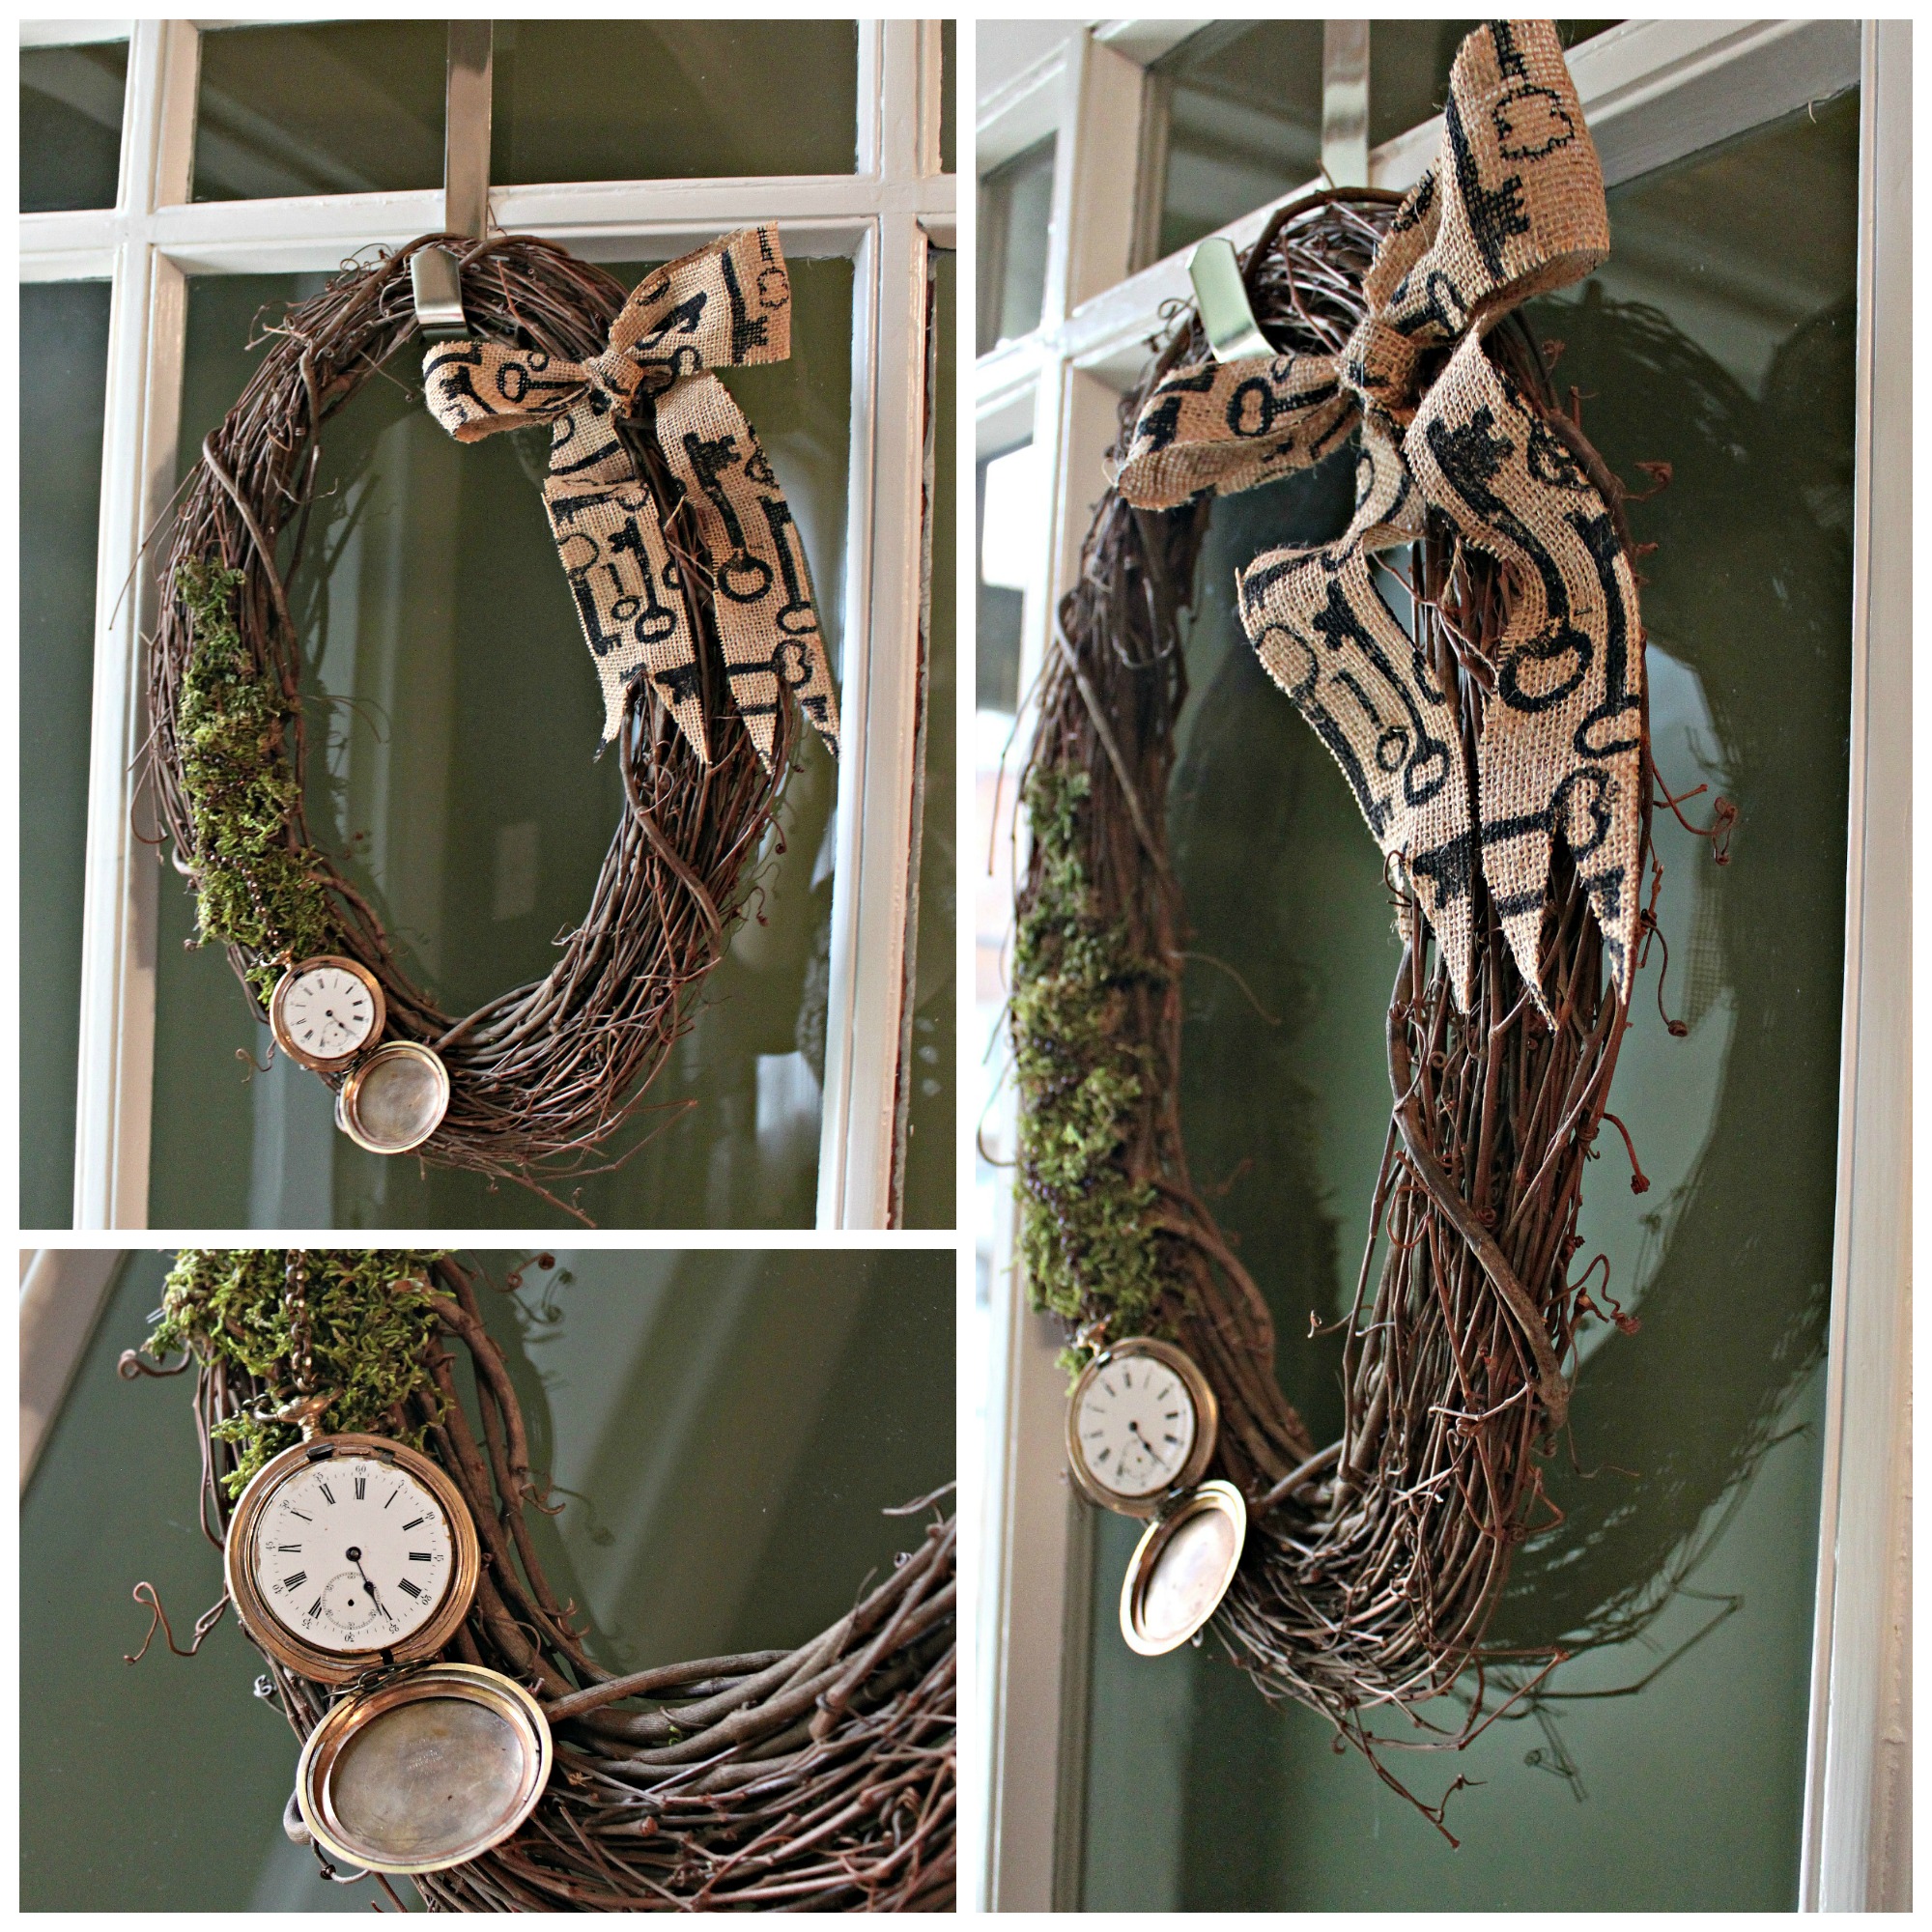
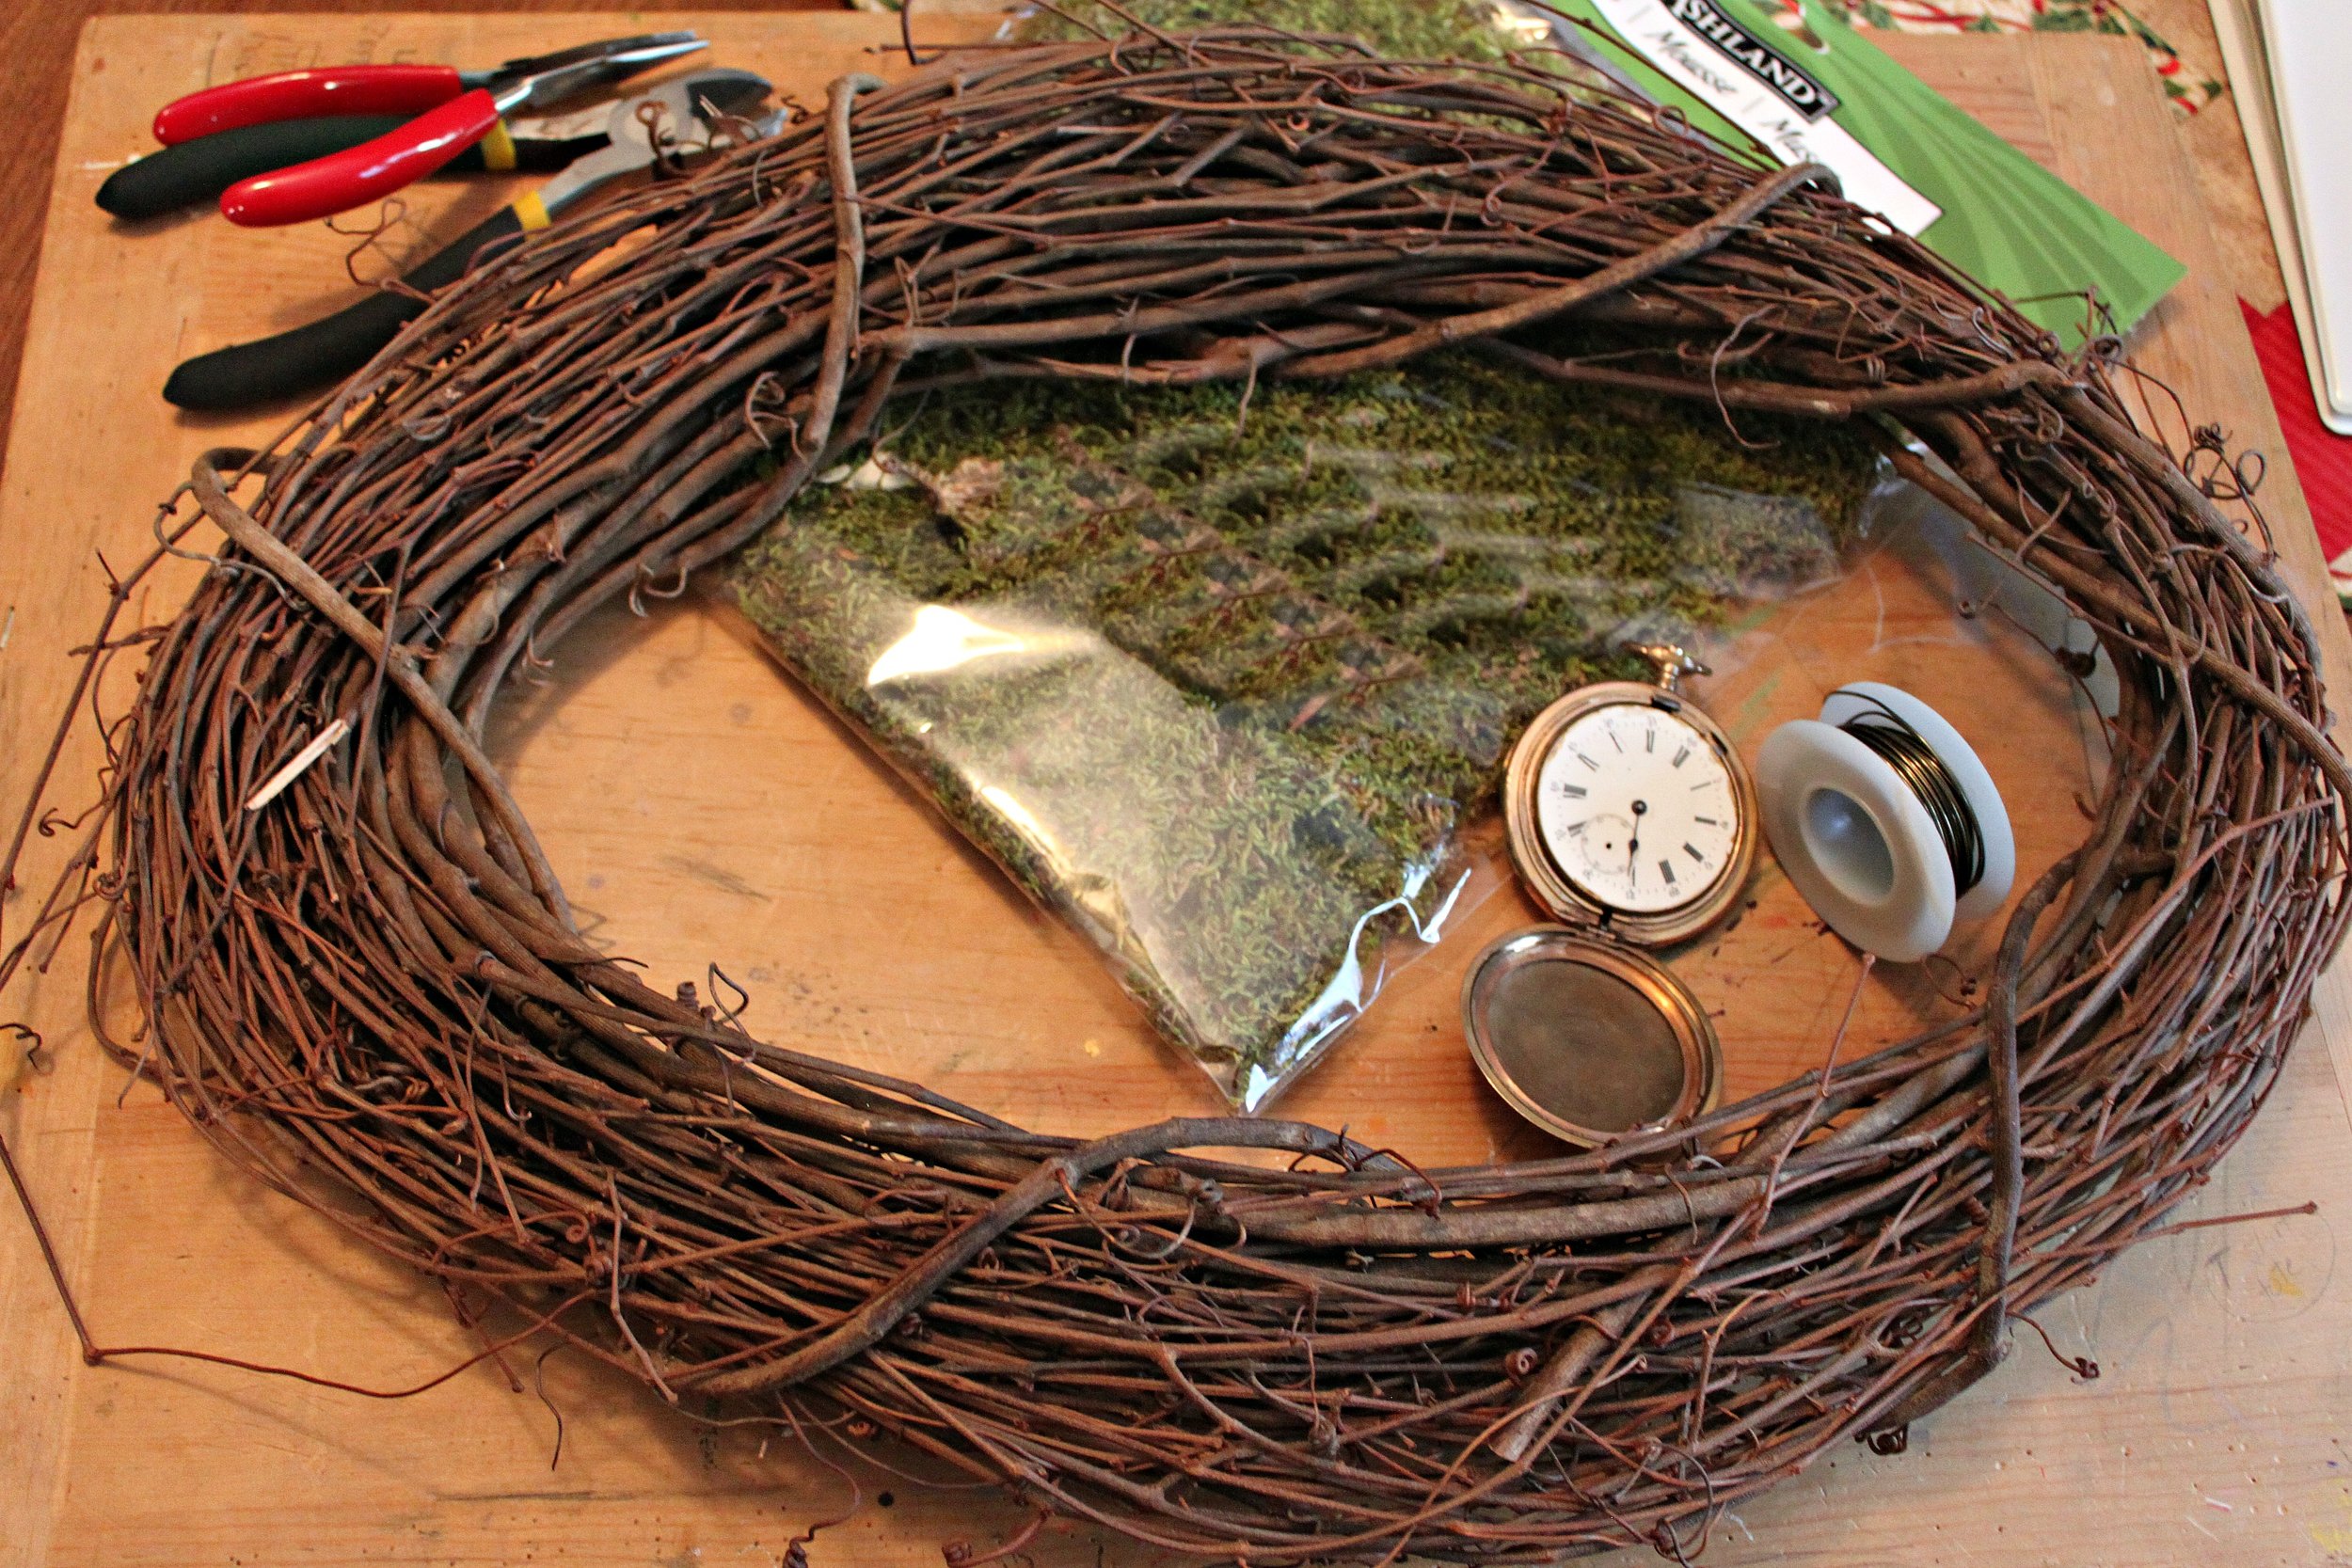
Steampunk Wreath DIY CollageMy favorite part of the holiday season is making decorations! Here is a steampunk wreath to dress up your doorway made from simple & easy to find materials! I like to call this wreath--A Pocketwatch Lost Among the Moss! The materials are relatively inexpensive ($20-25). Here's what you'll need:

  • Wreath (wicker works really well because you can both wire wrap & hot glue pieces in place)
  • Moss
  • Pocketwatch
  • Some chain (I used approx. 2 inches)
  • Ribbon (mine is a burlap skeleton key patterned ribbon available at Michaels)
  • 1 strong jump ring (large enough to fit both a chain link & your pocketwatch's loop)
  • Hot glue gun
  • Wire (mine is an antique gold color which blends well with a brown wicker wreath)
  • Wire cutters & flat nosed pliers
  • Scissors

IMG_9284Steps:

  1. Plan out your wreath. Arrange your moss, pocketwatch, chain, and ribbon and once you have a configuration you like, begin attaching each of your elements.
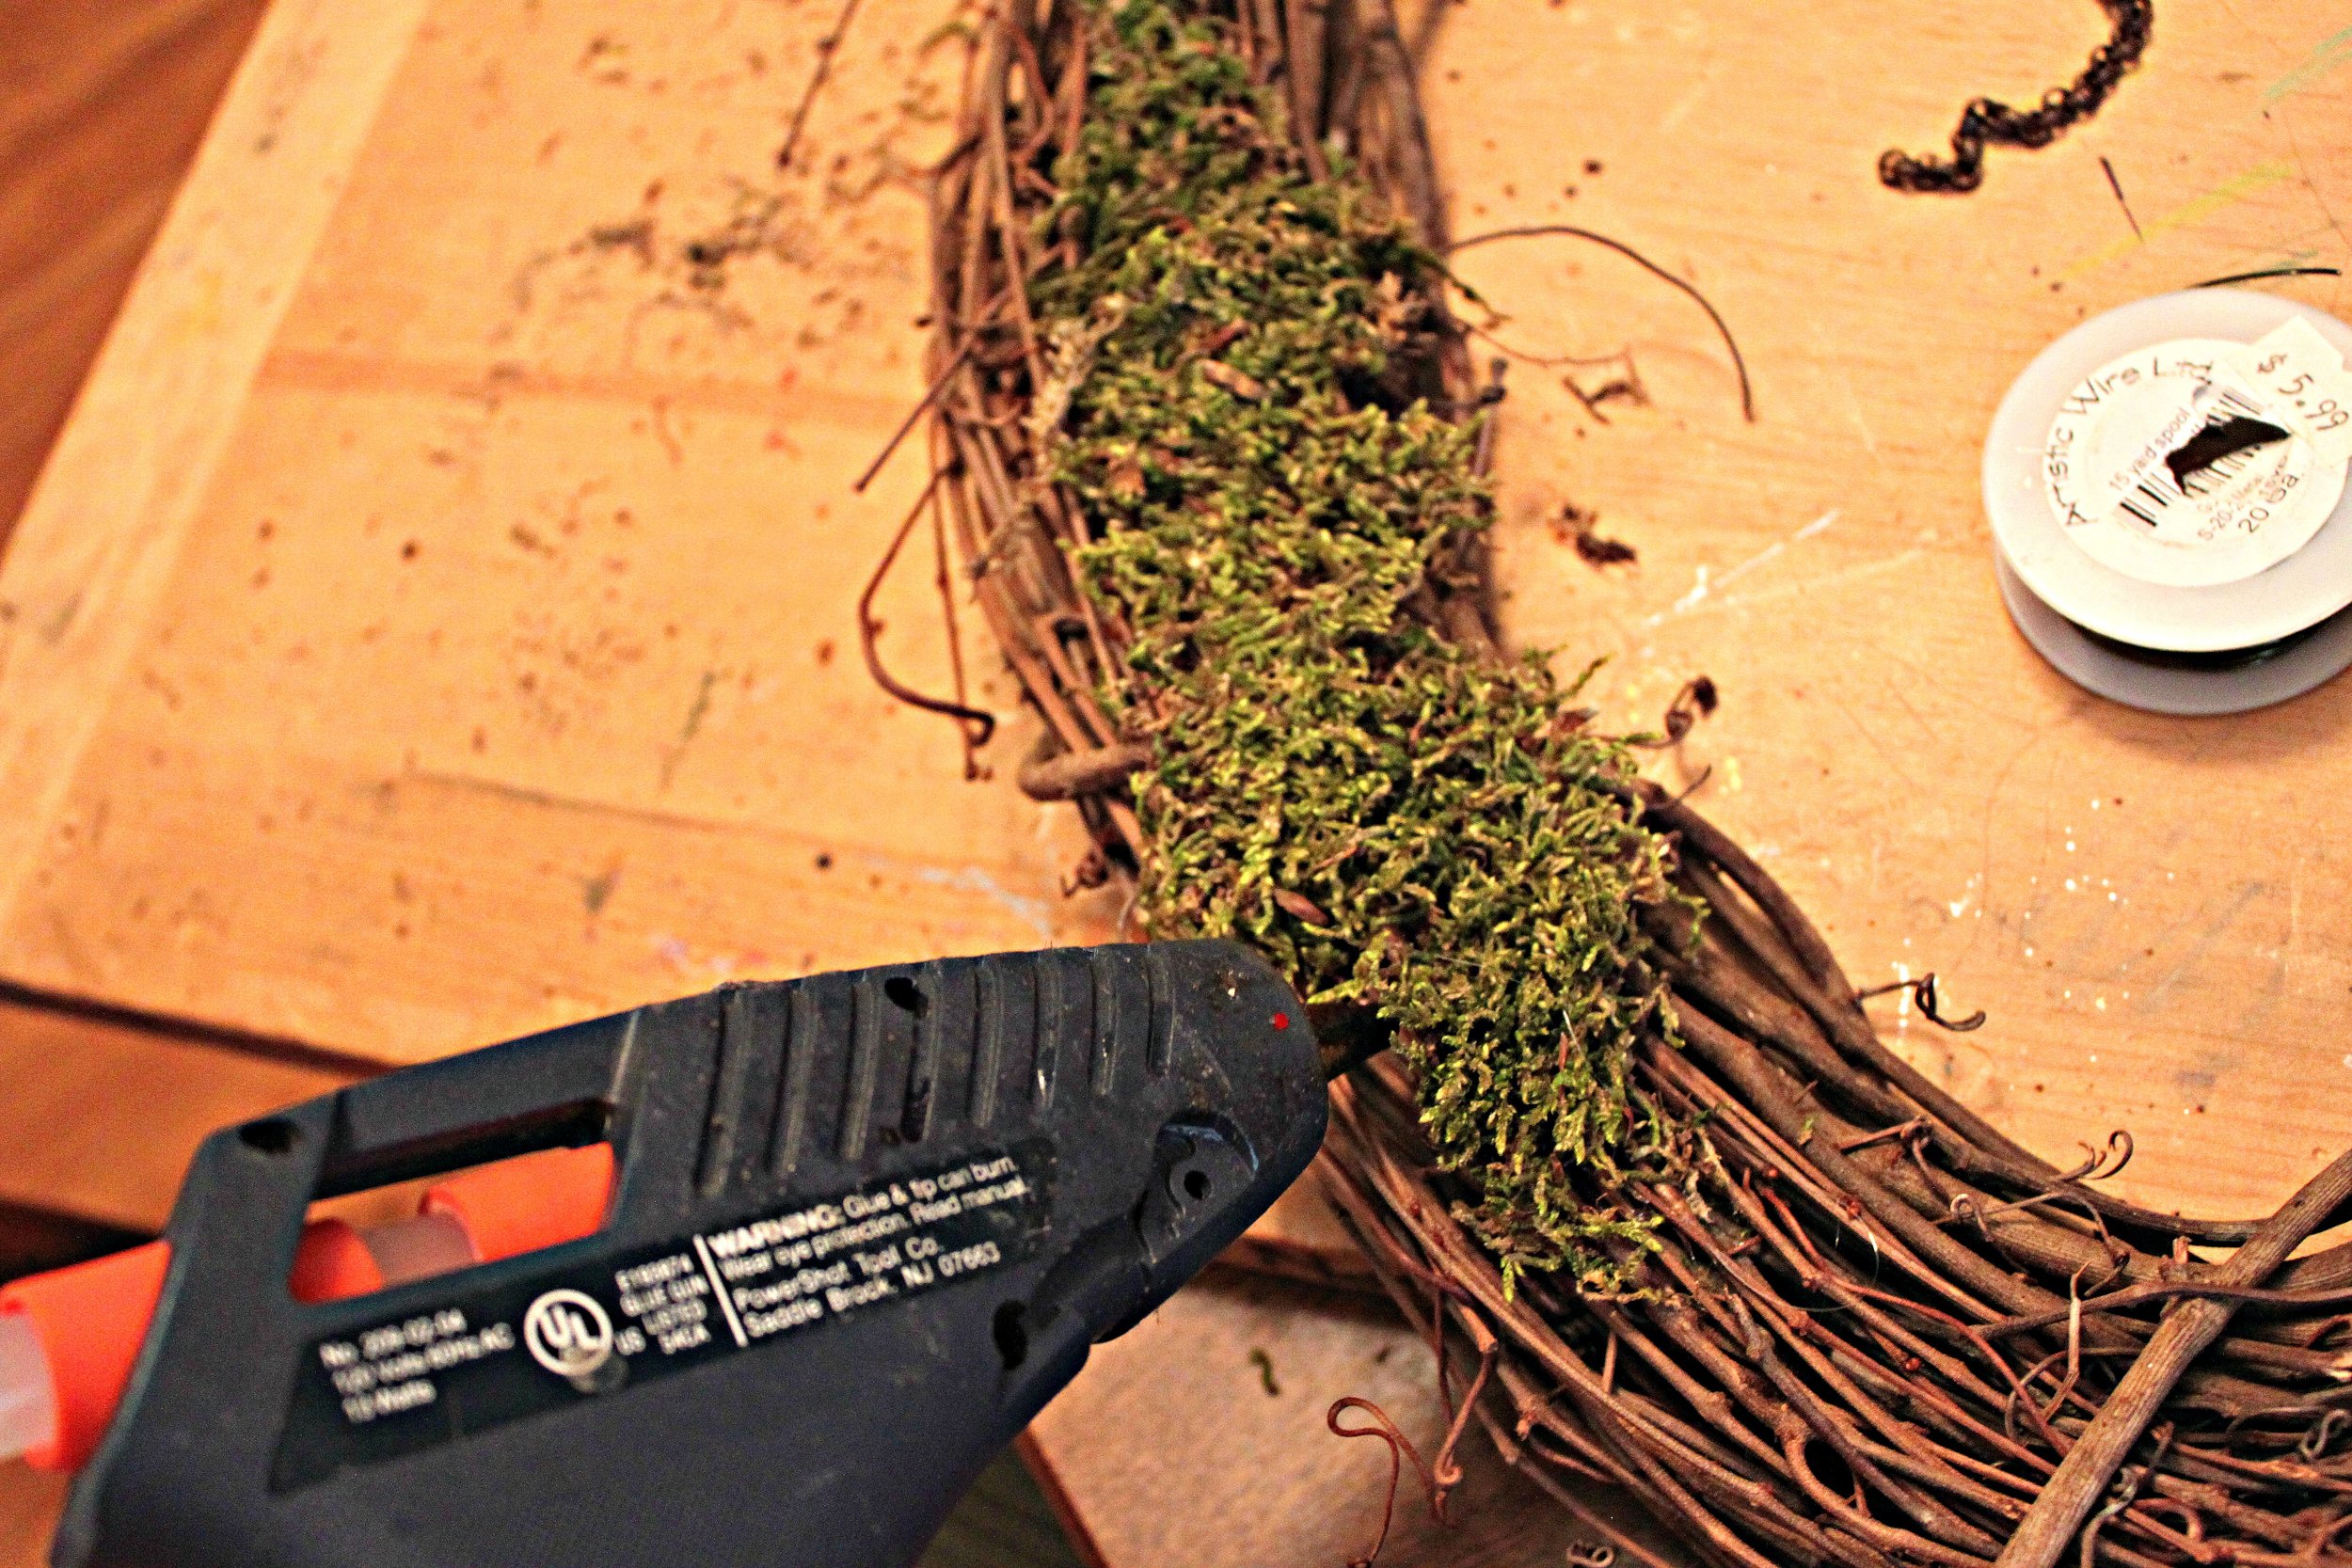
  2. First, using your hot glue gun, attach the moss to the wreath.IMG_9285
  3. Once the glue is dry, attach your pocket watch securely to the wreath with wire. Cut lengths of wire (approx. 1 to 1.5 inches) with your wire cutters. Using these lengths of wire, secure the pocketwatch in 2 key places: its loop and the hinge between the watch and its lid. IMG_9287Be sure to twist the wire so that the watch is securely held in place. Pull your wire taut (the flat nosed pliers will help you significantly with this step). IMG_9286Cut off any excess wire & tuck in the sharp ends into the wreath.
  4. With your pocketwatch in place, now attach your chain to the pocketwatch loop with a jump ring using your flat nosed pliers.
  5. Next, secure your chain's placement. I wanted my chain to look as if it was splayed out across the moss and so I secured the shape I desired with lengths of wire. Repeat the process mentioned in Step 3 for the chain links, only this time secure only the chain links that keep the shape you desire. IMG_9288
  6. Set aside your wreath and fashion a bow out of your ribbon. Once you're happy with your bow, hot glue it in place.IMG_9289  IMG_9290
  7. Once the glue is dry, hang with pride on your door! IMG_9292

As always, Merry Making!


Happy Thanksgiving!

UncategorizedSamantha Extance3 Comments

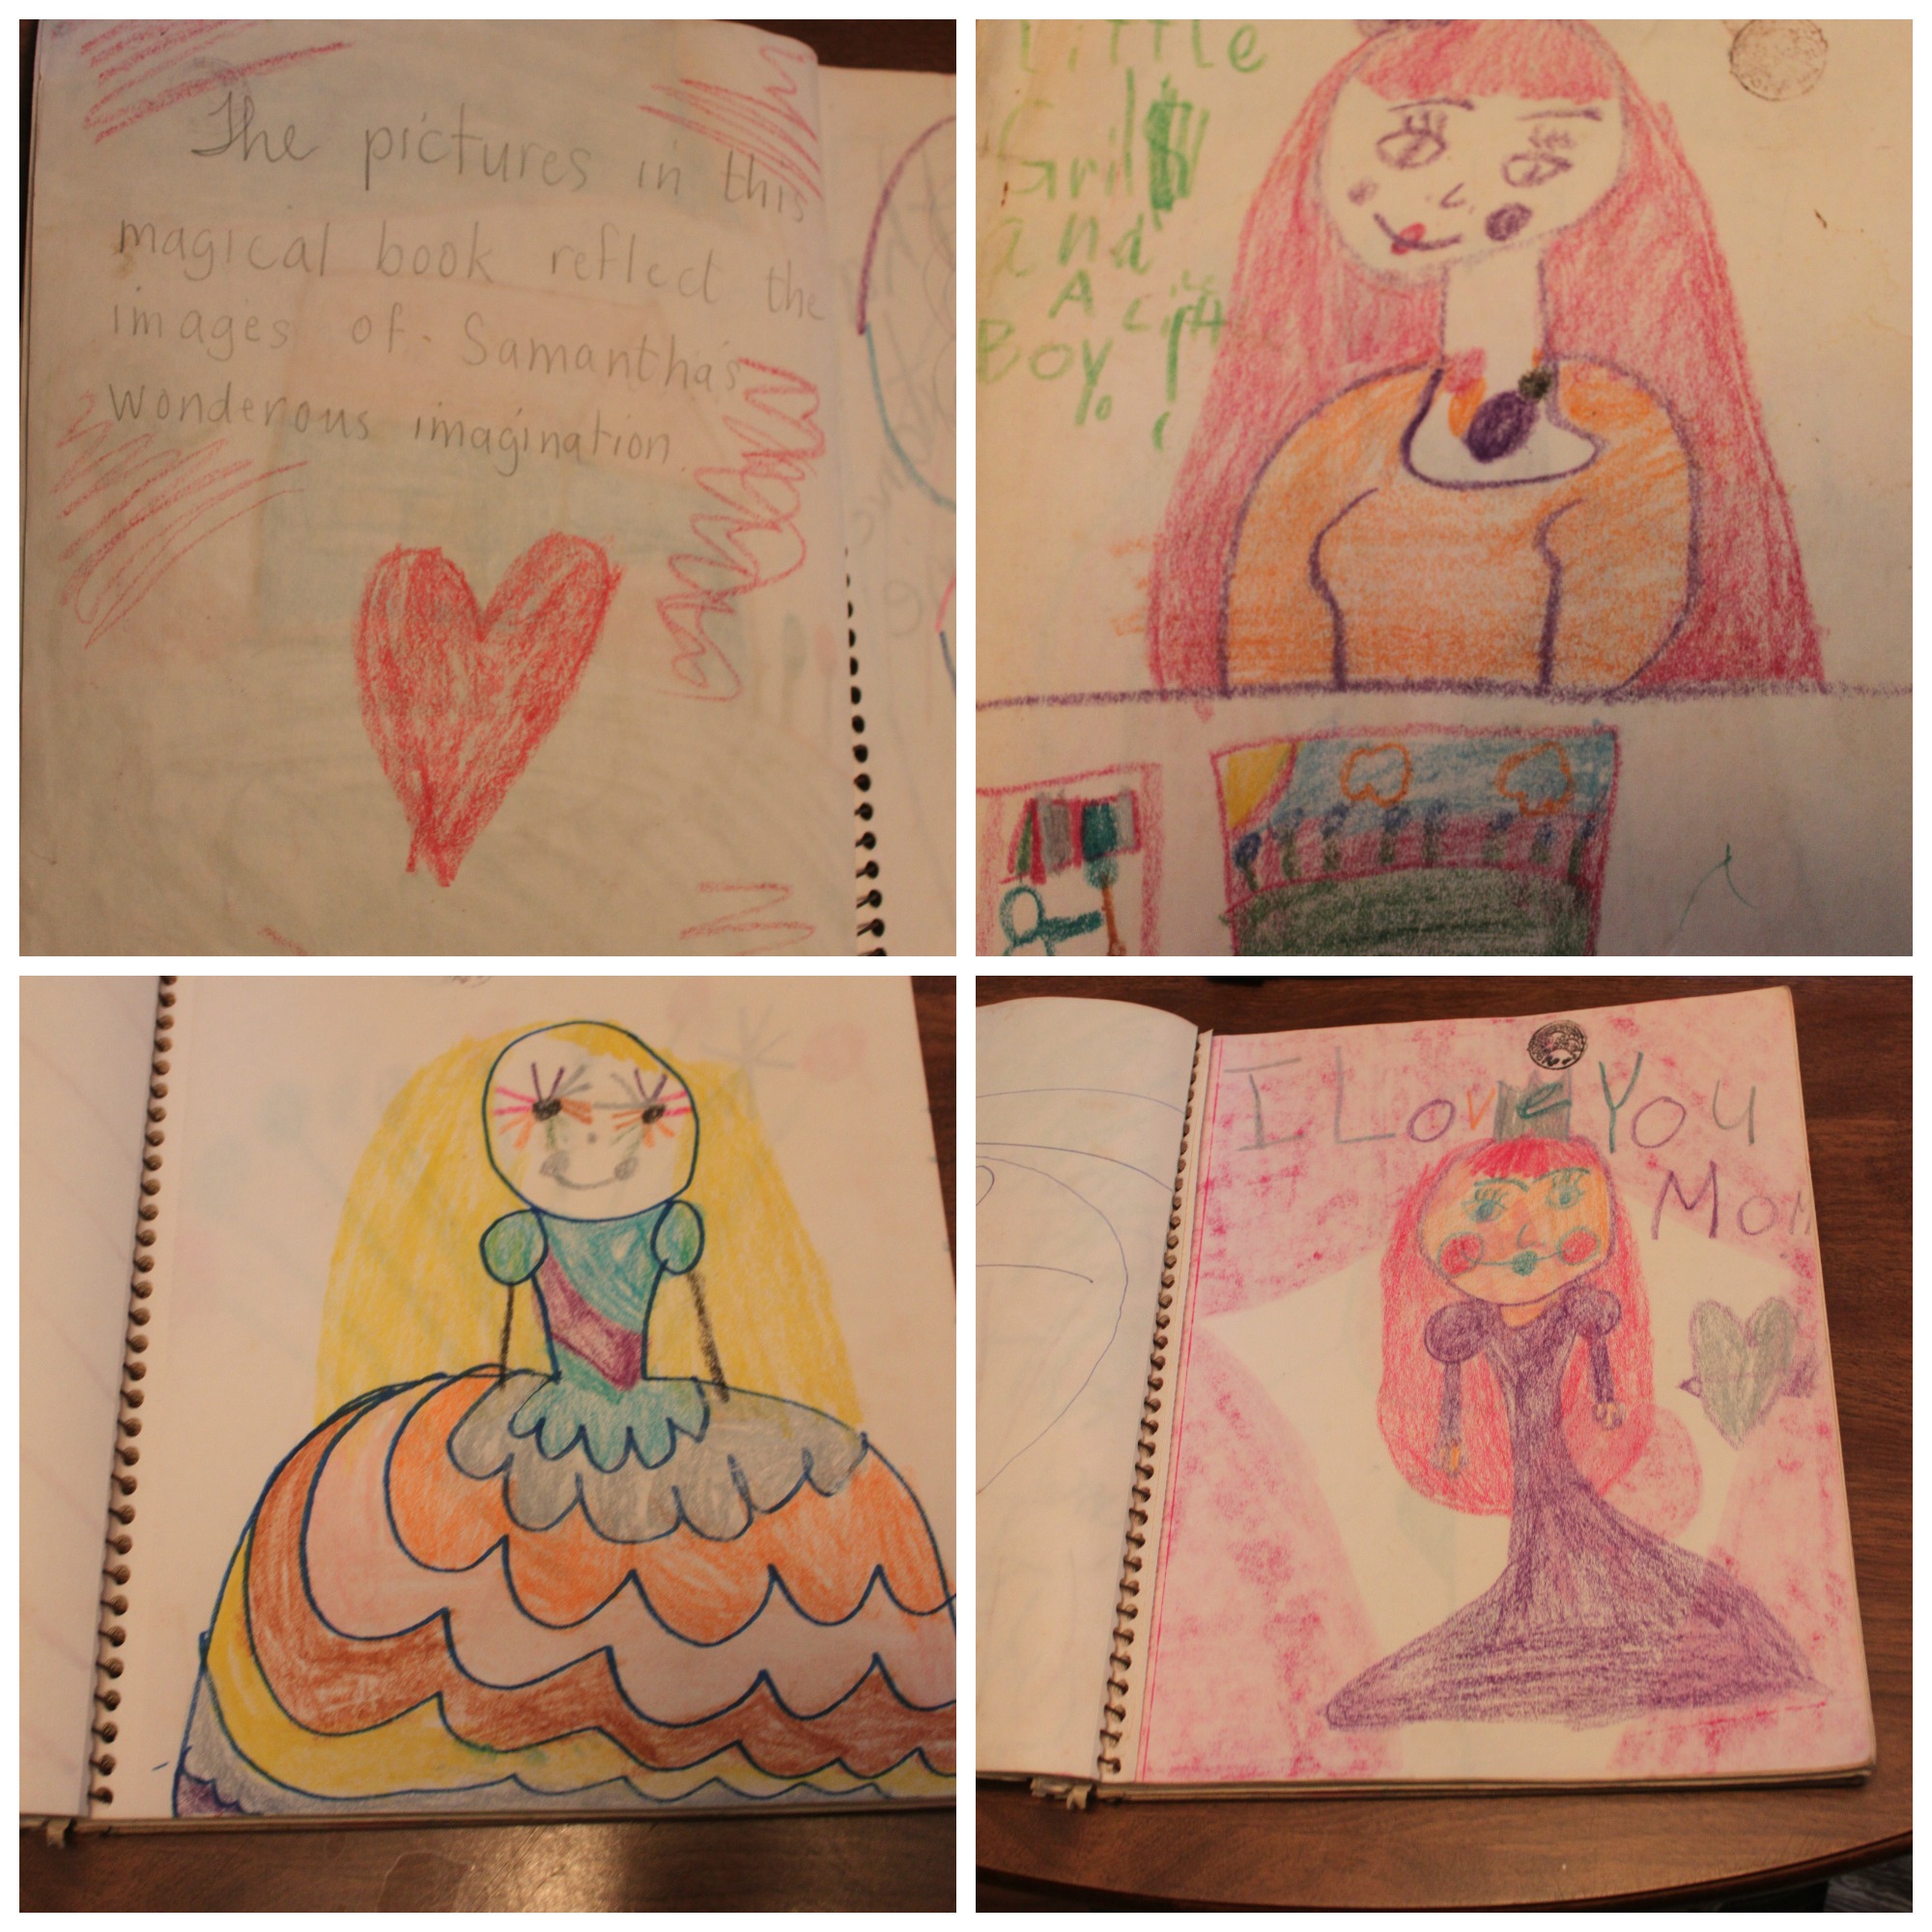
I am thankful for so many things, especially of late! I'd like to share a few with you. poems collageMy basement flooded, and although I lost a number of journals & sketchbooks I had stored down there--I did not lose the 2 most important ones: my very first book of poetry that I wrote and my very first sketchbook.

Sketchbook CollageI'm also thankful for my awesome mom--who still to this day writes supportive little notes in the notebooks & sketchbooks she gives me. From an early age she fostered my imagination & creativity.

Ok, it's about to get really gushy so you might want to scroll down--I'm also thankful for the wonderful new person in my life, my boyfriend, Rhys. He made me this super cool stocking--it's going to be a very geary Christmas! shot_1385568551092And last, but not least, I am thankful for all of you--who read my blog & support my little steampunk jewelry business. Here's an Etsy Coupon code for a special Black Friday through Cyber Monday discount (just use it when you check out): "maketulsa13".

Been making steampunk ornaments for The Alliday Show on Saturday! So excited!

Have a Happy Thanksgiving!


Meet the Harveys!

UncategorizedSamantha ExtanceComment

1240101_416487038463656_448988613_nI am always so honored when a couple chooses to wear my jewelry on their wedding day. I met Amanda & Kurt at Marry Me Indie last year and I was excited at the possibility of designing pieces especially for them. Here is a little peak at their special day! Congratulations Mr & Mrs Harvey! 1236070_10201936740681005_513018333_n Kurt's top hat was one of my favorite pieces to design--completely versatile--all of the pieces are removable!

1383701_422247764554250_1275305447_nI really love combining rhinestone pieces with gears! It's so dainty, feminine, and intricate! Perfect for an engineer like Amanda! 1375757_421520827960277_701401299_nThis last picture is my favorite! I'm a sucker for love, what can I say? If you have a wedding and want jewelry as unique as you, email me! I'd love to make something special for you!

DIY Steampunk Cupcakes

D-I-Y-Samantha Extance5 Comments

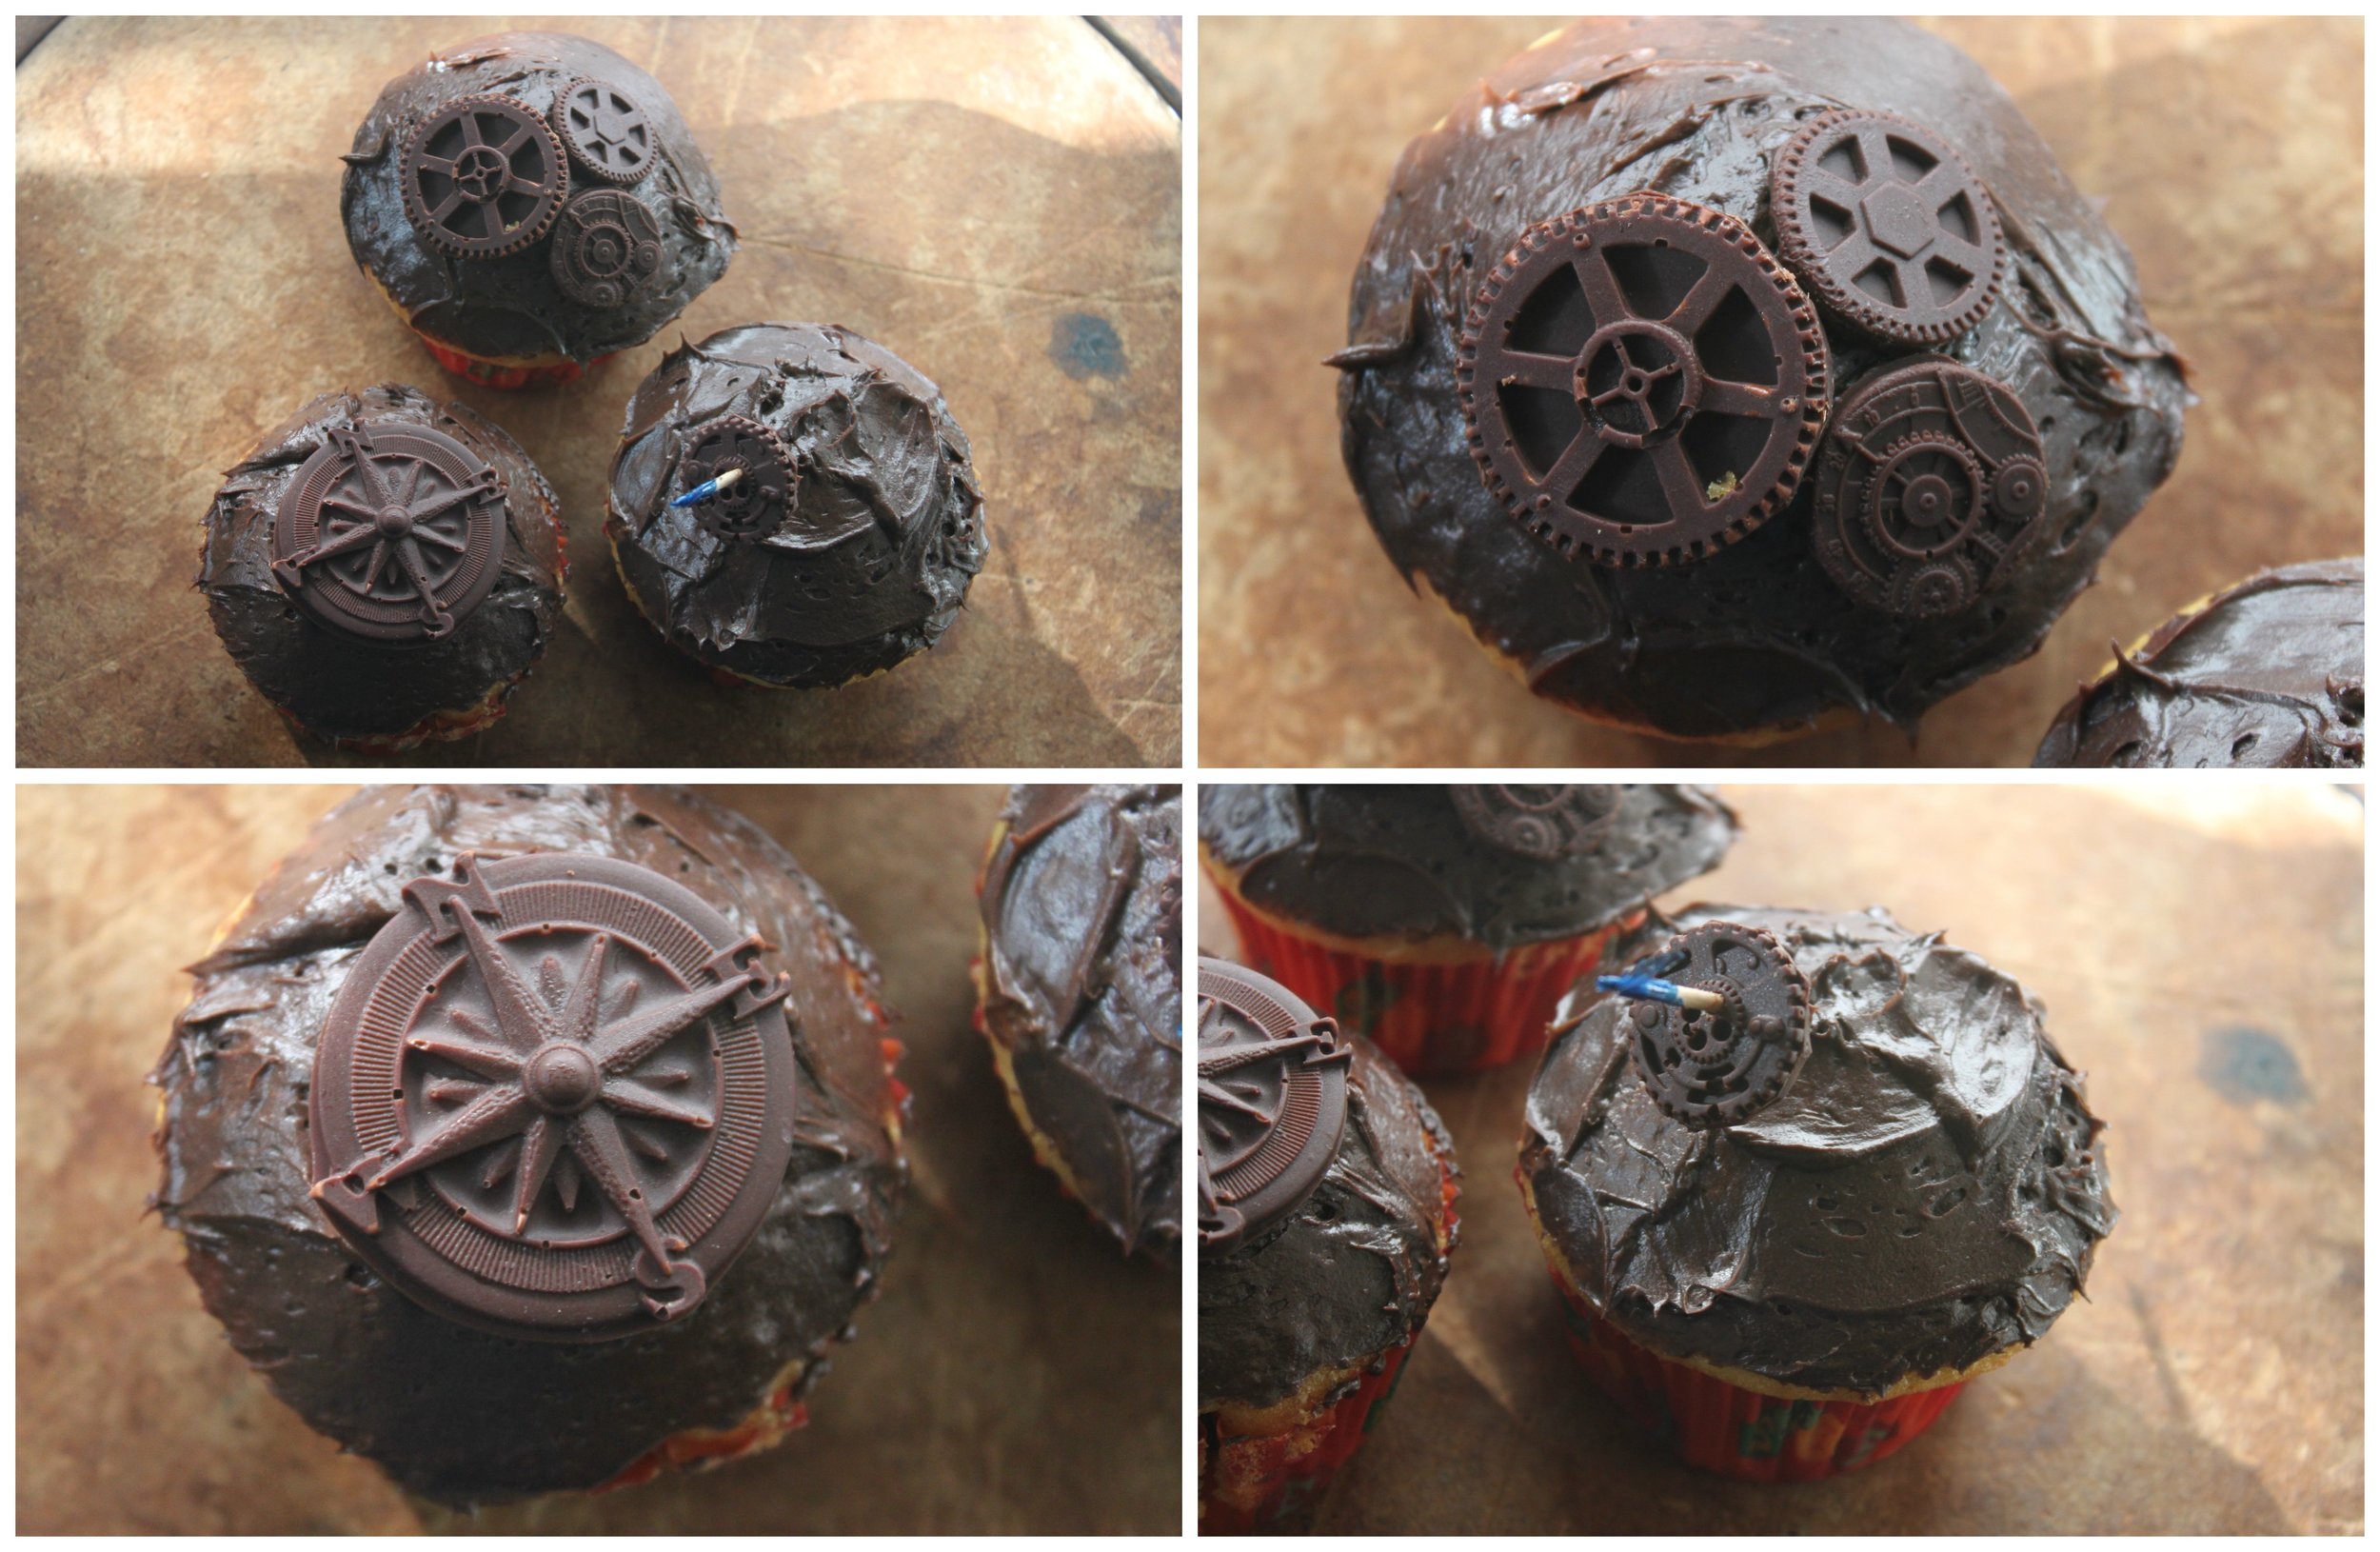
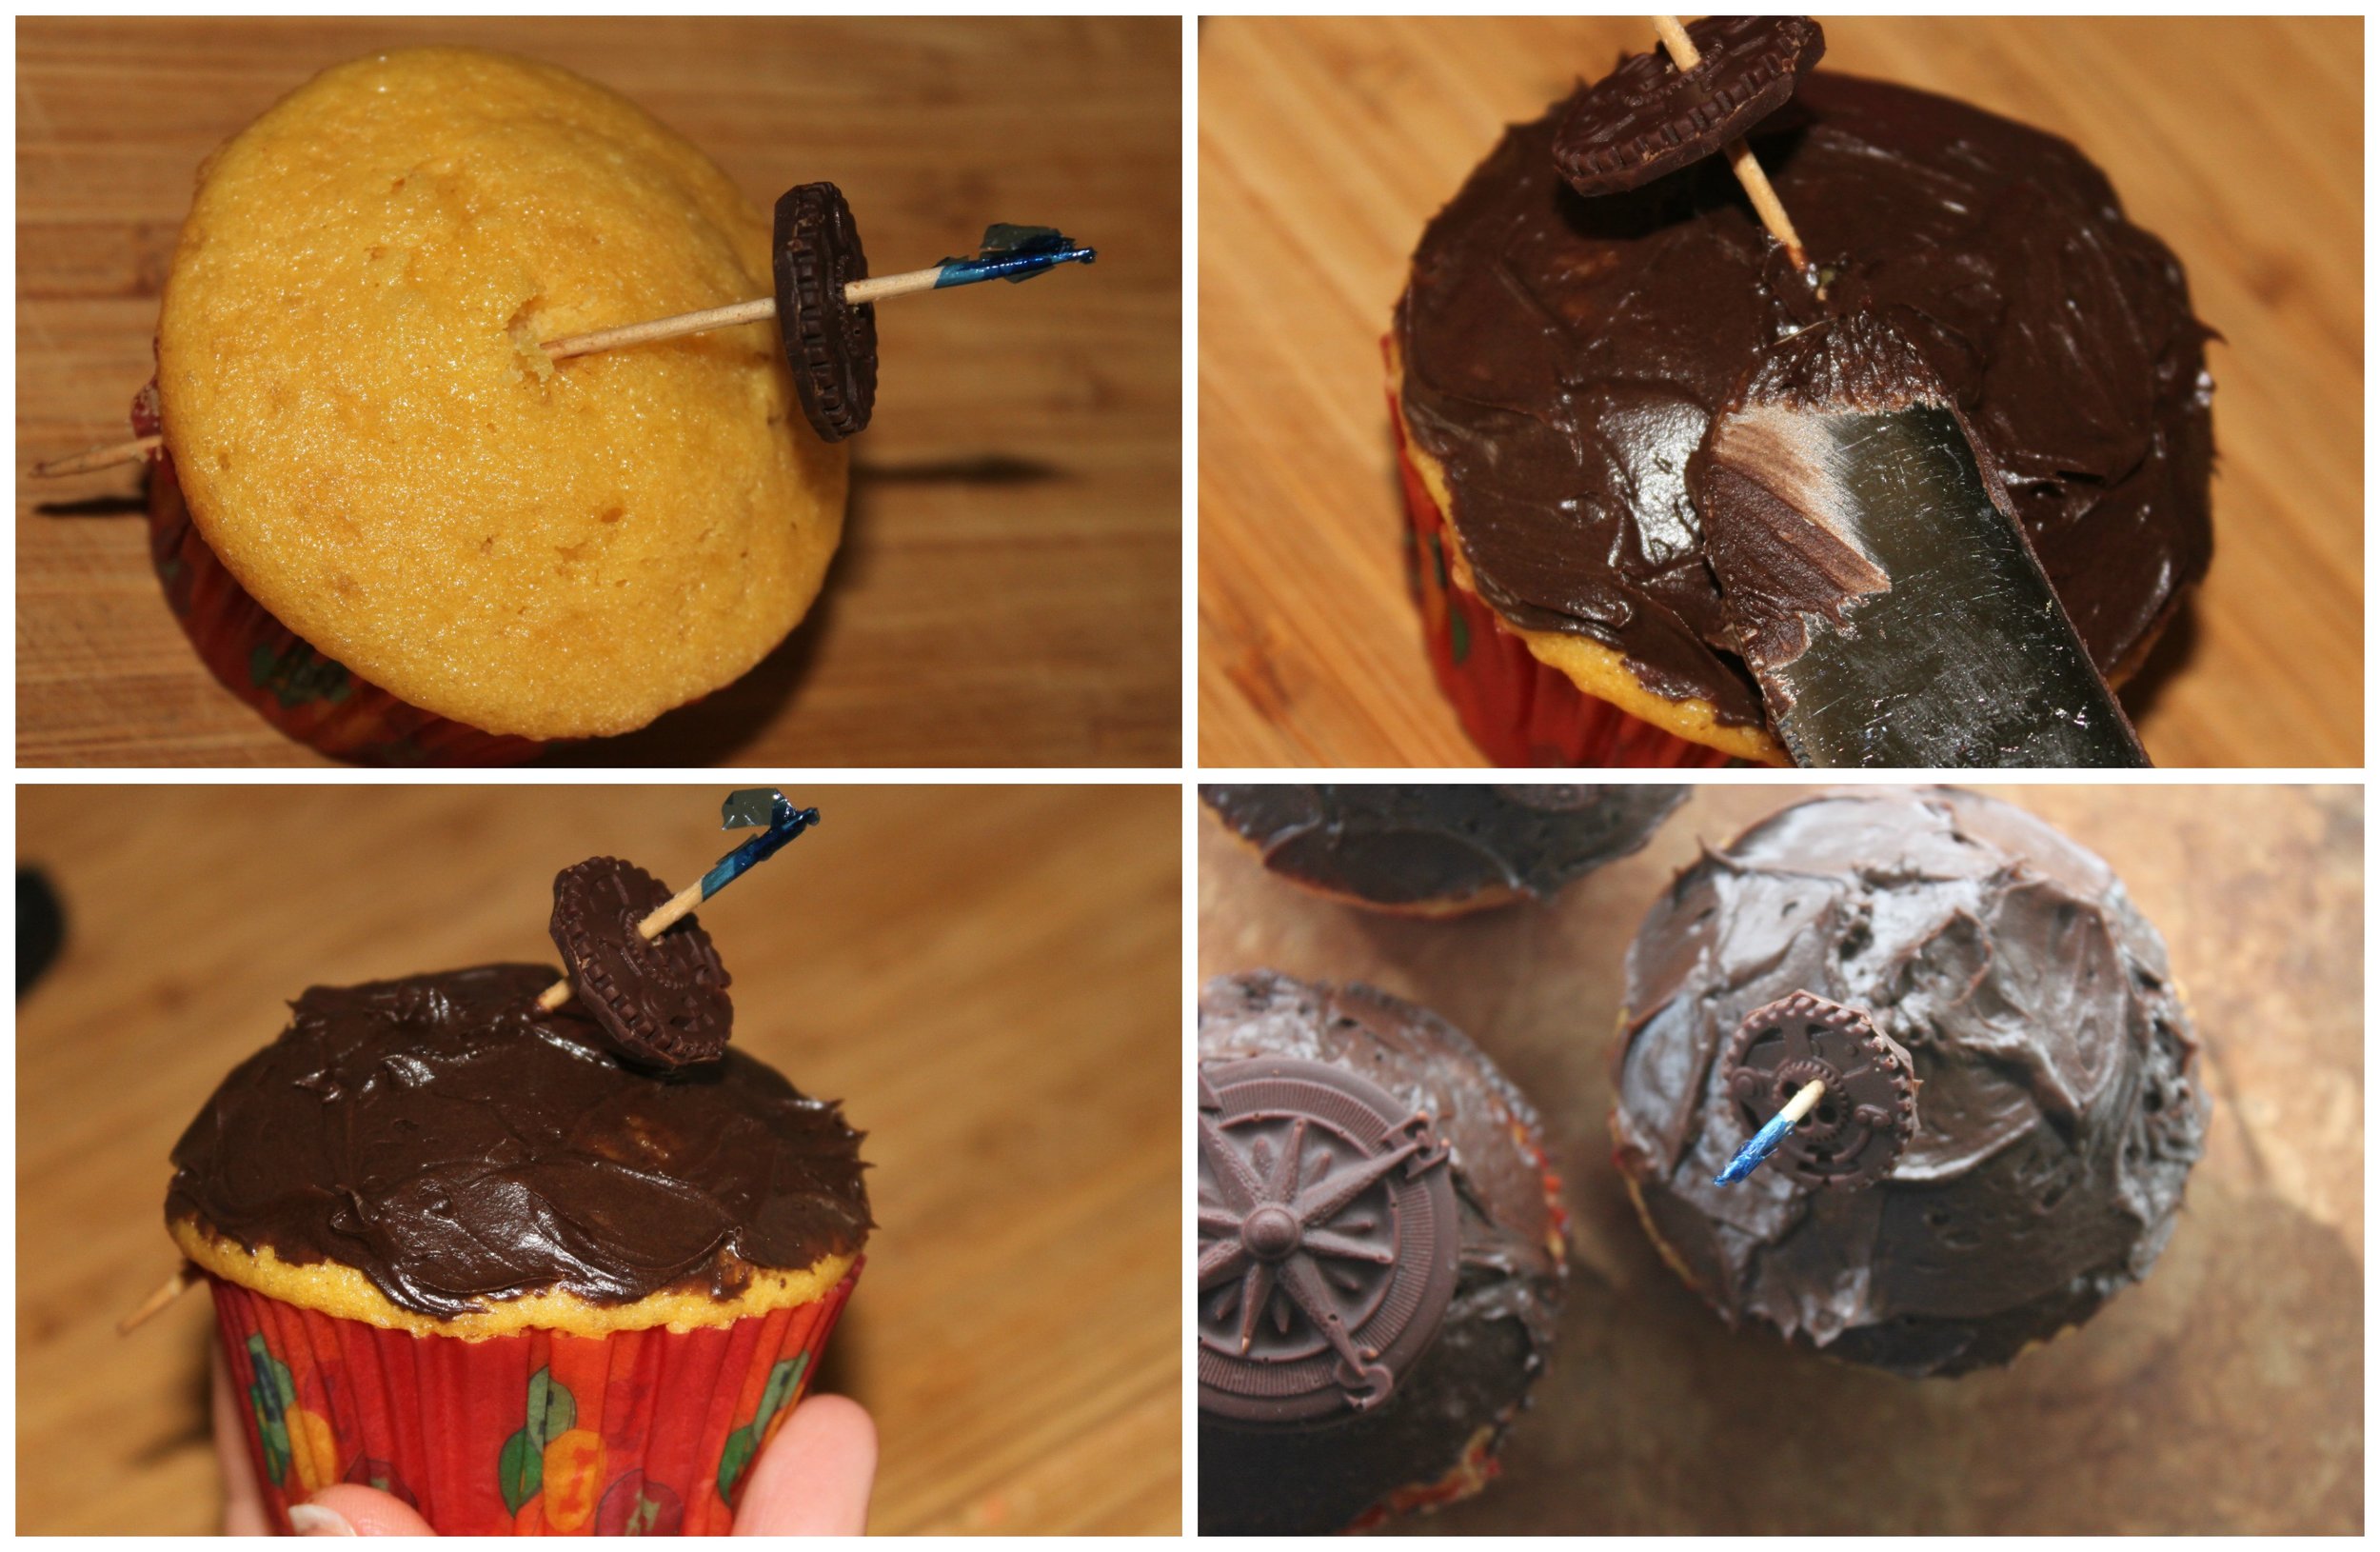
I am fascinated with steampunk cakes! I am an amateur baker myself and I recently purchased some great silicone food molds from an Etsy seller, MoldMuse. She has a bunch of molds available--a ton of which are steampunk! I love the ones that I purchased and I highly recommend them! They were super easy to use and yielded perfect geary confections. Steampunk Cupcake 4 You'll need:

  • Steampunk molds, safe for food. I highly recommend MoldMuse.
  • Cake mix (or a cake recipe that you love)
  • Frosting
  • Bittersweet chocolate
  • Pyrex measuring cup
  • Sauce pan
  • Vanilla extract (optional)
  • Finely shaved orange peel (optional)
  • Sandwich Toothpicks (optional)
  • Oven and other baking supplies--bowls, spoons, etc.

Steampunk Cupcake 1Steps:

For your steampunk chocolate pieces:

  1. Melt your bittersweet chocolate in a double-dutch pan (or if you don't own one, in a Pyrex measuring cup placed in the middle of a sauce pan filled with water). This prevents your chocolate from burning.
  2. Once your chocolate has melted, add vanilla extract and finely shaved orange peel if desired. Add to taste.
  3. Next, pour your chocolate into your molds. Be careful not to overfill your molds otherwise you will have to cut them down to shape.Steampunk Cupcake 2
  4. Once your molds are filled, place them in your refrigerator to set.
  5. Once your chocolate has hardened (about an hour or so), pop them out of your molds. Mine were very easy to pop out because MoldMuse's molds are flexible.
  6. If you did overfill your molds, grab a sharp knife and trim around the edges of your chocolate gear.
  7. Set aside in refrigerator while you bake your cupcakes.

Cupcakes:

  1. Bake as directed by your cake recipe or box instructions.
  2. Frost when cooled.

Steampunking your Cupcakes:

There are 2 ways you can steampunk your cupcakes: 1) By arranging your chocolate molds on top of your cupcakes and, 2) Making a gear rotatable with a sandwich toothpick through your cupcake.

Option 1:

  1. Arrange your chocolate gears on top of your cupcakes artfully.

Option 2:

  1. Poke a hole in your chocolate gear (large enough for your toothpick to go through).
  2. Slide the toothpick through the hole in the chocolate gear and then diagonally through your frosted cupcake (so that the toothpick comes out of the side). Clean any icing off of the toothpick with a wet cloth. Steampunk Cupcake 3
  3. Now your cupcake's gear turns! Watch the video to see![youtube=http://www.youtube.com/watch?v=C4PA6fucCqk]

Style Me Steampunk: The Traveling Minister

FashionSamantha Extance1 Comment

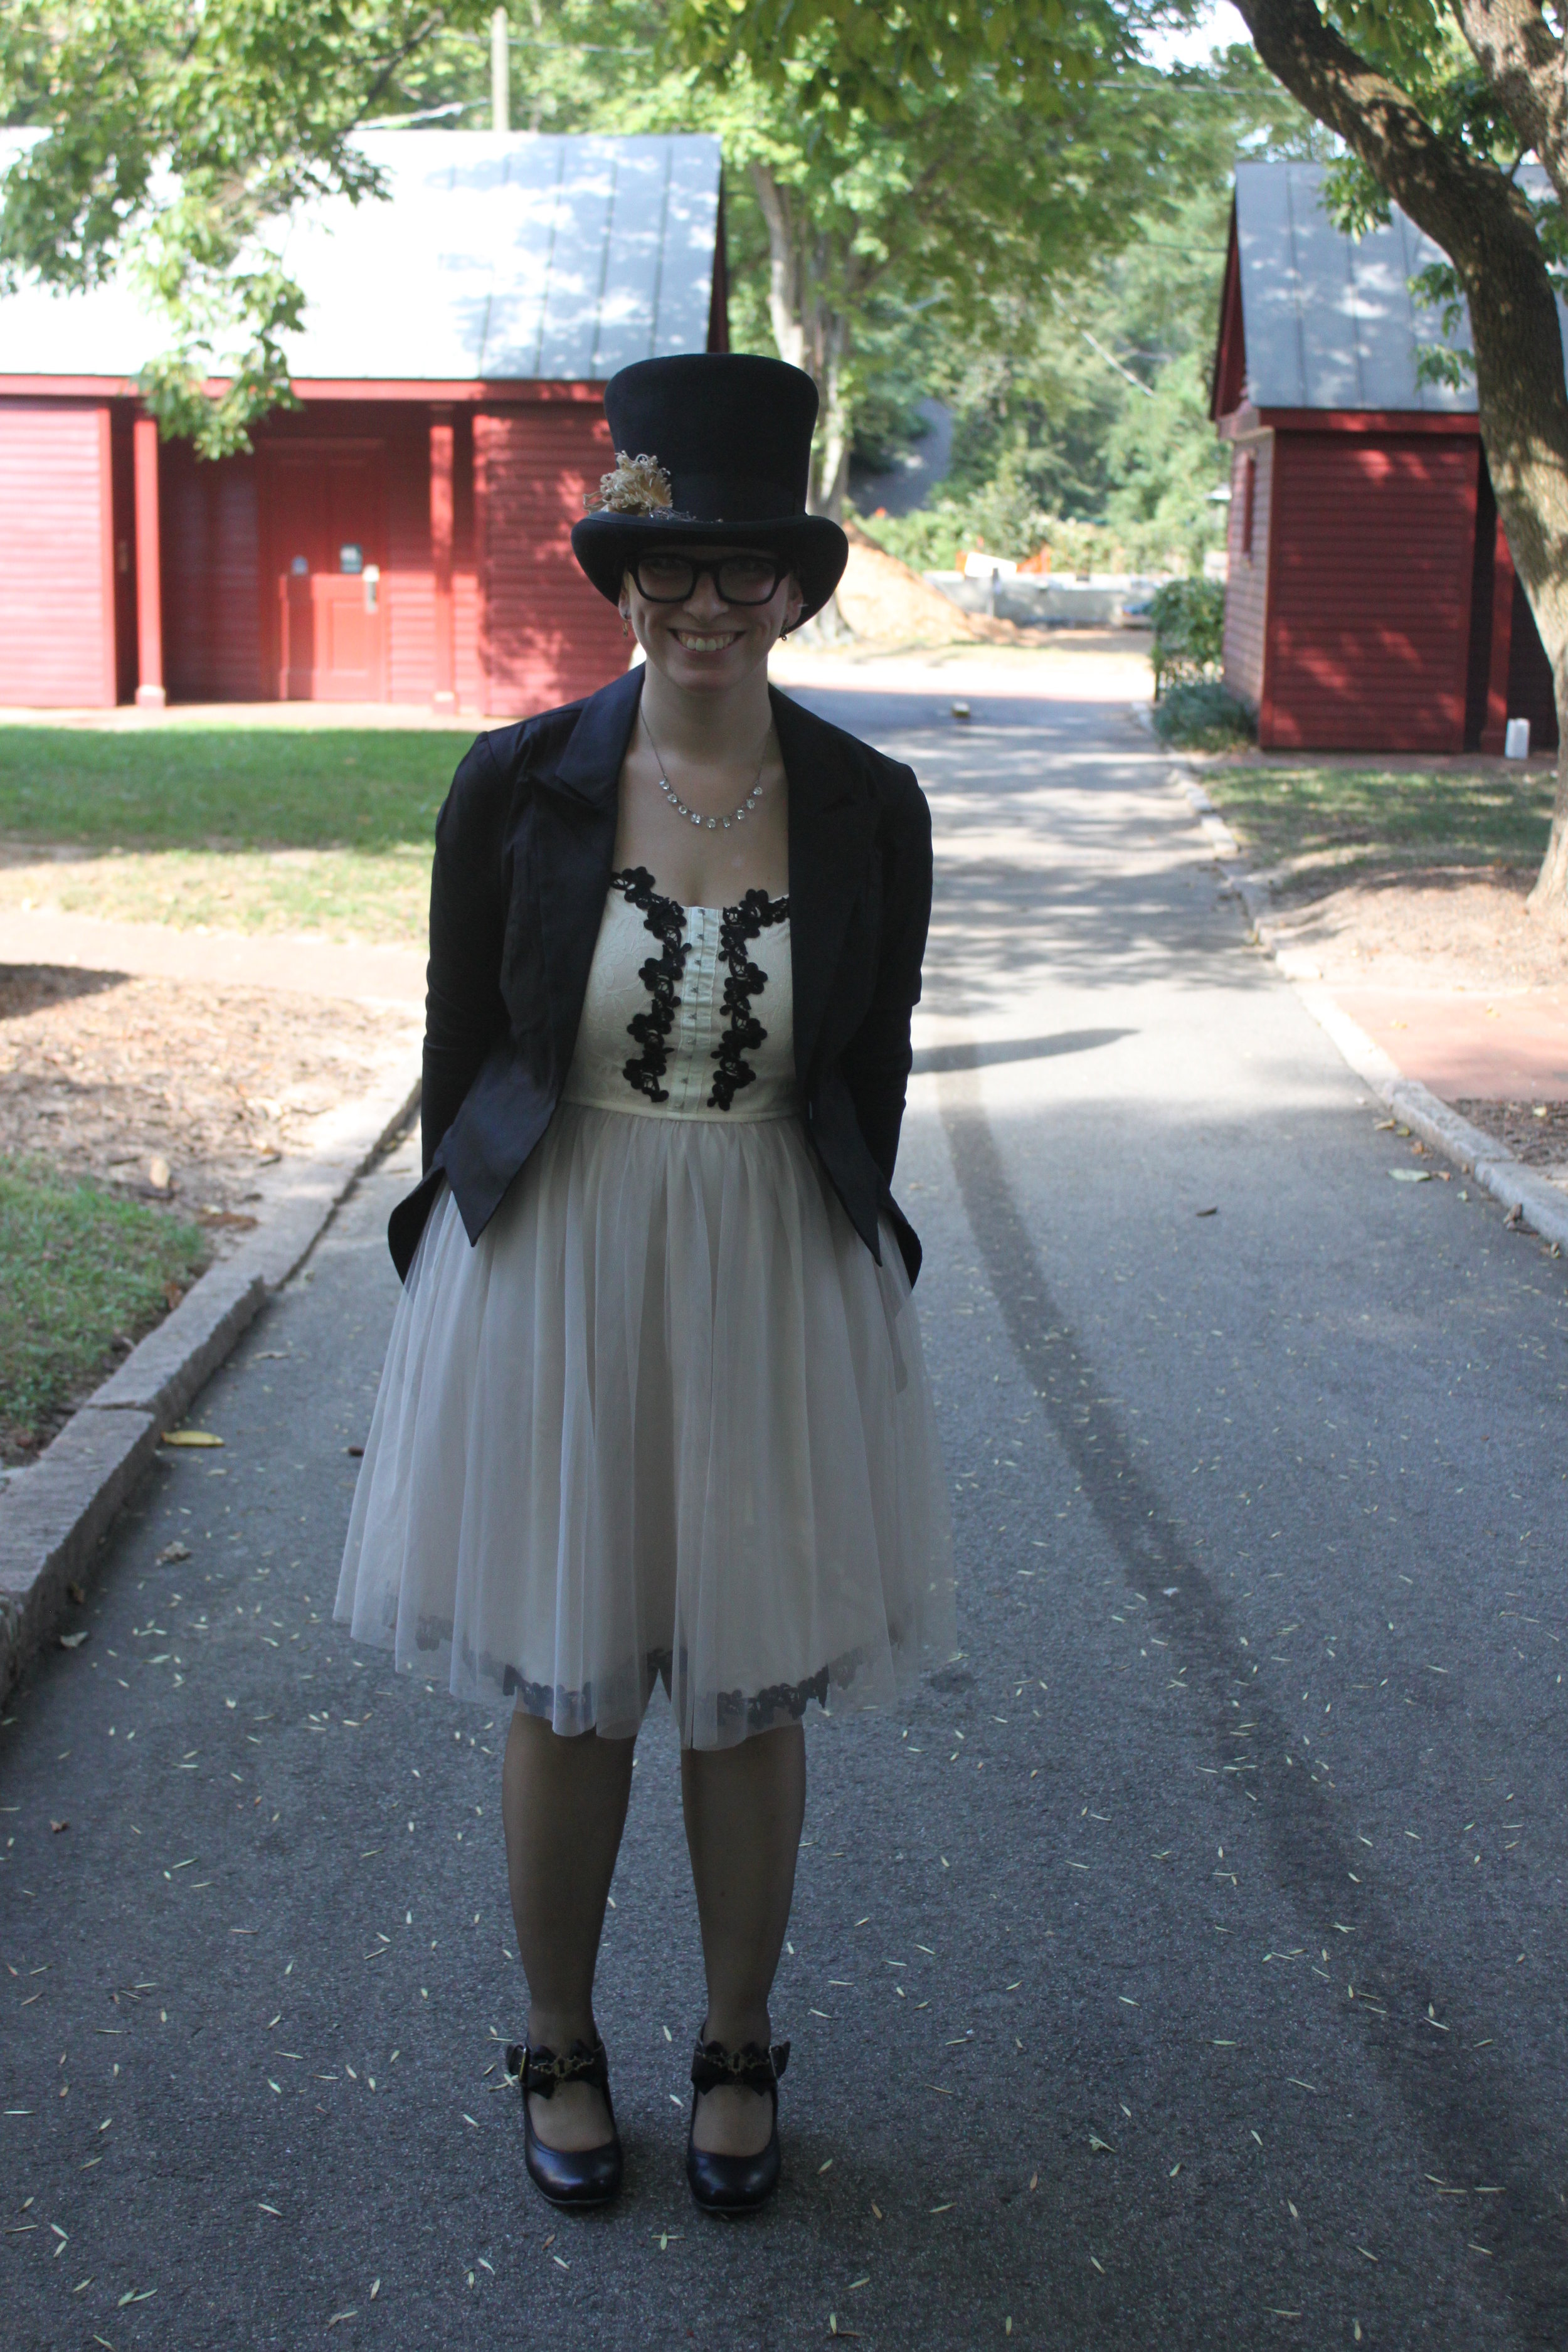
I love steampunk fashion & accessories–in fact, I love these 2 things so much that I cannot relegate them solely to cons, shows, or Halloween. “Style me Steampunk” is a series of blog posts on how to infuse your everyday wardrobe with a steampunk flair. From dressy to casual, office appropriate attire to outfits you can wear when you paint the town red–I will offer up ideas for outfits that will hopefully inspire some of you to dip into your closet and get creative! 163Two weeks ago I officiated my cousin Becca's wedding. As per the groom's request, I wore a steampunk outfit for the occasion. (You can read more about their handmade wedding here and here.)  What I love about this look is that it's steampunk, feminine, and formal without being costumey or over the top. 158

To recreate this look, you'll need:

  • Black top hat (accessories optional, mine is adorned with vintage pale pink feathers and a filigree pin my mom & I found in Paris)
  • Black tuxedo waistcoat (I purchased mine from ModCloth but there are also tons of fabulous Etsy sellers who make waistcoats and tuxedo jackets in Victorian/Circus styles and cuts. You can also make your own using this Simplicity Pattern too!)
  • Tulle & Lace Dress (I had to find a dress that complimented the wedding's colors as well as the rest of the bridal party. I found this dress at Target--and it's on sale now. I added black lace trim around the hem underneath the tulle and also to the bodice of the dress to dress it up. I recreated the bodice shape from a design I saw on a Victorian evening gown at the Victoria & Albert Museum ages ago.)
  • White Lace Gloves (thrifted)
  • Black stockings
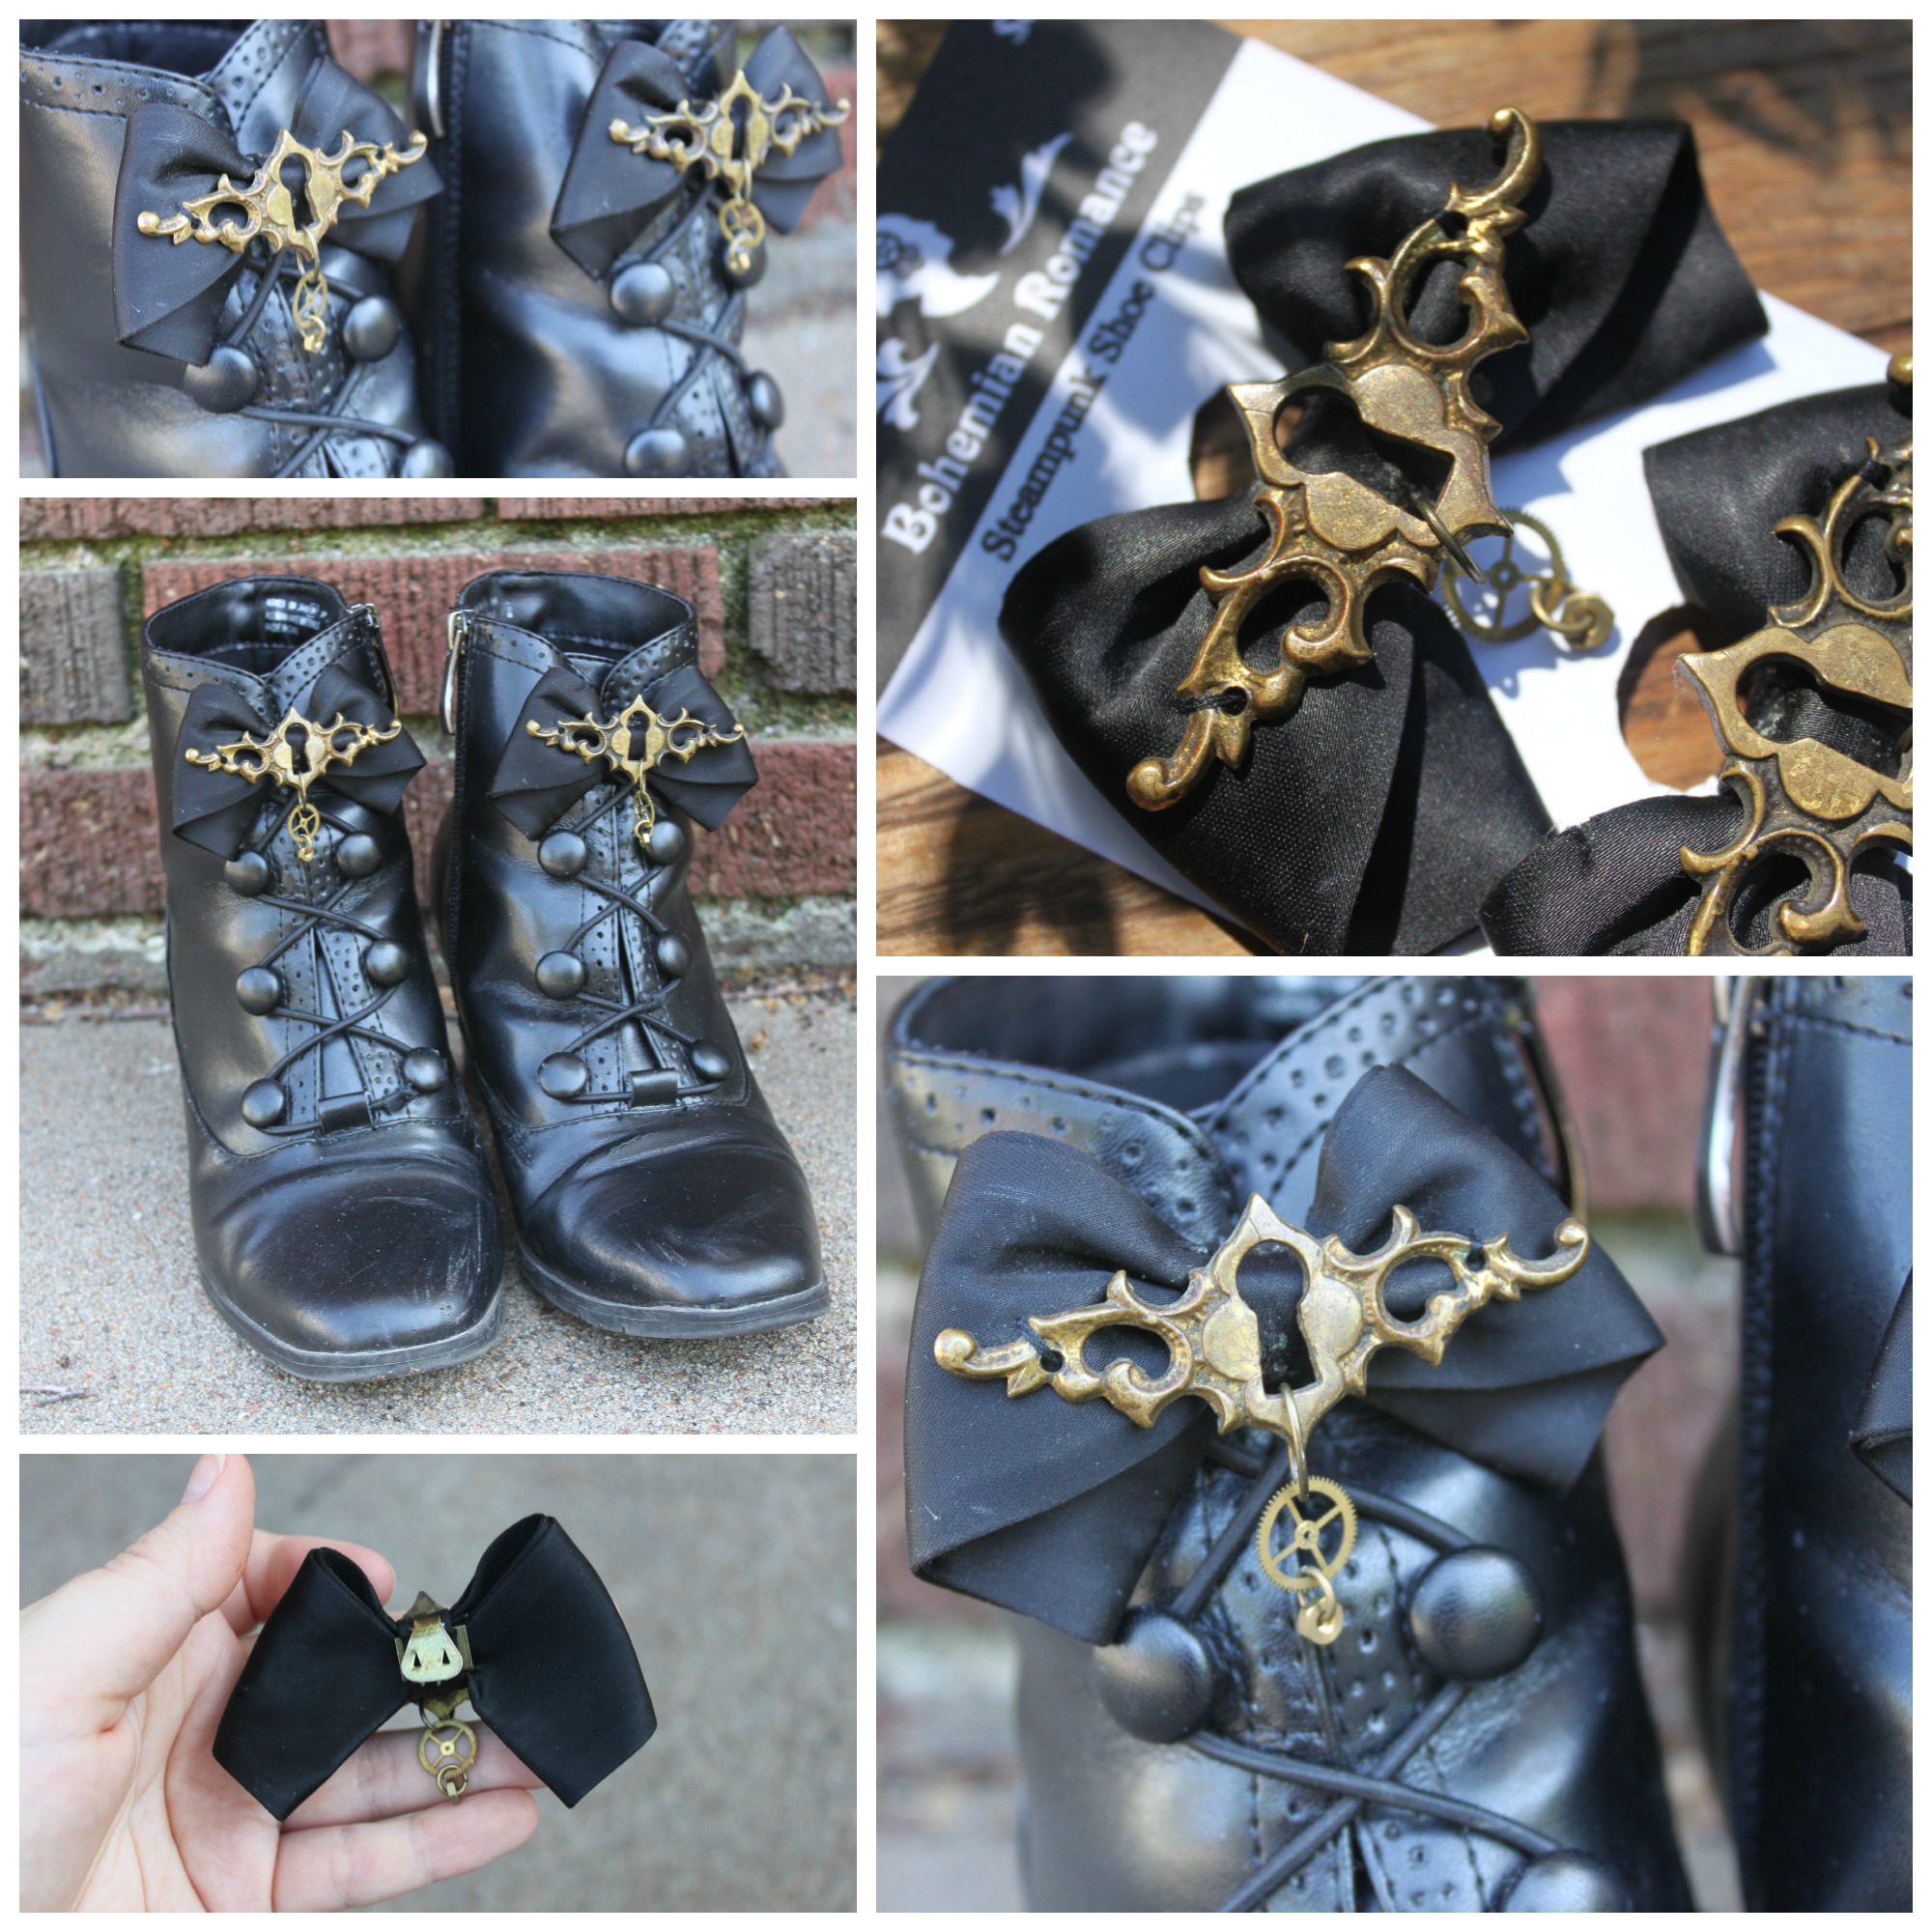
  • Plain black Mary Janes (which I then ornamented with steampunk black satin  bow shoe clips which I made myself)Steampunk Bow Shoe Clips Collage
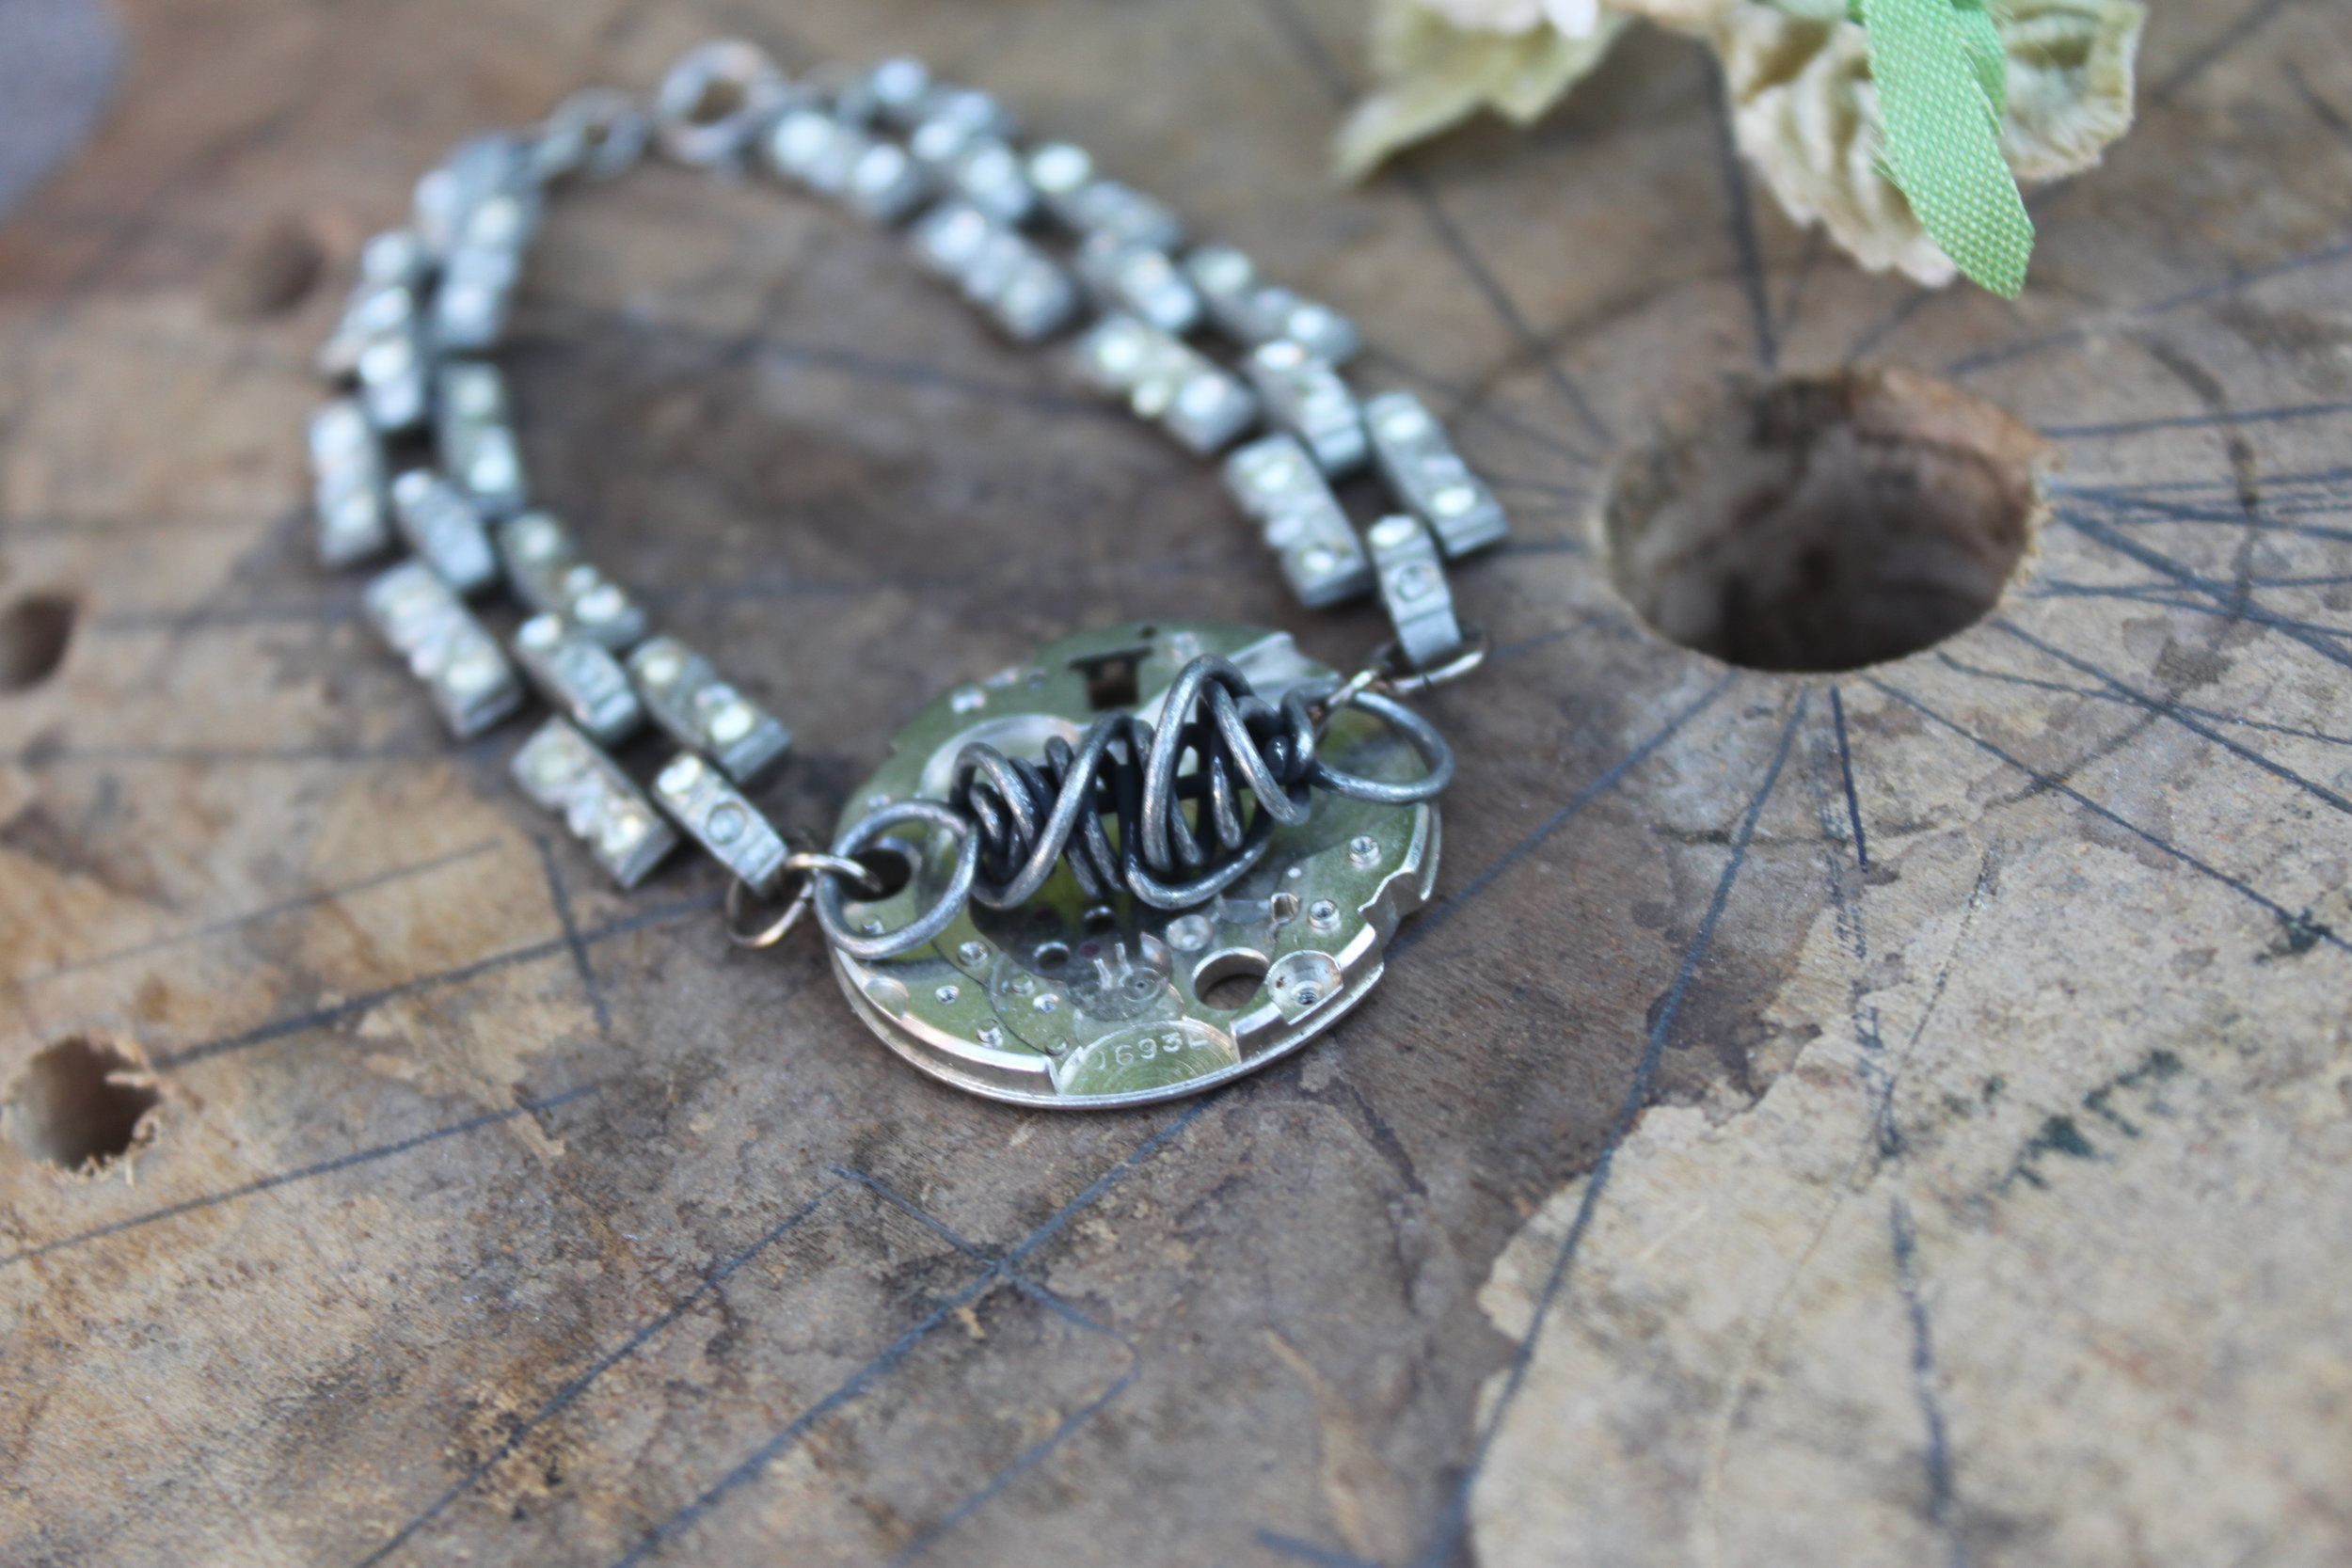
  • Steampunk Jewelry & Accessories (I chose dainty gearrings, an heirloom cut glass necklace, and one of my rhinestone & gear bracelets.)IMG_8306IMG_8122

I had a blast creating this look--especially since it was for such a festive, happy occasion. I'm so lucky I have a family that celebrates my eclectic steampunk fashion sense! Have fun creating this look for yourself!

Going to the Chapel and I'm Gonna Steampunk Your Wedding!

UncategorizedSamantha Extance3 Comments

I am thoroughly exhausted after this weekend! My cousin, Rebecca, and her (now husband) James tied the knot in a beautiful little chapel in Raleigh, North Carolina. The whole family pitched in and there were so many handmade touches. From the stunning guest quilt my grams made, owl ring bearer pillow sewn by my mom, to the accessories worn--you could see everyone's personal touch on my cousin's special day. (I wrote a much longer post on the Marry Me Indie blog about all of the handmade elements of Becca & James's wedding which I encourage you to read later.) For my part, I was asked to officiate. I was so honored to be asked and had so much fun putting together a personal ceremony that complimented both their sweet & sarcastic personalities. There was not a dry eye in the place nor was there a single person who didn't laugh wholeheartedly once or twice. 163

As per the groom's request, I wore a top hat (made by my mom, The Salvage Steamstress), a tuxedo jacket (which had a much older feel & look), and steampunk accessories (made by yours truly). I had on a pair of dainty gearrings, one of my new gear cluster rings, a monocle pin, and steampunk bow shoe clips to dress up my plain black heels. Steampunk Bow Shoe Clips Collage

I lost my hat to the Father of the Bride, my Uncle Jeff, who fell in love with it. But luckily, I escaped with the rest of my accessories.186

Another subtle steampunk touch was my gift to the bride--a bouquet locket. We lost Popu, our grandfather, earlier this year, and Becca asked if I would make her a special locket so she could keep him close to her on her wedding day. Becca, who is a photographer, had taken this stunning portrait of Popu--where his striking blue eyes pierce through the camera with his gentleness and kindness. I thrifted an antique silver locket--an Art Deco locket to be exact, and placed her portrait of him inside. On the facing piece, there is a tiny heart cut from a pair of his old work coveralls. Her something blue. I hung it from a small silver gear and pin.257

Steampunking your wedding does not mean you have to go over the top or have a strict Victorian, Steampunk, or Sci-Fi theme. It can be subtle. Steampunk can blend in with other themes--like my cousin's, which was a modern, Southern wedding.shot_1378590698989

It is always an honor to make pieces for weddings--and I am happy to say that I have styled a couple getting married this weekend! Can't wait to share some of their pictures with you! Getting hitched yourself? I love designing jewelry & accessories for weddings. I especially enjoy creating pieces that are not only beautiful, but personal.

Labors of Love--New from My Steampunk Studio

InspirationSamantha Extance3 Comments

It's been a wonderful three day weekend. I finished a quilt, made a beautiful bouquet locket for my cousin's wedding next weekend (pictures to follow in another post), and tinkered around making new steampunk creations. Thought I'd share a few with you! Reversible Mechanic Necklace CollageThe Airship Mechanic's Necklace is reversible. On one side is a gage and on the other a ruler. Flipping over the skeleton key, you can show off both sides! I love it when pieces are reversible!

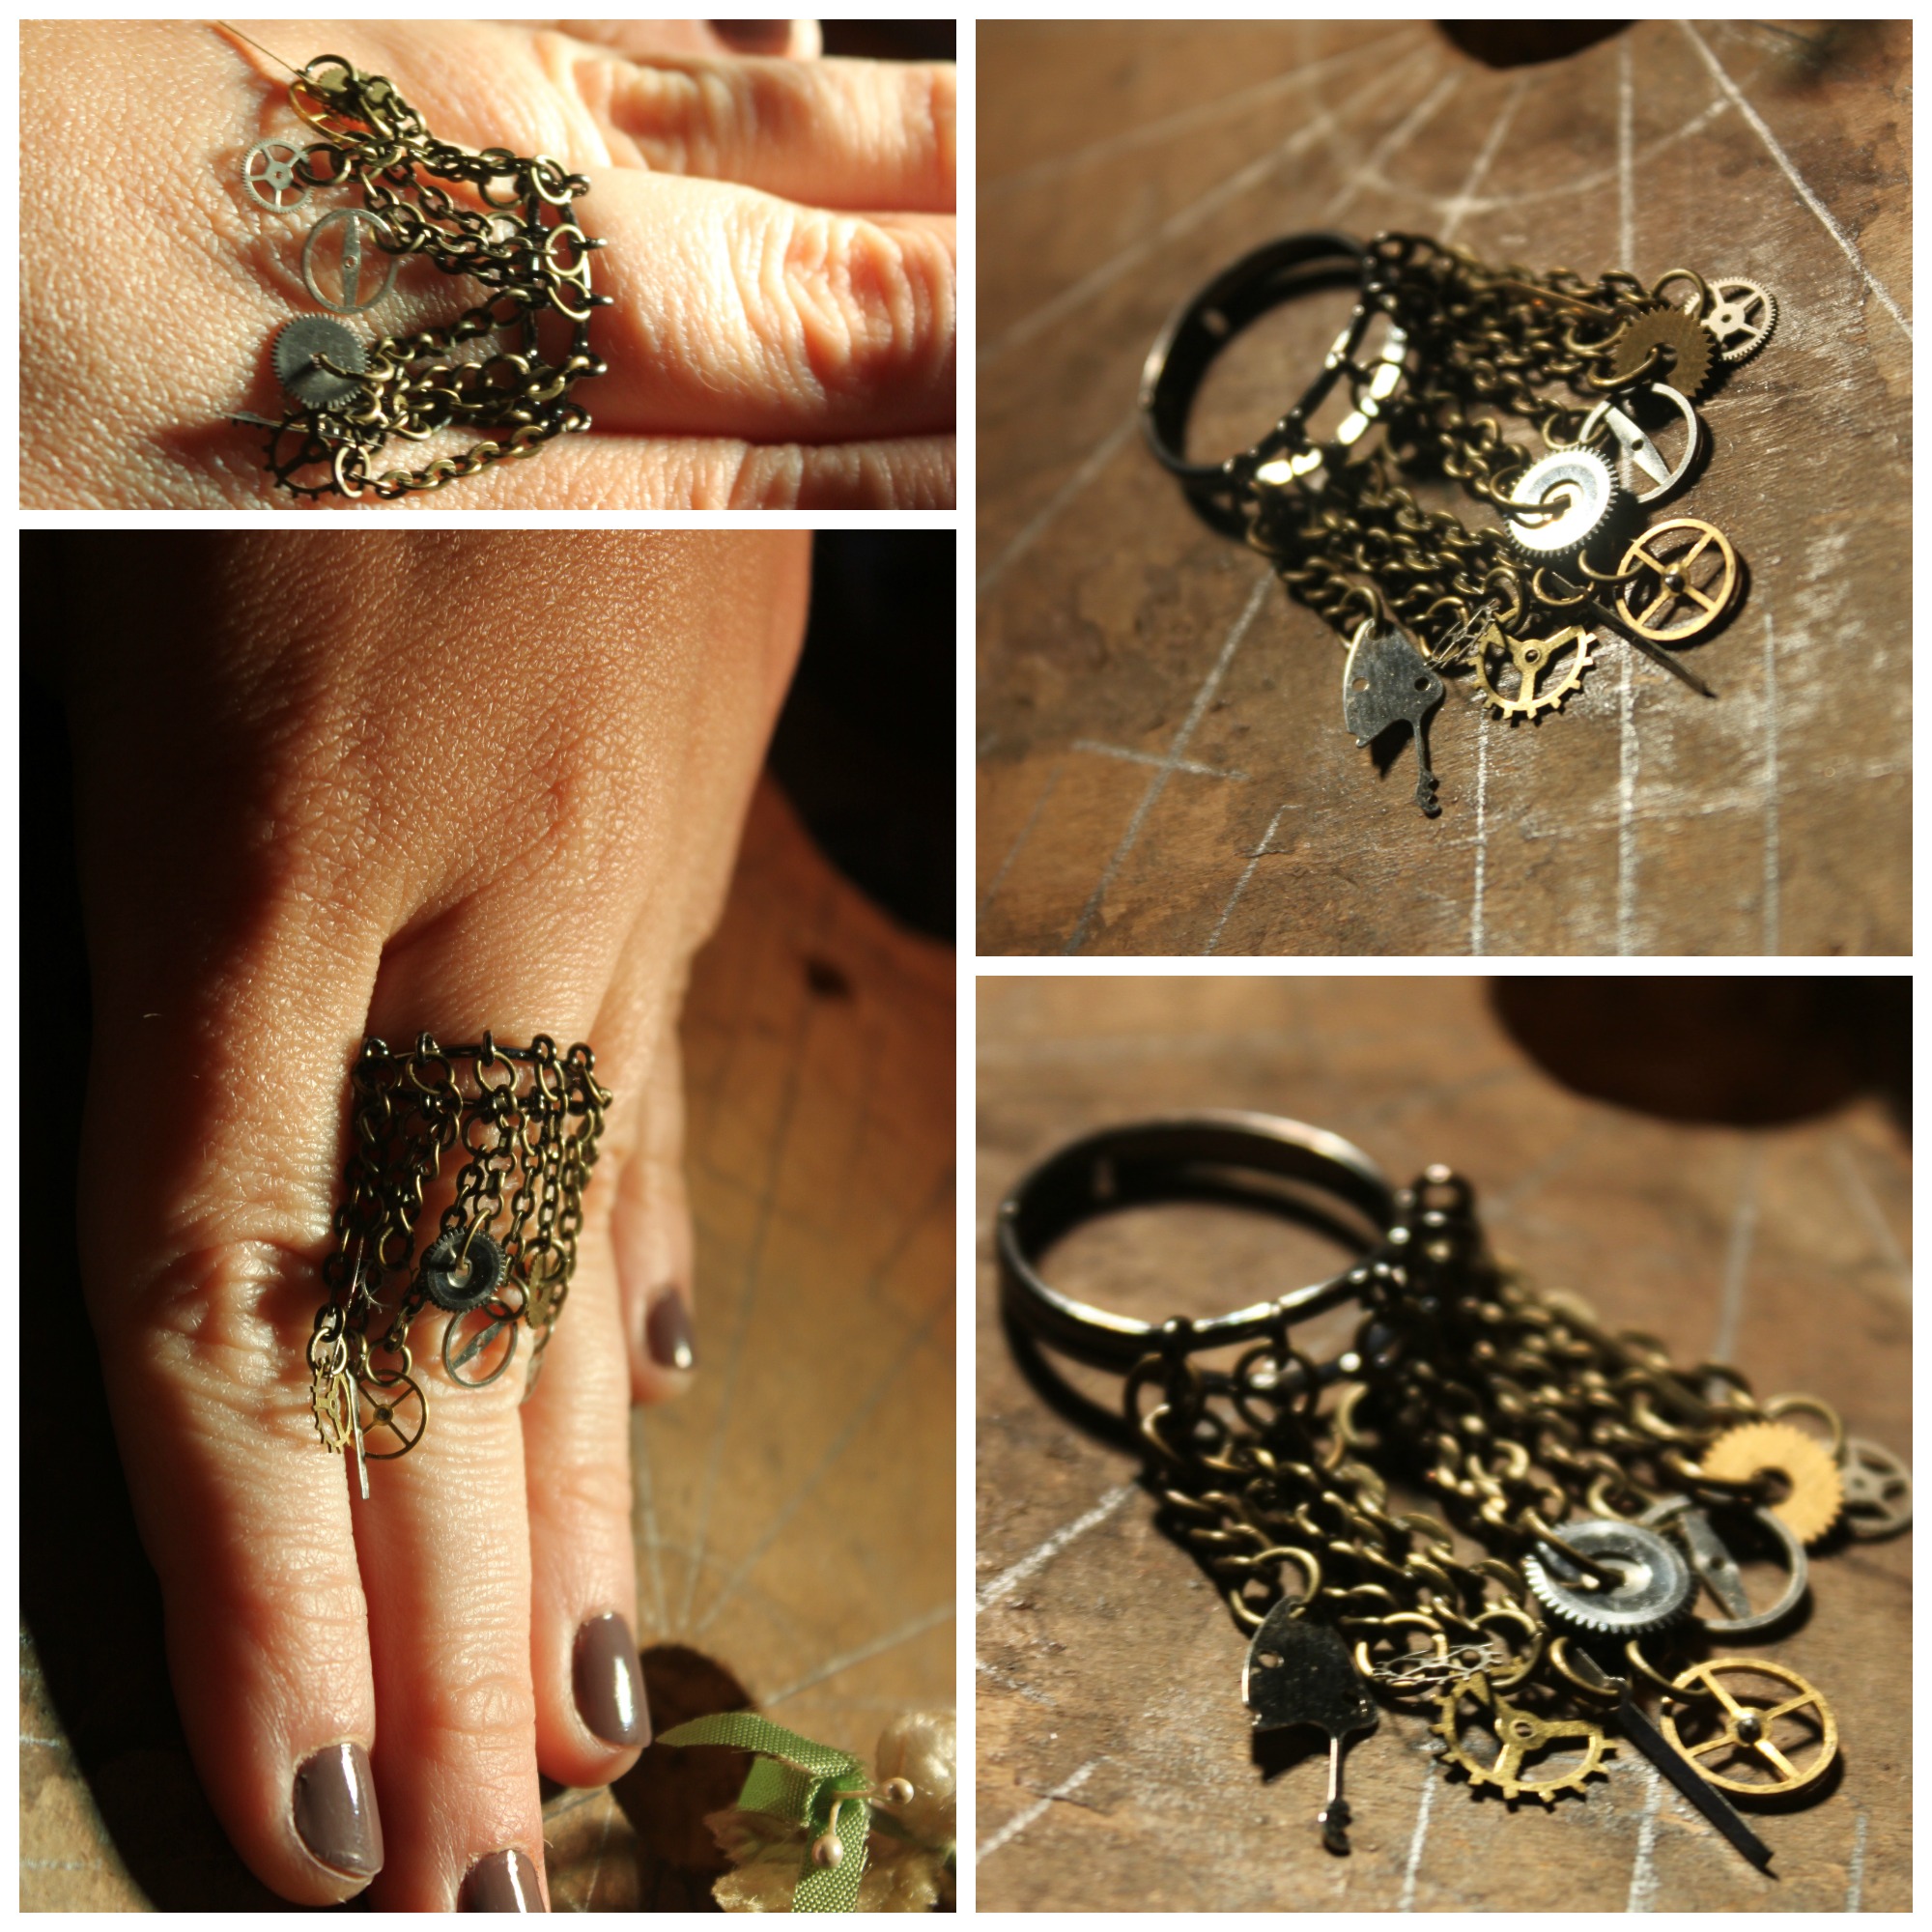
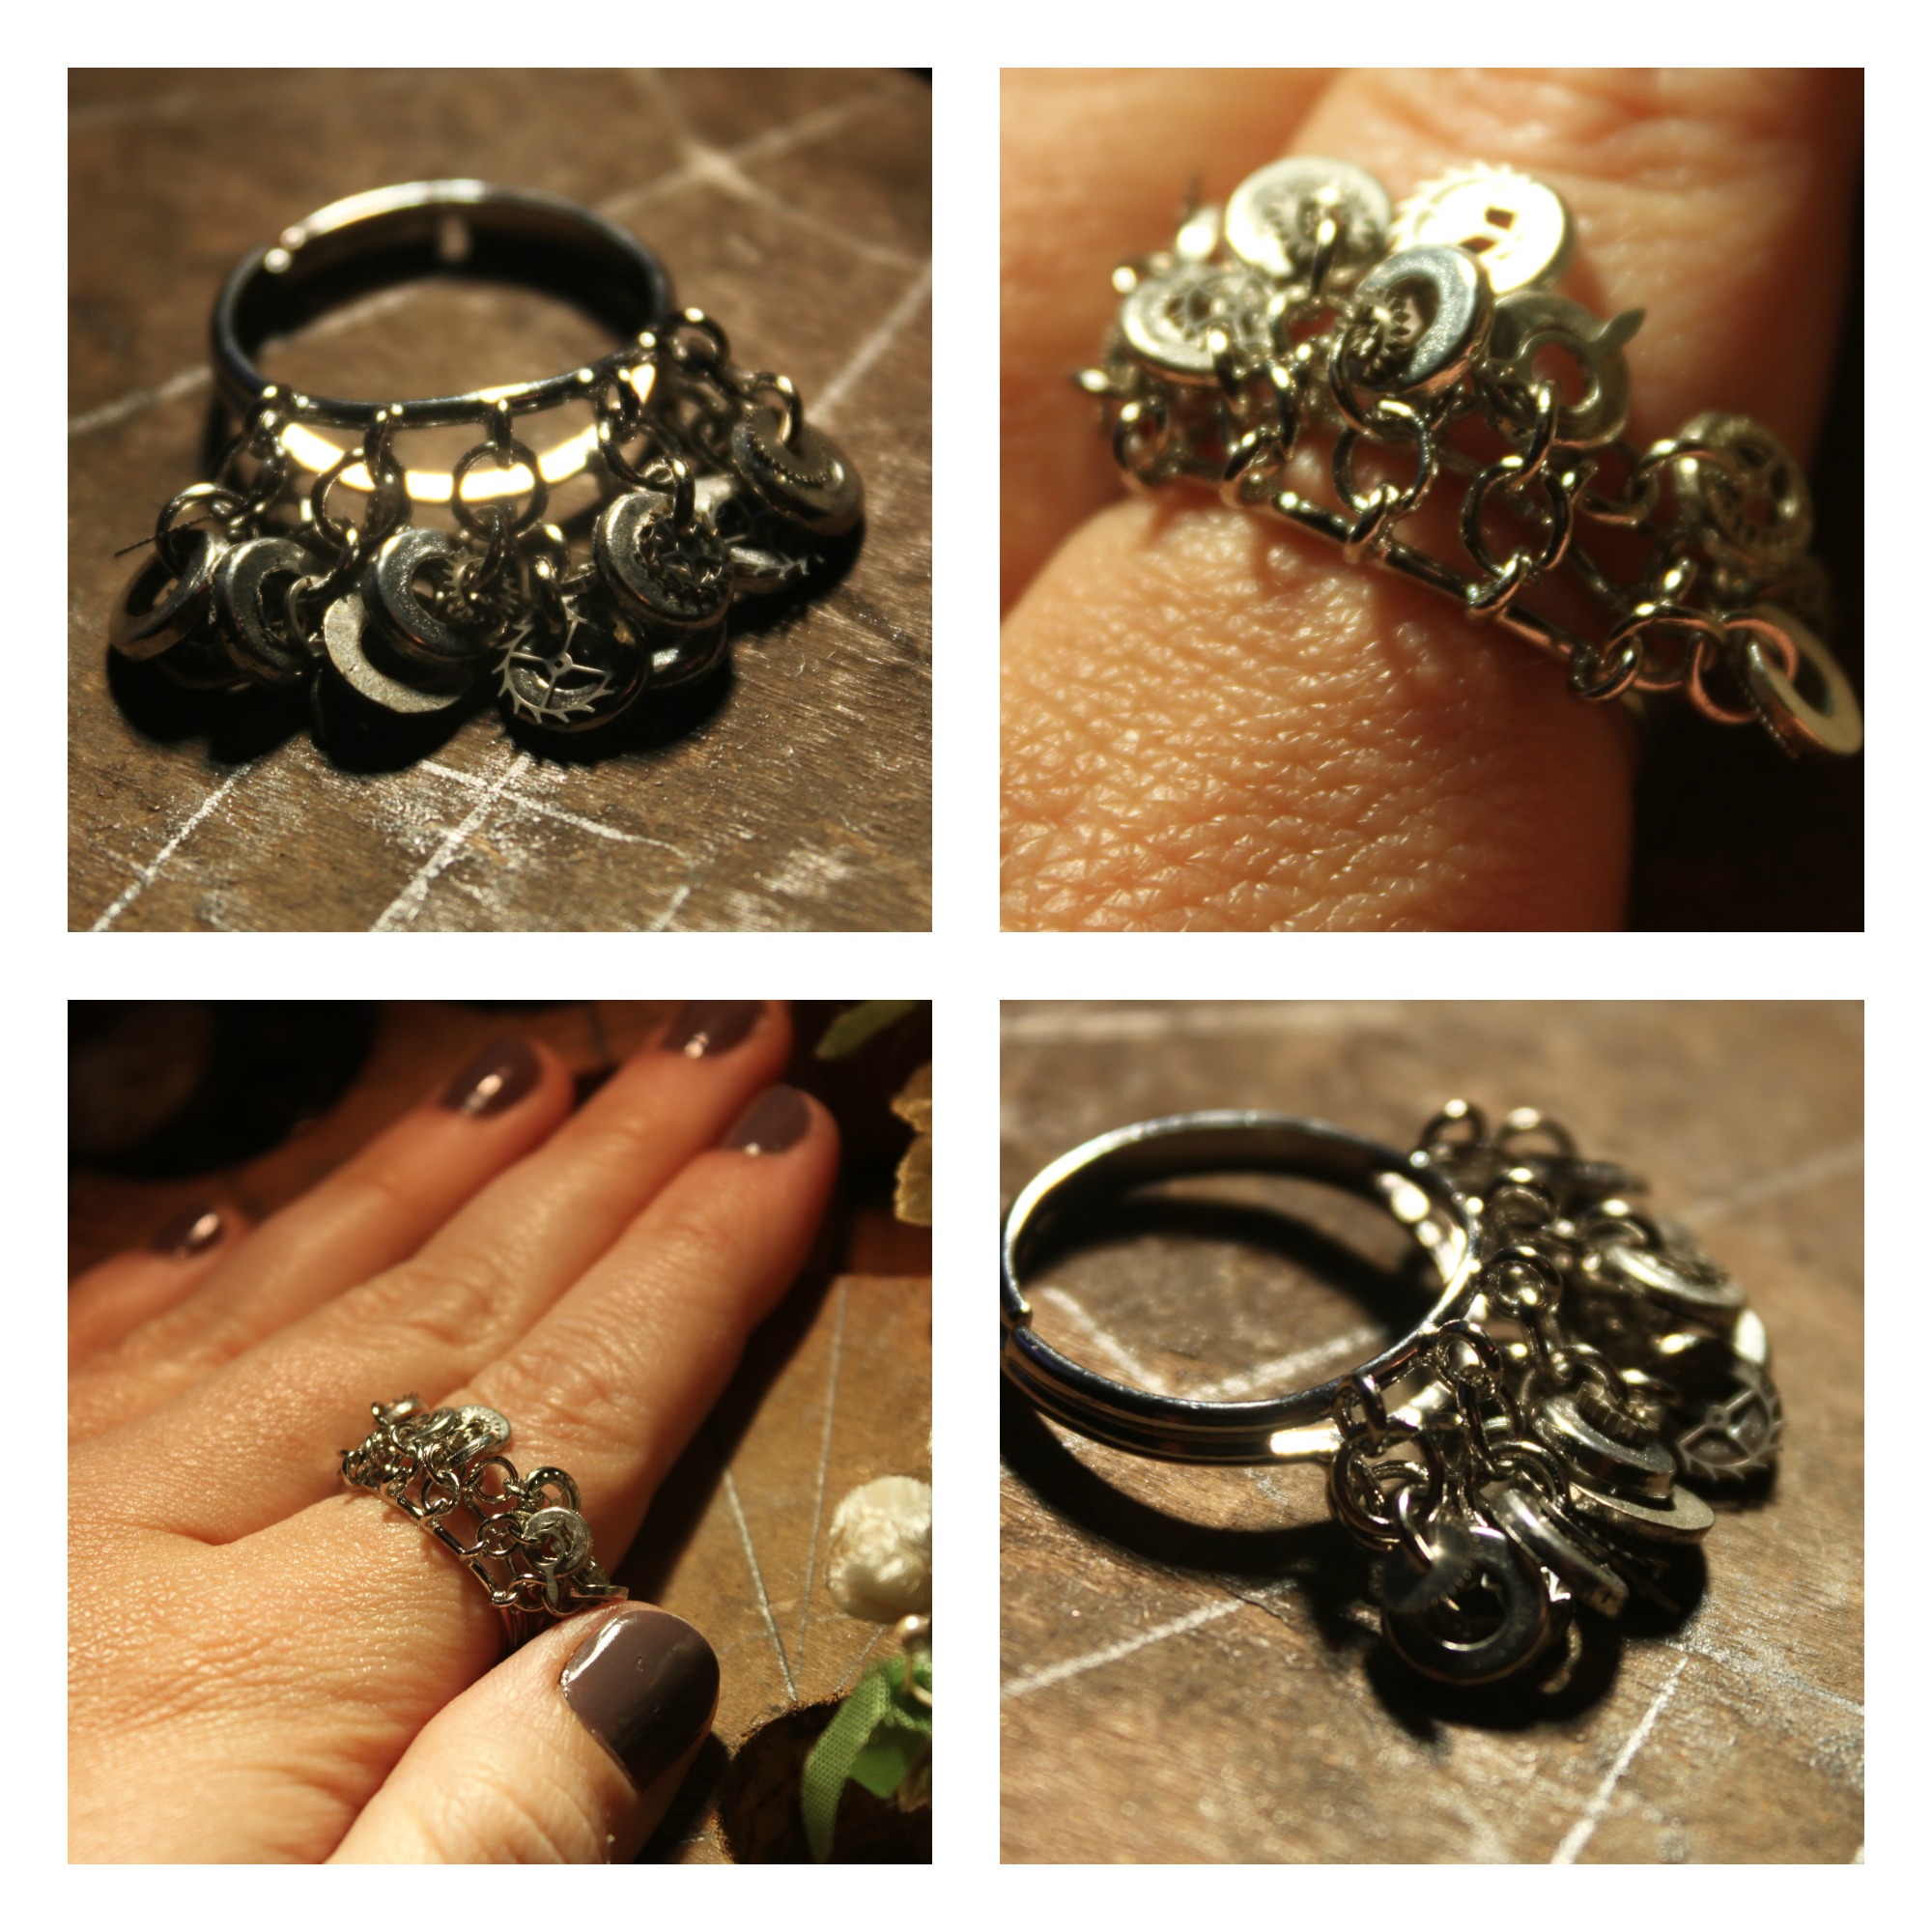
Gear Ring CollageA new product for me--rings! These are a fun cluster of gears, tiny machine parts, and sewing notions.

Gear Cascade Ring CollageThis ring is a chain & gear cascade. I love how each layer falls over each other and a perfect blend of silver, gold, back, and bronze glint off your skin.

Steampunk Ring 1 CollageAnd this last ring is a medley of washers & gears! You'll all definitely by seeing these new rings at my next show!

Steampunk Bookmark CollageI've also been making more steampunk bookmarks--which is perfect because it's back to school!

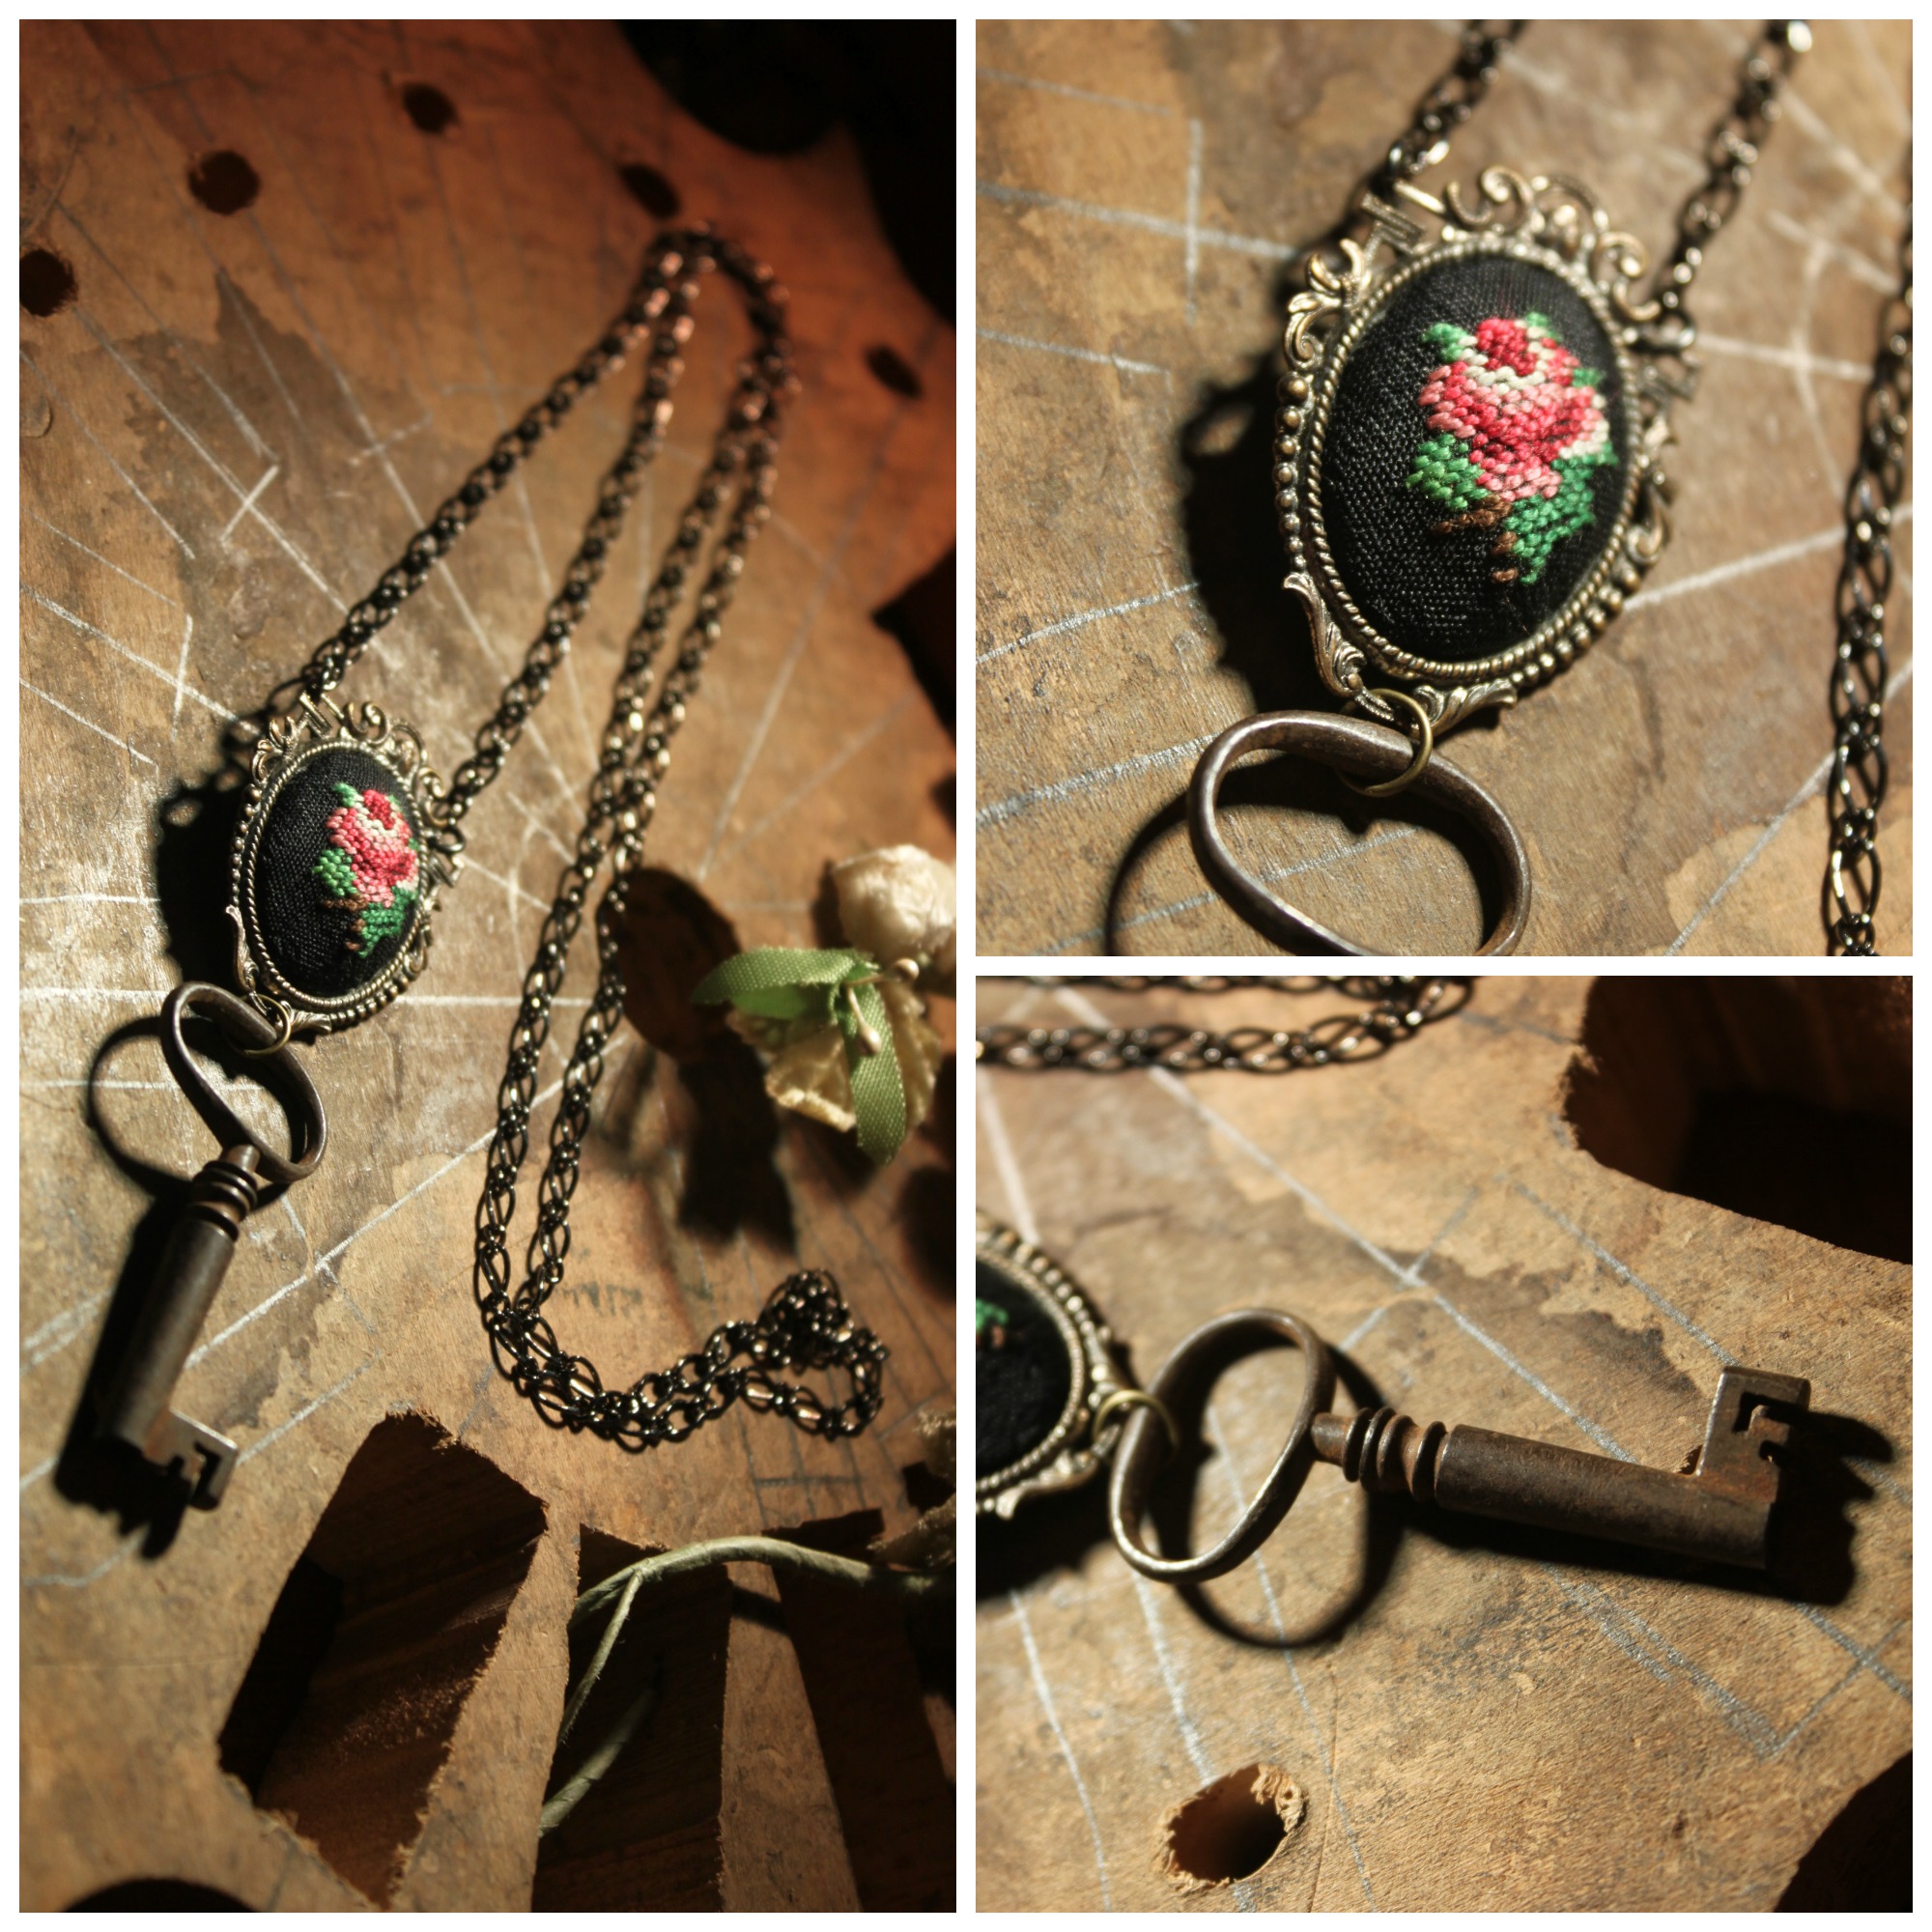
Embroidered Rose Necklace CollageI've had this embroidered rose filigree pin for a while and finally the right key came along! Don't they make a cute pair?

Airship Travel Pin CollageAnd finally, this cool travel pin which I adorned with gears, chain, and machine parts. Perfect for any airship or flight enthusiast. That's a little peek at what I've been up to this weekend.

Intercast Gries Reproducer Corp. Jewelry

Flea Market FindsSamantha Extance5 Comments

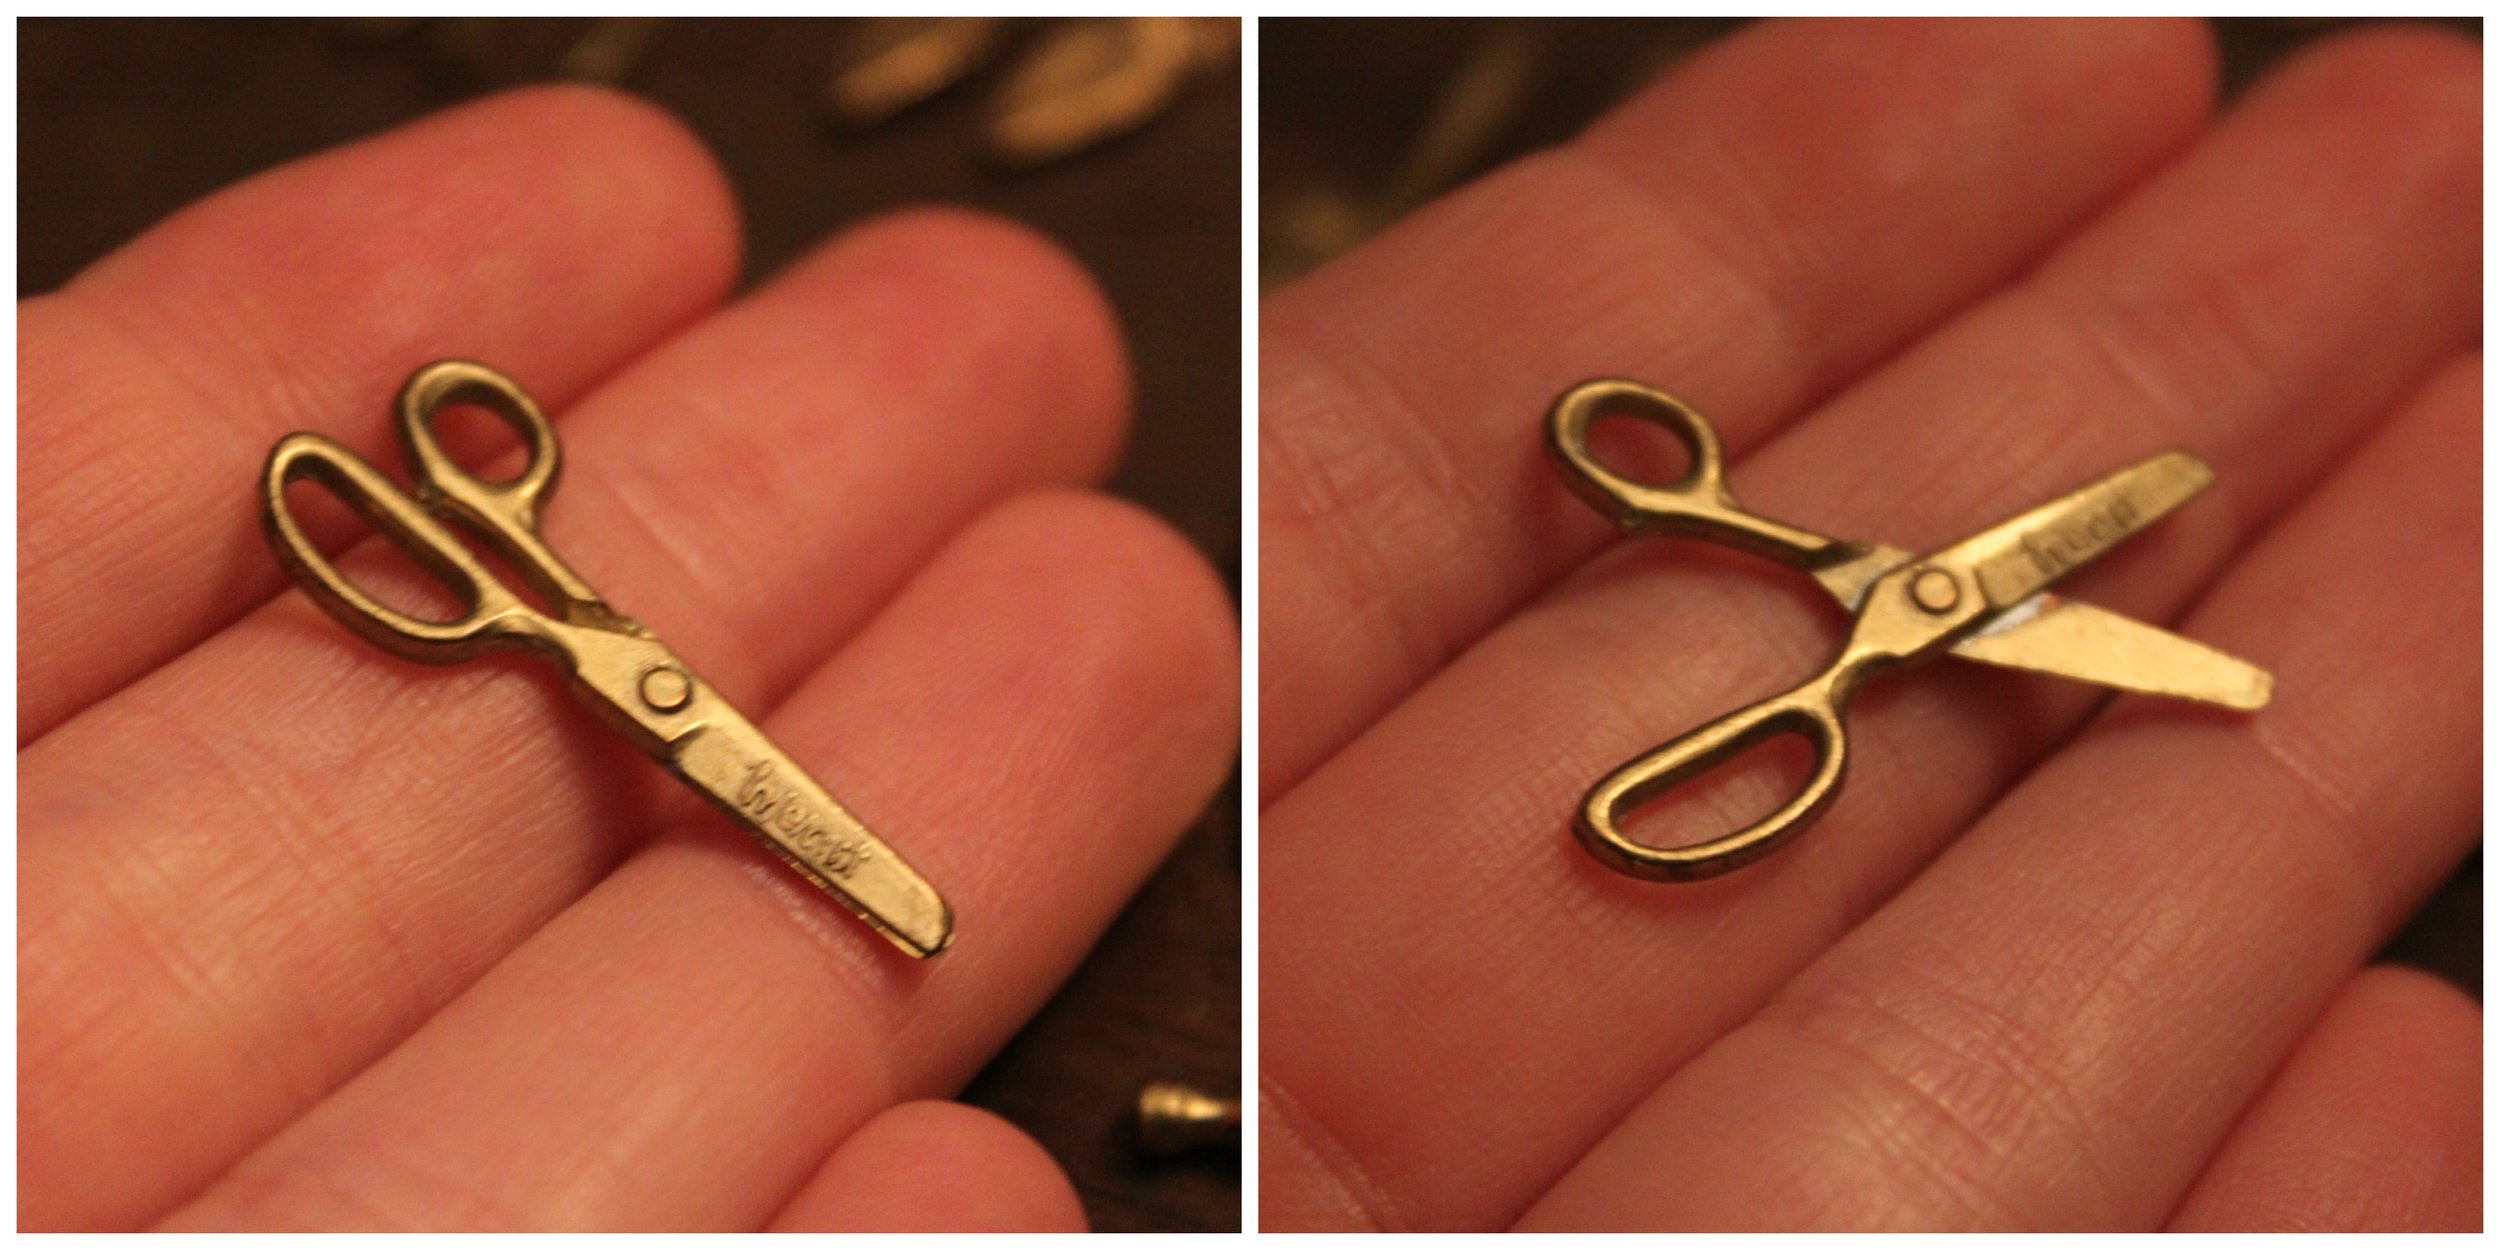
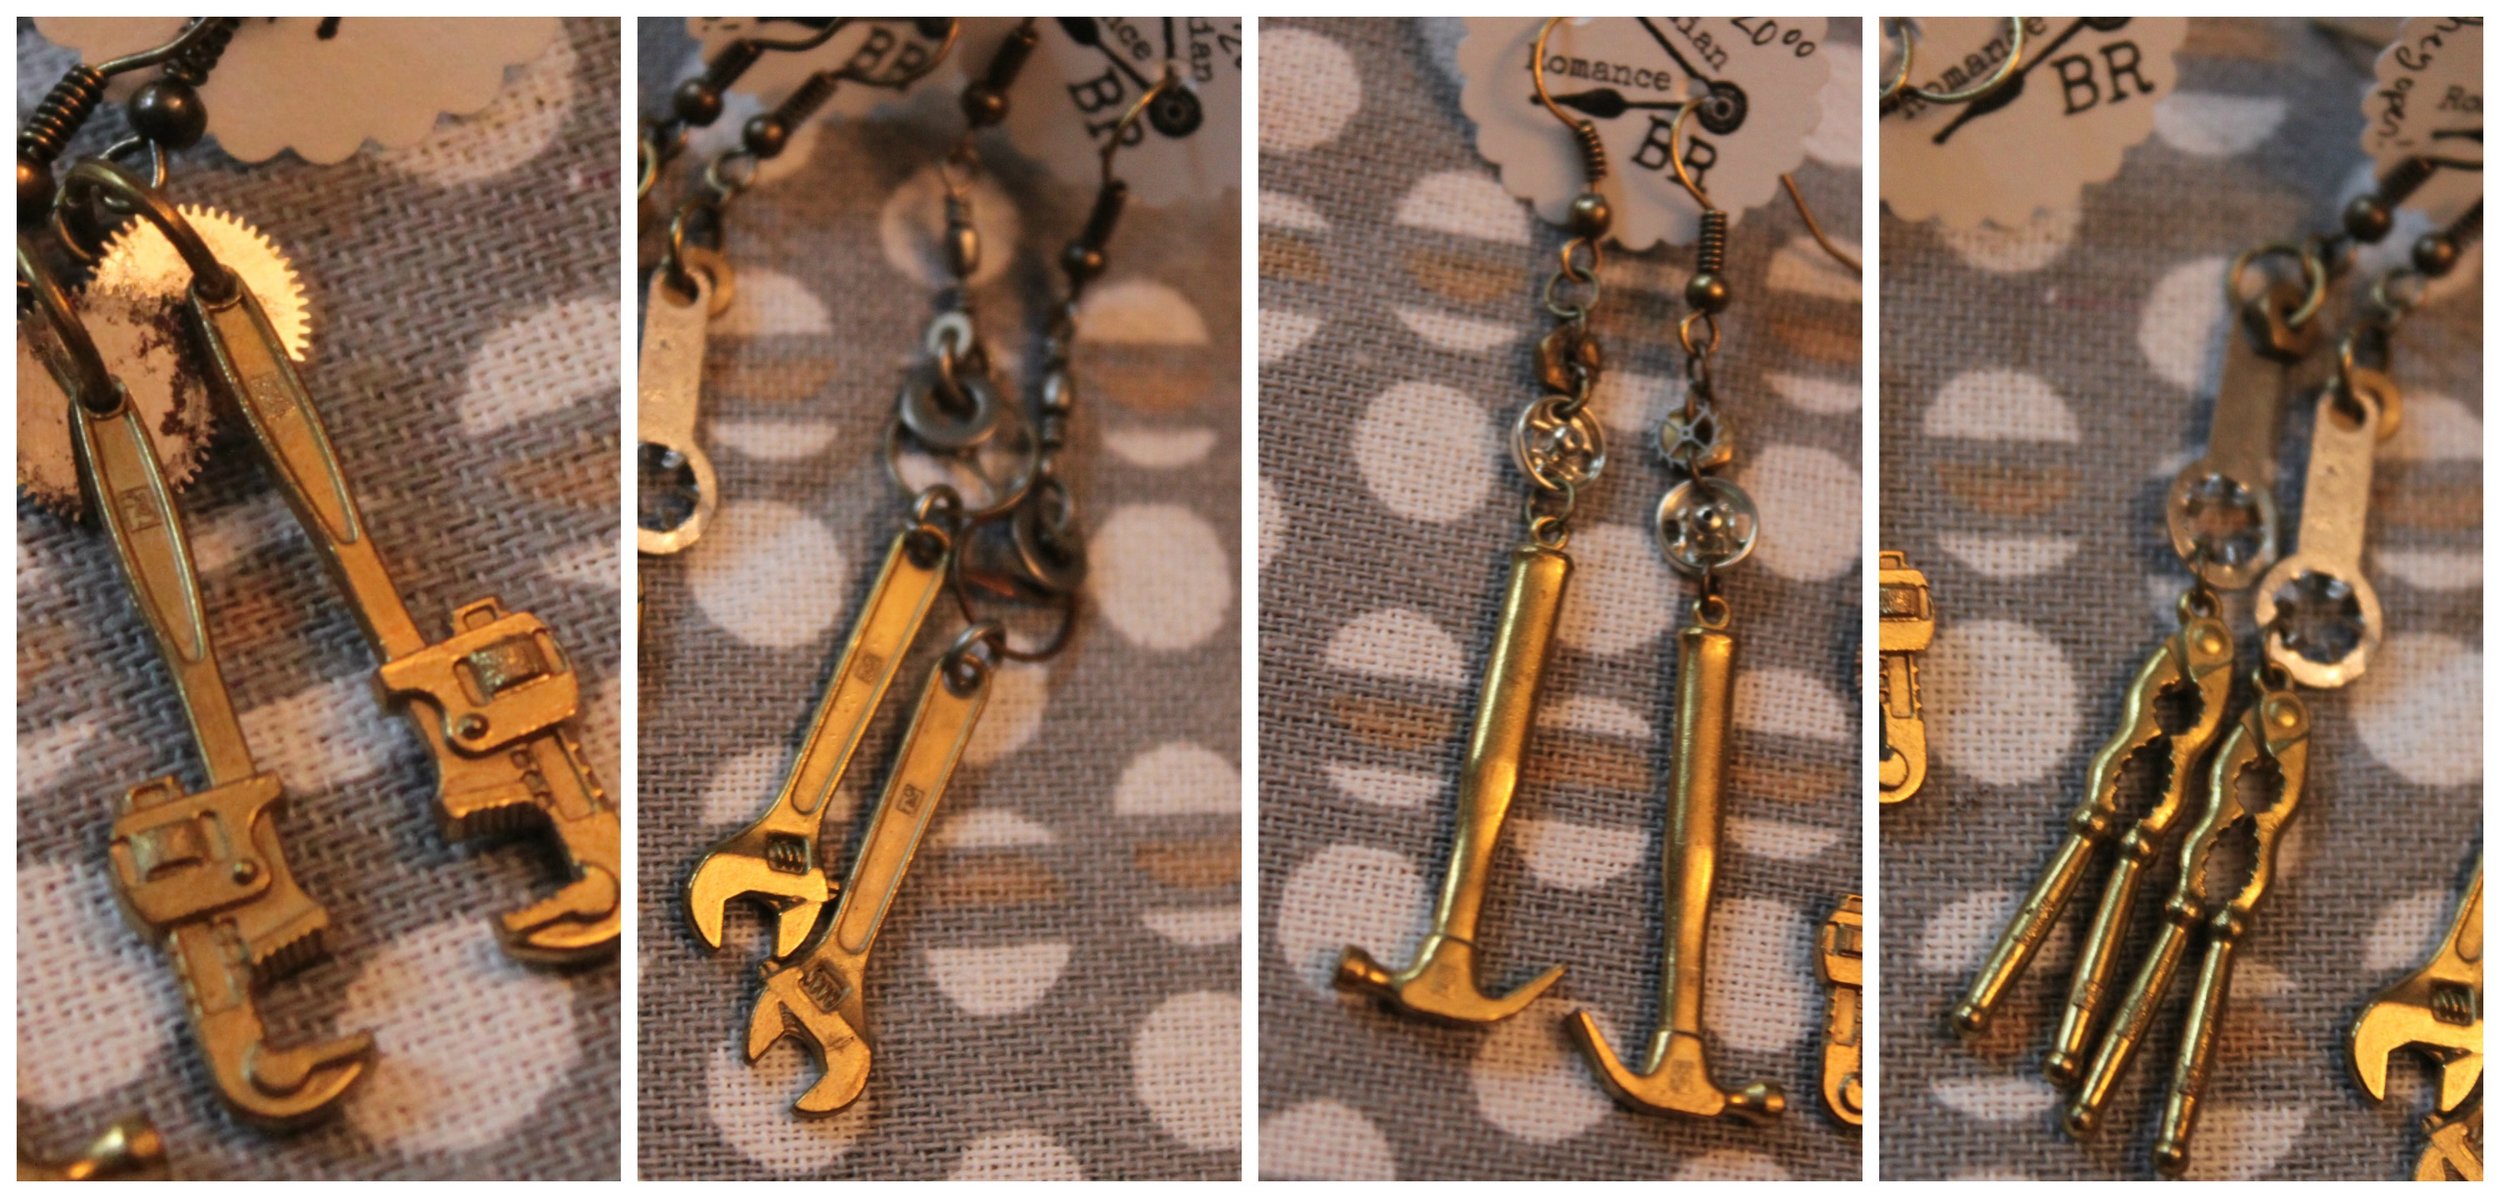
I found these really great tool charm that actually move! I thought they were perfect for steampunking! First, a little bit of history: the Gries Reproducer Corporation operated out of New York and from the 1950s to 1960s ran giveaways of tool charms (like these) in Cracker Jacks! Pretty neat, huh? 1950 1 Collage 1950 2 Collage1950 3 CollageThe pliers are perhaps my favorite since I do work with them often myself. I made a cute pair of earrings for my mom & I. 1950 4 Collage
1950 5 Collage1950 6 CollageThe scissors are cute too! They remind me of a steamstress!

1950 7 CollageAnd last, but not least, the pocketknife which is by far the most intricate & dainty. Here's what I made with them!

1950 Earrings CollageI just love gearrings--especially gearrings that appeal to the airship mechanic & tinkerer in all of us!

A Lazy Day in my Steampunk Studio

Flea Market FindsSamantha Extance2 Comments

First off, I would like to say thanks for reading my blog! I've noticed that there are a number of you reading in other parts of the world--so hi to my neighbors in Canada, Bonjour France, Cheerio England, How are things Australia? Ciao Italy, Hei Finland, Guten Tag Germany, and Cześć Poland! It's a lazy day here in my little steampunk studio. I received a care package of flea market treasures from my family yesterday and today I have set down to research some of the oddities they sent.

Pictured below is a tiny toy bust of a woman, an early 19th century Fireman's medal (marked Station no. 2), and transistors (which are so breathtakingly intricate & add pops of color to the monotone metal that they are a frequent staple in my jewelry).

Thirft Treasures Collage 1Among the many neat bits & bobs sent were 2 medals. The first is for Second Prize in the All Round Contest of the Outing Club, located in Hartford, Connecticut. It was issued and engraved with the year, 1891. The Outing Club was one of many gentleman's clubs in America. Men would gather for excursions outdoors, namely hiking, fishing, hunting, and swimming. On the back of the pin the name of the medal-maker is imprinted: a Mr. John Harriott of Boston, Massachusetts (located at 3 Winter Street). Mr. Harriott was a silversmith, enameler,  engraver and jeweler who even made 2 medals for J.P. Morgan's son, Evan on behalf of the Loon Lake Historical Society.

Thirft Treasures Collage 2The other medal, made to mark someone's membership to the Woodstock Council No. 147, was made by The M.C. Lilley & Co. who operated out of Columbus, Ohio. According to the Columbus Metropolitan Library, M.C. Lilley & Co. was "[f]ounded in the mid-1860s, the M. C. Lilley Company was world renowned as manufacturers of regalia." They made a number of items: swords, flags, emblems, uniforms, and of course, medals. Among their many customers were the Freemasons, Knights of Pythias, West Point & Annapolis, and a number of fraternities. The company was founded by 4 veterans of the Civil War: Mitchell Campbell Lilley, John Siebert, and Charles & Henry Lindenberg.

Thirft Treasures Collage 4The greatest surprise of all was the 9 tintype photos that I found wrapped up in a piece of crinkly tissue paper. I have no clues as to who these souls were, where they came from (except to hazard a guess that  they were from Connecticut or New York), or what their names were. I love old photographs just the same--despite their endless mystery.

Thirft Treasures Collage 5Last but certainly not least, out of this marvelous box I pulled out a pair of children's goggles. My favorite part of these goggles is that they were marked by the little adventurer--Billy--who wrote his name on one of the flaps. These motorcycle/automobile goggles were made in France, marked on the metal rim as "L'express Brevet L.C.B.F. 433606."

Thirft Treasures Collage 6I am lucky that I have such a supportive family--who are also avid flea marketers & junk-lovers themselves! Who are your partners in crime when it comes to thrifting, flea markets, & antiquing?

The Beauty of Collaboration

Fashion, InspirationSamantha ExtanceComment

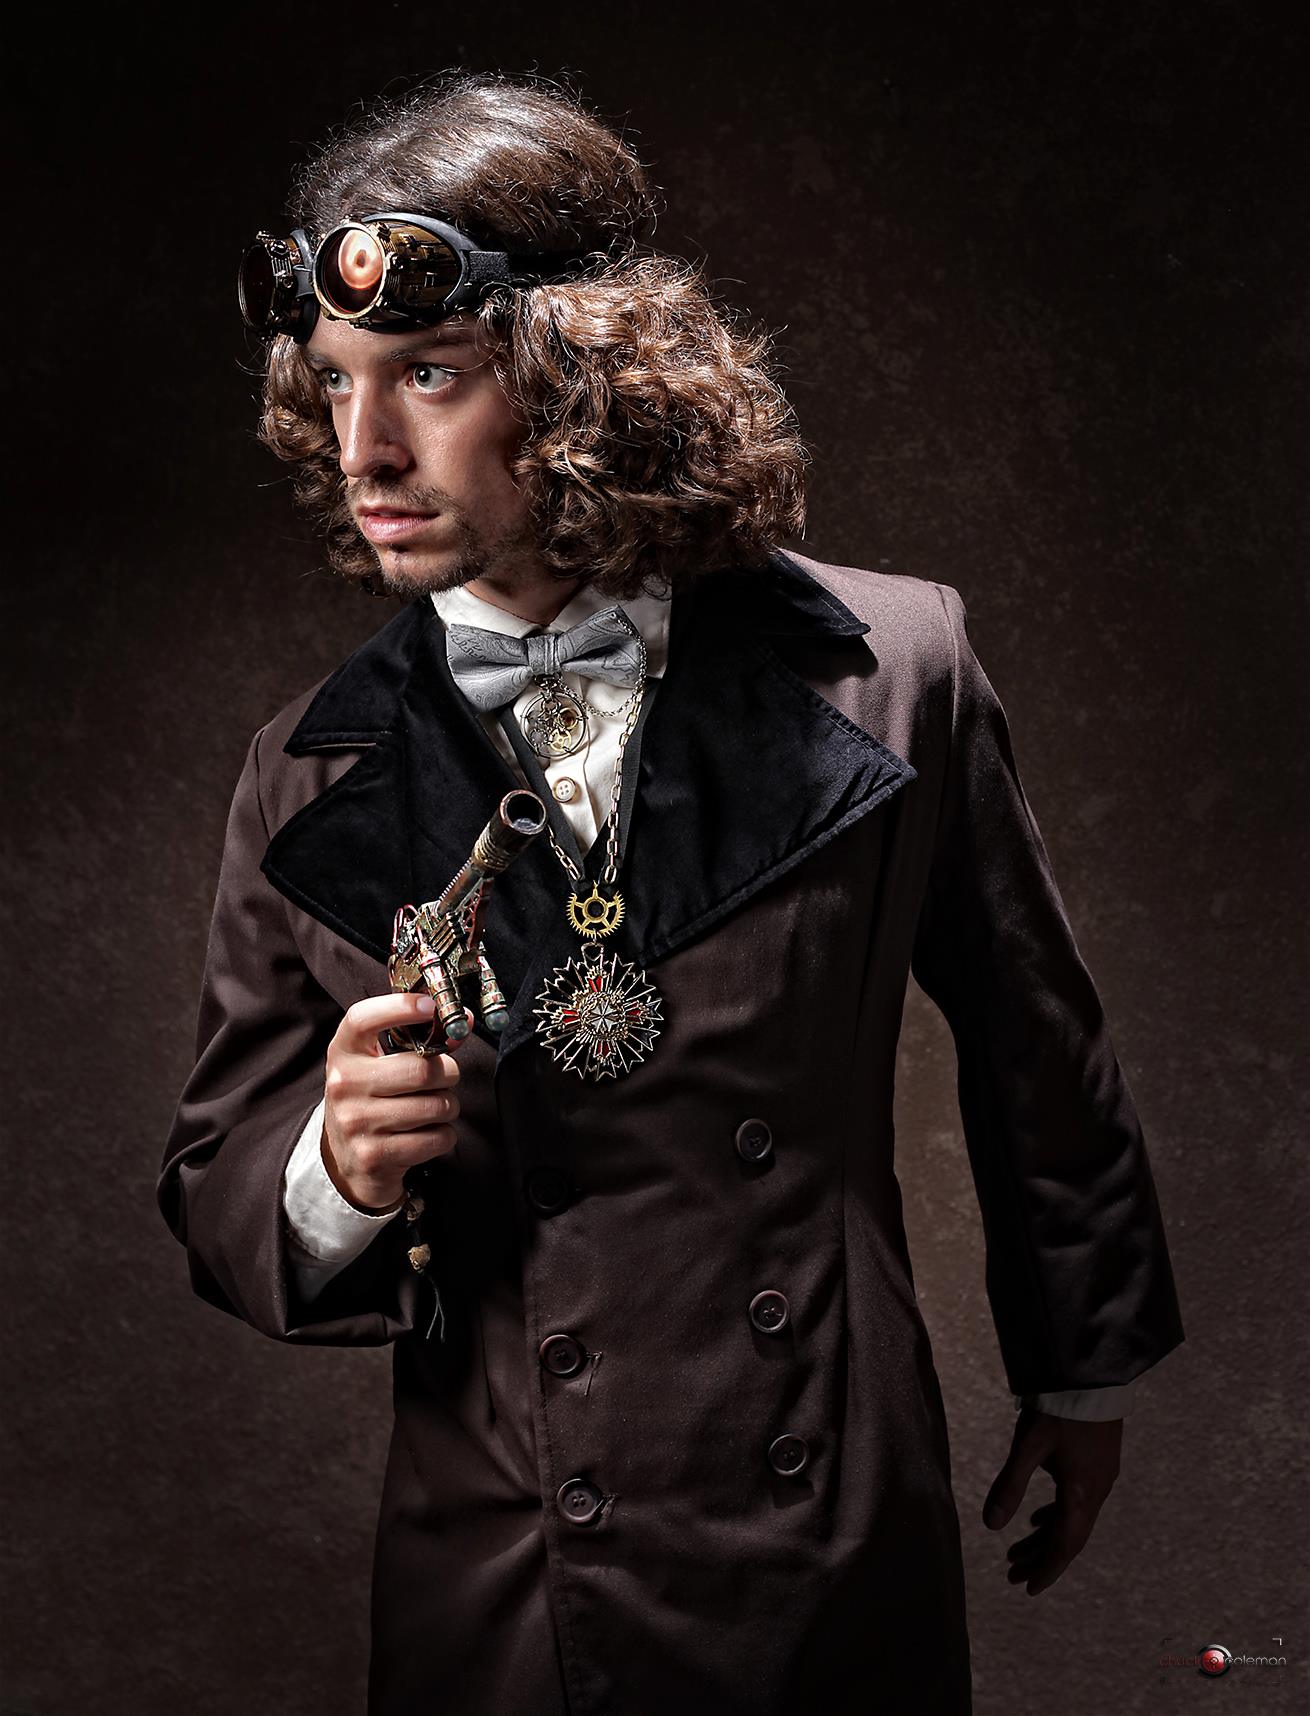
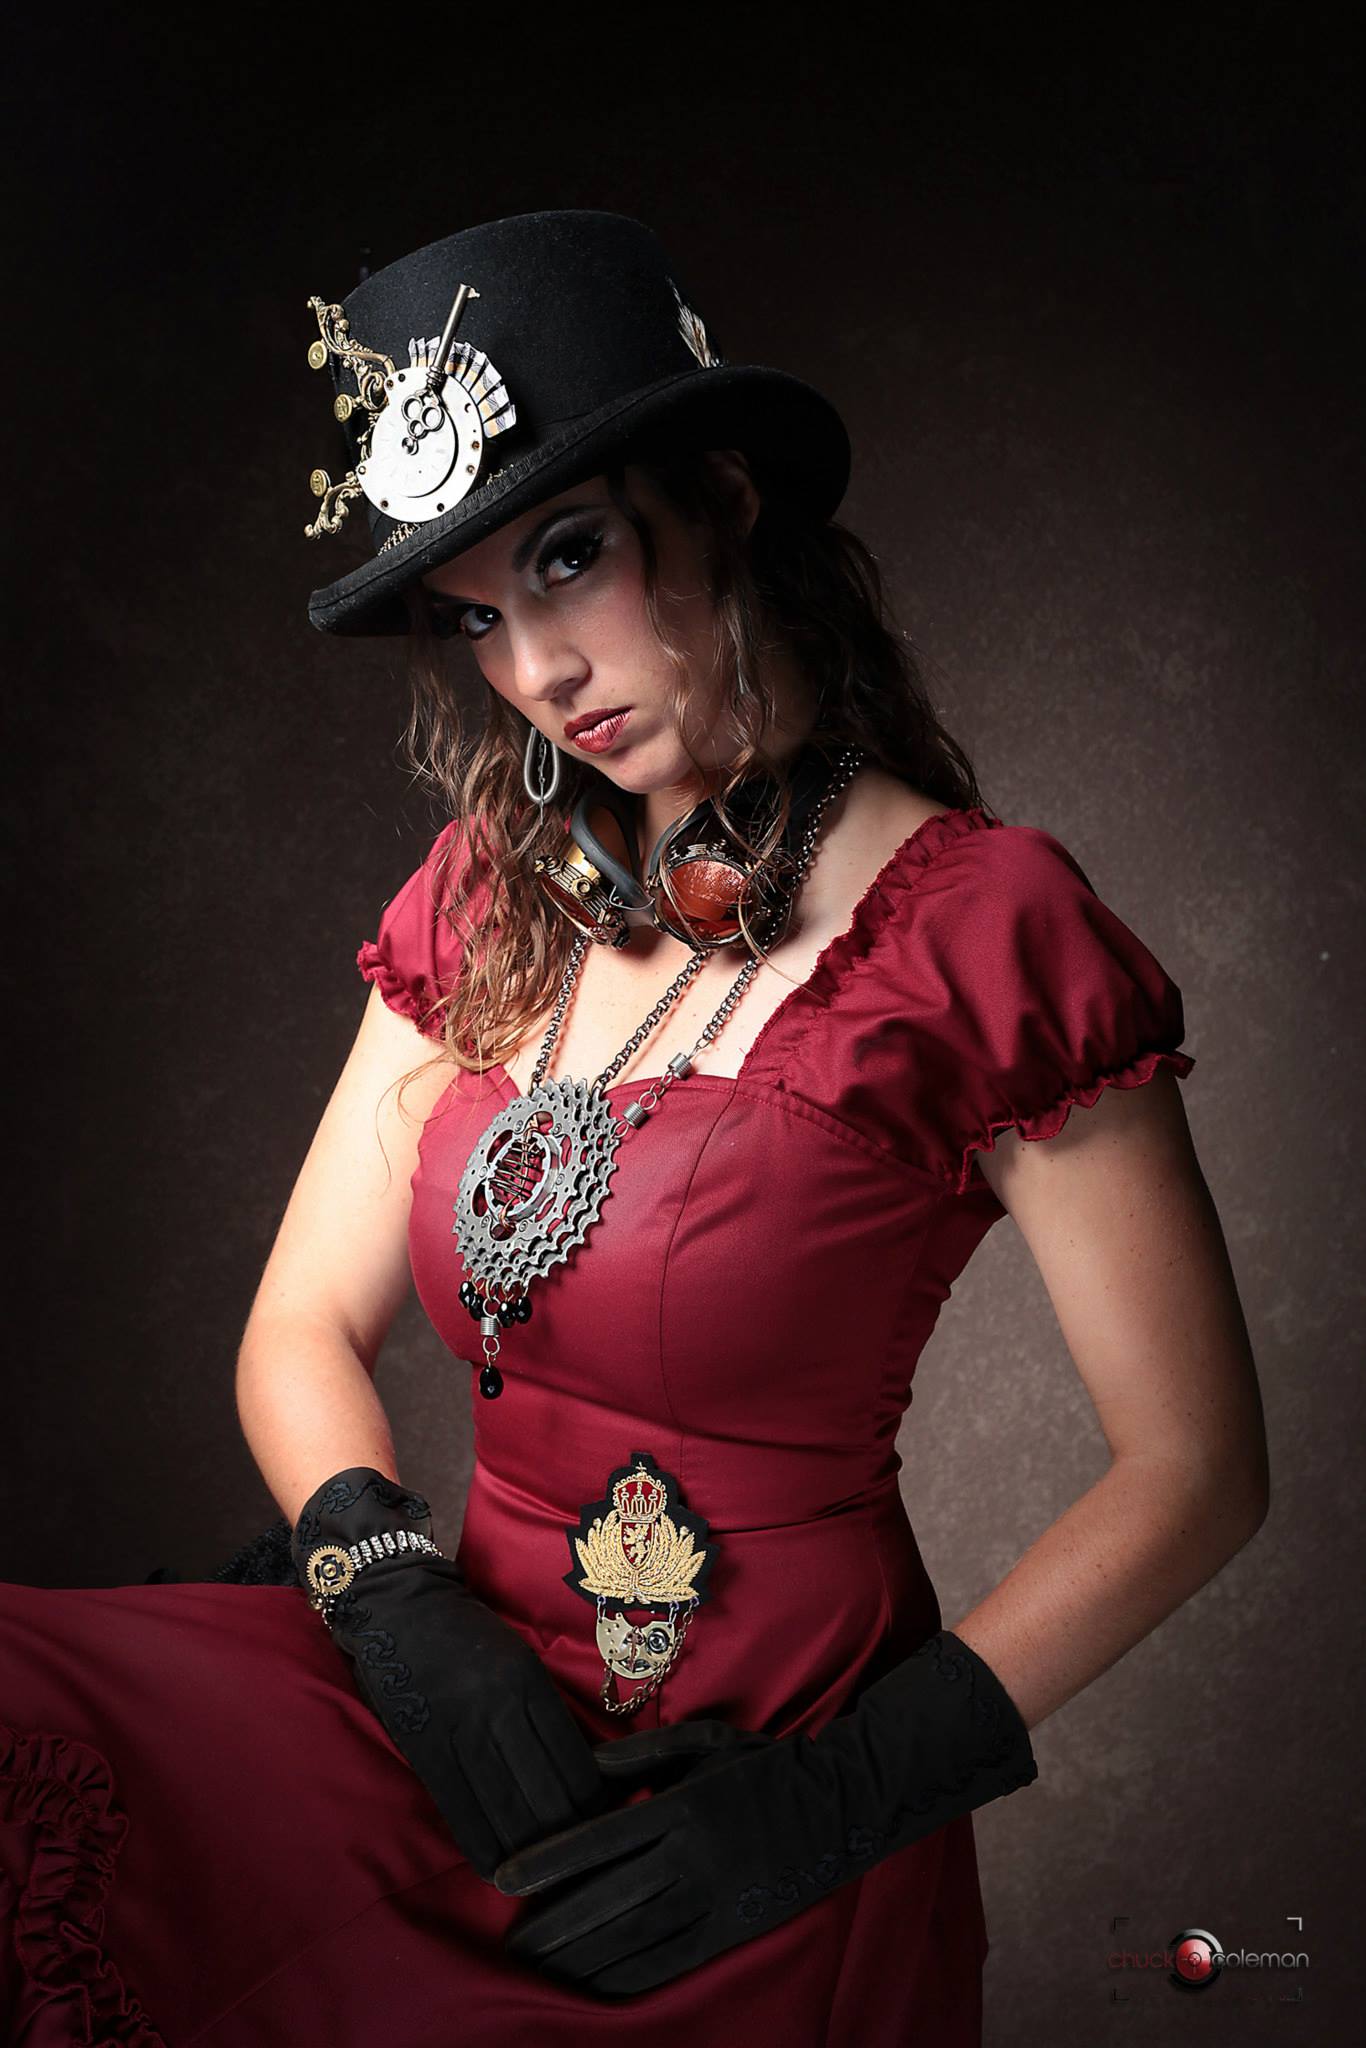
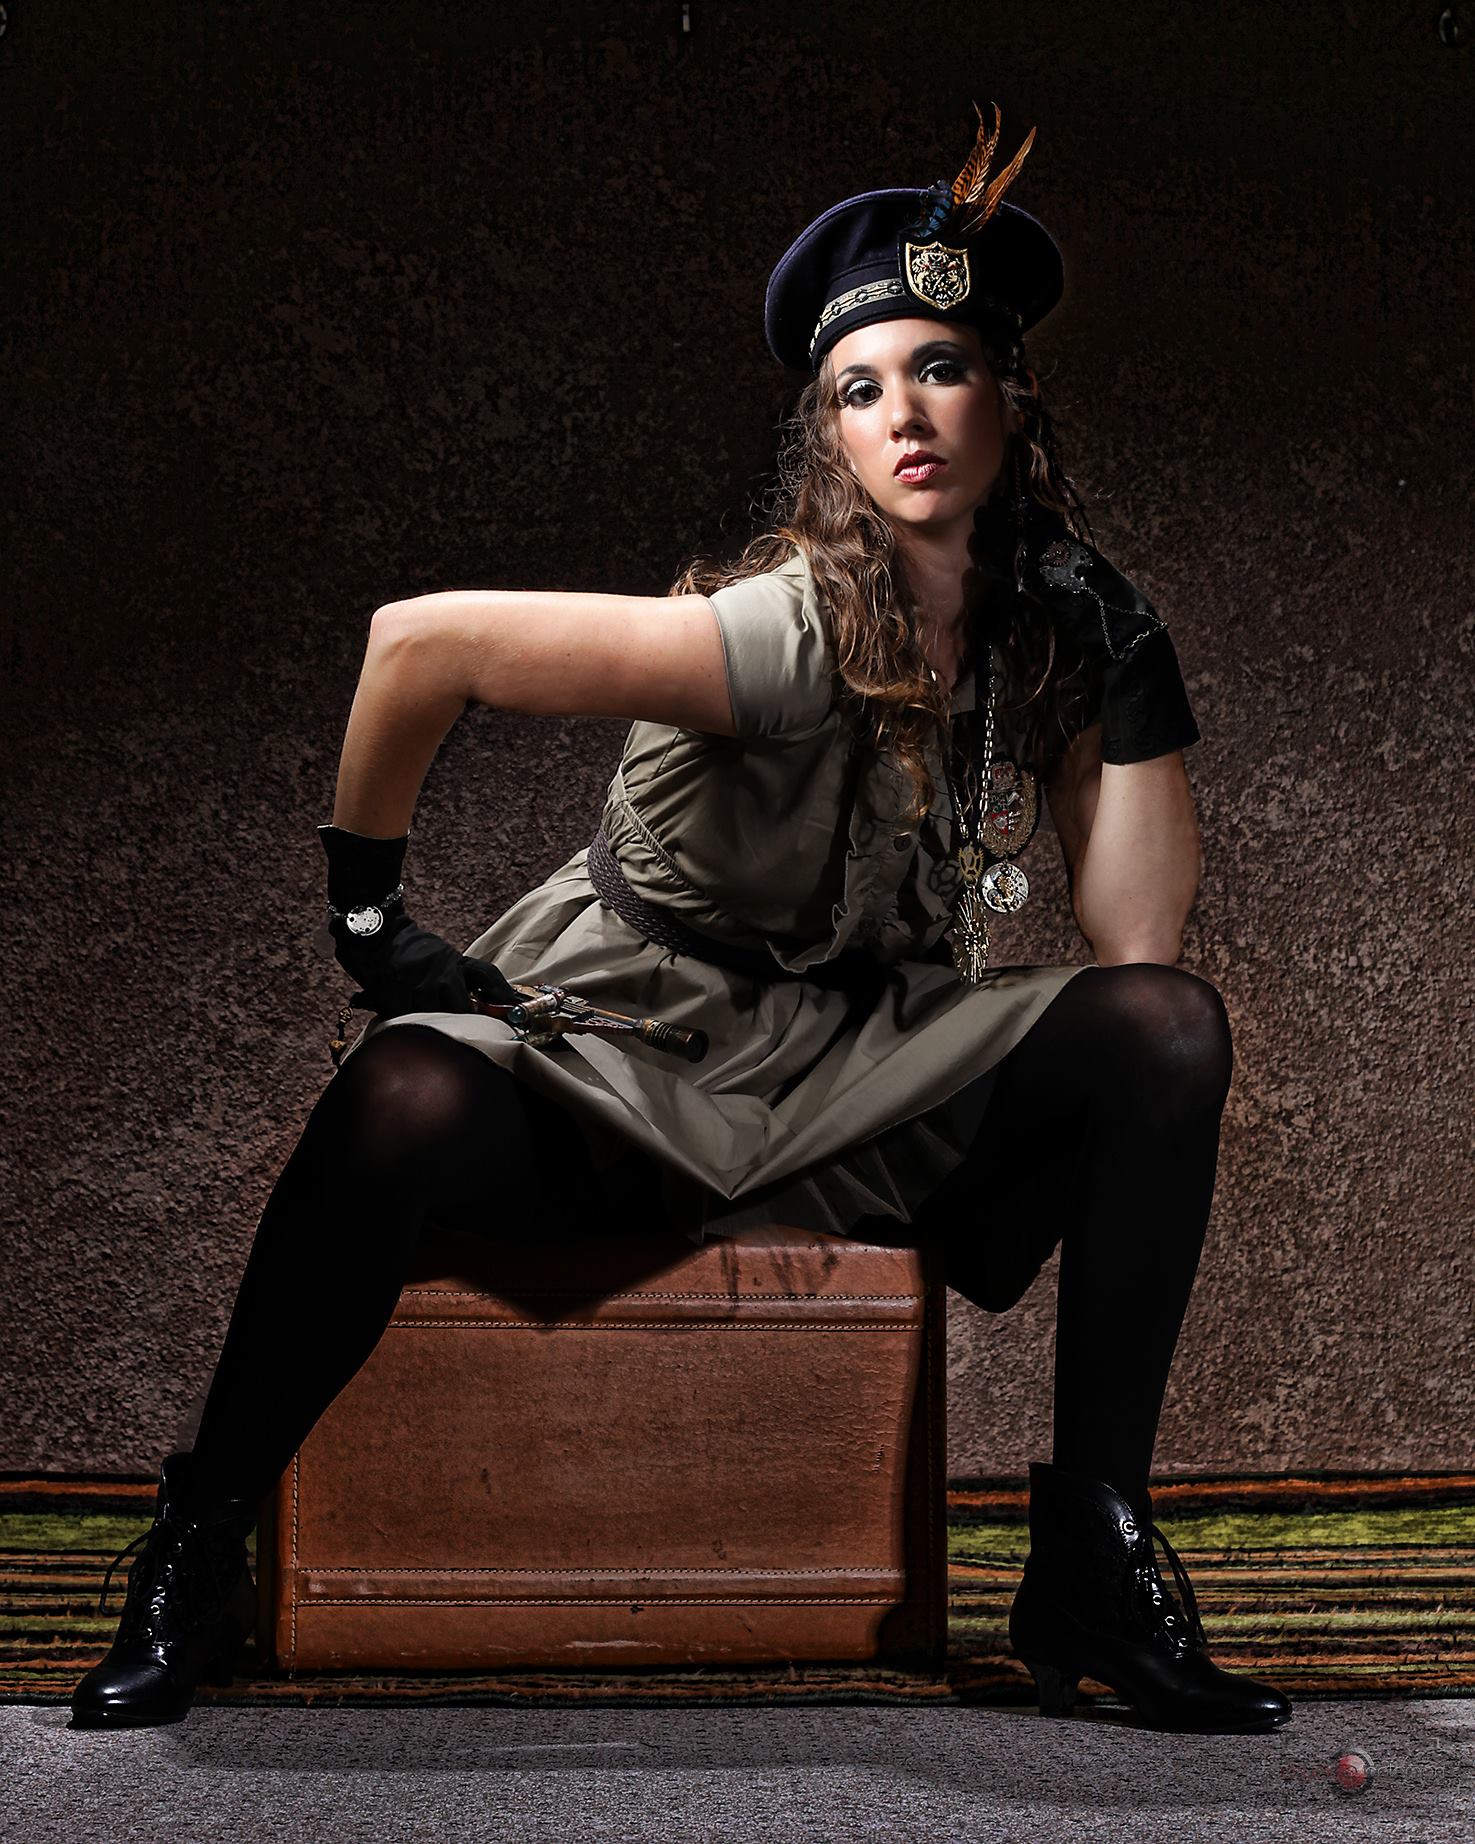
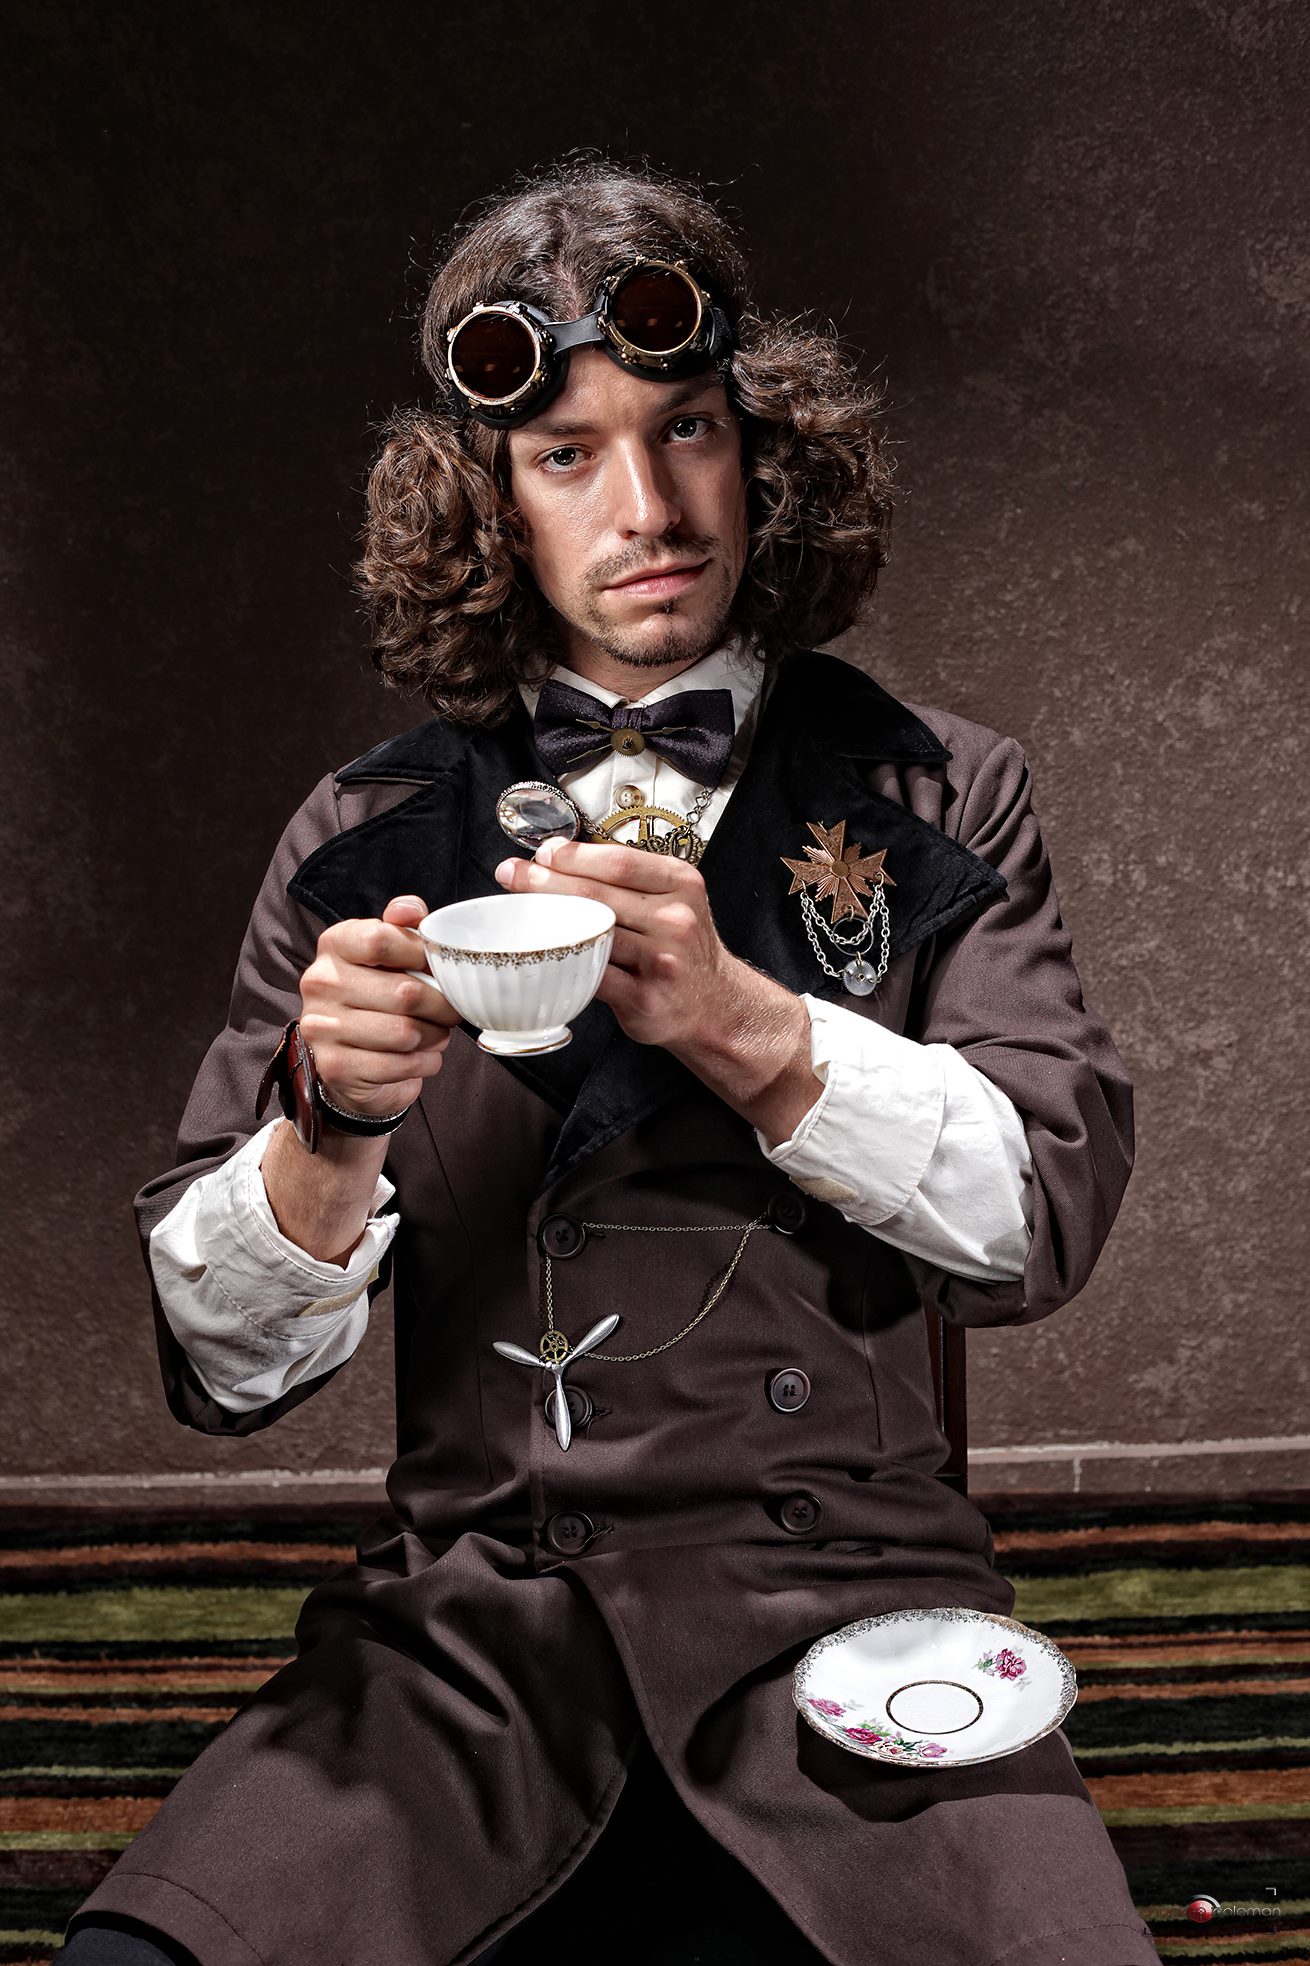
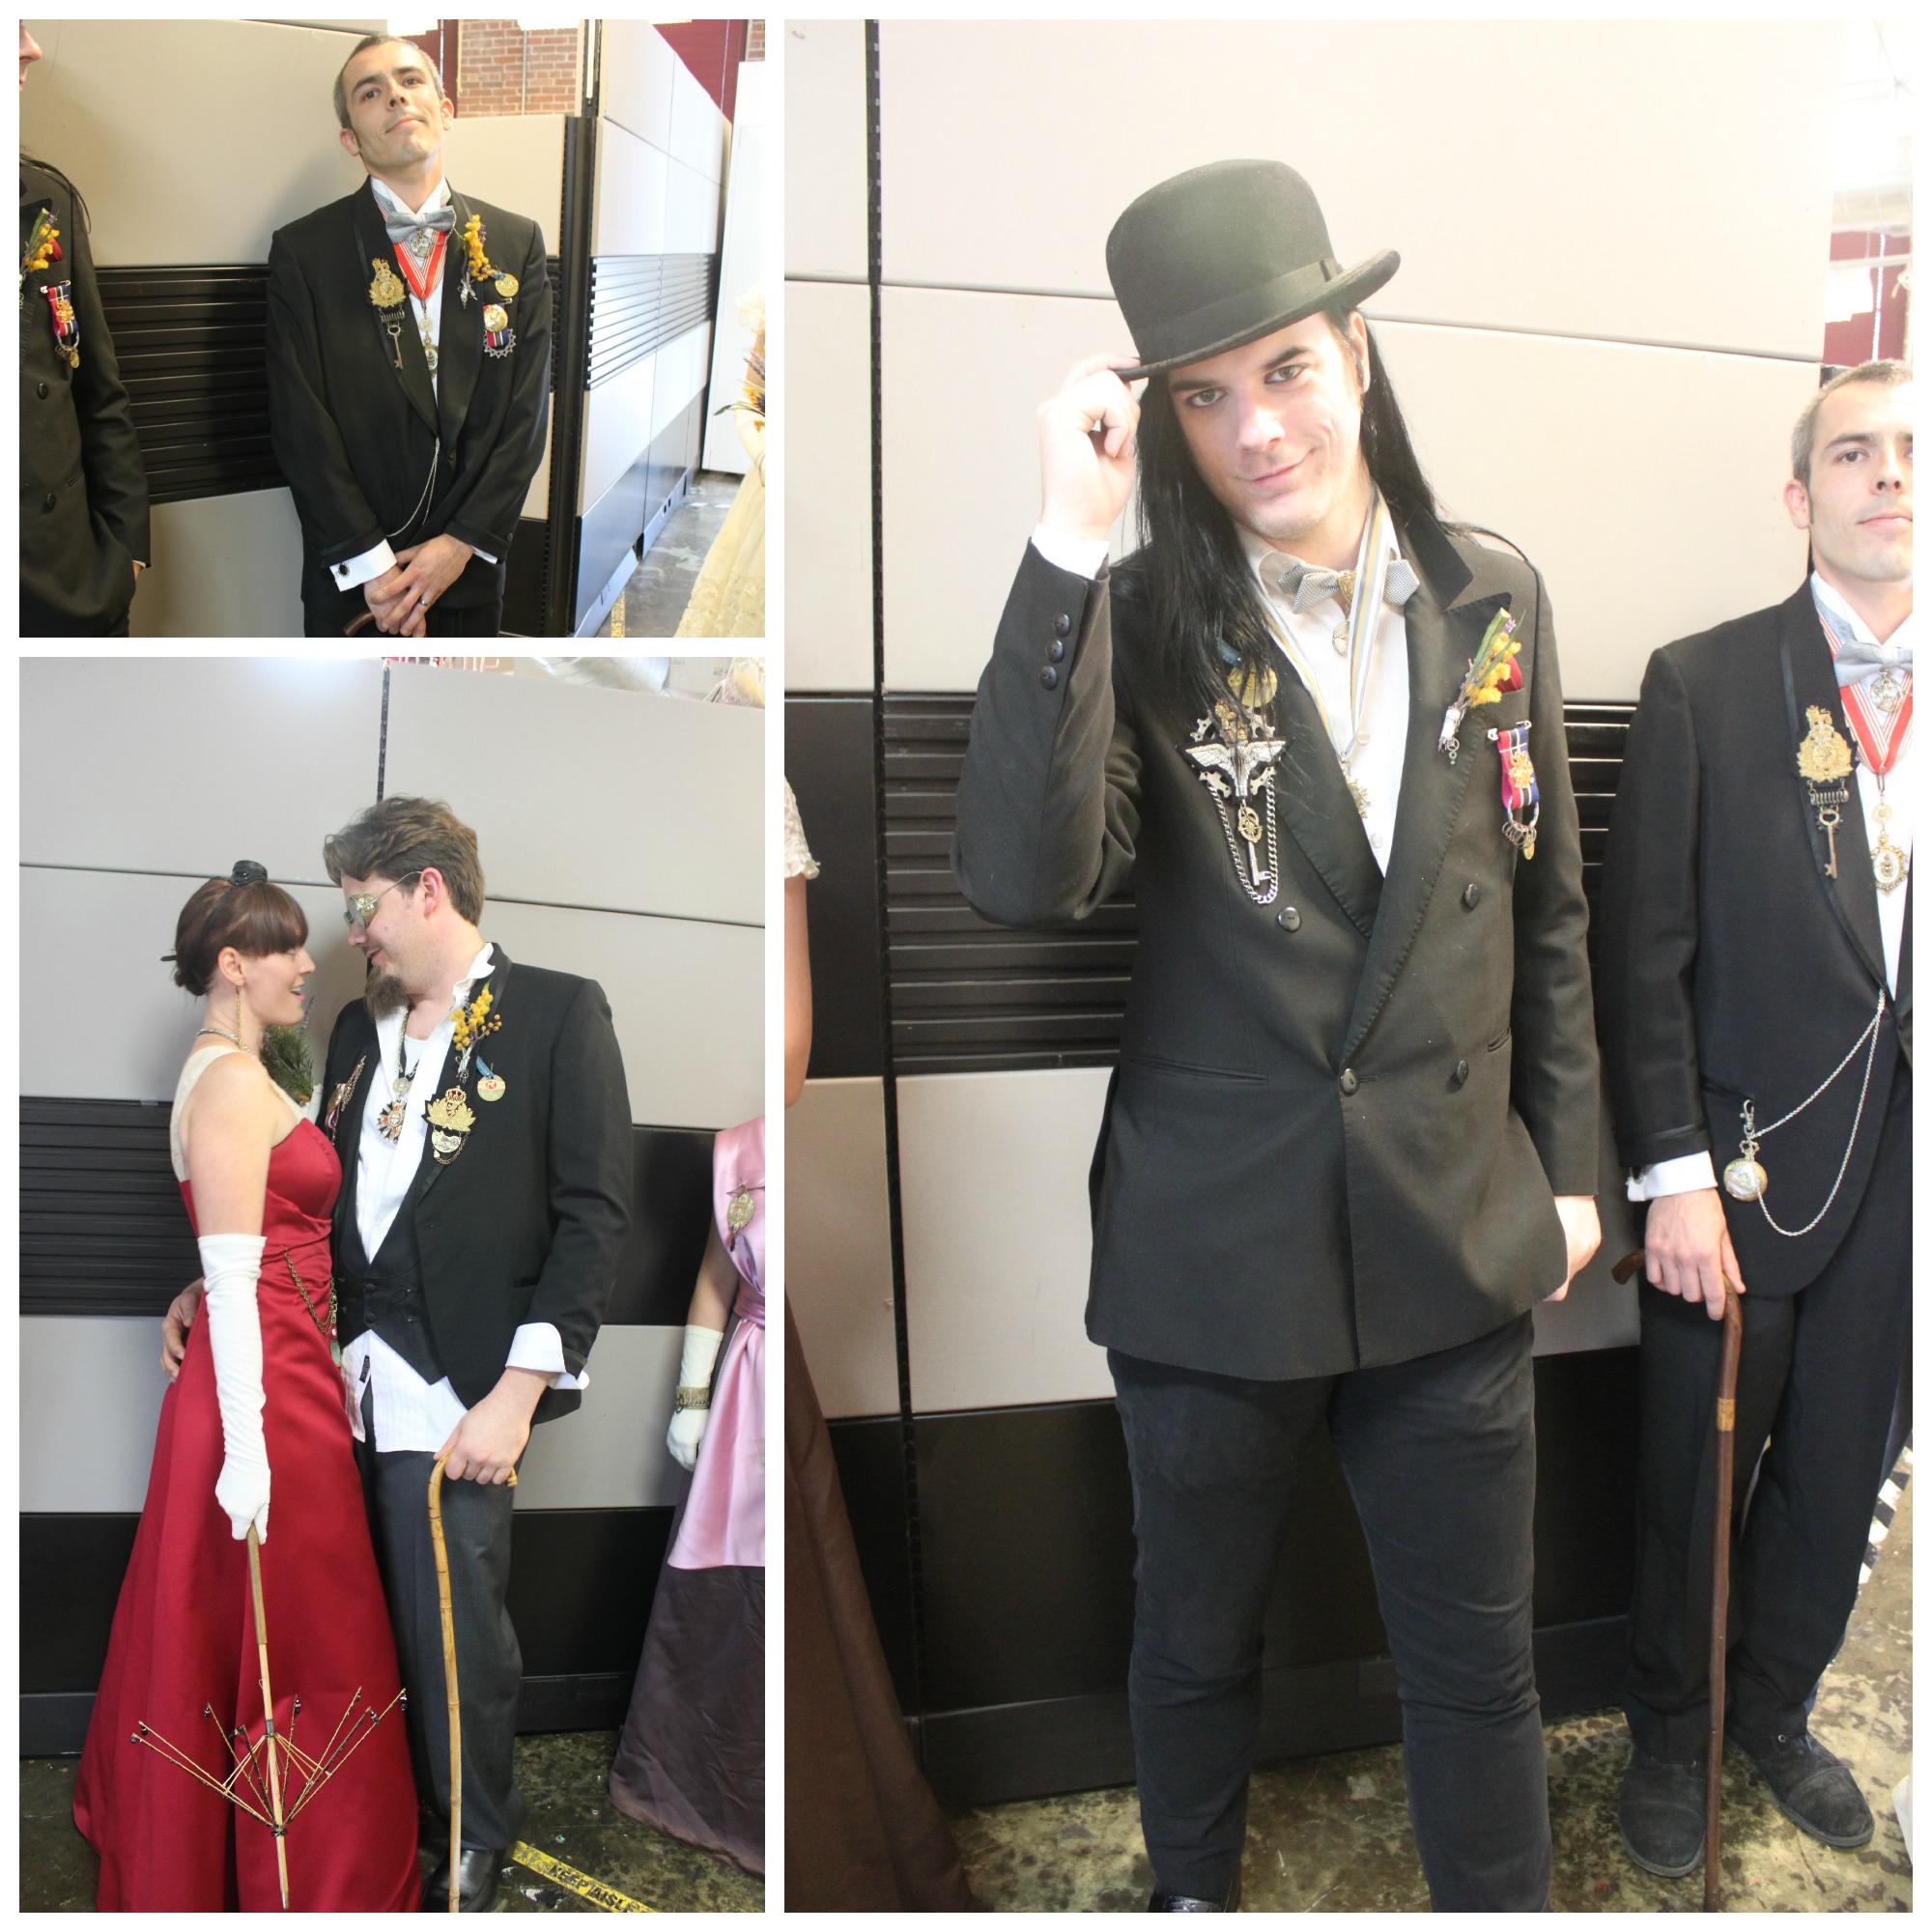
This weekend my jewelry & accessories were used in a steampunk fashion shoot & workshop for photographers. Here is a selection of stunning photographs taken by the very talented Chuck Coleman, of CCI Agency and Steamers World,  to whom I owe a tremendous Thank You. Chuck captured photos that seem as if they were plucked from one of the many fictional worlds that inspire me! I can't wait to see how Chuck's artistry grows and hope that this will be the start of many more collaborations! 1074743_398542726923005_1080550050_oPictured above is the Frankly Scarlet Top Hat, Skeleton Umbrella, Golden Gear Cameo Necklace, and Spring Earrings! 1077266_399039543539990_378457749_oPictured above is the Pocketwatch Bow Tie (a favorite of mine!) and a Royal Steampunk Medallion. Is this chap dashing?

1072645_398556406921637_2133111456_oPictured above is the Time Conductor's Top Hat, Steampunk Princess Braclet, Royal Crest Medal, Spring Earrings, and a Steampunk Bicycle Gear Necklace. Strong, beautiful, and not to be trifled with!

1074023_398627126914565_1776030313_oPictured above is the Steampunk Highlander Hat, Compass Slave-Bracelet, Royal Steampunk Crest Medal, Simply Steampunk Gear Bracelet, and a Royal Steampunk Medallion.

1074457_399319886845289_768851215_oTime for tea? Why I don't mind if I do! Pictured above is the Airship Propeller Necklace, Tim-Traveler's wrist watch, Steampunk Medal, Keyhole Gear Lariat, and the Tick-Tock Bow Tie! Does he look like an Earl Gray to you? (Pardon the pun! It was too delicious to resist!)

1075450_398669153577029_936443597_oThis dapper dame is wearing the Aunte Mame Bowler (my mom's favorite) and a pair of dangly gearrings! Isn't she fabulous?!

1077166_399277090182902_773196526_oAnd last, well for now--I will be posting these pictures and more on my gallery page, is this wonderful photo! Pictured on the gentlemen are two Royal Crest Steampunk Medals and a Royal Steampunk Medallion. On the lovely lady, is the Golden Gear Cameo Necklace, Compass Bracelet, Gearrings, Time Conductor's Top Hat, and of coarse, the skeleton umbrella!

Thanks again to Chuck Coleman, to all of the fabulous models, and to all of the other artists who collaborated to make this shoot possible! Now, off to make more steampunk treasures!

Steampunk Flea Market Finds!

Flea Market Finds, InspirationSamantha ExtanceComment

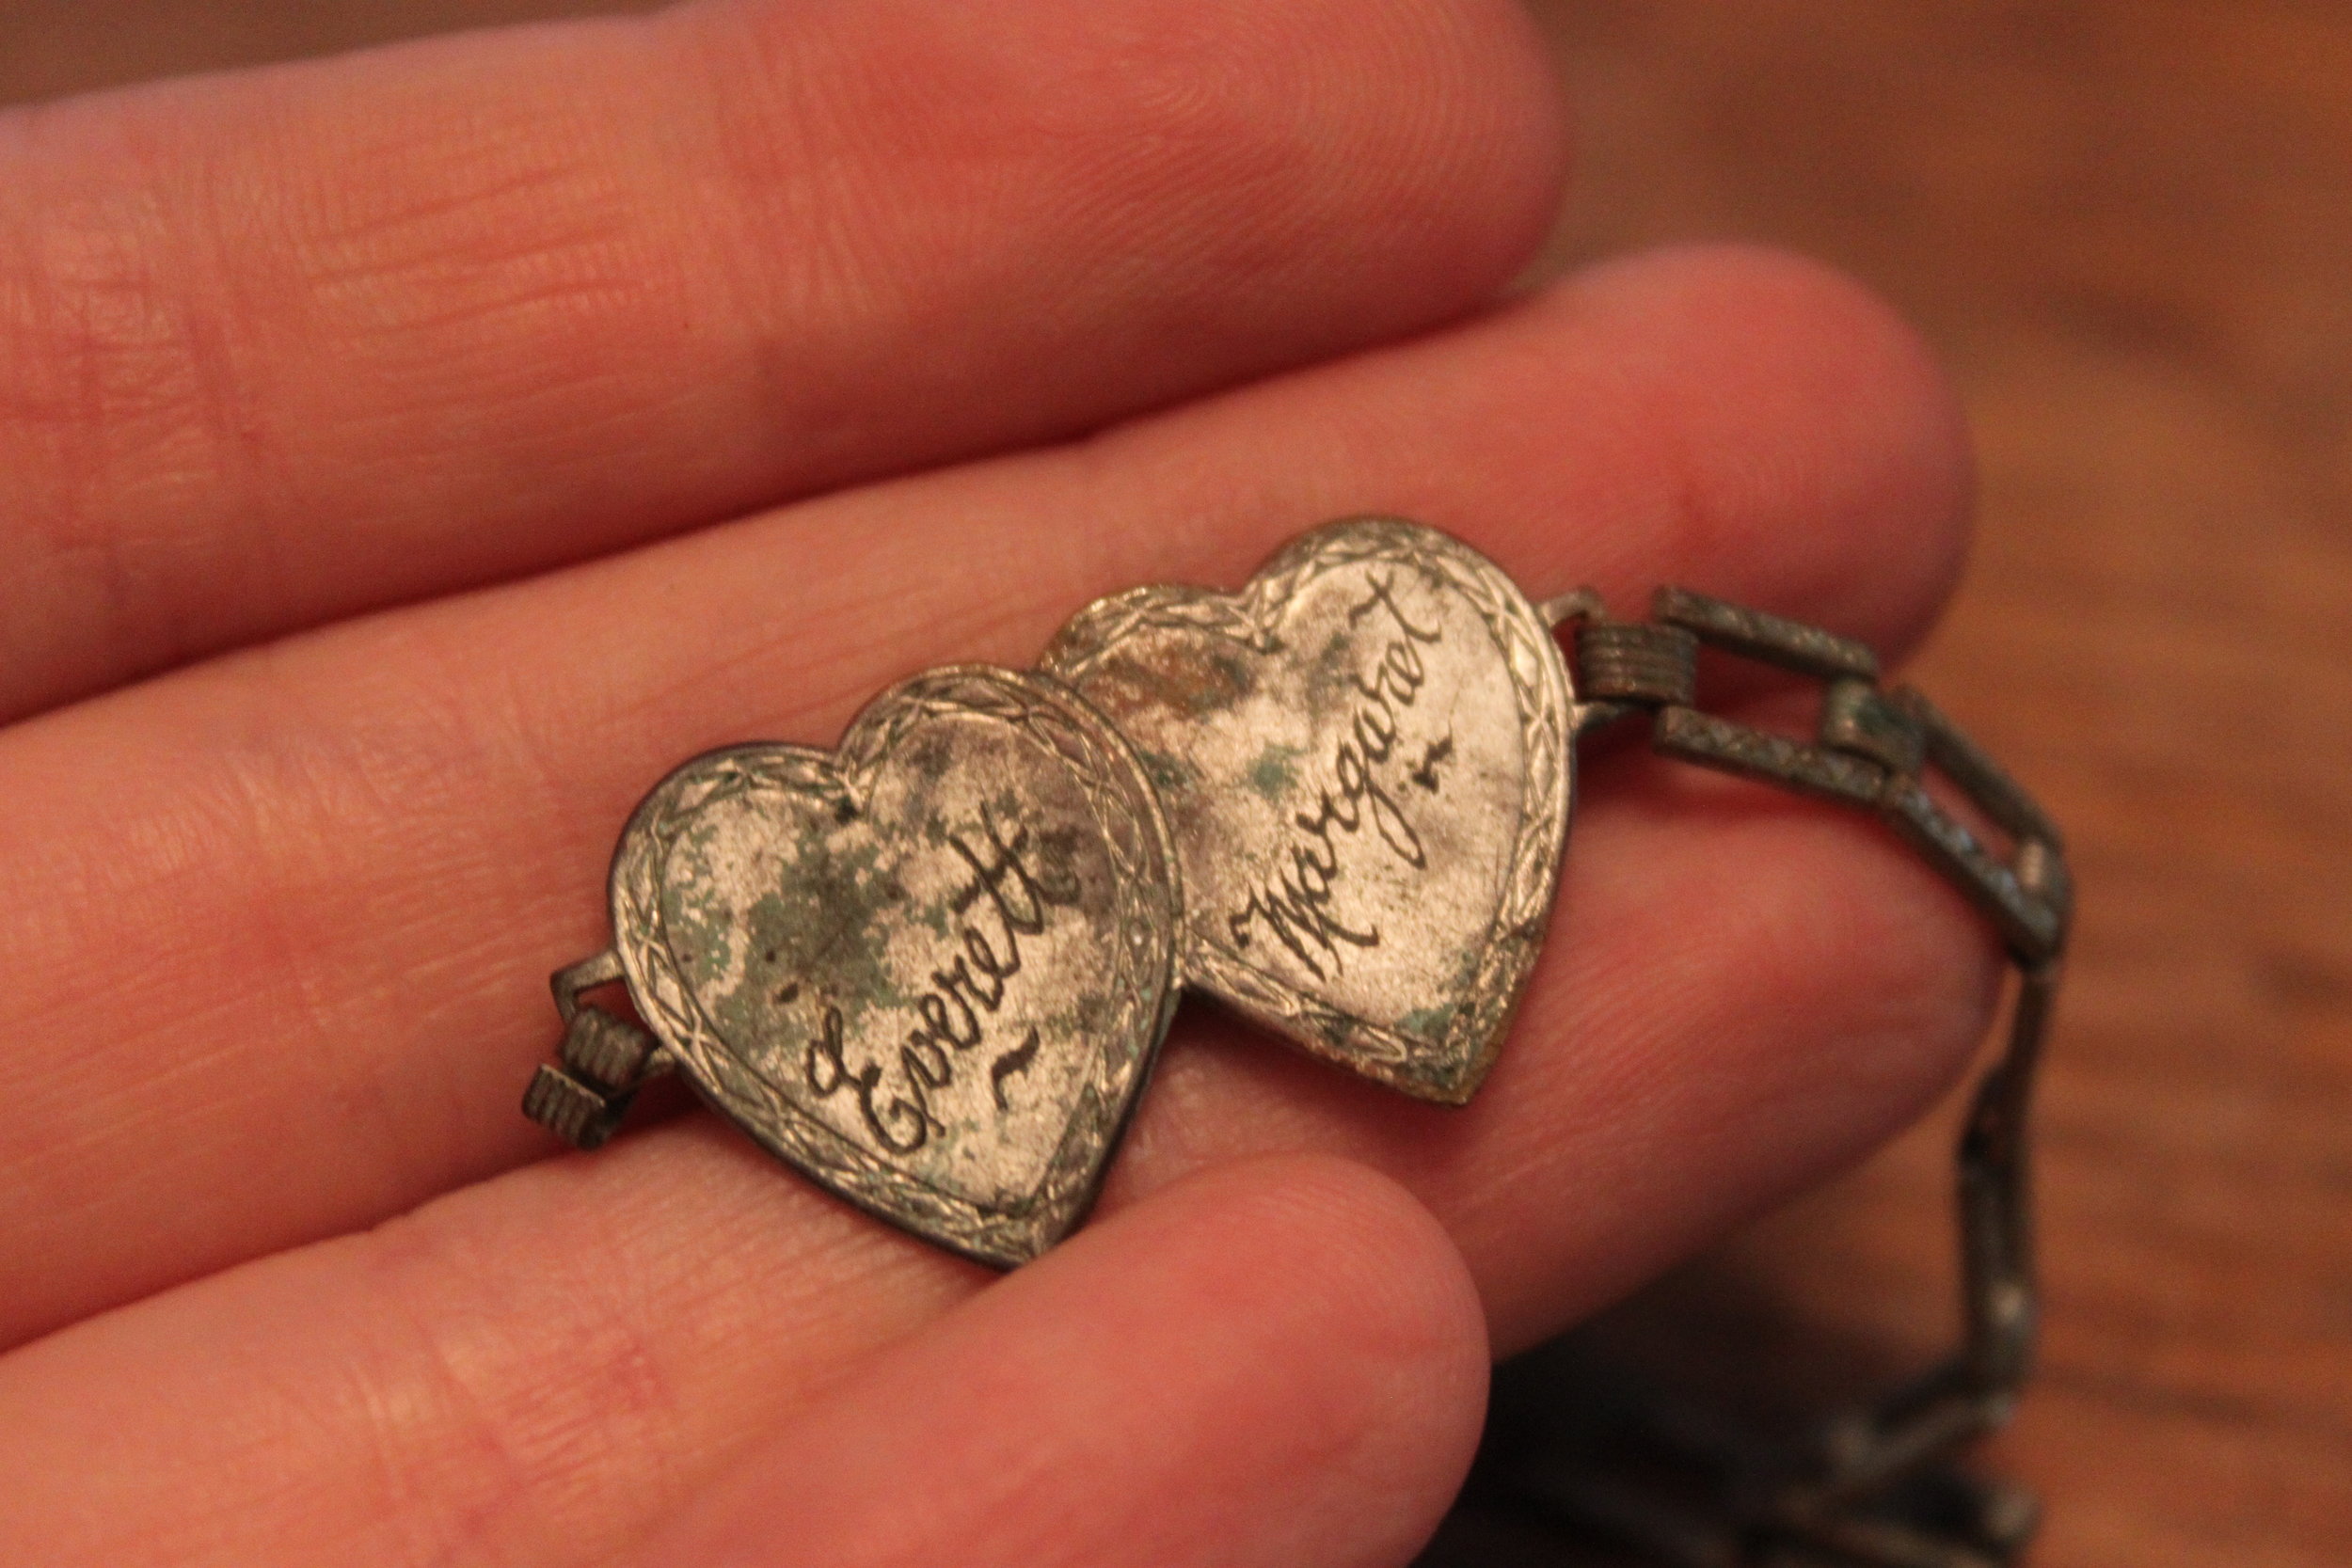
I got a lovely care package from my family in New York today. In typical care packages, most people find their favorite sweets and little trinkets & edibles. Mine, however, are filled with machine parts, cuckoo clock innards, and flea market finds from my whole family. It's really wonderful to get one of these packages and it often results in holing myself up for the next few days and creating lots of new steampunk pieces. There are so many great finds that I had to share them with you! The first thing I found inside was this dainty little bracelet. Clearly it belonged to a lady named Margaret and was a token of her love of Everett. Margaret & Everett sittin' in a tree...K-I-S-S-I-N-G. Pieces like this always make me wonder--were they ever married, or did their love had some torrid end? IMG_8234Another treasure I unwrapped was a broken pocketwatch. Some pocketwatches are engraved with a maker's seal or brand. The most fascinating tidbit of history is that this pocketwatch is stamped with the word "Remontoir" which indicates that this watch is powered by a mainspring on its own. Before 1860, even pocketwatches had to be wound with a clock key. Another wonderful detail is that the clock is engraved with the original owner's name--a Mr. Irving Abel. IMG_8243

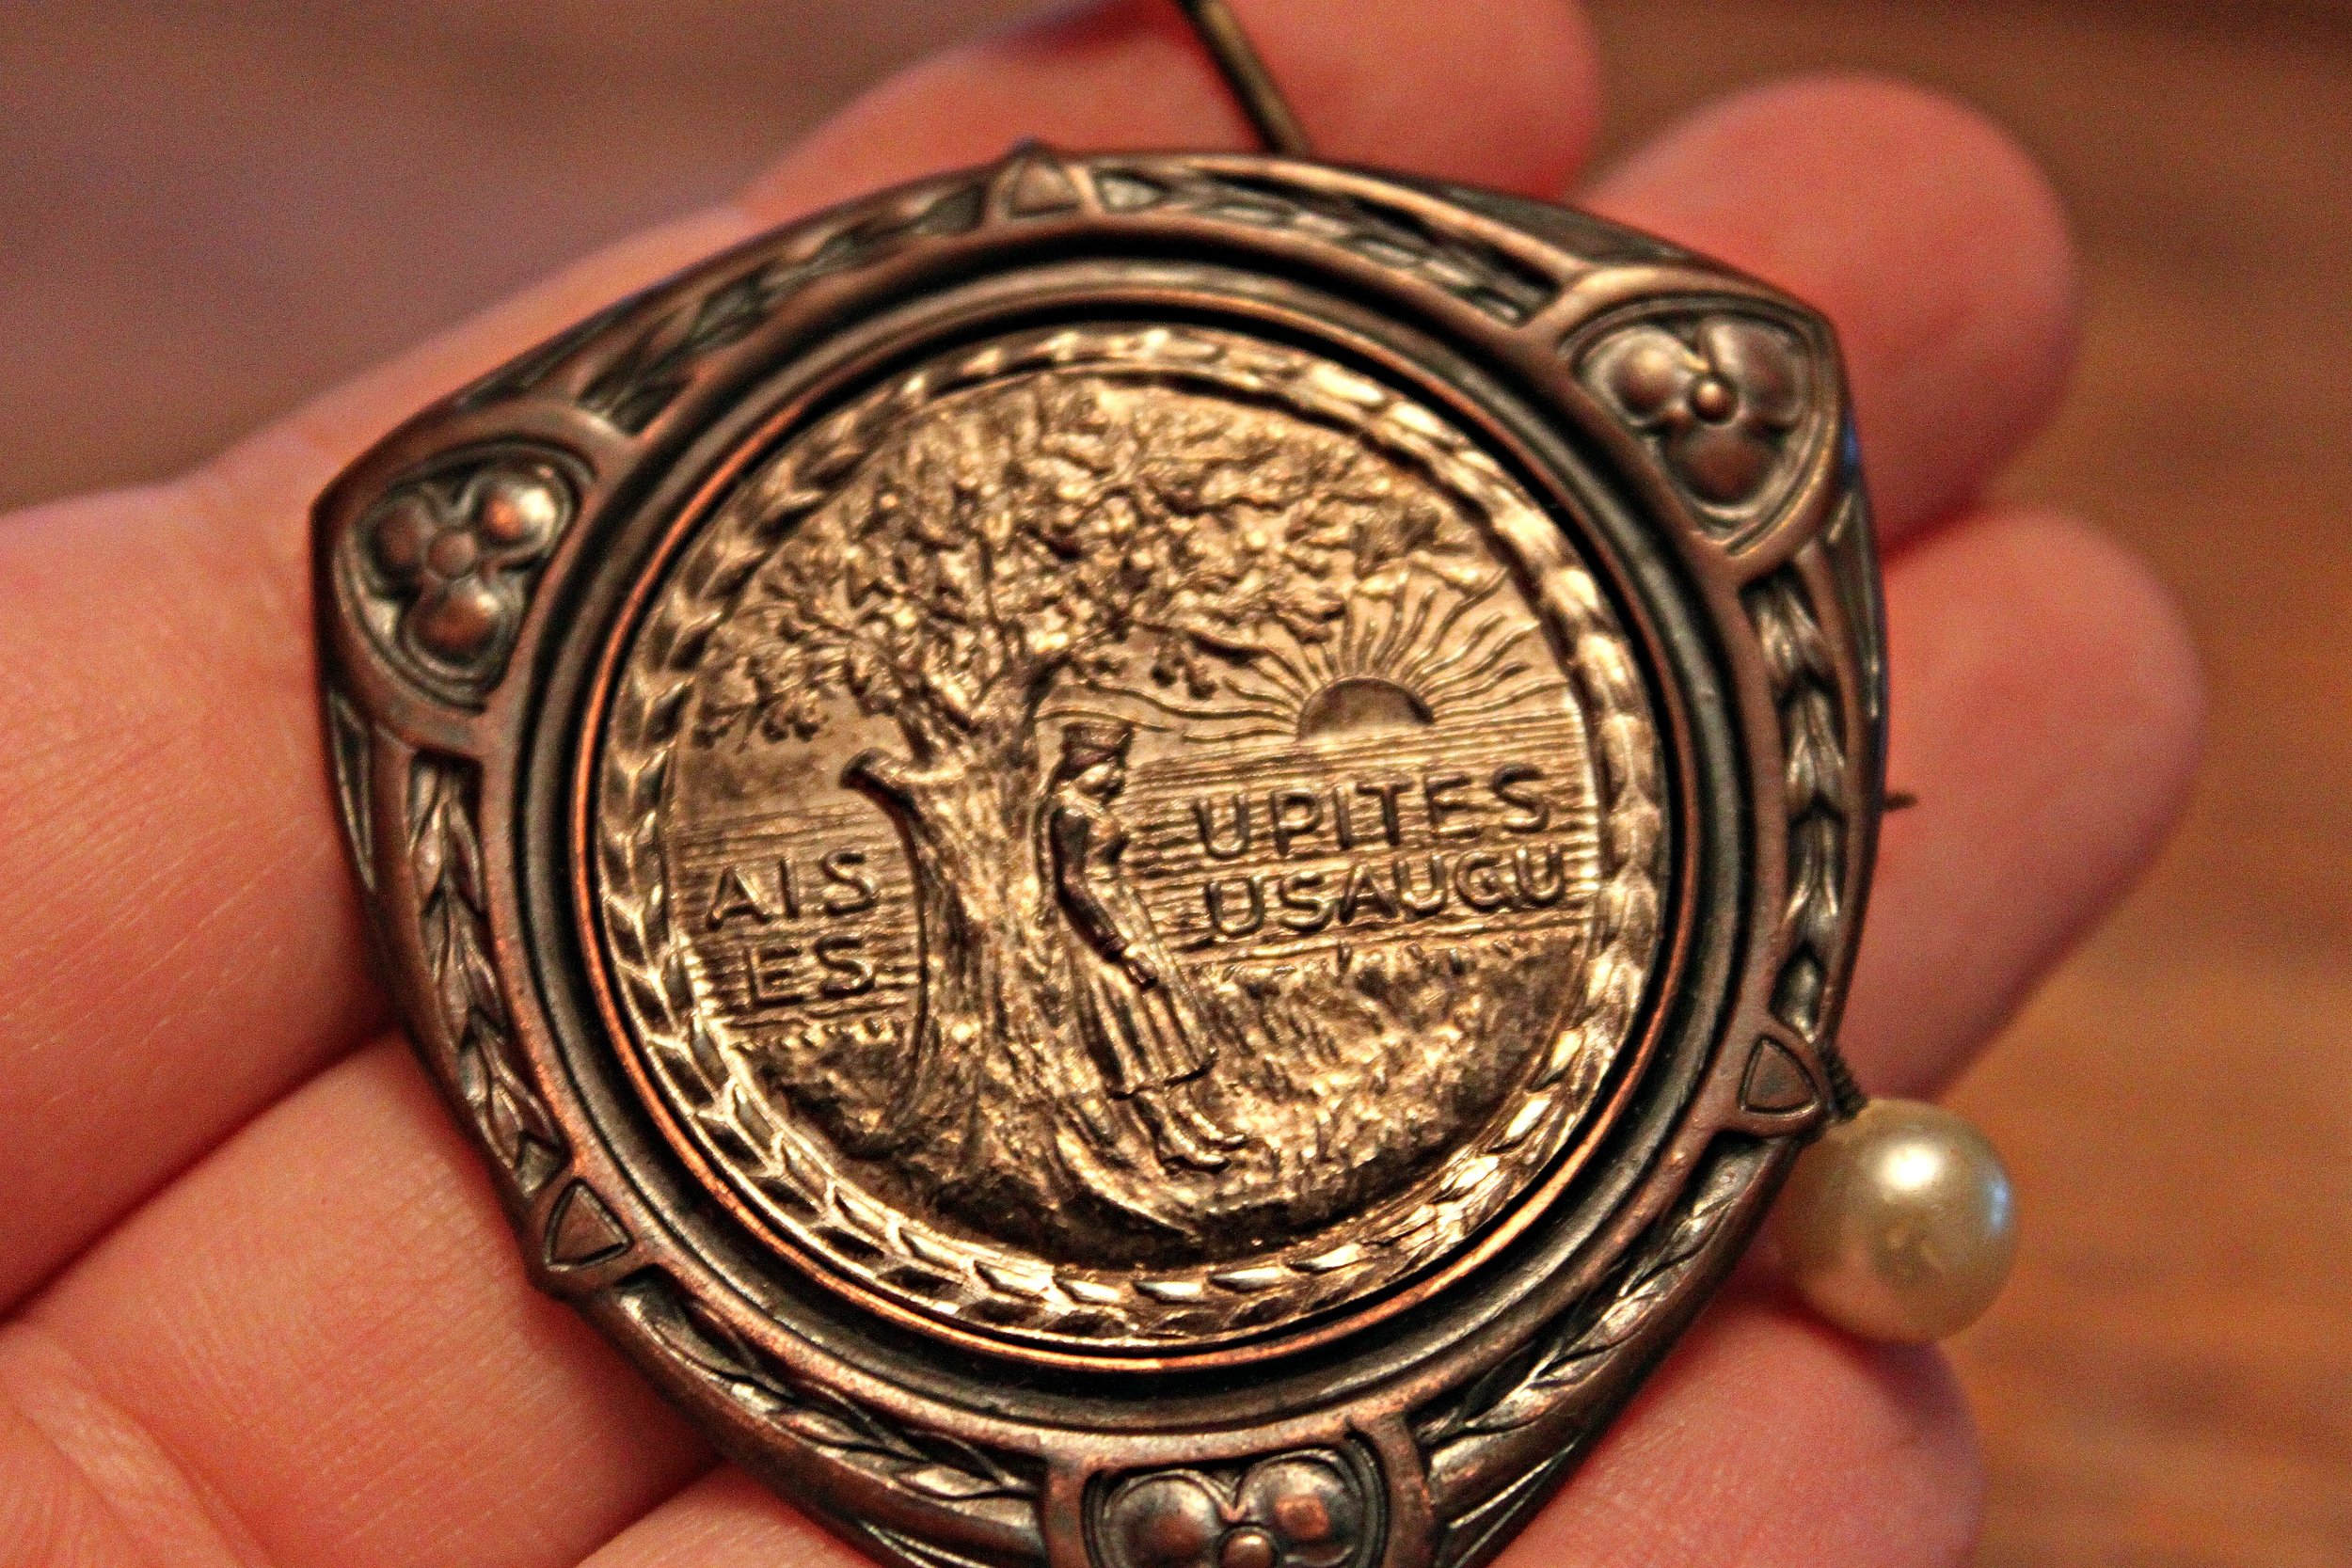
My godmother found this next piece, a silver & pearl pin with the words--"Ais Urites Es Usaugu" written on the front. The pin features a women standing underneath a tree by a lake at sunset. I had searched for a translation of the words to no avail. I believe they are a Latvian dialect & that the woman under the tree is Zeme māte, or Mother Earth, a figure in Latvian dainas (or folktales). If anyone has come across this before, please let me know--I'd love to pick your brain. IMG_8248

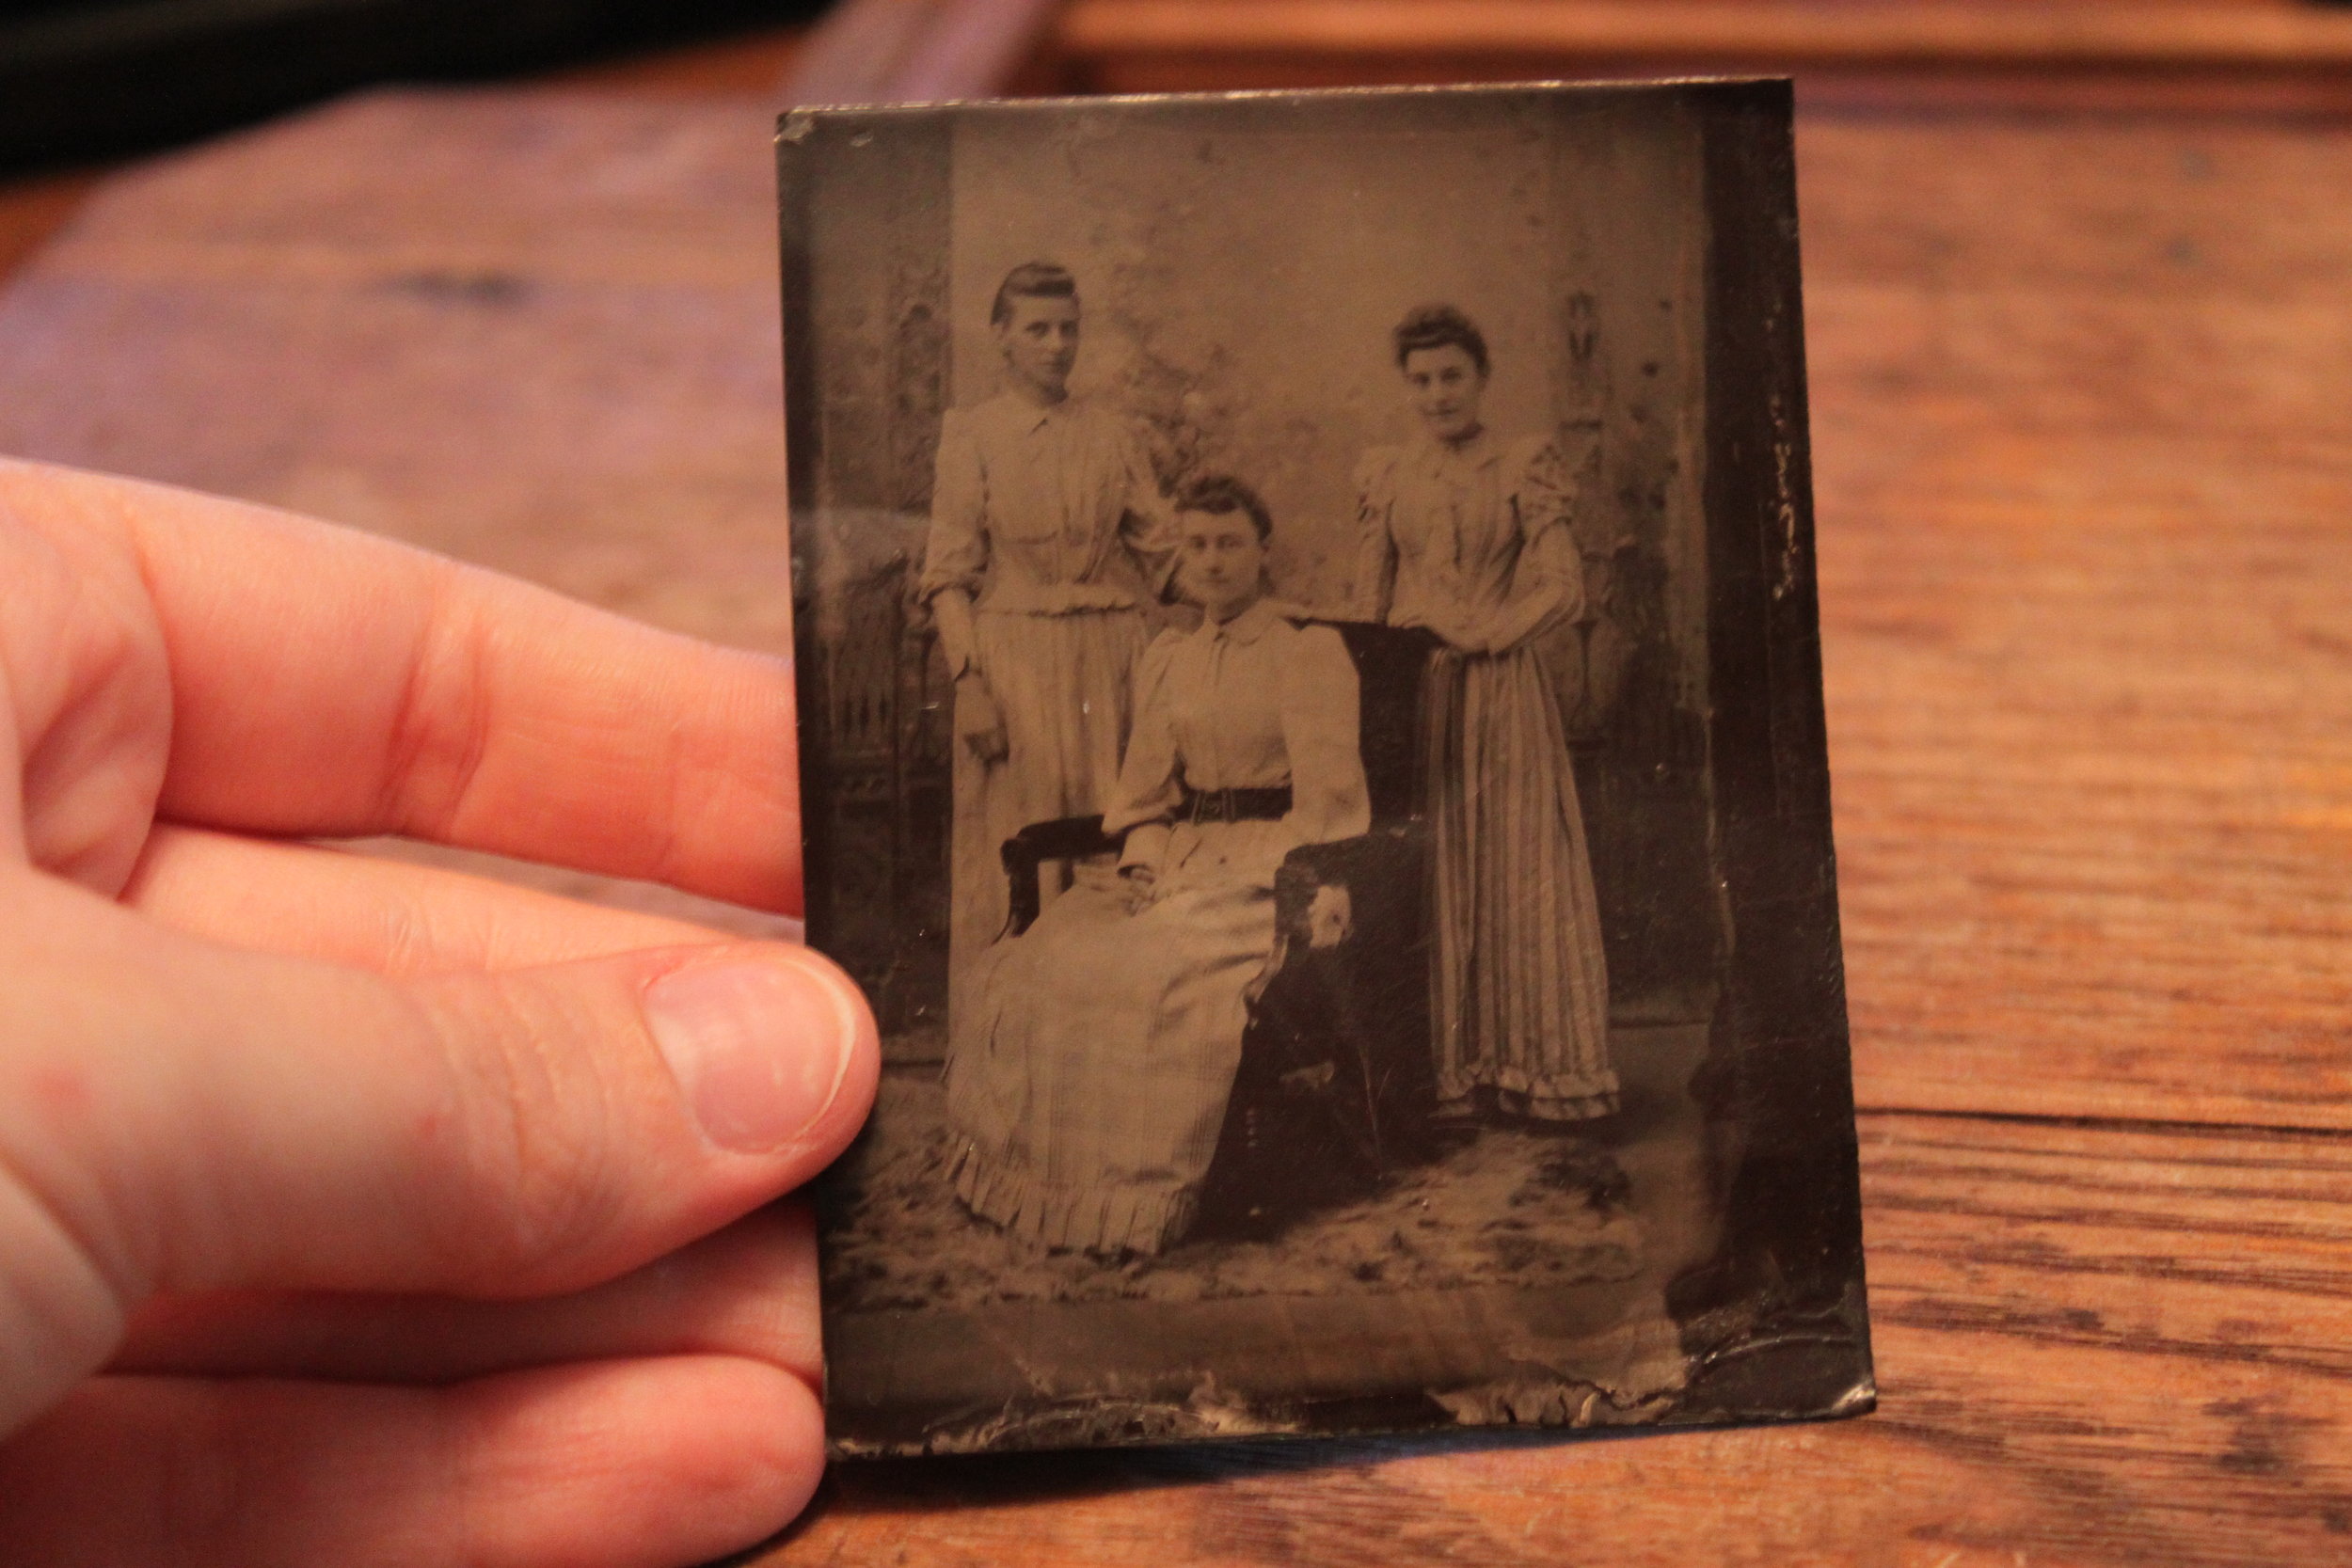
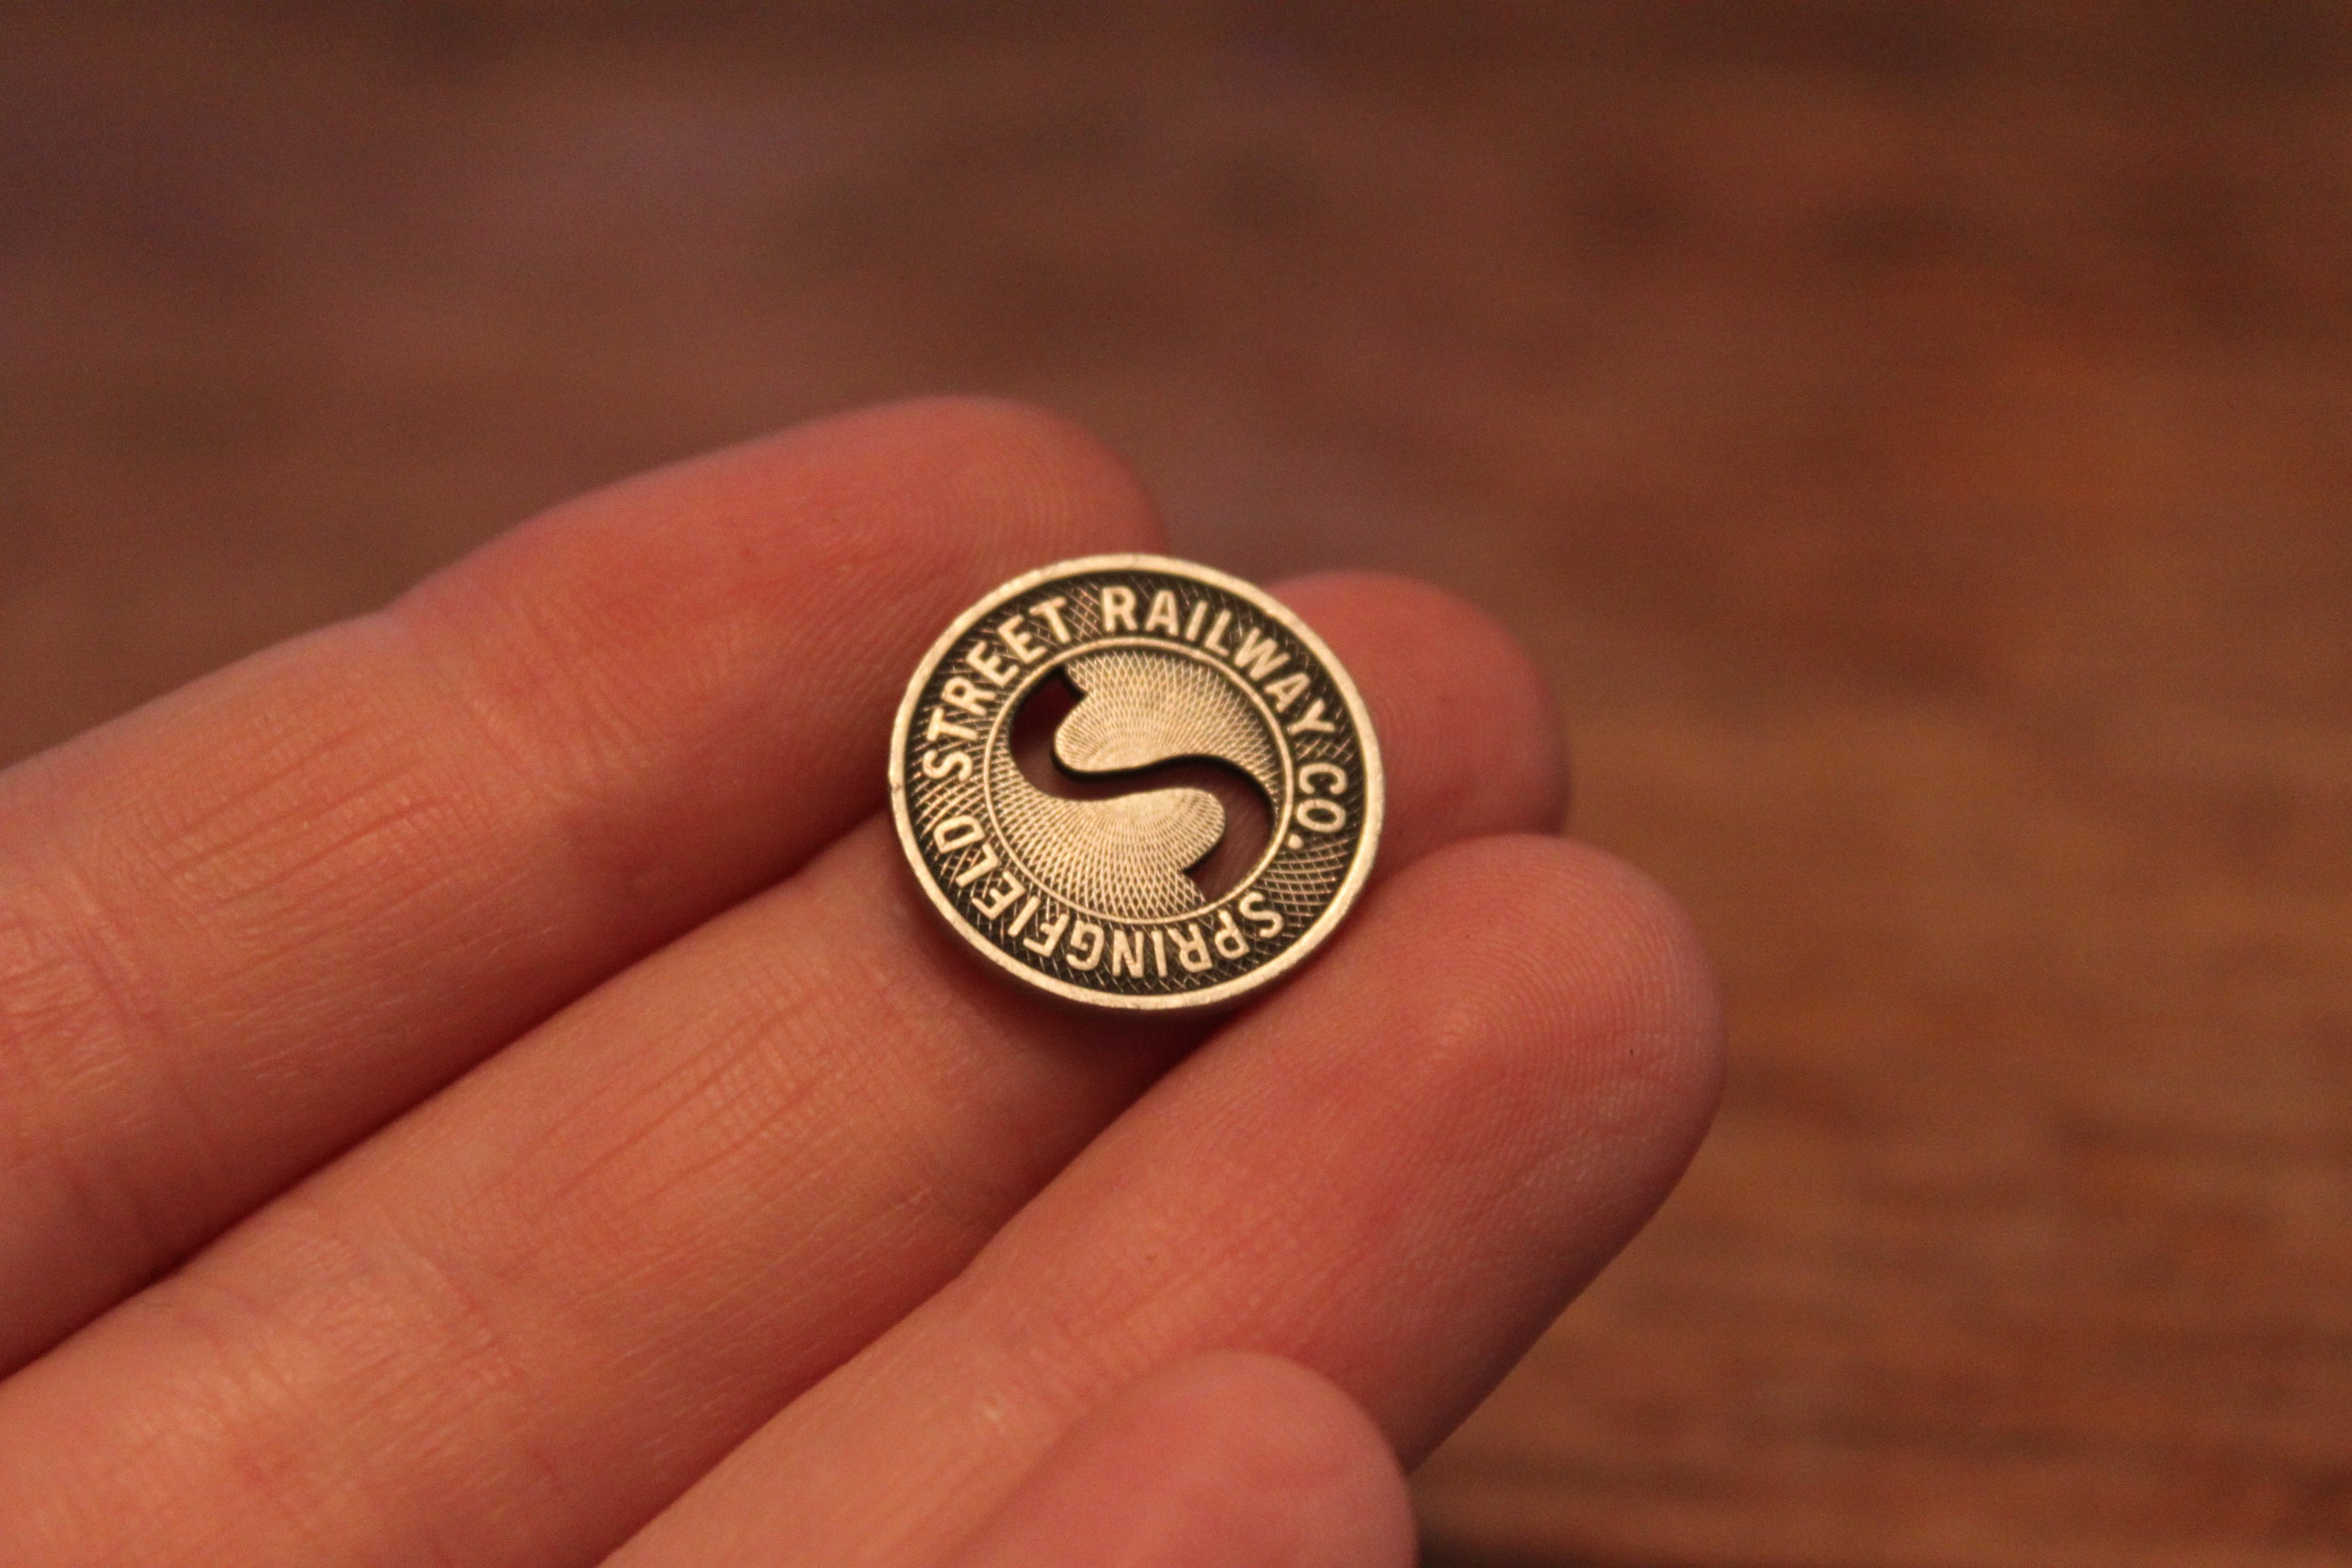
My family, knowing my love of old photos, sent me a tintype photograph of 3 young ladies. I am assuming they are sisters. There is no information about them scrawled on the back. I am left to ponder what their names were and what their lives were like. IMG_8235Here's a close up of the sisters.IMG_8237Among other flea market treasures, there was a whisk-holder which I am happily converting into a business card holder; a wooden puzzle piece of Oklahoma; and some vintage jewelry to upcycle.flea market finds CollageAnother piece that sparked my curiosity were the Springfield Street Railway Co. coins. The company, originally called Palmer and Monson Street Railway, operated out of Springfield, Massachusetts and changed its name in 1901. The coins are from anytime between 1901 and 1927 (when the company stopped its operation and changed to the bus system). A fare was 5 cents. More about the Springfield Street Railway Co. can be found in Albert Sutton Richey's quantitative study, Traffic and Operation: Springfield Street Railway Company published in 1917.

IMG_8245Well, I am just bursting with ideas & creativity--can't wait to upcycle these incredible pieces of history!


Style Me Steampunk: Shopkeeper's Daughter

FashionSamantha Extance1 Comment

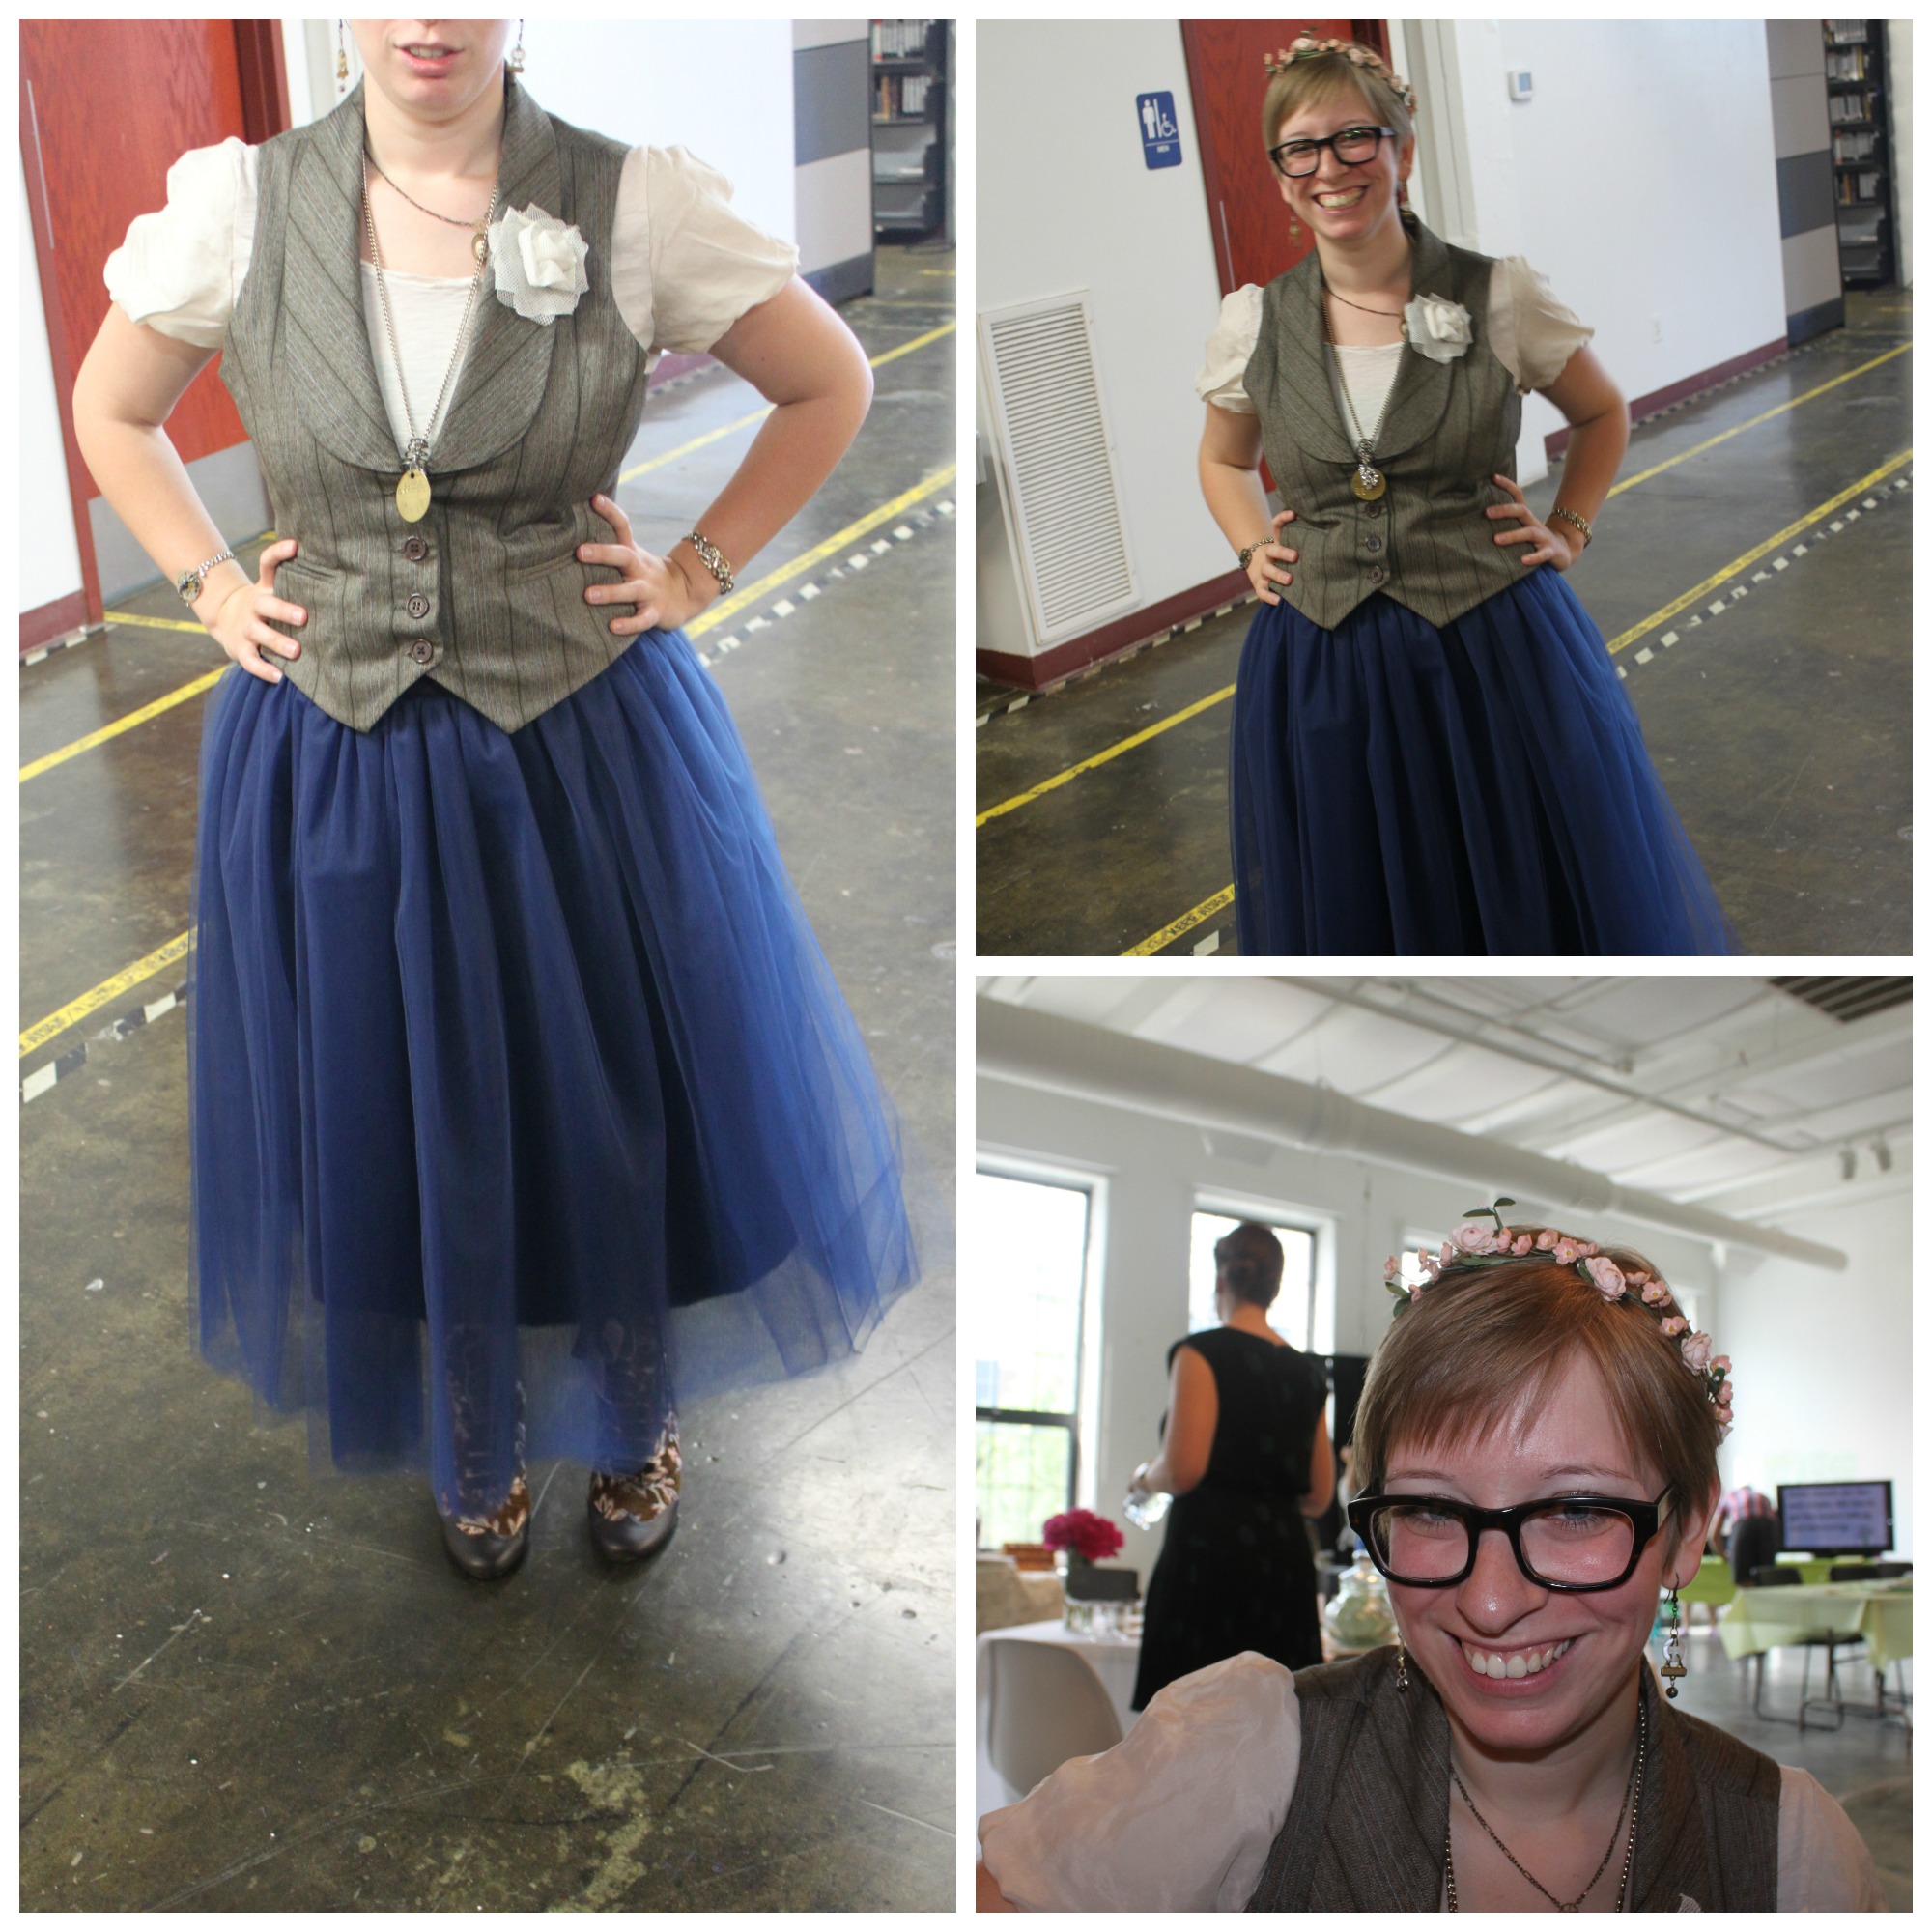
I love steampunk fashion & accessories–in fact, I love these 2 things so much that I cannot relegate them solely to cons, shows, or Halloween. “Style me Steampunk” is a series of blog posts on how to infuse your everyday wardrobe with a steampunk flair. From dressy to casual, office appropriate attire to outfits you can wear when you paint the town red–I will offer up ideas for outfits that will hopefully inspire some of you to dip into your closet and get creative!steampunk fashion 1 Style me Steampunk: The Shopkeeper's Daughter

A while back I created a look called the Steampunk Ballerina--the Shopkeeper's Daughter is very similar in that it involves wearing a full tulle skirt. This look is a lot fancier and is a great outfit for dress-up occasions.  To recreate this look here's what you'll need:

  • Tulle Skirt (there are a number of clothing companies that have similar style skirts right now. They are en vogue right now) I purchased mine from Shabby Apple's Fete de Fleurs collection. Right now they have a number of cute colors to choose from--white, pale pink, and blue (as seen above).
  • Vest (that complements the color of your skirt) Mine's thrifted--my very favorite kind of clothing!
  • Blouse (preferably with decorative or fancy sleeves) Choose a neutral color that will go well with both your vest & shirt
  • Fabric Flower (for your lapel) I made mine following a DIY I found on Pinterest
  • Poetic License Floral Tapestry Boots (love, love, love these boots) I wrote an earlier post about how to incorporate these boots into your look.
  • Steampunk Jewelry (made mine! Check out my Etsy shop for bling of your own)IMG_6906
  • Vintage or Antique flowers (to adorn your luscious locks) I fastened mine with bobby pins.IMG_7911 closeHave fun rummaging through your closet my fellow steampunk fashionistas!

Broken Eyelash Dream, A Royal Steampunk Wedding Fashion Collection!

Fashion, ShowsSamantha Extance2 Comments

Few people know how much of a wedding geek I can be but I'm finally ready to admit it--I nerd out over weddings, well handmade weddings mostly.  I love the attention to detail and most importantly the attention to the happy couple's story. It's no surprise that I've been asked to be a maid of honor (twice now!), and a bridesmaid (I won't admit how many times but I might give Katherine Heigel's character in 27 Dresses a run for her money).Steampunk Wedding Fashion 1 When Marry Me Indie approached me about putting together a collection for their indie, handmade wedding show I was certainly up for the challenge (and I certainly wanted the chance to upcycle all of those bridesmaids' dresses hanging in the back of my closet). I transformed each dress into a simply steampunk creation--both tasteful and elegant. I can't wait to share how I did it in a few DIYs to come later this month (so stay tuned)!Steampunk Fashion 2

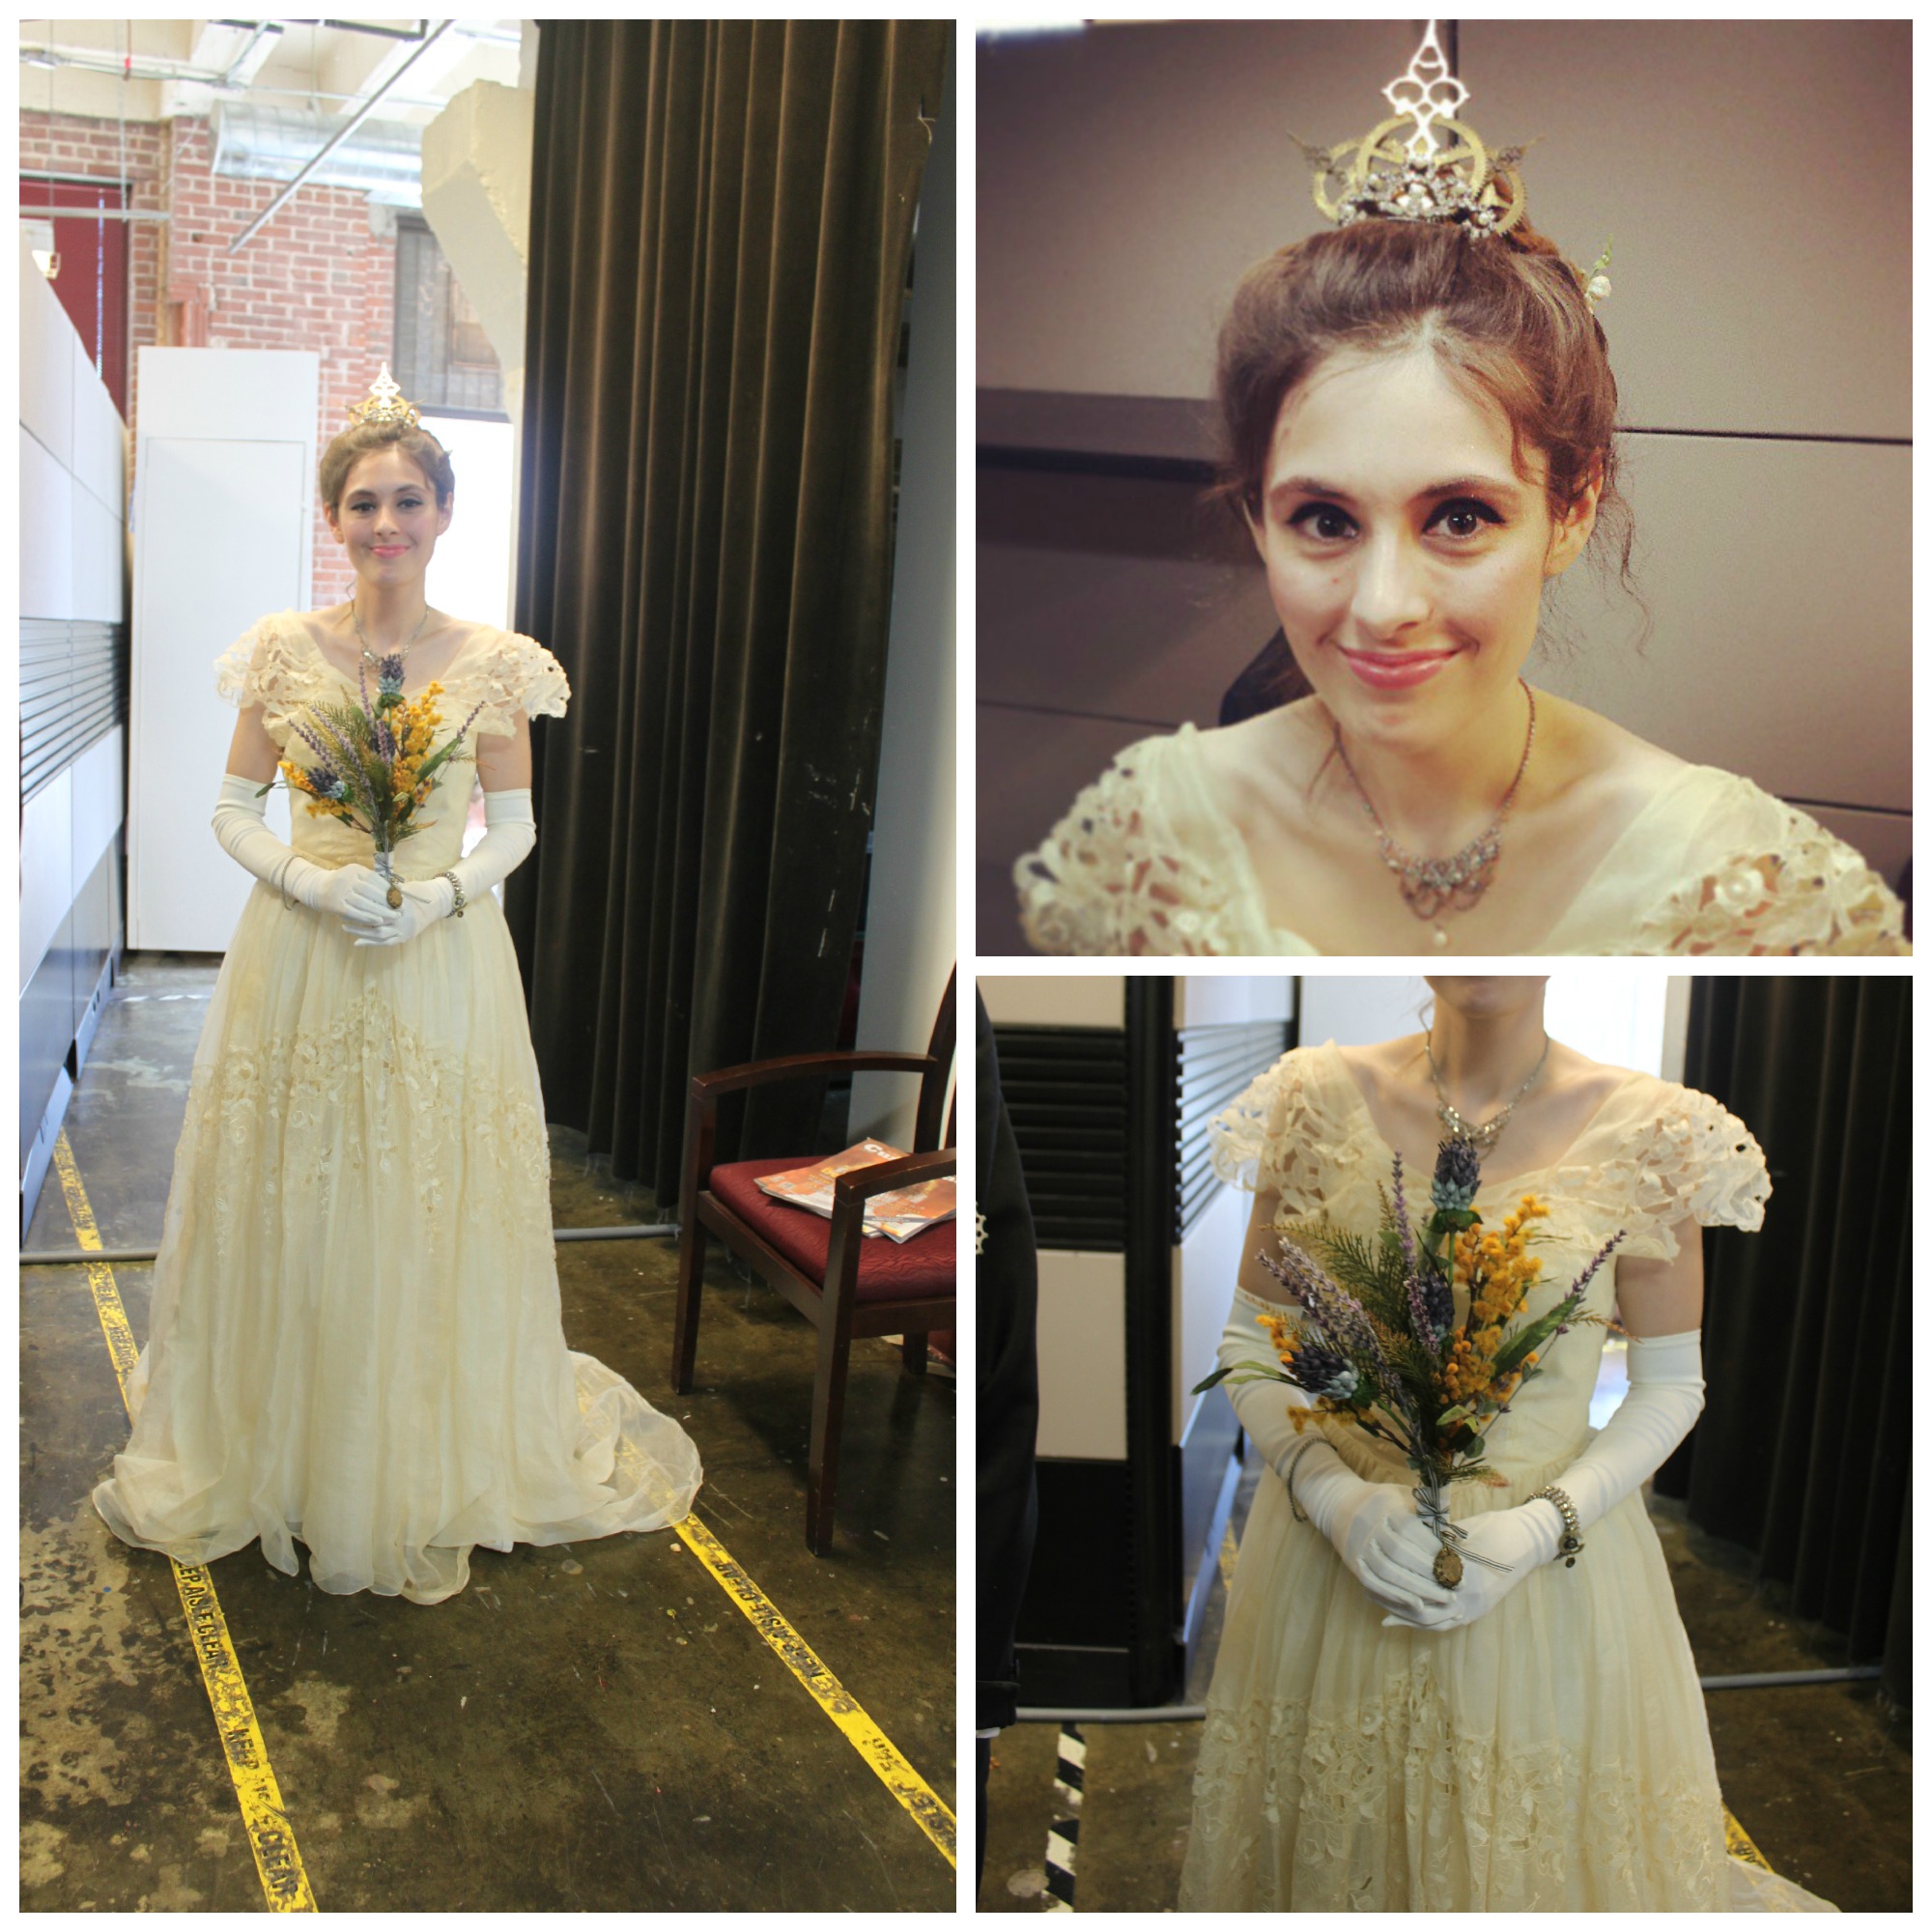
I had so much fun transforming each of the dresses, thrifting for vintage tuxes, and the piece de resistance came from my mom who found (at an estate) the most exquisite wedding dress I have ever seen. It is an off-the-shoulder dress made of gauzy white handmade lace with a long flowing train. It was sold with white ballet shoes (still with a penny for good luck taped into the inner sole)!Steampunk Fashion 3

Accessorizing was easy--I was inspired by vintage rhinestone pieces, gleaming brass gears, and these embroidered Royal crests & patches. I had so much fun ruffling through antique photographs of Victorian weddings and ogling all of the dresses, floral arrangements & nosegays.

When June 1st finally arrived I could hardly contain my excitement! Everything had fallen into place  and sure there were a couple of hiccups but the show was a complete success (much like a wedding day I expect). I couldn't have done it without the encouragement of Christine & Renee; the help of all of my wonderful models--Melissa, Joe, Michael, Karen, Caroline, Ryan, Mitch, and especially Alicia (who was such a hauntingly beautiful bride--she looked as if she had stepped out of a shroud of ghostly invisibility to corporeal form to remind us of a bygone era); the help of Sherri, who filmed the fashion show for me; and last, but not least, my collaborator and co-designer, my mom (The Salvage Steamstress).Steampunk Bride

So for those of you who couldn't make it--here's a video of the show. Hope you enjoy it!

[youtube=http://www.youtube.com/watch?v=Nxc_DW1VsJg]

And a Silver Sixpence in my Shoe!

ShowsSamantha Extance1 Comment

Hi everyone! It's the big day! Marry Me Indie is today and I can't wait for our big fashion show of men's & women's jewelry & accessories for a Royal Steampunk Wedding! I'll be taping & photographing the fashion show--which starts at 3:00pm! Come by and see me before then at my booth! For more info on Marry Me Indie, see their lovely poster below! And in case you were wondering about the title of this post--I recently learned something that I thought I'd share with you. The familiar bridal saying--Something Old, Something New, Something Borrowed, Something Blue--has just one more line--And a Silver Sixpence in my Shoe! The vintage hand sewn lace bridal gown that I am sending down the runway is American made and when my mom & I happened upon it at an estate sale it came complete with white ballet slippers to match the gown's delicate elegance--and what did I find taped inside the sole but a penny! So for us in the states the saying & superstition is not complete without a brand new shiny penny! See you at Marry Me Indie! xo Sam
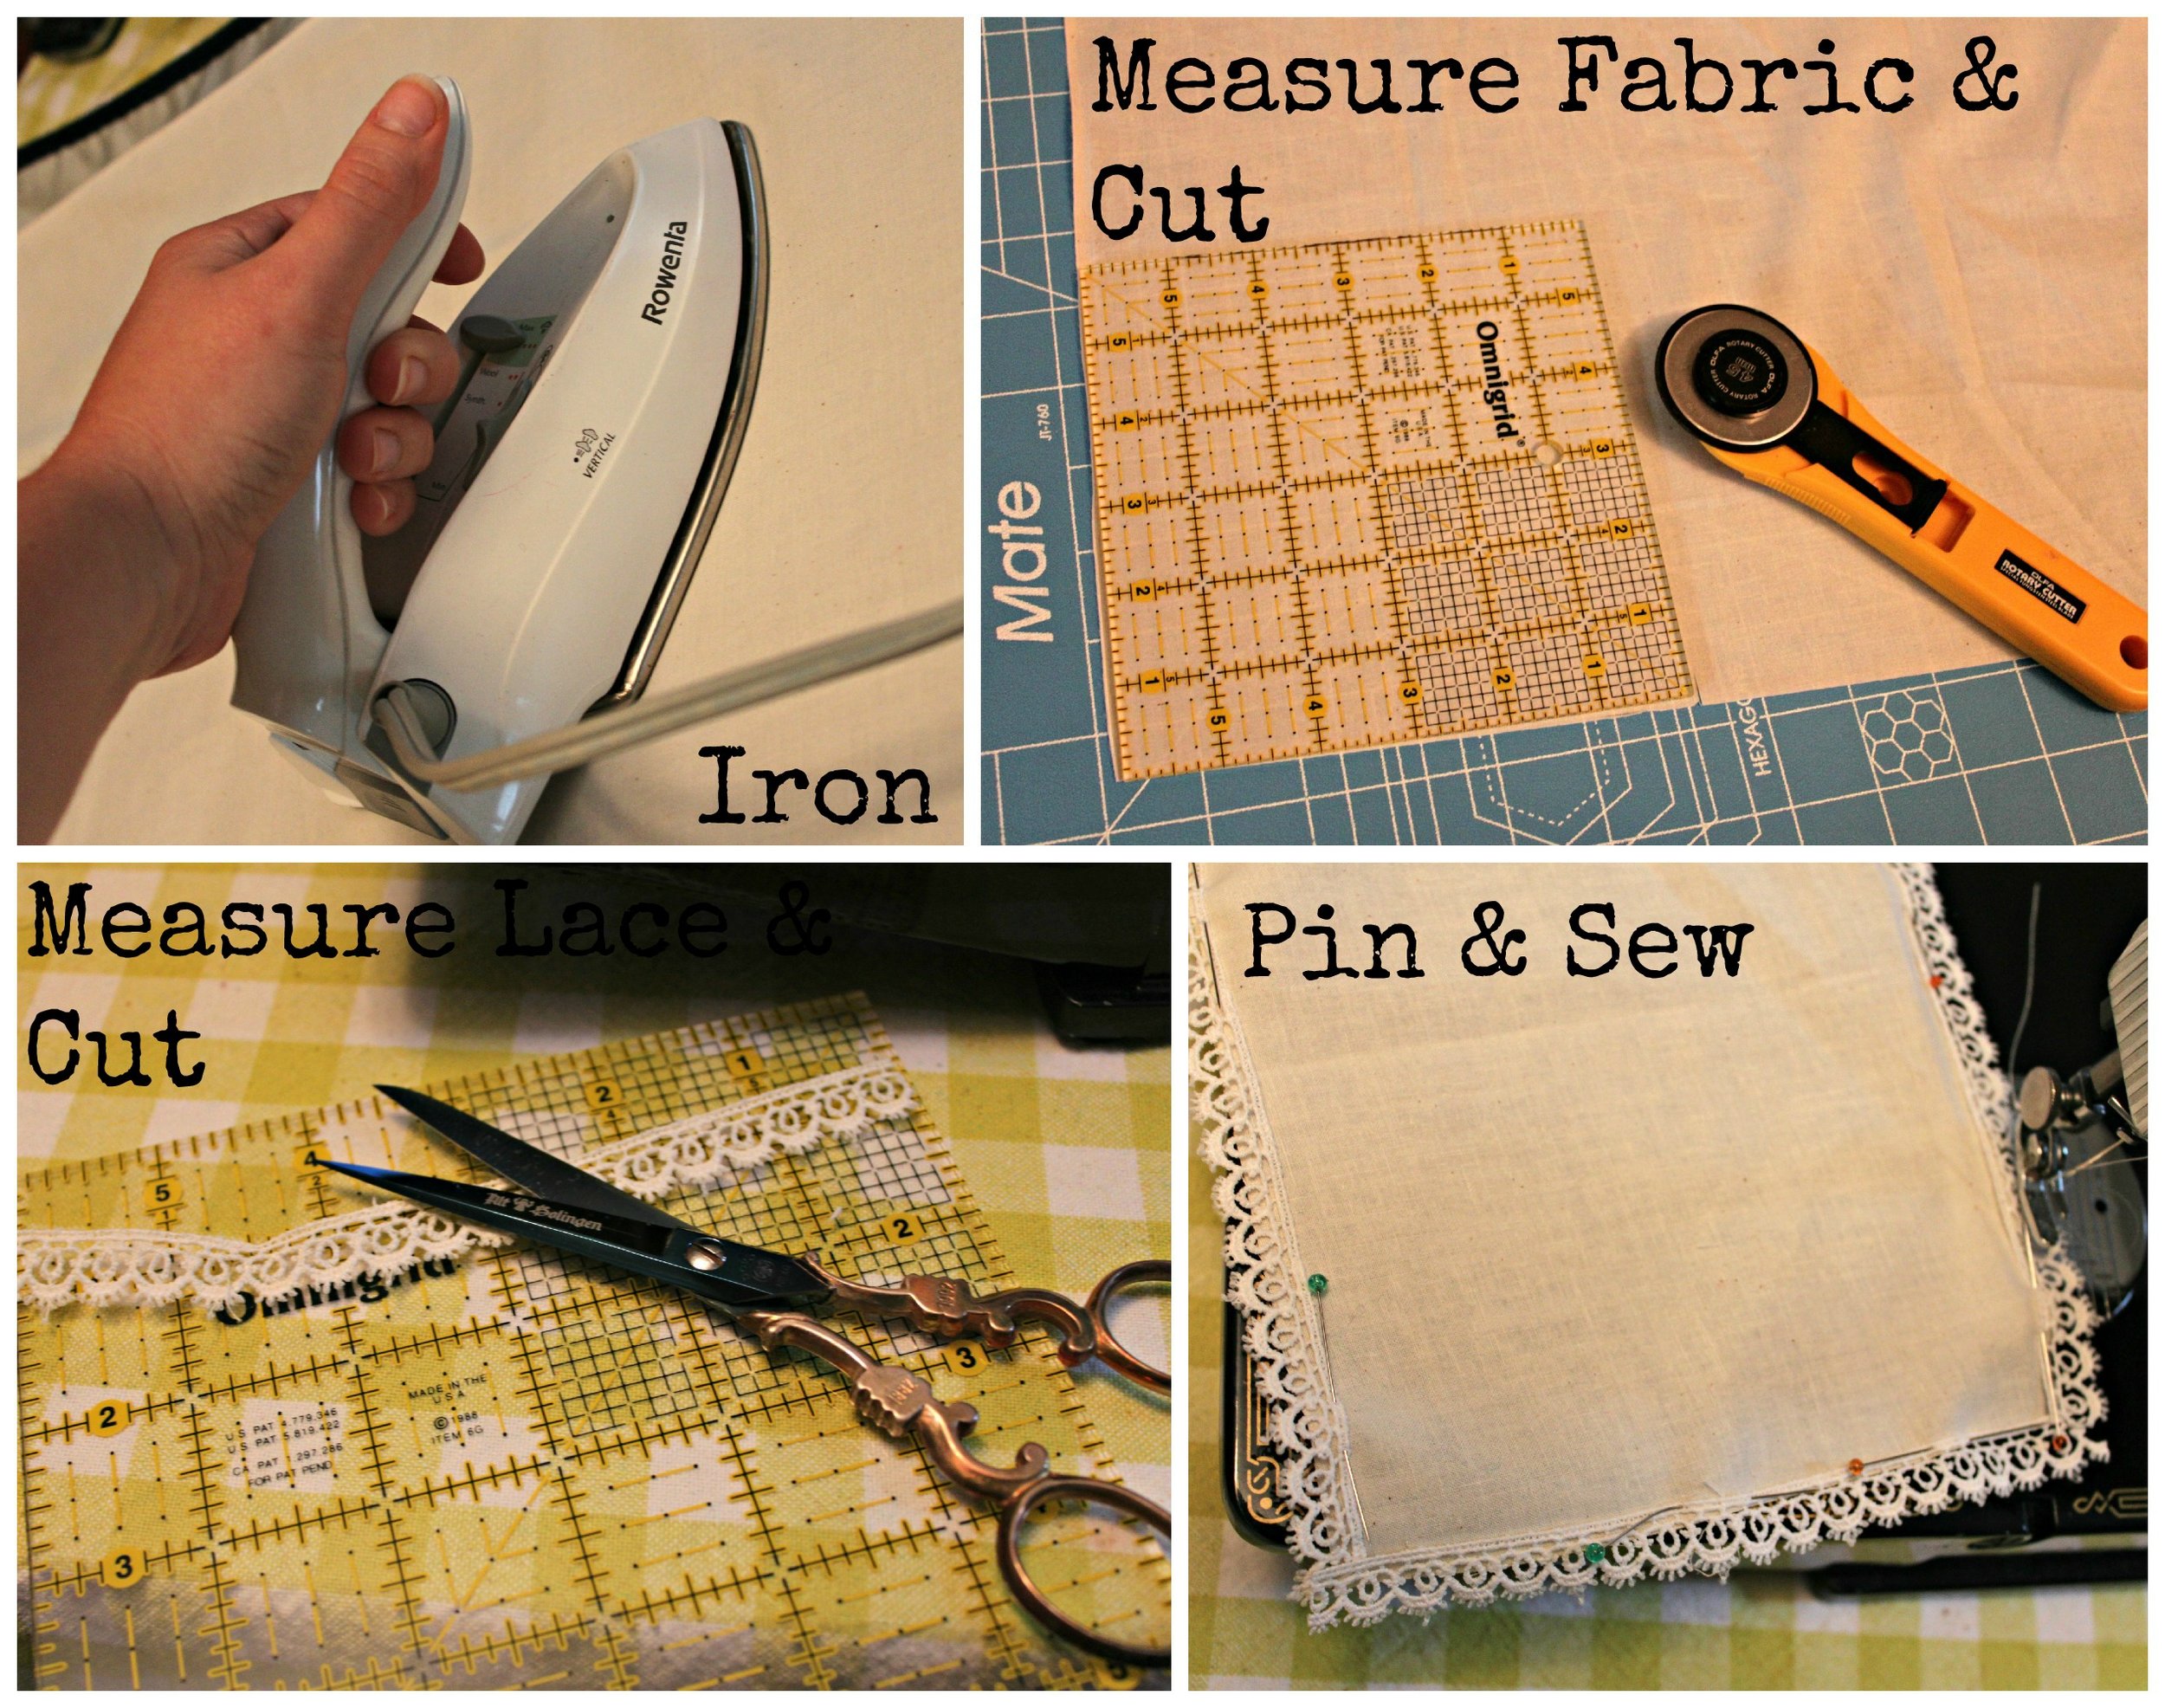


DIY Handkerchief

D-I-Y-Samantha Extance4 Comments

All ladies need a handkerchief, so why not make your own? Here's what you'll need:

  • Square of Absorbent fabric (my fabric is a piece of 5x5 muslin)
  • 20 inches of lace
  • Pins
  • Sewing machine
  • Scissors; Olfa cutter
  • Omnigrid ruler (or any other kind of fabric ruler)
  • Embroidery thread & needle (optional)

DIY Handkerchief 3Steps:DIY Handkerchief

  1. Iron your fabric.
  2. Measure your fabric with your omnigrid (or other fabric ruler). I wanted a tiny handkerchief so that I could pin it inside my dress or tuck it inside my bodice. I measured it to be a 5x5 square. Equal sides work best (so 6x6, 8x8, 10x10, 12x12 for example) is best. Once you've measured your fabric, cut it out using your olfa cutter or scissors.
  3. Next measure your lace. You want 4 pieces all equal to the length of your handkerchief sides. I measured and cut 4 pieces of 5 inch lace since I have a 5x5 handkerchief. DIY Handkerchief 2
  4. Pin your lace in place. Make sure that your lace overlaps at the edges. Then sew. You can sew continuously by lifting up your machine's foot and pivoting your handkerchief. Cut off any excess threads.
  5. (Optional) Embroider your initials or an elegant design on your handkerchief. You can also both embroider & draw on your handkerchief (as I've done above. I embroidered the initial "C" and drew a pretty floral design using a micropoint fabric pen).

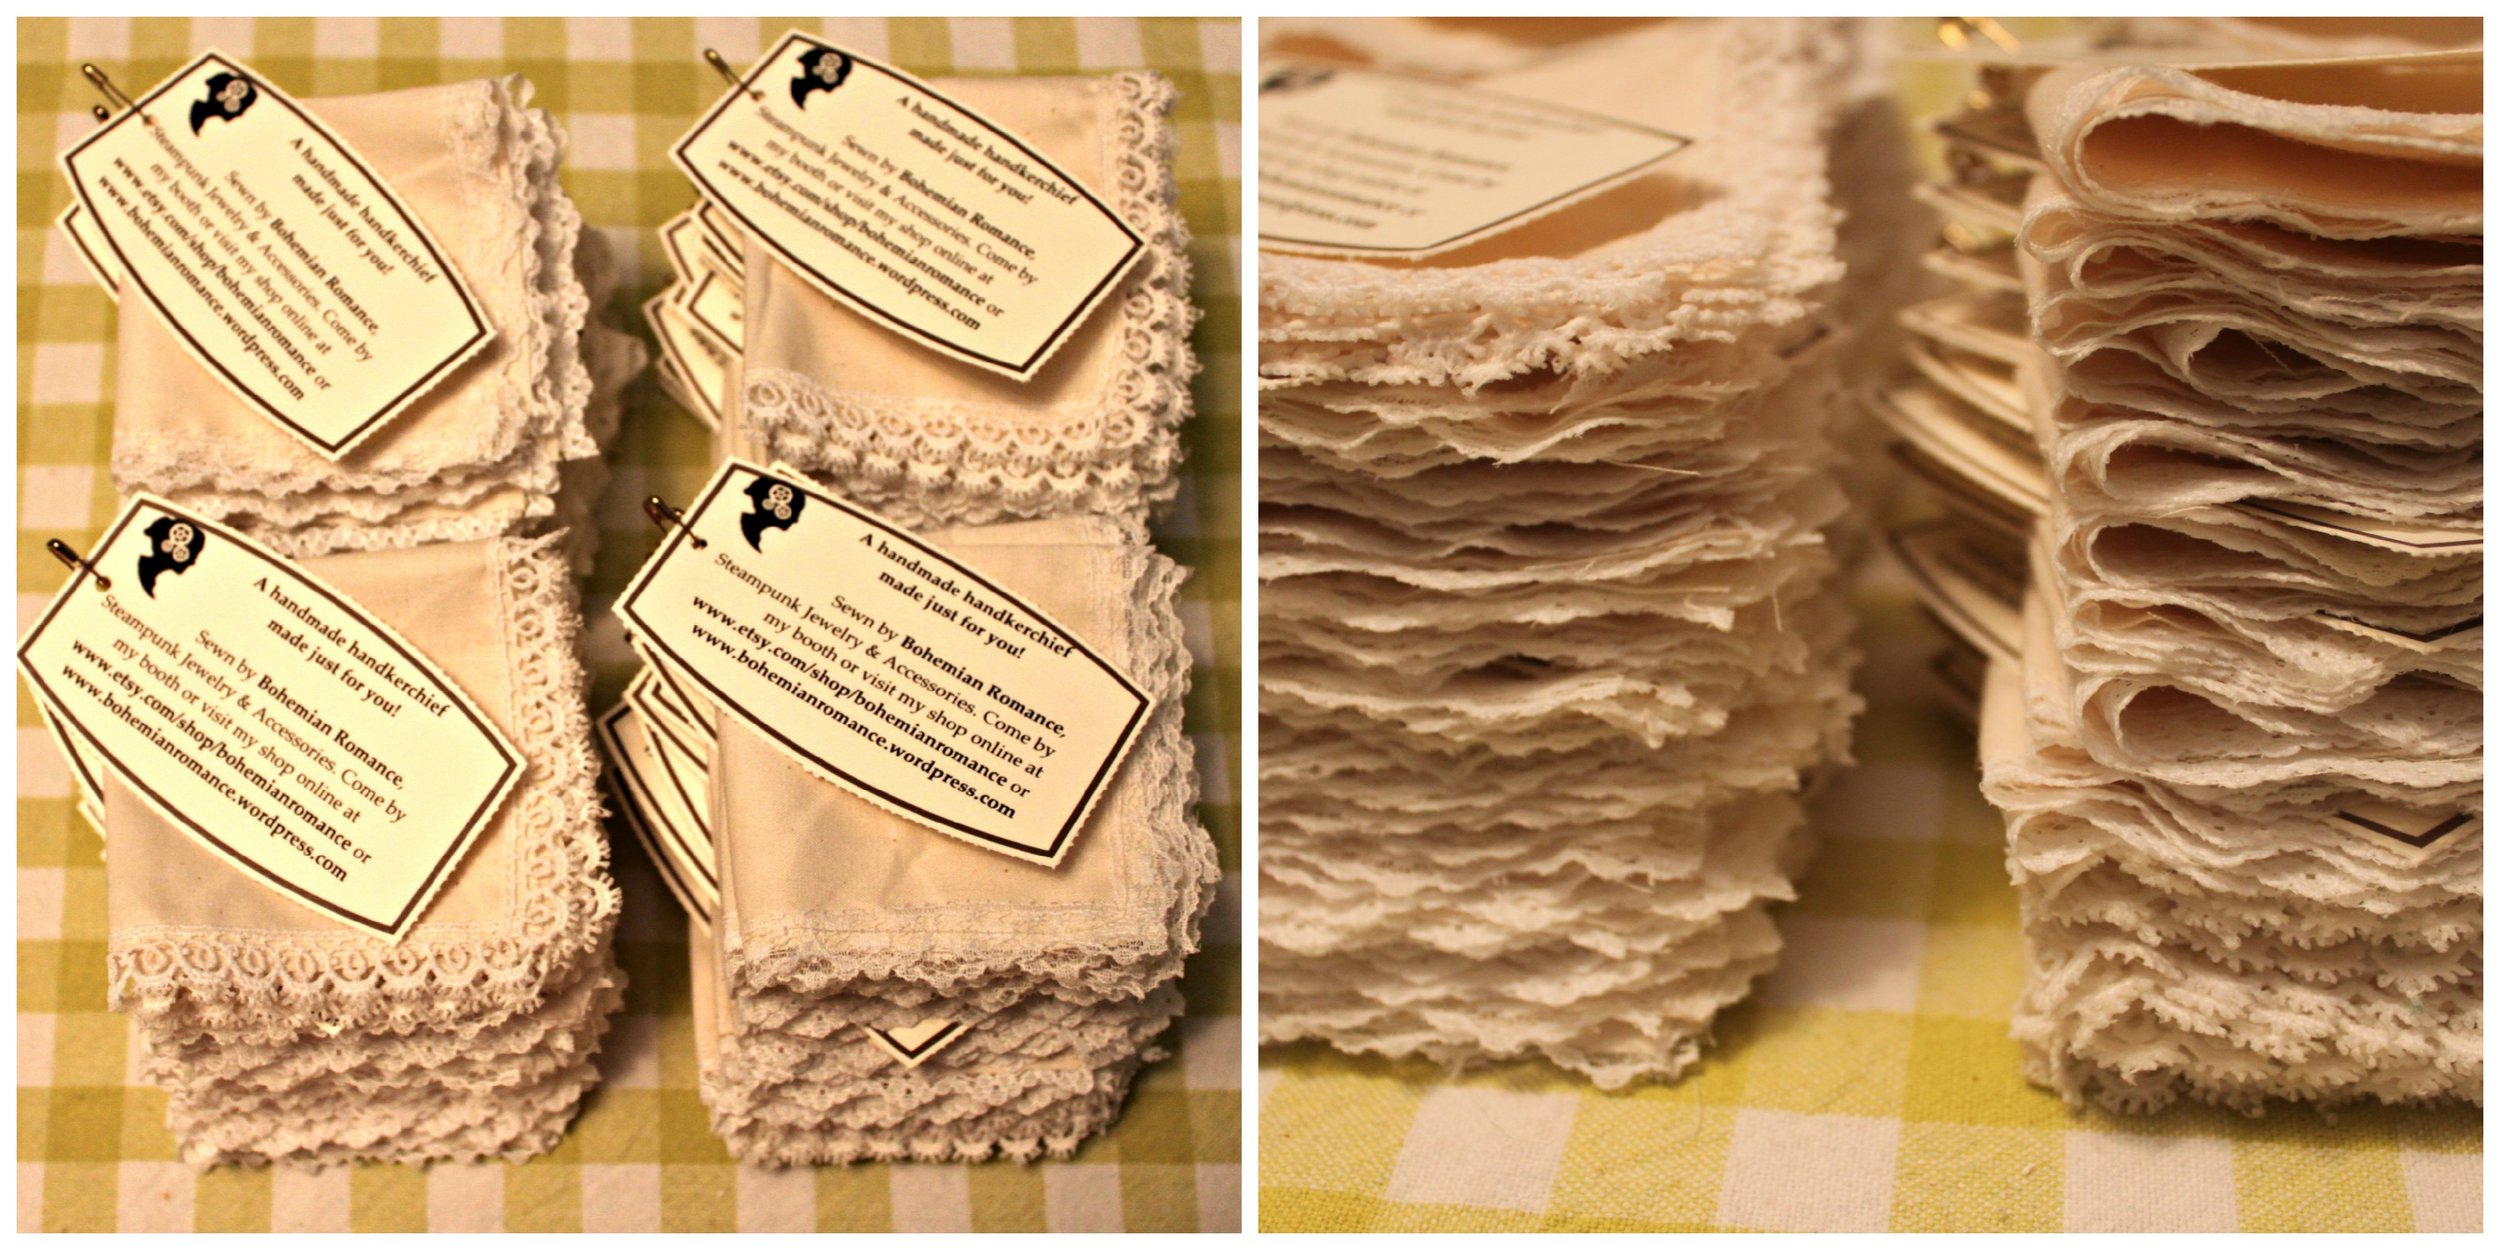
These handkerchiefs are elegant & easy to make. They are a perfect bridesmaid gift! I am making handkerchiefs as a giveaway for Marry Me Indie! The first 50 brides to attend will receive a bag full of free goodies from each of the vendors. So if you want a handmade muslin & lace handkerchief of your very own--come by the show early!

New from my Steampunk Workshop!

UncategorizedSamantha ExtanceComment

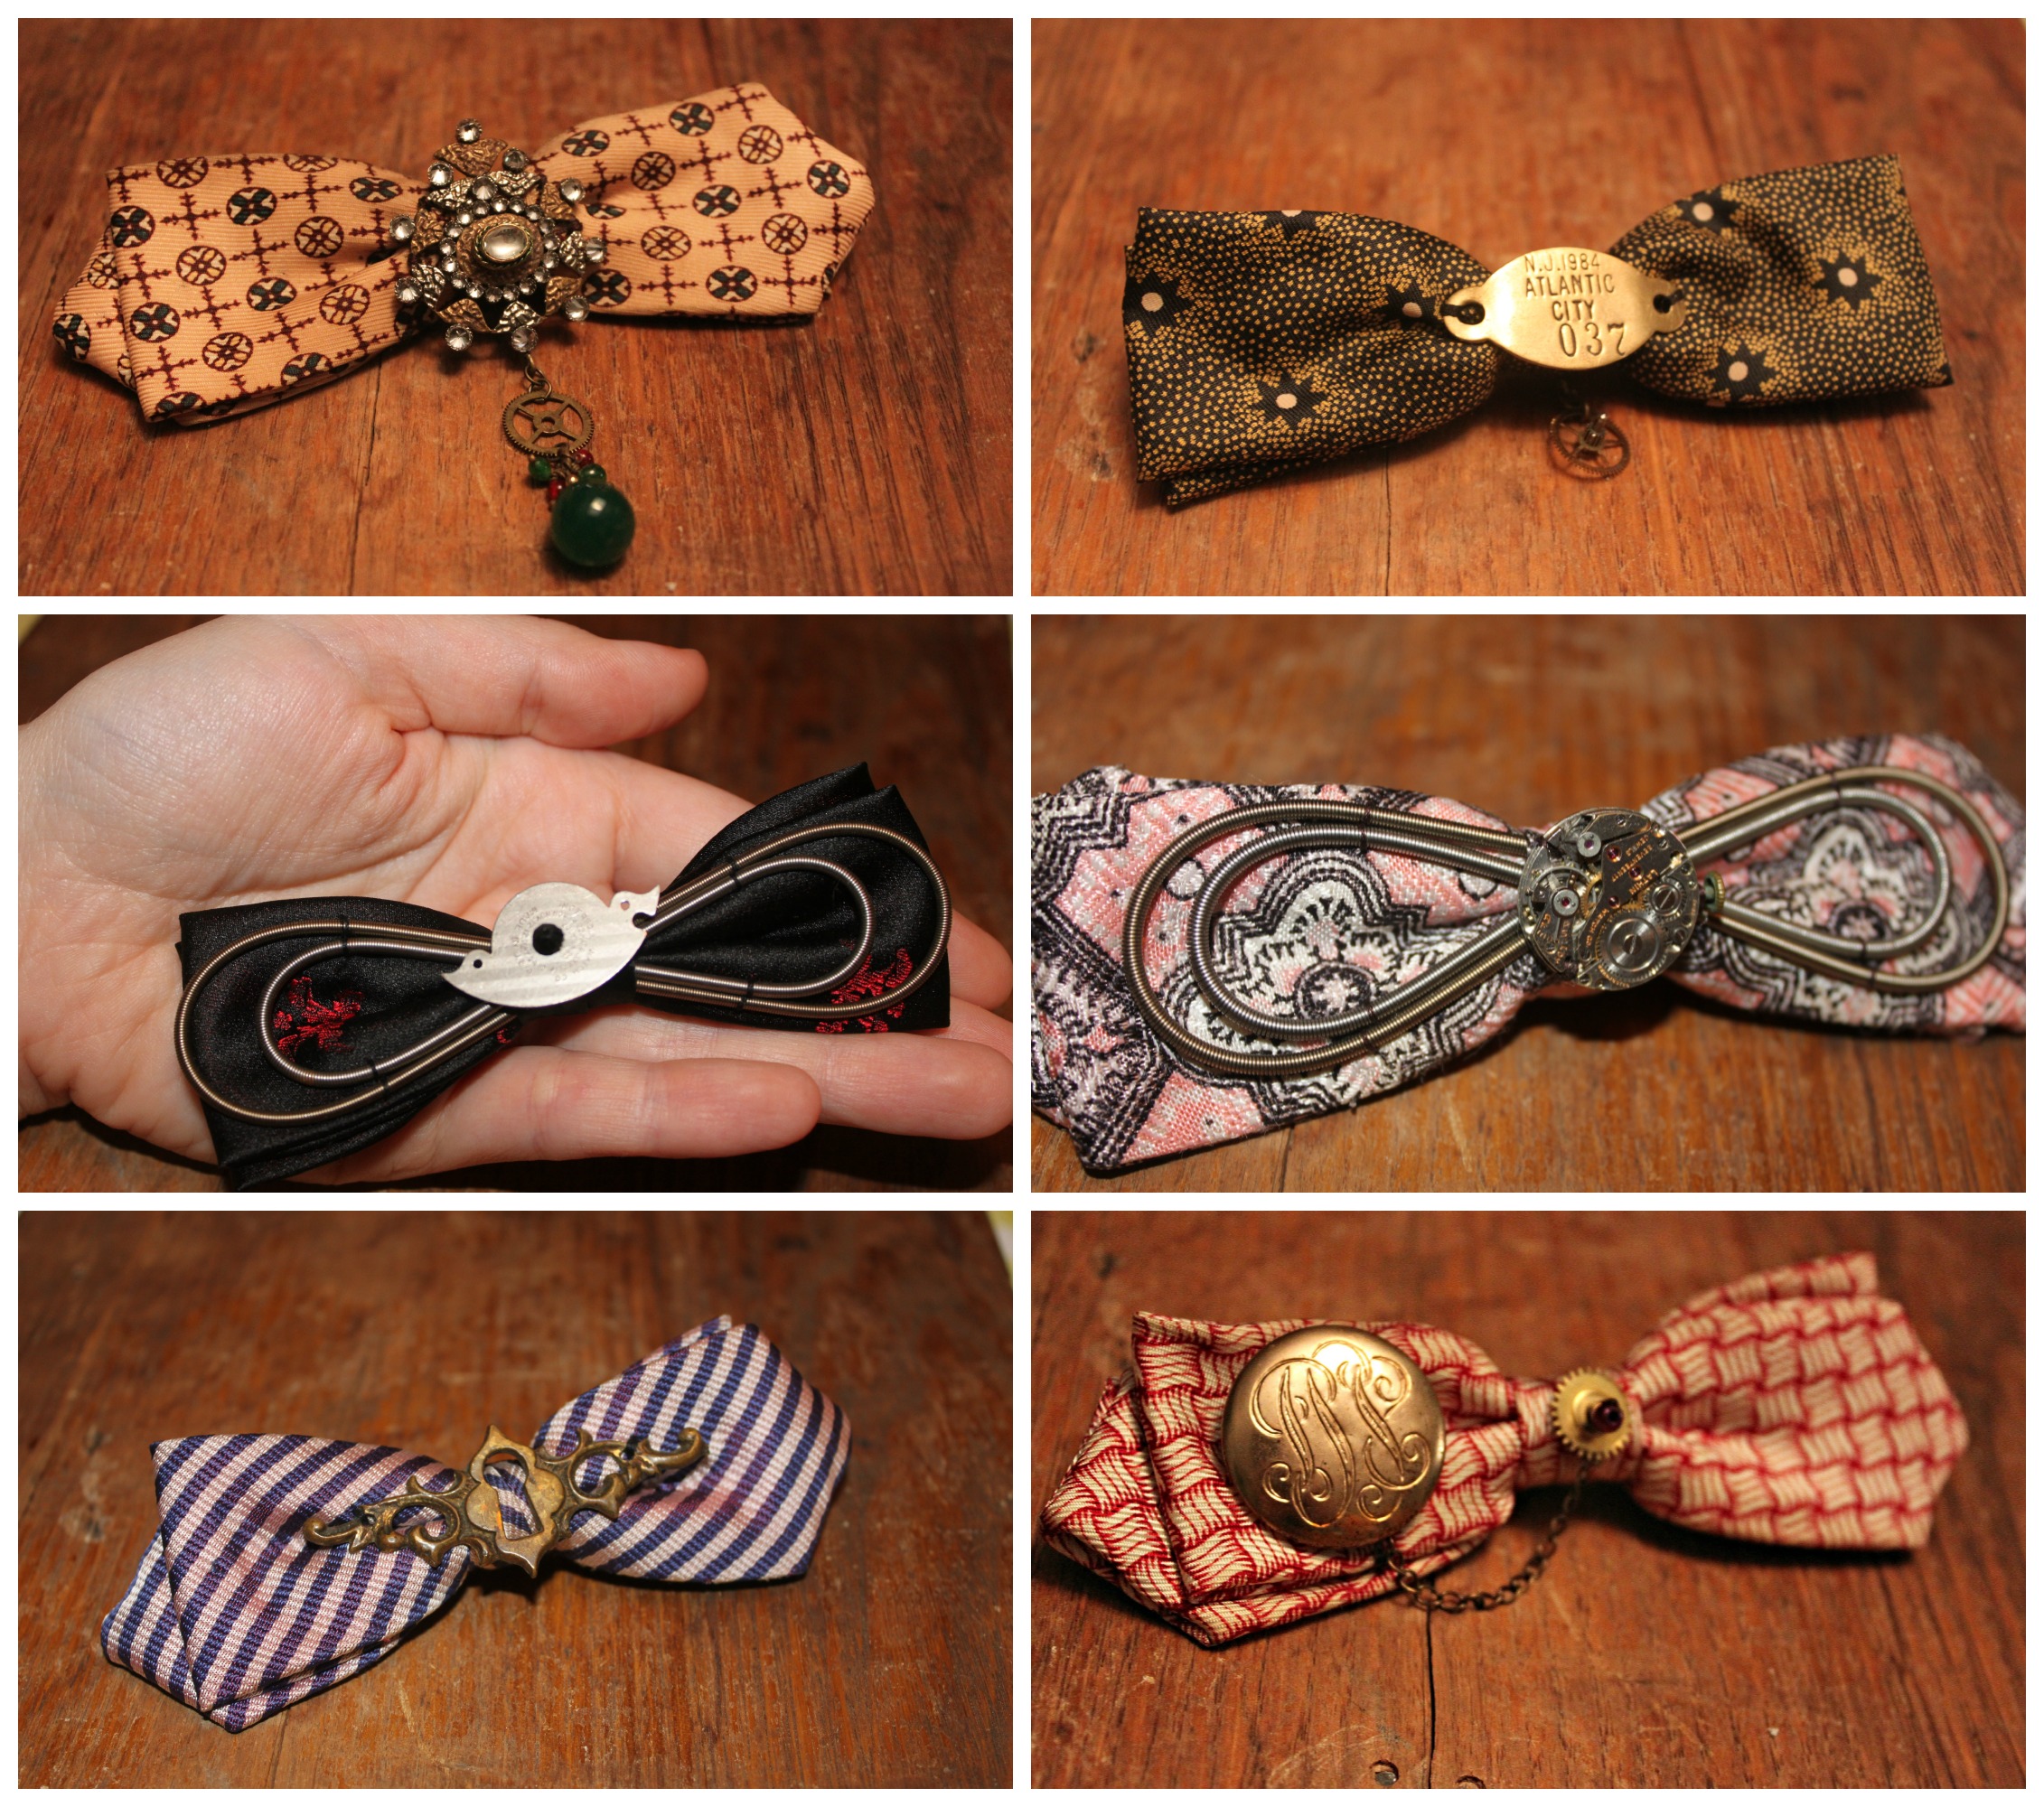
I have been making new creations left & right for Blue Dome Arts Festival this weekend & for Marry Me Indie (on June 1st)! I am especially excited about all of the upcycled & steampunked bow ties! New Steampunk Bow Ties CollageMy favorite is the striped keyhole bow tie--when the light hits the fabric it tints the fabric pink! A couple of these will be at Blue Dome this weekend and the others will be worn down the runway at Marry Me Indie! Glass Cameo Necklace CollageAnother new creation is this elegant yet simple Glass Cameo & Skeleton Key Necklace. The metal filigree is inlaid with tiny rhinestones which brings out the luster of the key & chain.  The luster almost reminds of midnight blue--that shimmer of twilight.

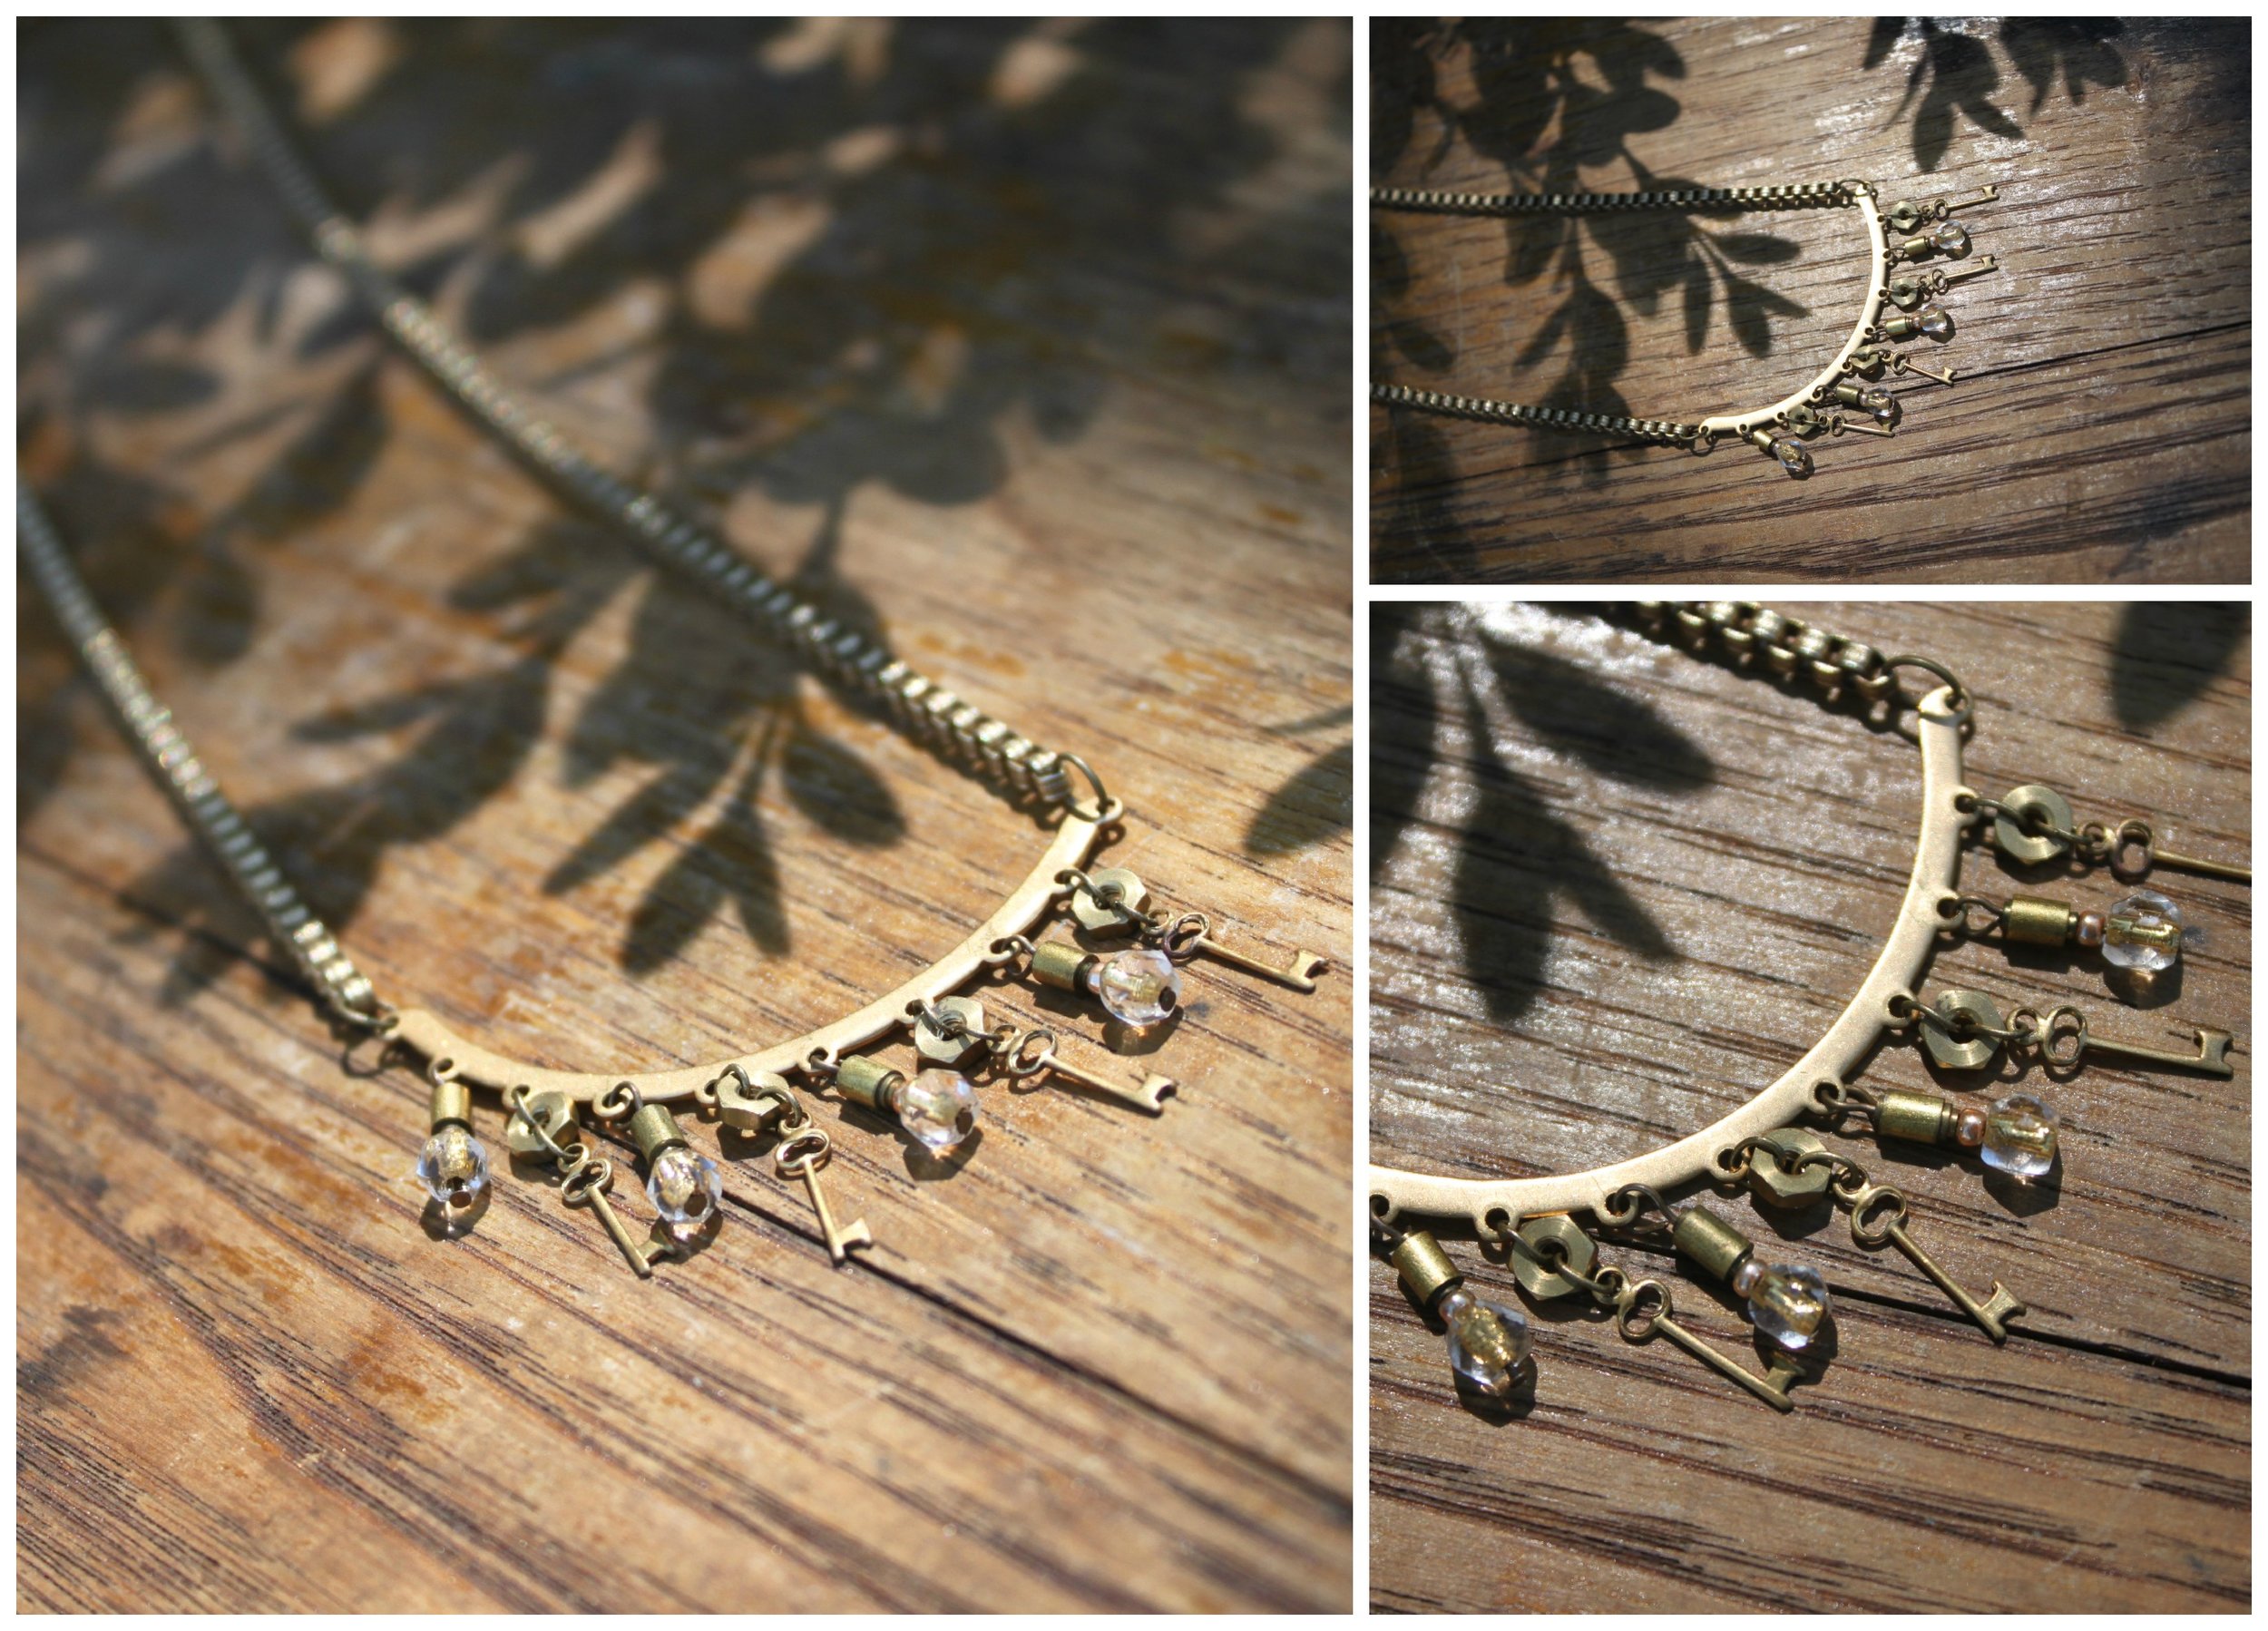
Steampunk Golden Key Necklace CollageThis next necklace is the total opposite--a little burst of golden sunlight & warmth to adorn your neck. Brass washers, gold key charms, pocketwatch screws, and vintage gold foil beads reflect the glorious sunshine.

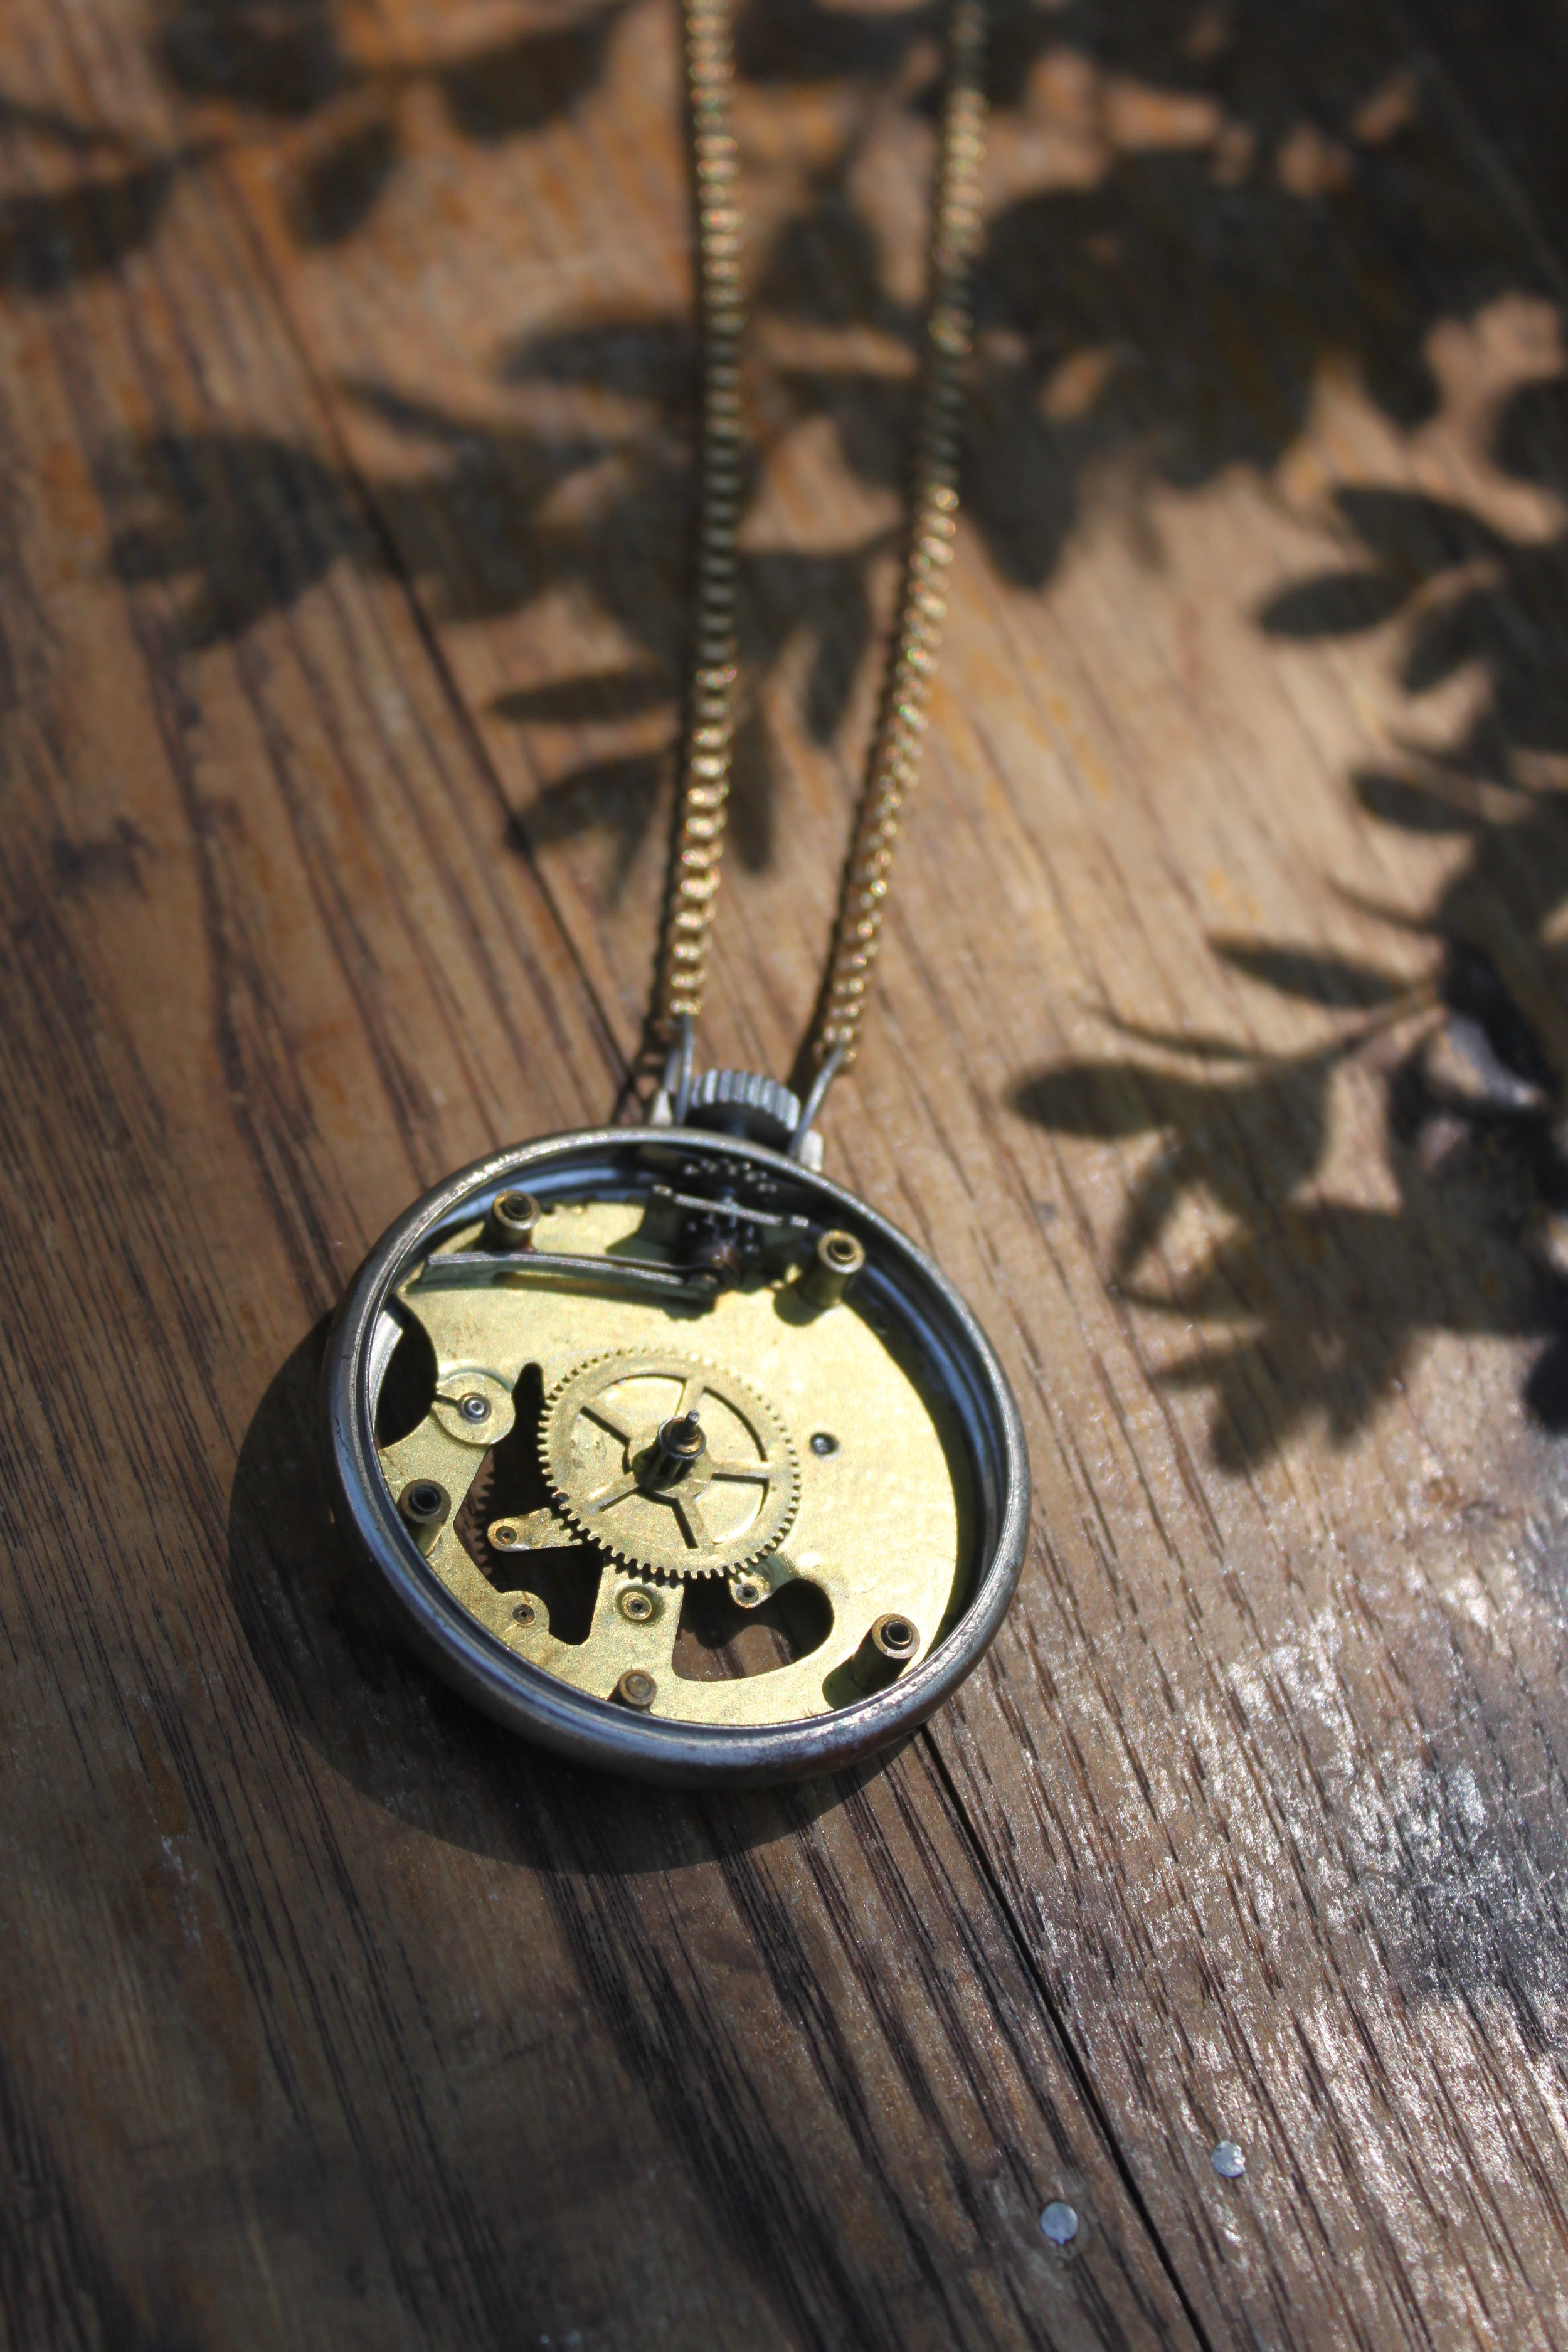
IMG_7708Serendipitous day--speaking of sunshine, it cast this beautiful shadow of budding leaves against the wood grain that I used as a backdrop to photograph my jewelry. I love moments like this--lucky moments--when nature's beauty compliments man made (or, in this case, woman made) beauty. I have a ton of pocketwatch necklaces for sale! And they're all a little different.

IMG_7714  IMG_7702  IMG_7668  And last but not least, this simply steampunk necklace! IMG_7719So that's a little sneak peek at what I've been up to! Lots more, so stop by Blue Dome this weekend (this Fri, Sat from 11am -10 pm; Sun 11am-5pm at the Make:Tulsa group Booth)! Hope I see some friendly faces!