Bohemian Romance Jewelry

Uncategorized

My Greatest Junk Shop Find

UncategorizedSamantha Extance1 Comment

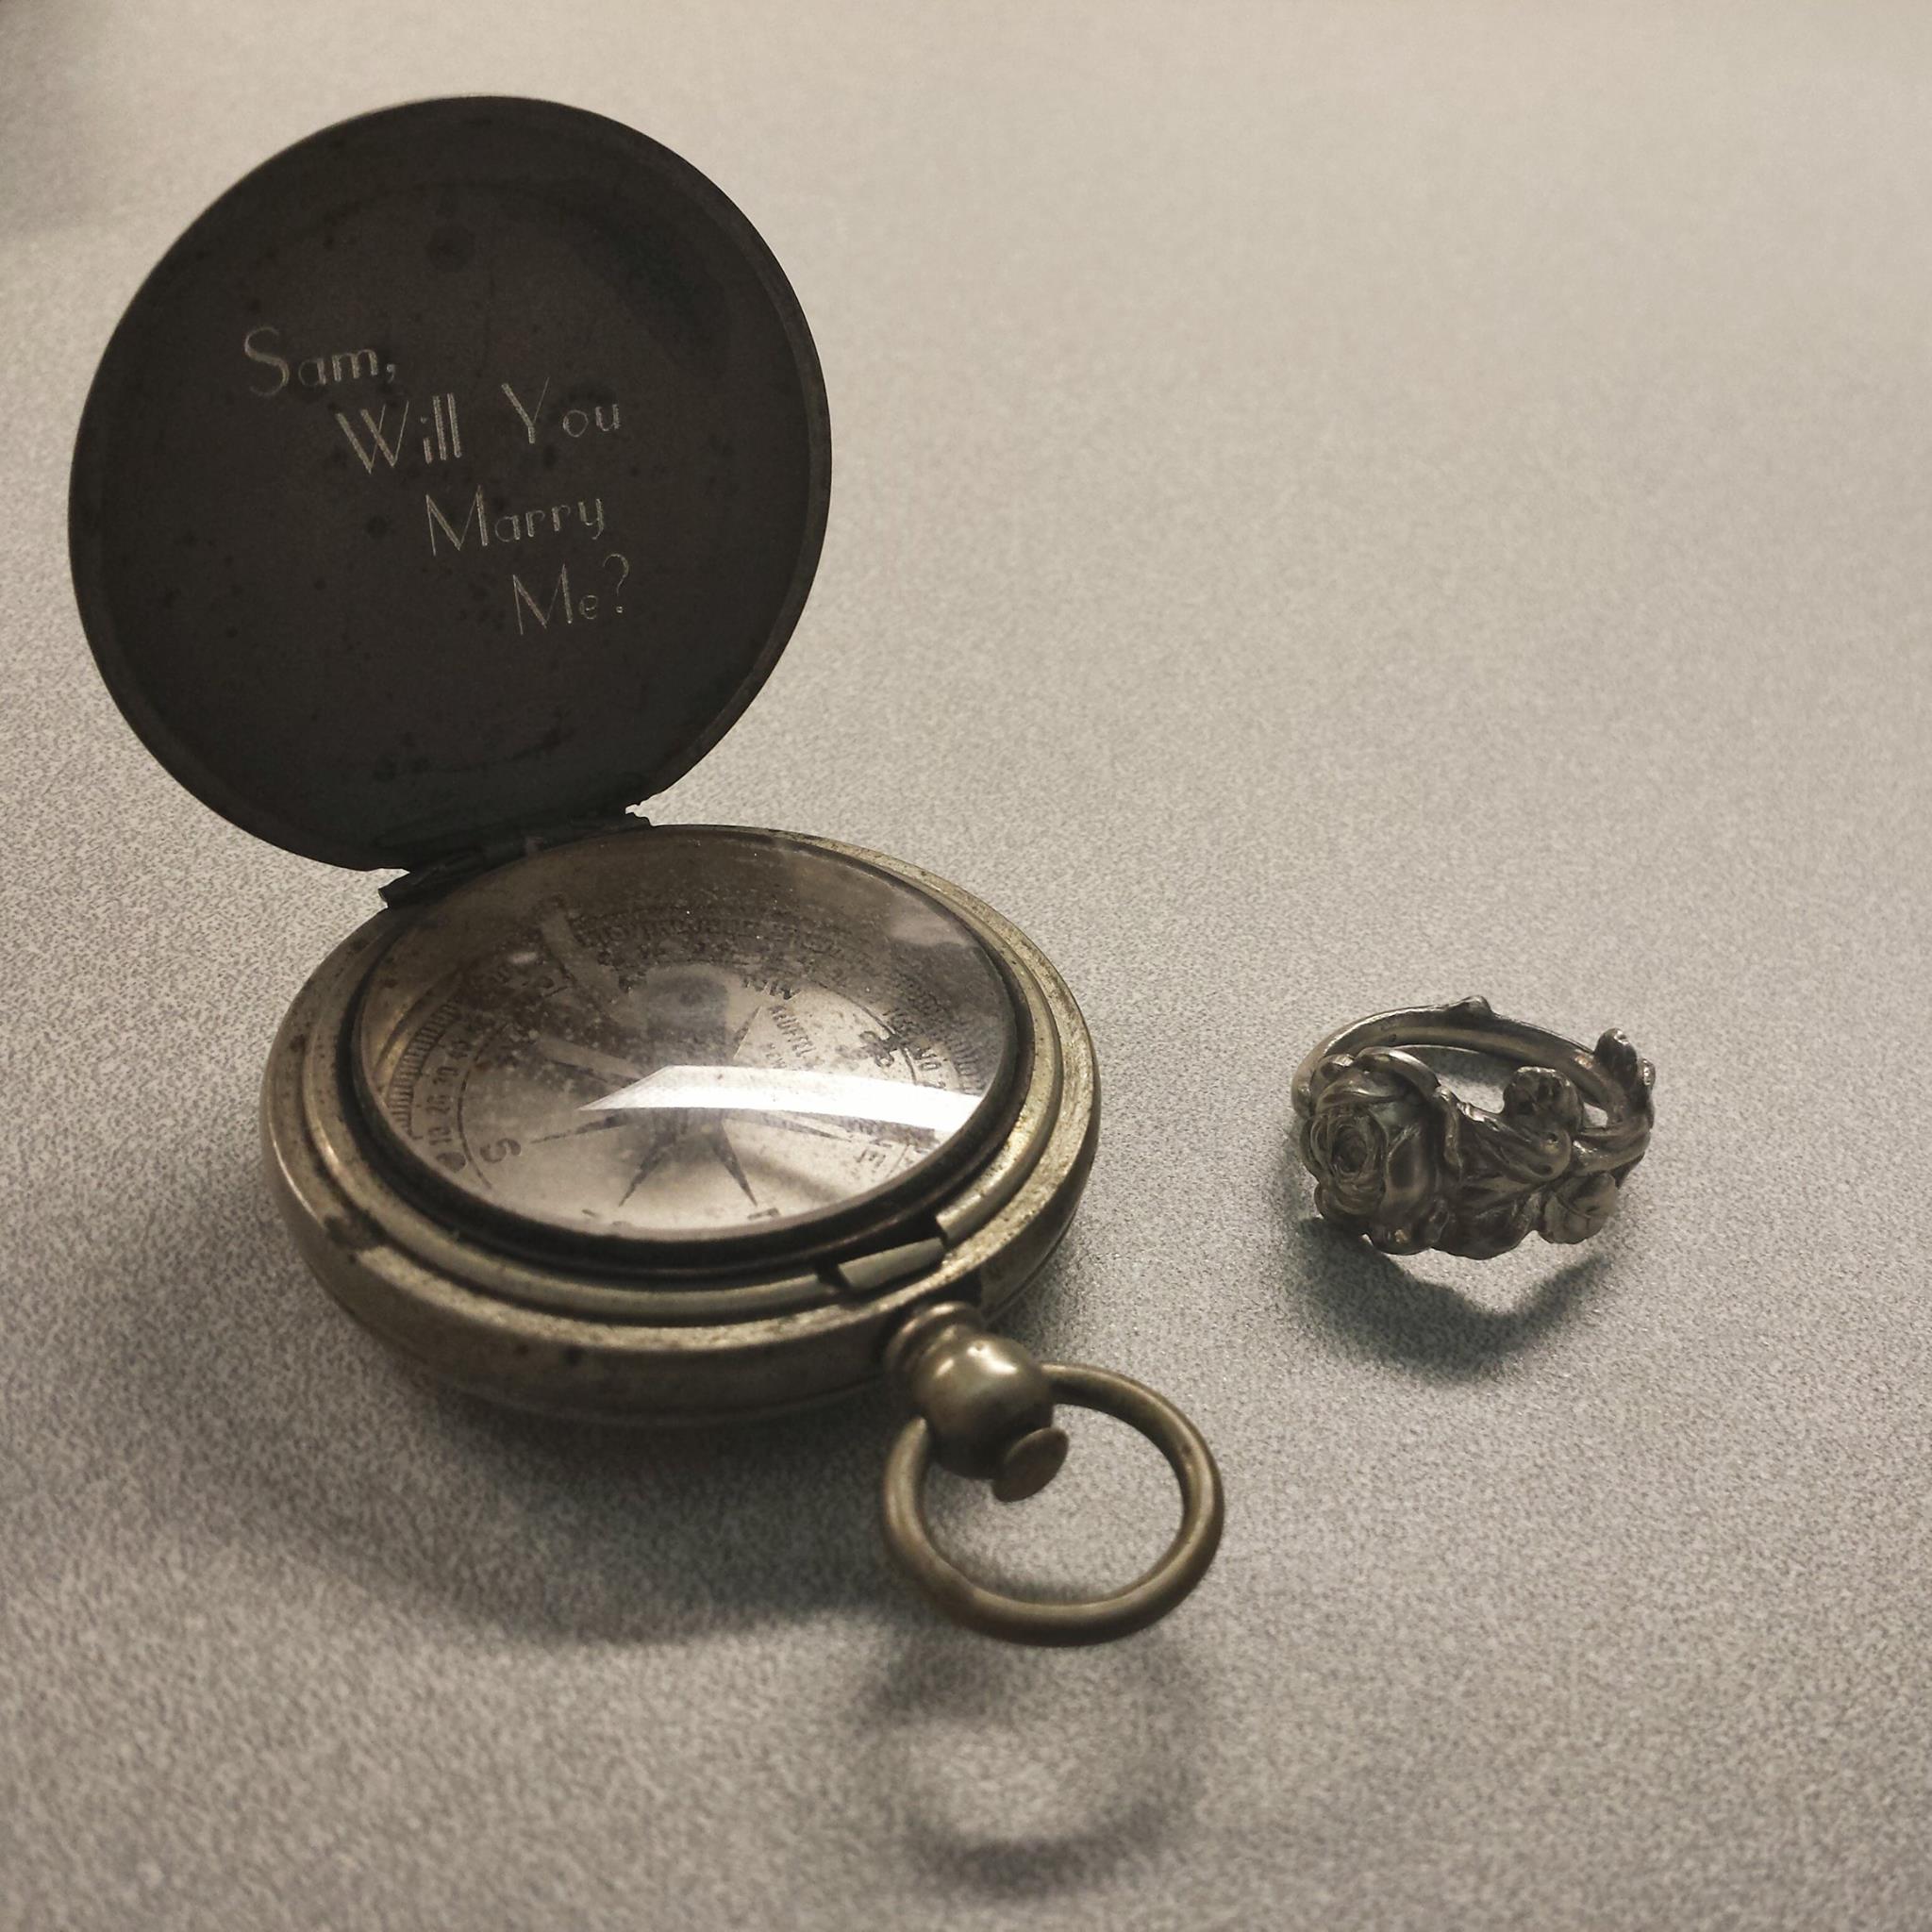
Sunday began as usual: I woke up, read more of my book while my body slowly acclimated to being awake, brushed my teeth, and got ready to go out for breakfast with Rhys. On our way to Tally's Cafe on Route 66, we popped into one of my favorite "junk" shops, Generations Antique Mall, which is right next door to the cafe. We ambled up the aisles, which with me is always a slow process as I like to examine objects that are often overlooked & rifle through boxes chock-full of random things searching for pieces to upcycle. We reached the end of the second aisle when we came to a large glass display case. Several of the top shelves were stuffed with old jewelry, watches, and ornate rings. The bottom shelves were almost empty, and on one shelf there was only a dull silver pocketwatch. The sticker on it read: "Does Not Work. $25." Rhys insisted that we take a look at it. I declined at first, stating that $25 was a lot for a pocketwatch not in working order. Little did I know its true value. Rhys again insisted and assured me we'd haggle the price. He asked the owner to open the case. I reluctantly retrieved the pocketwatch, popping the lid open, and discovered writing etched on the inside lid. Engraved onto this 1910 silver compass (it was not a pocketwatch after all) were the words: "Sam, Will You Marry Me?" I held my breath. My disbelief suspended when I turned around to see Rhys down on one knee with a beautiful engagement ring. Before he could even get a full sentence out--I had said Yes! And of course, was blubbering with happy tears the next minute. 52168_10154543378935624_7830856201092534447_o

That compass is the greatest "find" I have discovered in any junk shop--its value utterly priceless. Its history now forever altered; our story now entwined with its.

IMG_20140810_114729_1I am so incredibly lucky that I met Rhys ten months ago. I fell in love with his compassion for others, his unfailing kindness, his sharp wit, and yes, even his puns! He has enriched my life with his own sense of wonder, wanderlust, and creativity. He has become my compass--he helps me navigate my fears & dreams; he gives me direction; and he points me toward truth. Simply put, he's the love of my life.

Shake2I'll keep you all updated on wedding planning & the DIYS that will inevitably ensue. To read about the proposal from Rhys's perspective, check out his blog. To get a stunning spoon ring of your very own, check out Aaron Paul Designs on Etsy! (My ring was made from a 1928 Sterling Silver Spoon originally manufactured by Reed & Barton Silver Company. Aaron Paul is an artist who I met at last year's Indie Emporium, and whose work I admire. The ring is perfect!)


The Ones that Didn't Get Away

UncategorizedSamantha Extance1 Comment

One of the questions I get asked often is: are there pieces that I make that I just can't sell? The answer is: Yes, oh, yes! For example, sometimes I will make a bunch of earrings in one sitting--and not be able to part with a single pair of them. I not only enjoy the process of making jewelry, but also sourcing it. Usually the pieces that I just can't part with are unique bits of history; are pieces that are considerably time-intensive. (The longer I work a piece, the more likely it is that I will want to keep it.); or, are pieces that I made collaboratively with my mom or friends. The jewelry then is not merely an accessory, but a cherished memory as well. While I wear my jewelry regularly, I don't run into all of you every day so I thought I would share a few of my favorite earrings that I couldn't part with for starters. I promise to post other pieces that have a permanent home just one stop over from my studio--my jewelry case & bookshelf vanity.

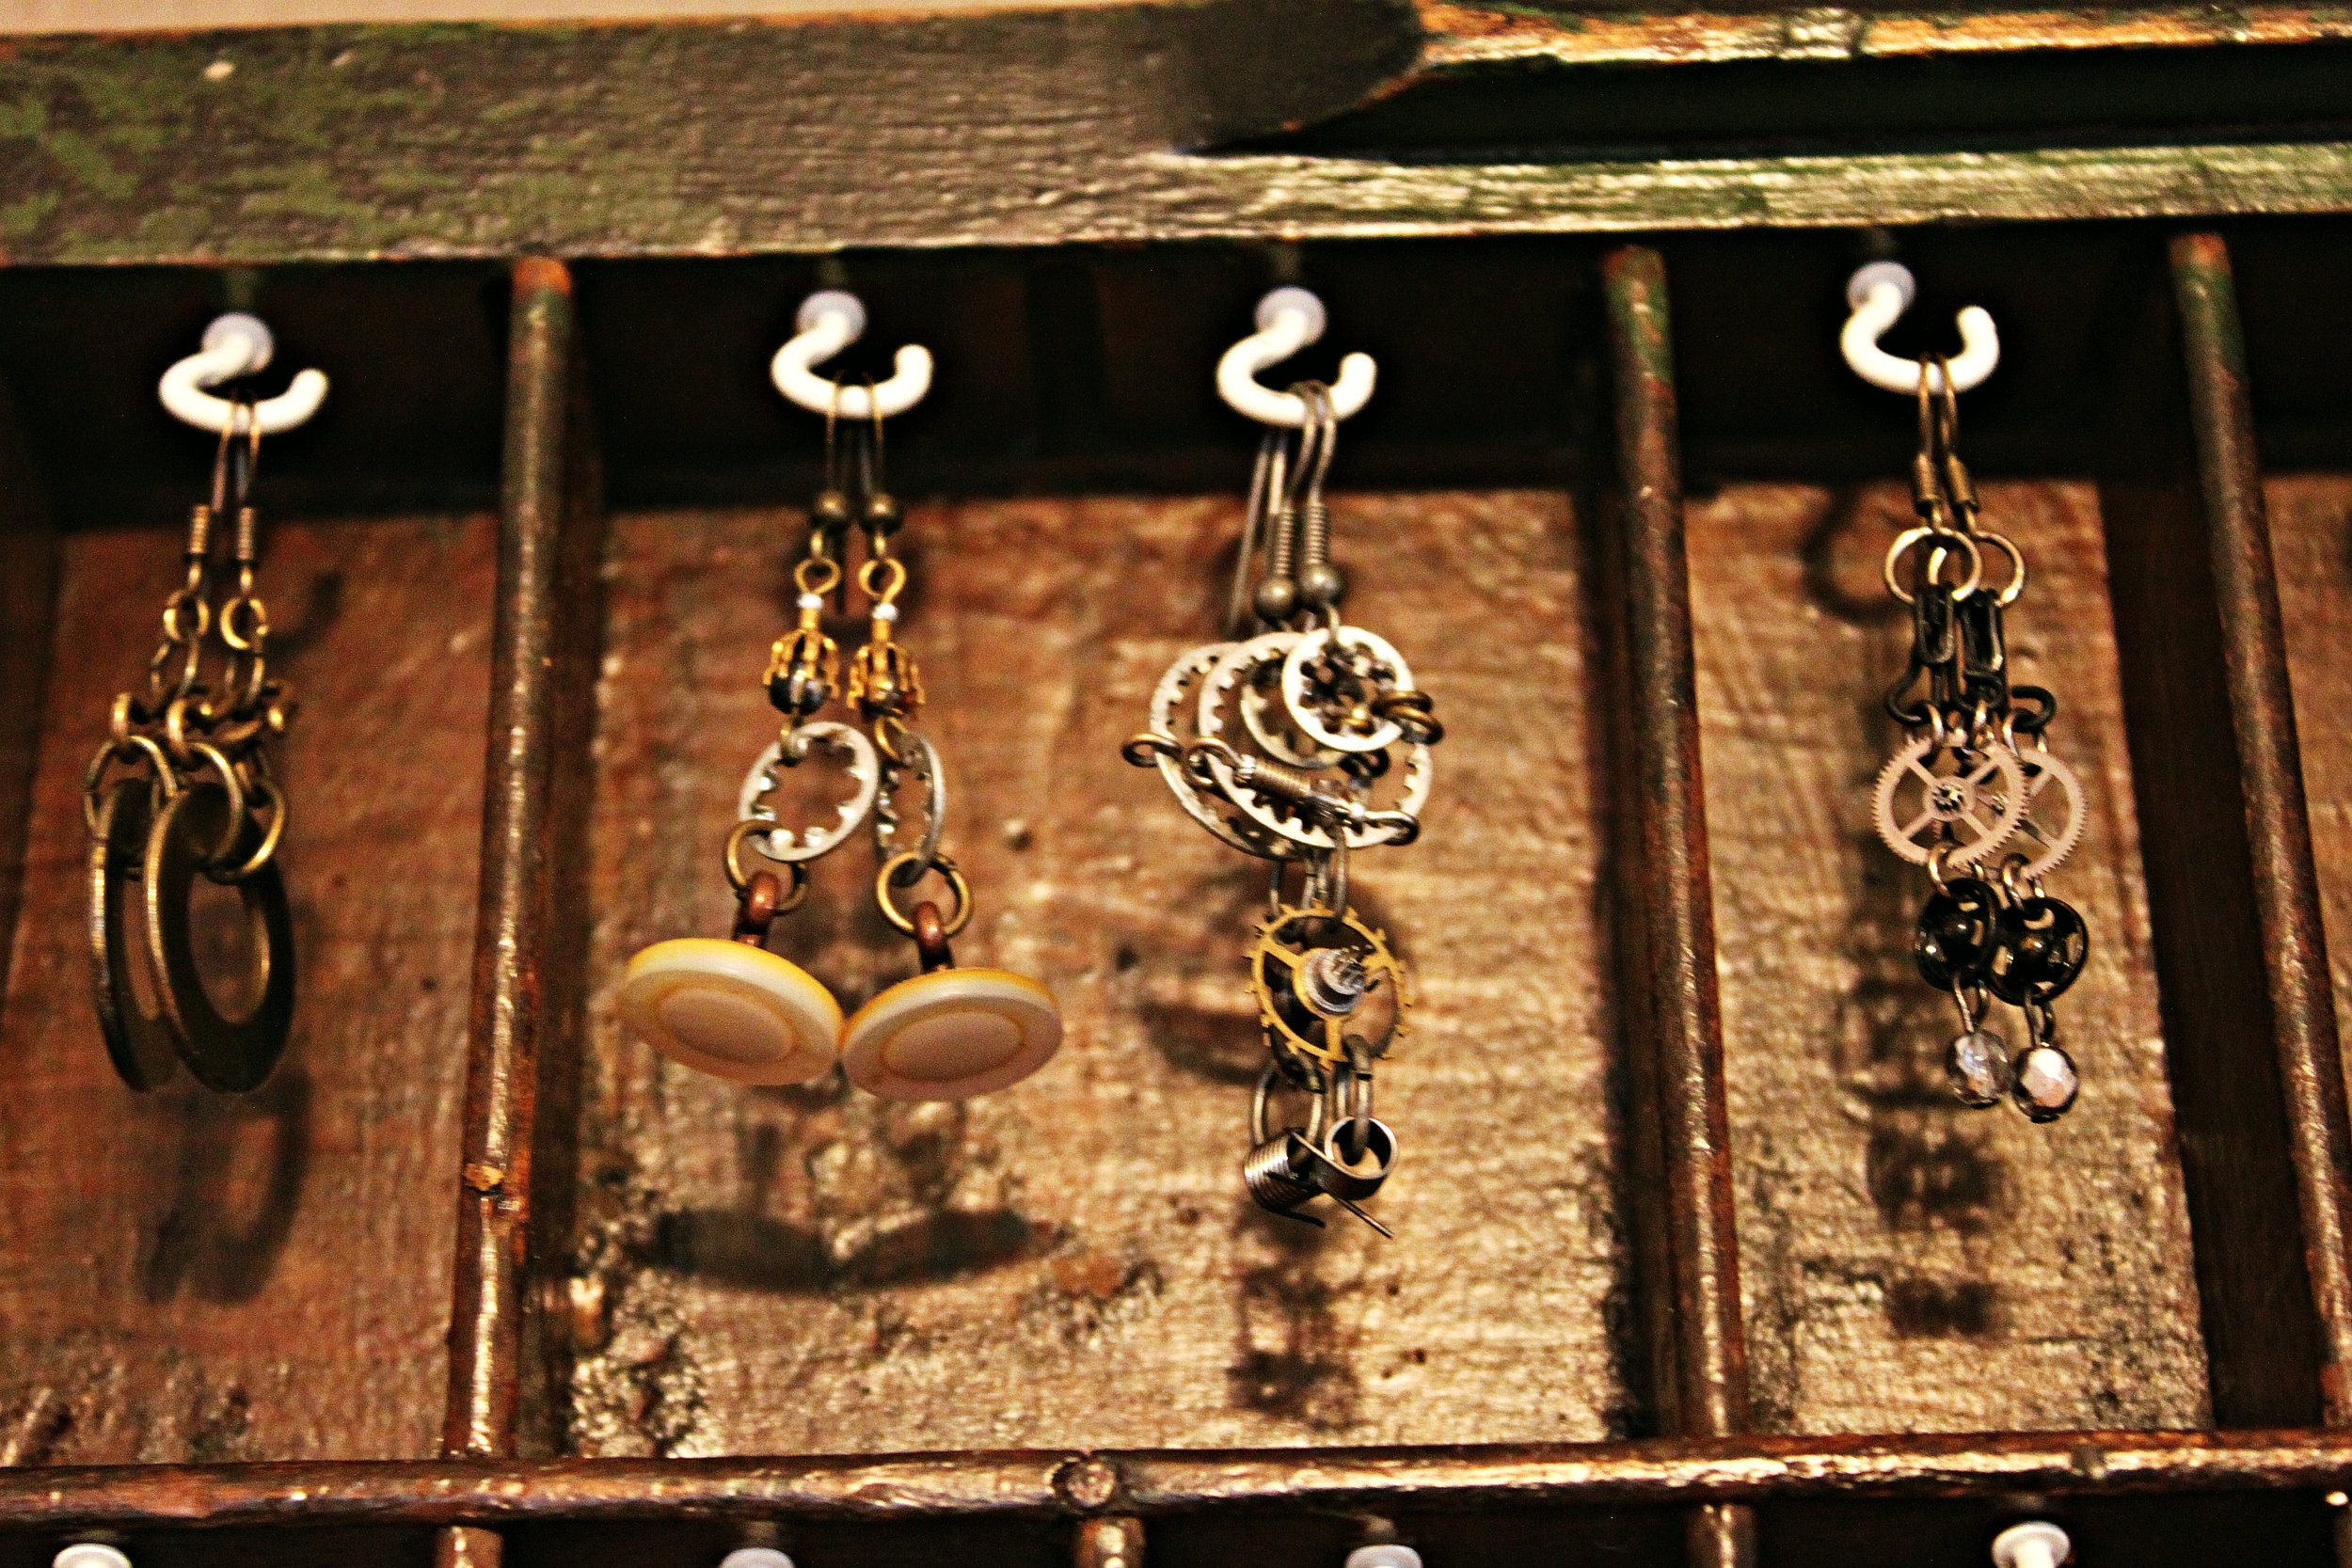
IMG_0285If you like my jewelry organizer--check out my DIY to make one for yourself! Accessorizing is so much easier when you can see all of your options at once. It also helps keep all of your earrings together, your necklaces untangled, and your rings visible.

IMG_0261I have nicknamed these earrings "Lady Lamplighter." The intricate woman holding up a fiery torch is etched in glass. It's delicate and yet still expresses a kind of strength. The glass pieces themselves are from an antique chandelier. Many of the pieces were broken--and the others unfortunately found a very creative 5 year old who painted in the ladies with crayon. I was able to salvage a few of the pieces--and made this pair of earrings. (The are also my favorite!).

IMG_0300These next two pairs I love for the same reason: they are dainty & feminine while also being primarily made of metal. The earrings on the left (my second favorite) are made with washers, nuts, and pearls. The earrings on the right are made with clothing snaps and rhinestones.

IMG_0297I kept these earrings because the process of making them was so fun! I got even more inventive and simply loved how they came out! These earrings are made with gears, spring cogs, clothing fasteners, washers, seed beads, and bugle beads. I am also someone who really loves mixing metals--the brass and the muted silver of the beads & washers is a nice mixture of tones with the beat up look of the brass.

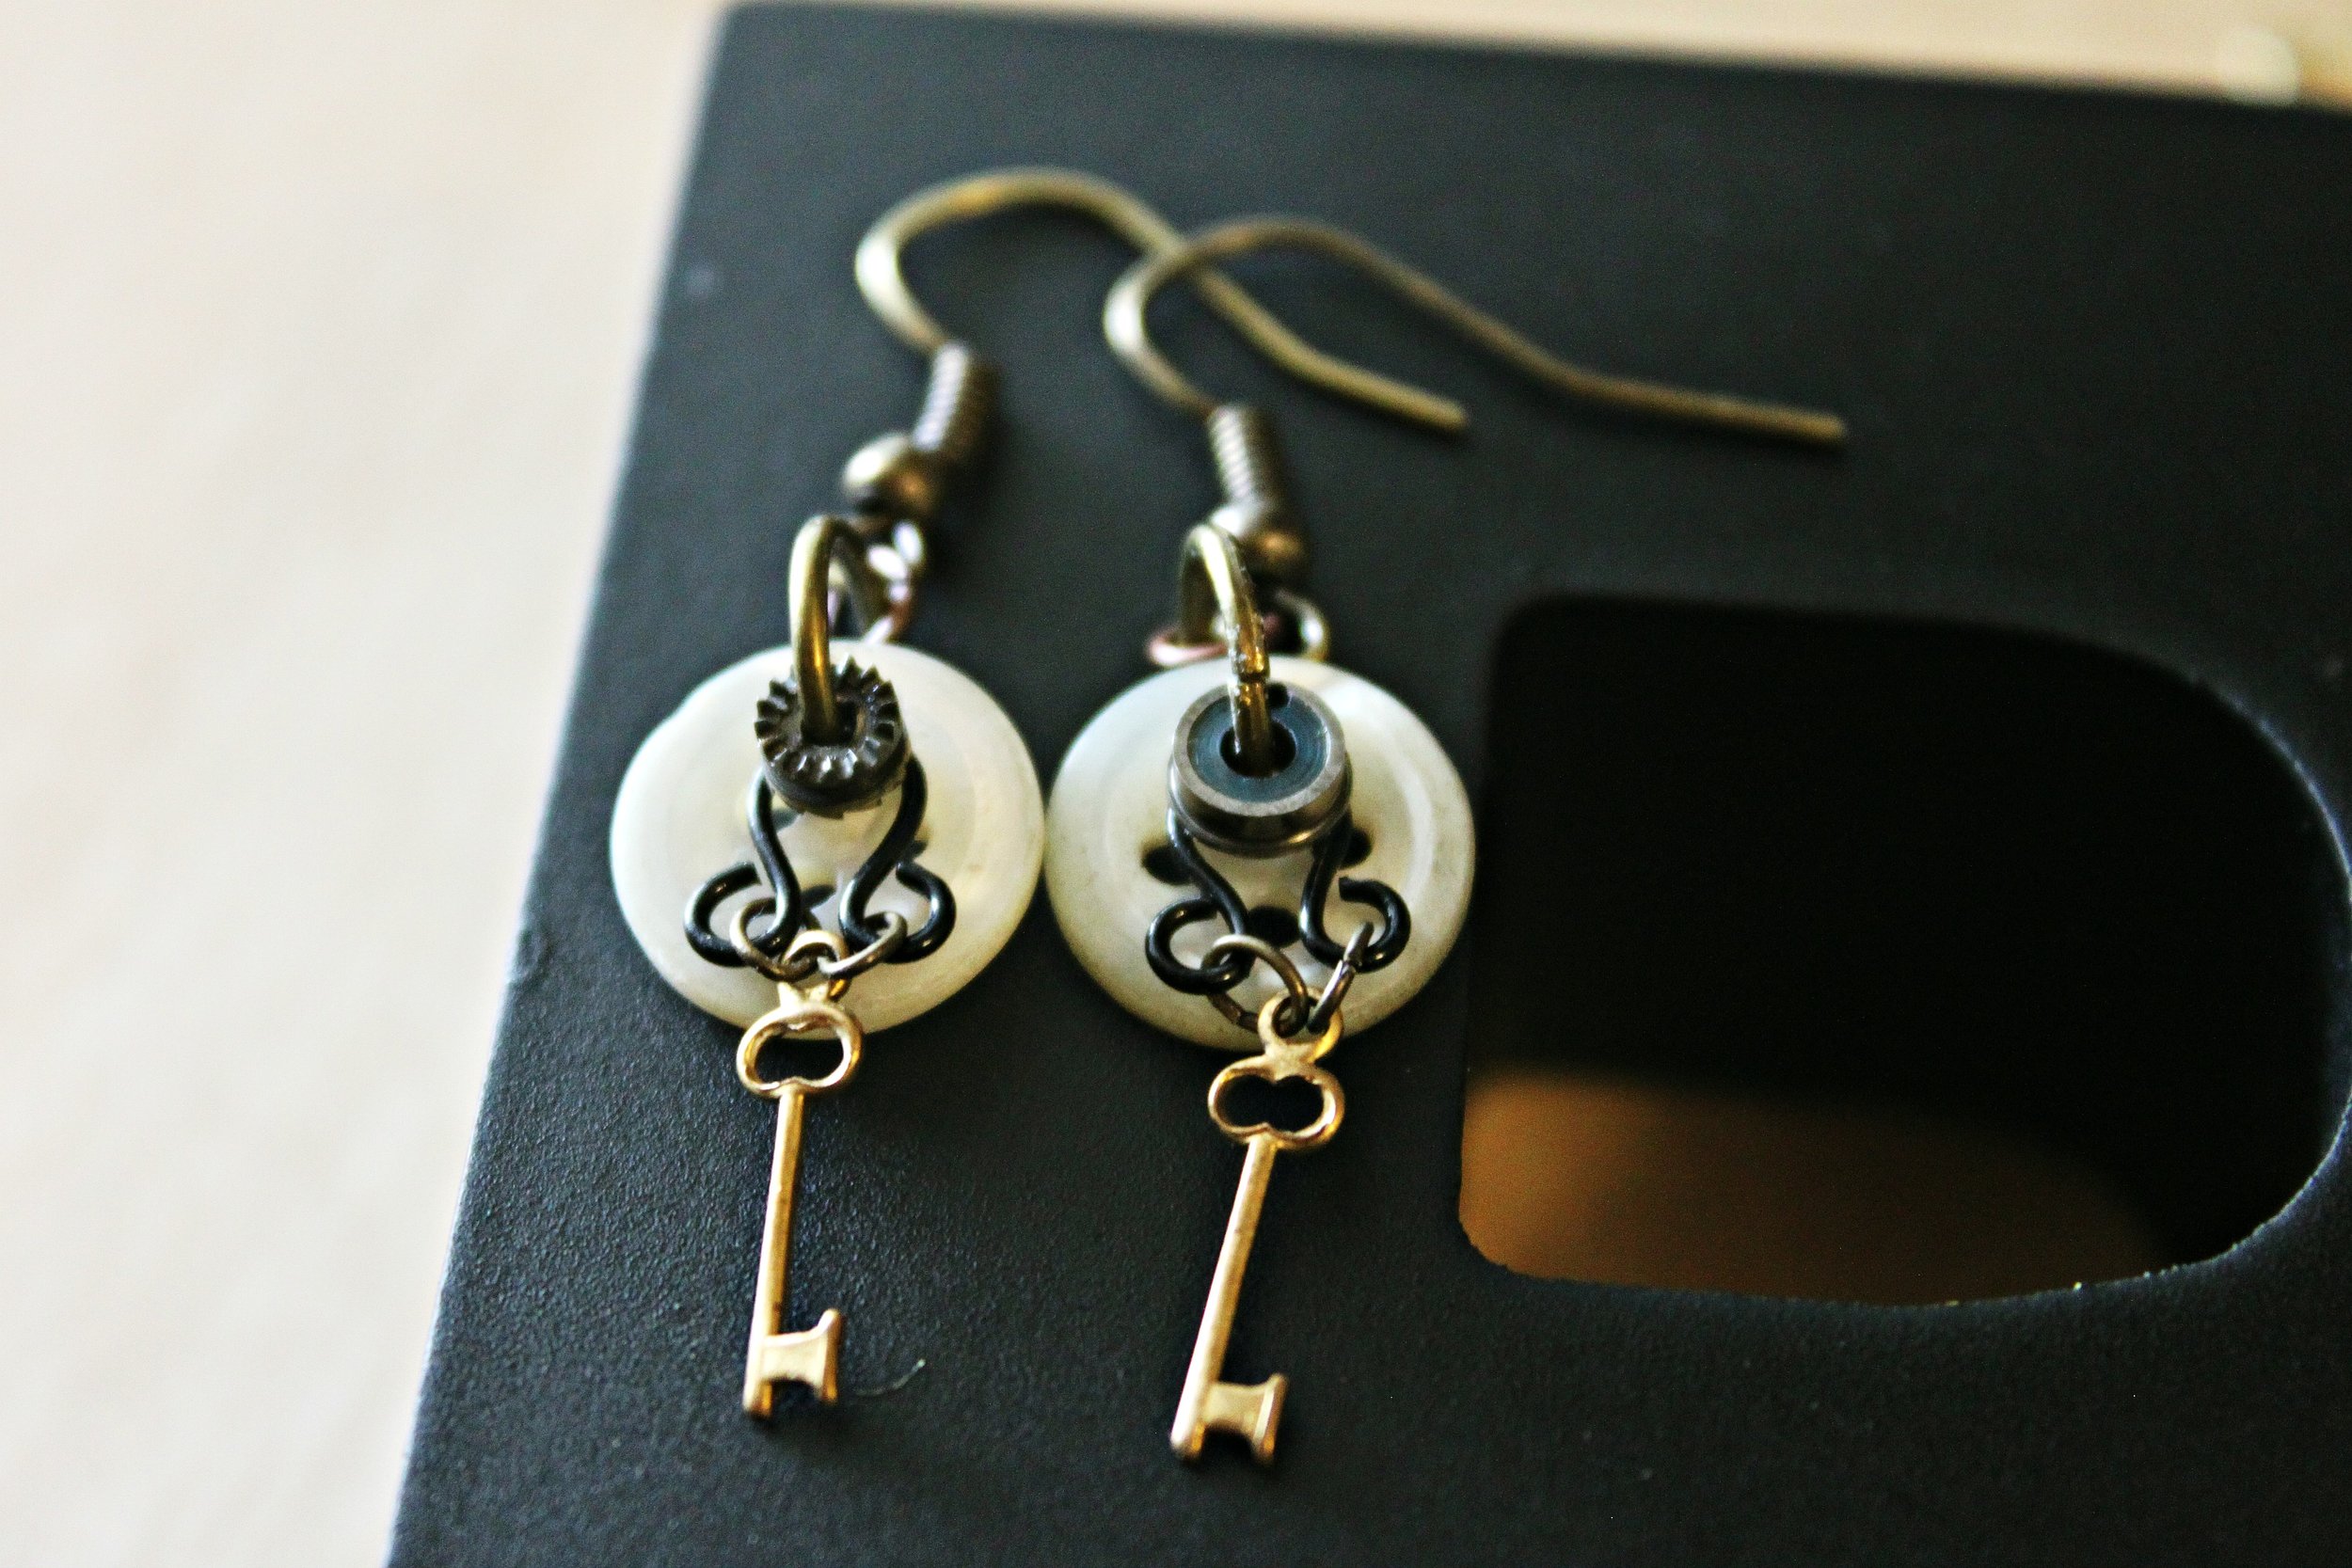
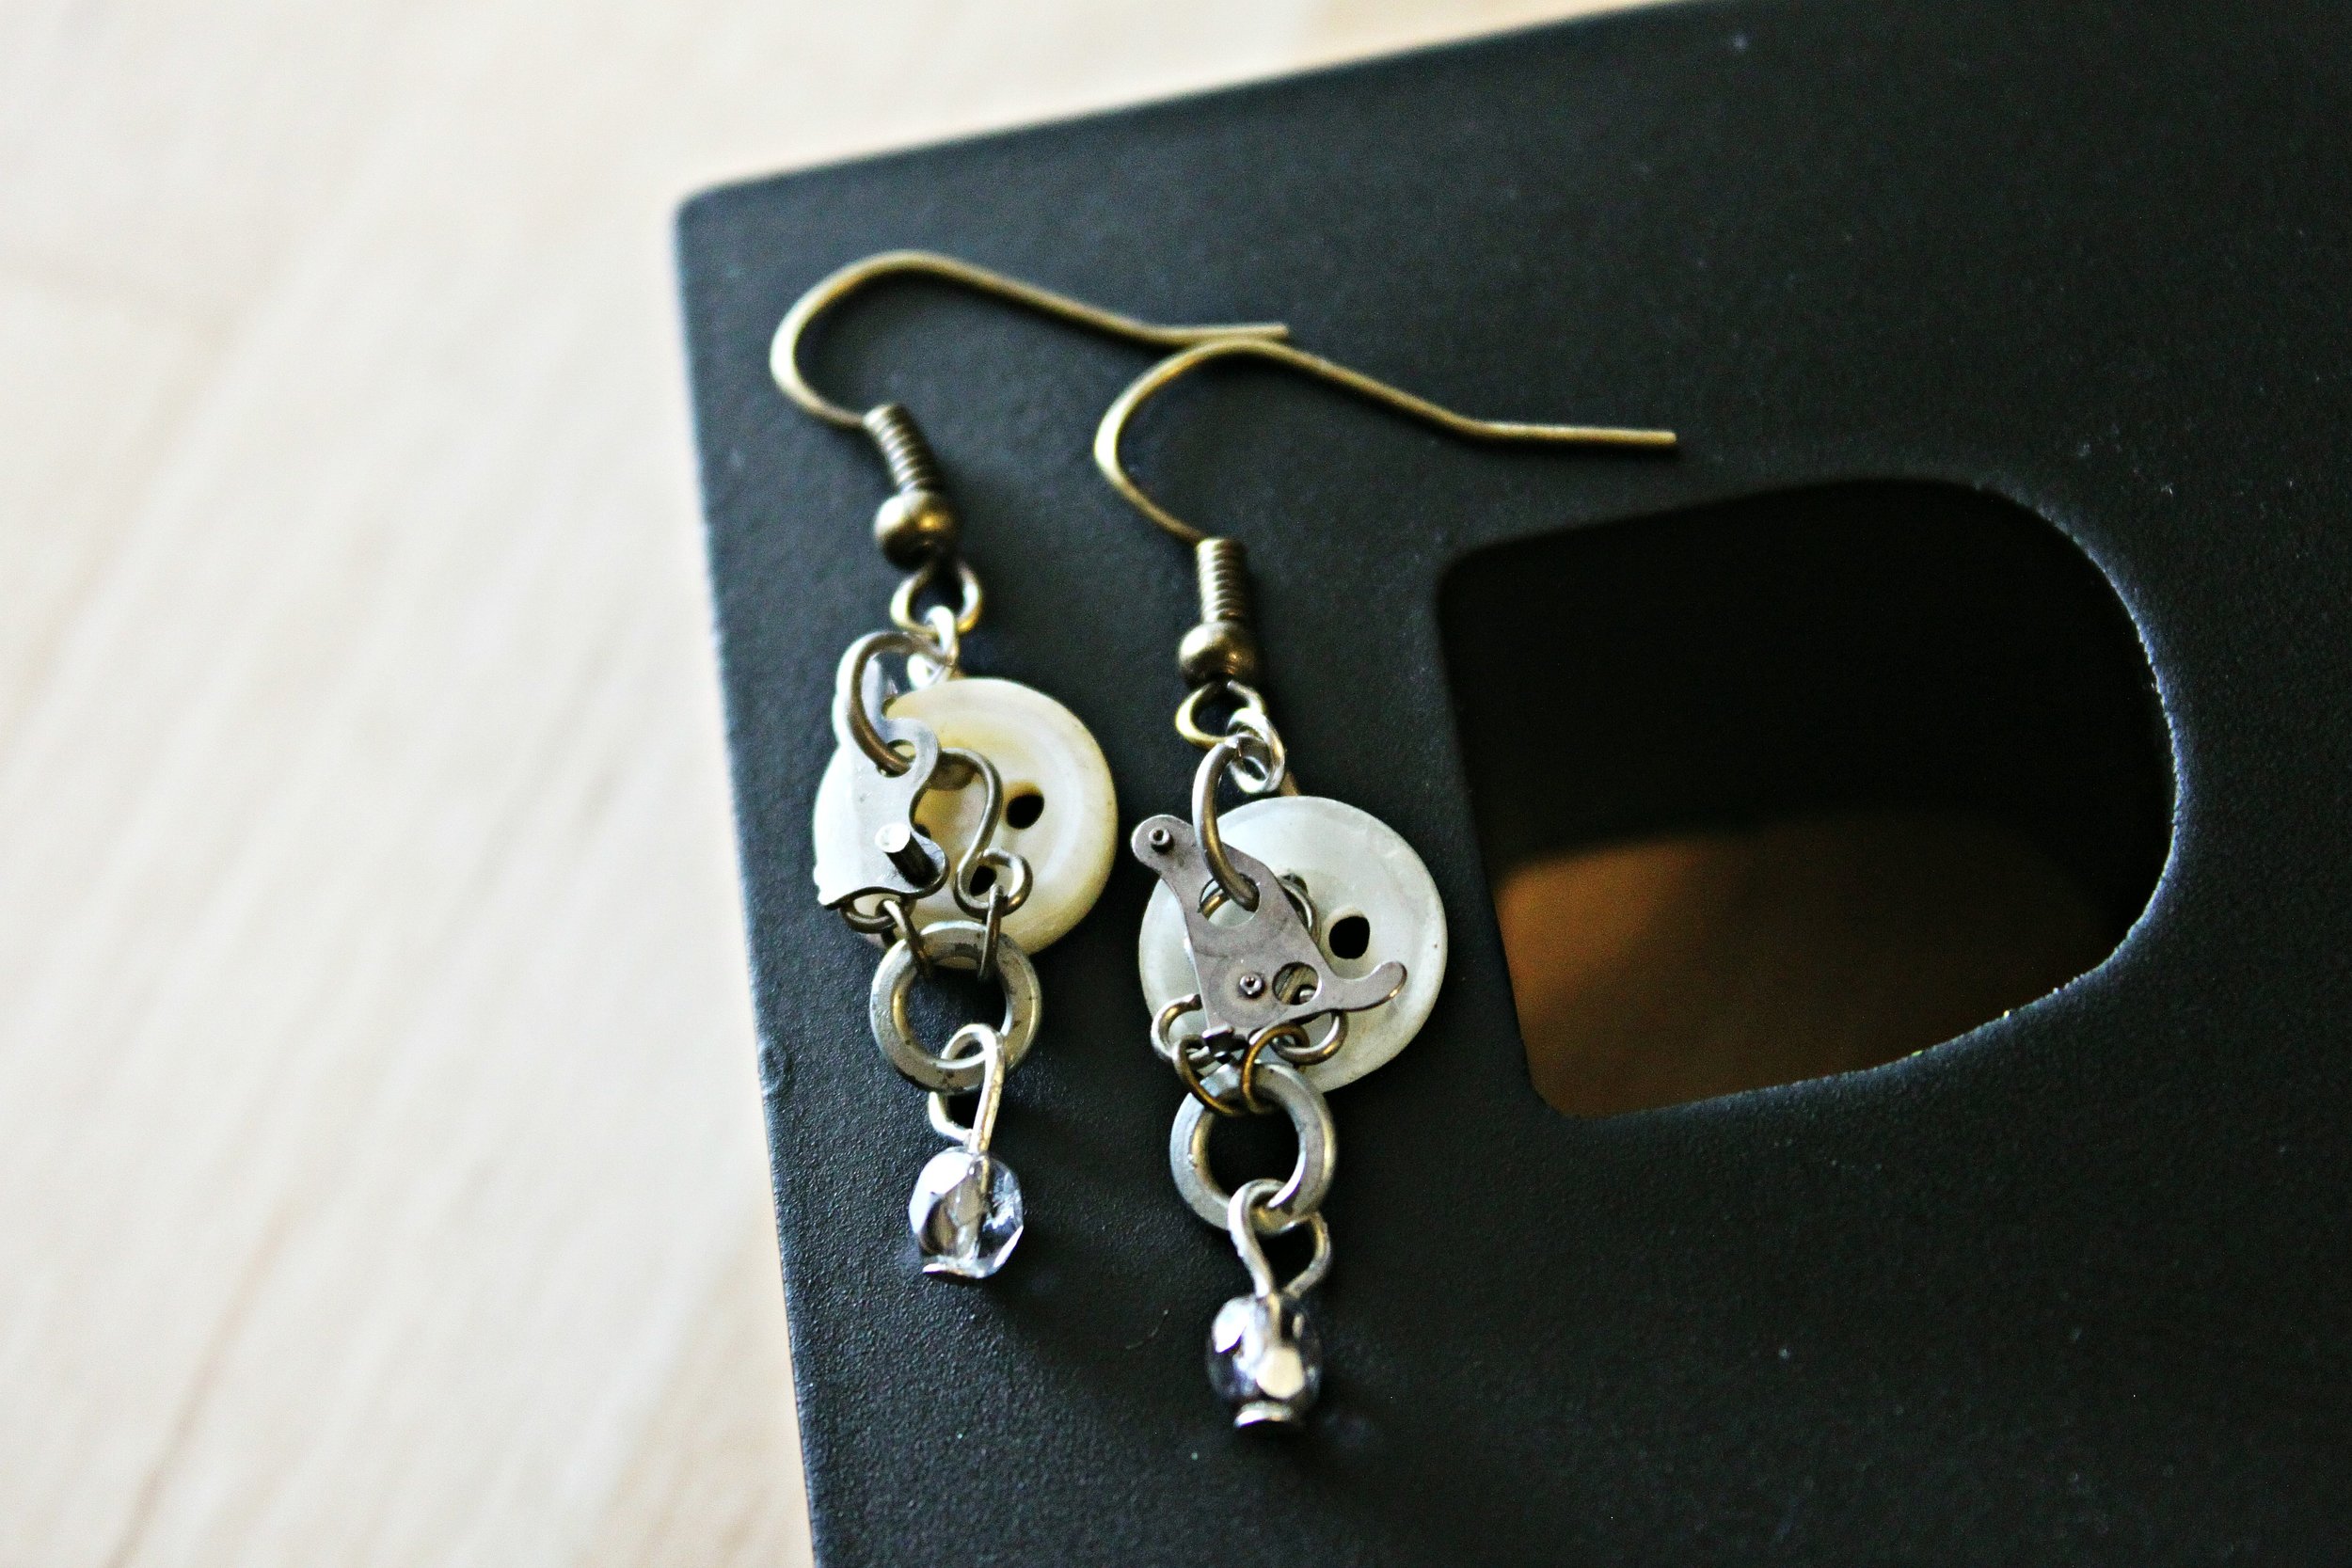
IMG_0266Here's a similar pair--one of my recent creations--made with pearl buttons, clothing fasteners, key charms, and 2 mismatched pocketwatch parts. White pearl buttons are a favorite material of mine. I love their luminescence and even when a pearl button is caked in dust or scuffed, it has a quality of richness to it. Below is another favorite pair of earrings--also made with pearl buttons.

IMG_0288To the right you'll also see a pair of earrings made with gears & old silver cameos. The cameos were originally earrings, but their studs were rusting and so I excised them to save the intact cameos & fashioned a new pair of earrings!

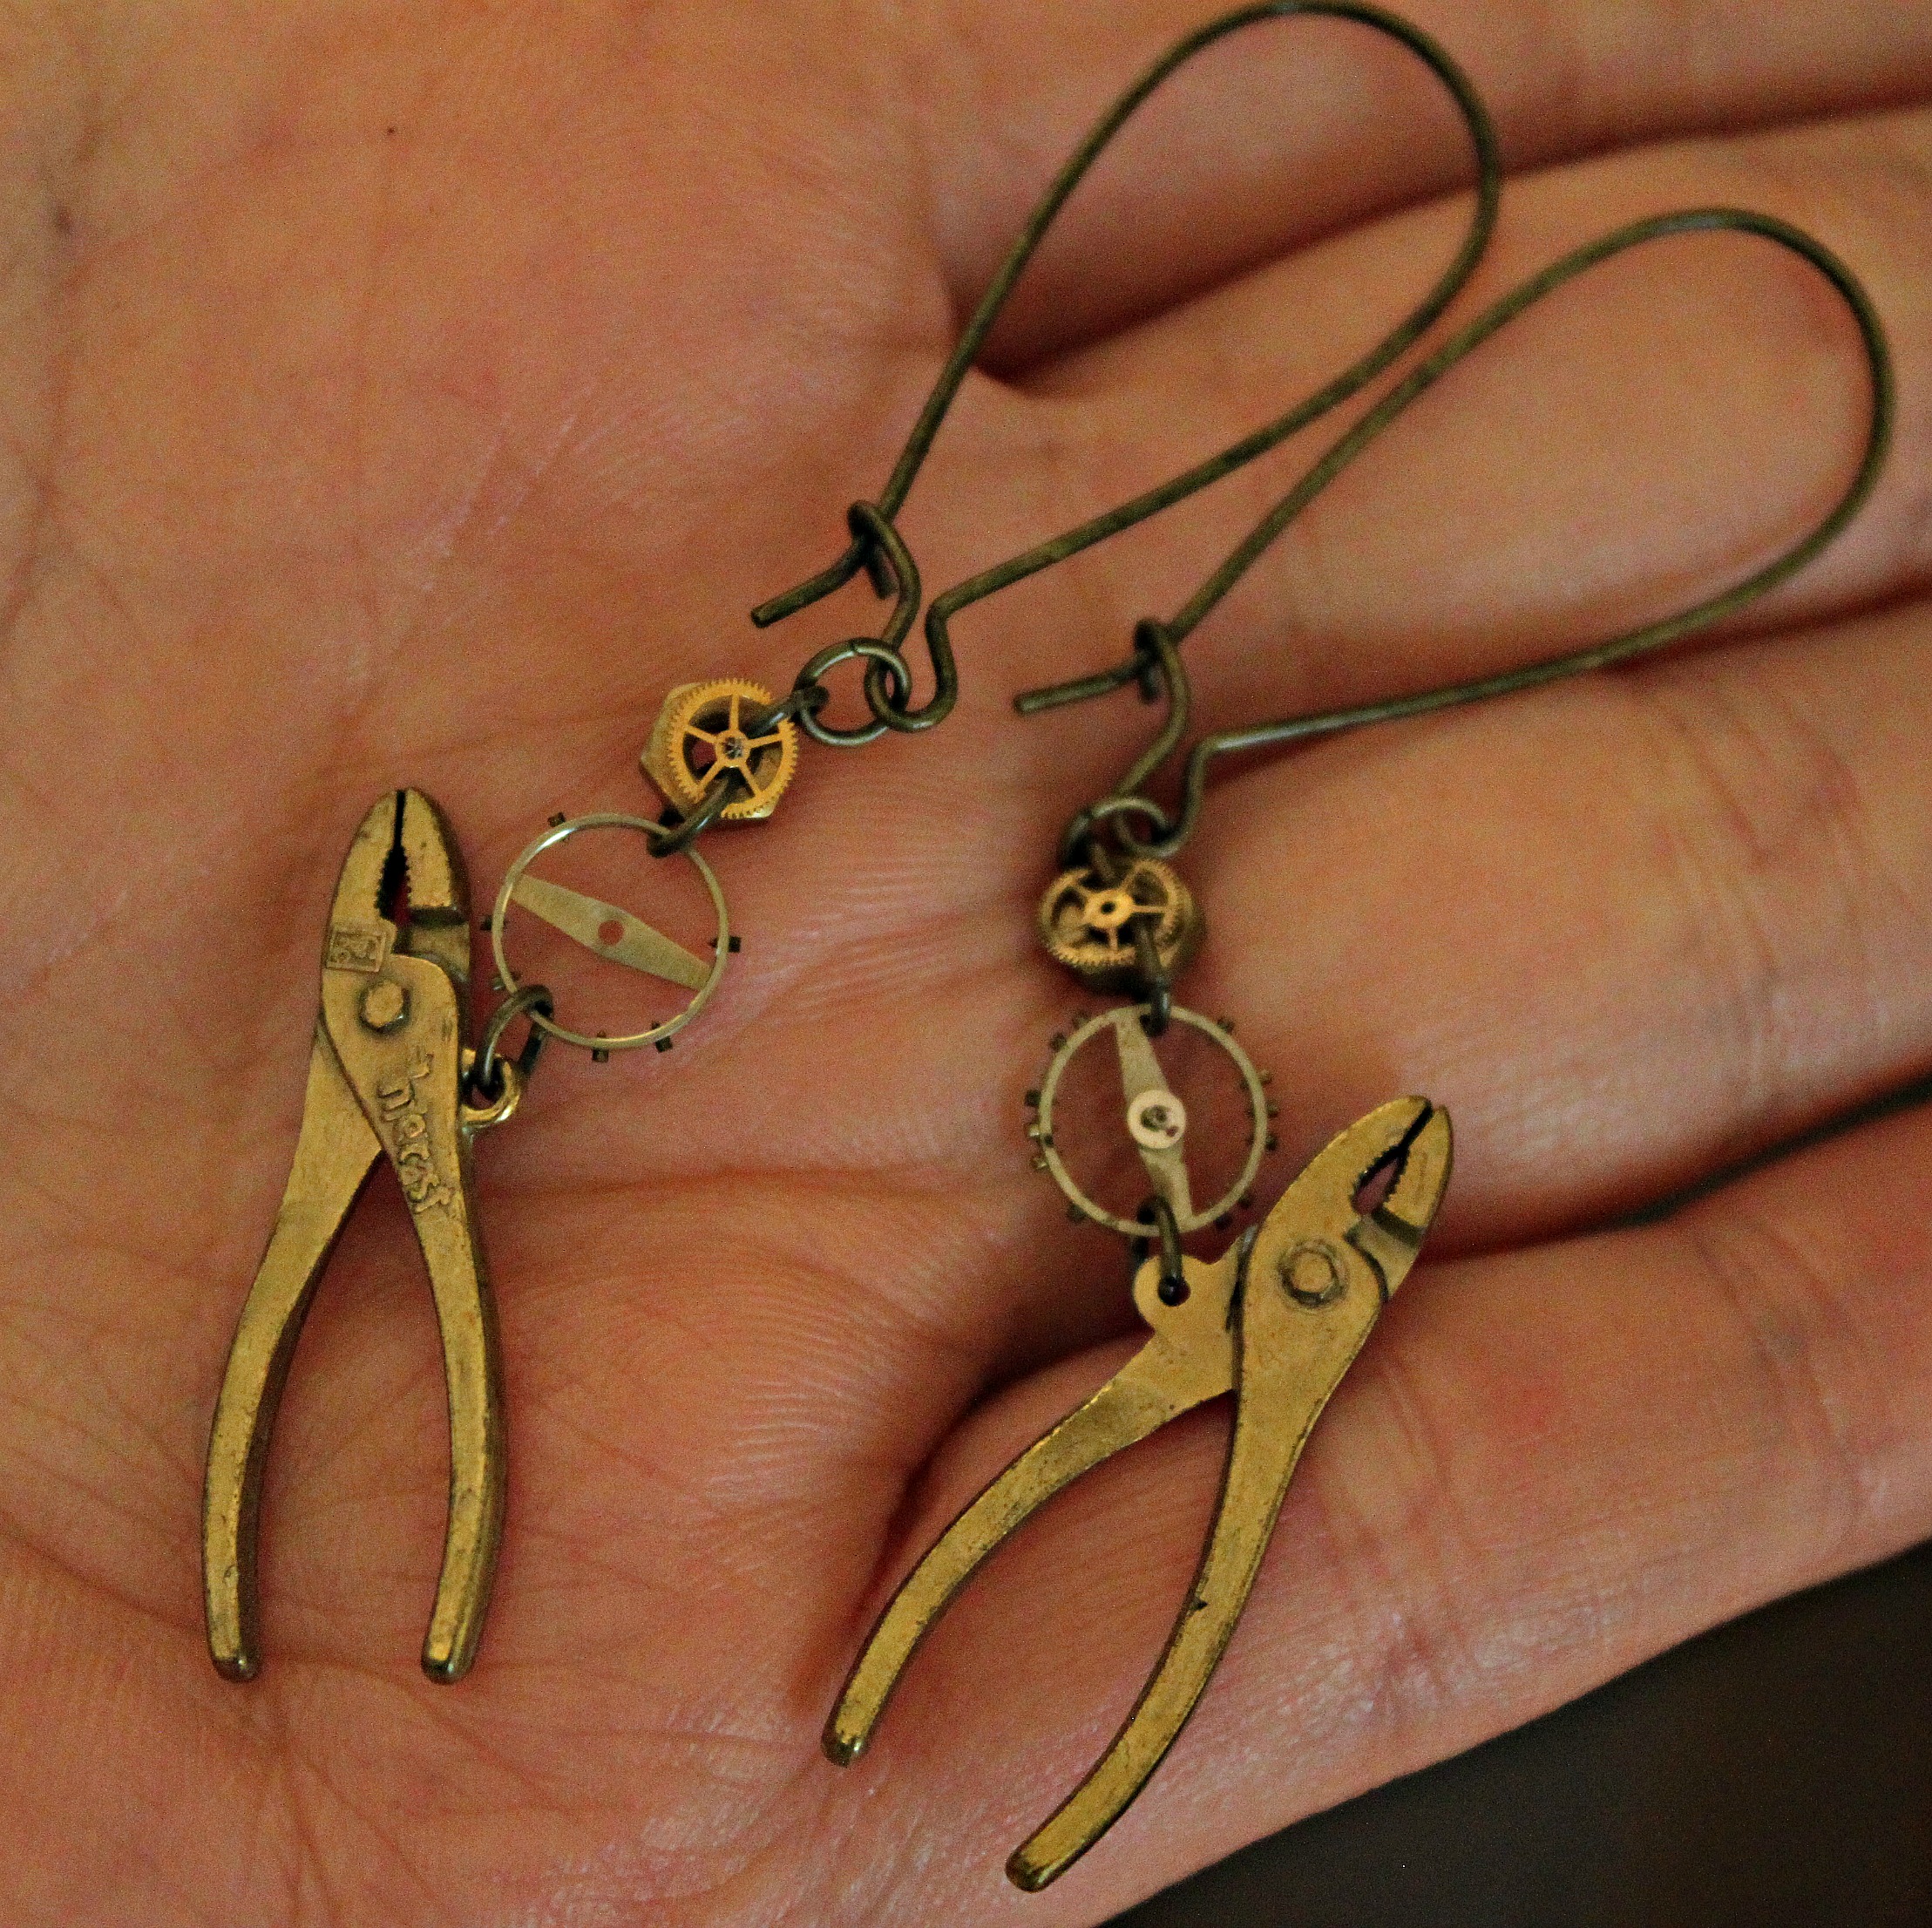
IMG_0293These earrings have a unique material--the tiny pliers. The pliers were made by the Intercast Gries Reproducer Co. as a cracker jack prize (You can read more about them here in a separate blog post.) I love how the pliers are actually functional--they open & close. I made myself a pair of earrings; especially since pliers are one of my main tools. I coupled these little prizes with gears and washers. They are a crackerjack pair of earrings if I do say so myself!

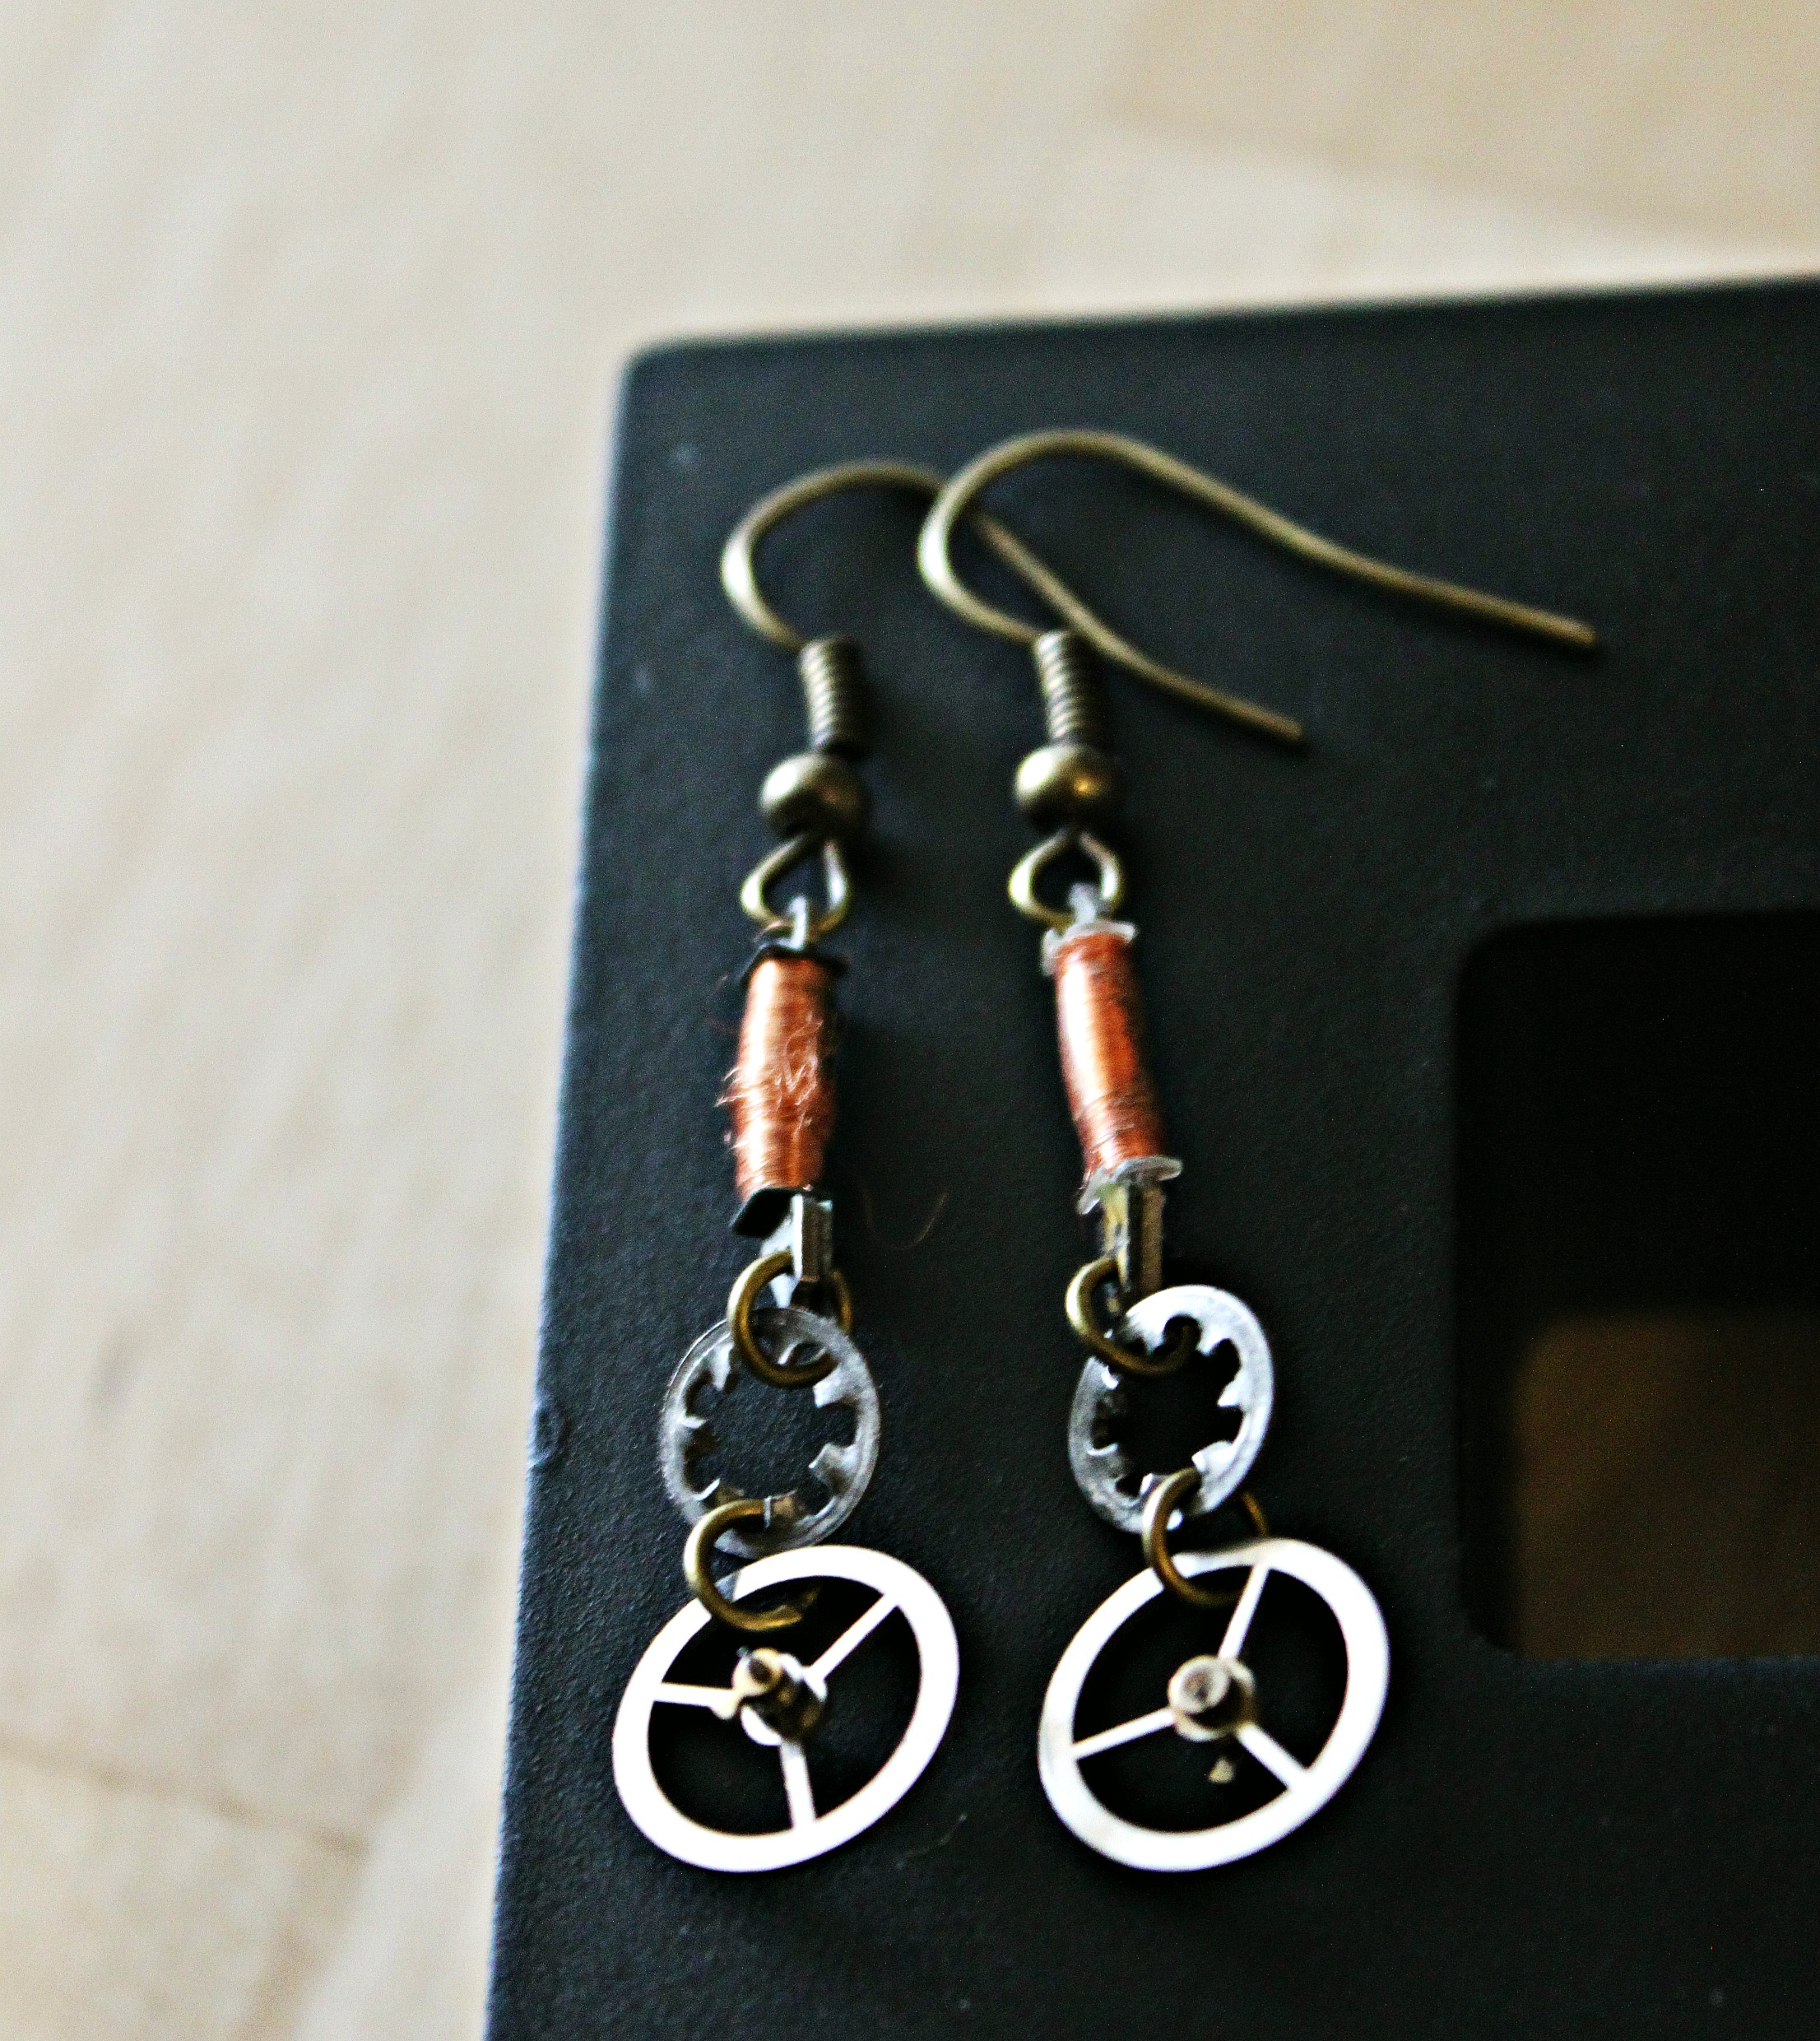
IMG_0271These earrings came together serendipitously! The bronze looking piece at the top of the earrings is actually a metal plate piece that unscrews out of a tiny alarm clock. The bronze colored substance around it is wire. I came across one of these little pieces over a year ago and placed it on my studio table to "percolate" until I figured out what I wanted to make with it. Then a few months ago, I bought a jumbled box of junk at a flea market and inside I discovered the piece's twin! I love it when that happens--and it happens so rarely that I find an exact match.

IMG_0302I've come to think of these earrings as my Steampunk Christmas Earrings--because of the jolly red of the crystals. What many of you might not know is that I also use primarily upcycled & salvaged beads. I source them from damaged jewelry (or stupendously hideous costume jewelry), flea markets, and crafty swap-meets.

IMG_0269  IMG_0275  IMG_0282  IMG_0286

These last two pairs of earrings are made with a rare material--and one that recalls a most beloved memory. When I graduated with my Masters in English, my mom and I took a trip to Paris to celebrate. My mom had never been out of the country before and I couldn't be more excited to share in her first European adventure. It was a week filled with art, fresh French pastries & desserts, wine, conversation, and above all--junking! My mom had mapped out a Parisian tour of flea markets, little scrap shops, and jewelry boutiques. At the flea market, we ambled along & found a great many treasures. One of which were these gold filigree pieces. I used them to make earrings for the both of us as a reminder of our trip.

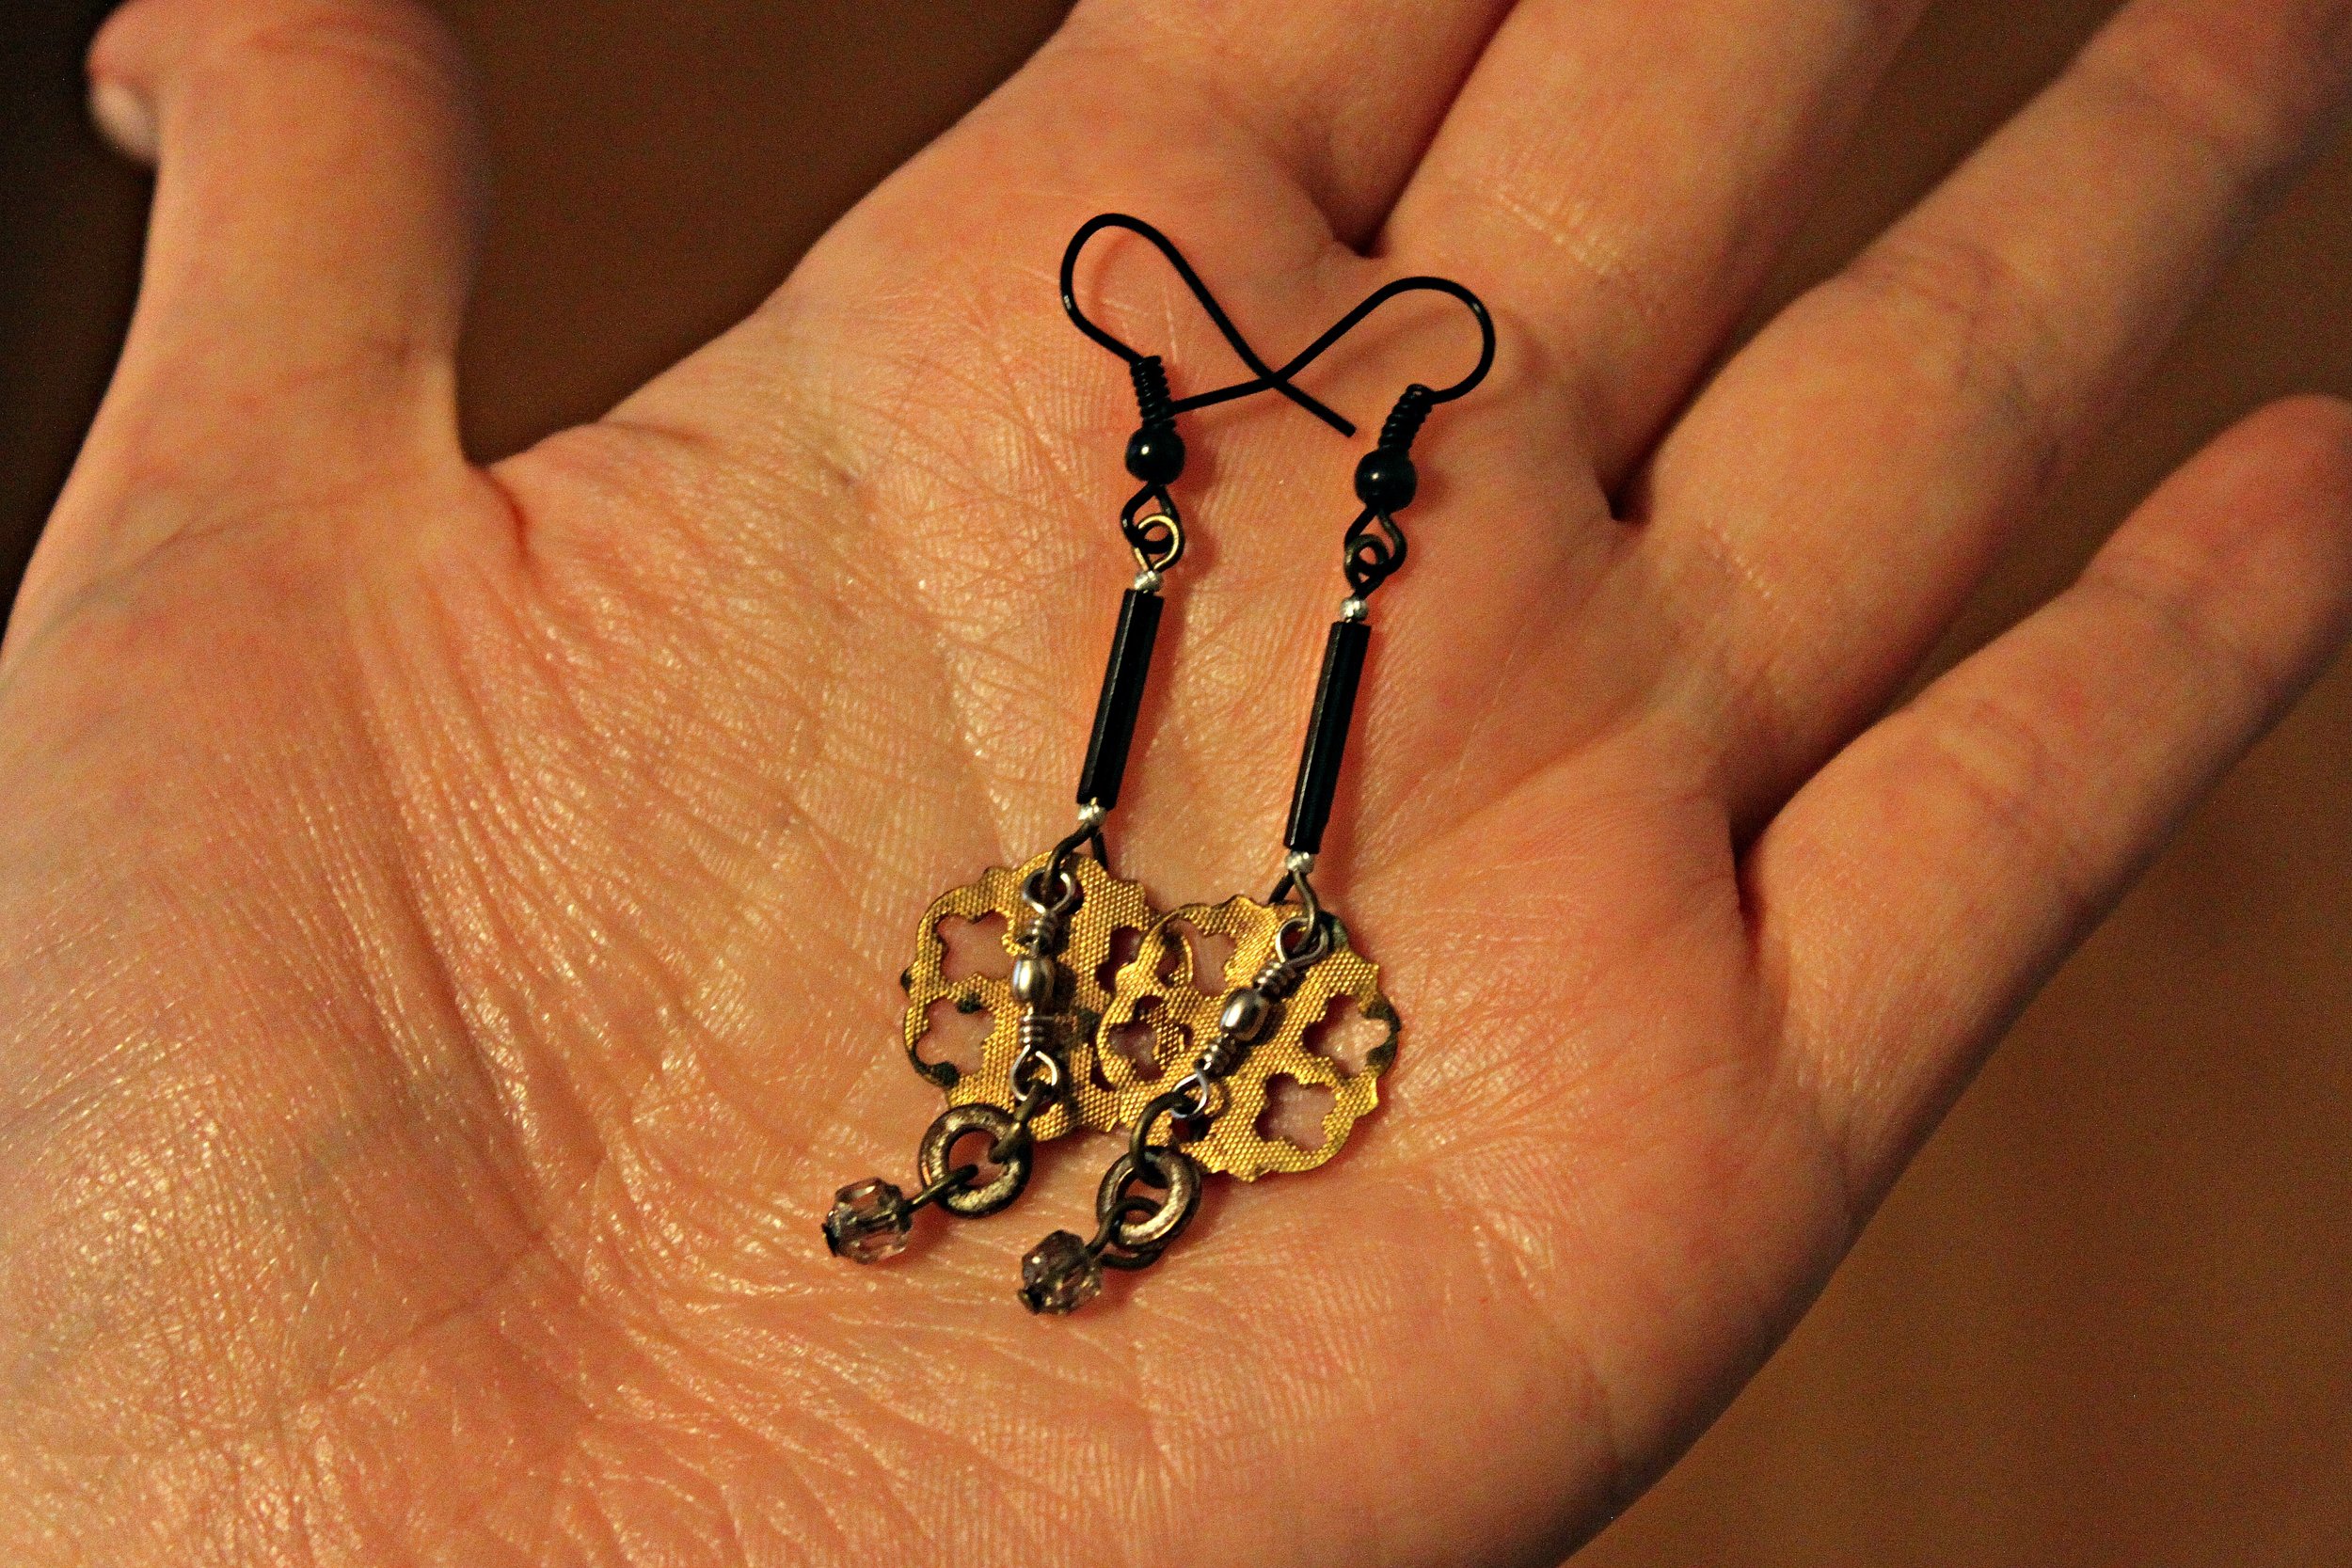
IMG_0299  IMG_0298Both earrings have a similar color palette--black & gold. The first pair I made with bugle beads, seed beads, washers, Austrian crystals from a family necklace, swivel clasps (another fave material), and finally the beautiful gold filigree piece from Paris. The second pair are a little fancier & bolder. These are made with clock hands, clothing fasteners, black jet beads, and the Parisian filigree piece. Every time I wear these earrings, and my mom wears hers, I am reminded of our many junk jaunts around not only Paris, but the Northeast. I am so lucky that I have someone to look up to--a dreamer, a giver, and a maker!

Hope you liked seeing these pieces! What's your favorite pair of earrings? Do they tell a story? What about them do you love?

A Good Day of Junkin'

UncategorizedSamantha Extance2 Comments

One of my favorite things about summer is all of the estate sales, garage sales, & flea markets! With the warm weather, there are almost an infinite number to choose from. Today's estate sale held so many wonders: tall intricately carved wooden grandfather clocks, delicate handkerchiefs & handmade napkins--carefully embroidered, Art Deco furniture that beckoned me way out of my price range, antique French books with marble covers, and so much more! I came away with a few treasures--things I could not put back once I had stumbled upon them. Here's my haul for the day: mirrorAn iron mirror--it's a sturdy little thing! My arm my shaking after holding it for an hour. I was drawn to it because of its marvelous pedestal bottom and rose & leaf pattern. It was a steal for 24.00! It's also one of those items that instantly transports me to another time. It feels possible to look into the mirror--and instead of my 2014 reflection to see a Gibson Girl staring back at me!

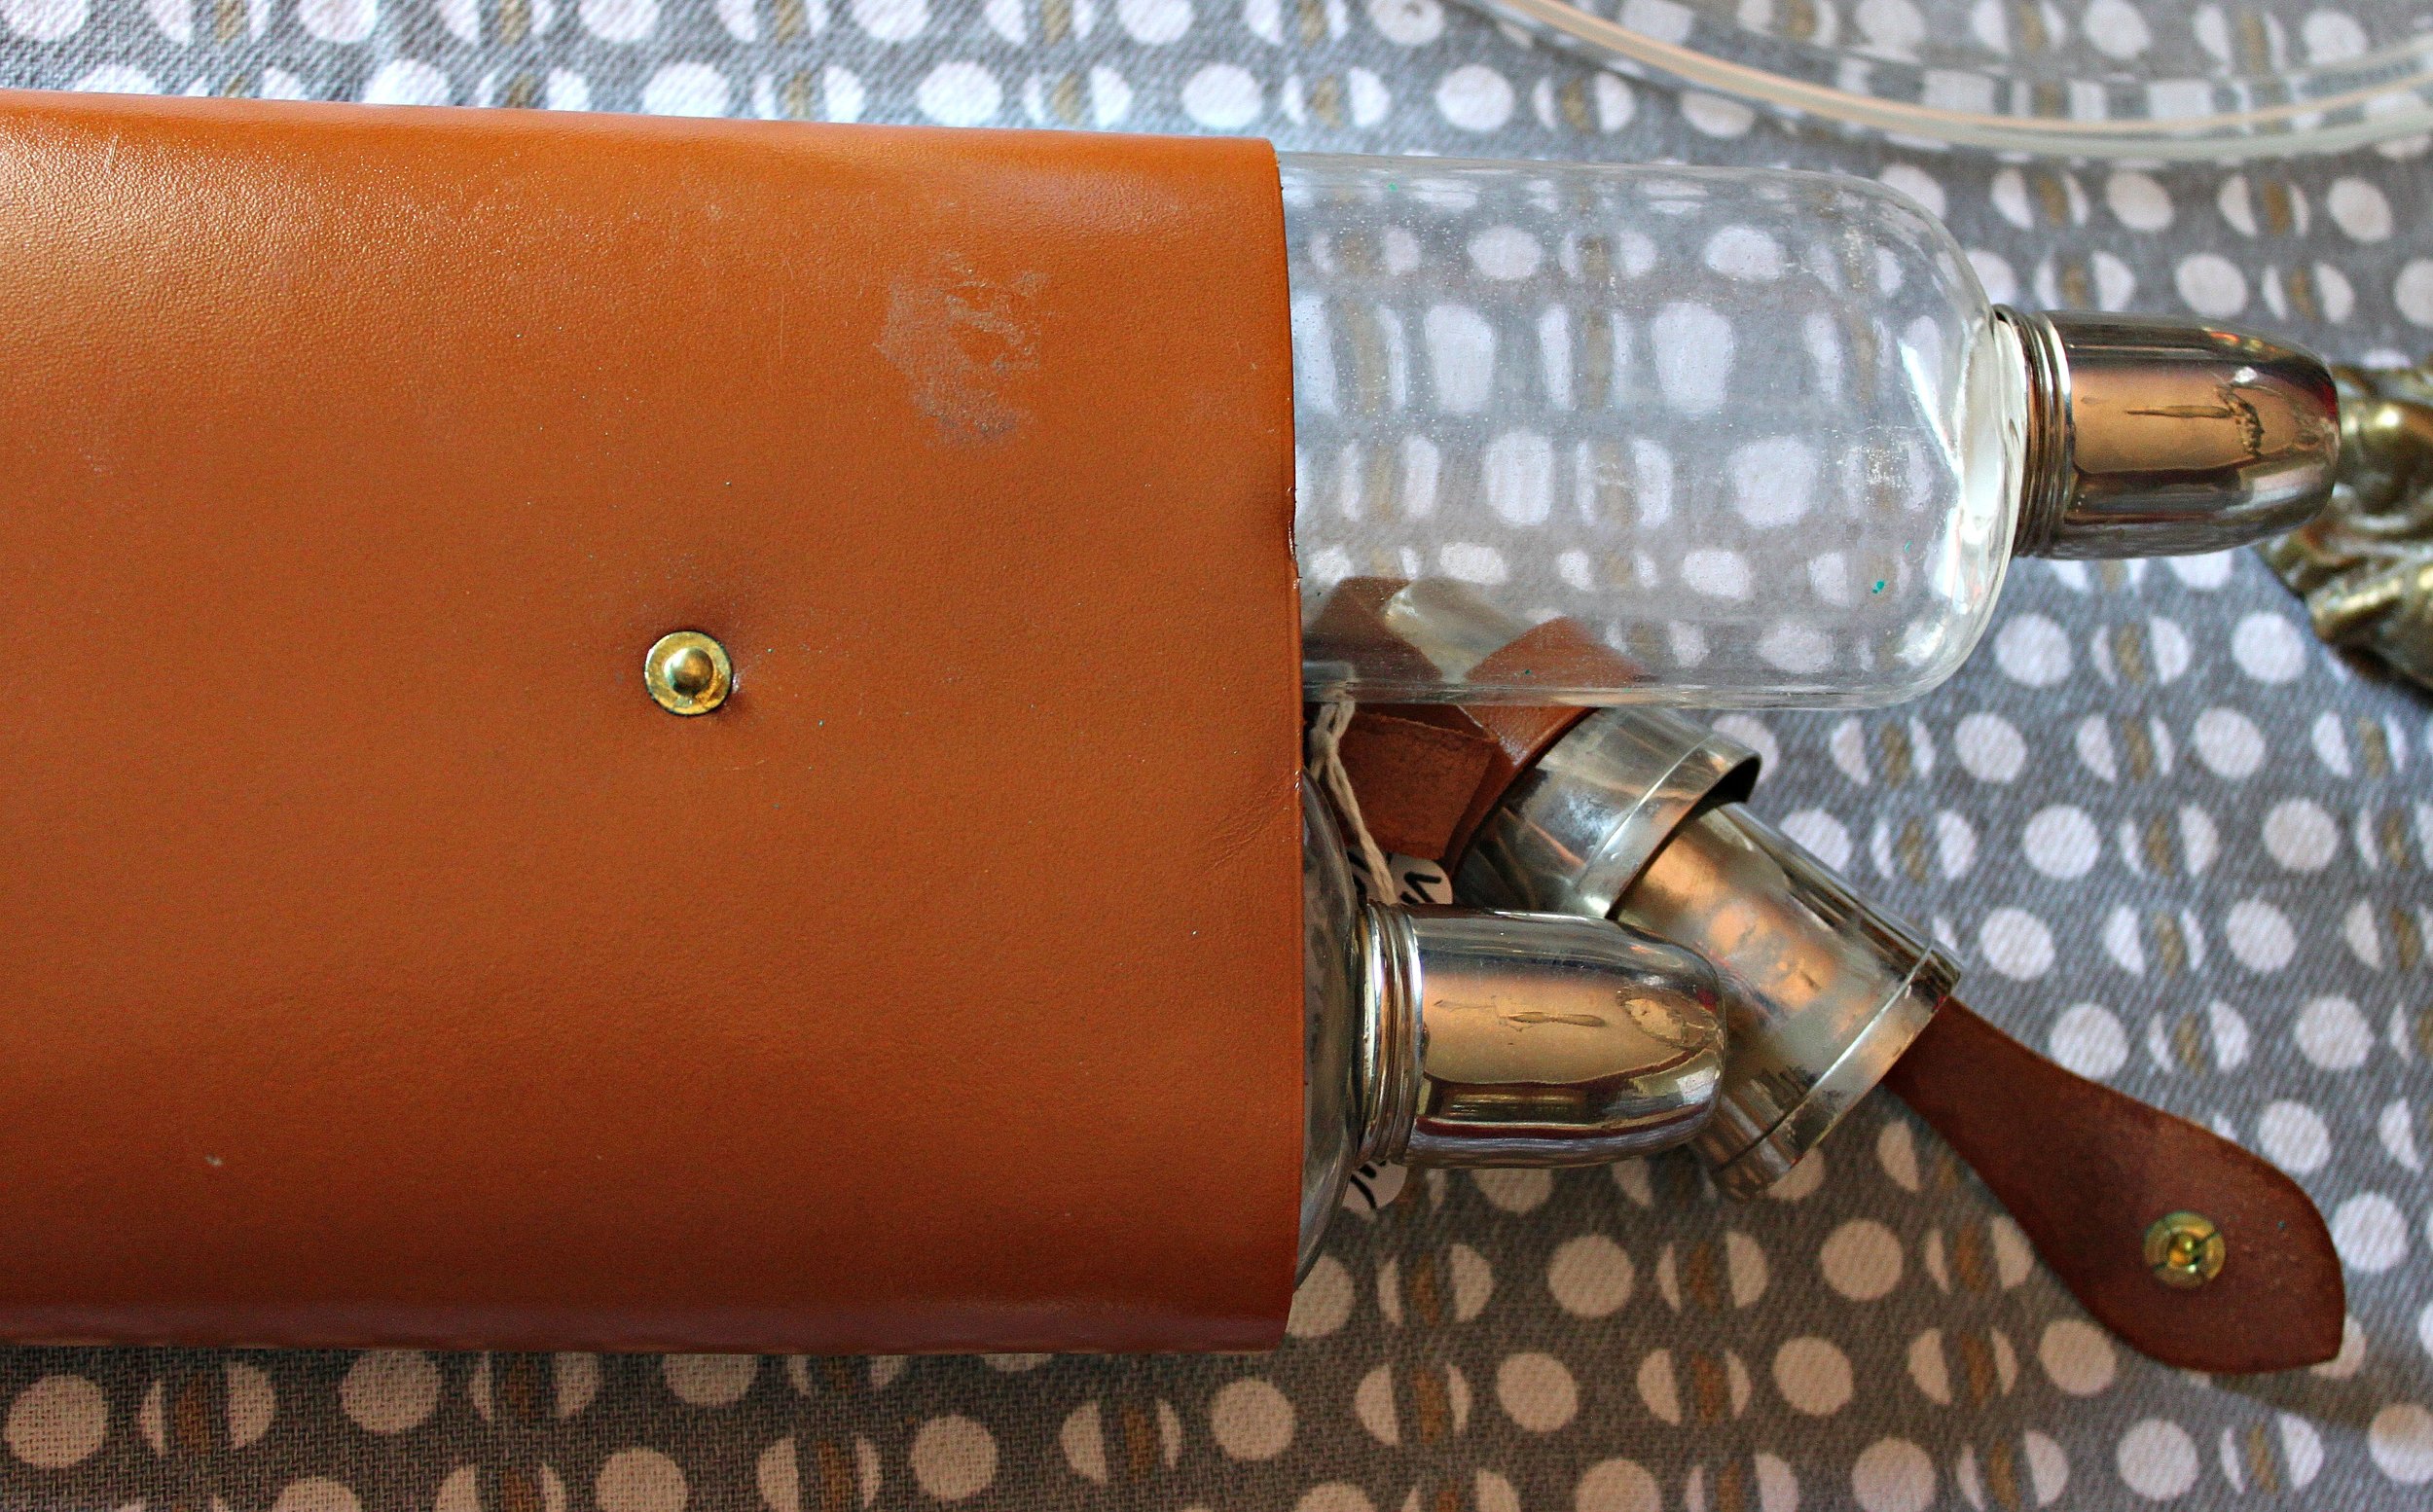
flask 1My favorite find of the day was this flask. The flask itself consists of two long skinny bottles to hold your liqueur and two metal drinking shot glasses. The leather case makes it even fancier. I can't wait to clean this up a little and steampunk it! (Only 18.50 too!) Here's a close up of the flask:

flask 2The flask bottles themselves are so nice--You could easily fill one with your spirit of choice, and the other with something to mix it with! I had never seen a two bottle flask before--so this was a real treat to find!

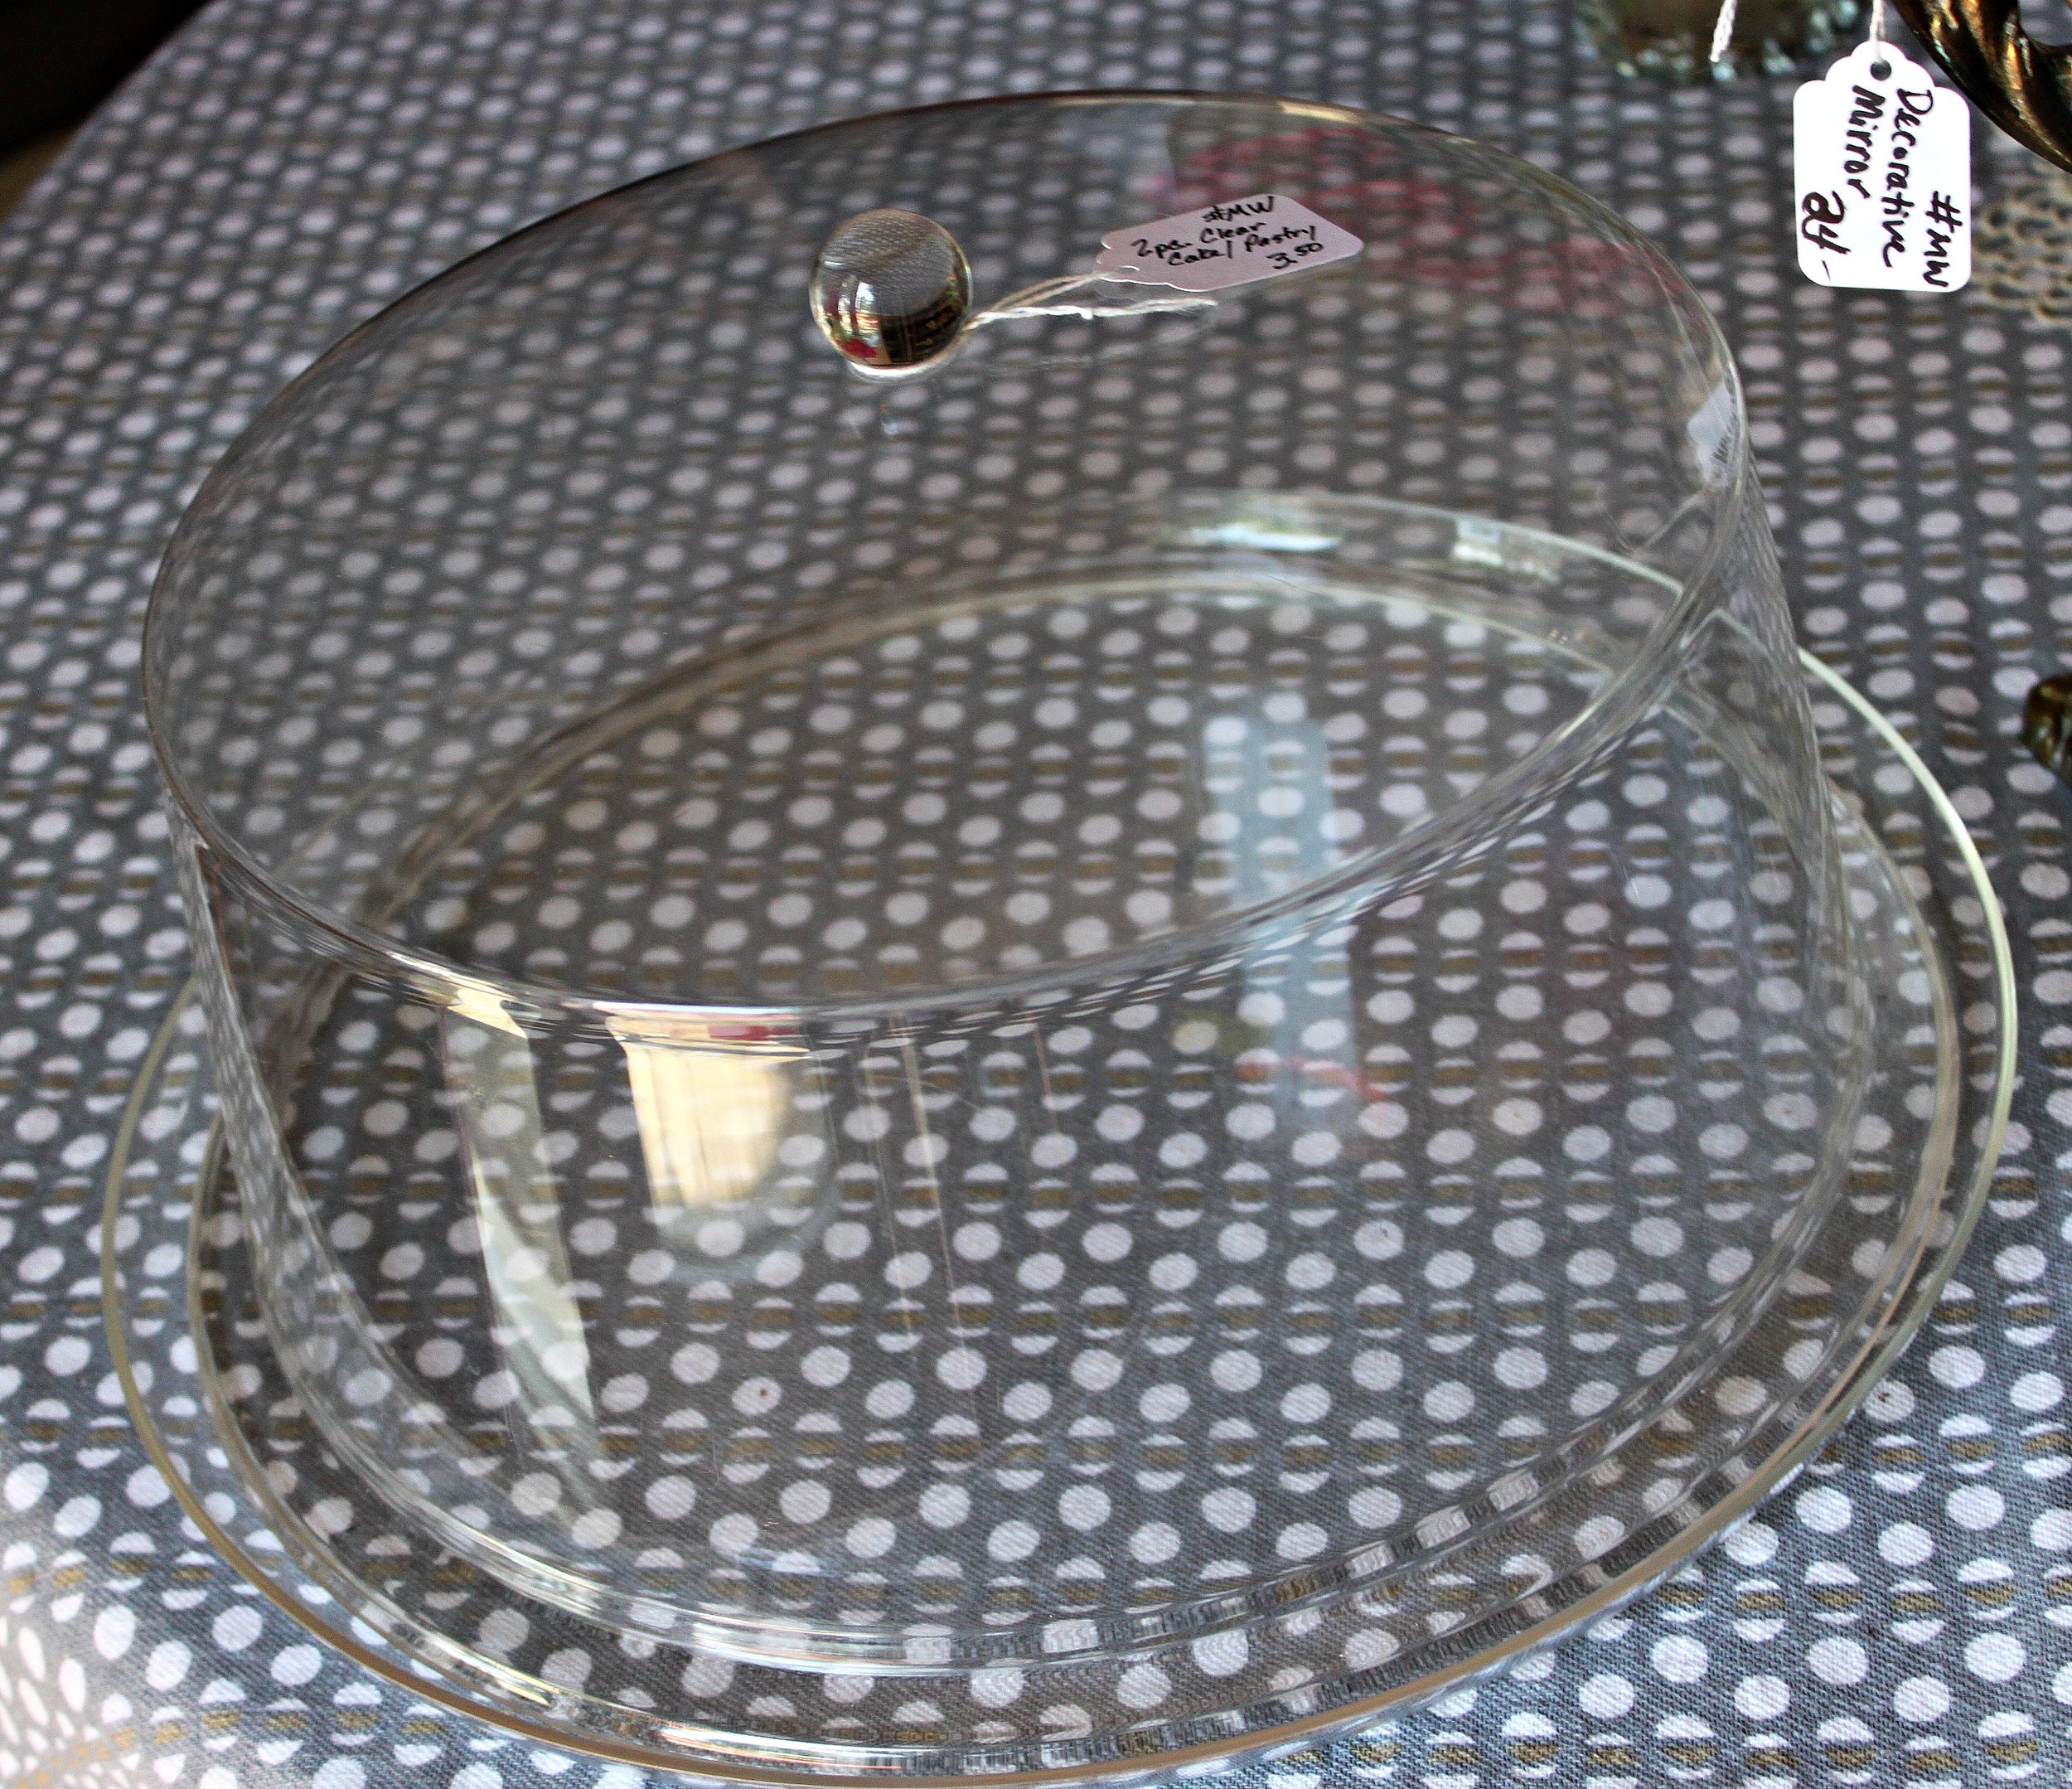
cake standI also found a cute plastic cake dish complete with cover. It looks like glass! Everyone I passed chided me on how carelessly I was carrying it (under my arm) until they learned it was only plastic. That made me feel even better about my purchase. Got it all cleaned up and I am currently waiting for a cake to cool so that I can frost it and use this baby! My final purchase is my second favorite find of the day: a kitschy child's clothes hanger decorated to look like a friendly lion. This is going to be a gift for my cousin Becca and her husband James, who are expecting their first child in December. I am so excited & happy for them. I can't wait to have another little one to spoil.

lionOverall, it's been a fantastic day! I am almost finished reading Peter Clines latest book, Ex-Purgatory (part of his Superhero & Zombie Series); last night Rhys & I finished reading our first book in tandem--Stephen King's The Stand and I can't wait for him to get home so we can have some cake & talk about it more; and I received a care package from my family in New York. Here's a sneak peek on what's inside:

snit supplies

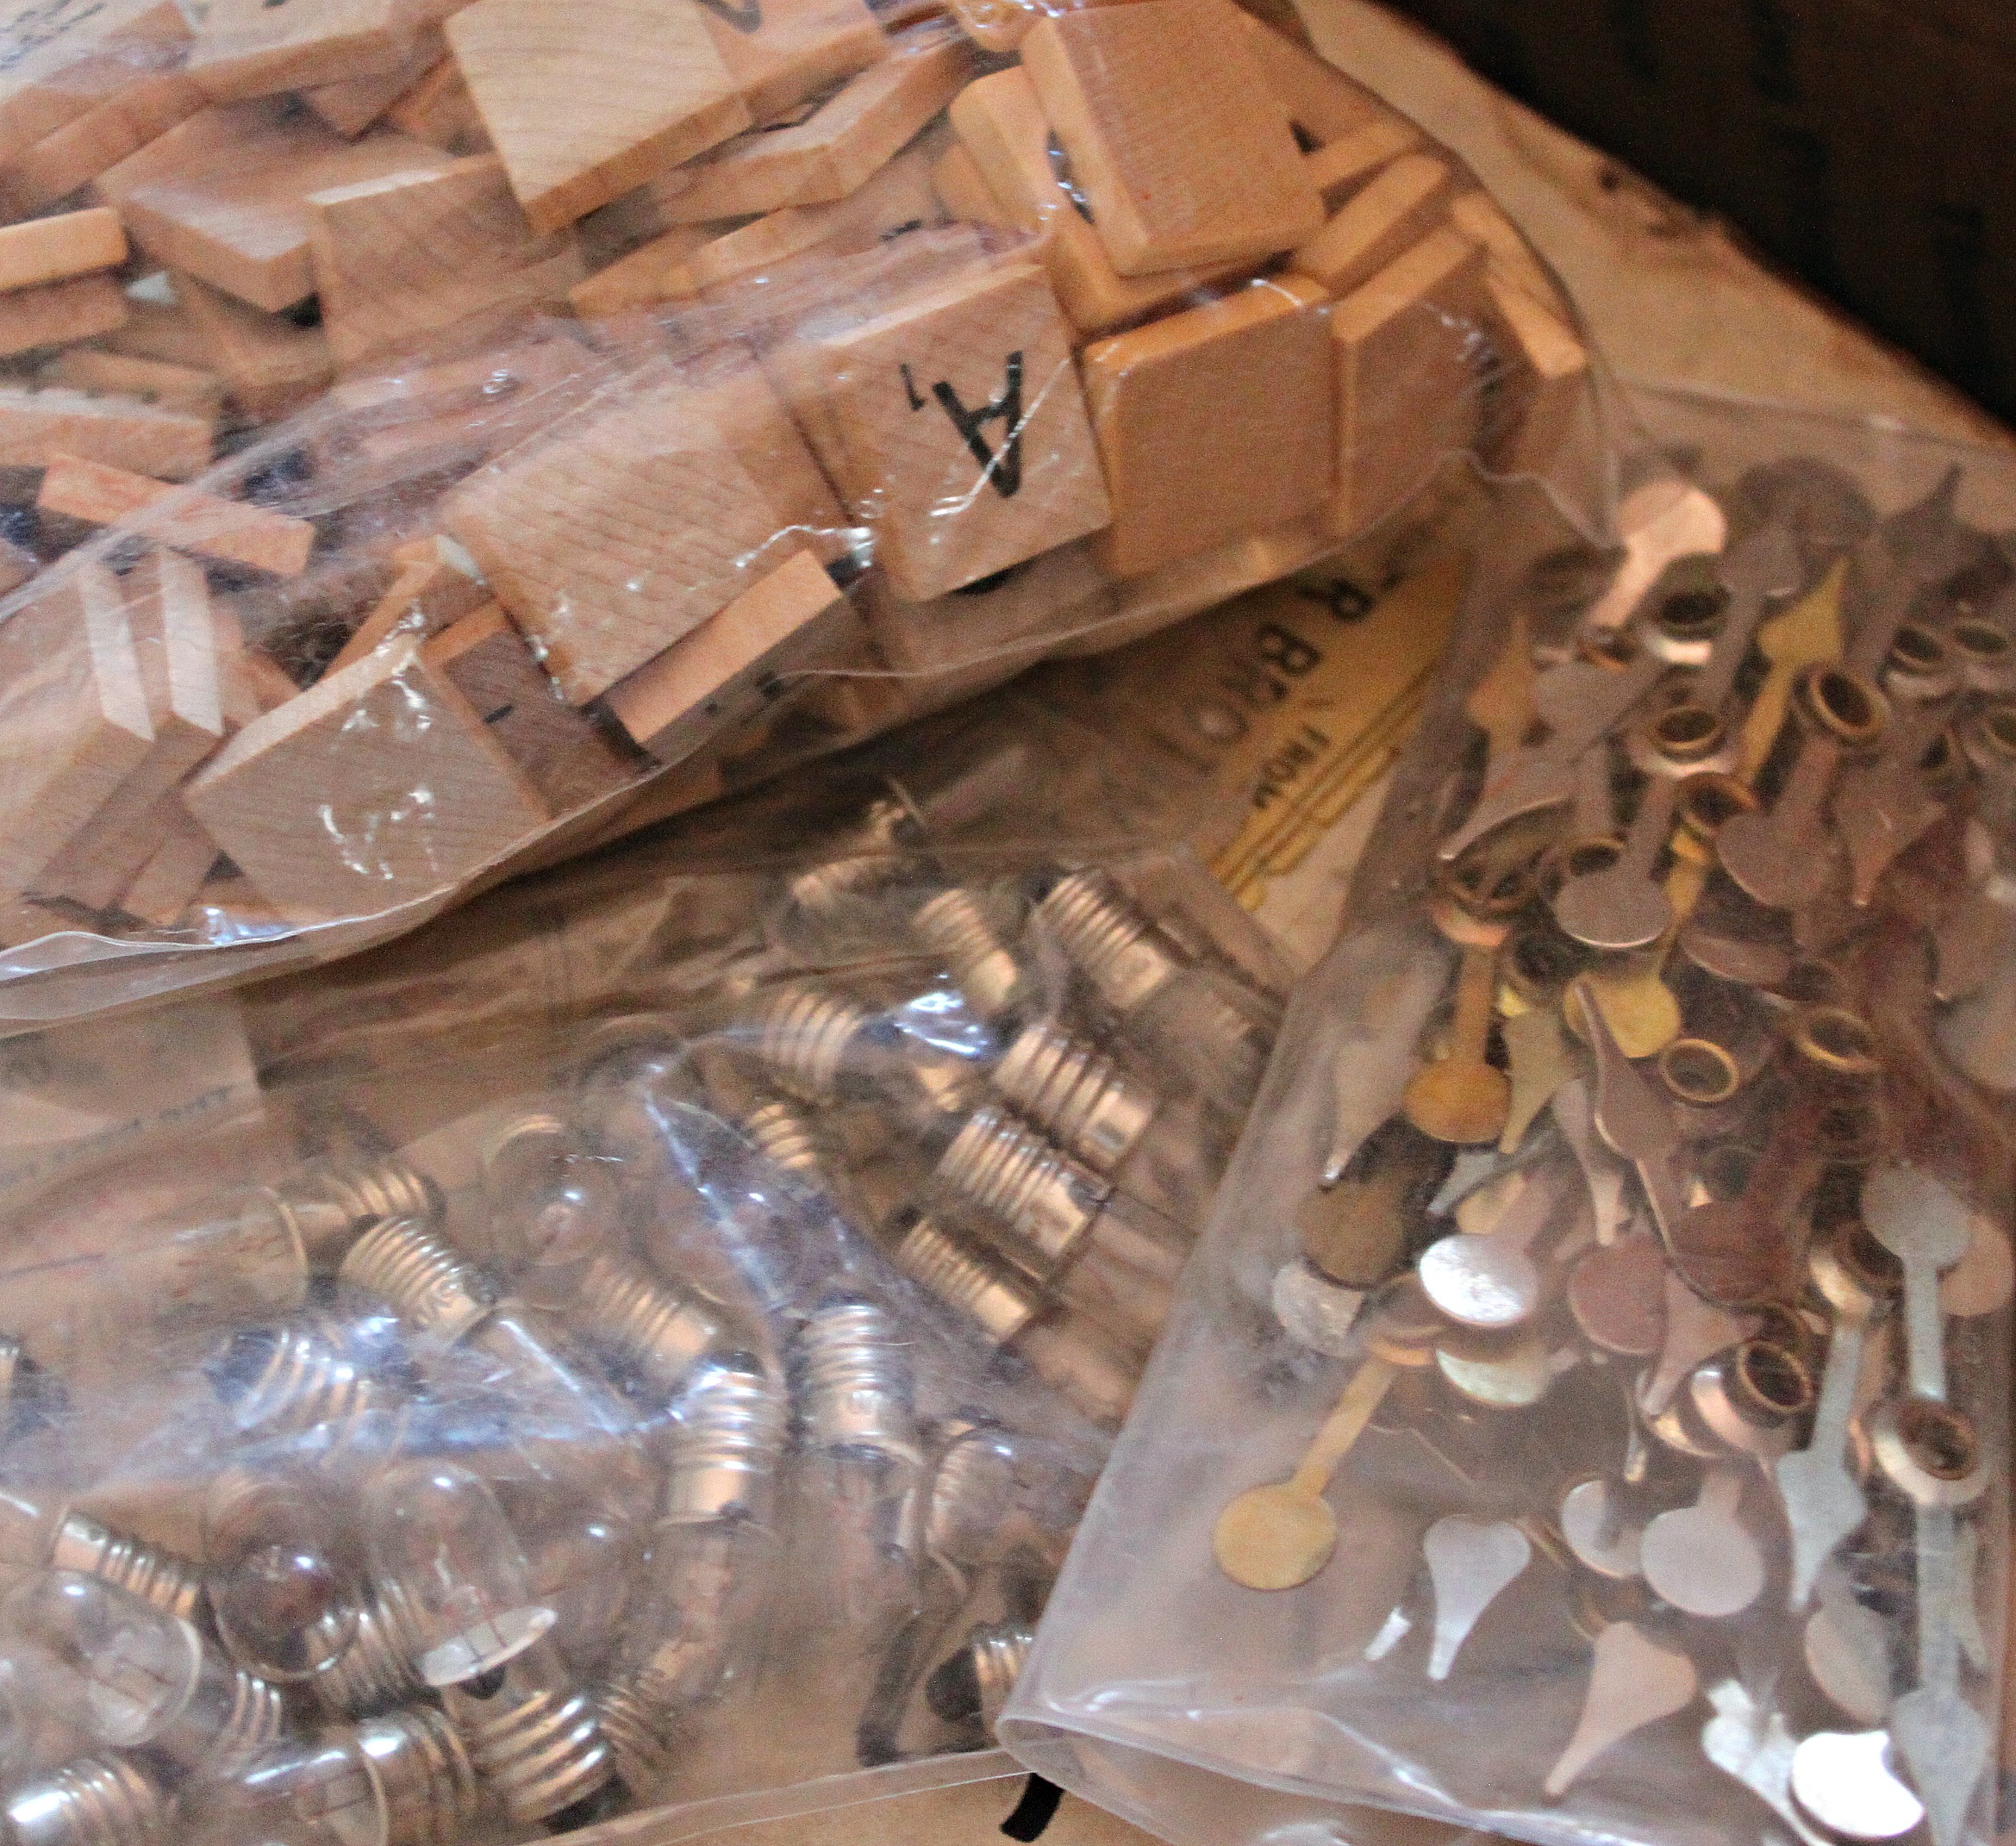
If you're wondering who "snit" is--that's me! It's my Uncle John & Uncle Jeff's nickname for me! They always send me the coolest junk! suppliesI also got some lightbulbs, game spinners, and Scrabble tiles. (I love making coasters out of these tiles! Check out this DIY if you want to make your own.) Summers are just wonderful--mine has been full of weekend roadtrips with Rhys, books you lose yourself in, bursts of creative energy, and junkin'! Thanks Heather for coming along with me today! Junkin' is always better with a friend! What have you been up to this summer?

DIY Steampunk Cake Stand

UncategorizedSamantha Extance2 Comments

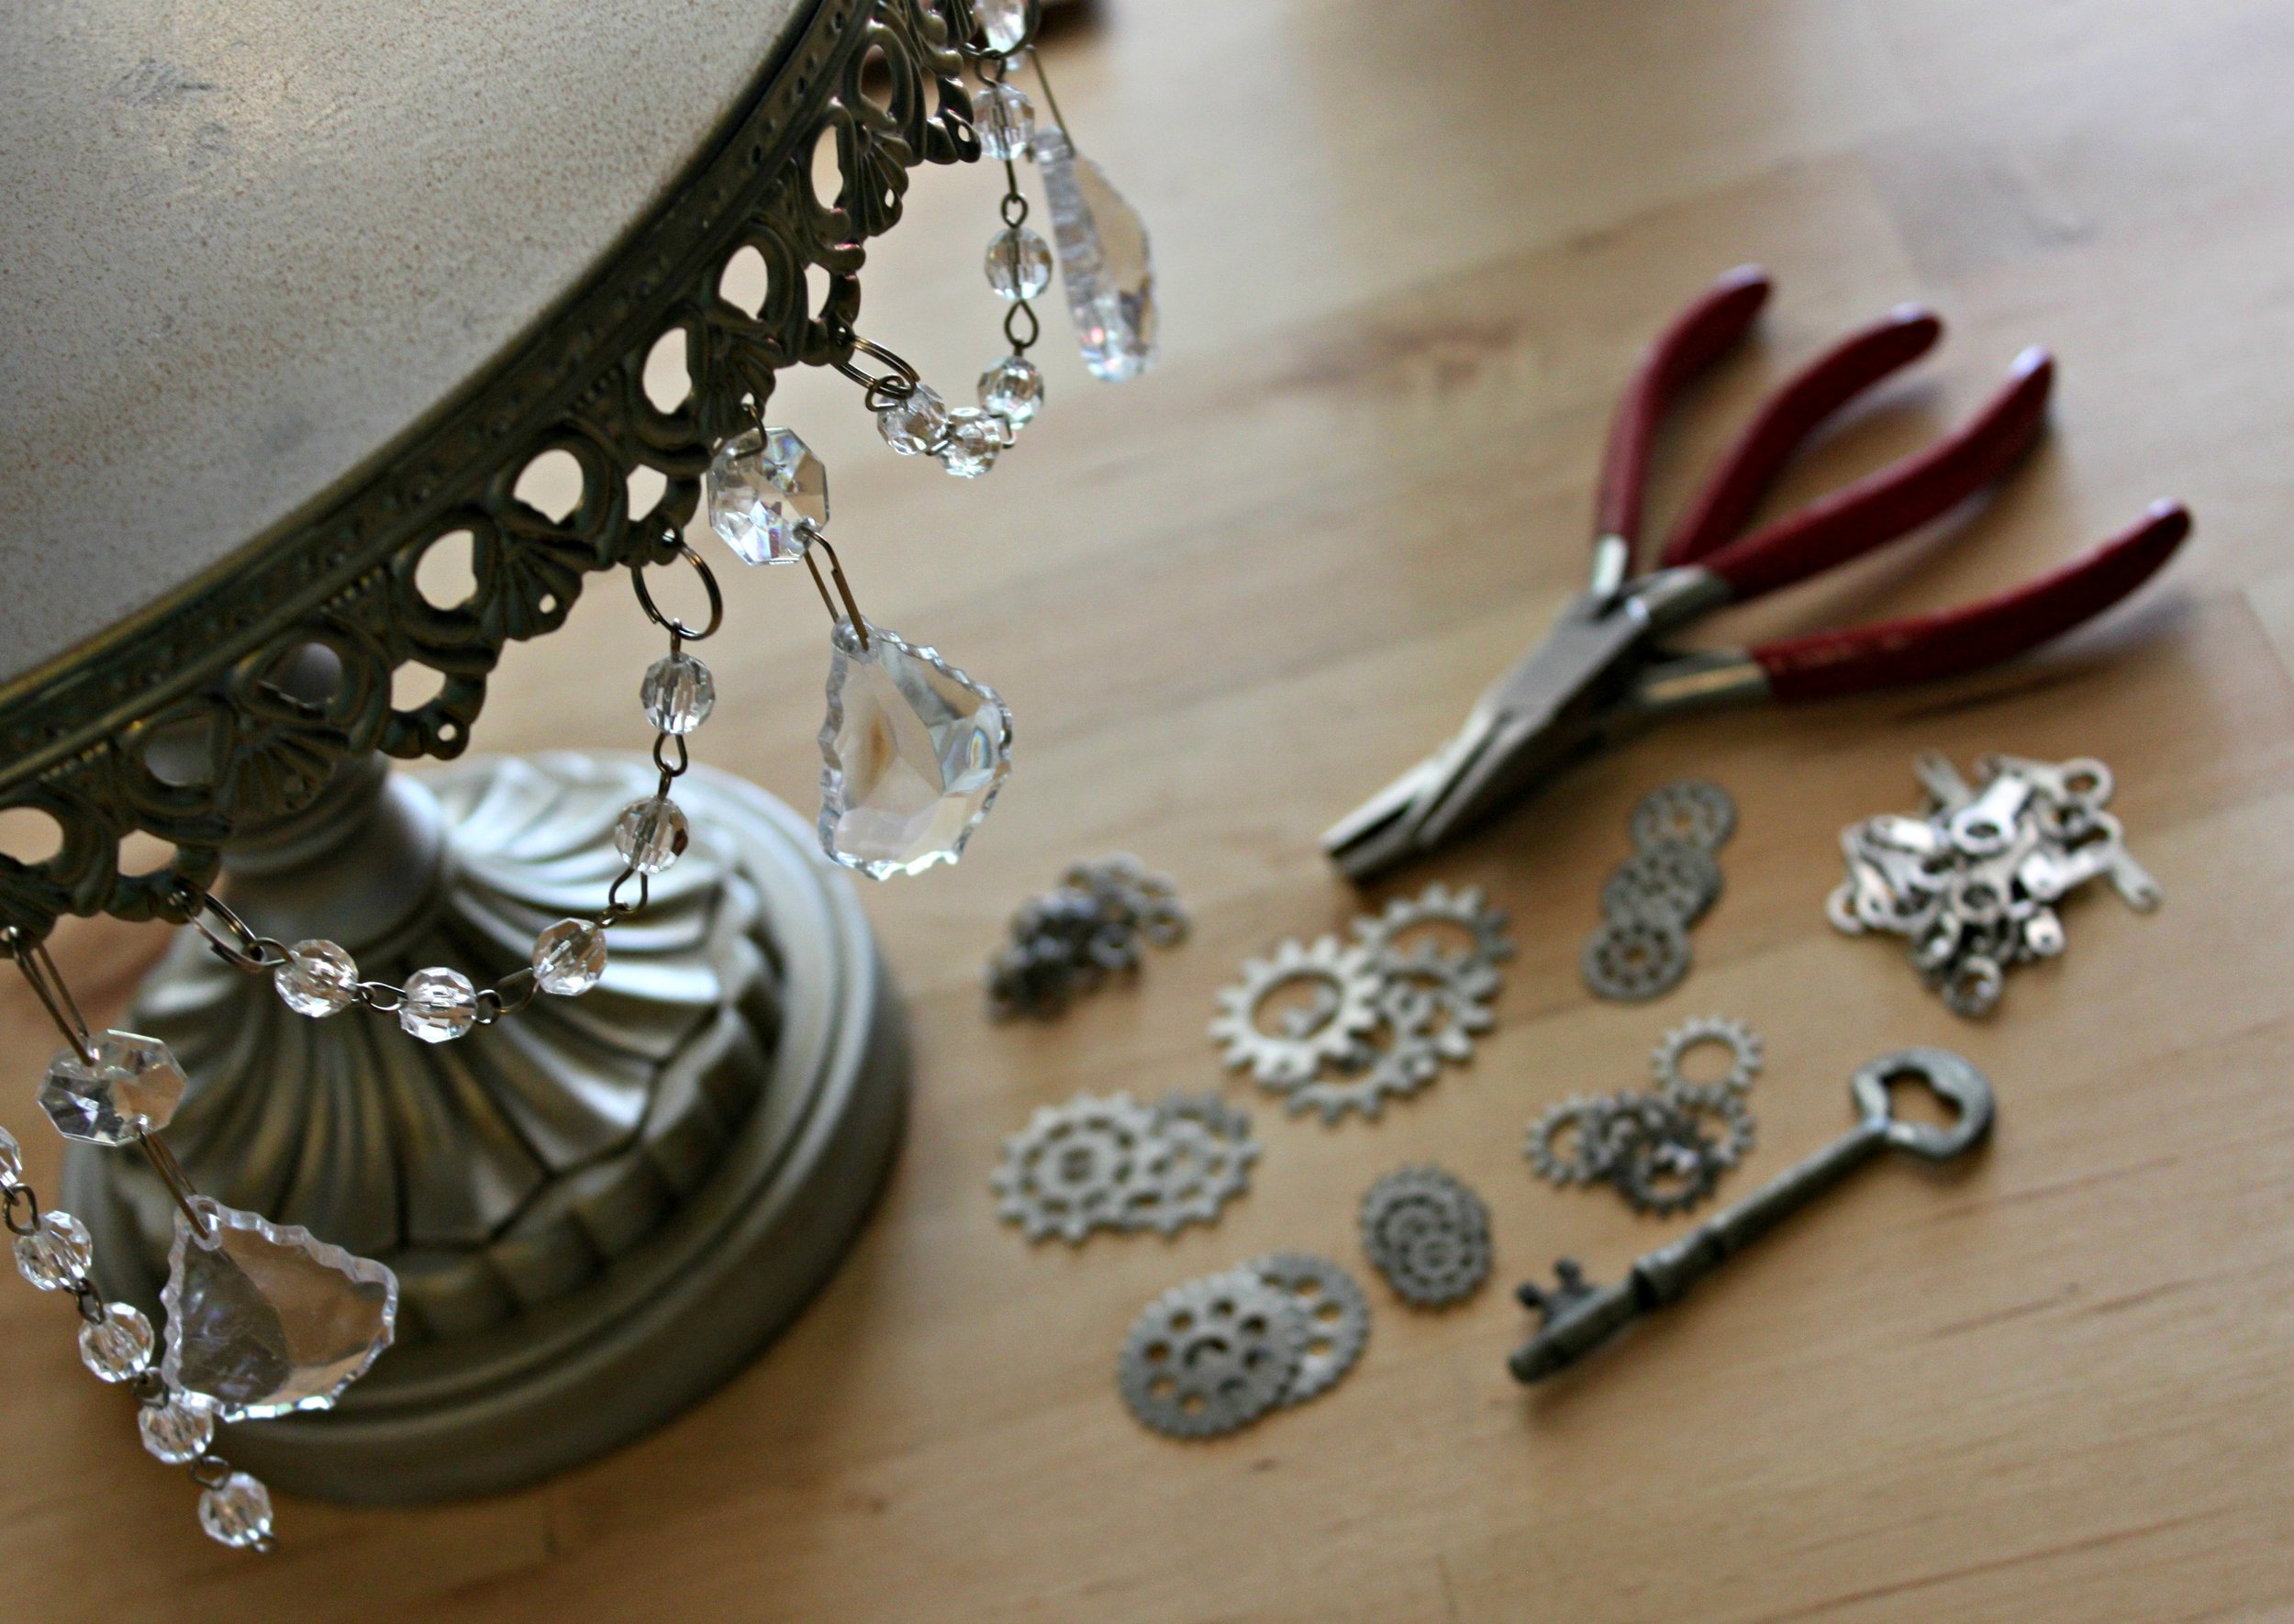
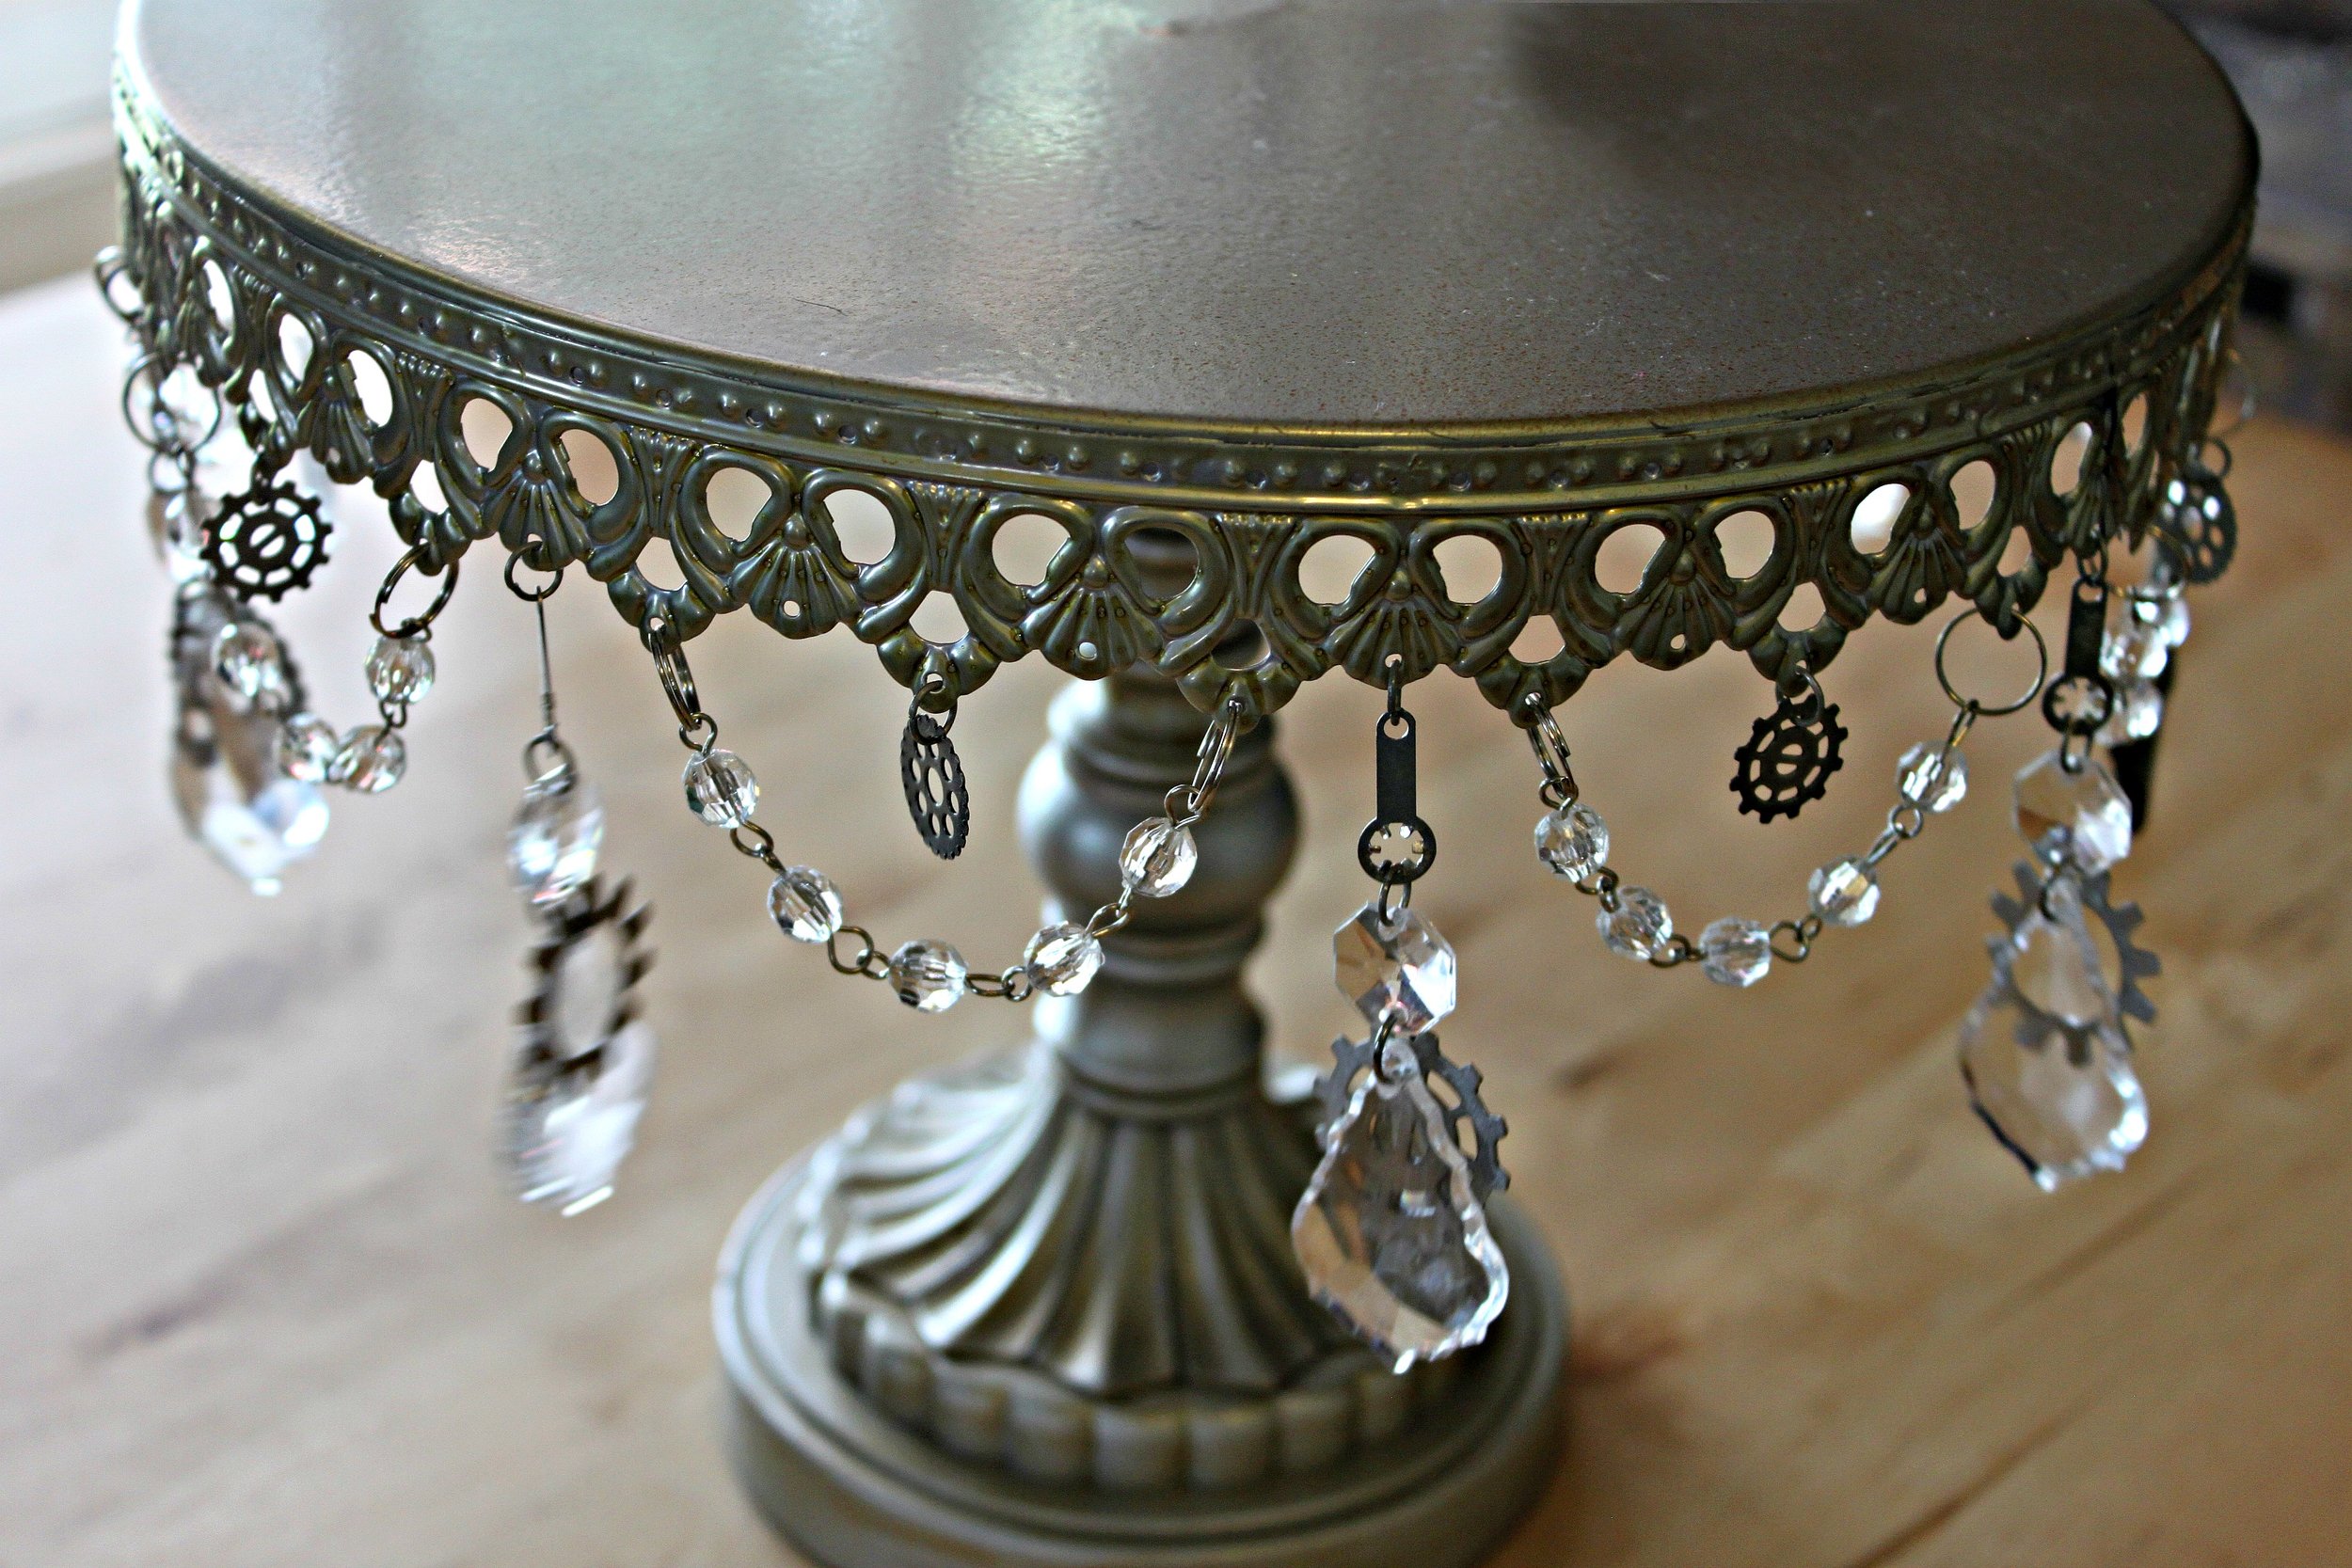
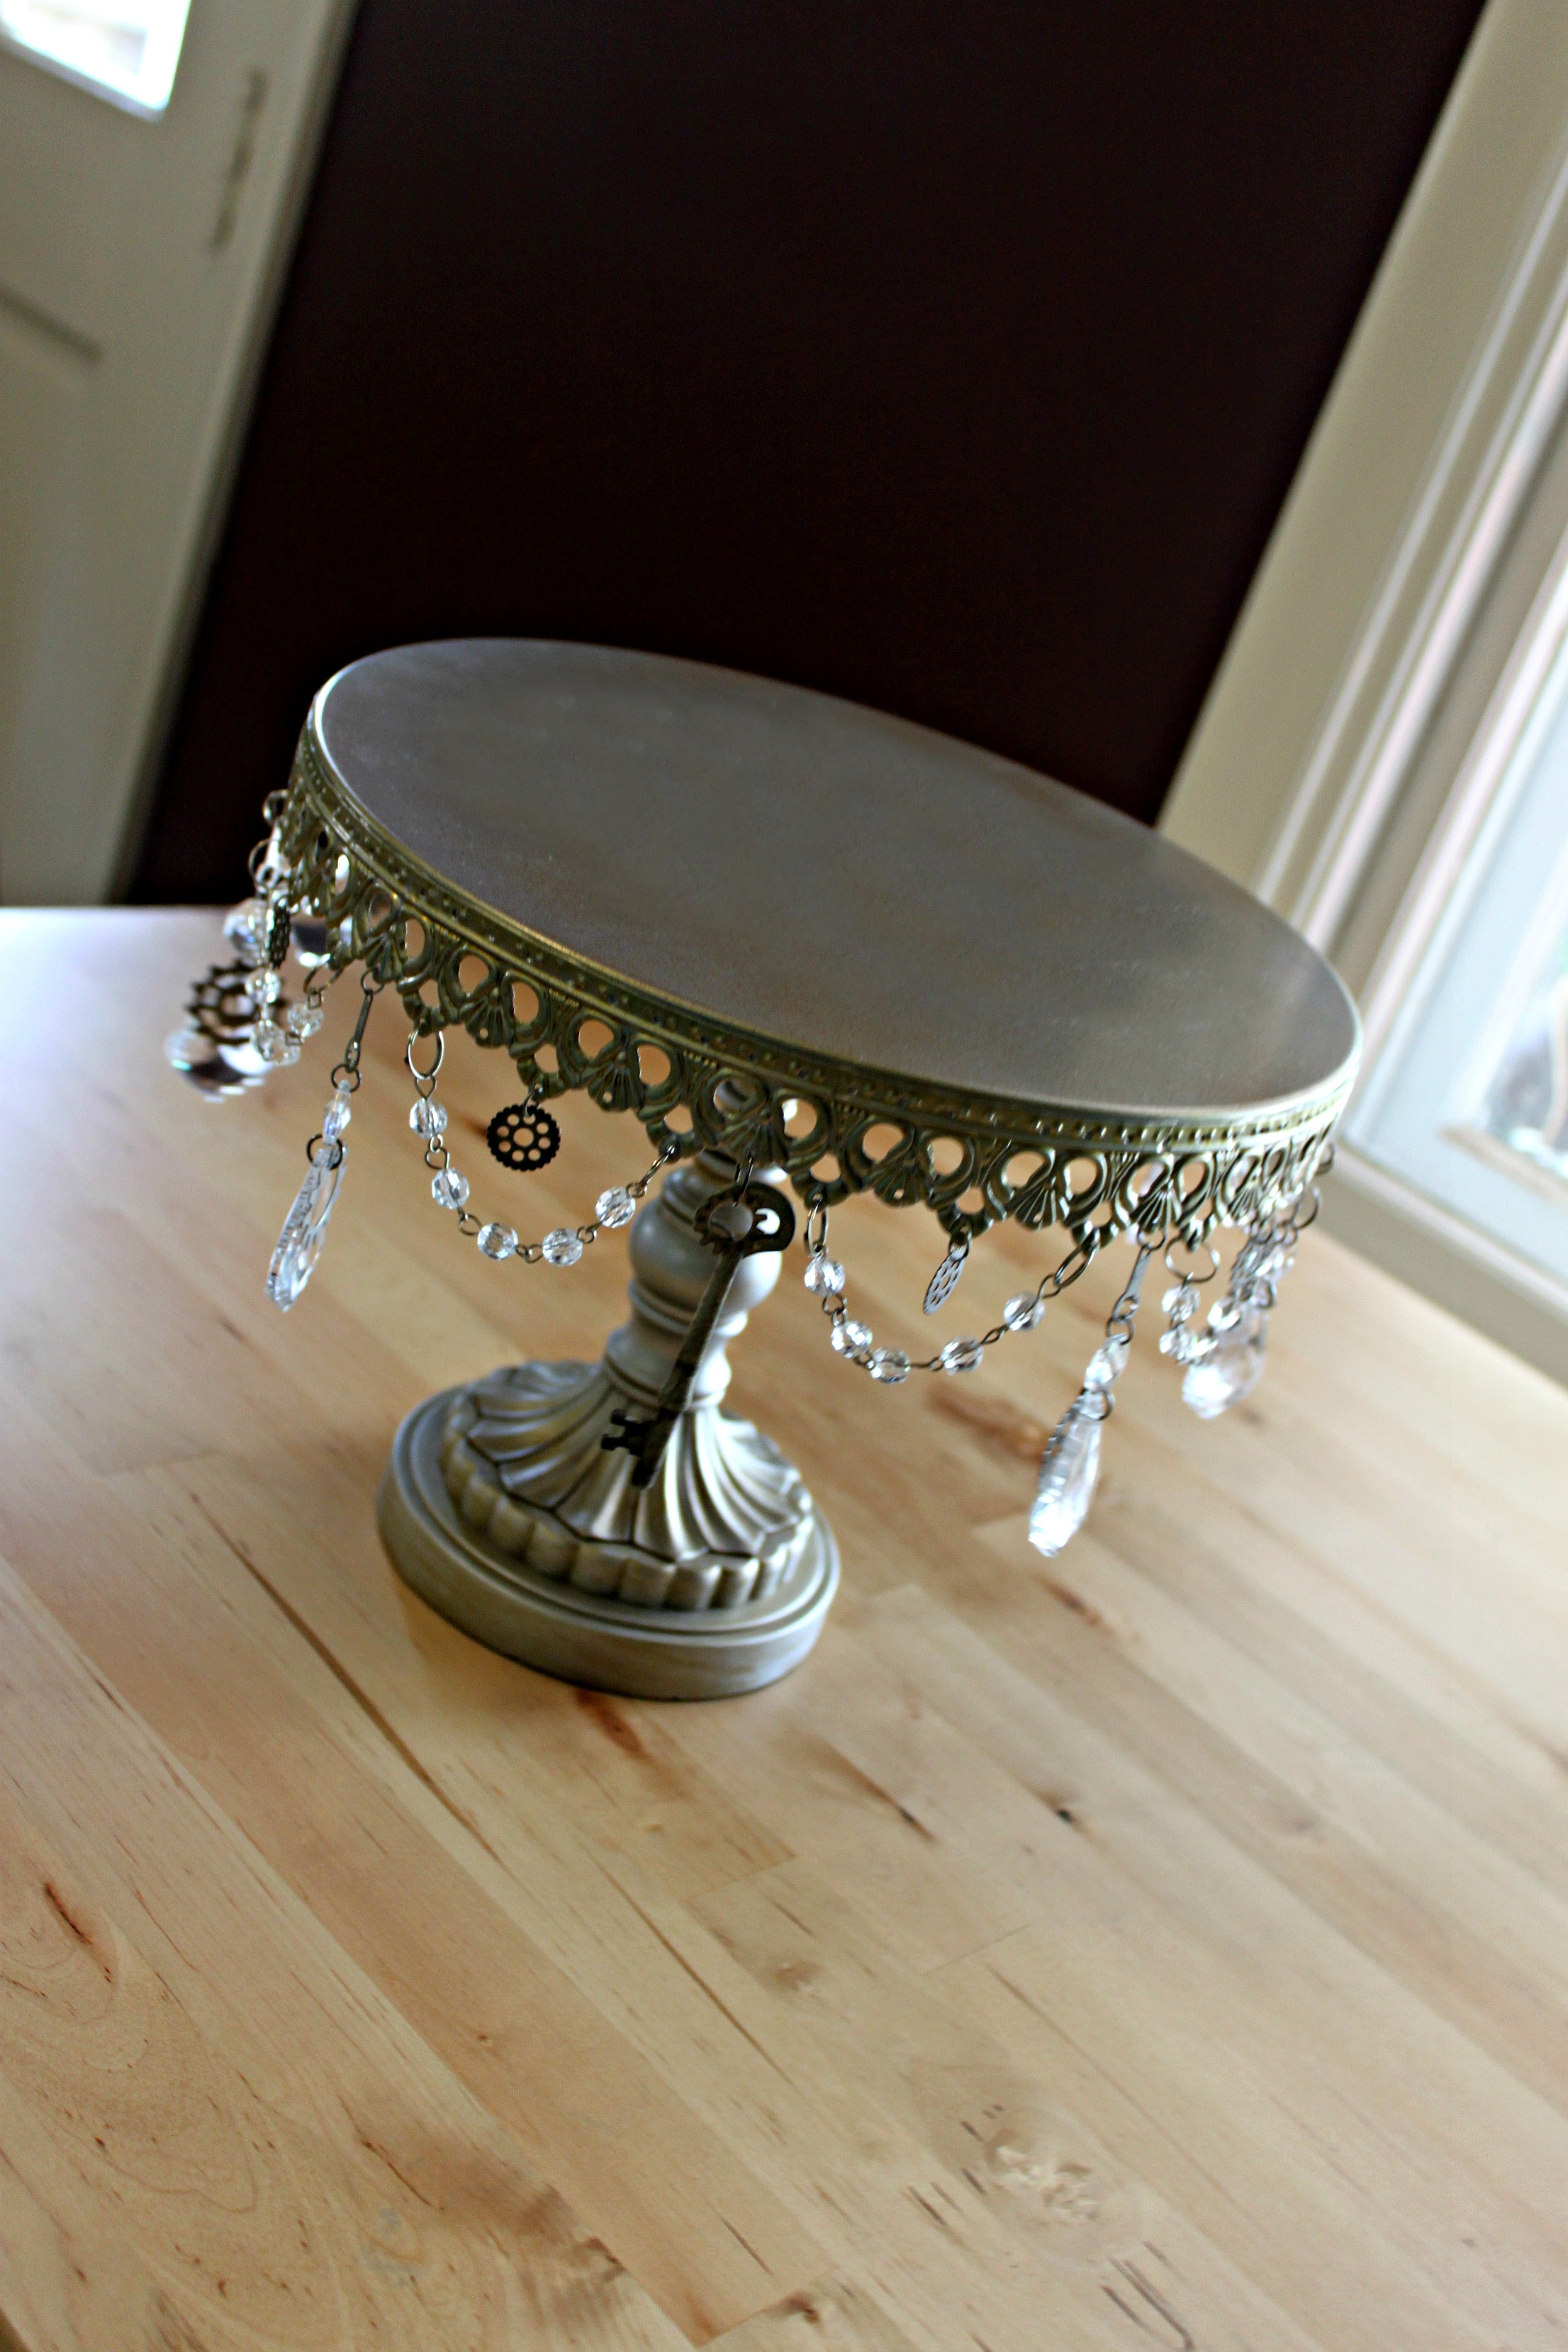
This is a fun & easy way to unleash a little steampunk flair in your kitchen, or perhaps add to a steampunk-themed party you're hosting. Here's what you'll need:DIY IMG_0045

  • Cake Stand (Available at your local Michaels, or online); I've chosen a filigree metal cake stand--one, because it's pretty schmancy and two, there are already holes to work with. Also, this cake came with beads already attached. (If you're purchasing a different style cake stand, then you will also need: 45 medium round crystal beads; 45 eyepins; 9 medium oval faceted crystal beads; and 9 large teardrop-shaped faceted crystal beads, preferably with a flat back so that the gears remain flush against the teardrop-shaped crystals)
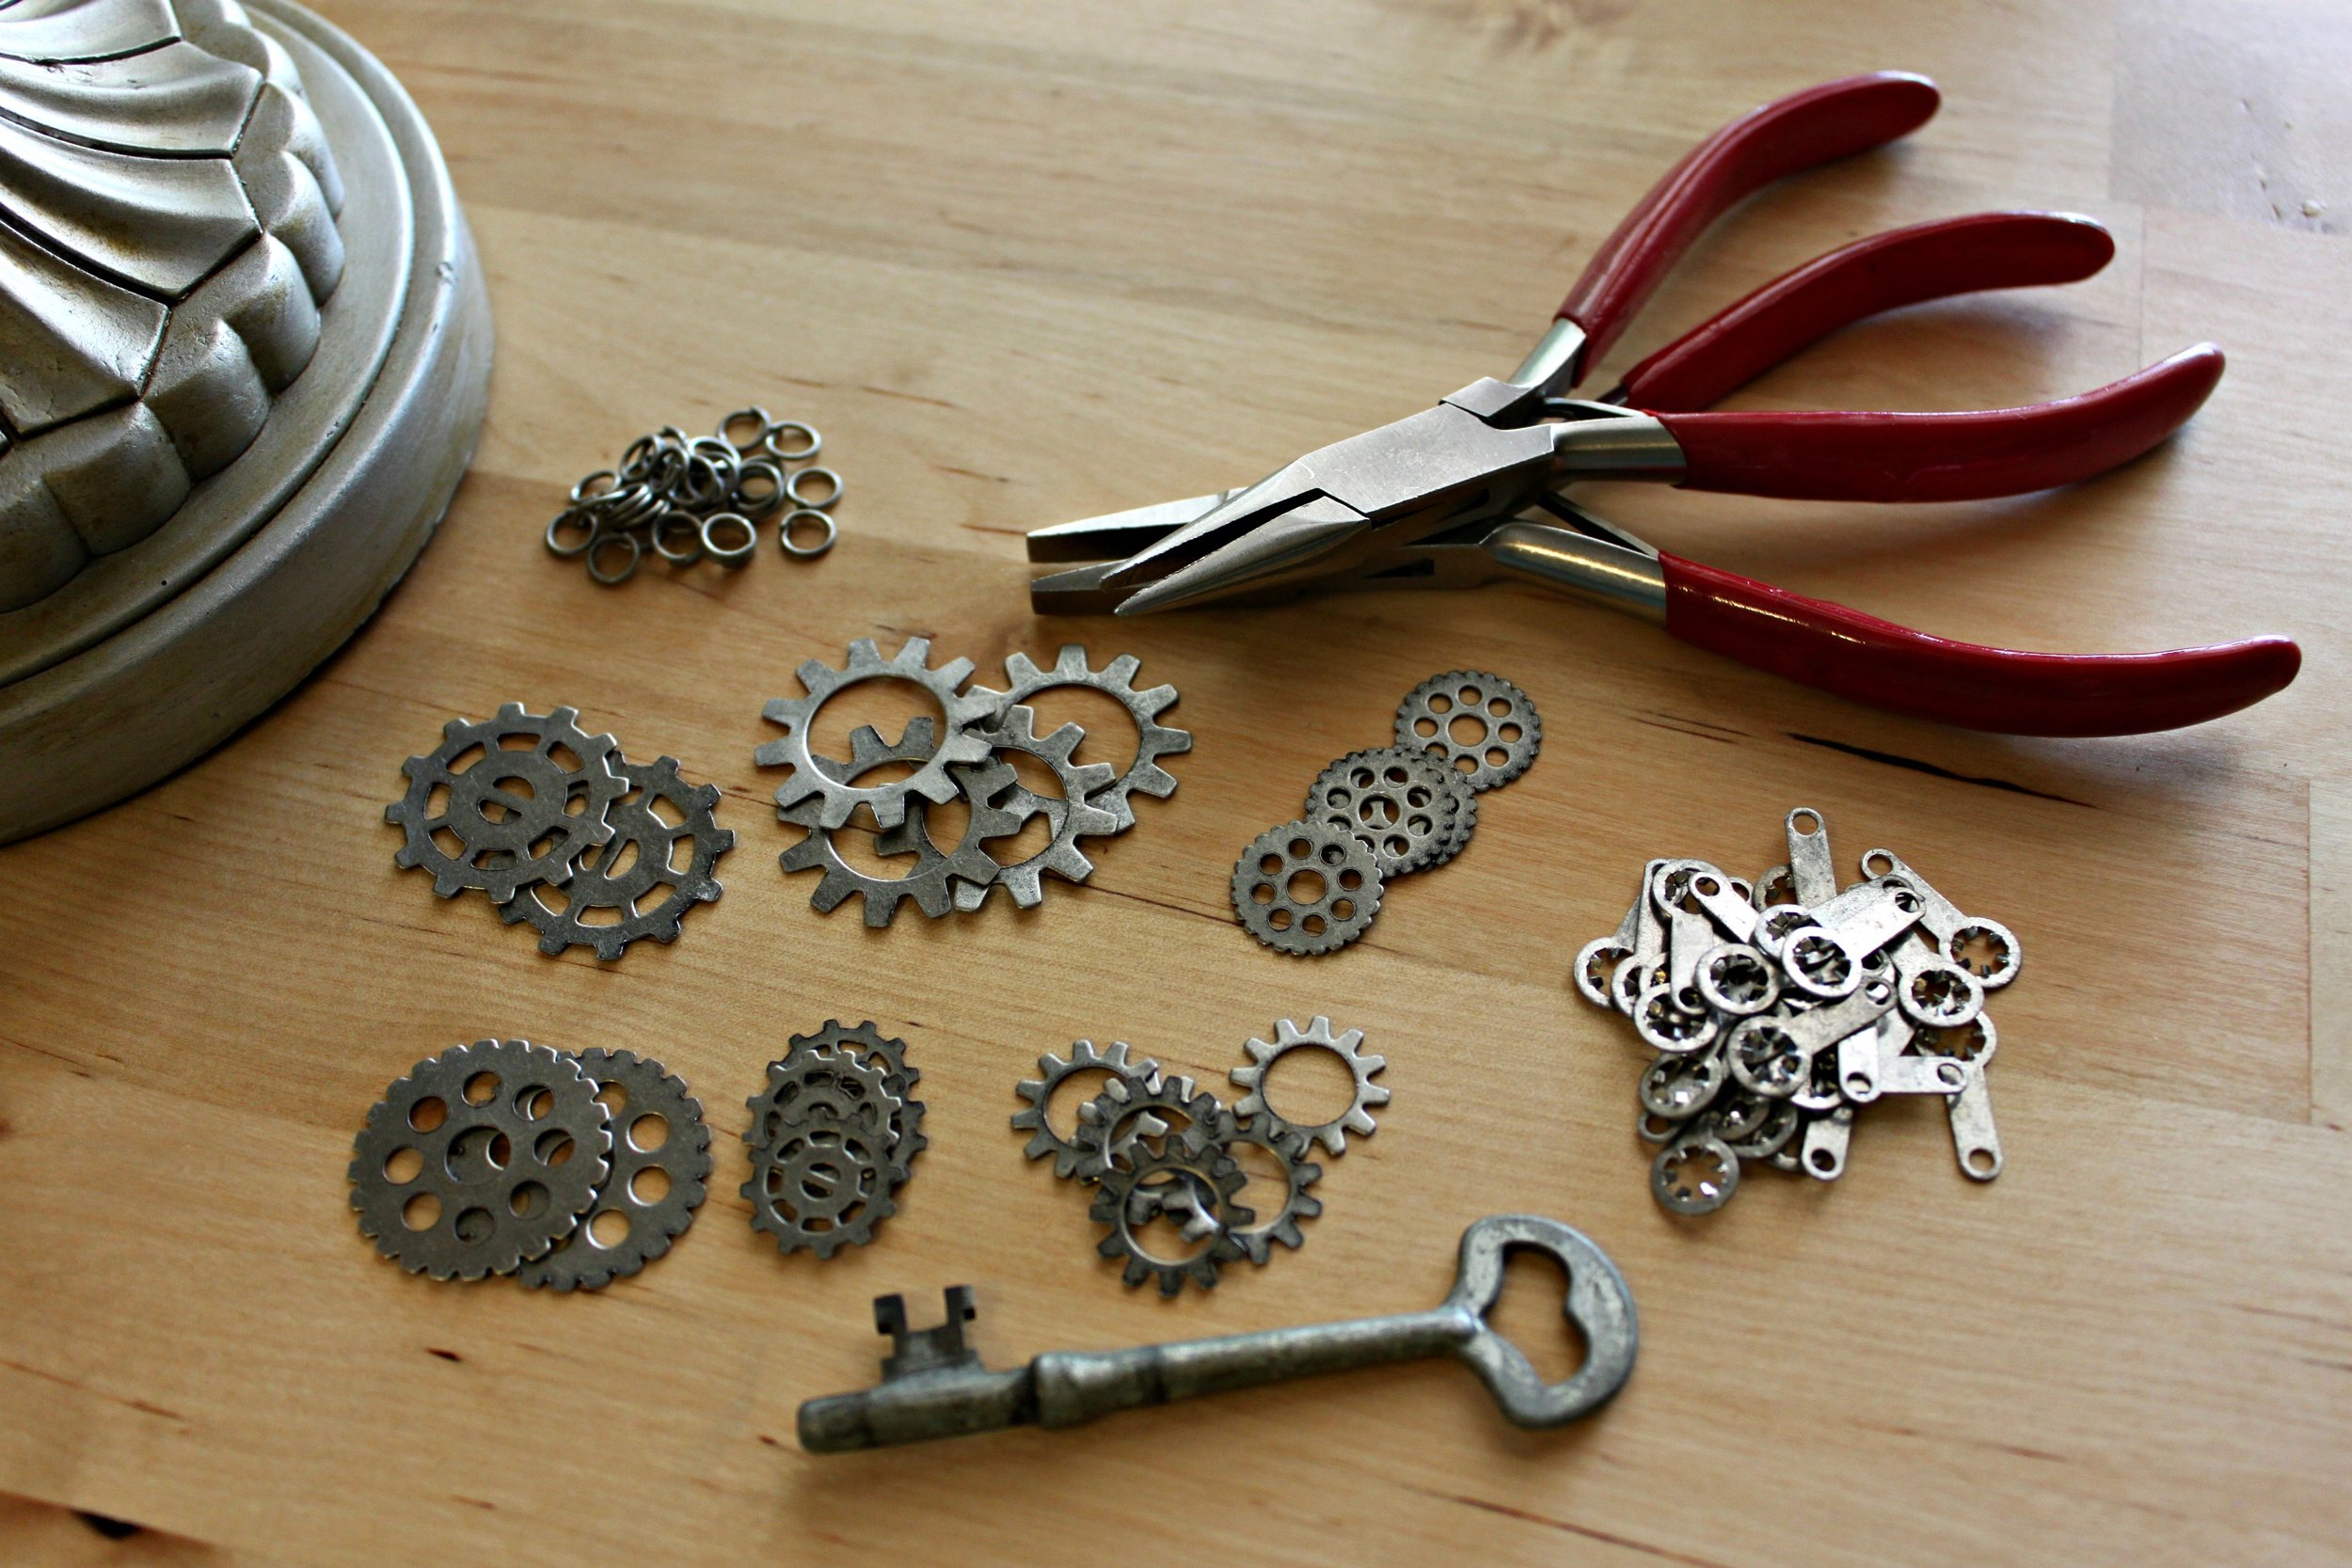
  • 10 small gears & 9 large gears (For this DIY, I'd recommend reproduction gears over salvaged gears because the gears will be around a lot more moisture; Reproduction gears are available at your local craft store)
  • 1 skeleton key
  • 9 lock washers
  • 27 small jump rings (45 if you are adding the beads yourself)
  • 9 large jump rings
  • Flat nosed pliers (and also needle nosed pliers & wire cutters, if you are adding beads yourself)

DIY IMG_0043Steps:

  1. If you do not need to add beads, move on to Step 2. If you are adding beads, read on. First, put all of your small round crystal beads onto eyepins. Use your flat nosed & needle nosed pliers along with your wire cutters to close off each bead's eyepin. (If you do not know how to do this, check out any basic beading book which will cover how to close eyepins. You can also click here for an online tutorial.) Once you are done, connect 5 beads together in a string.  You should have a total of 9 strings. Once you have strung all of your 9 strings, connect them to your filigree cake stand with a jump ring leaving at least 1 or 3 spaces (or holes in the filigree) above where your string dangles. Also be sure to leave a space/hole in the filigree between each individual string.
  2. In between each string--directly in the middle, add a small gear. (This is why I suggested having 1 or 3 spaces specifically). Use your flat nosed pliers & small jump rings to connect your gears to your cake stand. Repeat for each string.DIY IMG_0053
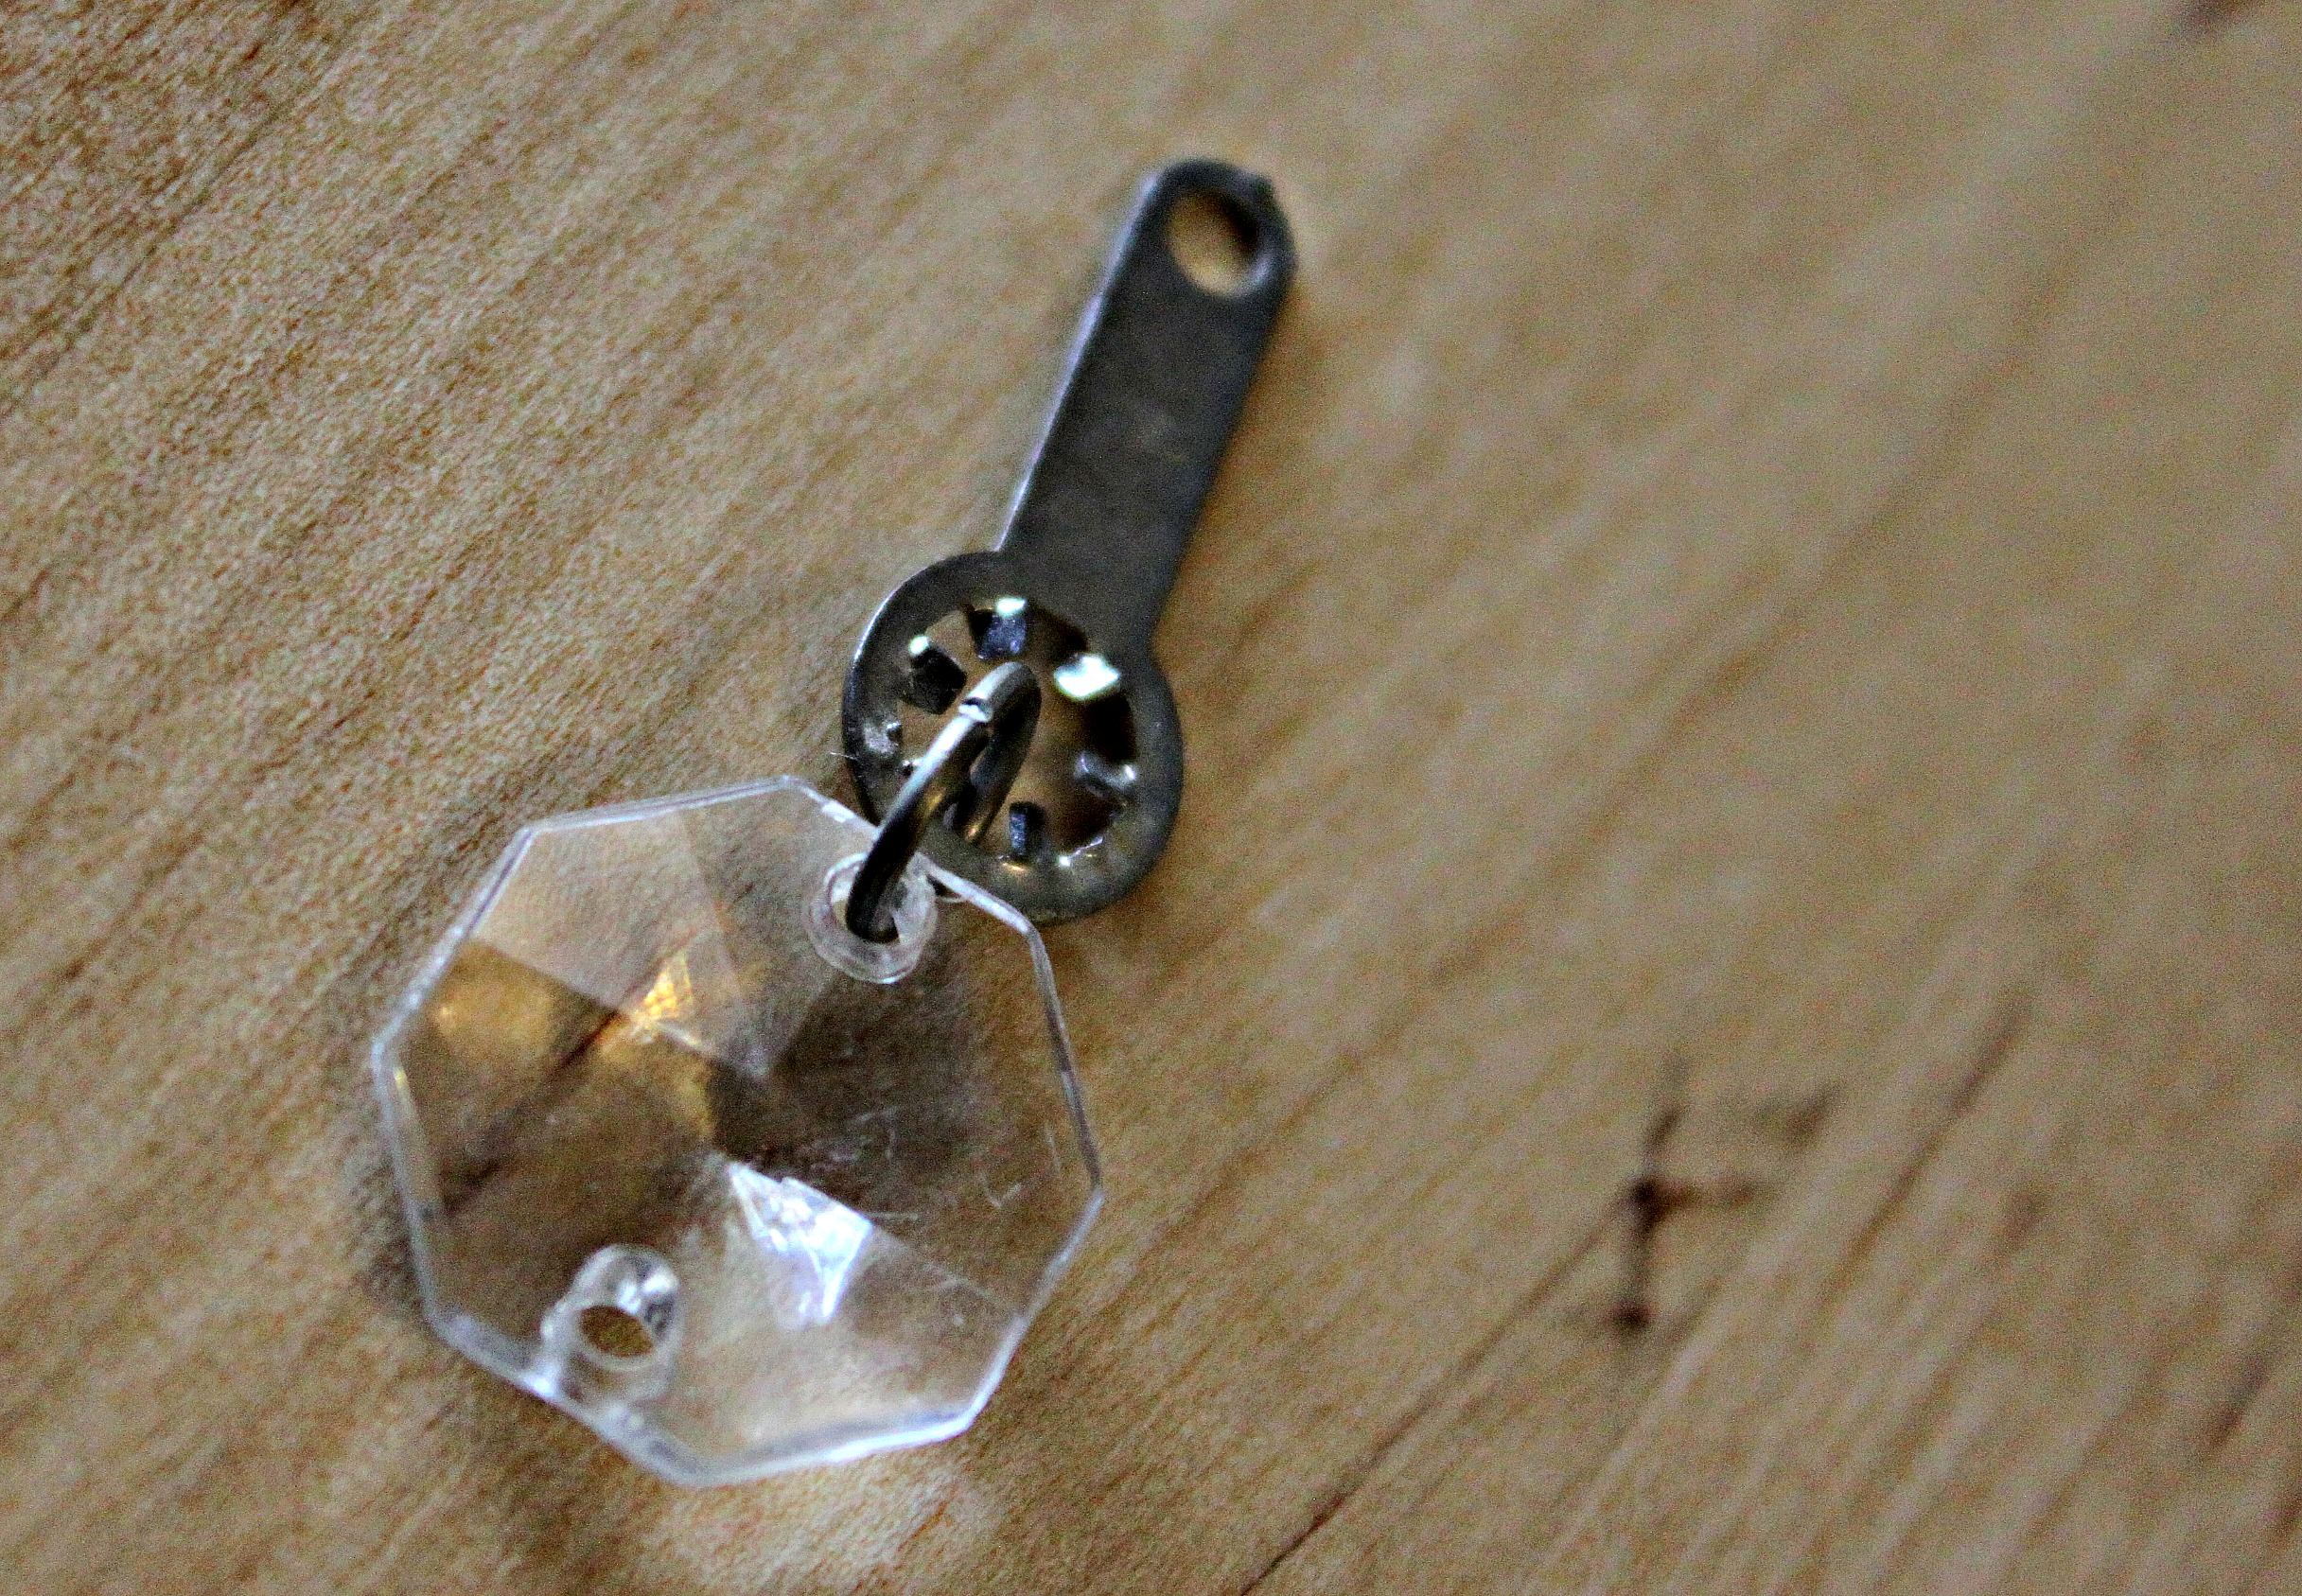
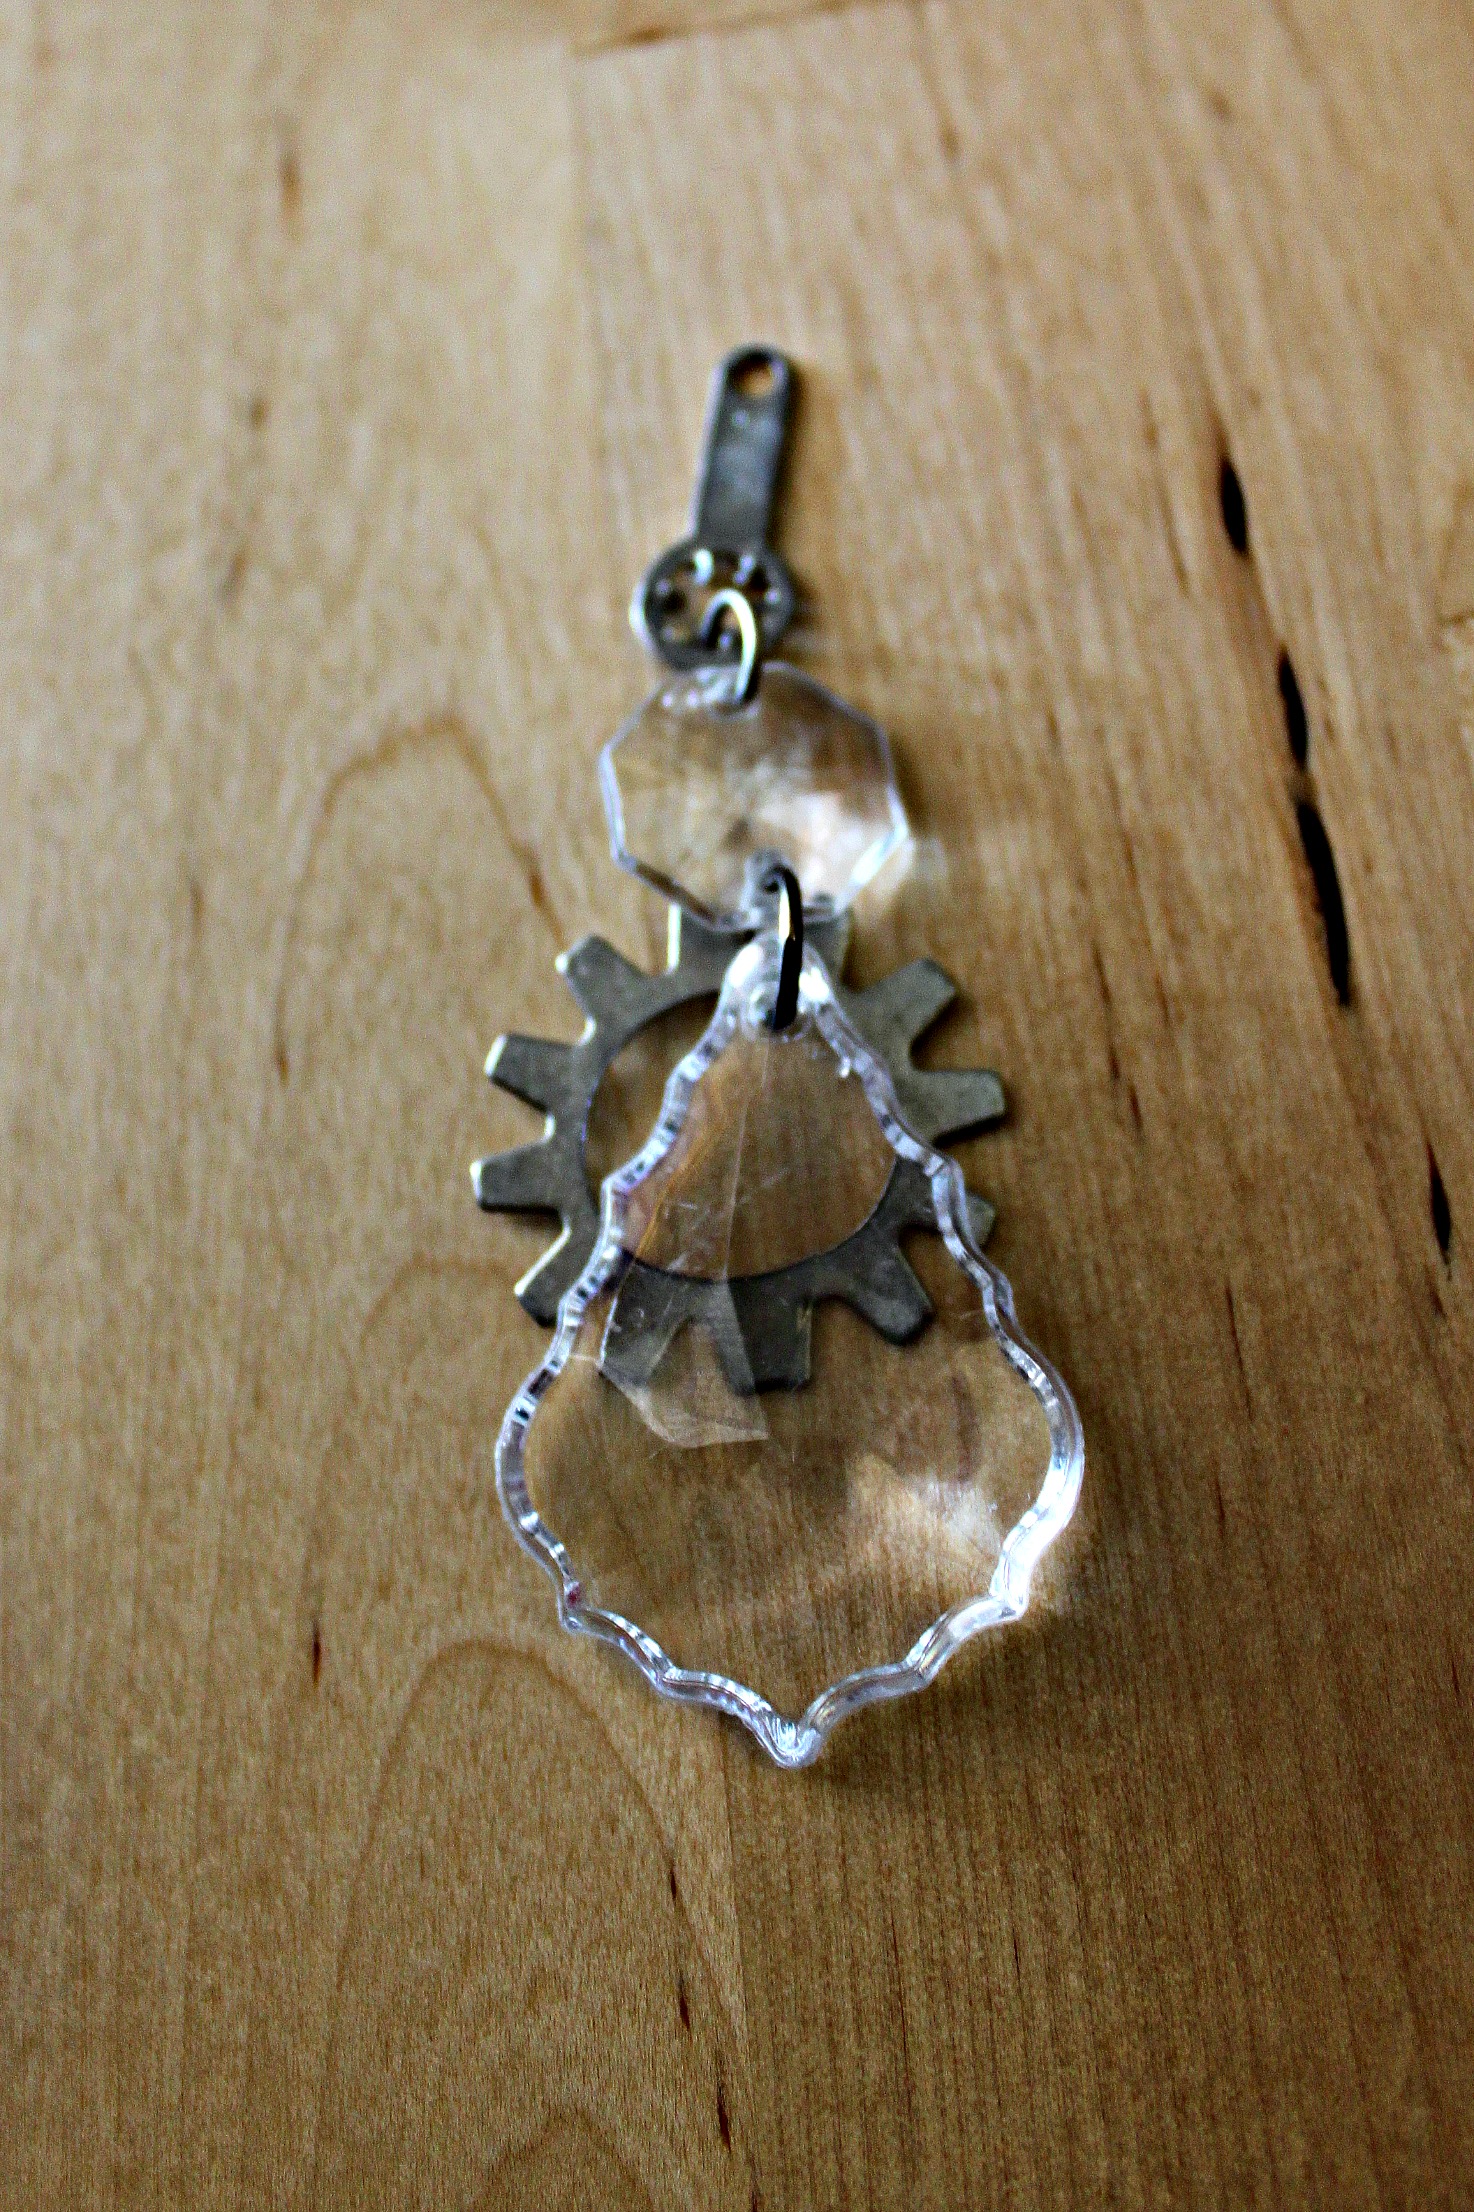
  3. Next, lay out the order of your large gear & teardrop crystal pendants. For mine, I layered them as follows: lock washer, medium round crystal bead, and large gear & large teardrop shaped crystal bead along with the jump rings I would need to connect each of these materials together. DIY IMG_0057
  4. Once you're happy with the order of your pendants, connect all of the individual materials together using your flat nosed pliers and jump rings. Use your large jump rings to connect the medium round crystal bead to the large gear & teardrop crystal. DIY IMG_0067The lock washer connects to the medium bead (it helps if you sing along: "oh the lock washer's connected to the bead..."--very much like "Dem Bones")DIY IMG_0061All of the materials are connected in the picture above. Be sure that you put the teardrop bead & the large gear on the same jump ring so that the gear hangs behind the crystal.
  5. Next, attach each large crystal & gear pendant to your cake stand using your flat nosed pliers & small jump rings. Attach each large crystal & gear pendant in between your individual bead strings in the space/1 hole you left empty. DIY IMG_0065
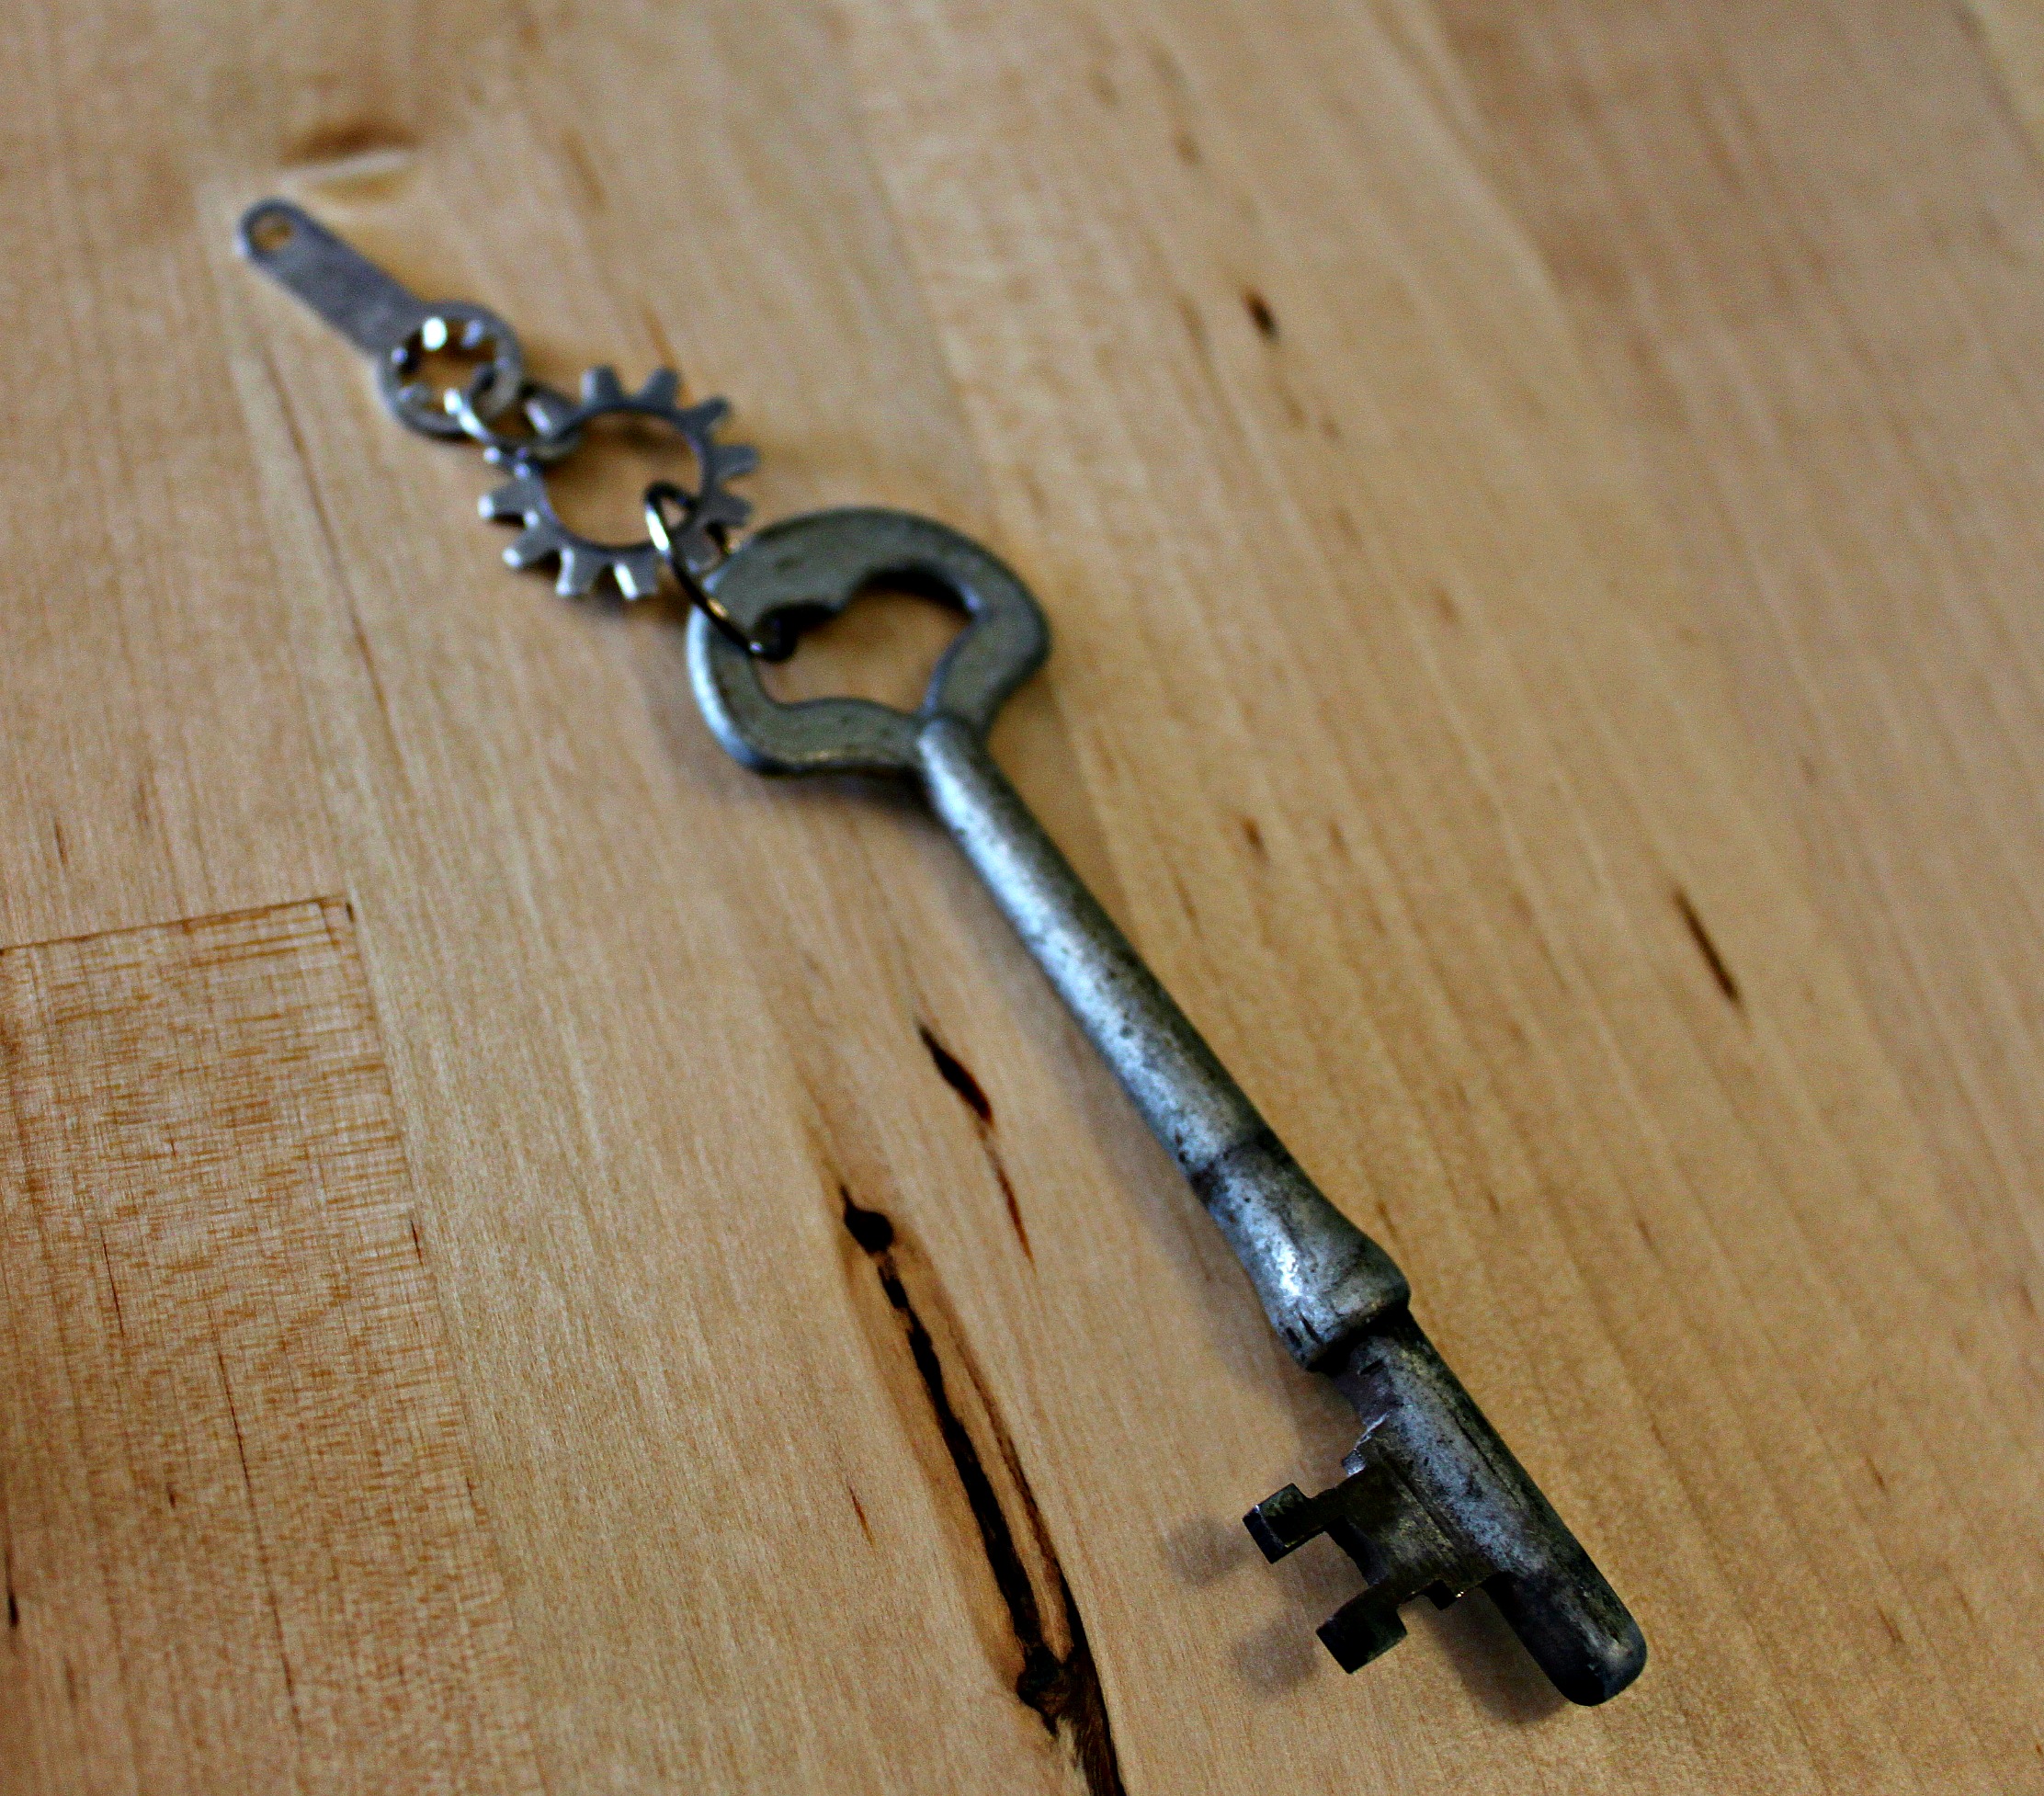
  6. (Optional) Instead of having all teardrop & gear crystal pendants, you could replace one with a skeleton key. If you don't wish to do so, then move on to the next step. (Funny story, this DIY came about because one of my crystal pendants on the cake stand broke, and I decided to steampunk it anyway and replace the crystal for a key. So keep this step in mind if one of your crystals breaks.) Lay out all of the materials for your key pendant along with jump rings. Then connect all of your materials together with your pliers. Then attach to the cake stand in one of the spaces/holes between an individual string of beads. DIY IMG_0049(All connected)DIY IMG_0051
  7. Get to bakin'! You've got a fancy steampunk cake stand to show off!

DIY IMG_0076  DIY IMG_0084  DIY IMG_0086When mine is not in use, or the cake was gobbled up all too soon, I like to adorn it with a doily.

If you liked this DIY, or are looking for more ways to steampunk your kitchen check out my other baking related post on steampunk cupcakes! As always, Merry Making!

Steampunk World's Fair 2014

UncategorizedSamantha Extance1 Comment

It's been a while since I blogged, forgive me. I have been a busy little bee lately. Mainly, I was getting ready for my very first Steampunk World's Fair held annually in Piscataway, New Jersey. I had an amazing time. I saw so many inspiring costumes, creations, and gadgets and I met some lovely people. Here's a little snippet of the weekend: 2014-05-15 14.36.18I flew up to my hometown of Brewster, in New York. I was lucky to make a mini-vacation with my family out of the show. I was especially excited to see my mom, grams, and 4 & 1/2 year old niece, Avery Jane. Early in the week, I played with Avery on the swings, took many rambling walks, and spent some time being creative. While Avery watercolored painted and my grams sewed a set of wedding pillows, my mom and I were busy making some new steampunk creations.

2014-05-19 16.25.20On Thursday evening, my mom and I packed the car, picked some violets that grow all along our front lawn for good luck, and we were ready to go! Roadtrips with my mom are always a blast!

2014-05-15 14.36.30After checking into our hotel, we went over to the event center to start setting up. Since I flew into NY, I didn't have my usual displays. And so the booth was a combination of scavenged items from our family home and items my mom has squirreled away for our shop someday. I love how everything came together! Here it is before we put out all of our creations!

2014-05-15 22.10.14A few of our displays that I just love: our box with large lightbulbs...

2014-05-15 22.10.24..our backdrop painting of a Victorian lady. It's titled: "The Eternal Question," we've renamed it "The Puss" since she has such a sourpuss expression on her face!

2014-05-15 22.10.31...My gram's old wooden stool which we used to display canes & umbrellas...2014-05-15 22.10.36And of course, old standbys: vintage & antique photographs, printer drawers, a model diving bell helmet, wooden boxes, and oddities.2014-05-16 15.40.45  2014-05-16 20.25.16  2014-05-16 20.25.20  2014-05-16 20.25.34 The part of our booth that I felt the most pride in was our hat display. The vintage hats my mom embellished were displayed over large Industrial spools, candelabras, tiny stools, and antique hat stands.

2014-05-16 15.40.38Of course, no booth is complete without your ensemble! I took greats pains to come up with outfits that would not only be in the spirit of steampunk & the fair, but that would be wearable for long hours. Day Two is my favorite! (Thanks Briana, of Bifftastica, for the awesome vest! I got so many compliments on its rows of gleaming buttons!)

SPWF Outfits Sam CollageThe weekend was full of many great costumes. Here are some that stood out to us:

2014-05-17 15.30.00The Diver

2014-05-18 10.46.37The Airship Mechanic

2014-05-17 12.48.26and...The Gentleman (who also purchased one of our steampunk ties which is pictured above!) One of my favorite accessories that I saw was an elaborate set of finger armor. I may have a new obsession!

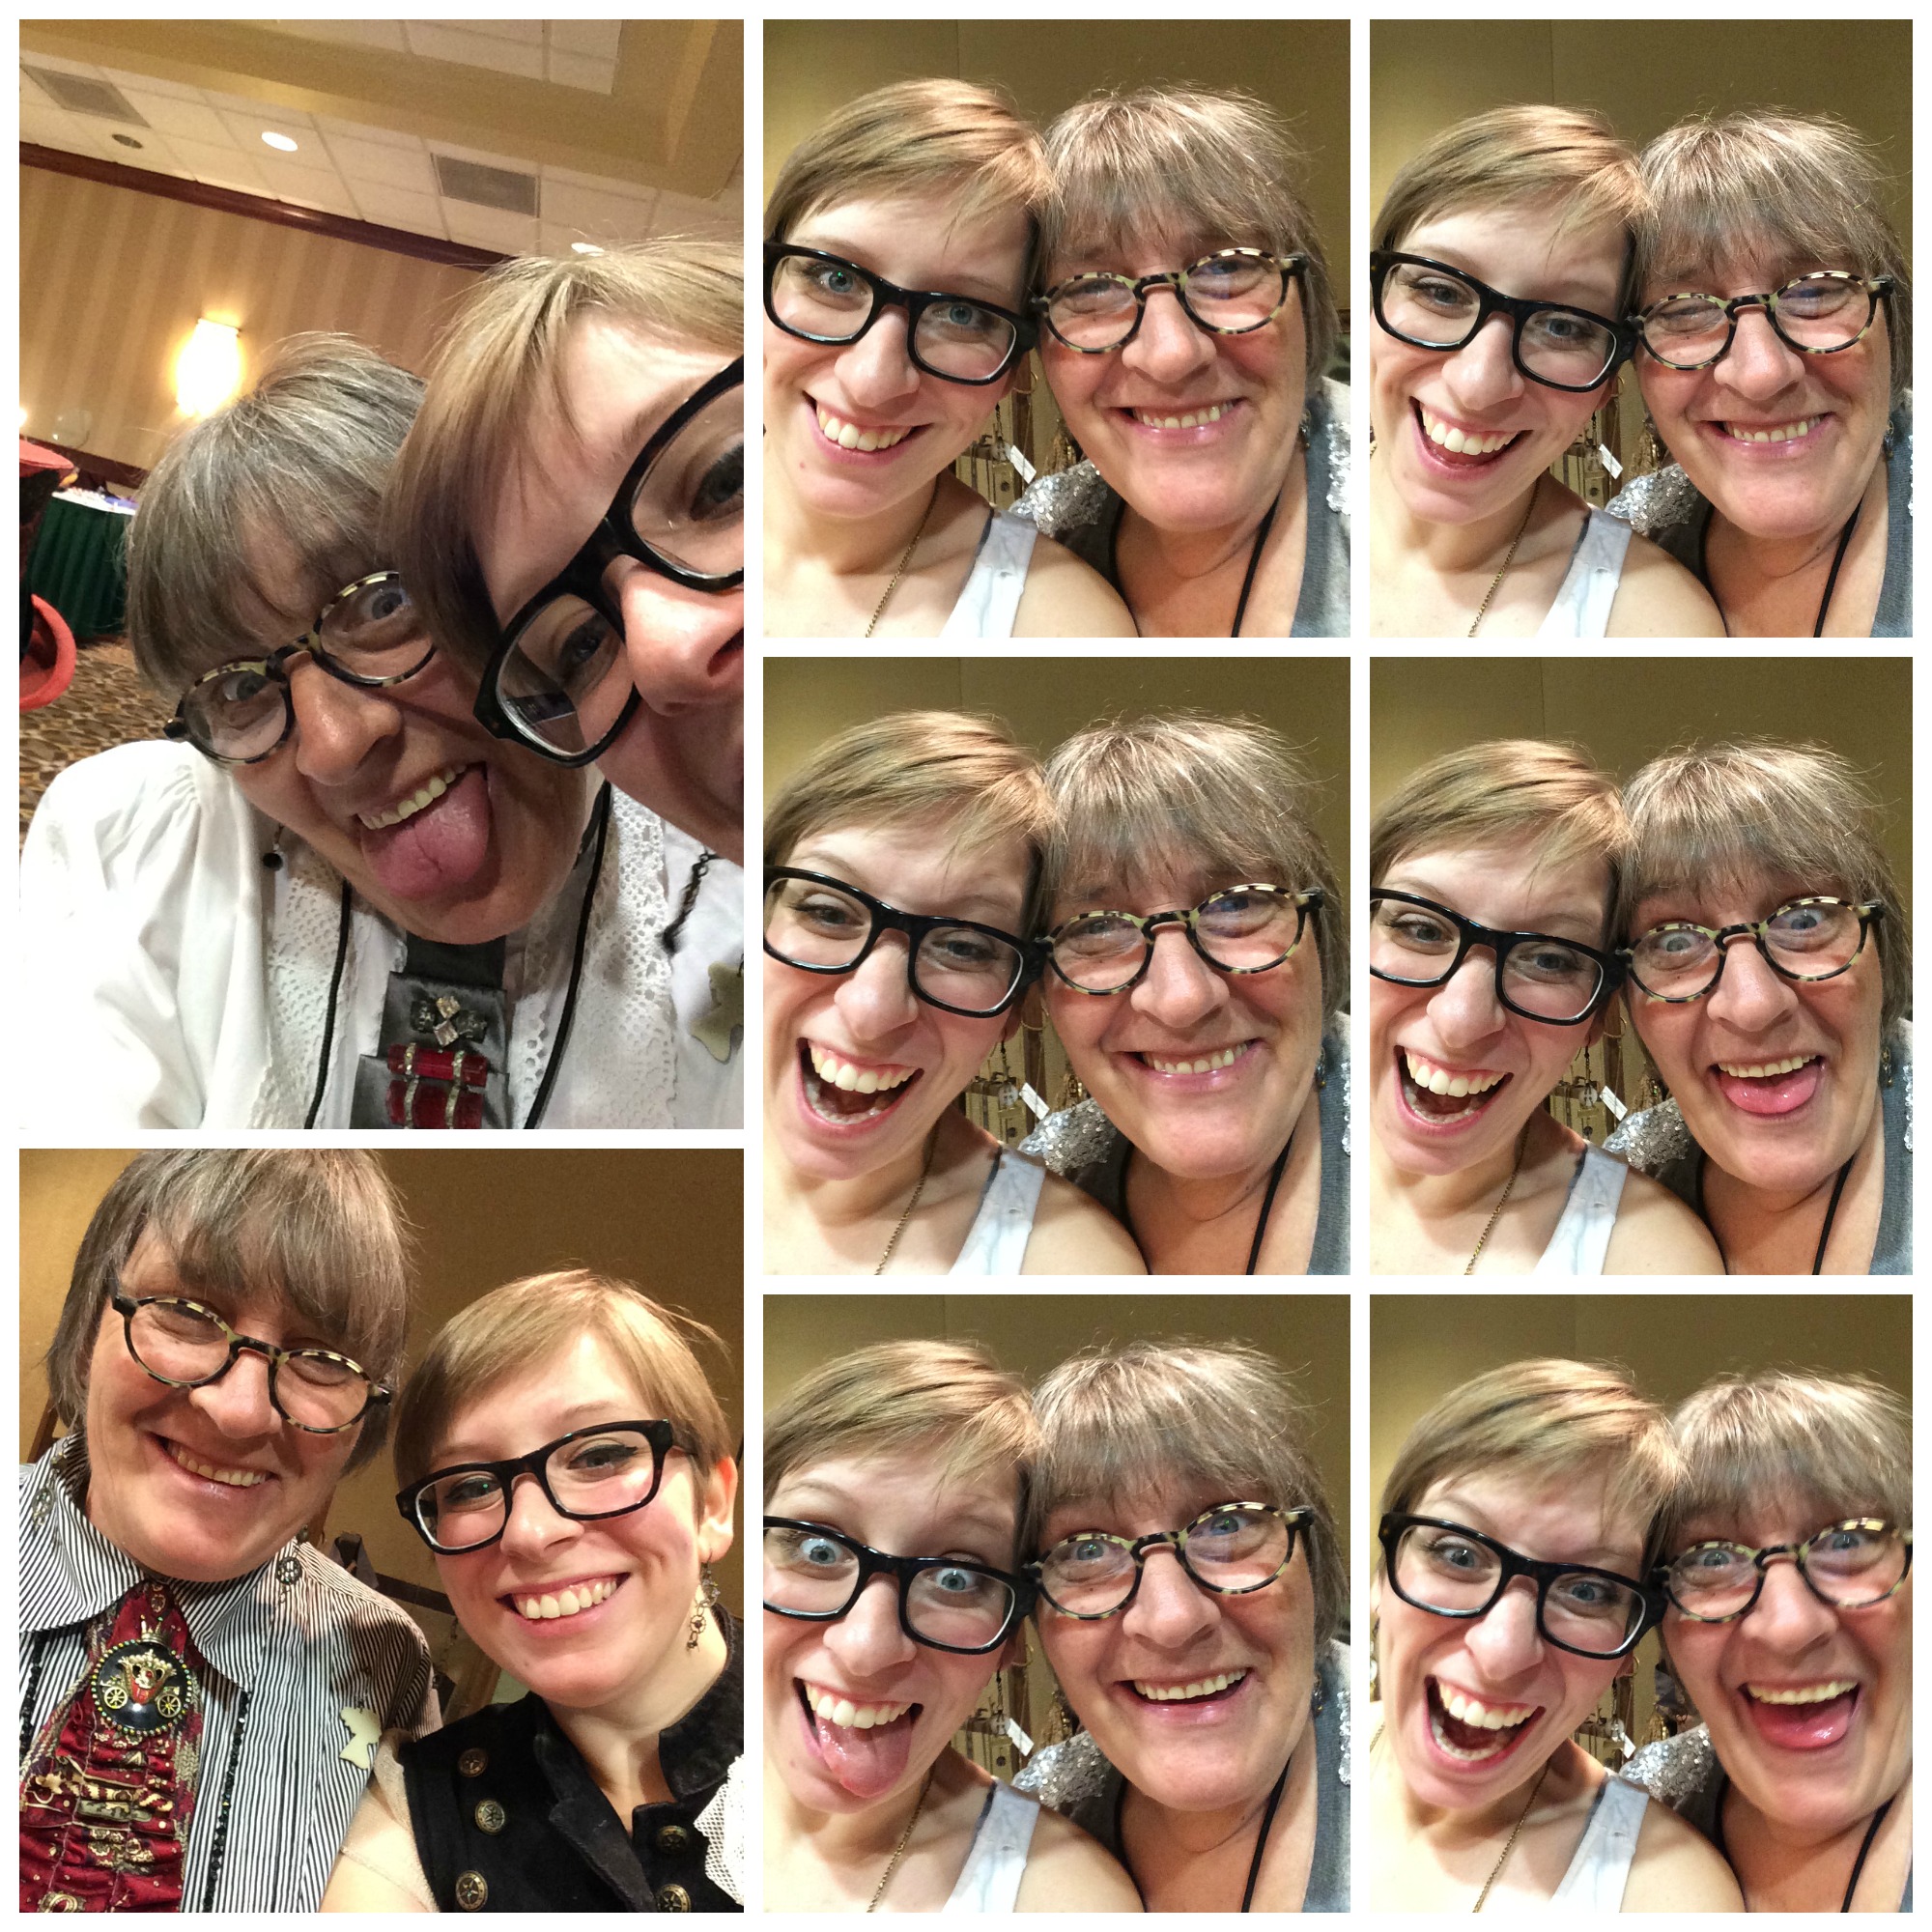
2014-05-17 11.29.06There's a lot I won't forget about that weekend...Our first sale to a dapper gentleman & pirate, "Obscur Idy." That first sale was so exciting. It made it all seem real. We had a lovely conversation about steampunk and creations. It was his warm smile and sense of whimsy that touched us both. 2014-05-17 18.12.50...The Lady Mad Hatter who gifted me a capsule from Wonderland (with included white glittery ribbon, a jack, and a tiny wooden mushroom) after I fixed her button that was falling off of her vest. It's a great feeling to be handy, even better when it's appreciated.2014-05-18 14.33.31...And last, but certainly not least, spending time with my mom. We always have a good time when we're hanging out together, and it's made even more fun when we can share a love of steampunk, a passion for making, and a renewal of creativity.

Me & Mima SPWF CollageCheck back again later in the week, I'll be posting a DIY on how to steampunk a cake stand!

My Handmade Home

UncategorizedSamantha Extance5 Comments

It sure has been a busy month! I am readying for Spring shows, dreaming up new DIYs, and preparing for the Tulsa Art Studio Tour (which I am so excited about! April 12-13 is taking too long to get here!). On top of all of that, I also moved into my very first home with my boyfriend, Rhys! And I thought I'd share some of the handmade pieces that make up a large part of our home and its heart. IMG_9887A wooden silhouette ornament painted by Audrey Eclectic rests against the built-in floor-to-ceiling bookshelves (I was sold on the house as soon as I saw them. Those shelves called out to the bibliophile in me, not to mention the fact that I have a zillion books!).
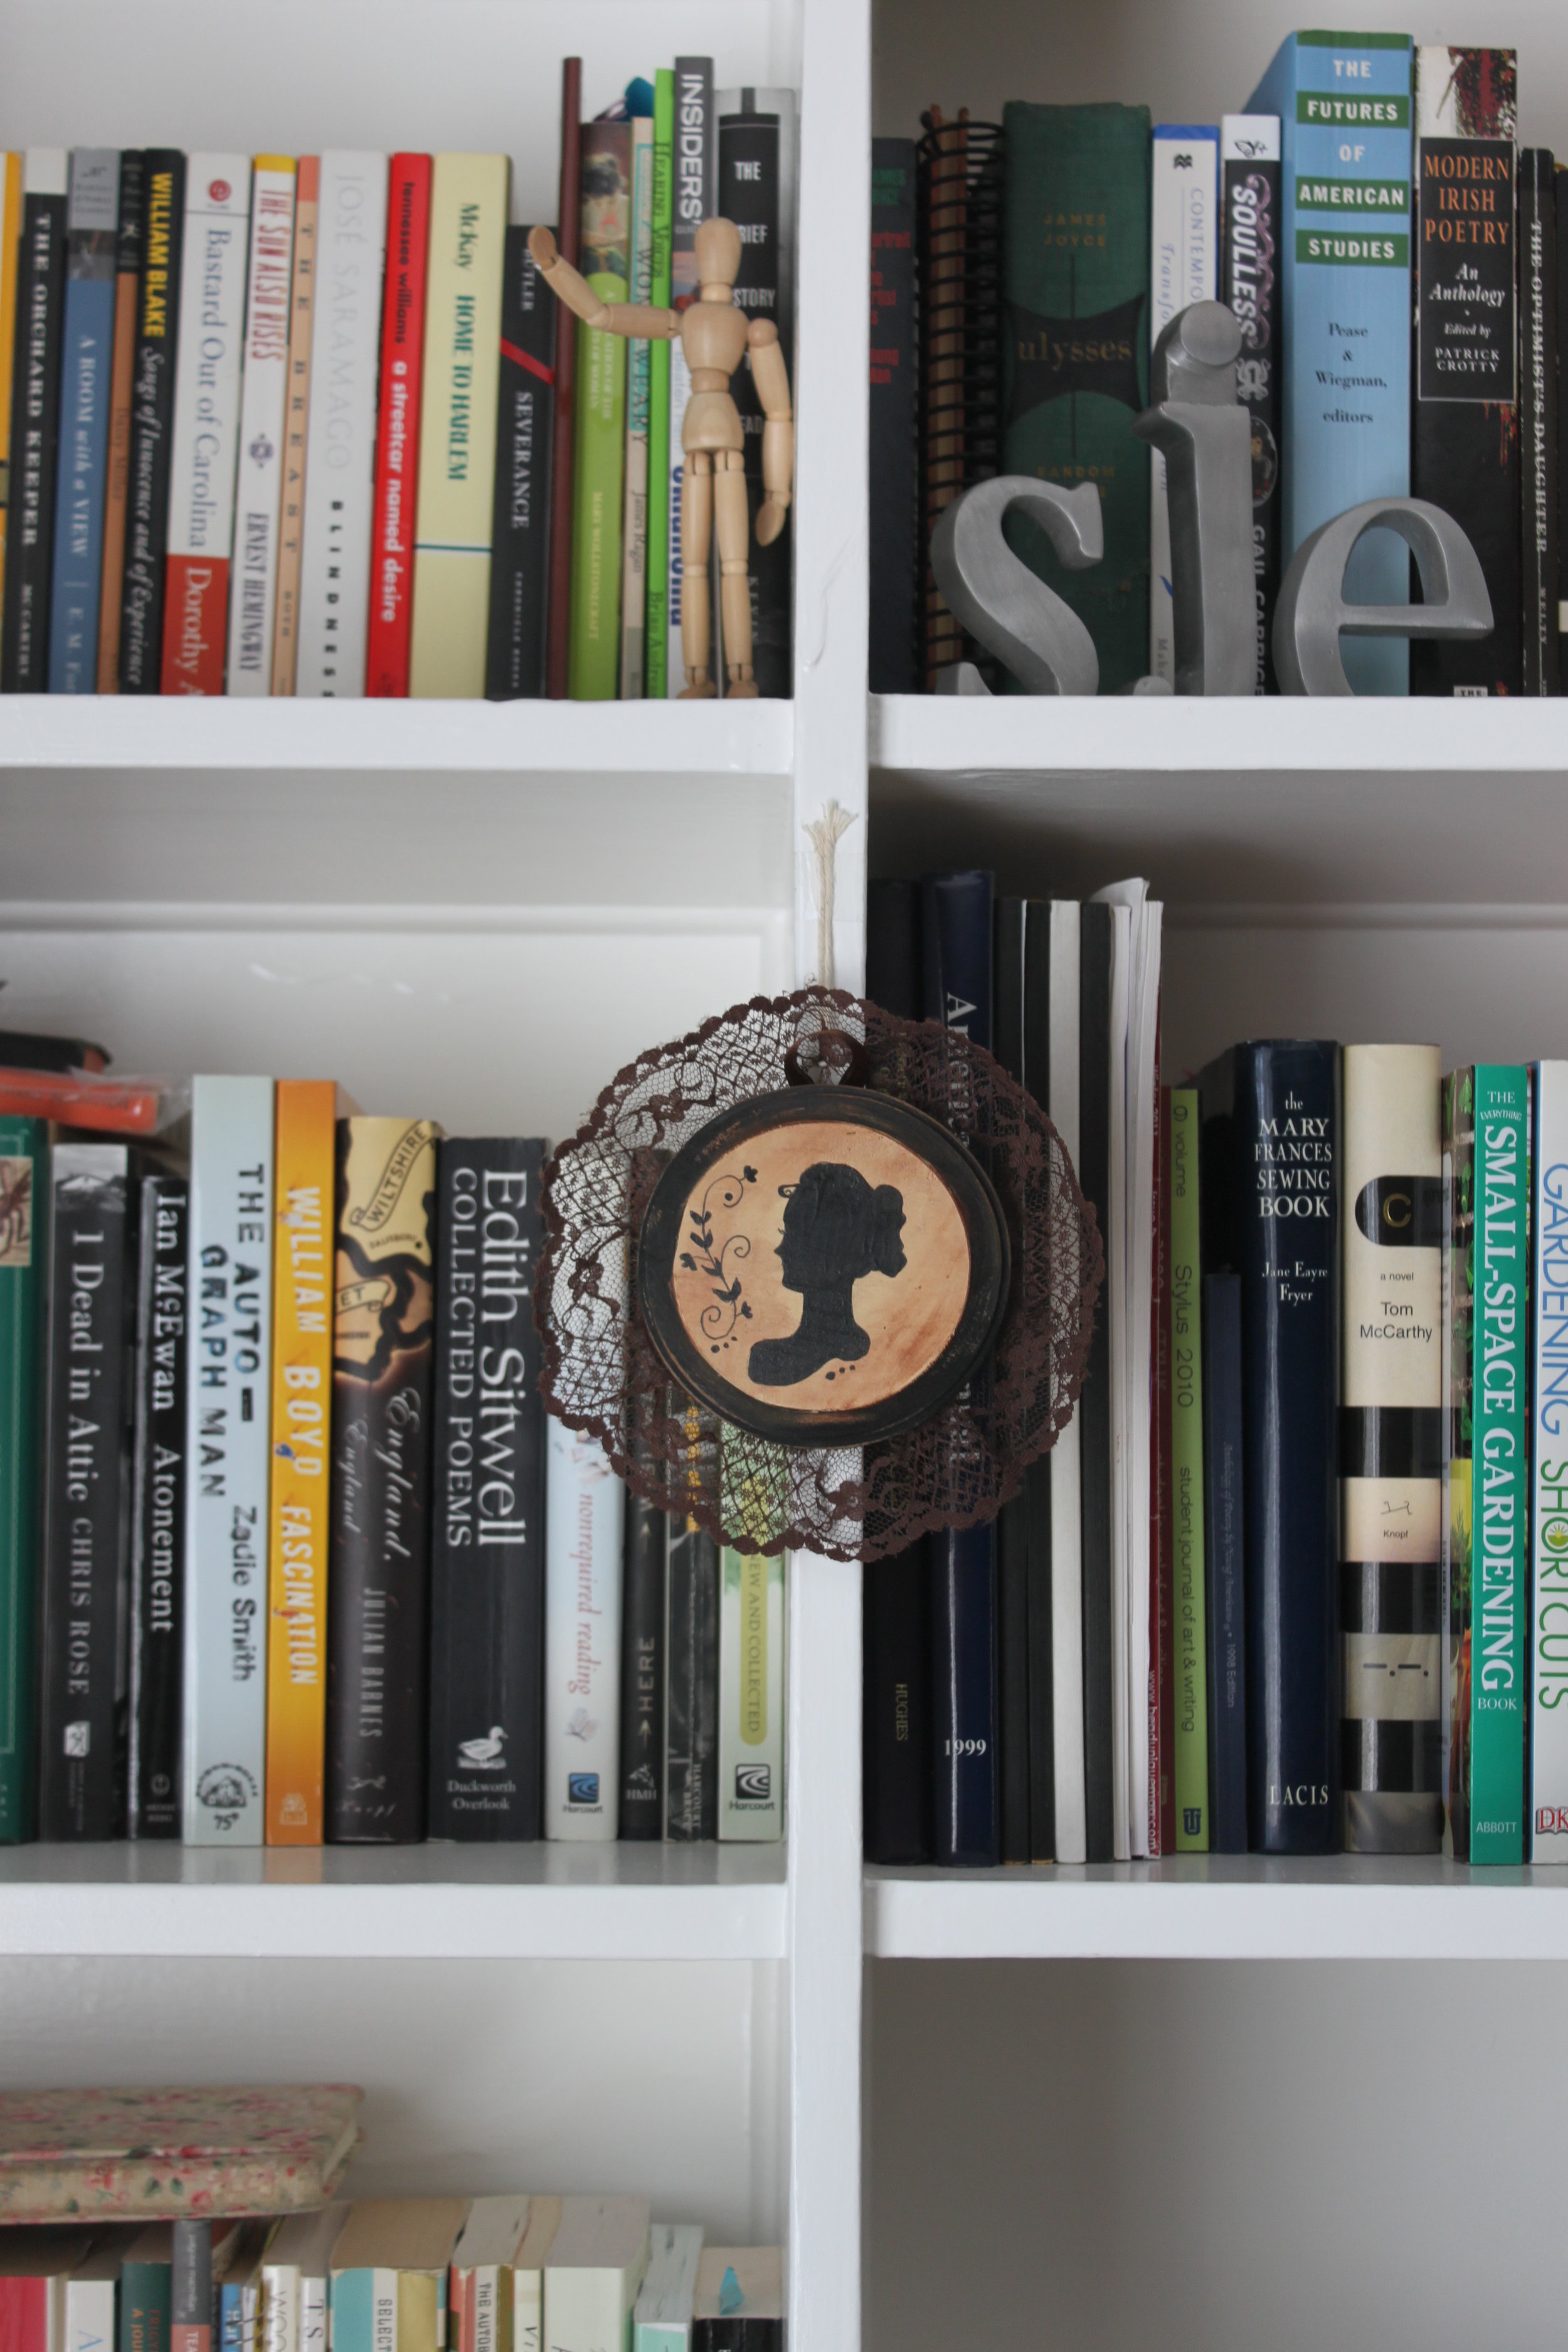
IMG_9888Not only did my books find a home on these shelves, but so did several other little handmade knick-knacks that remind me of good friends and fun crafty times. I made this Oklahoma string art at last year's Etsy Party hosted by Make:Tulsa!

IMG_9890Along the bottom of our fireplace's mantle is strewn a banner, made from upcycled music sheets, silk ribbon, and vintage buttons from my mom's stash. I sewed & cut this banner ages ago to decorate my apartment for my very first television DIY (with News Channel 6's Laura Moss). Whenever I look at this banner, it brings back to life my nervous excitement & my love for sharing DIYs.

The entire Living Room is chockablock full of handmade goodness:

IMG_9891The little Christmas decorations that I do not have the heart to ever put away after the holidays--a hand carved wooden Snowman & sculpted Santa Claus alongside a tiny crazy-quilted tree with button ornaments.

IMG_9892A wooden birdhouse my niece water colored just for me. (She's getting even craftier as she grows! Our home will likely have several new Avery Jane originals before the summer is out).
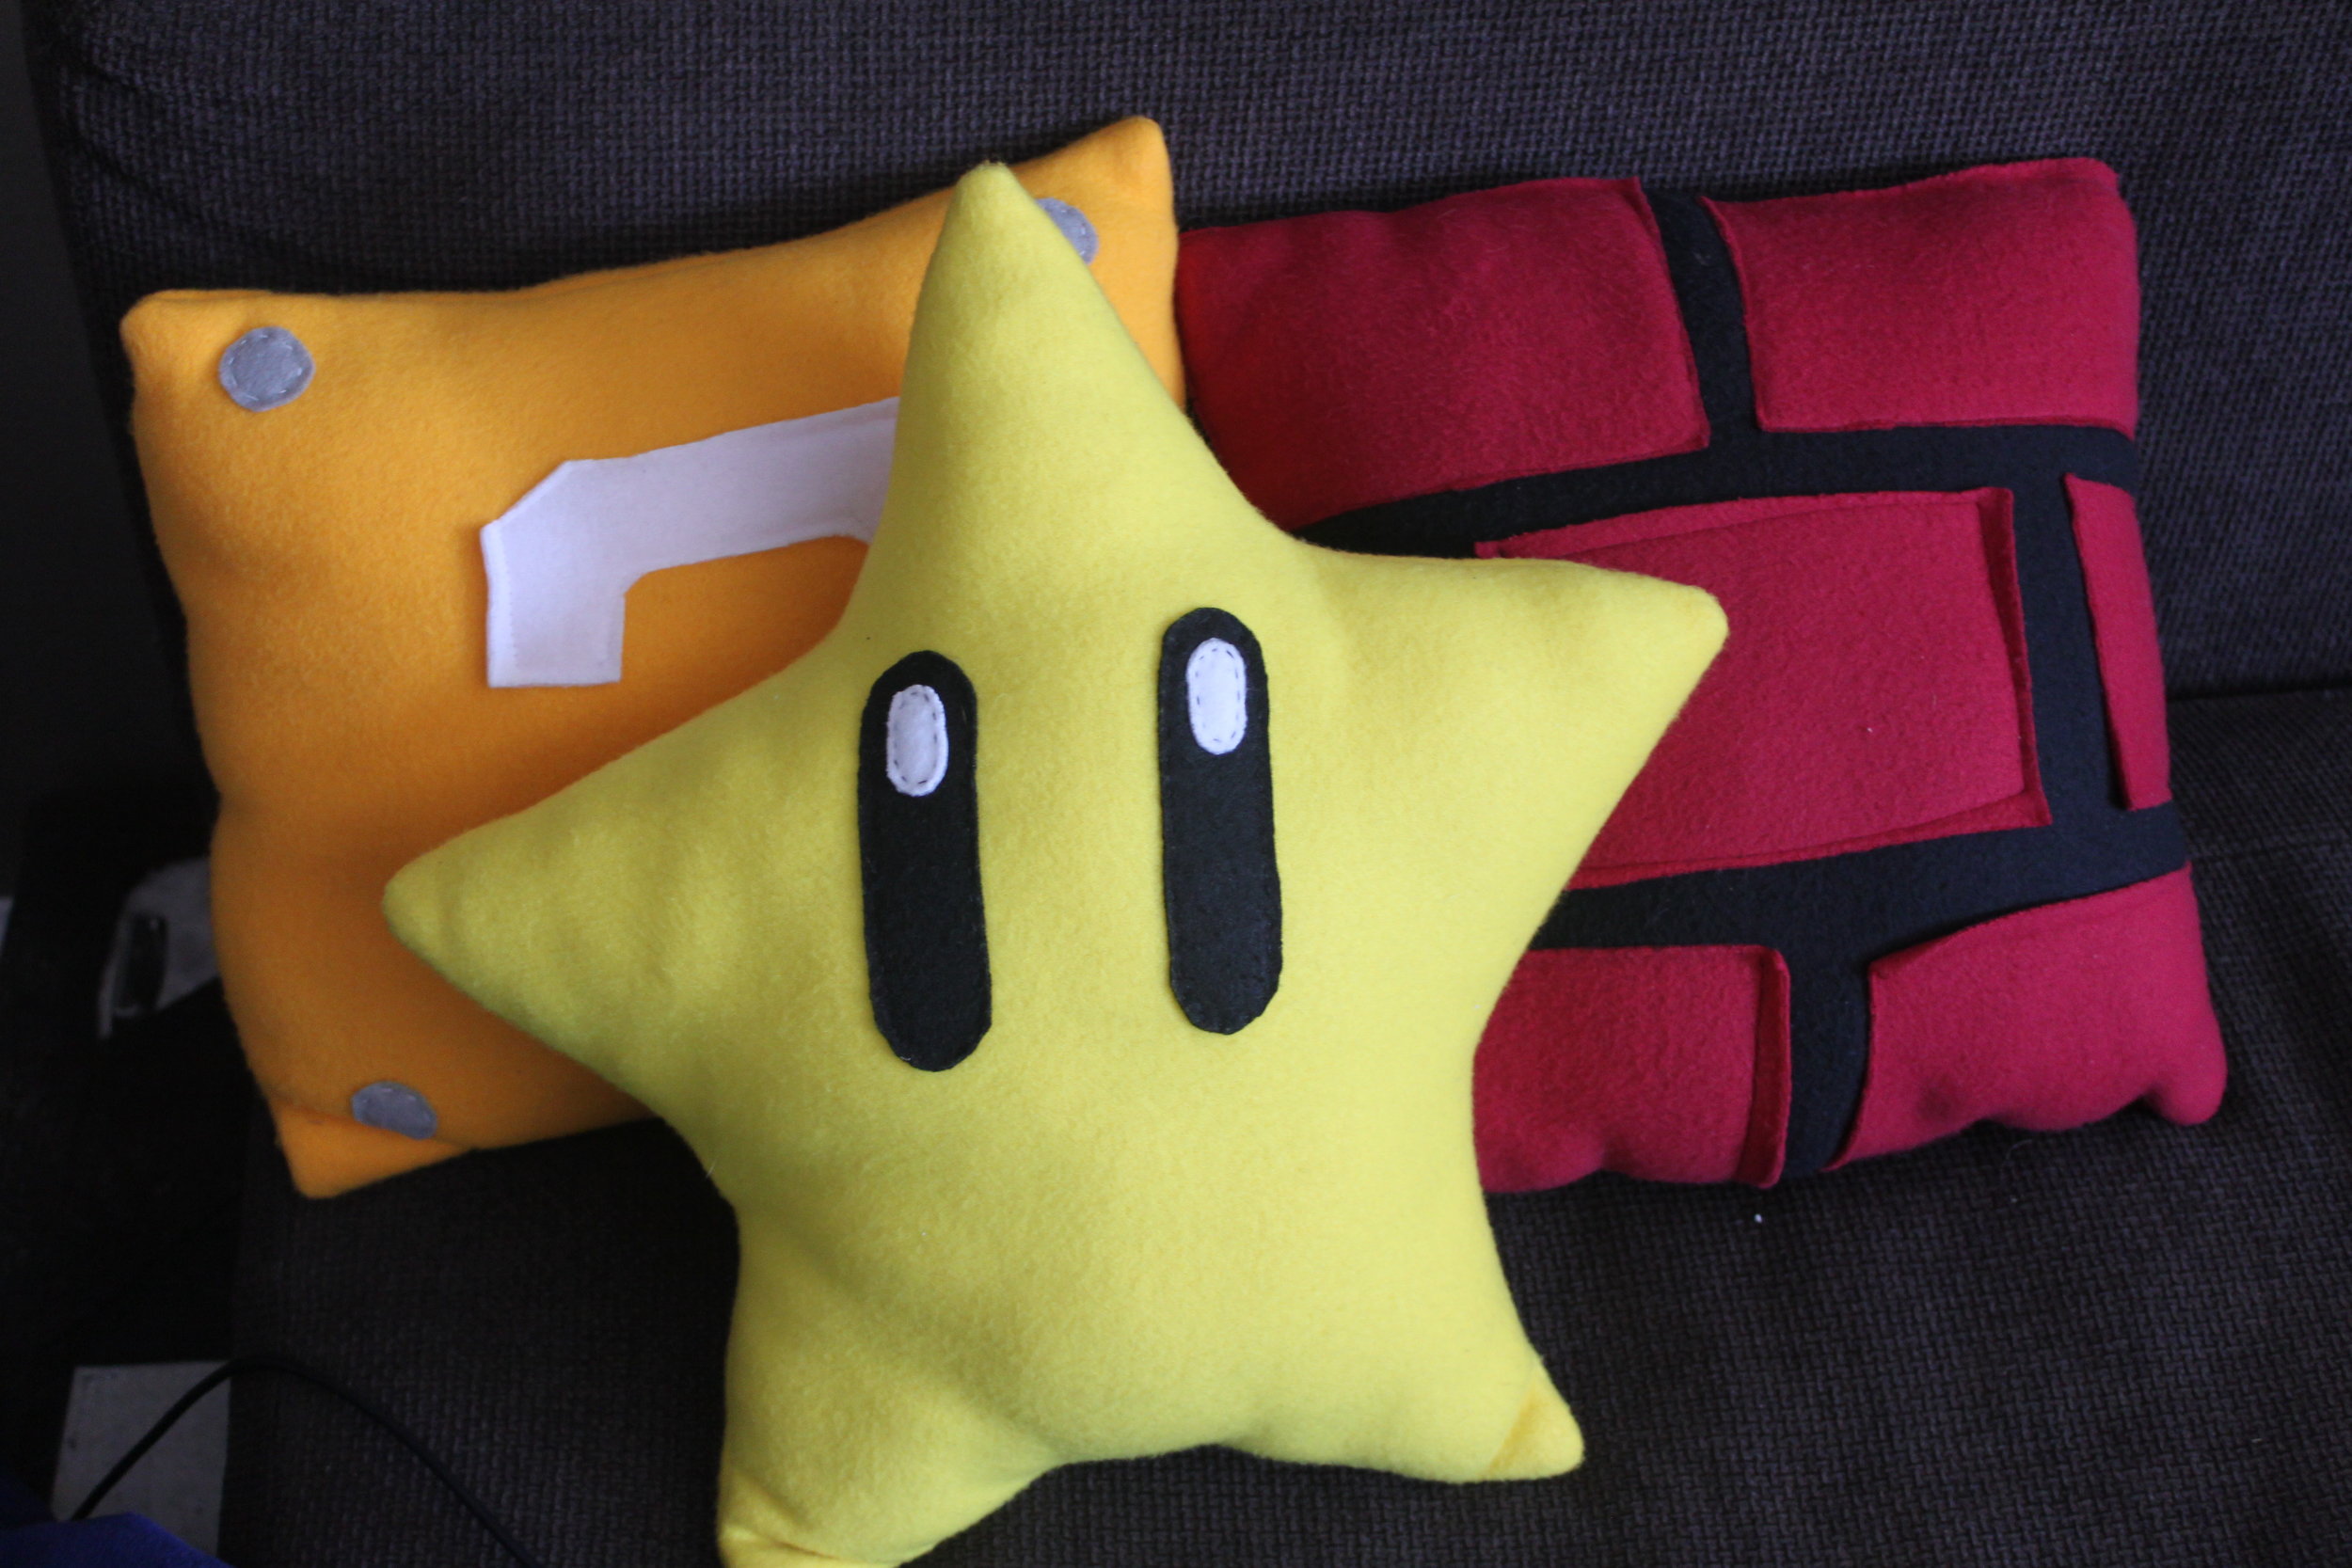
IMG_9917These fabulous felt Super Mario pillows made by Rhys's friends Darcy & Leah. They are super cuddly!
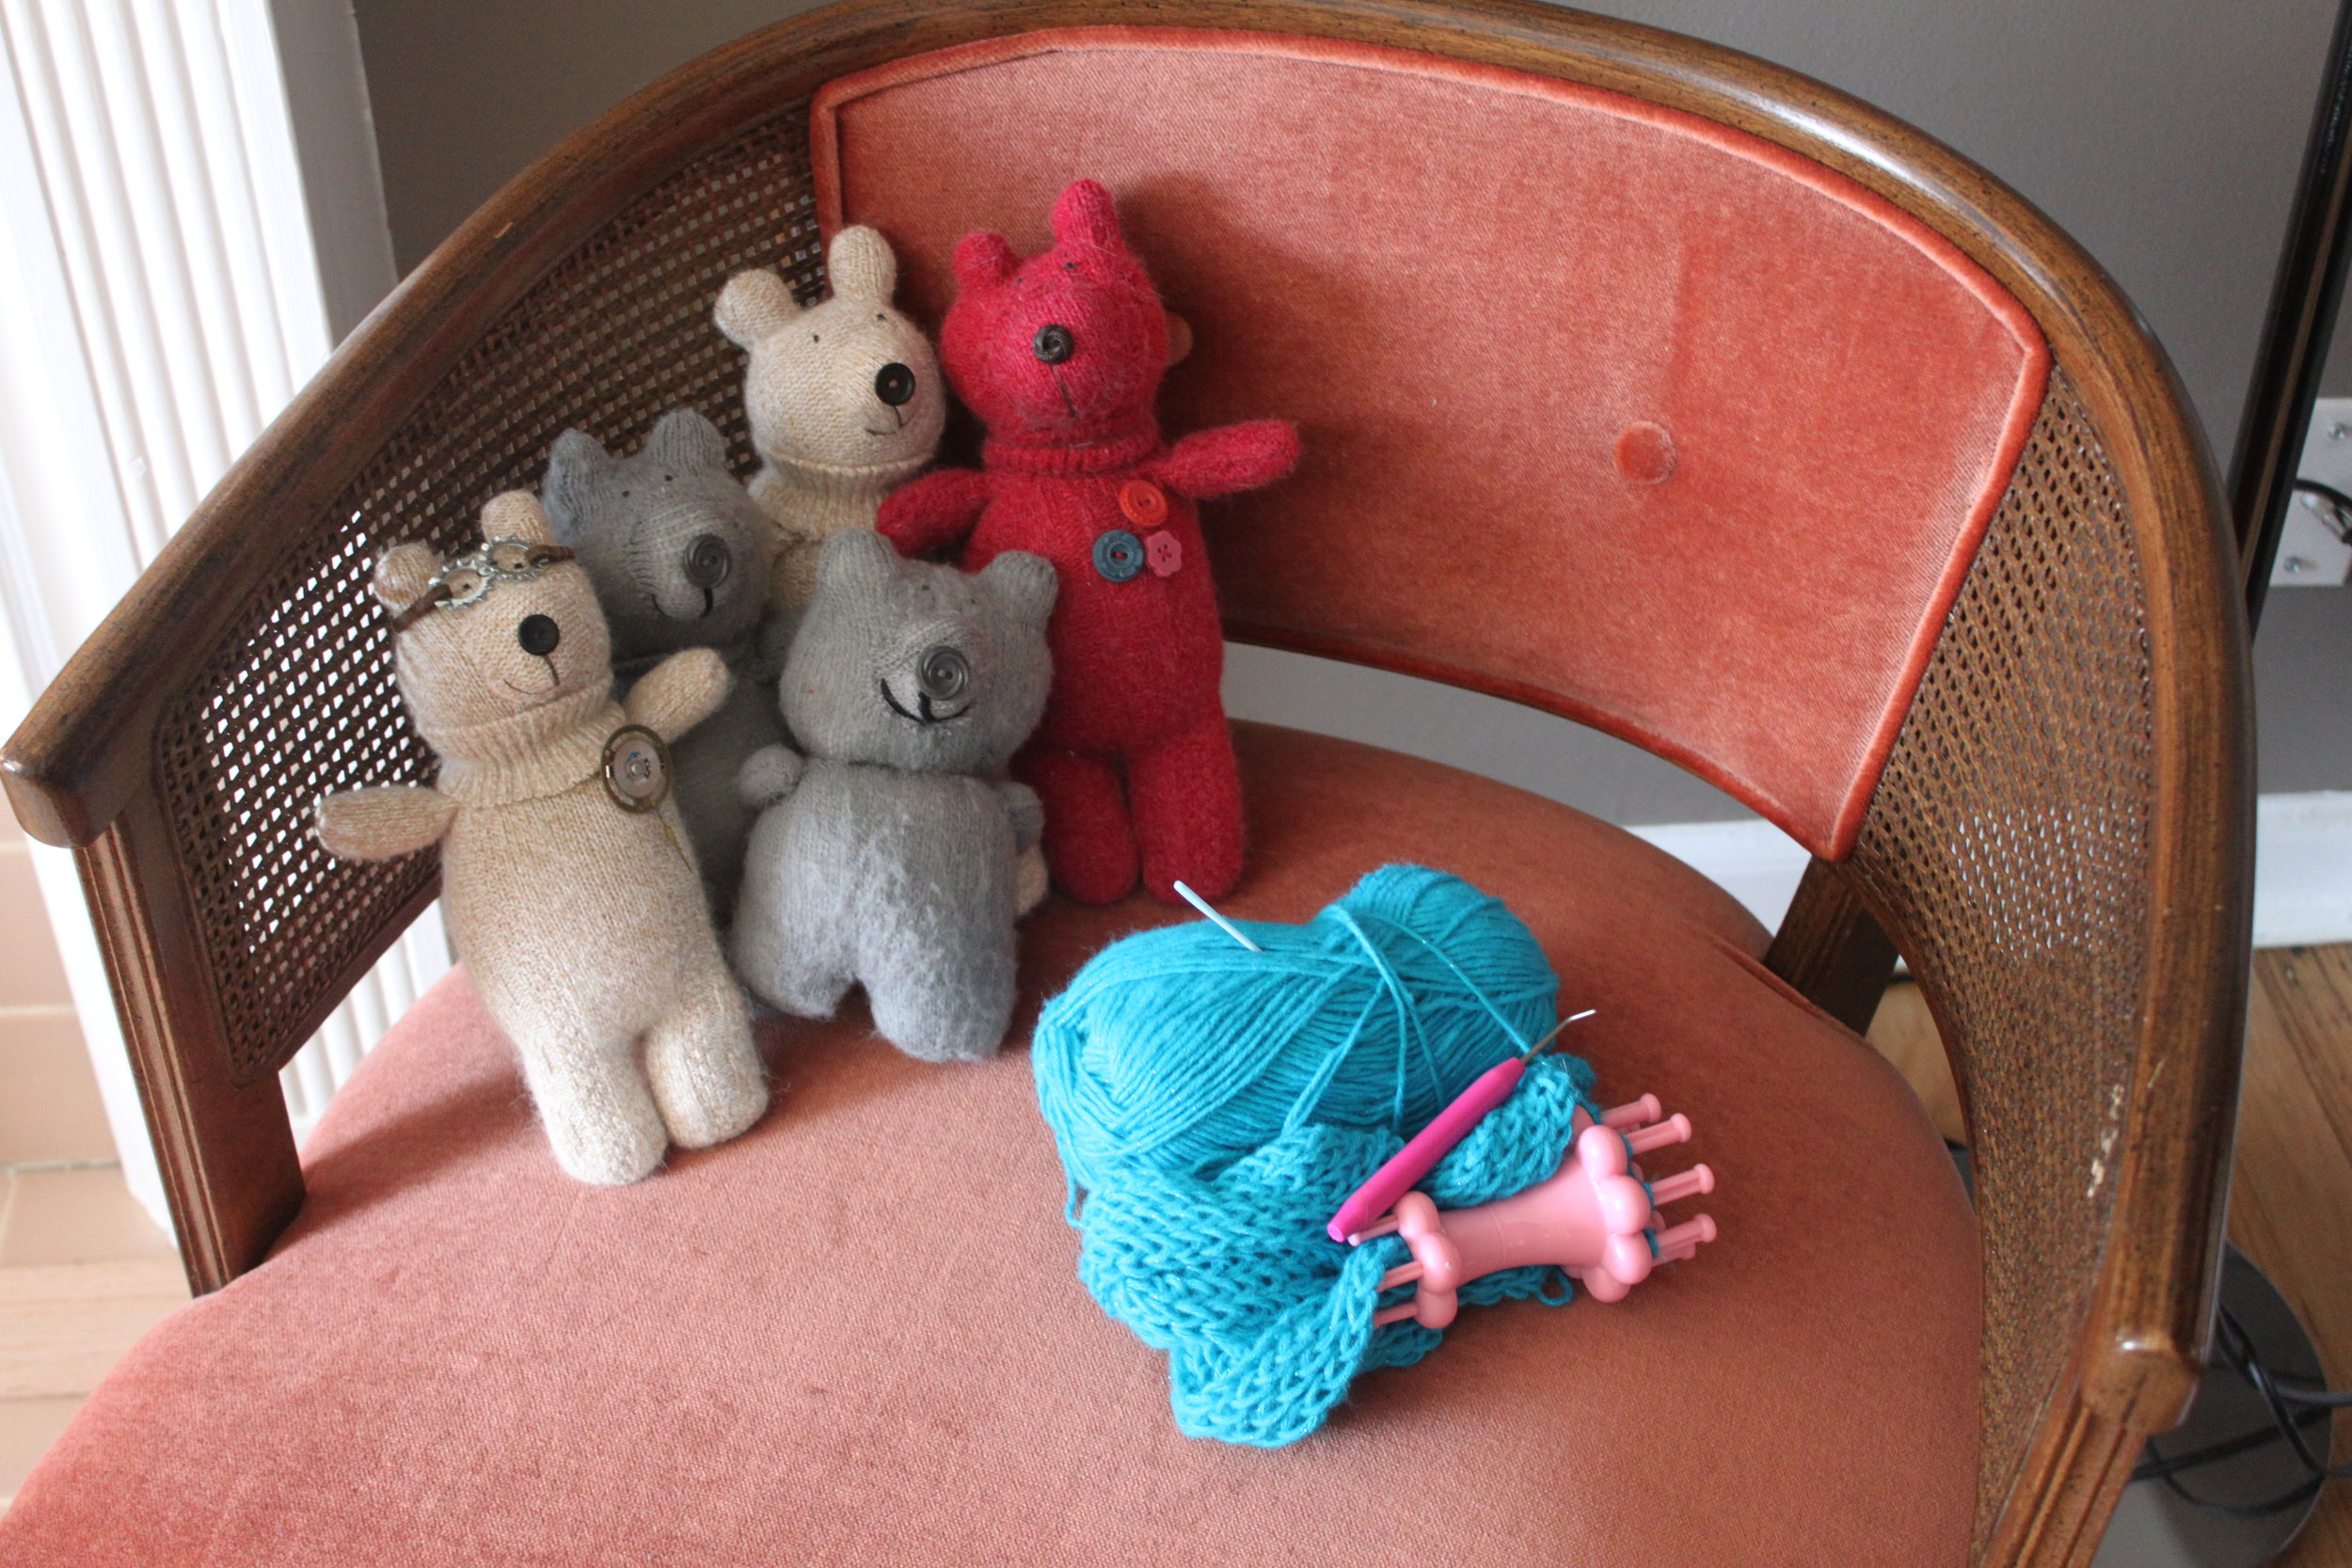
IMG_9918My little sock bears--I love making these guys, especially when I lose a sock and don't know what to do with its twin. Pictured above are: Gears, Gray, Lil'Gray, Oatmeal, and Buttons.

hh CollageWe have a ton of eclectic, local art pieces. I picked up these stunning canvas prints at Indie Emporium this year from A Wing and A Prayer. Whimsical & beautiful--I wanted them right next to our two big reading chairs where they could be seen, pondered over, and enjoyed!

IMG_9897Of course, there were a few things that I luckily "inherited" along with Rhys. My favorite of which is this stained glass art piece of Batman's symbol made for him by a friend. It sits in our kitchen window and catches the sunshine. I also like to think that it wards away evil-doers.

Our kitchen, also, has lots of handmade pieces scattered throughout:
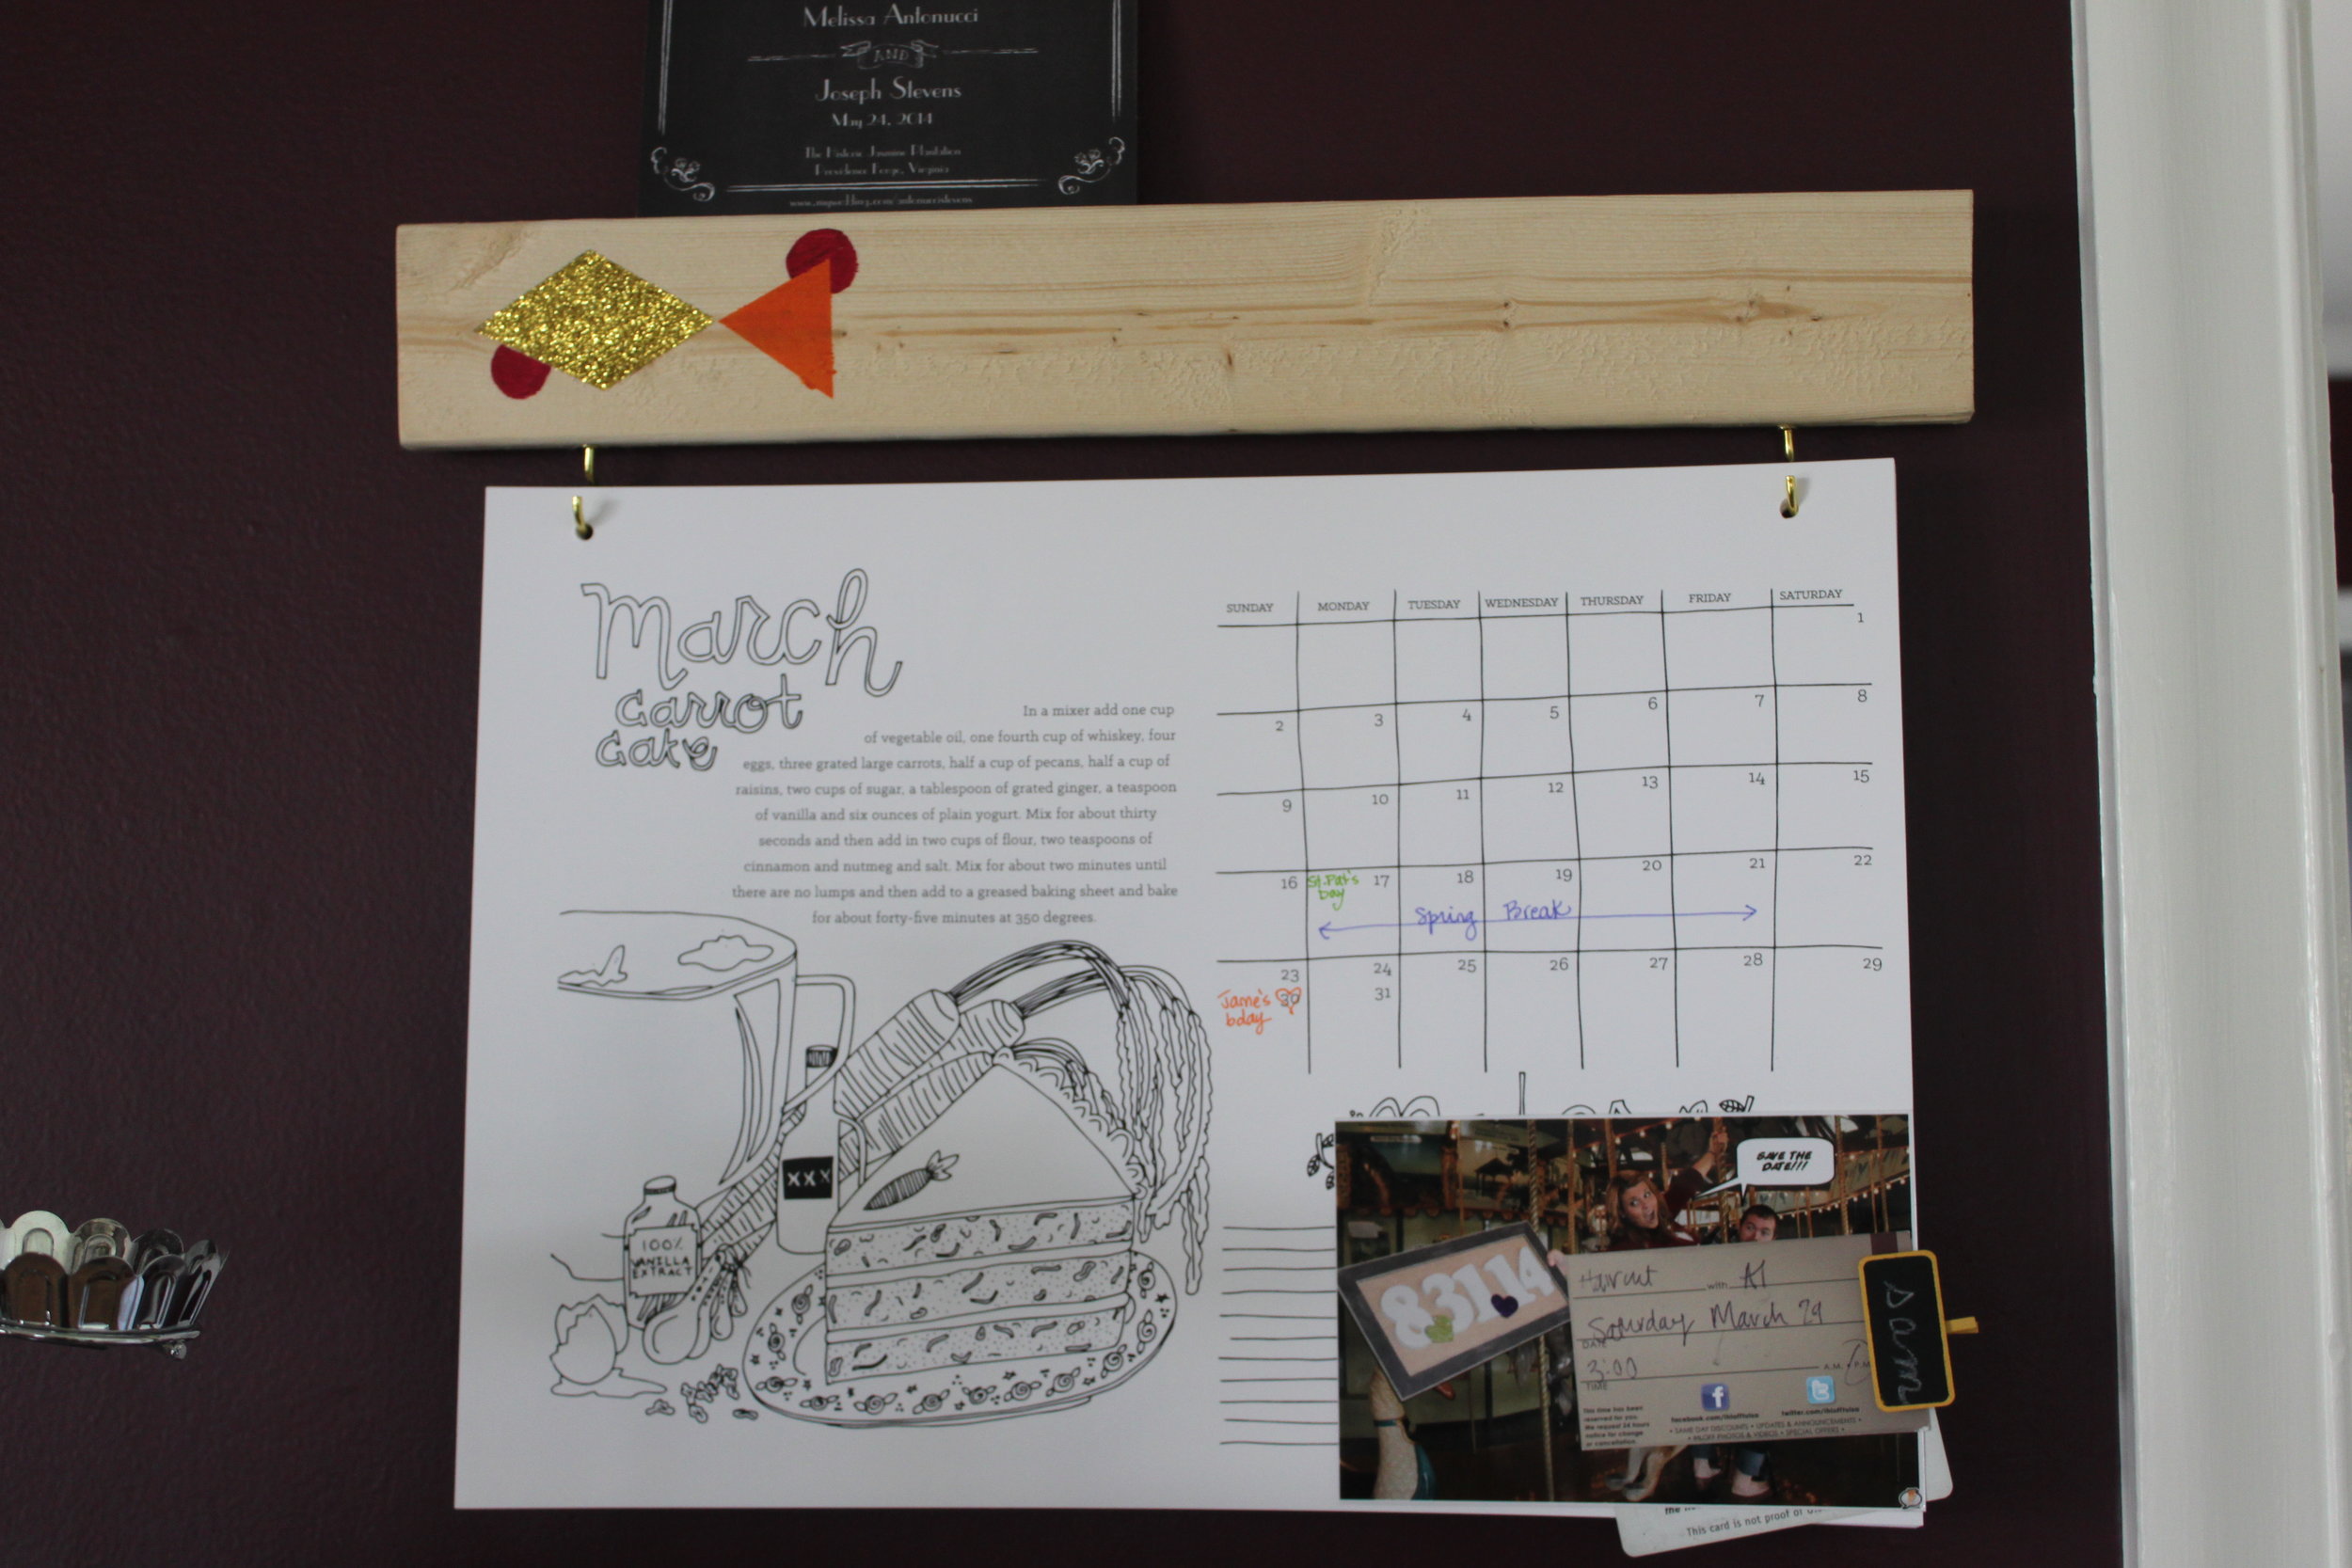
IMG_9898I love my Phat Beets calendar with seasonal recipes which I purchased at Made; the Indie Emporium Shop. The drawings are super cute & I am adding new dishes to my repertoire!

IMG_9899On the stove hangs tea towels from my dear friend, Christine Sharp-Crowe (weather&noise). I've always admired her aesthetic (which is borrowed from William Morris: "Have nothing in your house that you do not know to be useful, or believe to be beautiful").

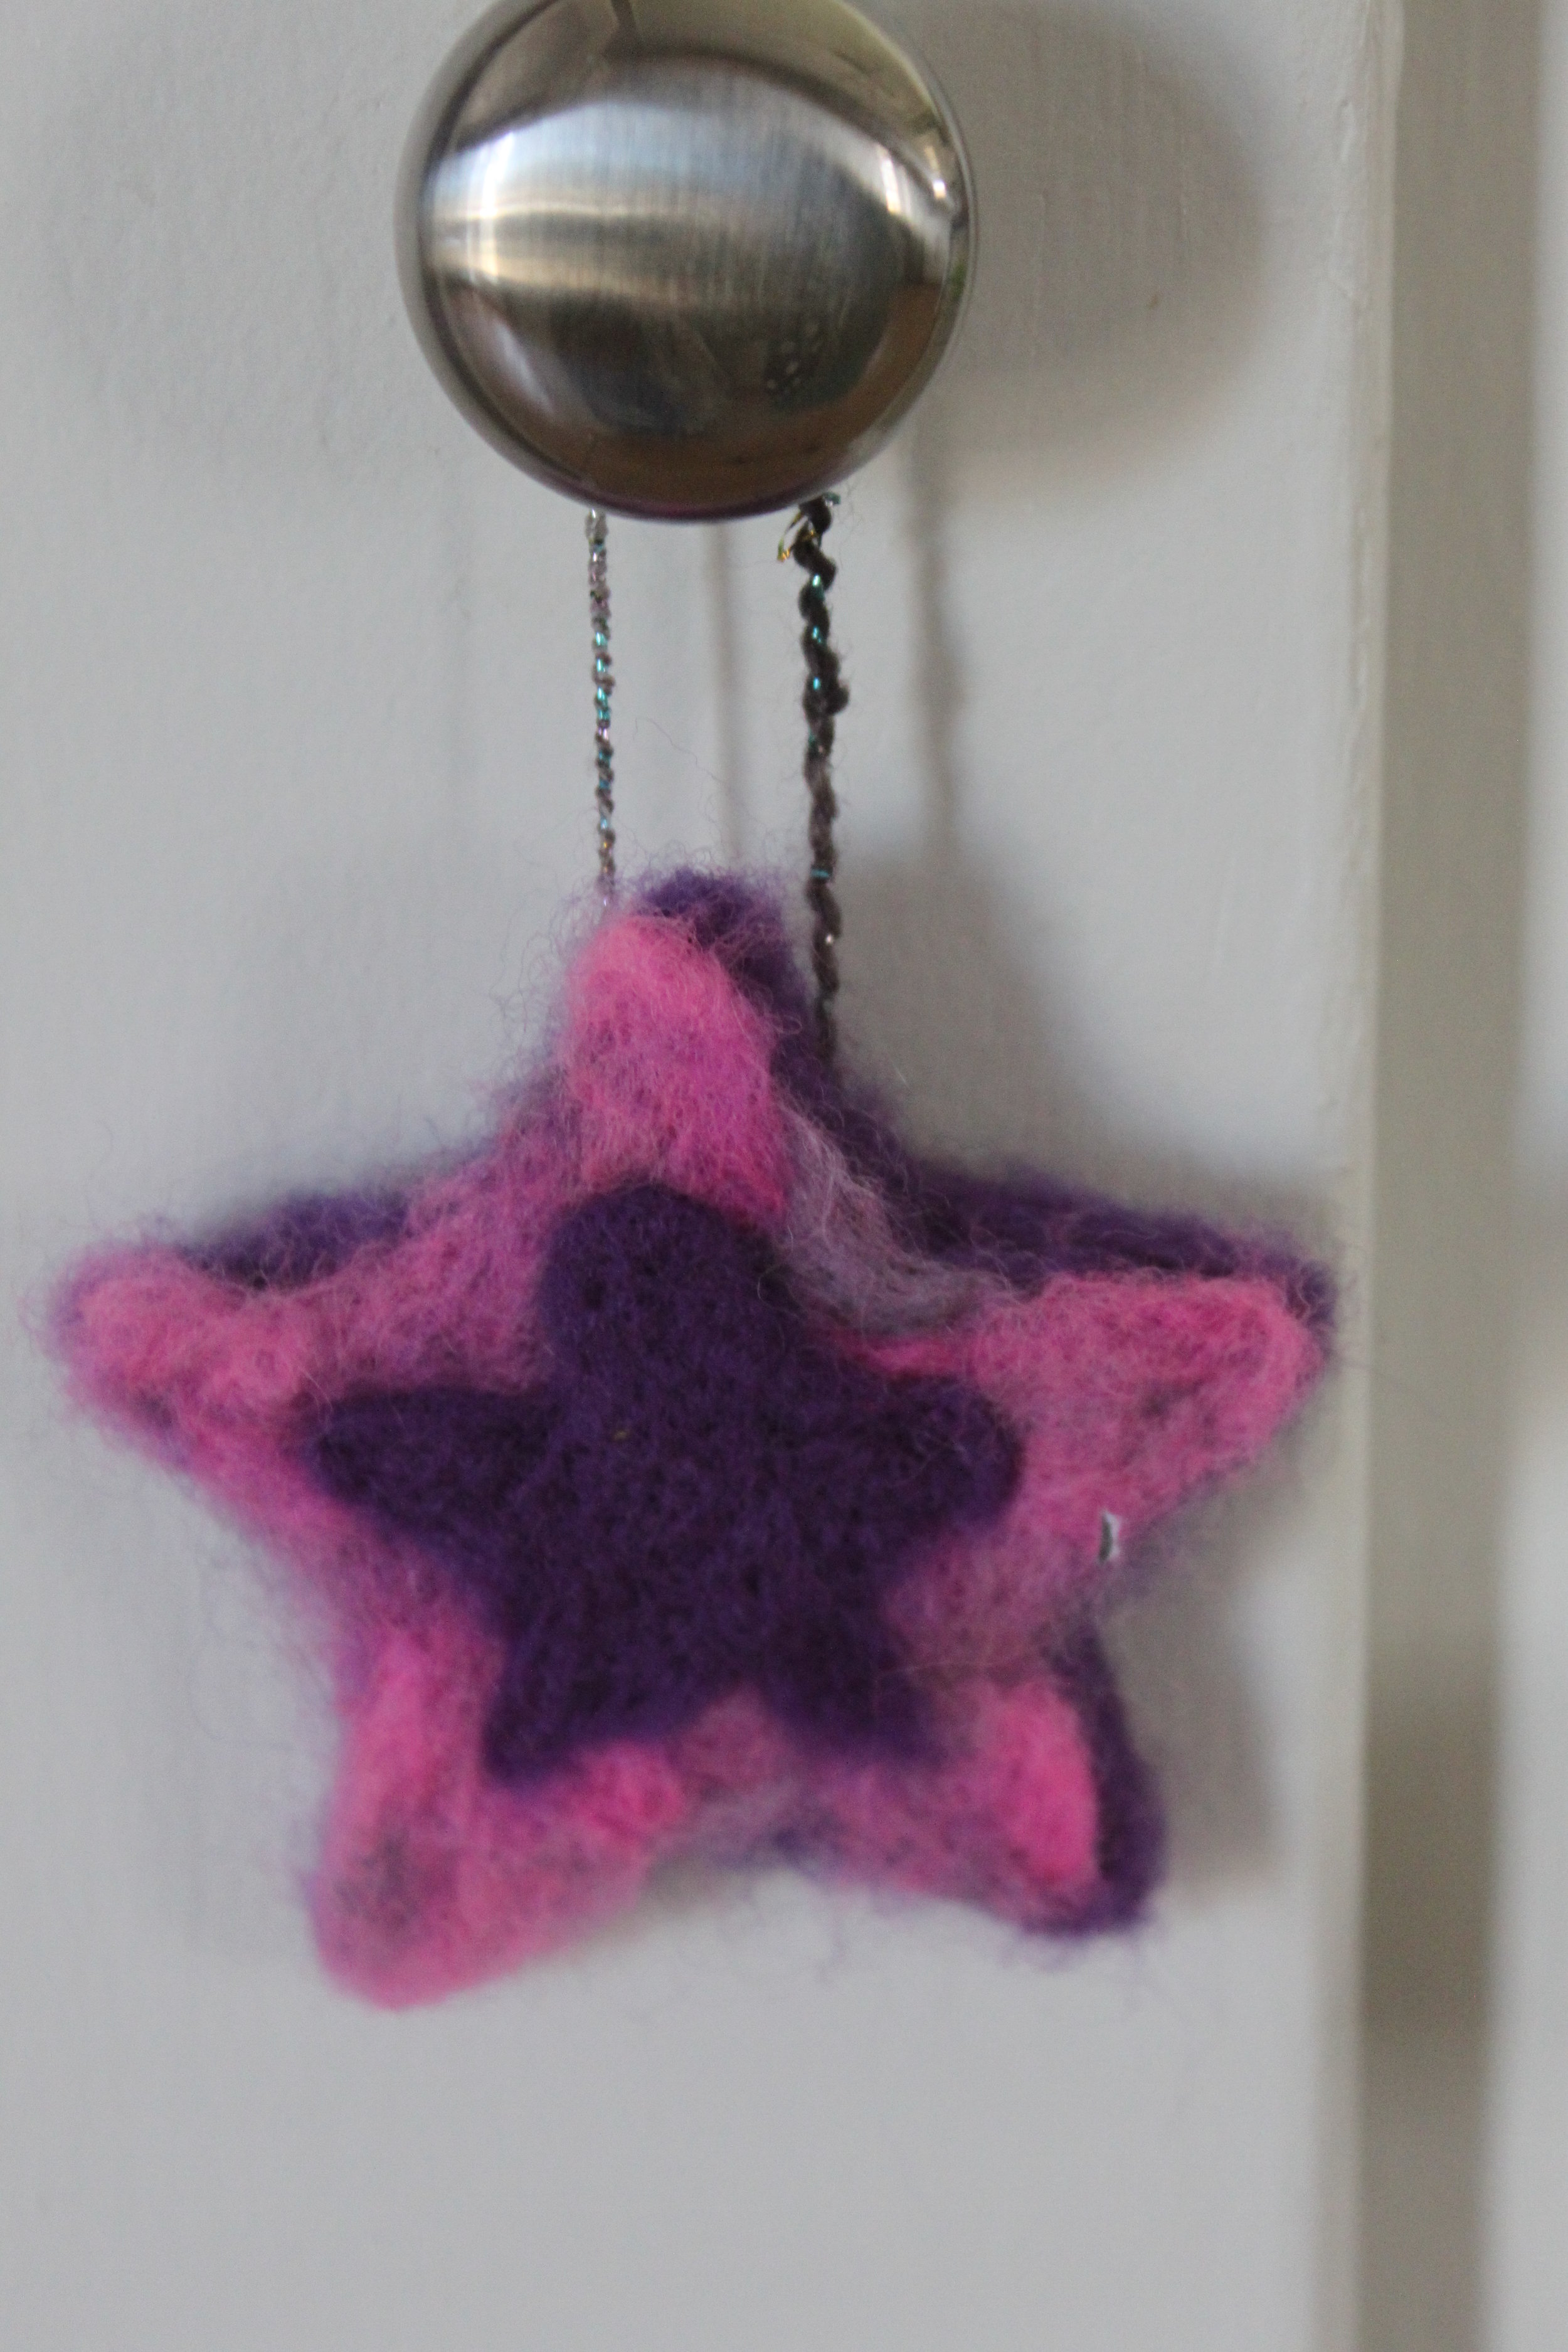
Alongside the stove, on the wall is a mounted bottle opener by A. Whip Designs! It was our first handmade purchase for our new home. (Thanks Okie Crowe for selling these in your righteous store).  Rhys loves craft & local beer, so this was a perfect find. IMG_9915And last, but not least, on the pantry cabinet doorknob hangs a little felted purple star made by my sweet friend Holly, of Hollyrocks. I can't wait to start a garden of my own and litter it with Holly's little polymer clay creations, garden stakes, & seed bombs. IMG_9916Perhaps my favorite of all the things that I have ever been made are the quilted wall hangings & table runners by my Grams. I have different ones for every season & holiday. I proudly display her careful stitching and beautiful quilting throughout our home. With a Housewarming Party soon approaching, I have my Welcome Pineapple up on the wall.
hh CollagePictured to the right, is a quilted table runner made my Grams (out of her favorite blue floral fabric) and a cedar Hope chest that was built by an old family friend, Tom. He crafted the chest to look like my great-grandmother's, as a thank you gift to me for editing his novel. In it lies quilted treasures galore and handmade holiday ornaments.

IMG_9919So far, one of the best perks of living with Rhys is getting to enjoy his photography all the time. His photos, to me, evoke an intimacy with his subject--whether he is snapping a shot of rural Oklahoma or far-away places that he's traveled. I always feel as if I've learned a secret about that place.
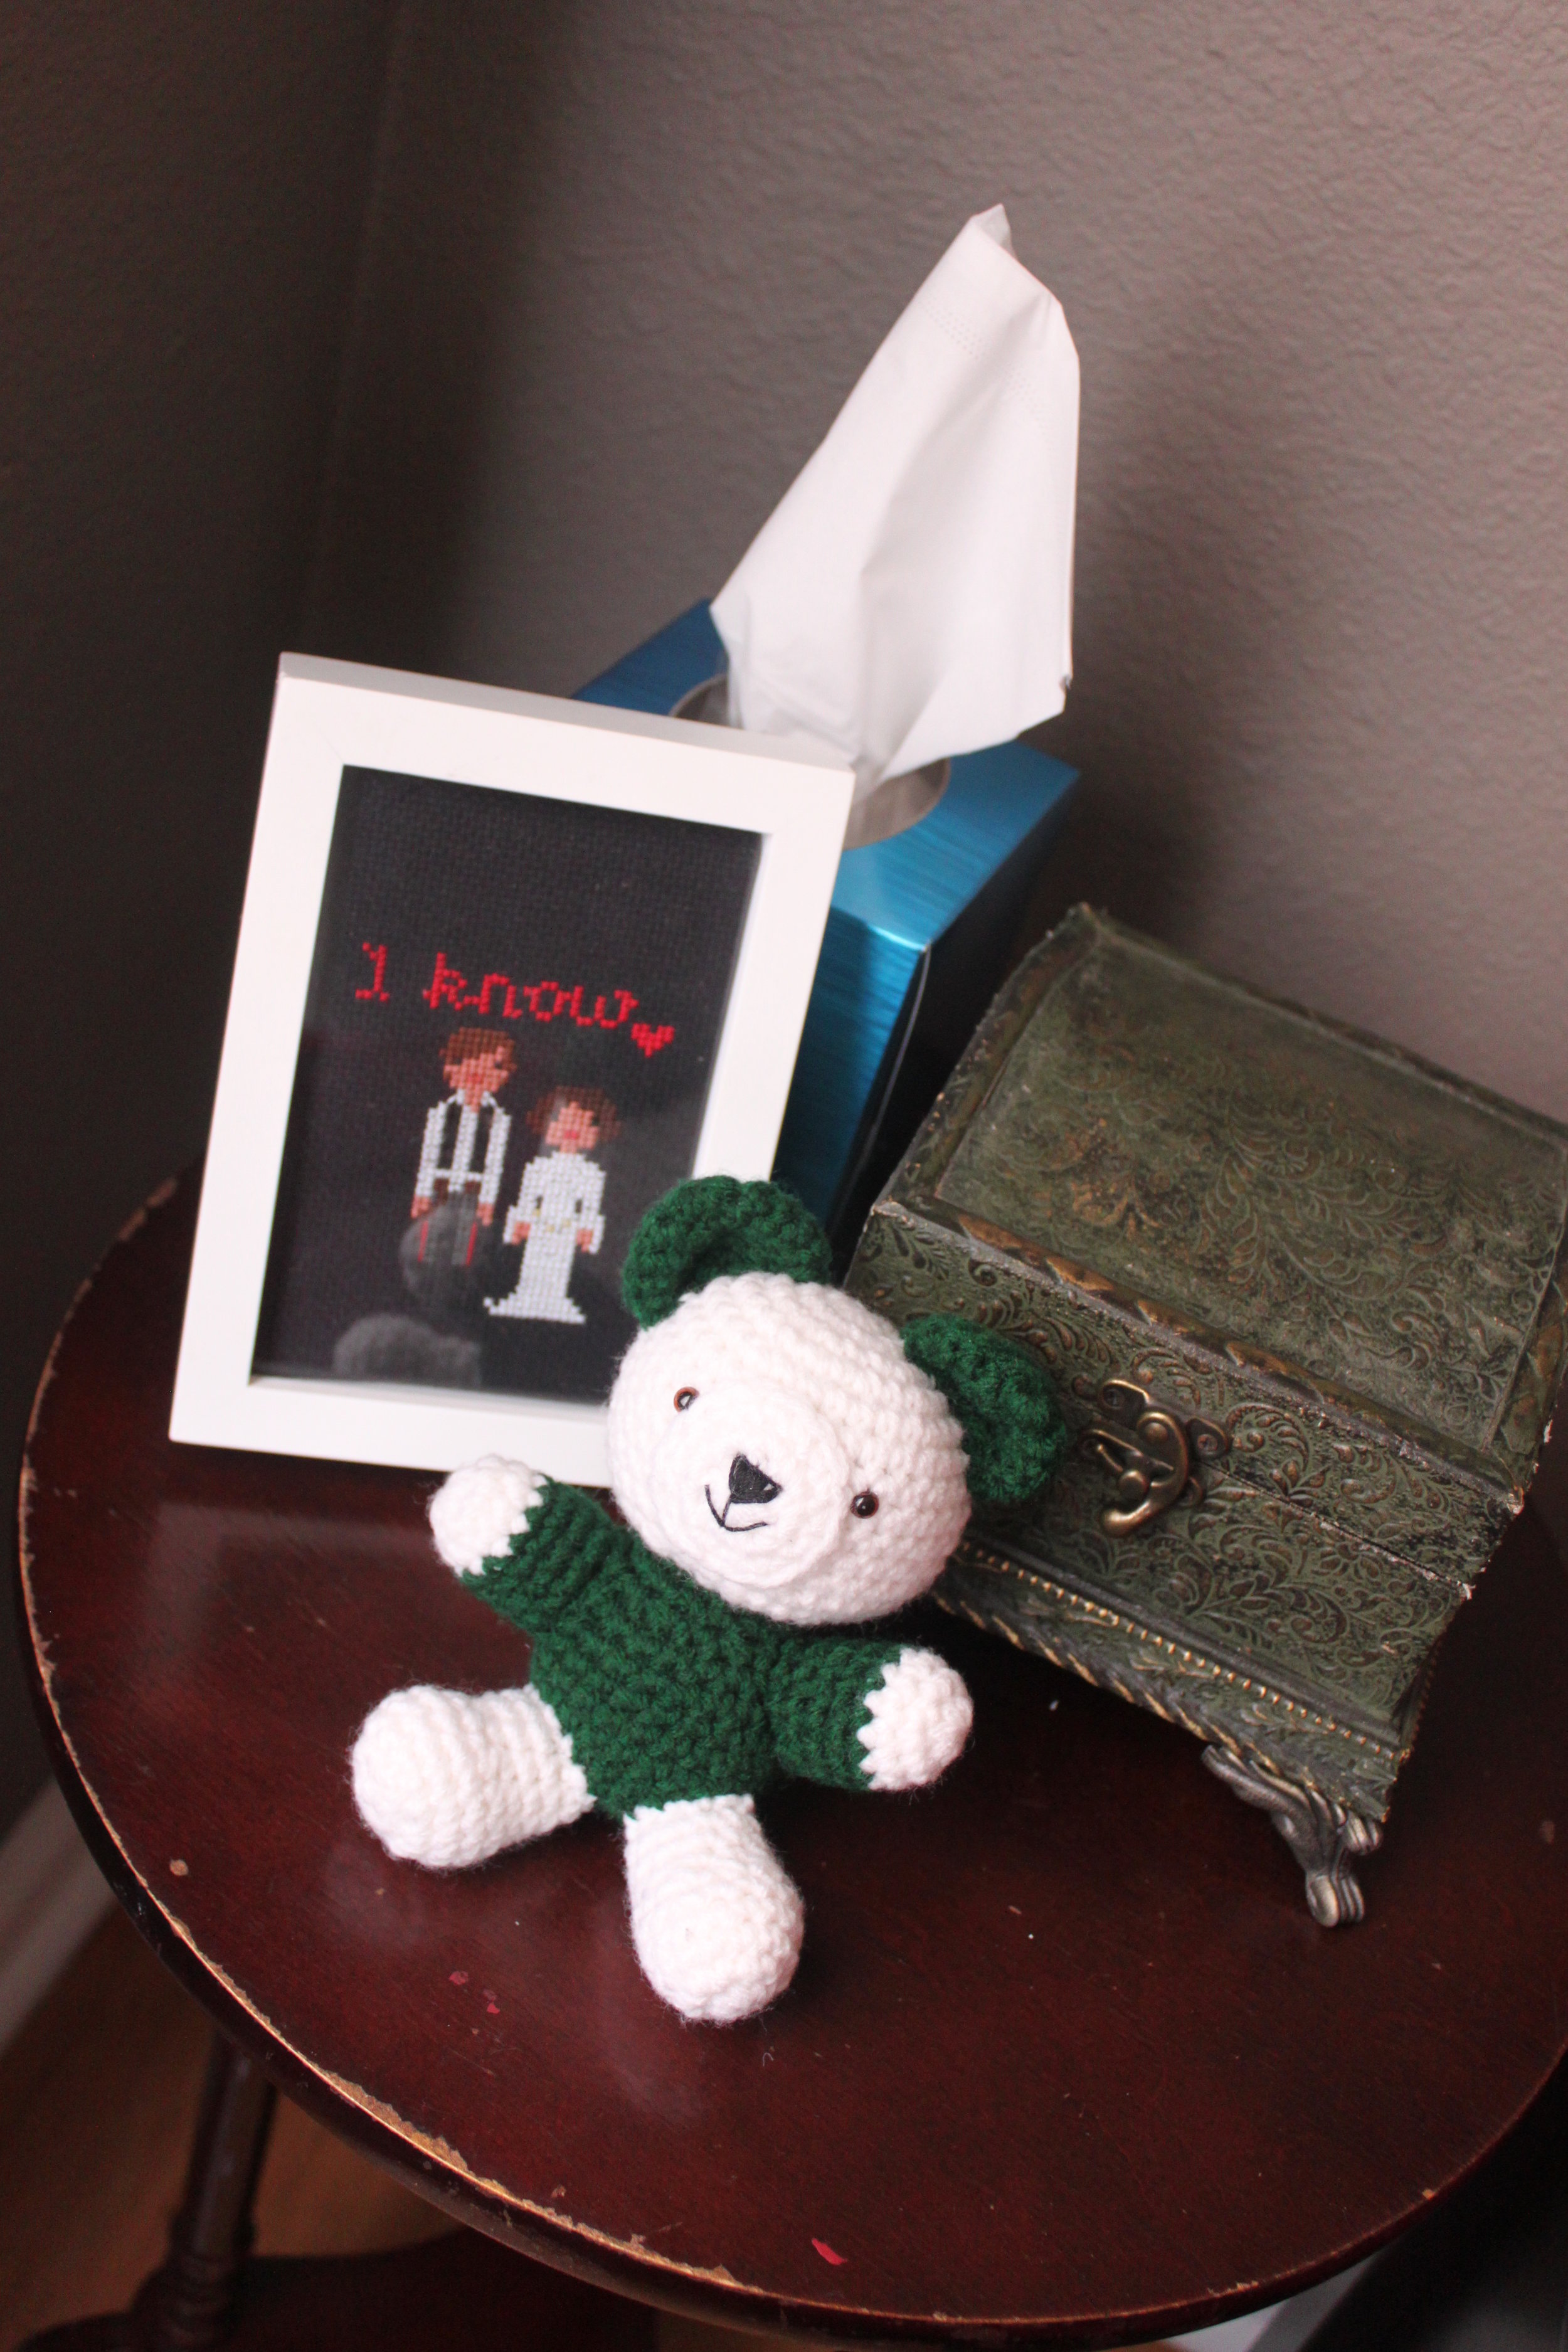
IMG_9913Ok, my dear reader, I am about to get a little gushy. I am so happy that I have found someone that I love this much. I consider myself lucky to have someone who not only supports my work, but is passionate about it too. Rhys has given me the freedom to steampunk anything in the house (what a guy!) and in knowing how much handmade means to me, he makes a point when he gives a gift, that it's handmade. (Like the Star Wars embroidered picture & crochet bear above, made by his friend Heather).
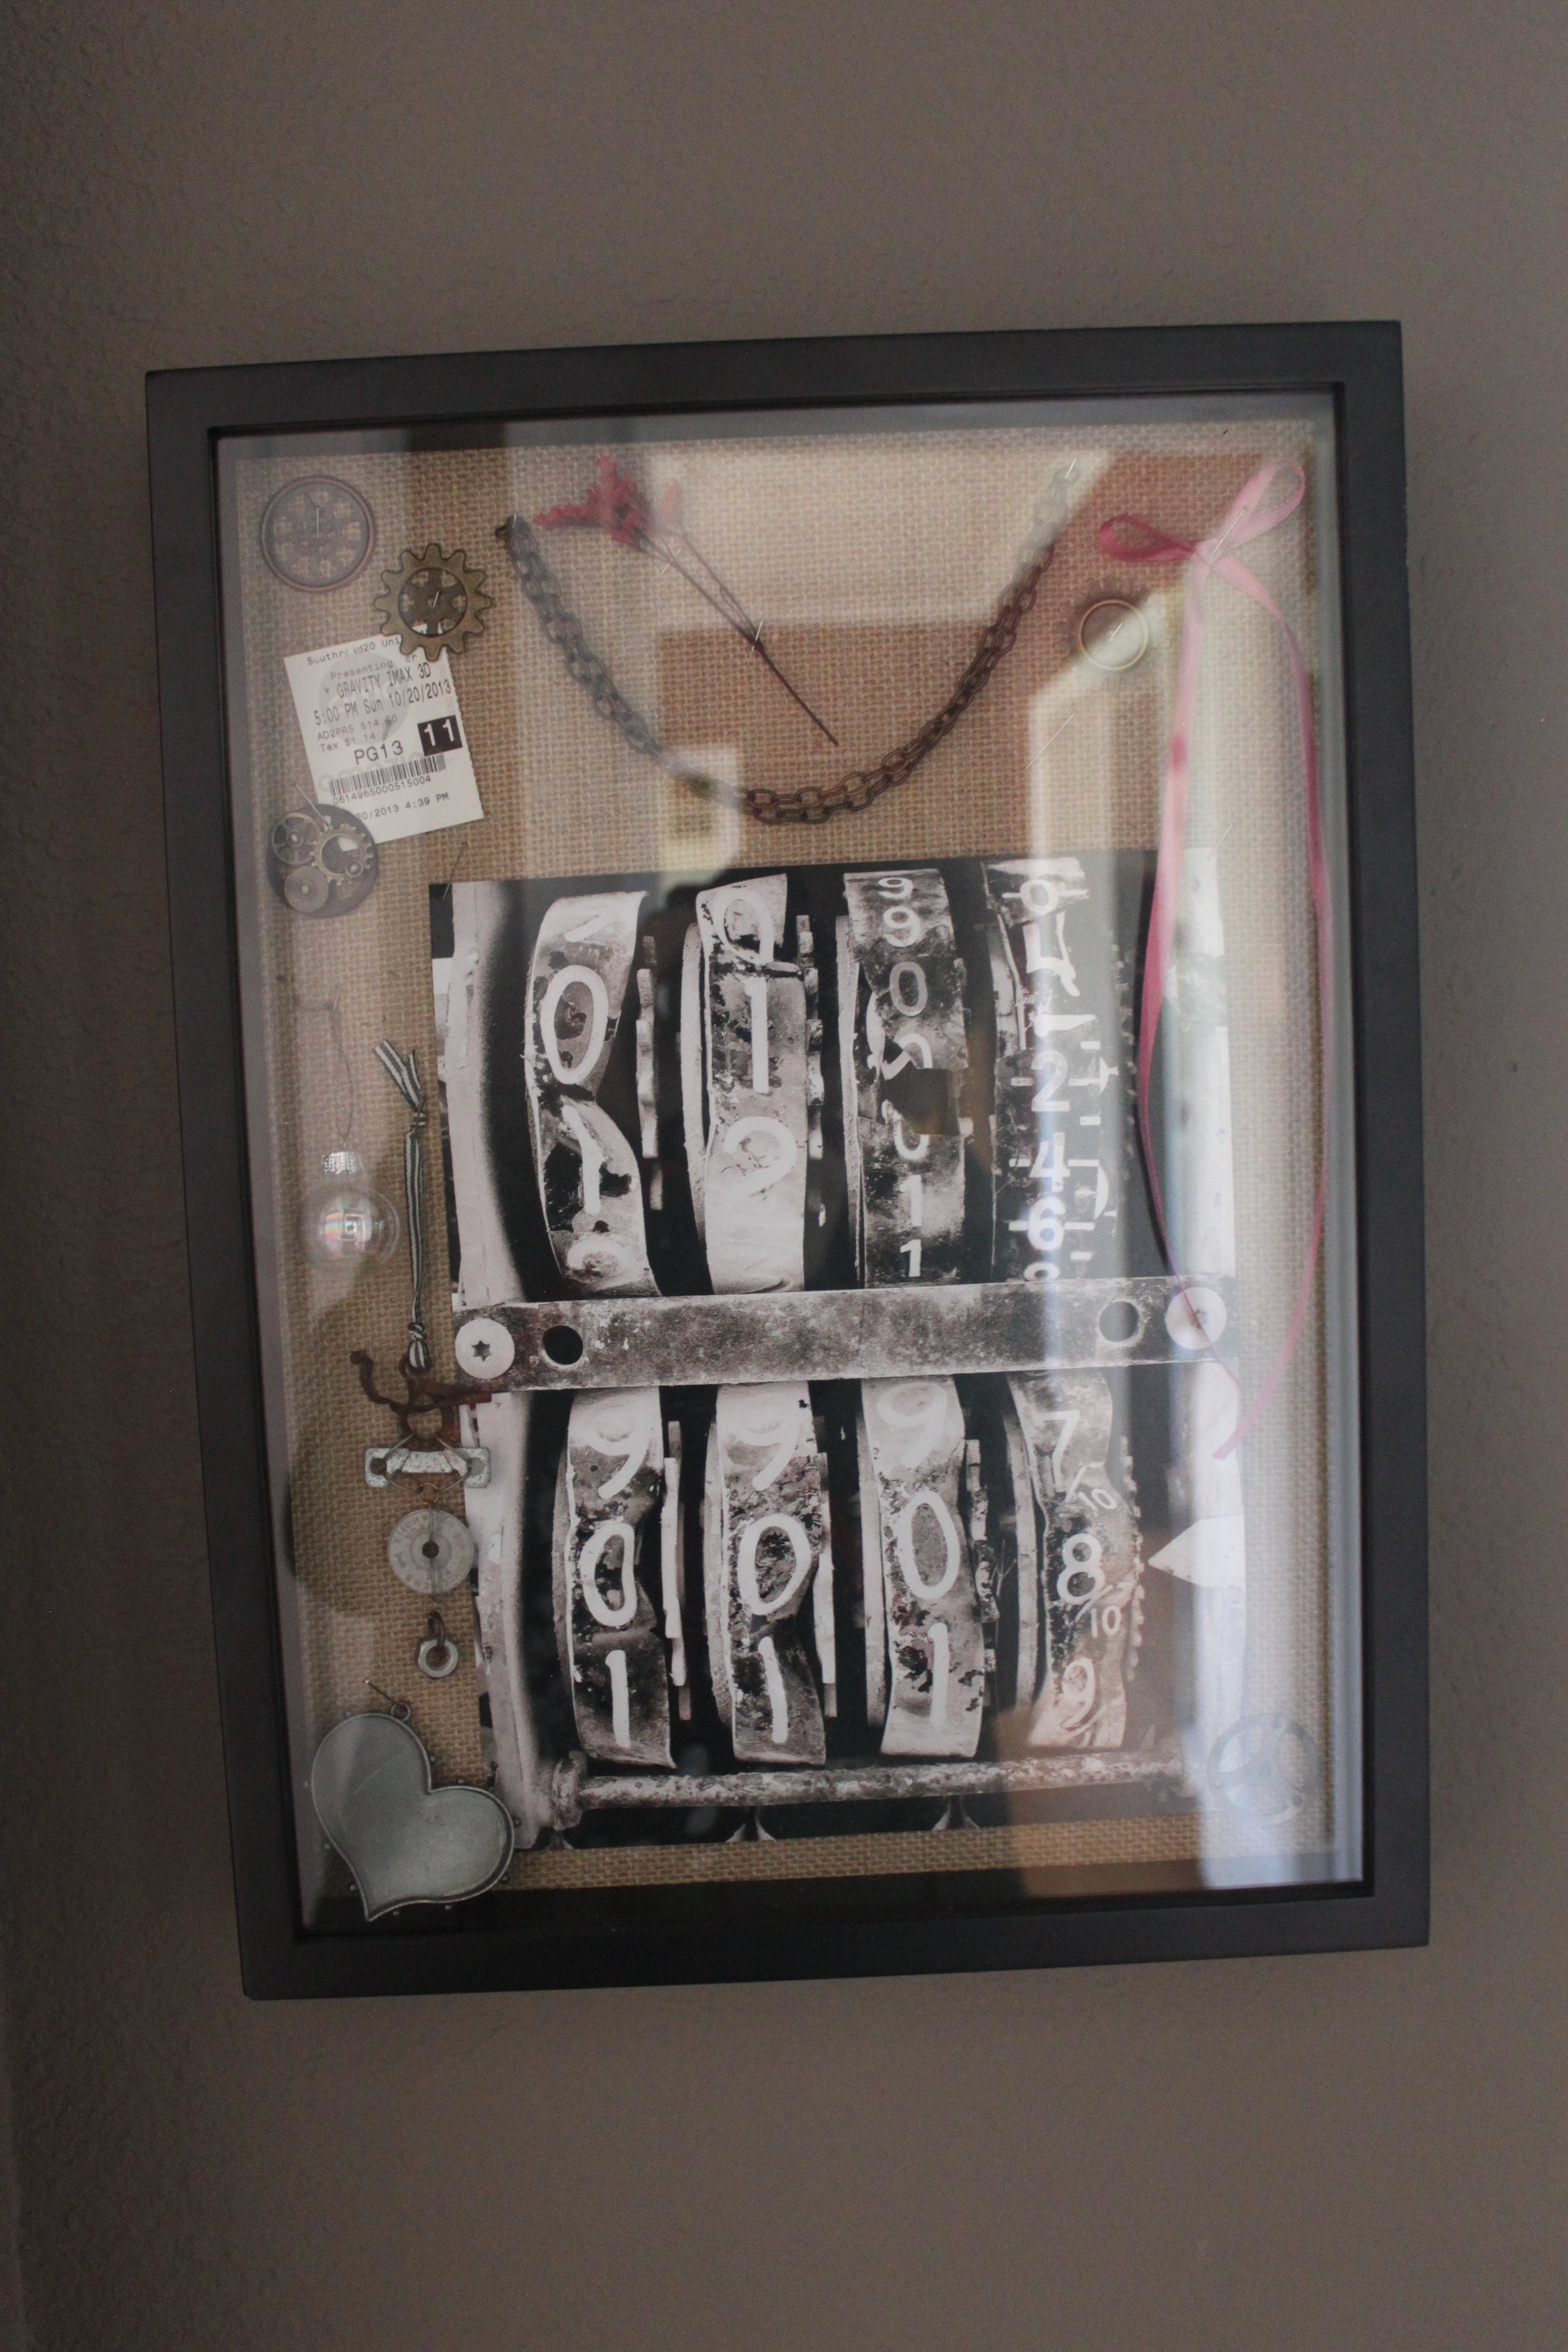
IMG_9909The most meaningful gifts I have received from him, he made himself. Rhys put together this shadowbox & filled it with gears and my favorite of his photographs--a close up of an old gas pump gauge.  Today, I added to it: the ticket stub from our first movie date, flowers from the first bouquet he gave me, and other memorable ephemera.

Unpacking, I realized just how much handmade means to me. There are so many pieces strewn about our home that were crafted by people whose stories & art I know and admire. It fills me with joy and warmth. At our housewarming party, I am sure I will tell many stories about the items in our home. And I hope, that those stories will fill everyone who crosses our hearth with the same joy, warmth, and dare I say it...a little wonder to create something too.
My Studio Will Be Open to the Public!

UncategorizedSamantha Extance1 Comment

I am happy & excited to announce that my studio will be one of the stops on the Tulsa Art Studio Tour this year! The Tulsa Art Studio Tour is hosted and organized by the Oklahoma Visual Arts Coalition and showcases "the talent of artists who live and work in the Tulsa area. This self-guided tour offers you the chance to meet artists, buy artwork, and observe art being created in a variety of working spaces." For a complete list of artists on this year's tour, click here. Tour Dates & Times: Saturday, April 12th and Sunday, April 13th from noon-5:oo pm (both days)

12196364773_5775066c35_b(1)My Stop on the Tour:

I have met many of you at local craft shows where we've talked about the antiques & oddities that I use both in my work and to display my work. I hope that I will see many of your familiar faces walking through my door. I am delighted to share the wonderful "junkyard"  that is my studio table--where pieces lie in wait, percolating, to be made into something new.

You'll also see my beloved antiques strewn about the room and adorning the mantle of the fireplace; my kitchen table--where this whole thing started; my gutted re-invention of a grandfather clock; and my walls, which are littered with old photos of the LeTrec Family--whose complete family photo collection I saved from a dumpster and whose faces inspire me everyday though my only history of them is imagined.

At my studio, once your Tour passport is stamped (with my logo silhouette), you can learn more about how I make my jewelry, learn about the art of upcycling, purchase my pieces, and even try your hand at a fun DIY project (we'll be making Lock Washer Earrings!). Tulsa Art Studio Tour 1

Contest:

I'll also be running a contest from now until the studio tour ends, I'll be giving away 3 bags of handmade steampunk jewelry & homewares to the 3 fans who spread the word about the tour the most! I'll be publishing spoilers of what's inside, but for now just know...these are bags you don't want to miss out on!

See you in April!

DIY Steampunk & Upcycled Valentines!

UncategorizedSamantha ExtanceComment

Valentine's Day is just next week! Time to get started on making those valentines and handmade is the way to go! Here are 3 DIY Valentine's Day cards you can make easily, quickly, and economically. For the first DIY Valentine's Day Card, here's what you'll need:

IMG_9583Bakers Twine, blank card & envelope, scissors, pen, glue stick, an awl, an old stamp, and a printer.

Steps:

  1. First, glue your stamp onto the front of your card (if you are using only 1 stamp it is best to center it). Be sure to press your stamp firmly down onto the card. Wipe away any glue that creeps out of the edges. step 1
  2. Next, open up your card and on a work surface, poke 2 holes in your card using your awl (also centered). Then thread your Bakers Twine through the holes and tie in a cute bow. Cut off any excess twine. step 2
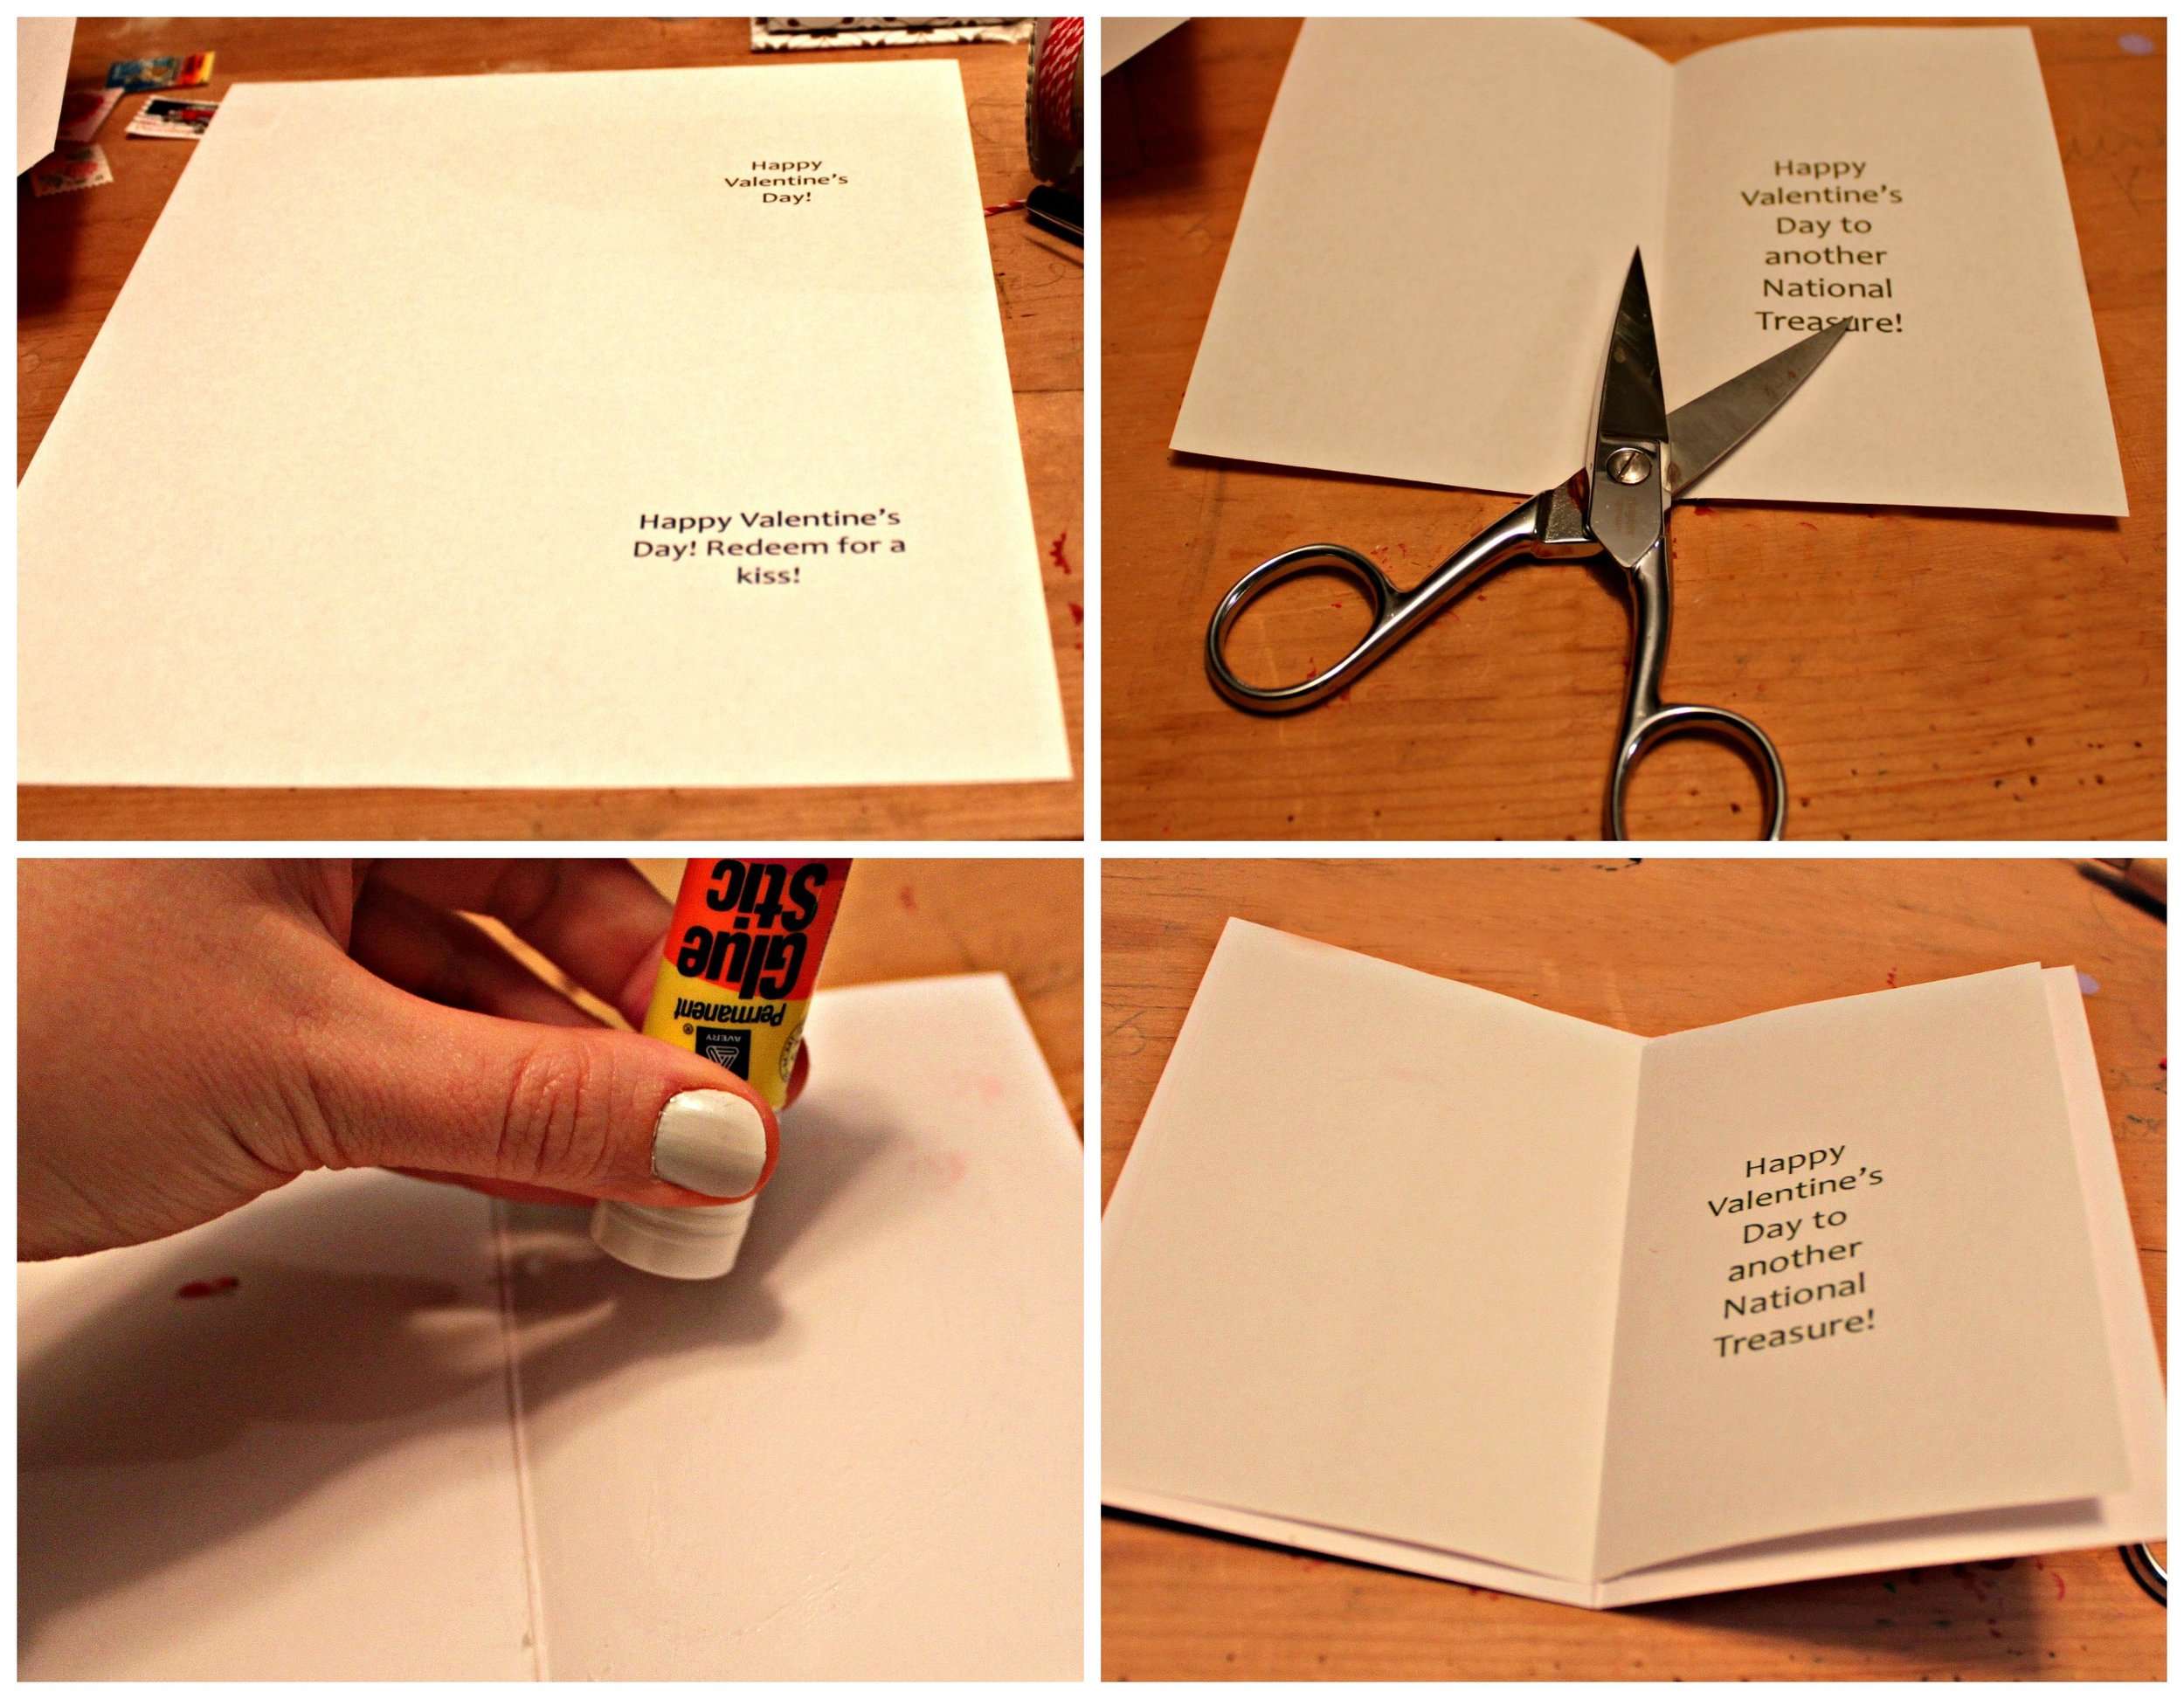
  3. For this next step you will need a computer & a printer. Open up a word document, download a free card template, and type in a message that you want to appear on the inside of your card. Cut down your inside page so that it fits neatly inside your card. step 3 Glue your message to the inside of the card. Be sure to place an even amount of glue on the card & smooth out from the center to the edges to avoid bubbles & creases. And voila, your valentine is complete!

Here are a few variations that you might also try if you are upcycling stamps:

variations

  • Instead of adding a bow to your card, you could draw a decorative border around your card or embellish lines already stamped or drawn on the individual stamps.
  • You could embellish the edges of the inside of your card (the message page) with a paper punch.
  • Instead of gluing the inside message to the card, you could also sew it into the crease.

Token of My Love Valentine's Day Card

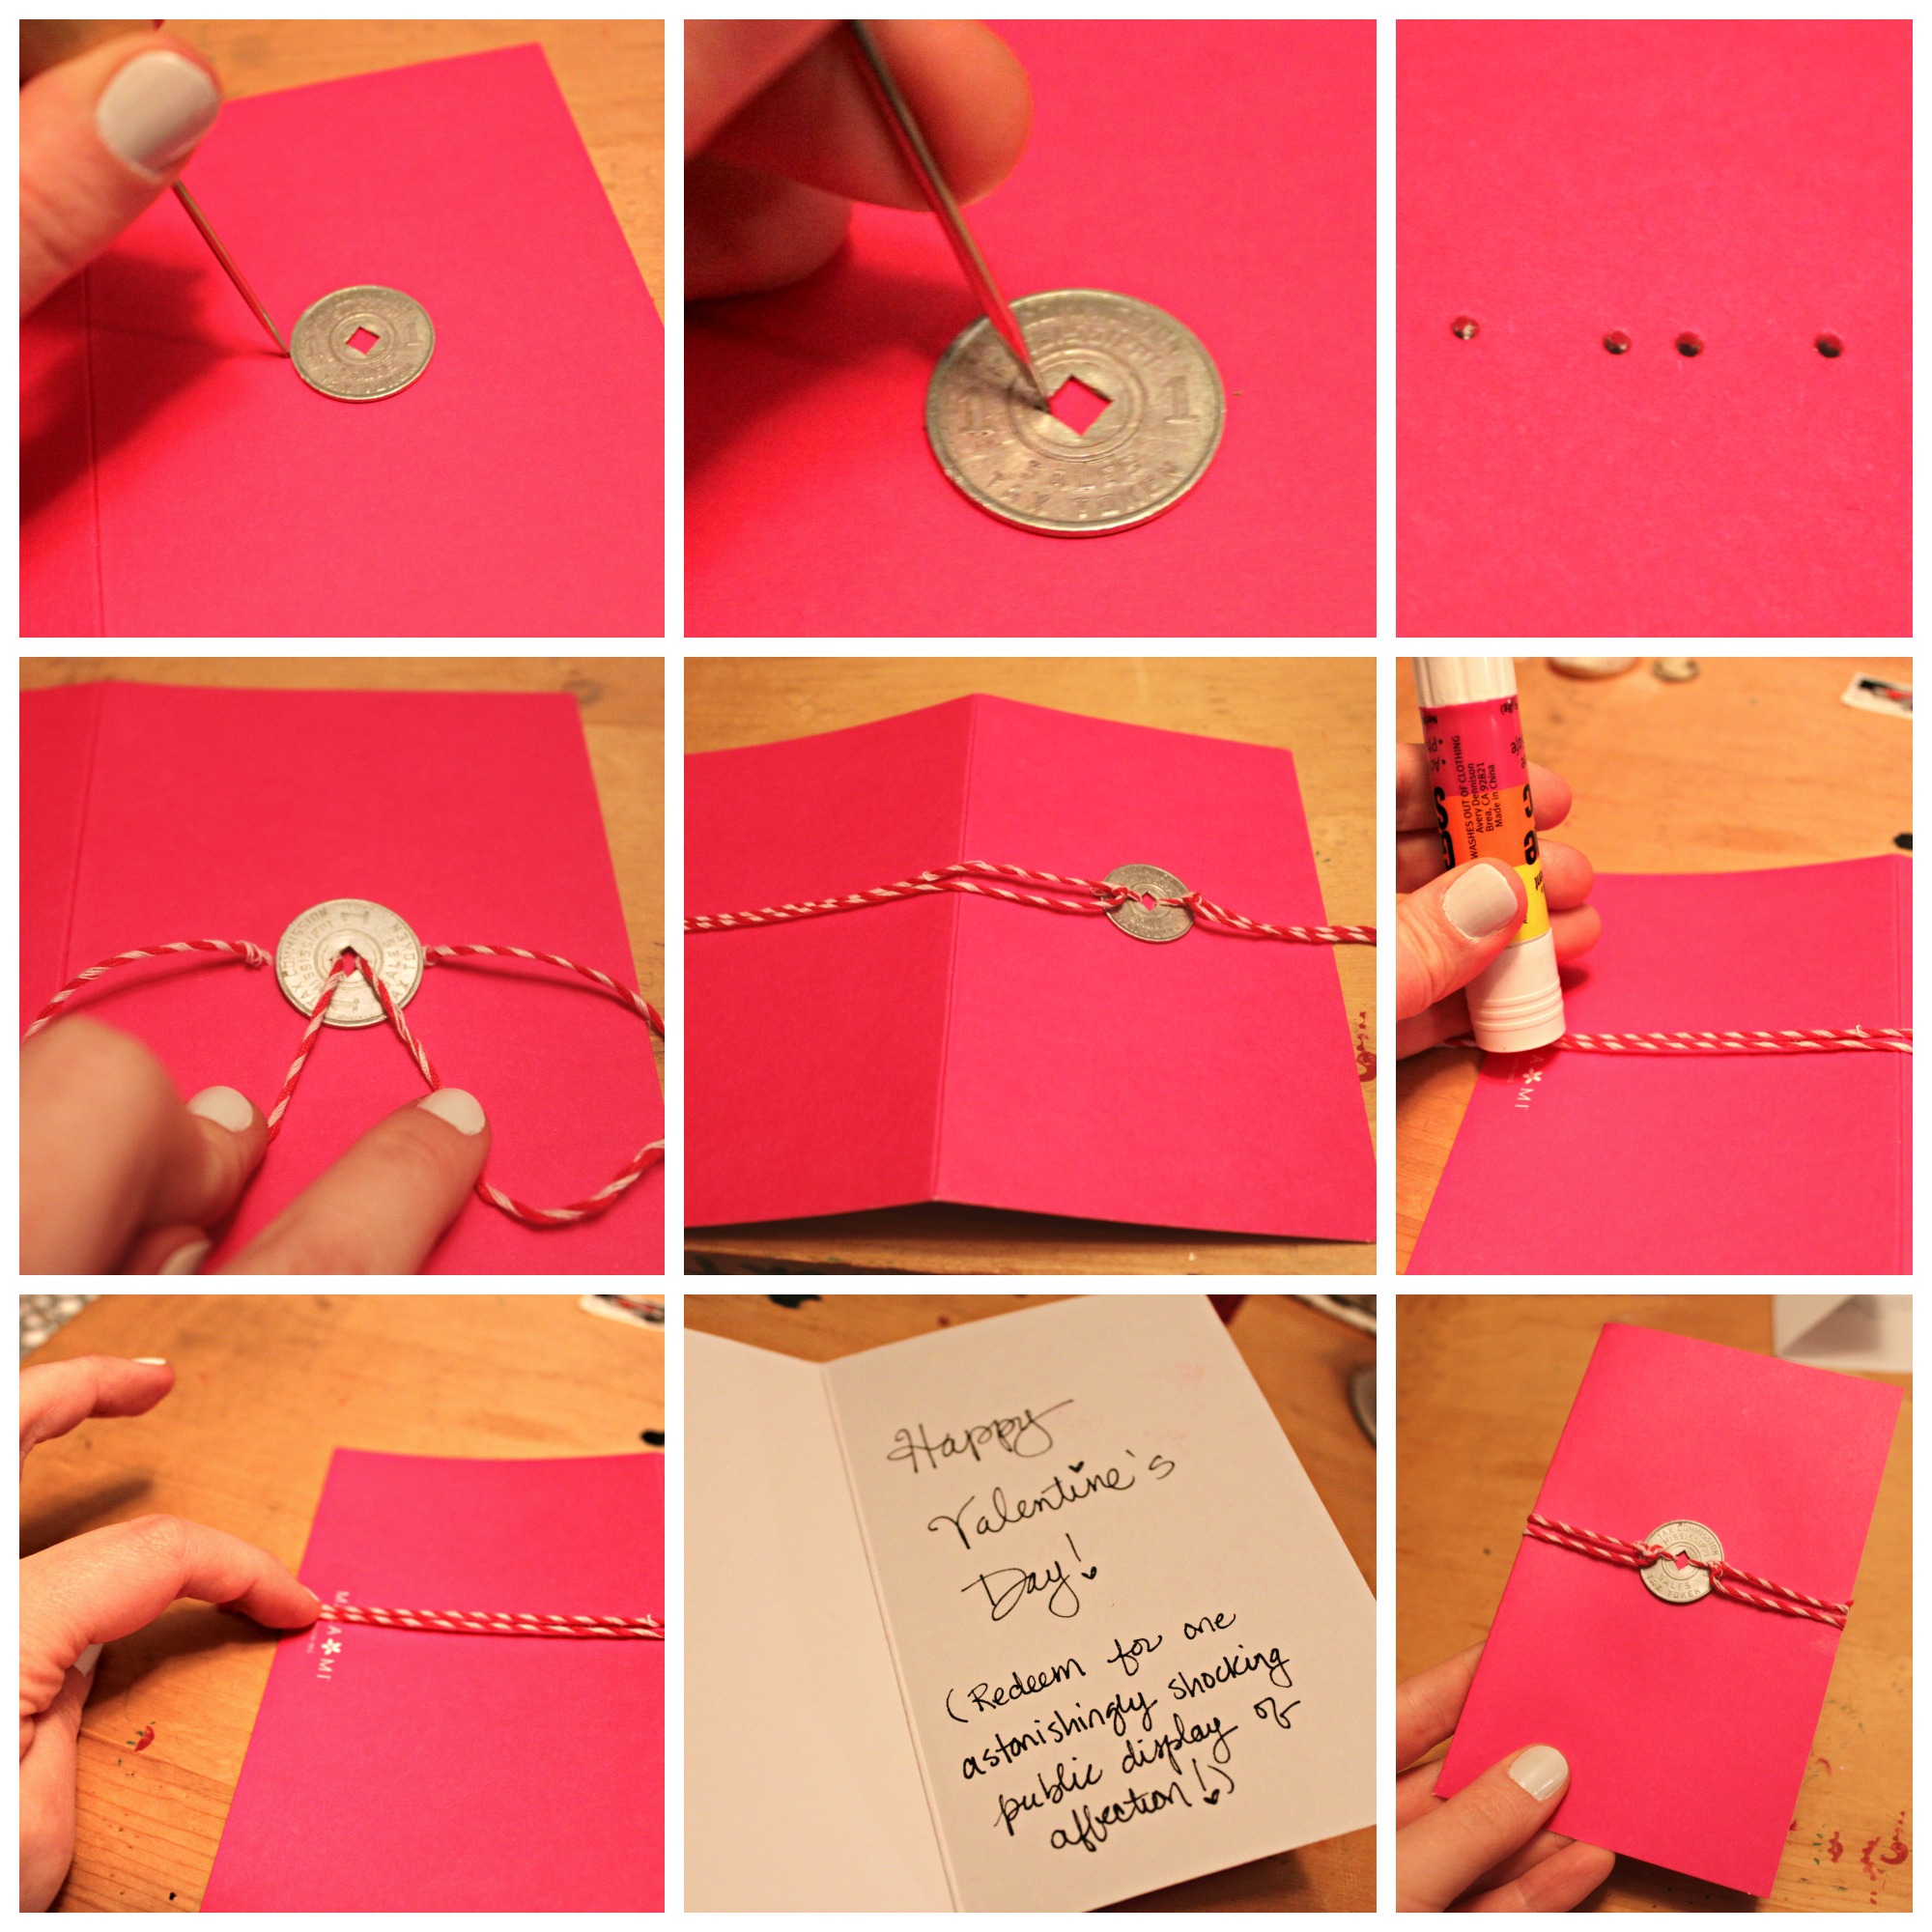
For this DIY valentine all you need is the following: Bakers Twine, blank card & envelope, scissors, pen, glue stick, an awl, a token coin with a hole in it, and a printer.token of love diy

  1. Open the card and place it face up on a work surface. Poke 2 parallel holes in the center of your card using your awl.
  2. Next, thread Bakers Twine through the holes.
  3. Place your token coin onto the Bakers Twine. Tie a cute bow. Cut off any excess twine.
  4. For this next step you will need a computer & a printer. Open up a word document, download a free card template, and type in a message that you want to appear on the inside of your card. Cut down your inside page so that it fits neatly inside your card. Glue your message to the inside of the card. Be sure to place an even amount of glue on the card & smooth out from the center to the edges to avoid bubbles & creases.
  5. With your valentine completed, give it to your loved one as a token of your affection!

Redeem for A...Valentine's Day Card

redeem card diySimilar to the last card, this DIY valentine you need: Bakers Twine, blank card & envelope, scissors, pen, glue stick, an awl, a token coin with a hole in it(preferably a large hole in the middle), and a printer.

  1. Open the card and place it face up on a work surface. Poke 4 parallel holes in the center of your card using your awl (along your token coin's outer edges and inner edges as shown above).
  2. Next, cut two separate pieces of Bakers Twine. You pieces should be long enough to extend past the edge of your card at least 1/4 inch. when doubled. Thread one piece through the holes on the right only and vice verse on the left.
  3. Place your token coin onto the Bakers Twine (threading the left side of the coin with the left piece of Bakers Twine and vice verse). Tie a sturdy knot on each side.
  4. Next, pull out the Bakers Twine on each side of your card so that the ends extend off of the card's edges. Glue in place and then once dry, cut off the excess twine.
  5. For this next step you will need a computer & a printer. Open up a word document, download a free card template, and type in a message that you want to appear on the inside of your card. Cut down your inside page so that it fits neatly inside your card. Glue your message to the inside of the card. Be sure to place an even amount of glue on the card & smooth out from the center to the edges to avoid bubbles & creases. You could also hand write your message for a more personal touch.
  6. With your valentine completed, give it to your loved one so that they may redeem...!

Also, check out my DIY Valentines from last year: on the Make Tulsa blog and for more steampunk valentines! As always, merry making!

Day Trip to Guthrie, Oklahoma

UncategorizedSamantha Extance4 Comments

There are so many things still to see in Oklahoma since I moved here. Last weekend's trip to Oklahoma's original capital, the town of Guthrie, yielded a great many surprises. Guthrie itself was a breathtaking city to explore--its many Victorian buildings are real treasures. I happily gawked and marveled at the elegant brick work, rounded windows, and elaborate moldings. (I also developed a new architectural love for the work of Joseph Pierre Foucart). Guthrie II 075 I also learned something new & exciting: that every Christmas in Guthrie there is a Victorian Walk with carolers and horse drawn carriage rides where everyone dons Victorian clothing! I will be sure to make a trip next December!

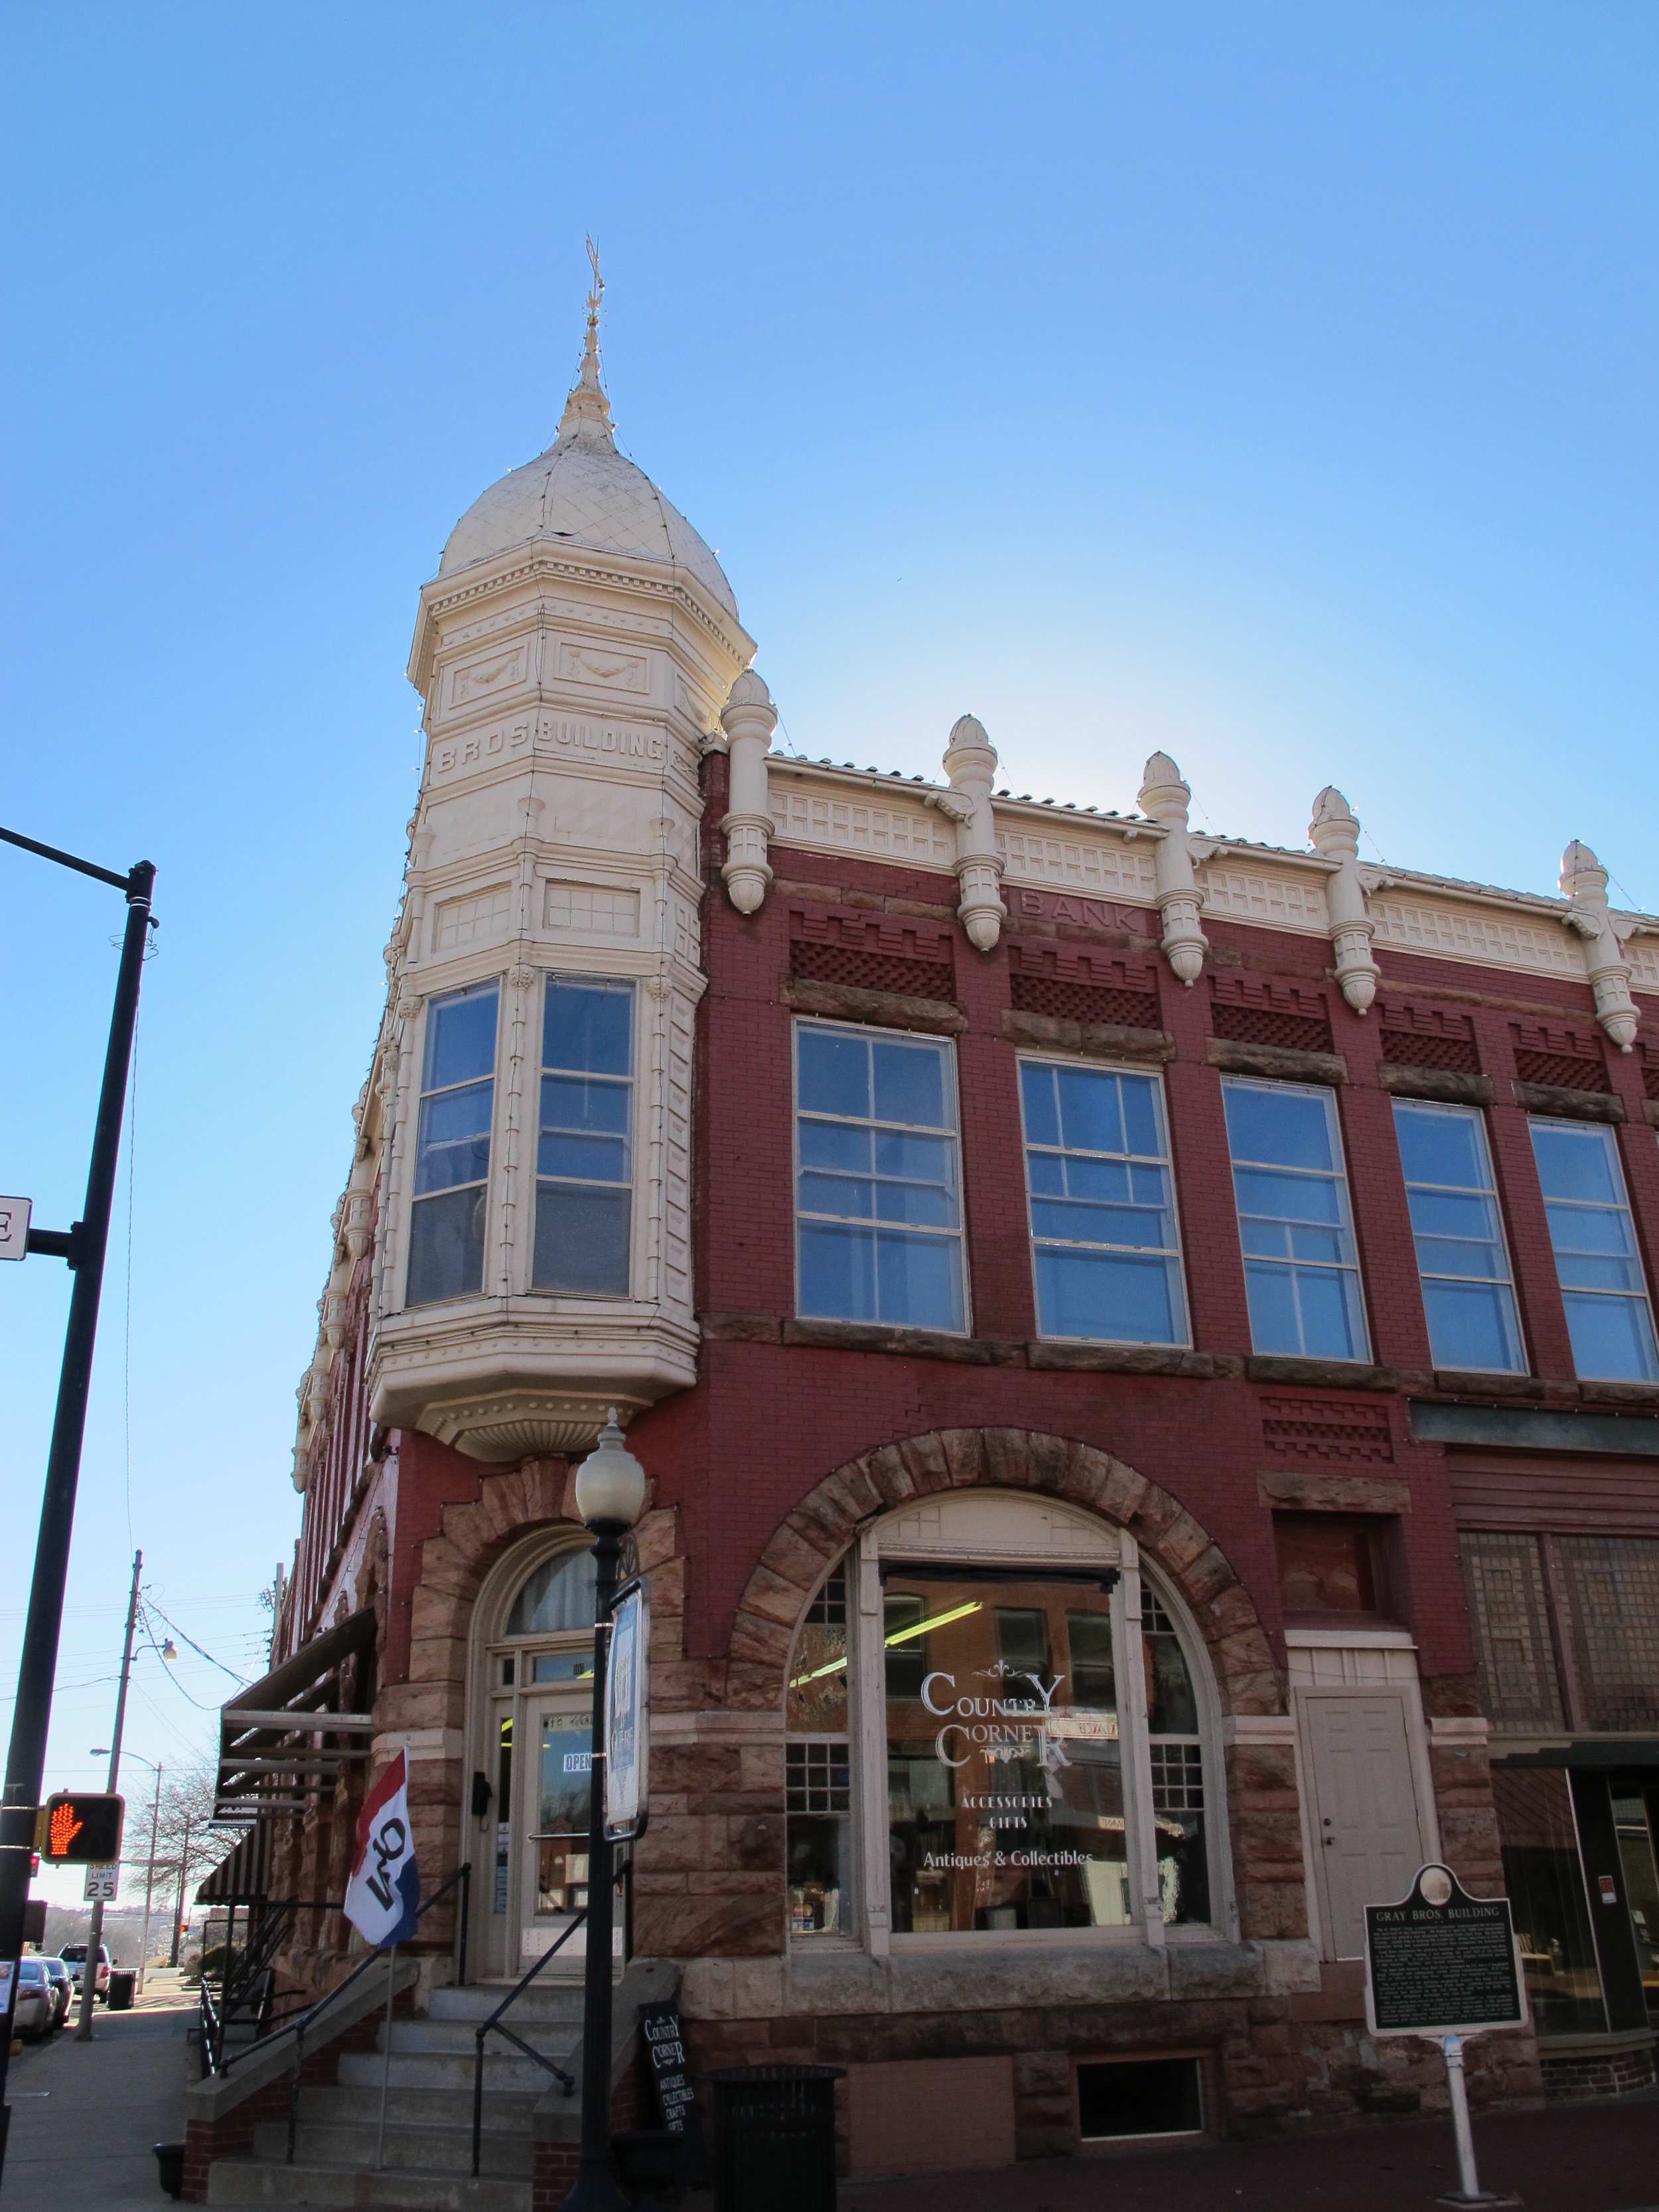
Rhys, whose itch to take a road trip & photograph sites of urban decay lead us to Guthrie, was so wonderfully patient with me when I discovered several antique & junk shops in and around Guthrie. I wanted to share my two favorite stops with you all: Country Corner (located at the intersection of Division St. & Oklahoma St.) and Kokopelli Village Antiques & Collectibles (located on Harrison St.).

Country Corner: I was was so excited to step inside because the antique shop is actually a Joseph Foucart building! I got to take a peek inside one of his architectural gems so that in itself was a real treat! There were so many excellent pieces, but Country Corner is a must-see for anyone looking to purchase antique furniture, books, or kitchen ware. Their greatest trove of treasures lies in their basement: a huge row of shelves filled with Kitschy, retro kitchen sets (mainly from the 40s, 50s, and 60s). Although not steampunk, the sets were all complete and in dazzling shape! It was wonderful to see over 50 kitchen sets totally complete & in near-mint condition.

Here are some of my fave finds from Country Corner:

Guthrie II 064Tubes galoreGuthrie II 067Glass Doorknob Hatstands! (So unbelievably fabulous)Guthrie II 065Working Grandfather clocks (Sadly, there were no broken ones for me to take home. I never break my golden rule: to only re-purpose broken or irreparably damaged clocks & watches.)Guthrie II 066Hi Nipper! Country Corner had an impressive selection of radios, phonographs, & records.Guthrie II 068

Kokopelli Village: This antique shop was my favorite stop. By far, it has the most interesting antiques--especially if you are looking for Victoriana & steampunk. Their collection of sewing machines is impressive. I saw a late 1800s child's sewing machine with a painted scene from Little Red Riding Hood on it that was truly breathtaking. (I may wind up purchasing it for my grams; in her entire sewing machine collection, she has nothing like it.) In fact, there were several sewing machine notions throughout Kokopelli.Guthrie II 077Among their massive collection of furniture and jewelry, I also discovered typewriters, shoe-stands, and hats!

Guthrie II 078Looks like my type! (Rhys's affinity for puns is rubbing off on me!)Guthrie II 079

What I was very happy to find among their collectibles was a variety of antique tools. Their tool selection is broad--they have a number of wrenches, screwdrivers, awls, hammers, saws, etc. from a broad age range. I was especially excited to find tools with wood handles. At my last show, unfortunately someone stole my pipe wrench with the wood handle. It had been a gift from my grandfather (he knew I loved to display tools among my jewelry and had parted with it so that I could use it). Now I am saddened that I will never see it again, but I did find a wood handle screwdriver that has lessened the sting of my dear wrench's absence. Nevertheless, I love old tools and now have a new place to find them!

And last, but definitely not least, Kokopelli Village has Victorian-style dresses! They are reproductions of Victorian patterns & very well made. When I inquired about their price, I was happily surprised: only $150.00! The fabric alone would be close to that price not to mention the time & energy it takes to sew following older patterns (Just ask my mom about plackets!). I will certainly be making another trip to Guthrie, and Kokopelli Village will be my first stop! Guthrie II 081Guthrie II 083Hope you are all cozy & warm wherever you are. Now I am going to curl up with some tea and my latest steampunk book, David Barnett's Gideon Smith & the Mechanical Girl , which is hard to tear myself away from already (only on Chap. 2).


DIY Steampunk Wreath

UncategorizedSamantha ExtanceComment

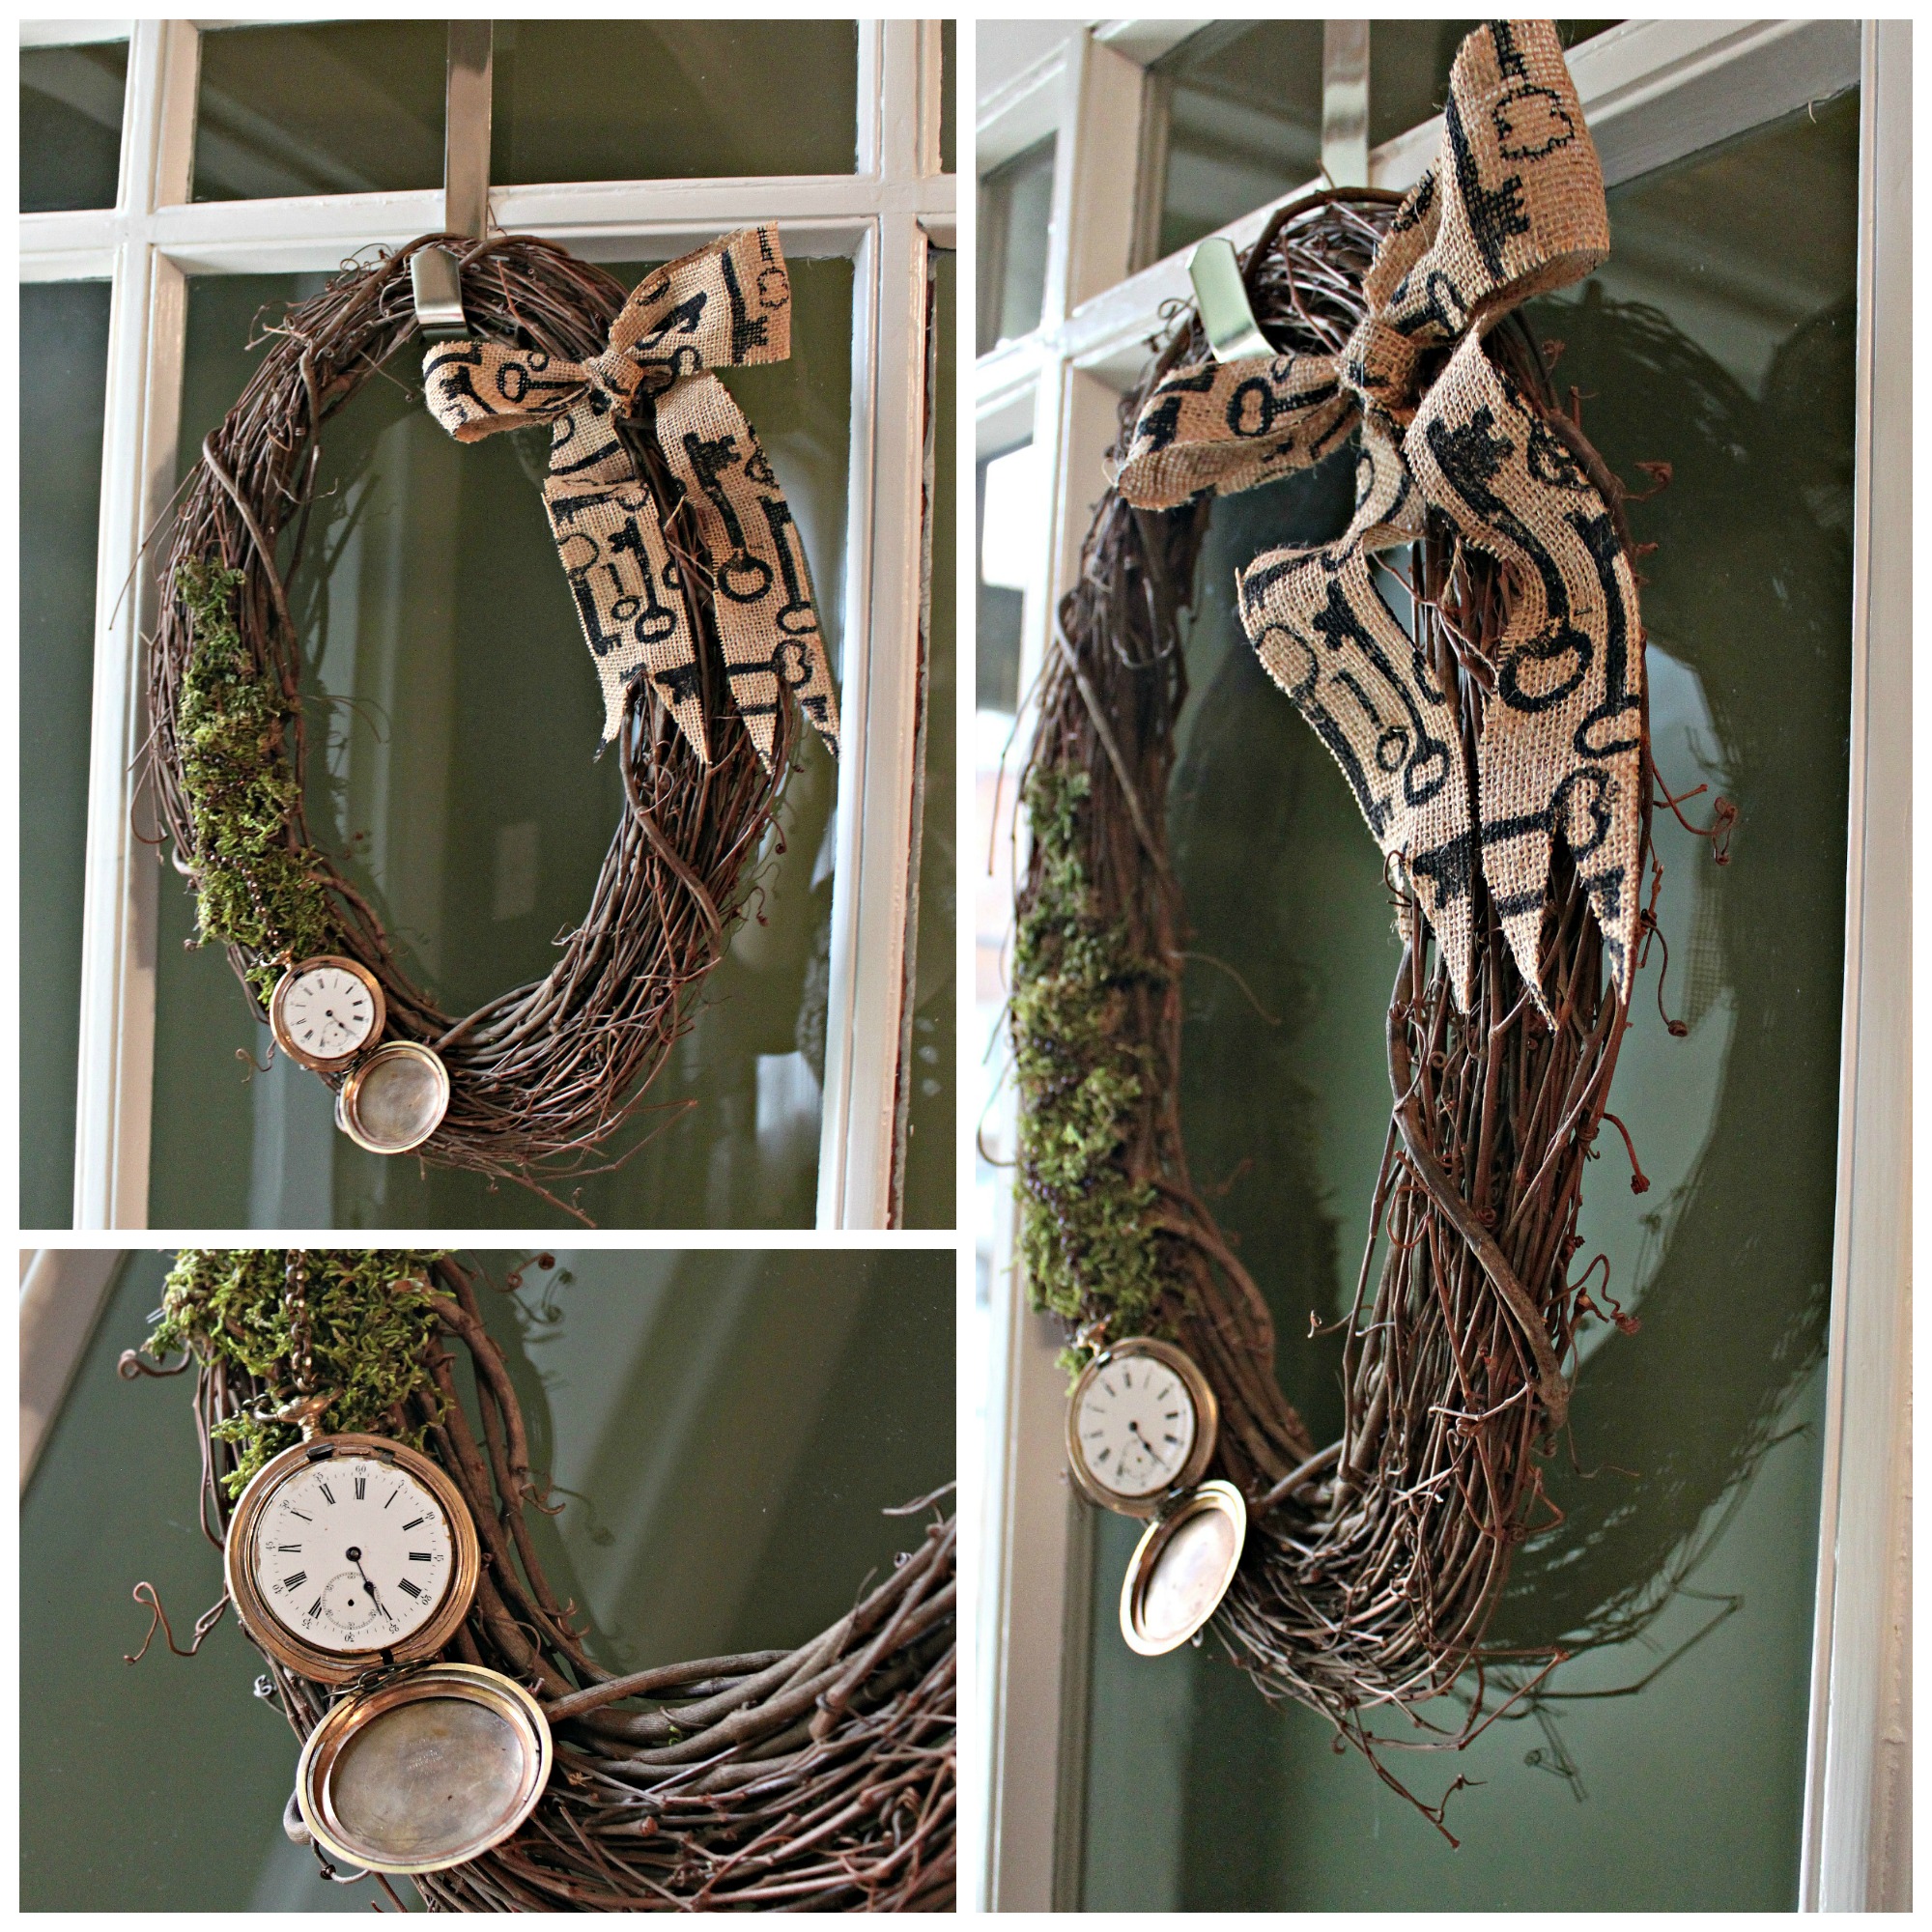
Steampunk Wreath DIY CollageMy favorite part of the holiday season is making decorations! Here is a steampunk wreath to dress up your doorway made from simple & easy to find materials! I like to call this wreath--A Pocketwatch Lost Among the Moss! The materials are relatively inexpensive ($20-25). Here's what you'll need:

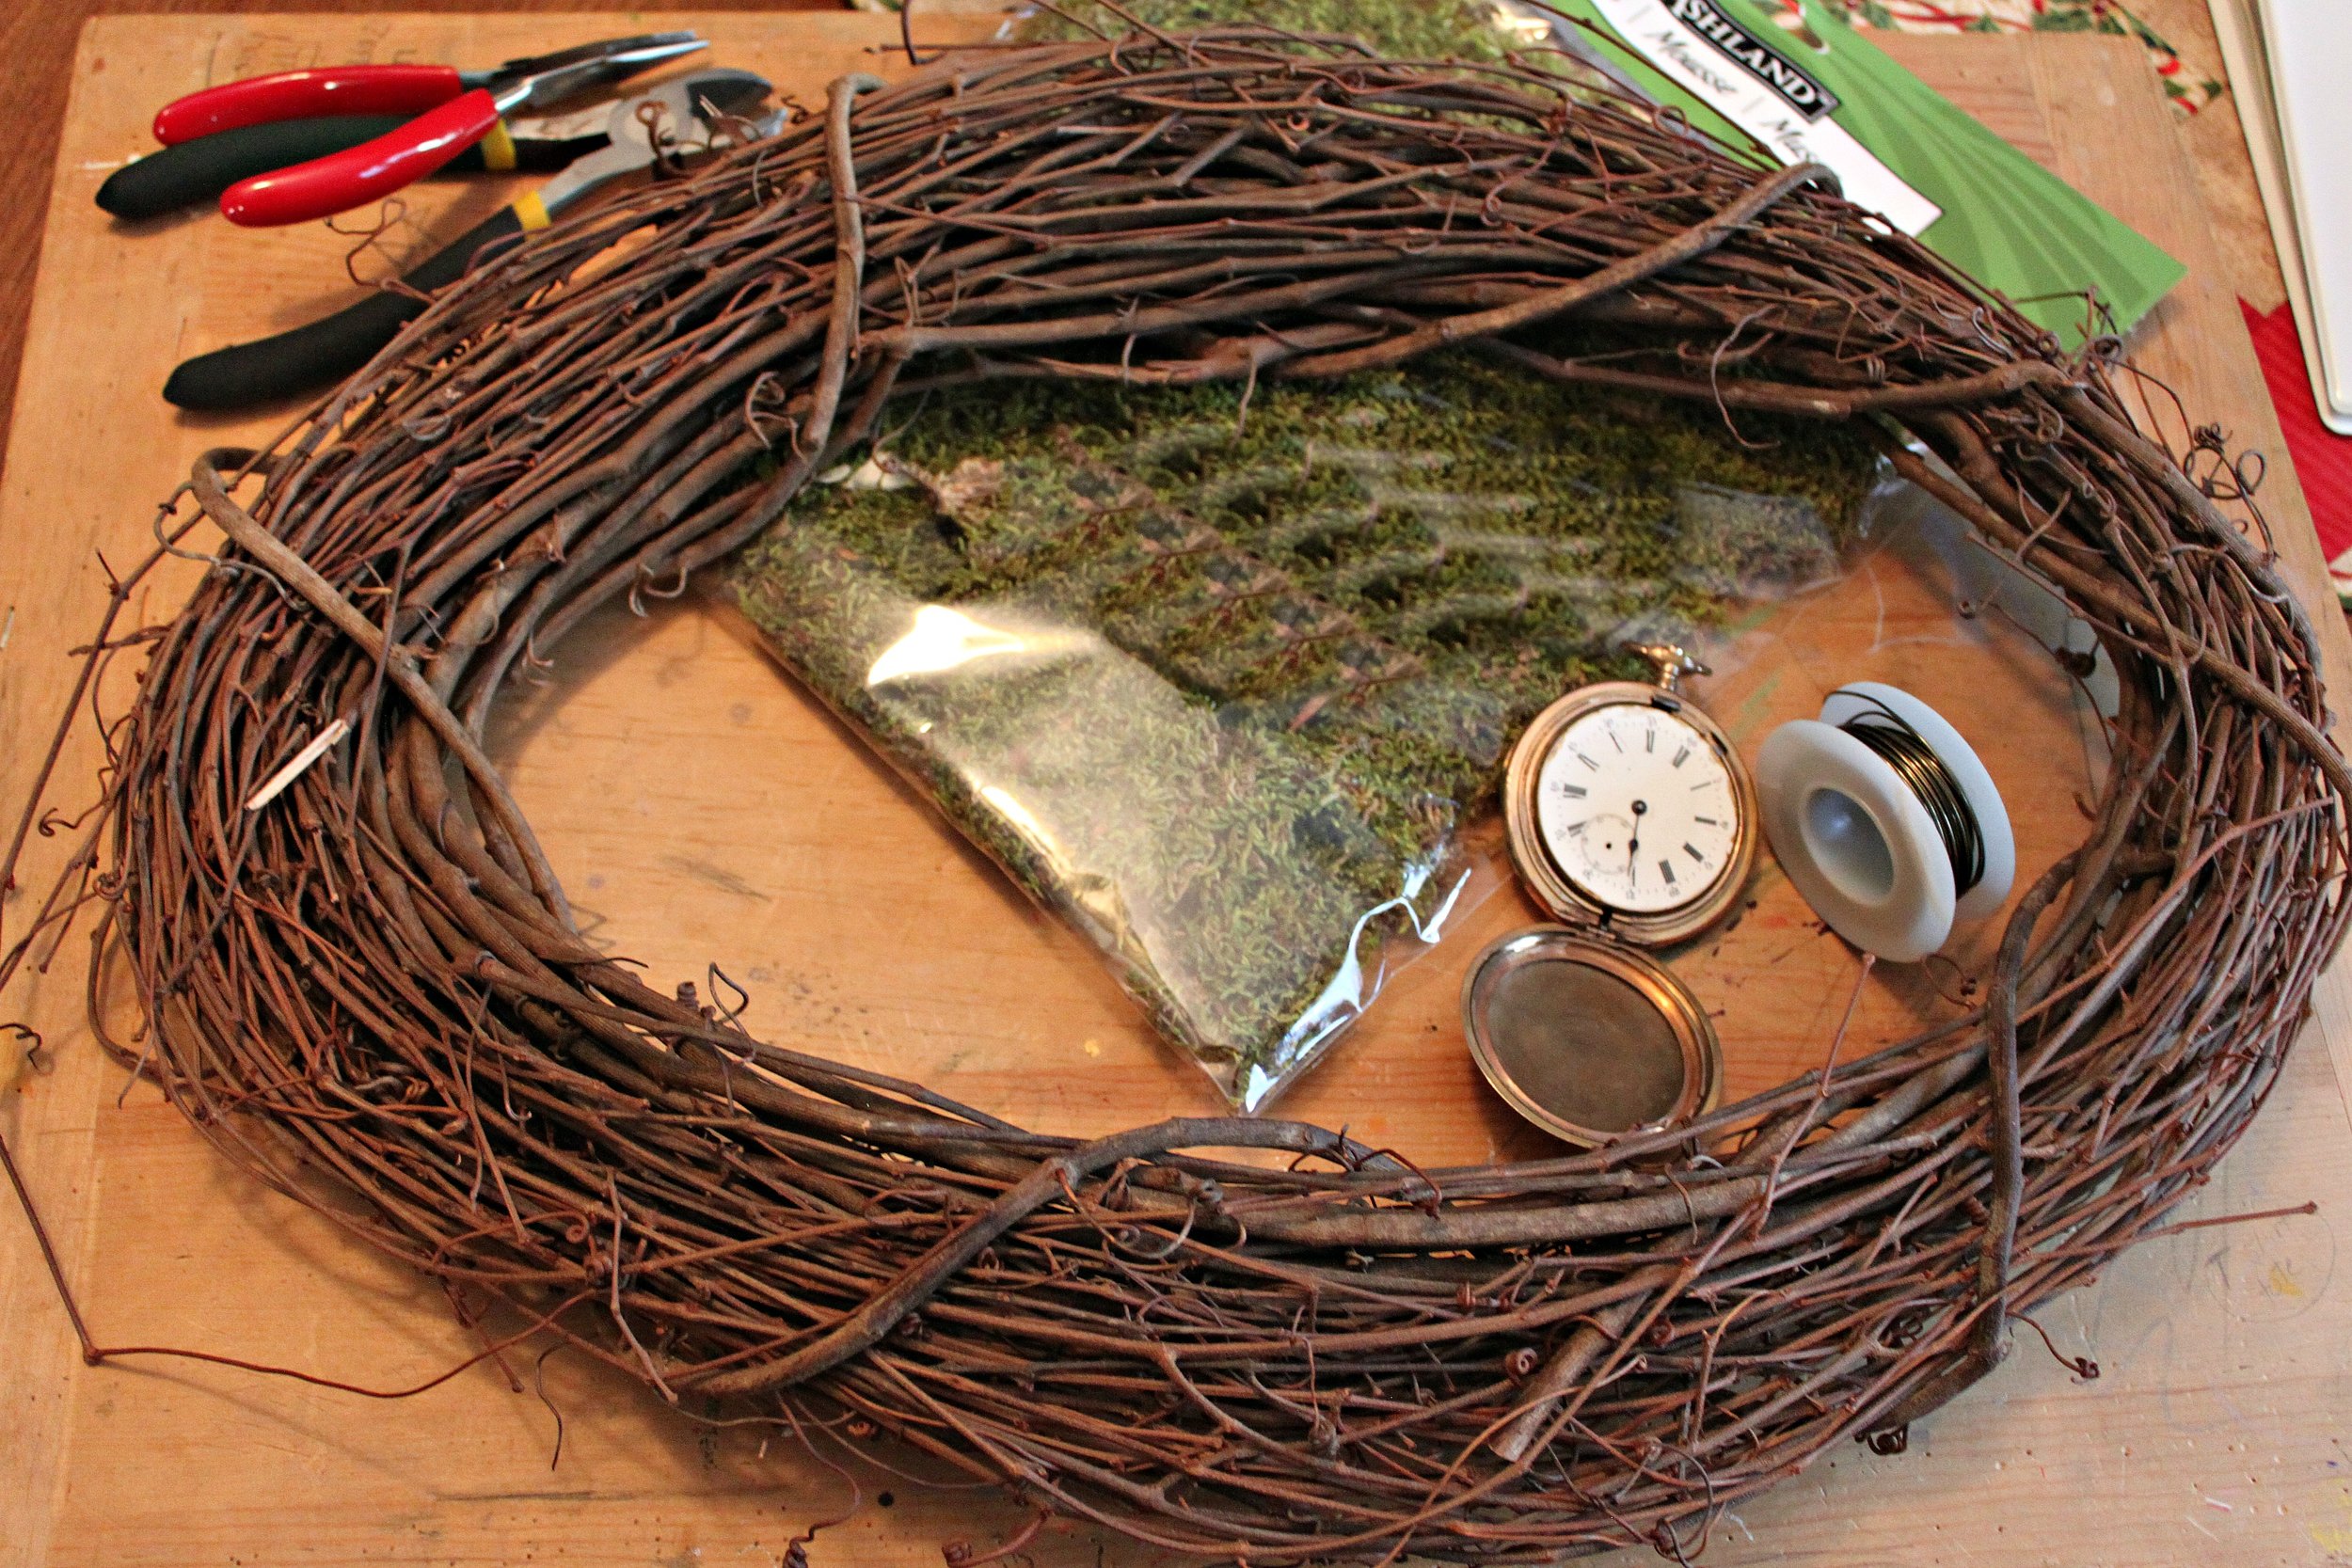
  • Wreath (wicker works really well because you can both wire wrap & hot glue pieces in place)
  • Moss
  • Pocketwatch
  • Some chain (I used approx. 2 inches)
  • Ribbon (mine is a burlap skeleton key patterned ribbon available at Michaels)
  • 1 strong jump ring (large enough to fit both a chain link & your pocketwatch's loop)
  • Hot glue gun
  • Wire (mine is an antique gold color which blends well with a brown wicker wreath)
  • Wire cutters & flat nosed pliers
  • Scissors

IMG_9284Steps:

  1. Plan out your wreath. Arrange your moss, pocketwatch, chain, and ribbon and once you have a configuration you like, begin attaching each of your elements.
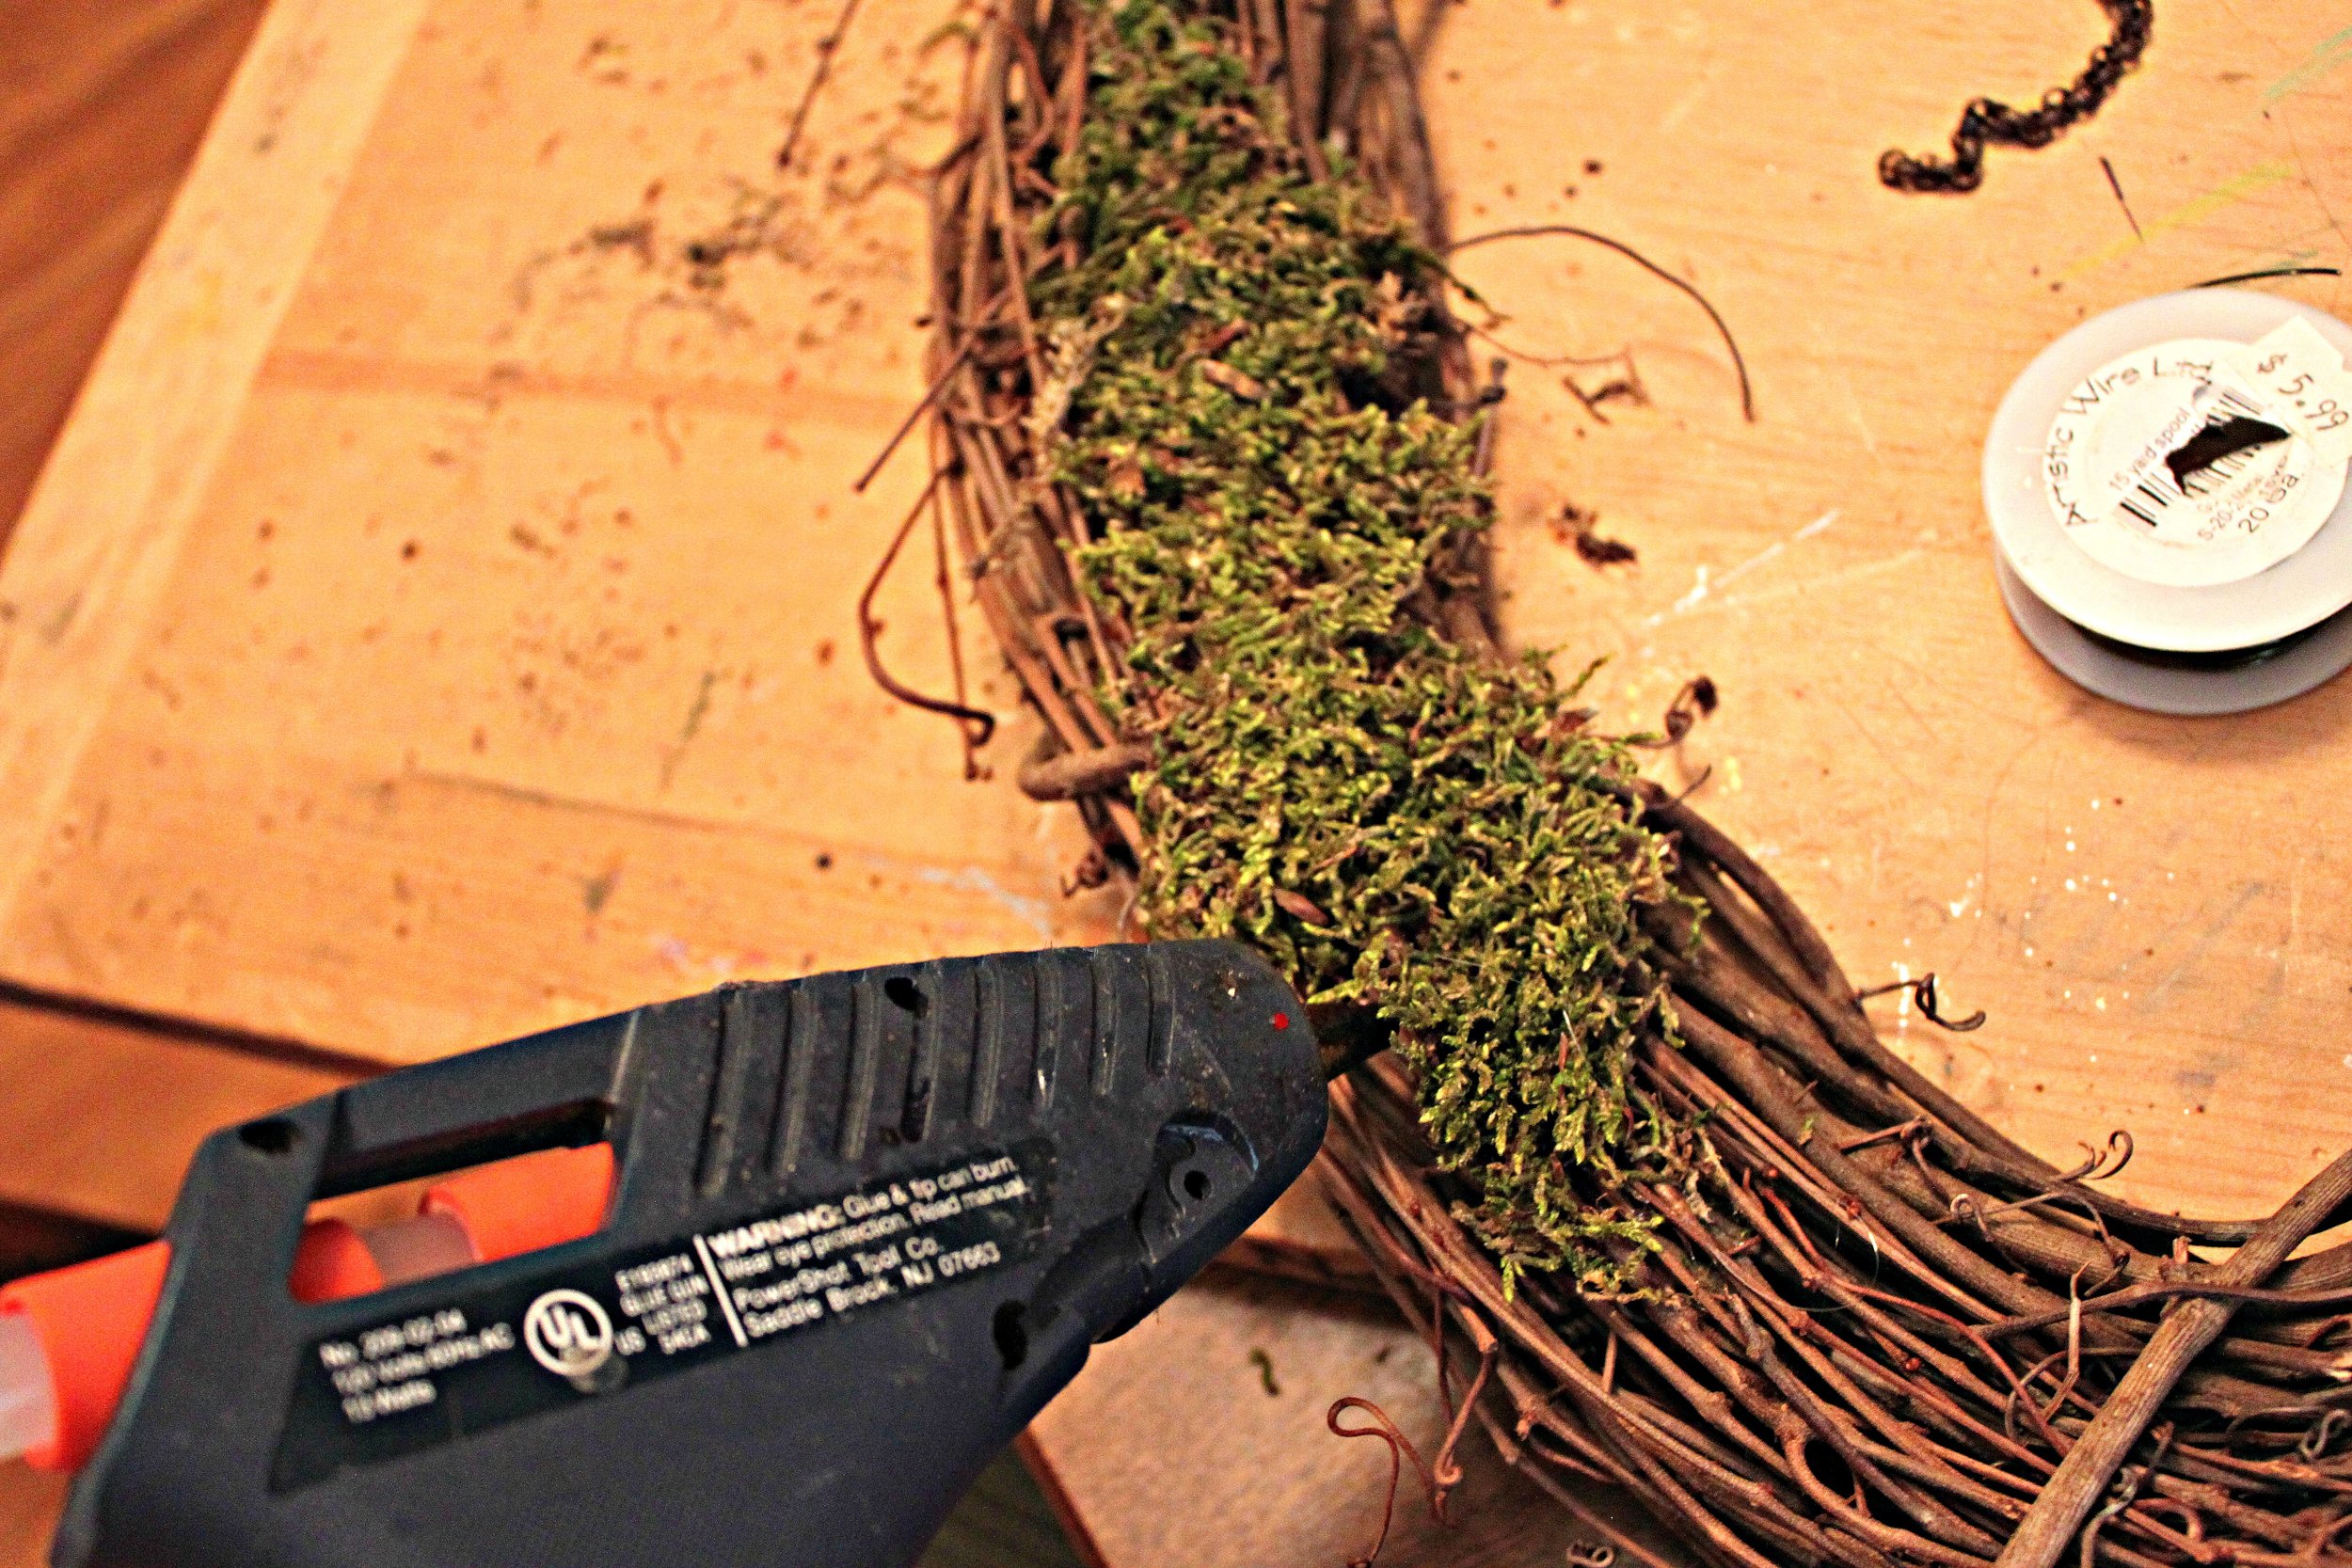
  2. First, using your hot glue gun, attach the moss to the wreath.IMG_9285
  3. Once the glue is dry, attach your pocket watch securely to the wreath with wire. Cut lengths of wire (approx. 1 to 1.5 inches) with your wire cutters. Using these lengths of wire, secure the pocketwatch in 2 key places: its loop and the hinge between the watch and its lid. IMG_9287Be sure to twist the wire so that the watch is securely held in place. Pull your wire taut (the flat nosed pliers will help you significantly with this step). IMG_9286Cut off any excess wire & tuck in the sharp ends into the wreath.
  4. With your pocketwatch in place, now attach your chain to the pocketwatch loop with a jump ring using your flat nosed pliers.
  5. Next, secure your chain's placement. I wanted my chain to look as if it was splayed out across the moss and so I secured the shape I desired with lengths of wire. Repeat the process mentioned in Step 3 for the chain links, only this time secure only the chain links that keep the shape you desire. IMG_9288
  6. Set aside your wreath and fashion a bow out of your ribbon. Once you're happy with your bow, hot glue it in place.IMG_9289  IMG_9290
  7. Once the glue is dry, hang with pride on your door! IMG_9292

As always, Merry Making!


Happy Thanksgiving!

UncategorizedSamantha Extance3 Comments

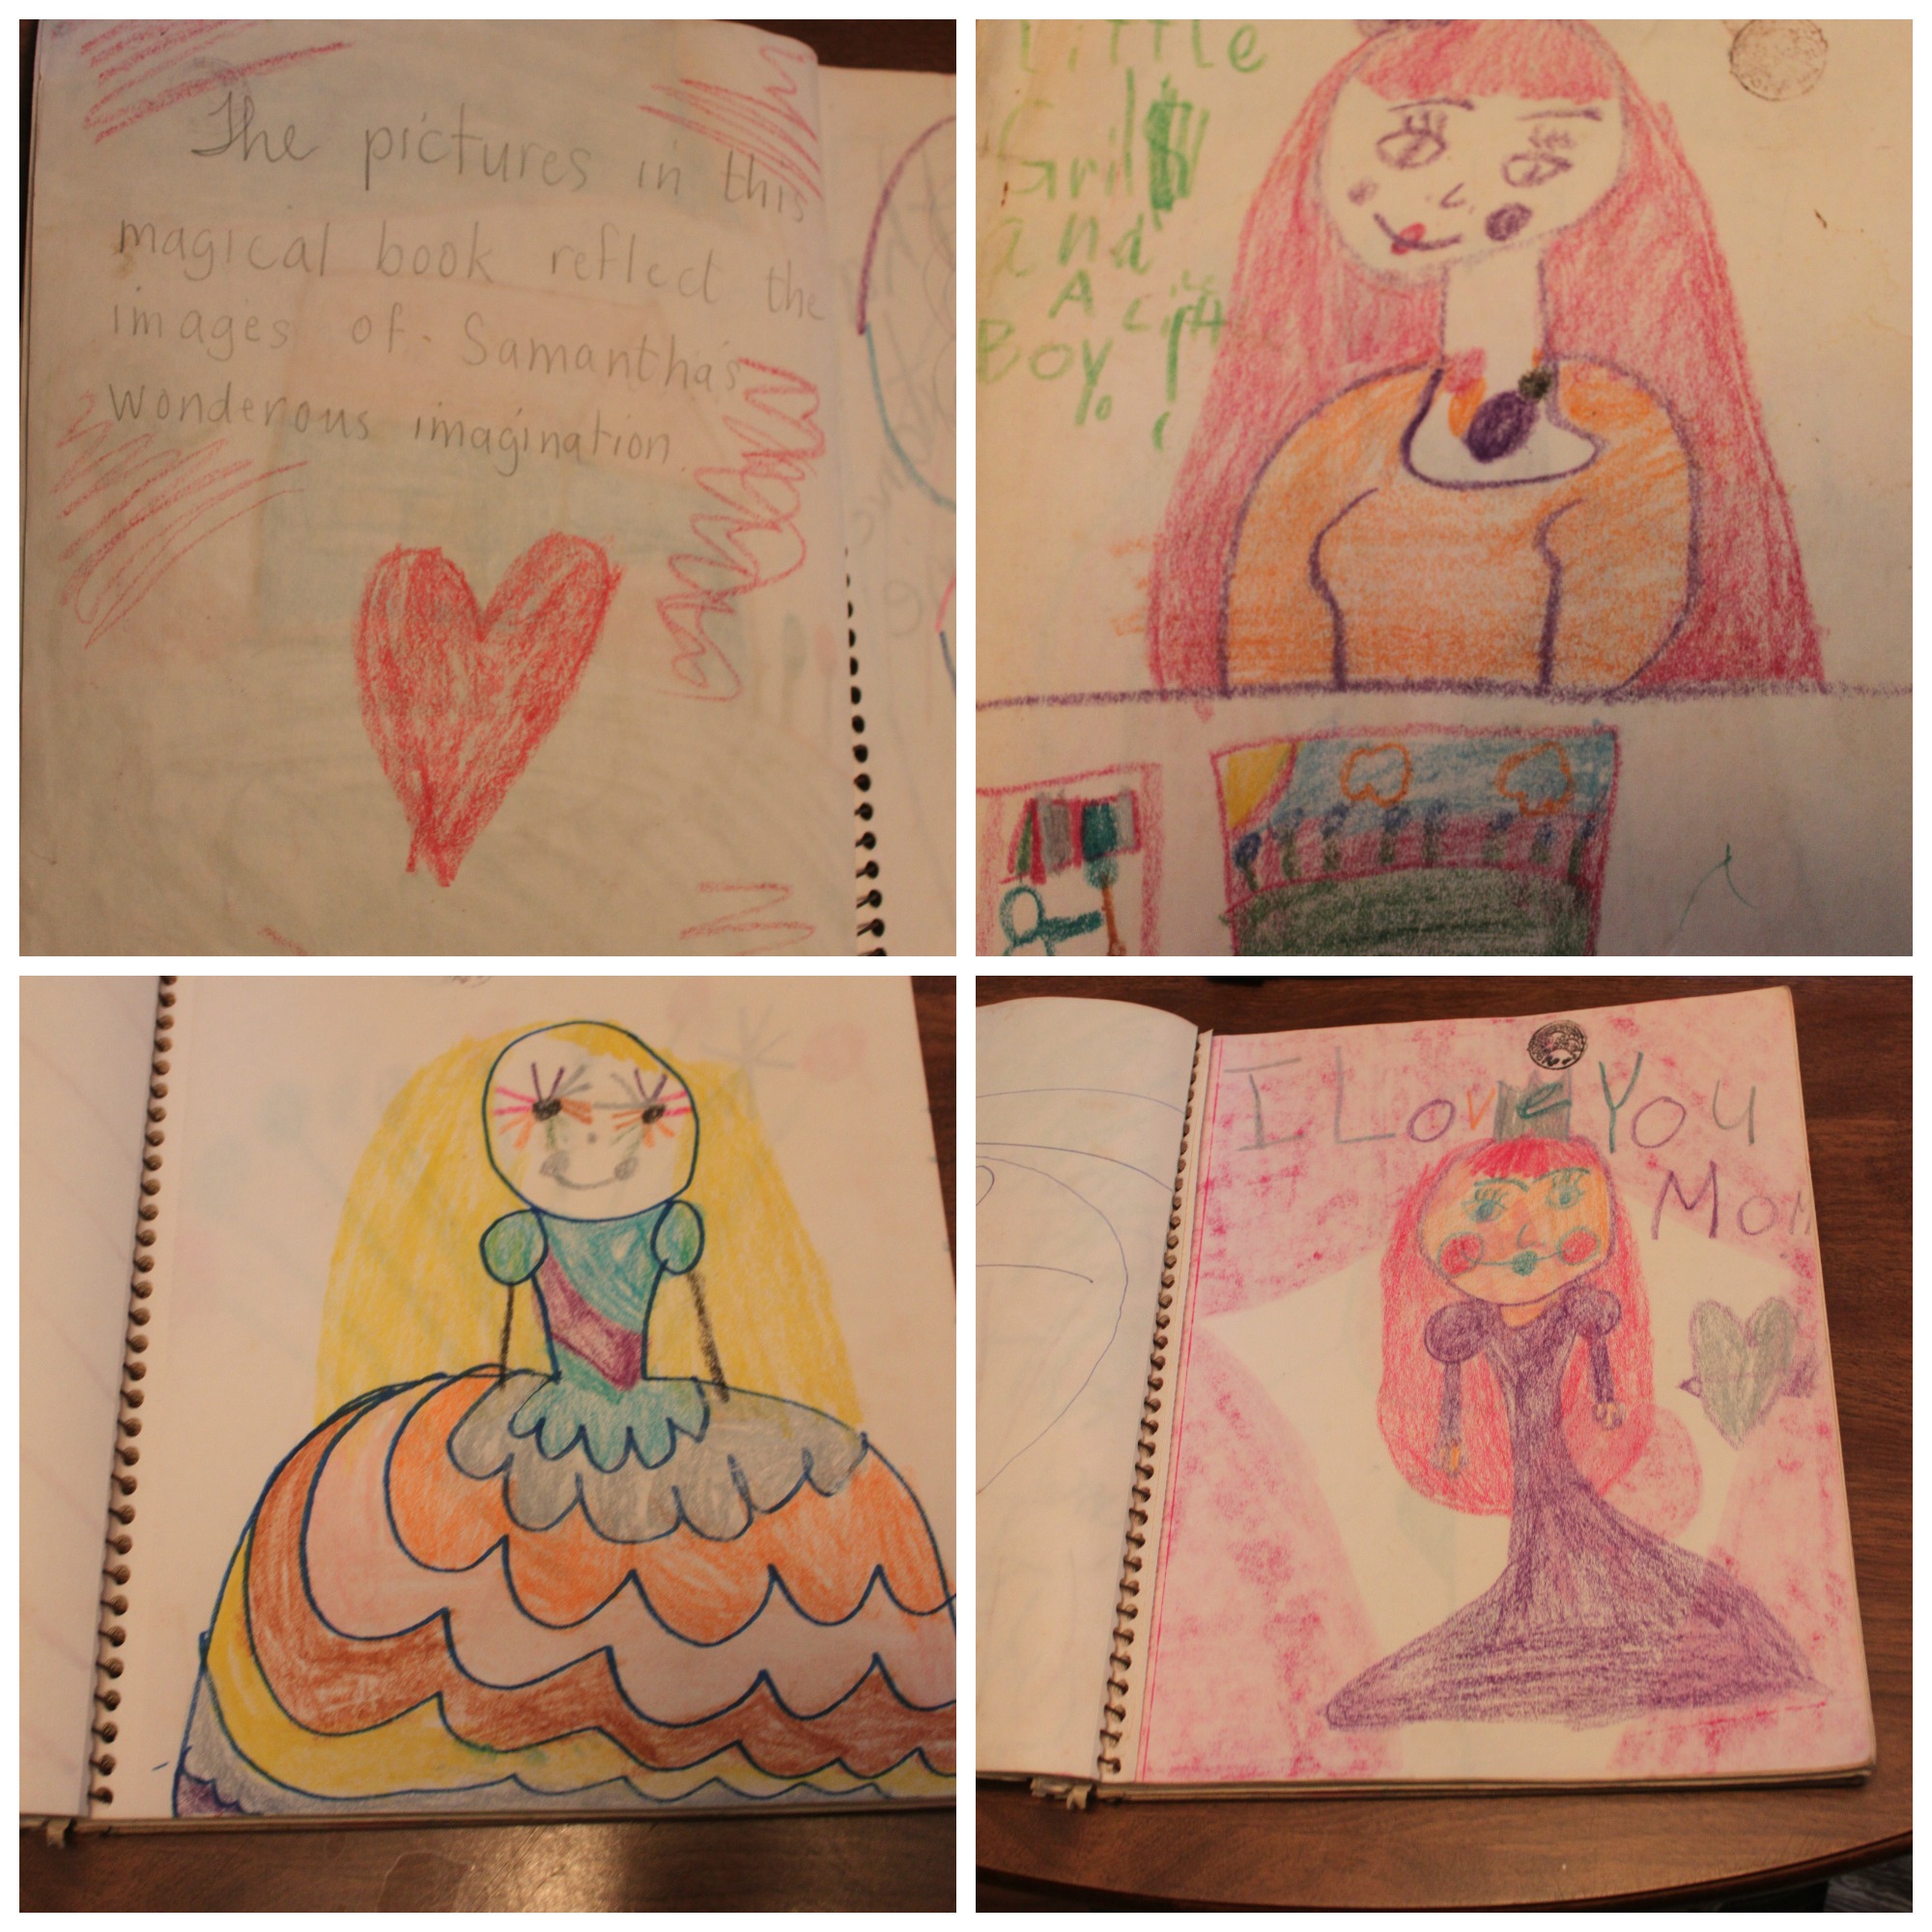
I am thankful for so many things, especially of late! I'd like to share a few with you. poems collageMy basement flooded, and although I lost a number of journals & sketchbooks I had stored down there--I did not lose the 2 most important ones: my very first book of poetry that I wrote and my very first sketchbook.

Sketchbook CollageI'm also thankful for my awesome mom--who still to this day writes supportive little notes in the notebooks & sketchbooks she gives me. From an early age she fostered my imagination & creativity.

Ok, it's about to get really gushy so you might want to scroll down--I'm also thankful for the wonderful new person in my life, my boyfriend, Rhys. He made me this super cool stocking--it's going to be a very geary Christmas! shot_1385568551092And last, but not least, I am thankful for all of you--who read my blog & support my little steampunk jewelry business. Here's an Etsy Coupon code for a special Black Friday through Cyber Monday discount (just use it when you check out): "maketulsa13".

Been making steampunk ornaments for The Alliday Show on Saturday! So excited!

Have a Happy Thanksgiving!


Meet the Harveys!

UncategorizedSamantha ExtanceComment

1240101_416487038463656_448988613_nI am always so honored when a couple chooses to wear my jewelry on their wedding day. I met Amanda & Kurt at Marry Me Indie last year and I was excited at the possibility of designing pieces especially for them. Here is a little peak at their special day! Congratulations Mr & Mrs Harvey! 1236070_10201936740681005_513018333_n Kurt's top hat was one of my favorite pieces to design--completely versatile--all of the pieces are removable!

1383701_422247764554250_1275305447_nI really love combining rhinestone pieces with gears! It's so dainty, feminine, and intricate! Perfect for an engineer like Amanda! 1375757_421520827960277_701401299_nThis last picture is my favorite! I'm a sucker for love, what can I say? If you have a wedding and want jewelry as unique as you, email me! I'd love to make something special for you!

Going to the Chapel and I'm Gonna Steampunk Your Wedding!

UncategorizedSamantha Extance3 Comments

I am thoroughly exhausted after this weekend! My cousin, Rebecca, and her (now husband) James tied the knot in a beautiful little chapel in Raleigh, North Carolina. The whole family pitched in and there were so many handmade touches. From the stunning guest quilt my grams made, owl ring bearer pillow sewn by my mom, to the accessories worn--you could see everyone's personal touch on my cousin's special day. (I wrote a much longer post on the Marry Me Indie blog about all of the handmade elements of Becca & James's wedding which I encourage you to read later.) For my part, I was asked to officiate. I was so honored to be asked and had so much fun putting together a personal ceremony that complimented both their sweet & sarcastic personalities. There was not a dry eye in the place nor was there a single person who didn't laugh wholeheartedly once or twice. 163

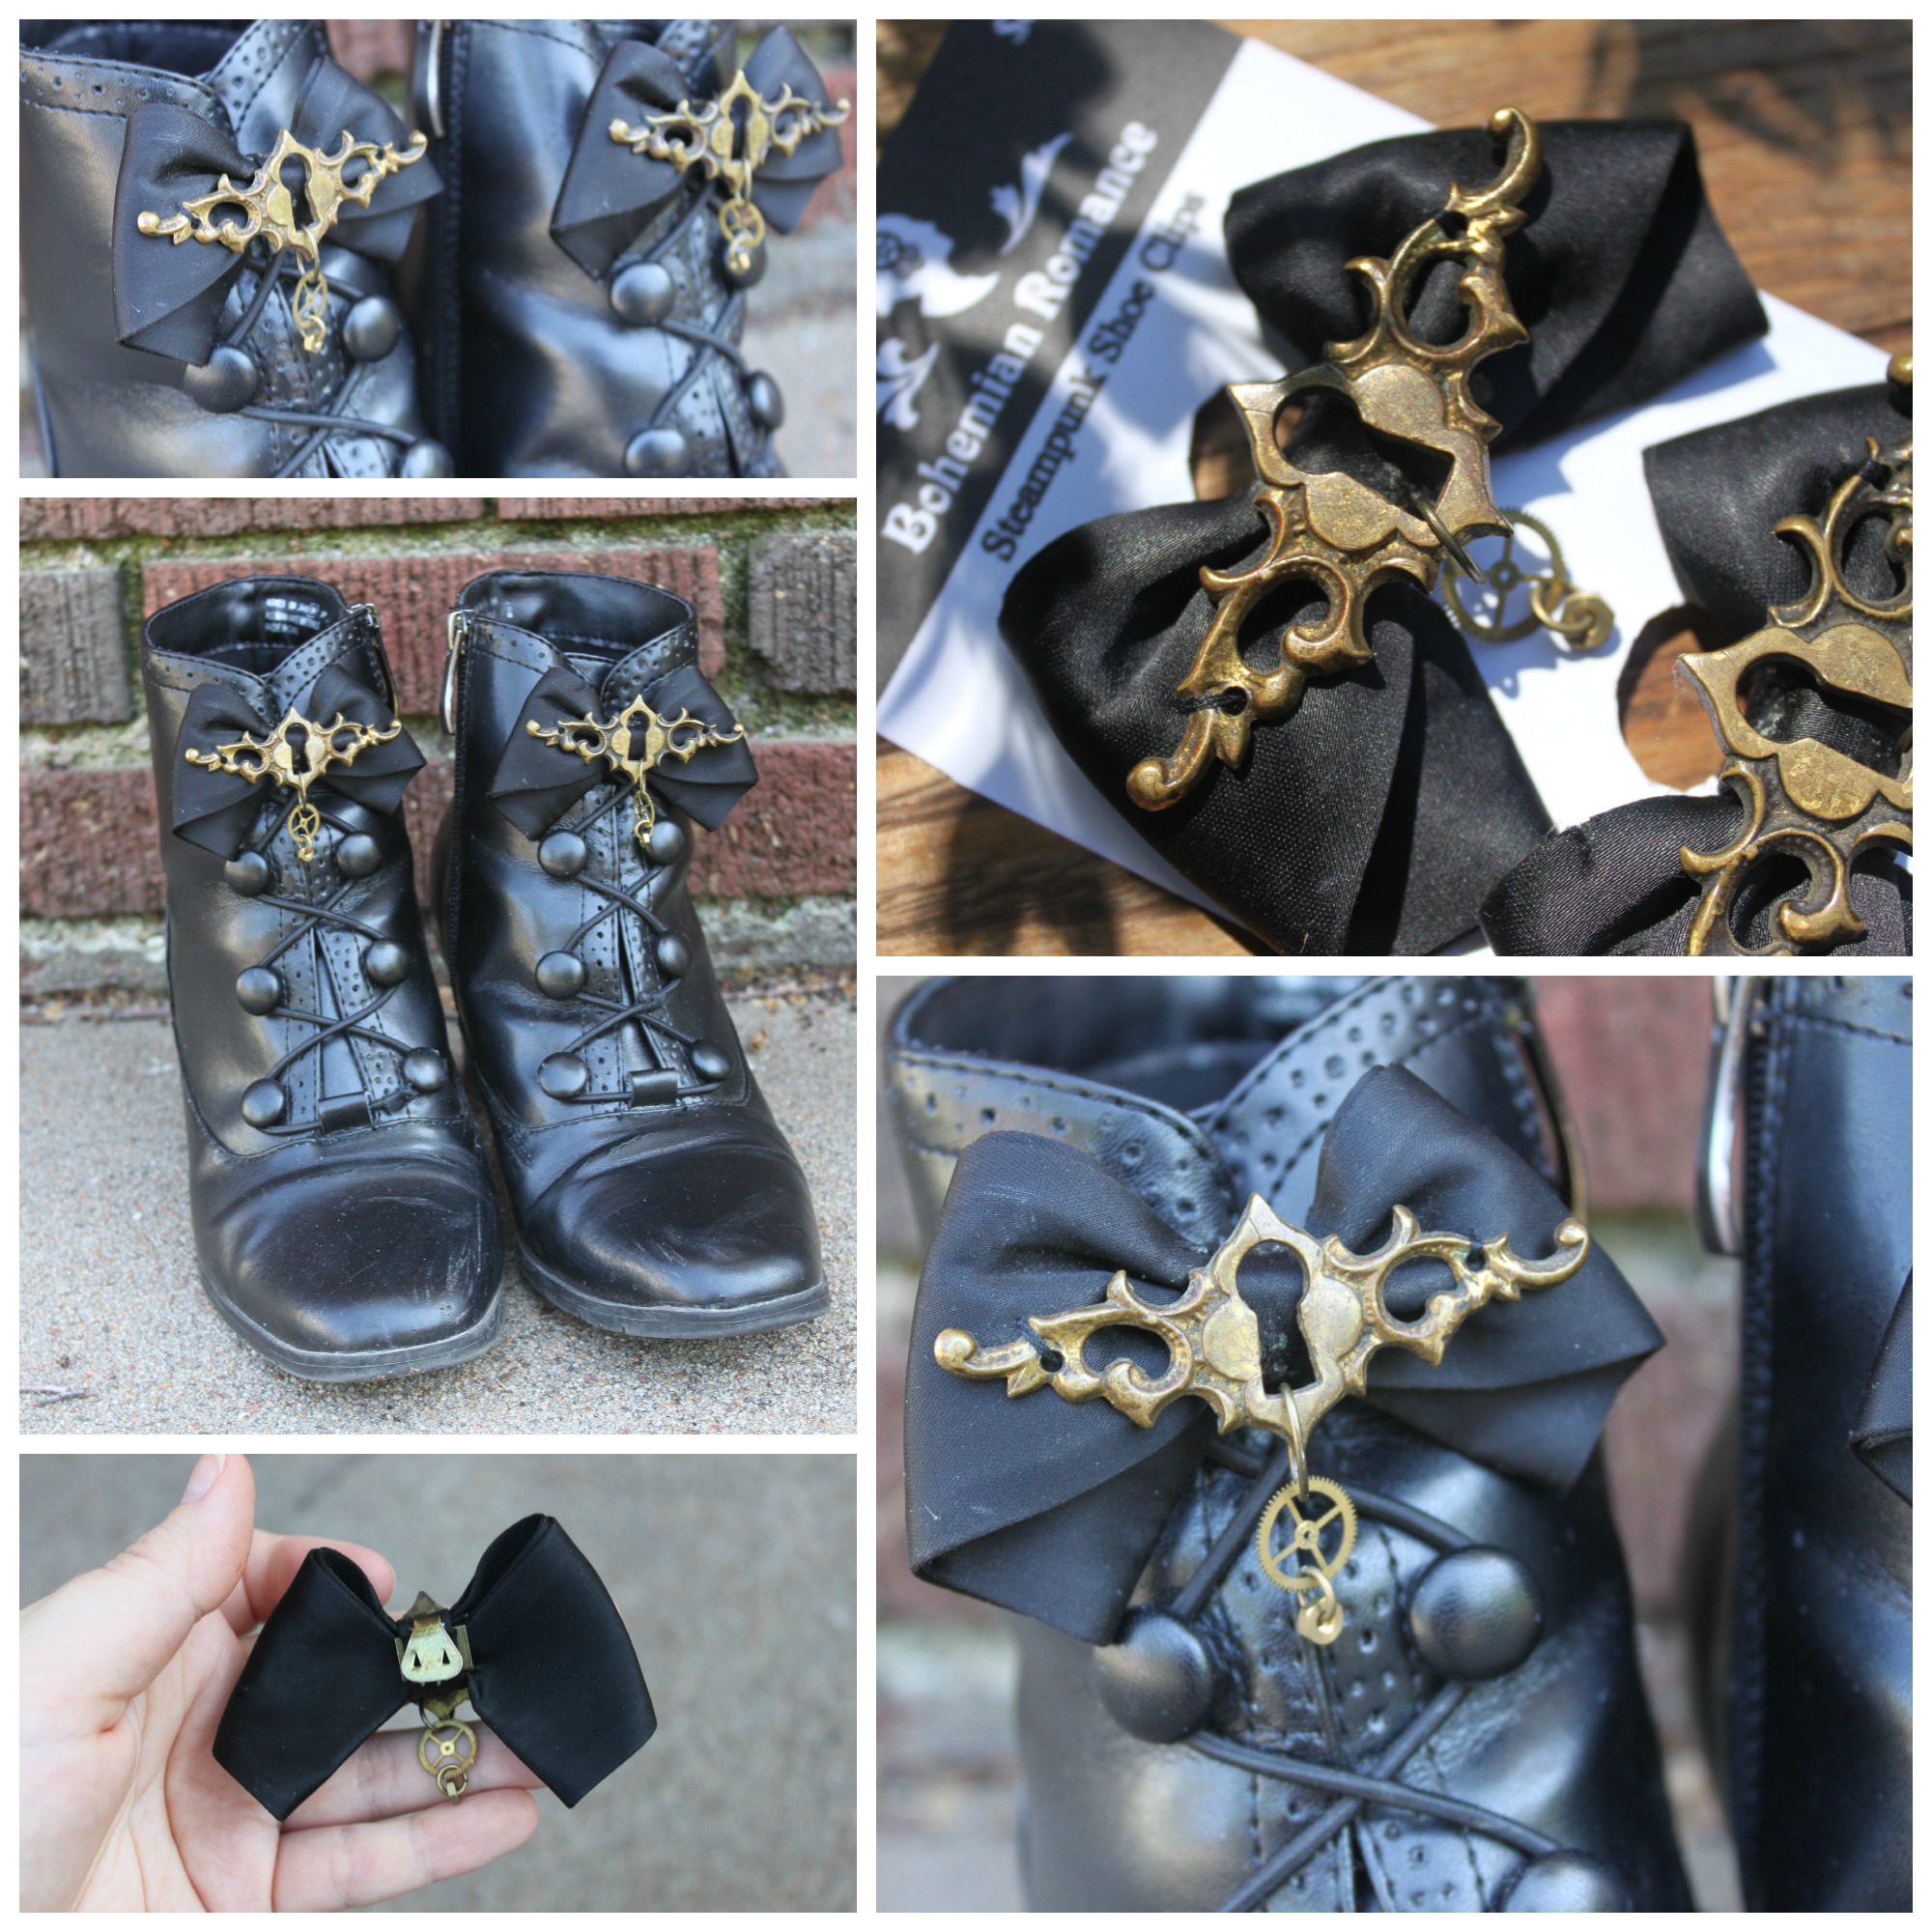
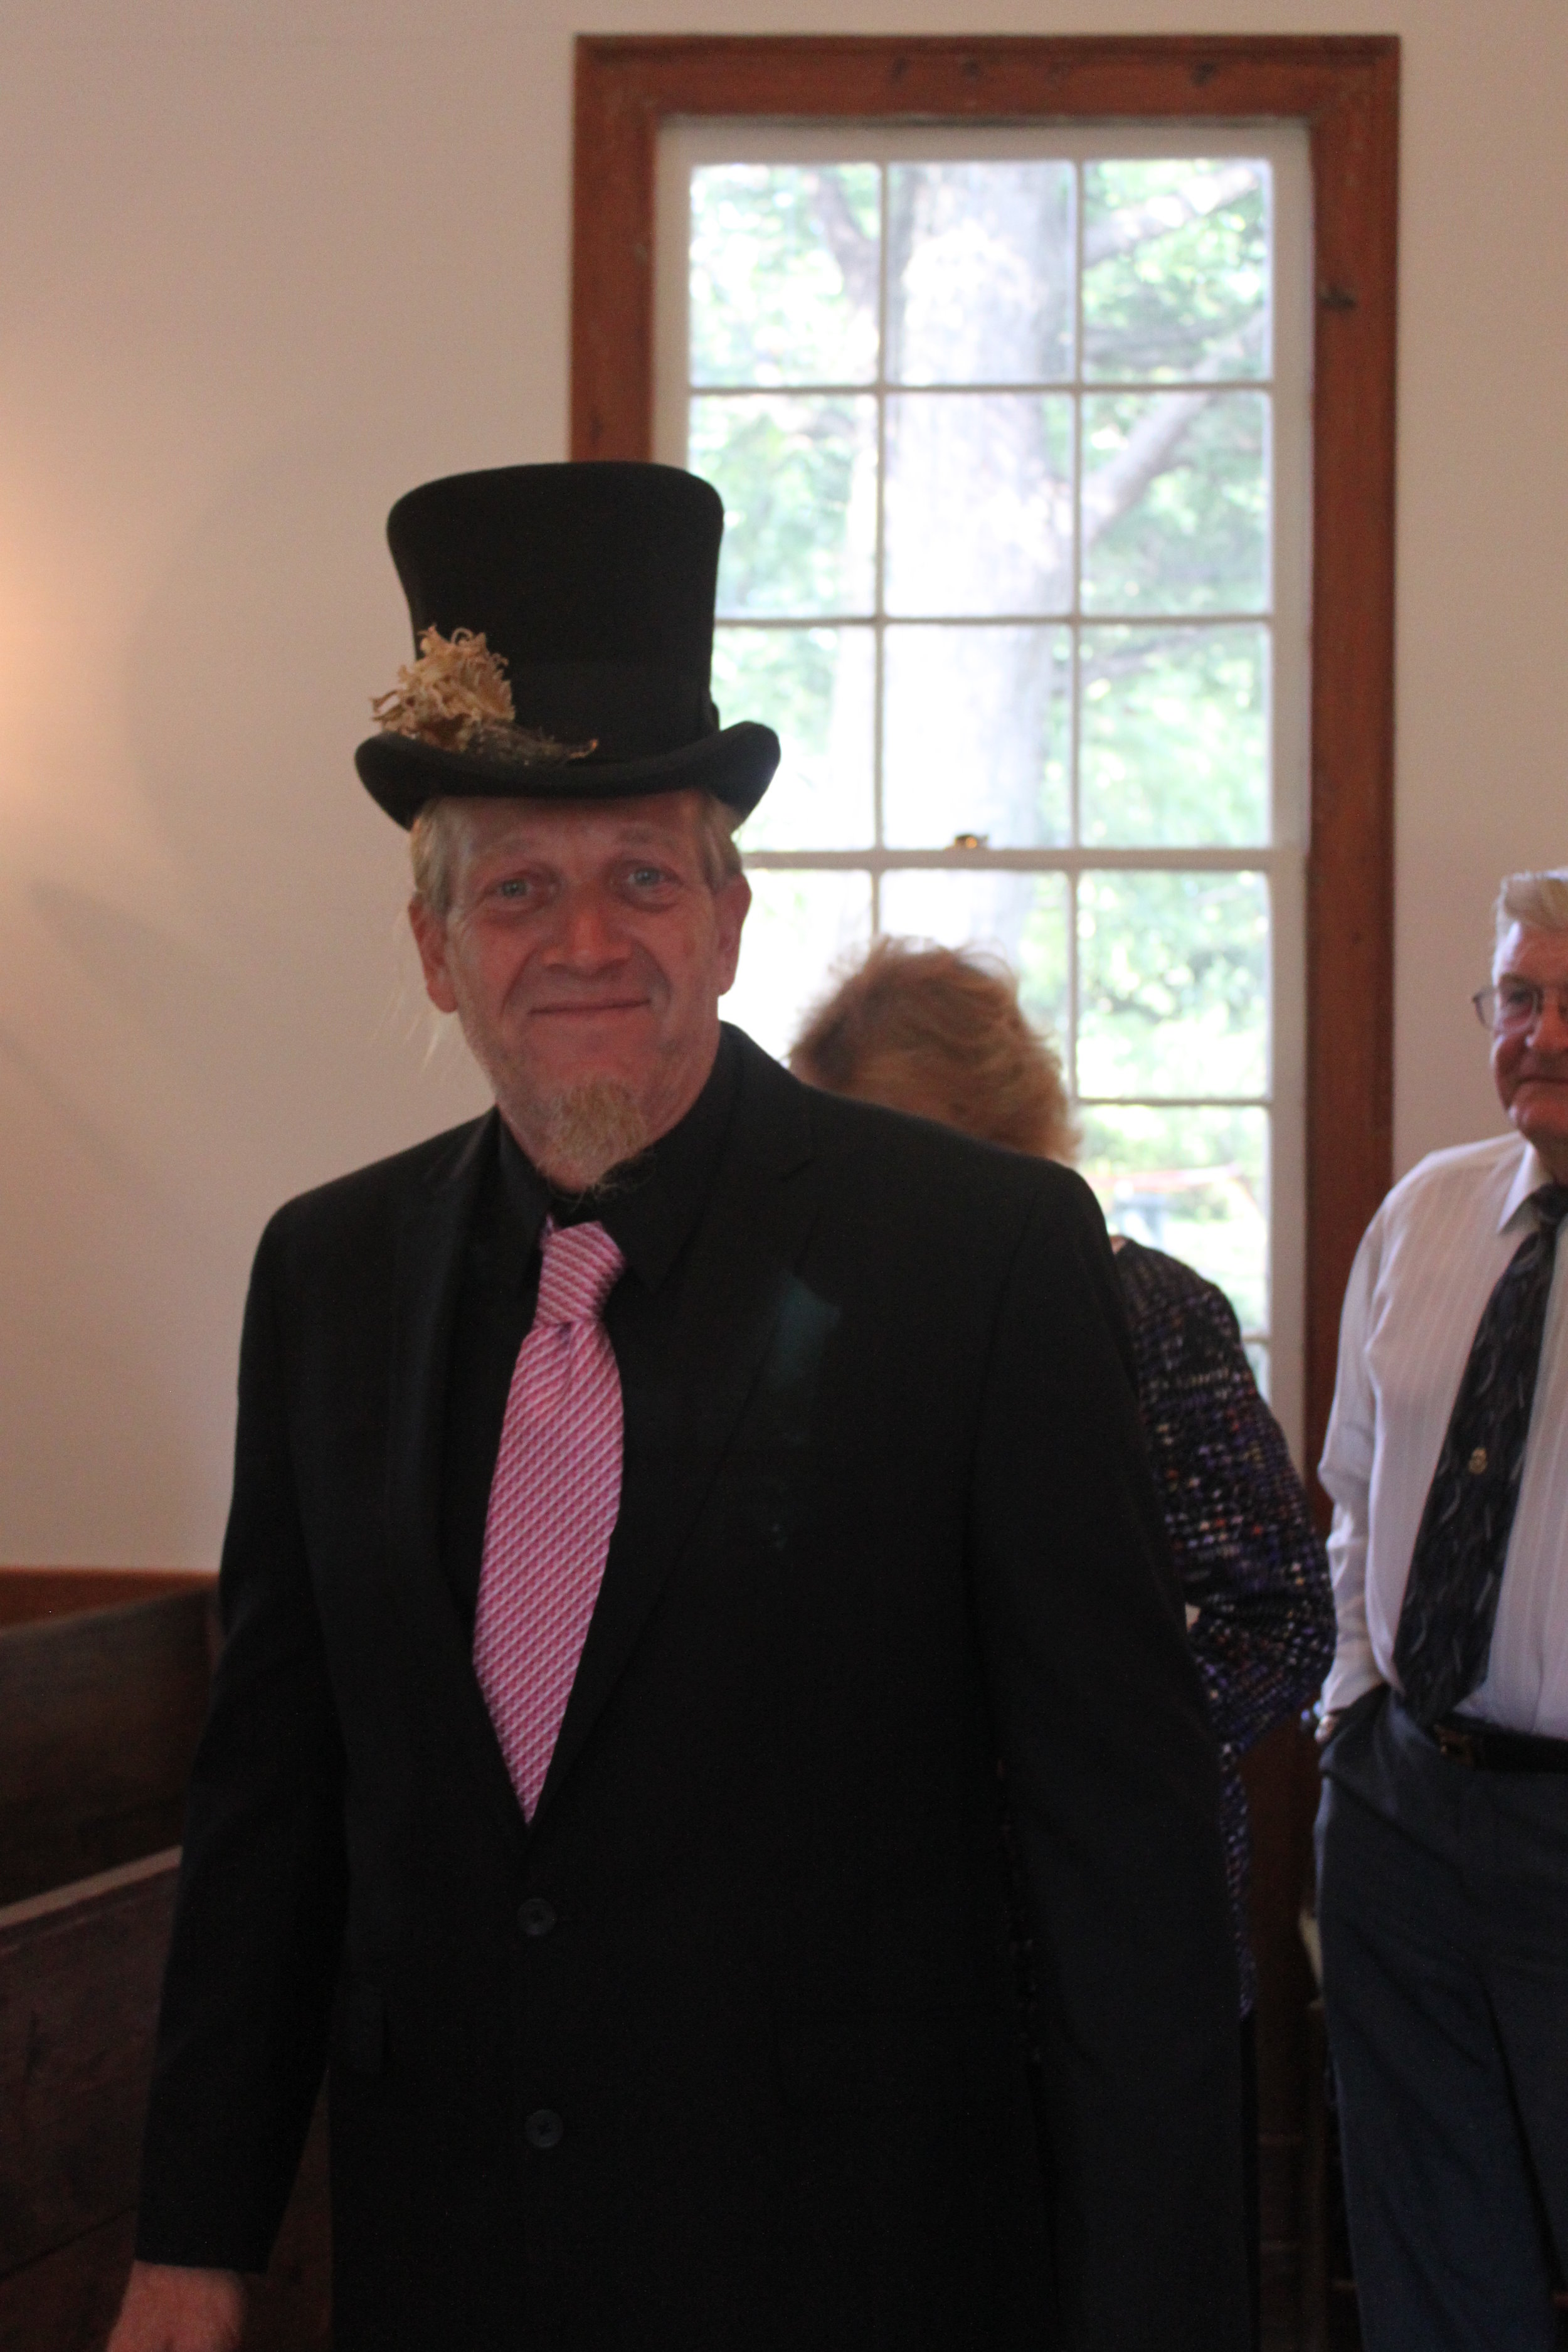
As per the groom's request, I wore a top hat (made by my mom, The Salvage Steamstress), a tuxedo jacket (which had a much older feel & look), and steampunk accessories (made by yours truly). I had on a pair of dainty gearrings, one of my new gear cluster rings, a monocle pin, and steampunk bow shoe clips to dress up my plain black heels. Steampunk Bow Shoe Clips Collage

I lost my hat to the Father of the Bride, my Uncle Jeff, who fell in love with it. But luckily, I escaped with the rest of my accessories.186

Another subtle steampunk touch was my gift to the bride--a bouquet locket. We lost Popu, our grandfather, earlier this year, and Becca asked if I would make her a special locket so she could keep him close to her on her wedding day. Becca, who is a photographer, had taken this stunning portrait of Popu--where his striking blue eyes pierce through the camera with his gentleness and kindness. I thrifted an antique silver locket--an Art Deco locket to be exact, and placed her portrait of him inside. On the facing piece, there is a tiny heart cut from a pair of his old work coveralls. Her something blue. I hung it from a small silver gear and pin.257

Steampunking your wedding does not mean you have to go over the top or have a strict Victorian, Steampunk, or Sci-Fi theme. It can be subtle. Steampunk can blend in with other themes--like my cousin's, which was a modern, Southern wedding.shot_1378590698989

It is always an honor to make pieces for weddings--and I am happy to say that I have styled a couple getting married this weekend! Can't wait to share some of their pictures with you! Getting hitched yourself? I love designing jewelry & accessories for weddings. I especially enjoy creating pieces that are not only beautiful, but personal.

New from my Steampunk Workshop!

UncategorizedSamantha ExtanceComment

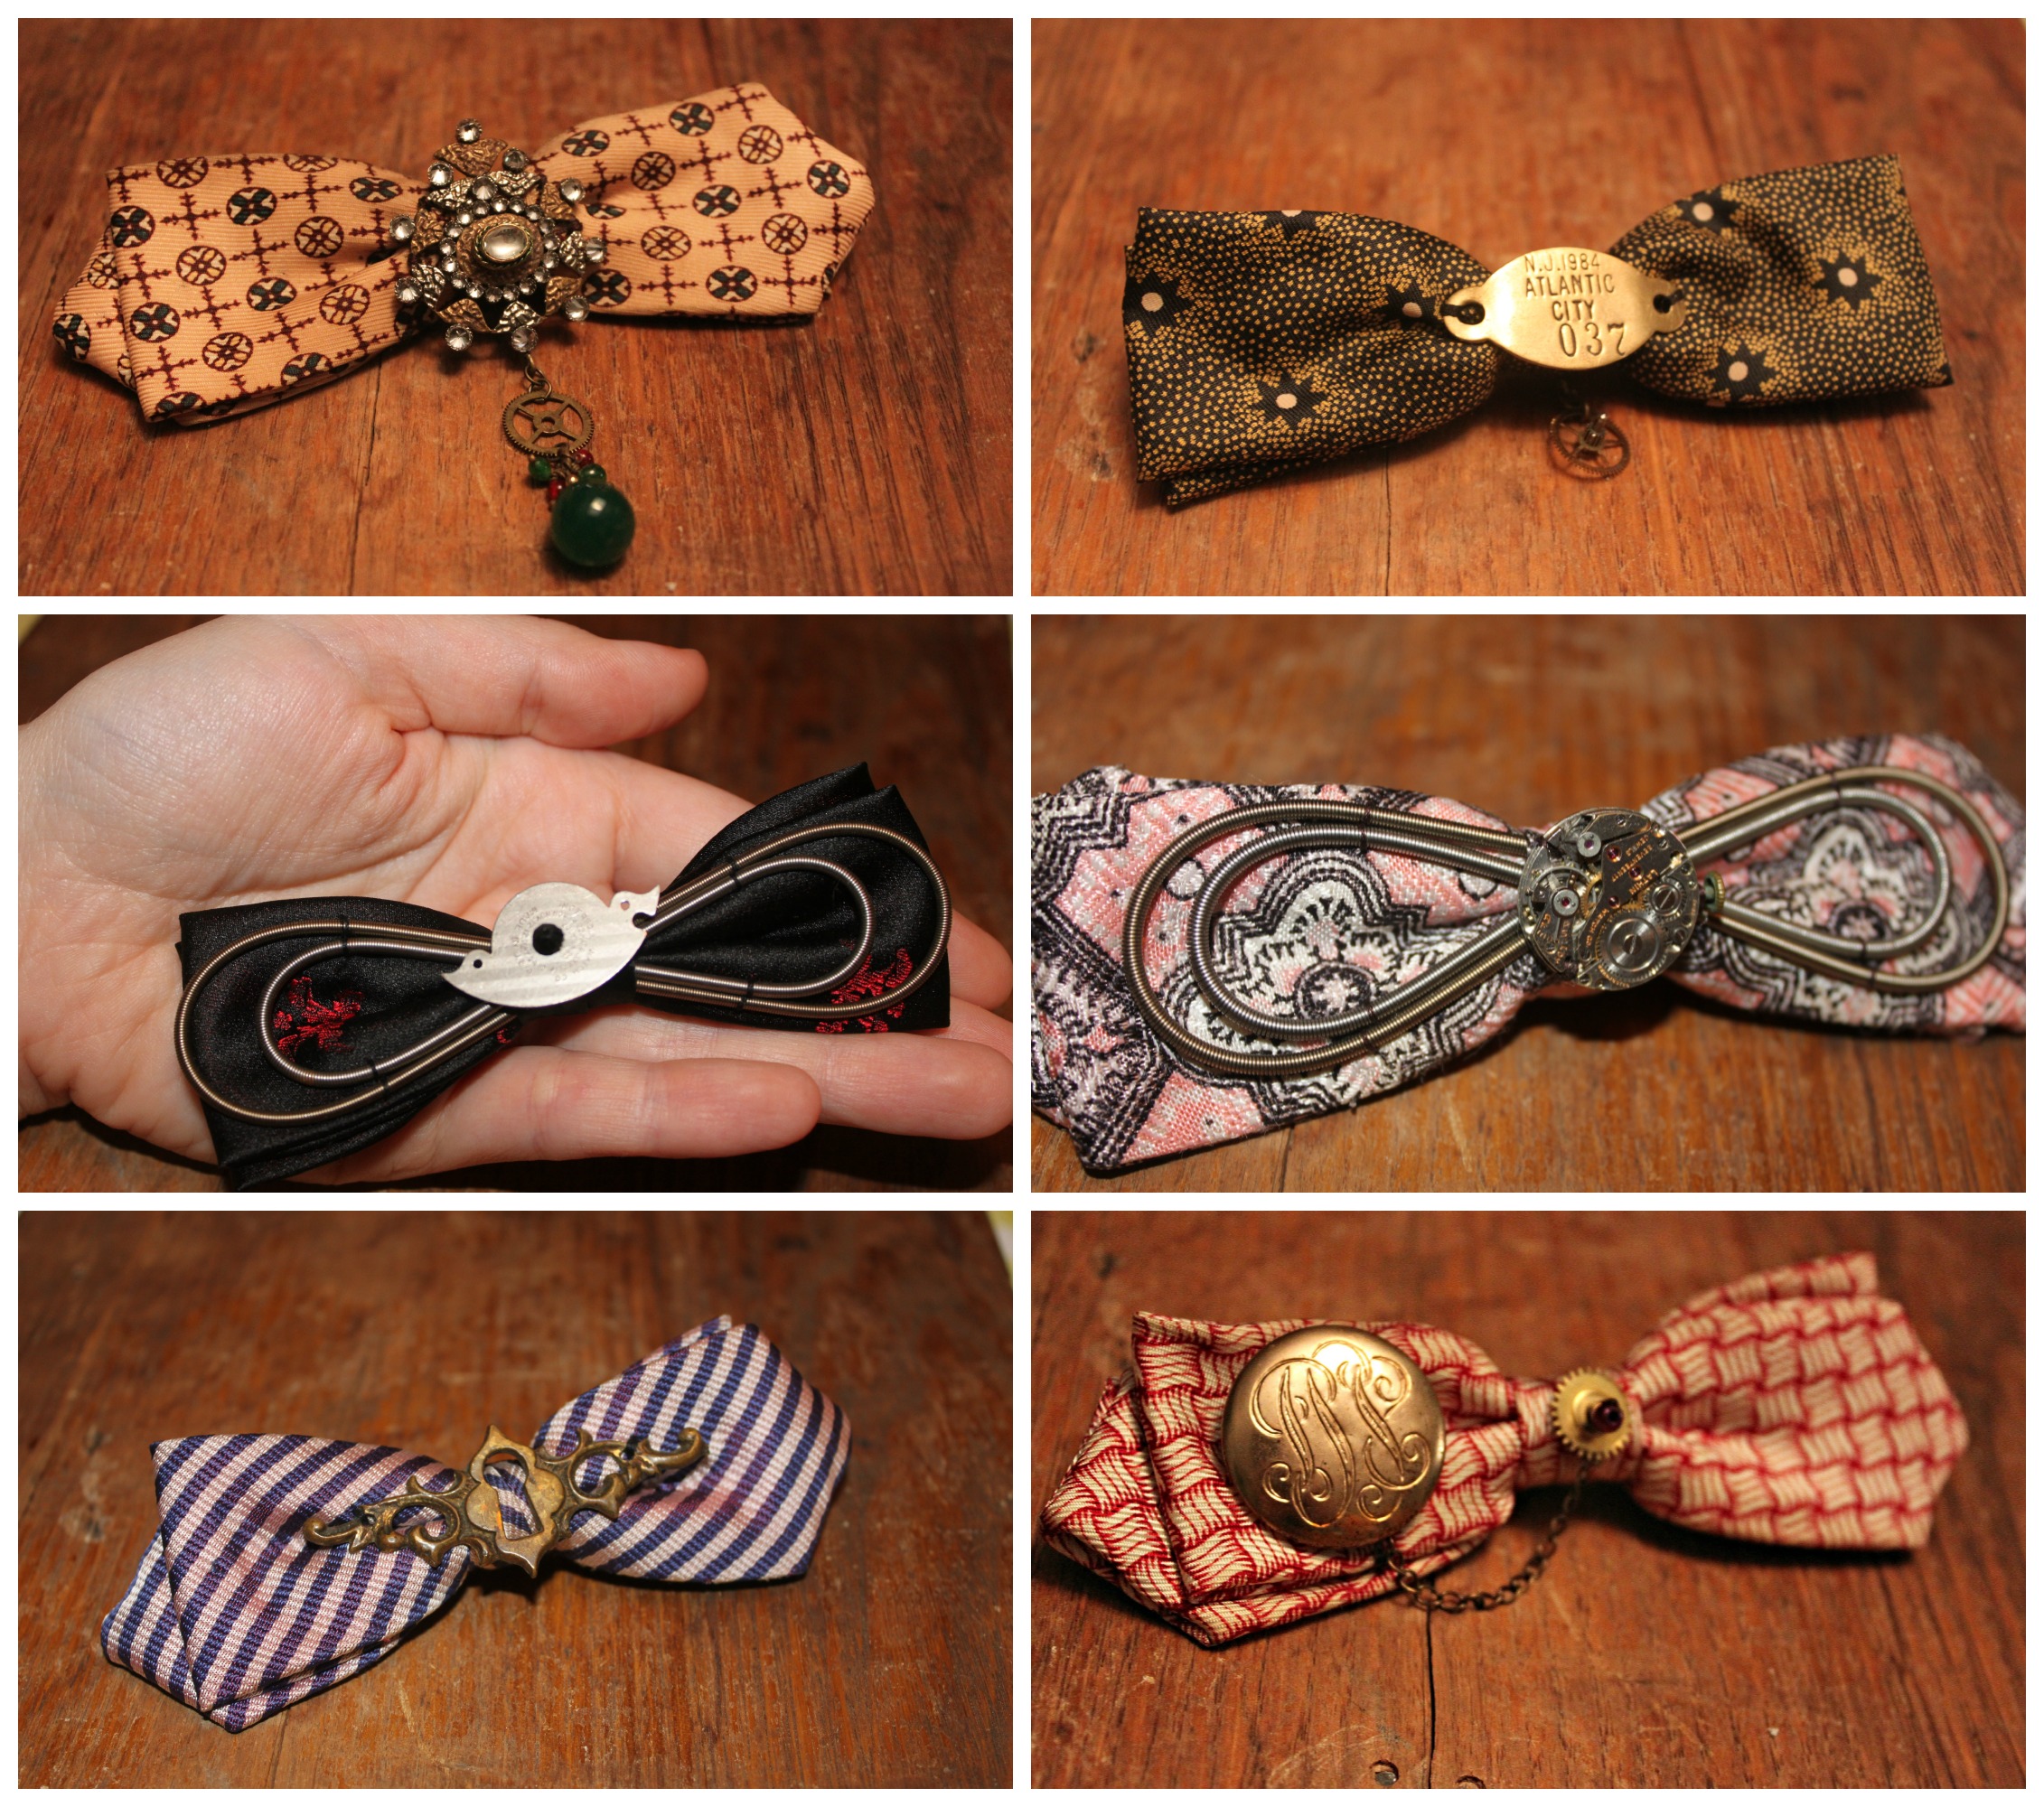
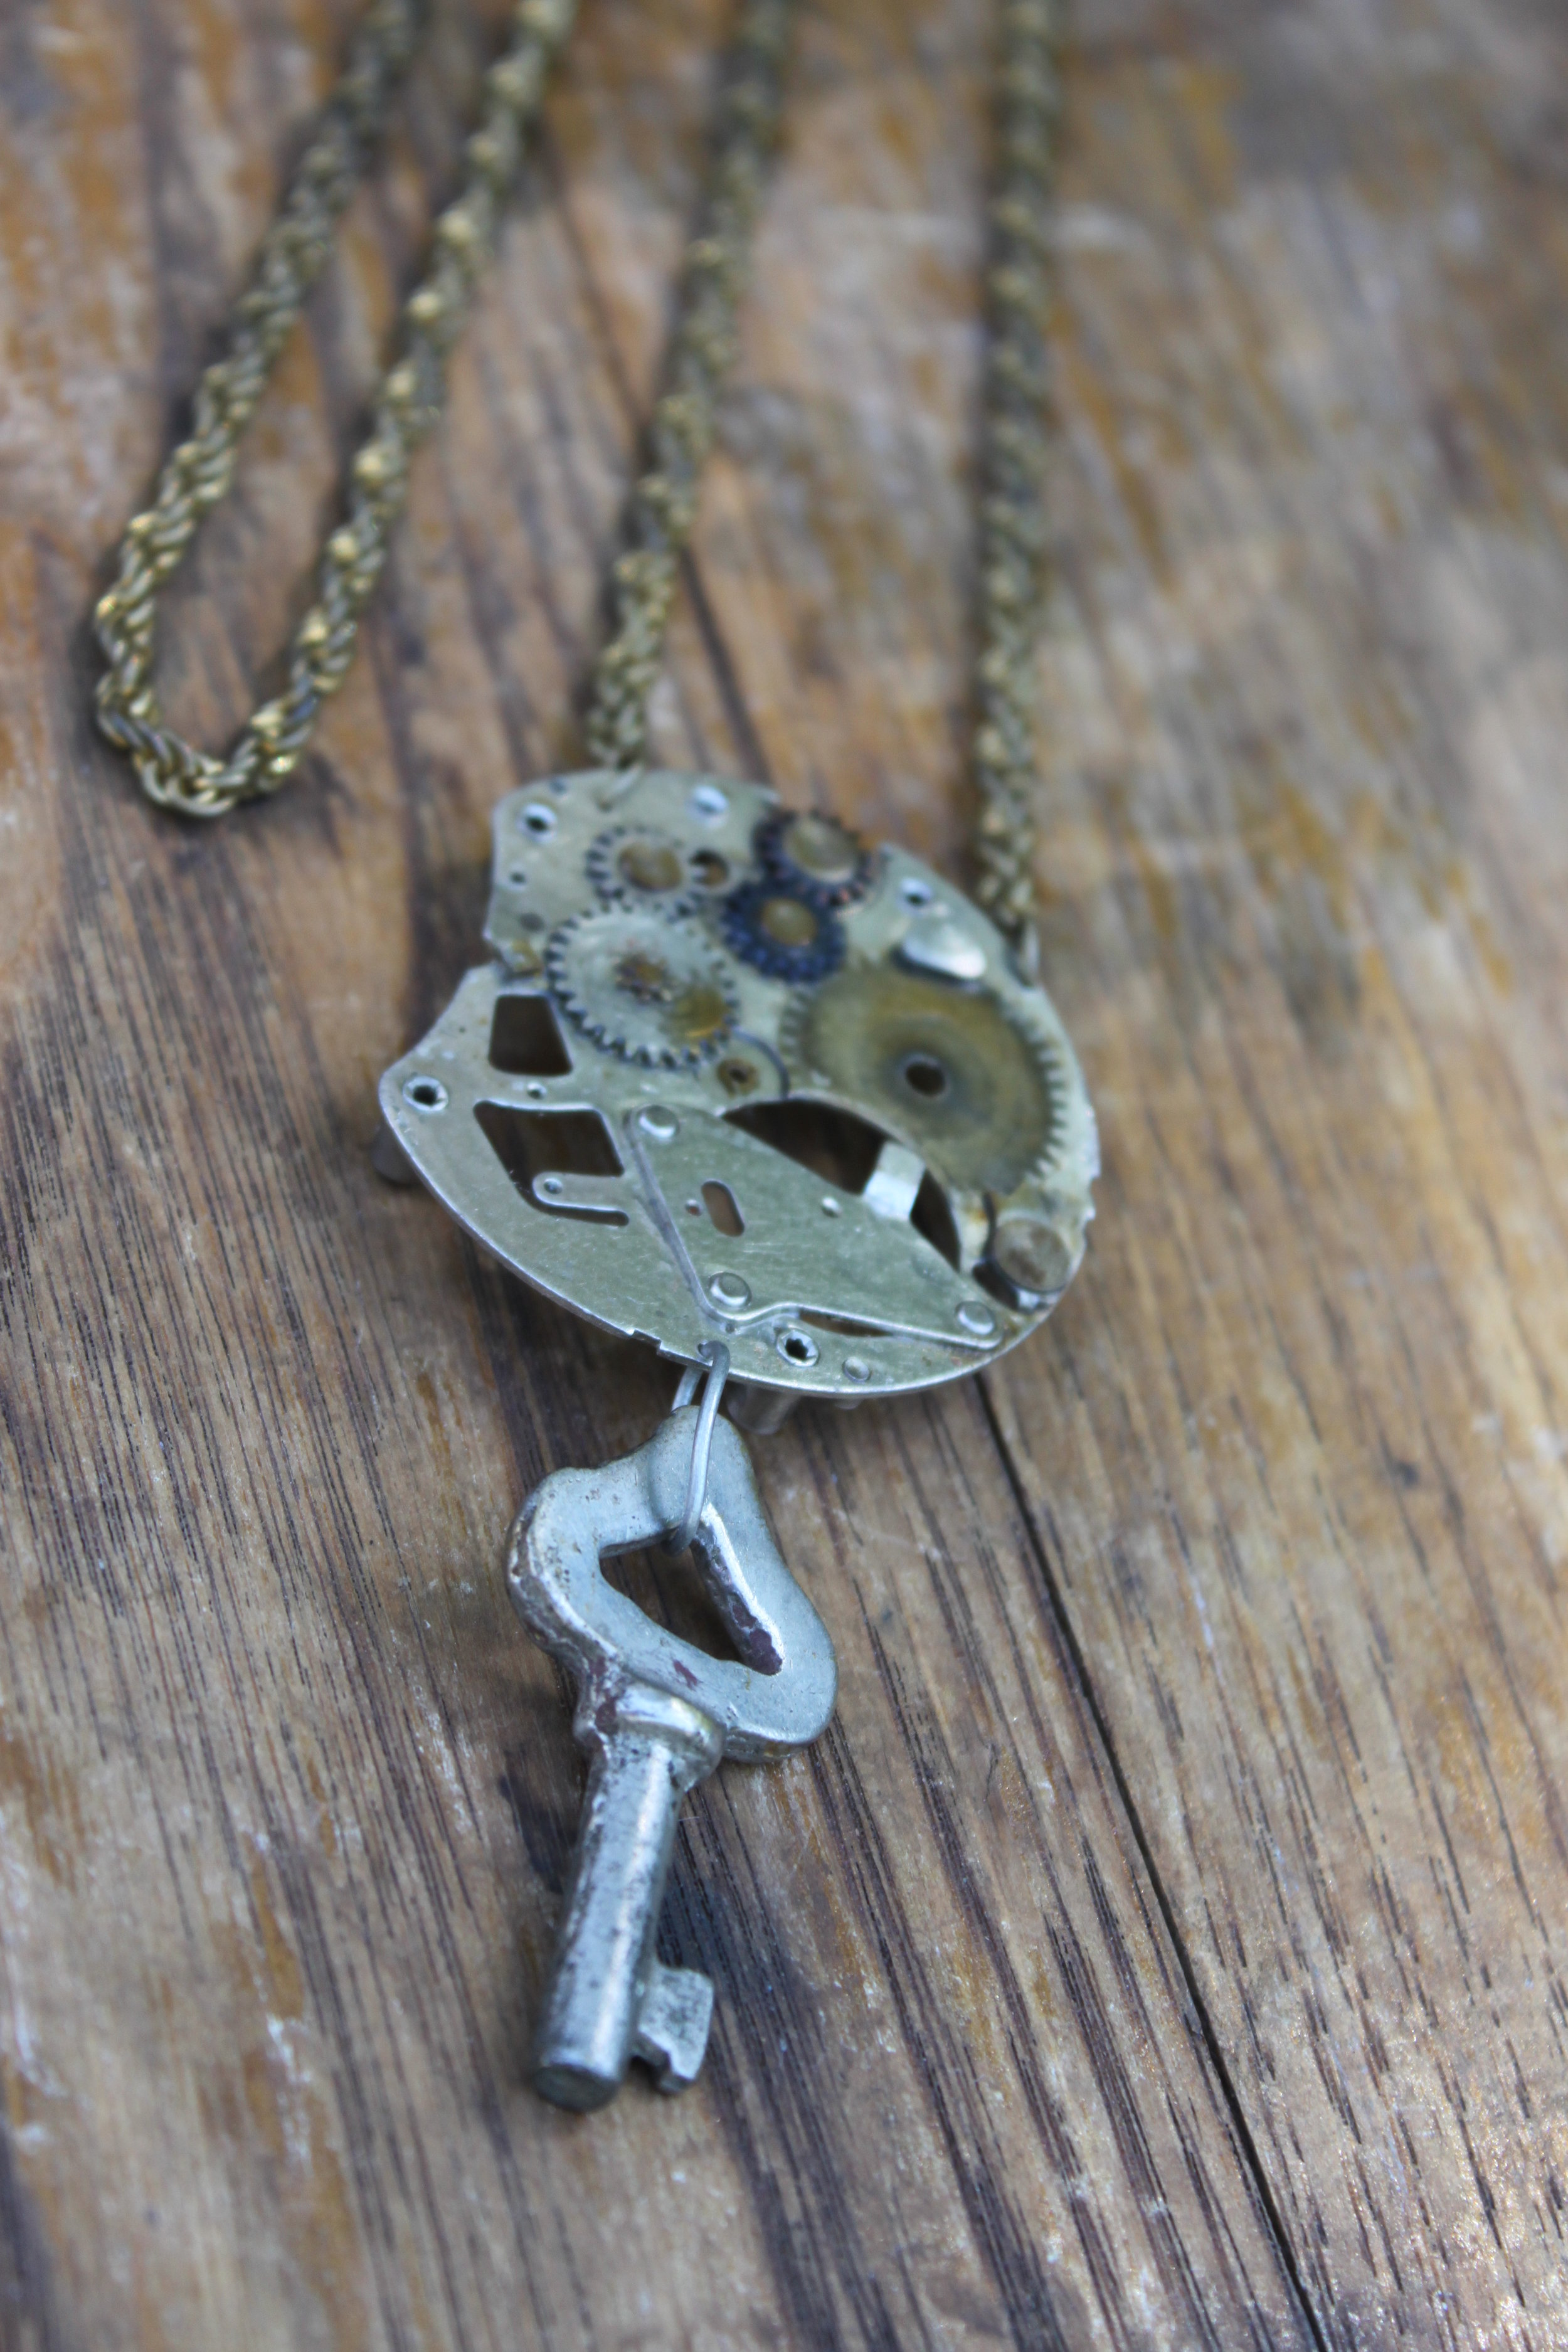
I have been making new creations left & right for Blue Dome Arts Festival this weekend & for Marry Me Indie (on June 1st)! I am especially excited about all of the upcycled & steampunked bow ties! New Steampunk Bow Ties CollageMy favorite is the striped keyhole bow tie--when the light hits the fabric it tints the fabric pink! A couple of these will be at Blue Dome this weekend and the others will be worn down the runway at Marry Me Indie! Glass Cameo Necklace CollageAnother new creation is this elegant yet simple Glass Cameo & Skeleton Key Necklace. The metal filigree is inlaid with tiny rhinestones which brings out the luster of the key & chain.  The luster almost reminds of midnight blue--that shimmer of twilight.

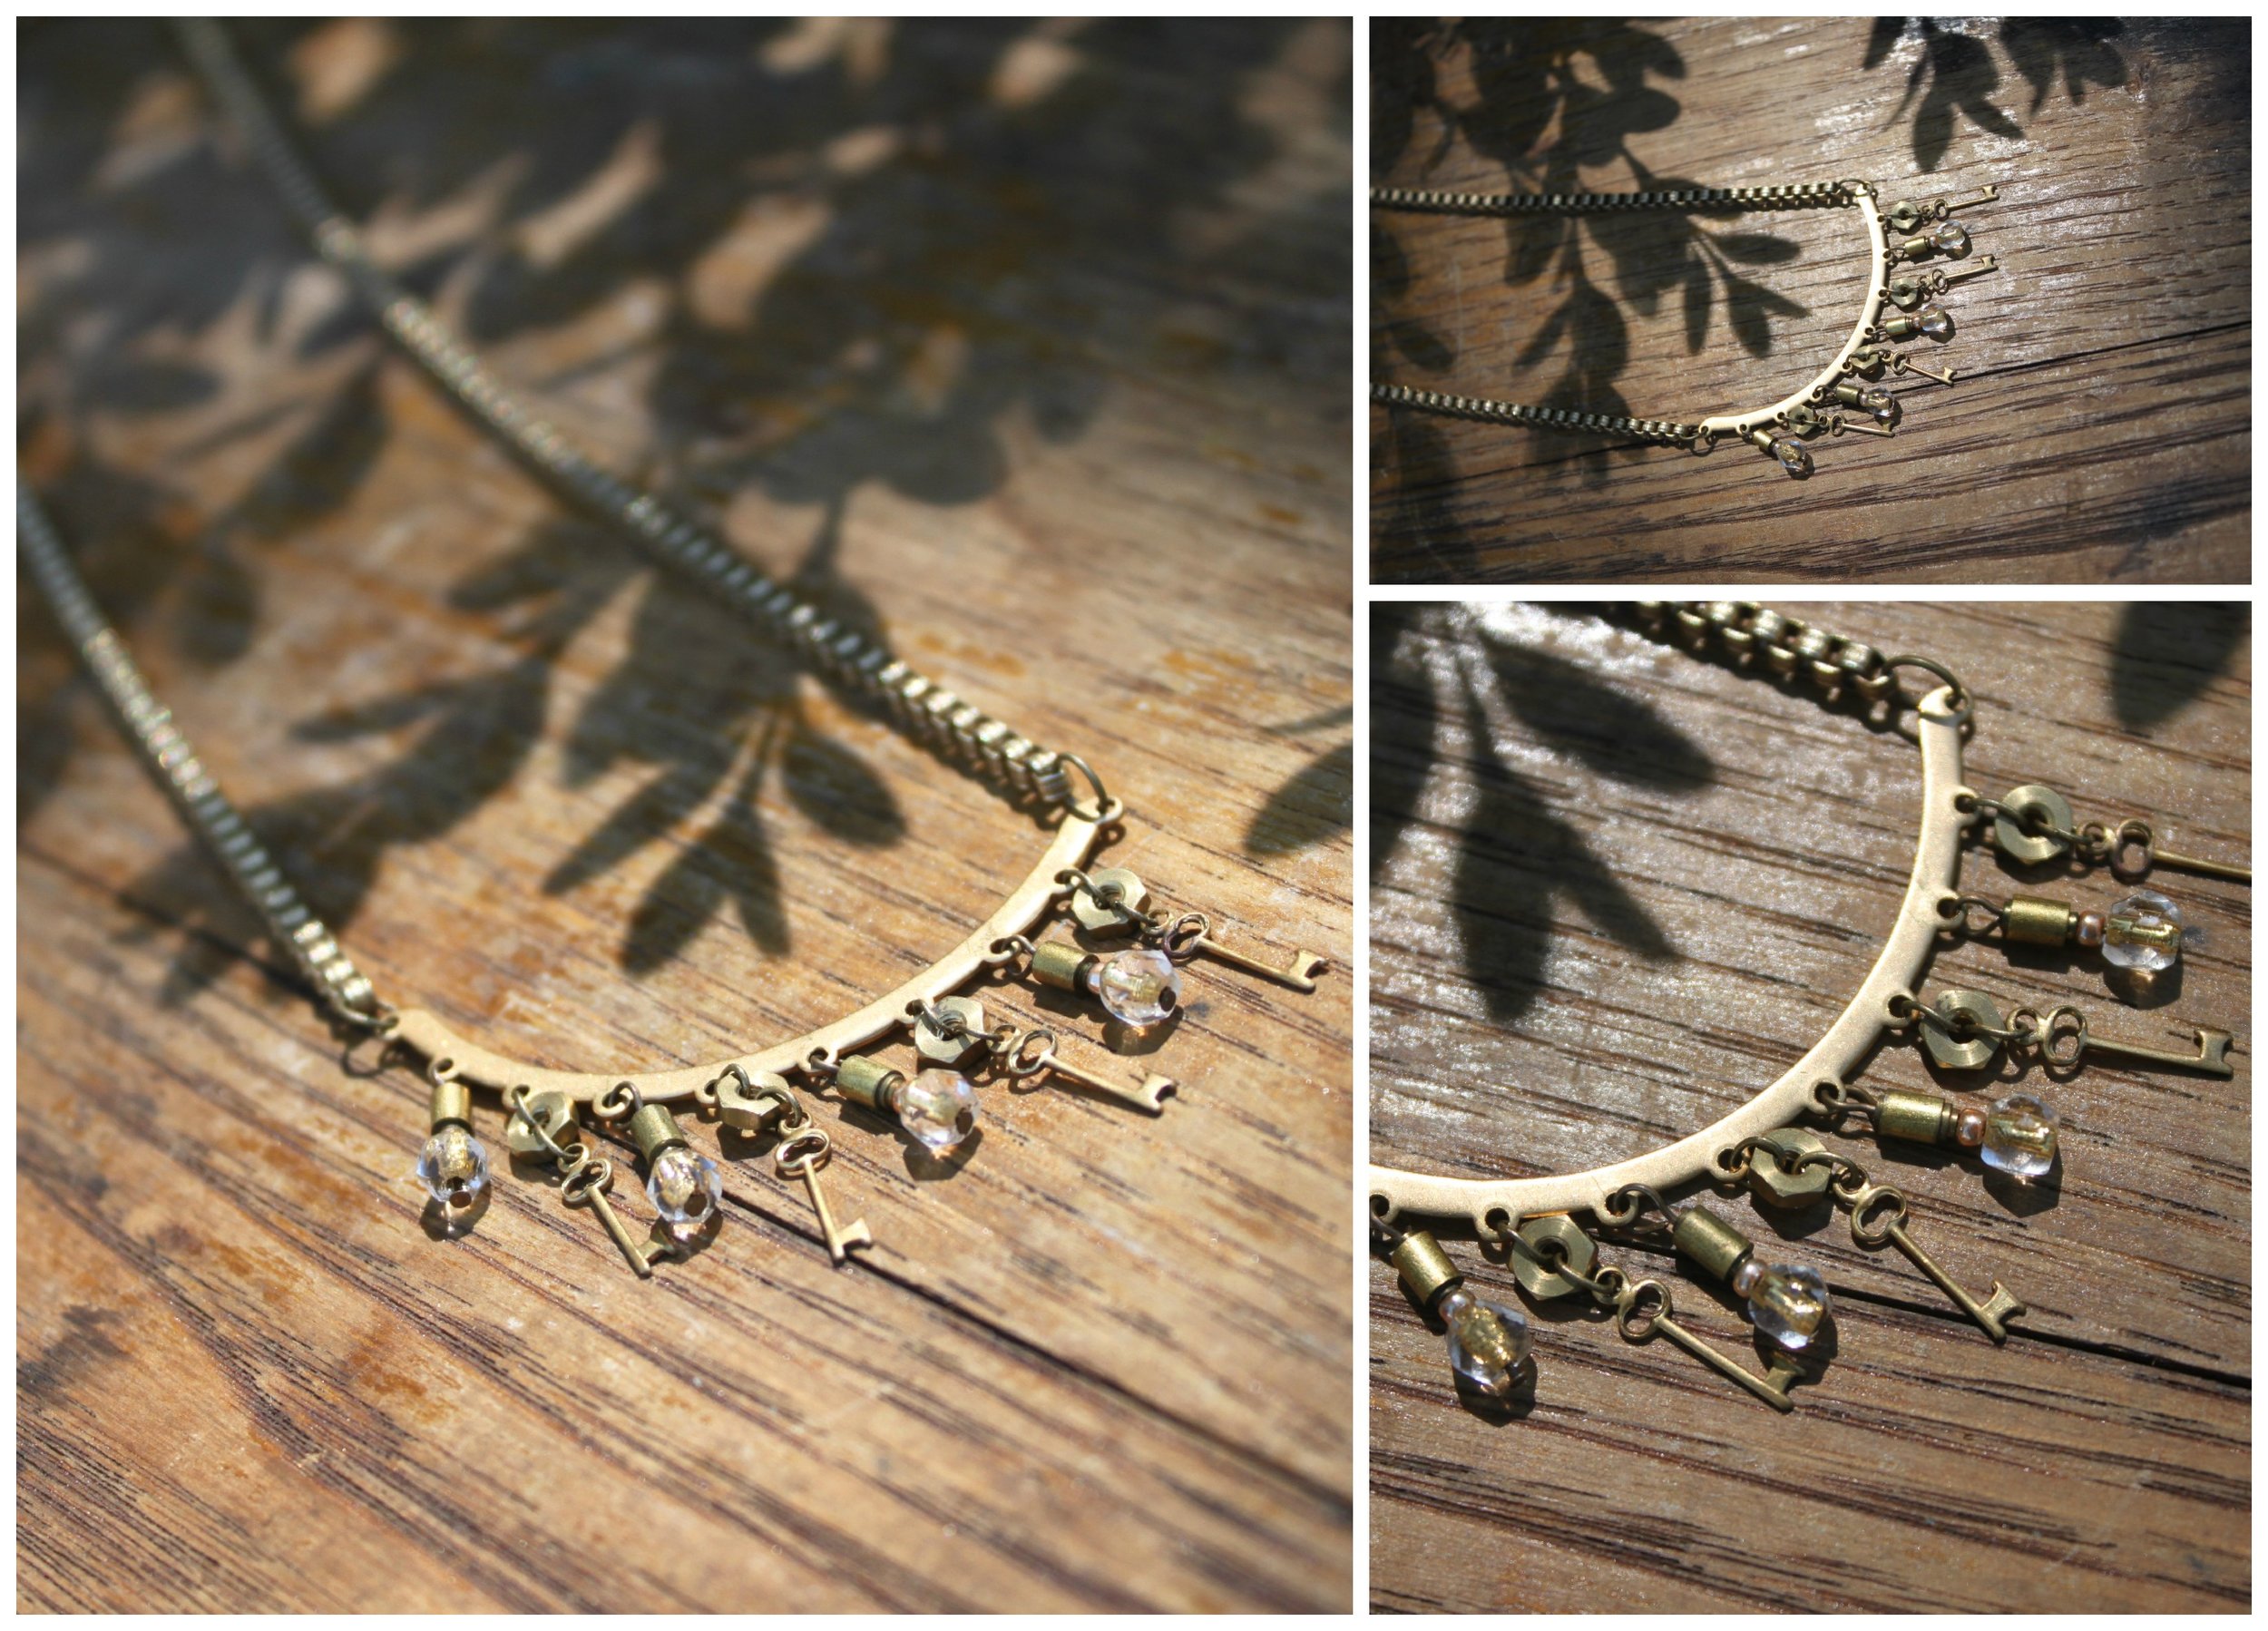
Steampunk Golden Key Necklace CollageThis next necklace is the total opposite--a little burst of golden sunlight & warmth to adorn your neck. Brass washers, gold key charms, pocketwatch screws, and vintage gold foil beads reflect the glorious sunshine.

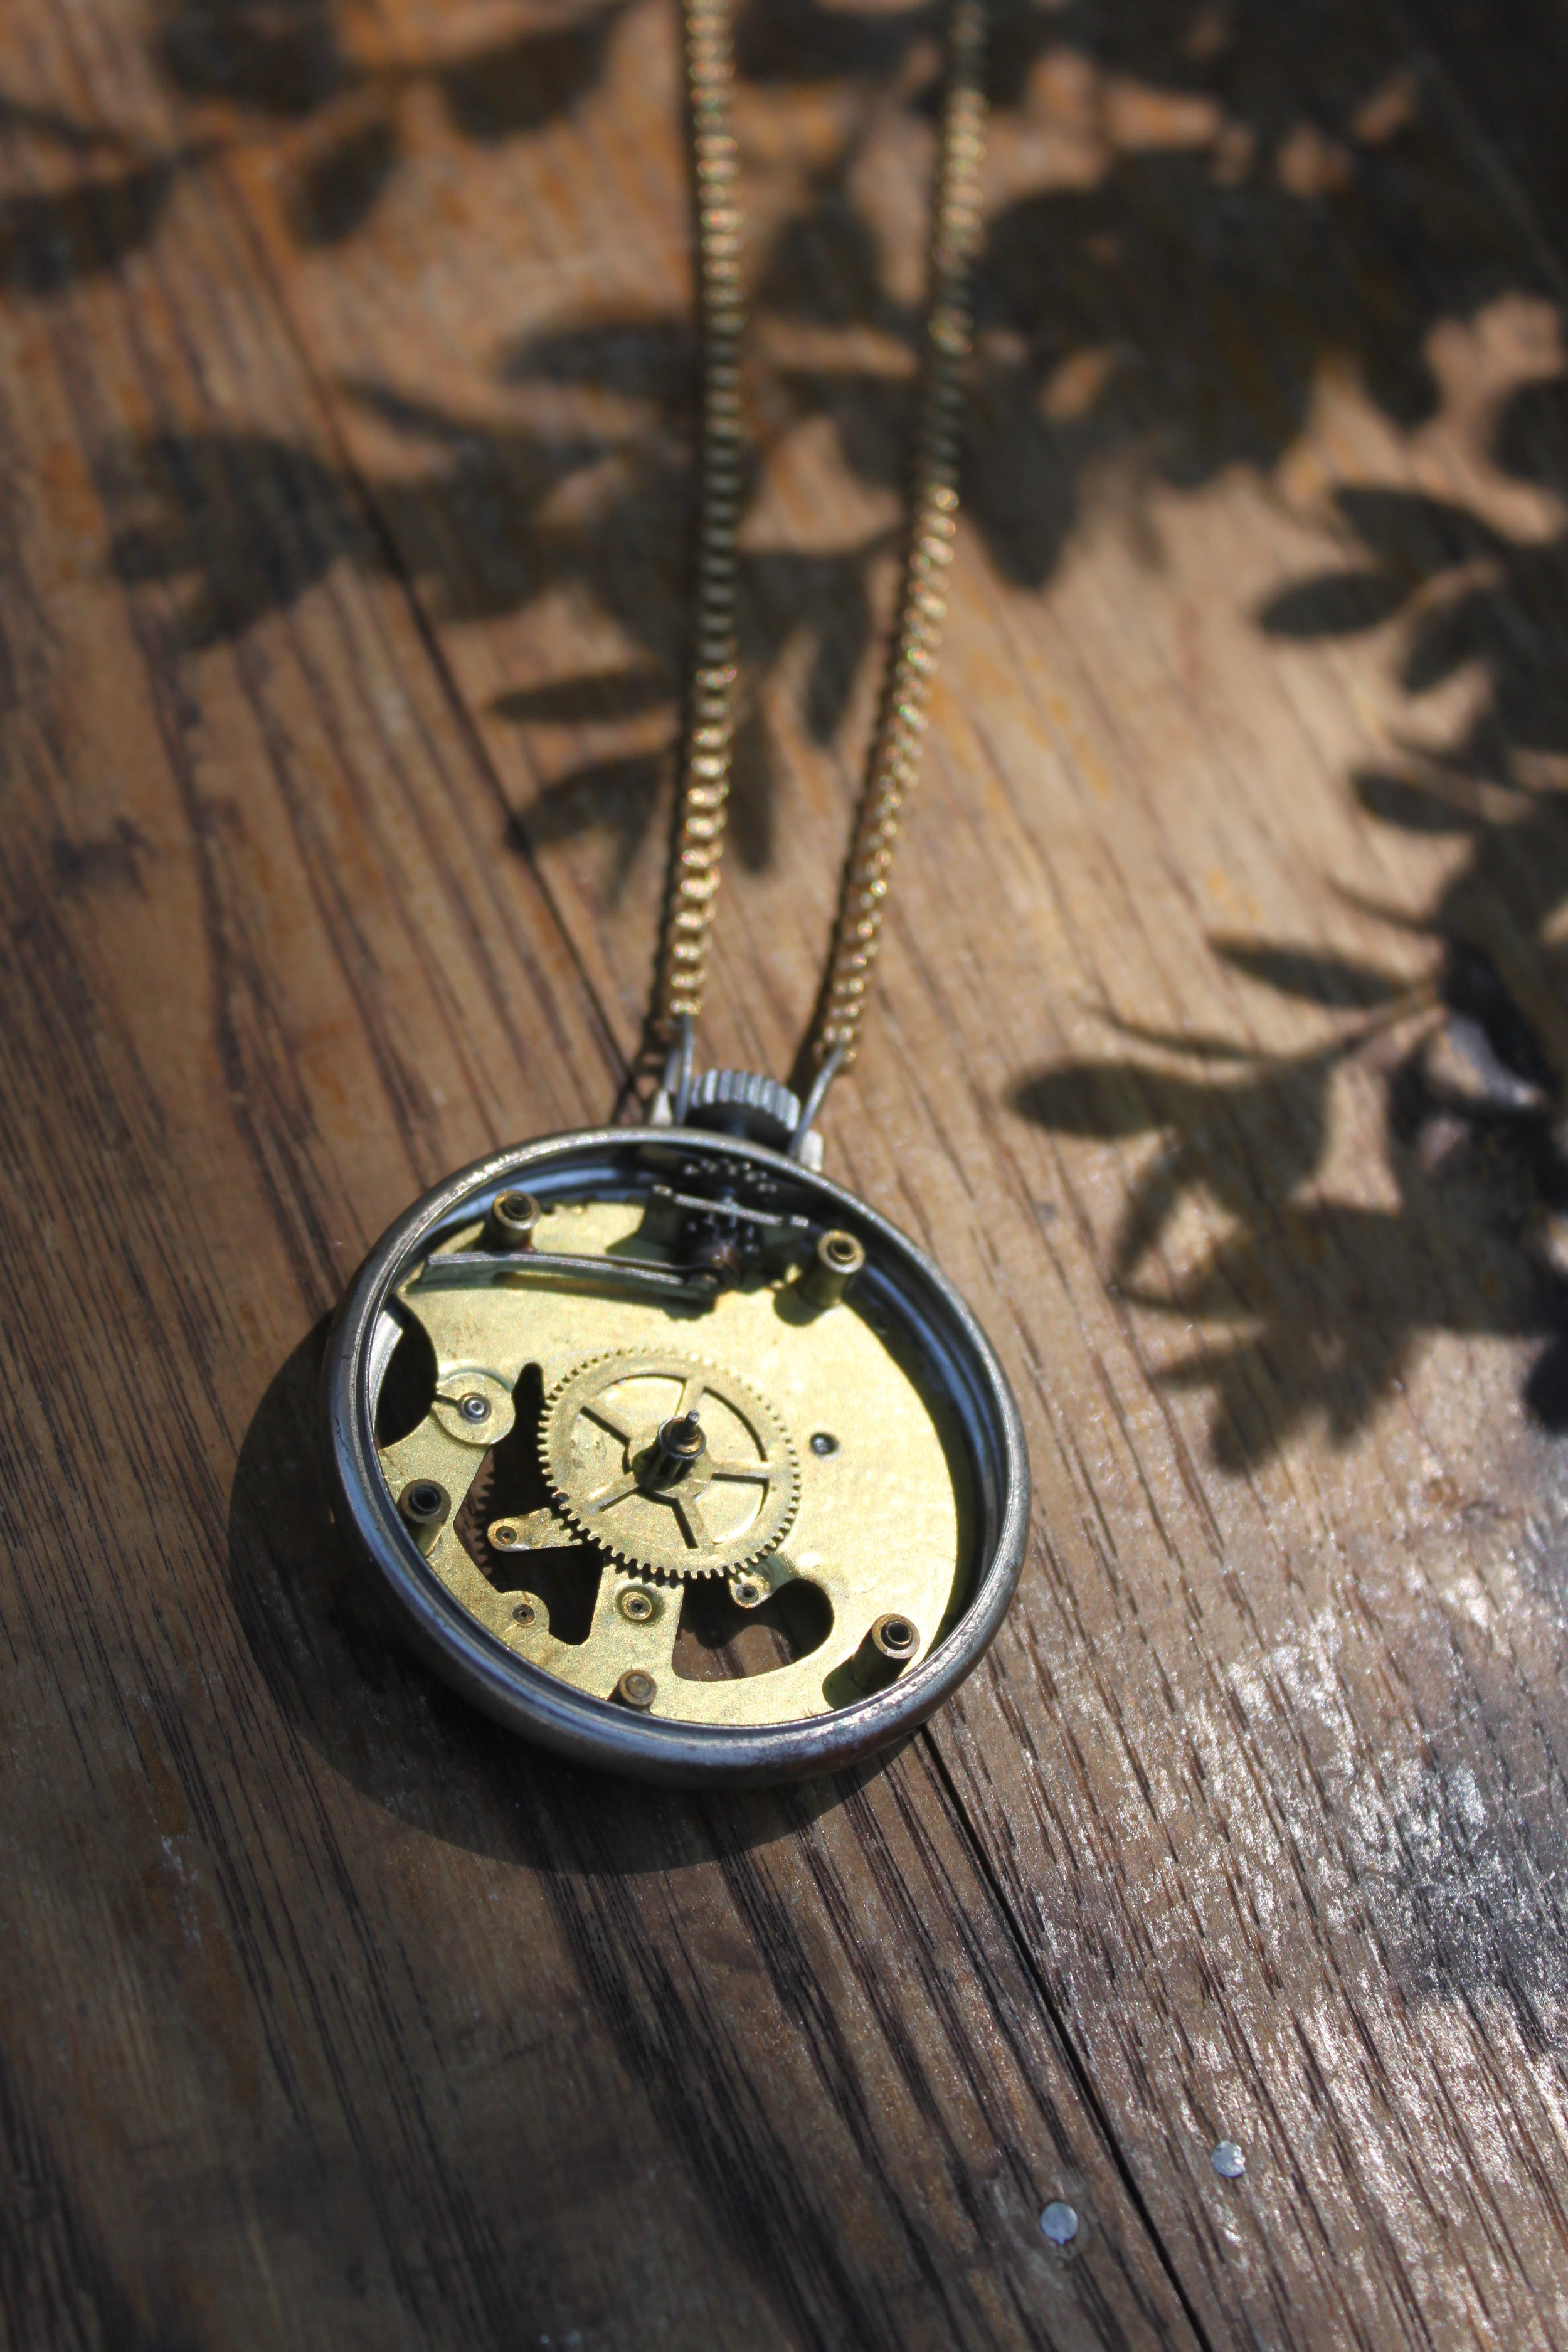
IMG_7708Serendipitous day--speaking of sunshine, it cast this beautiful shadow of budding leaves against the wood grain that I used as a backdrop to photograph my jewelry. I love moments like this--lucky moments--when nature's beauty compliments man made (or, in this case, woman made) beauty. I have a ton of pocketwatch necklaces for sale! And they're all a little different.

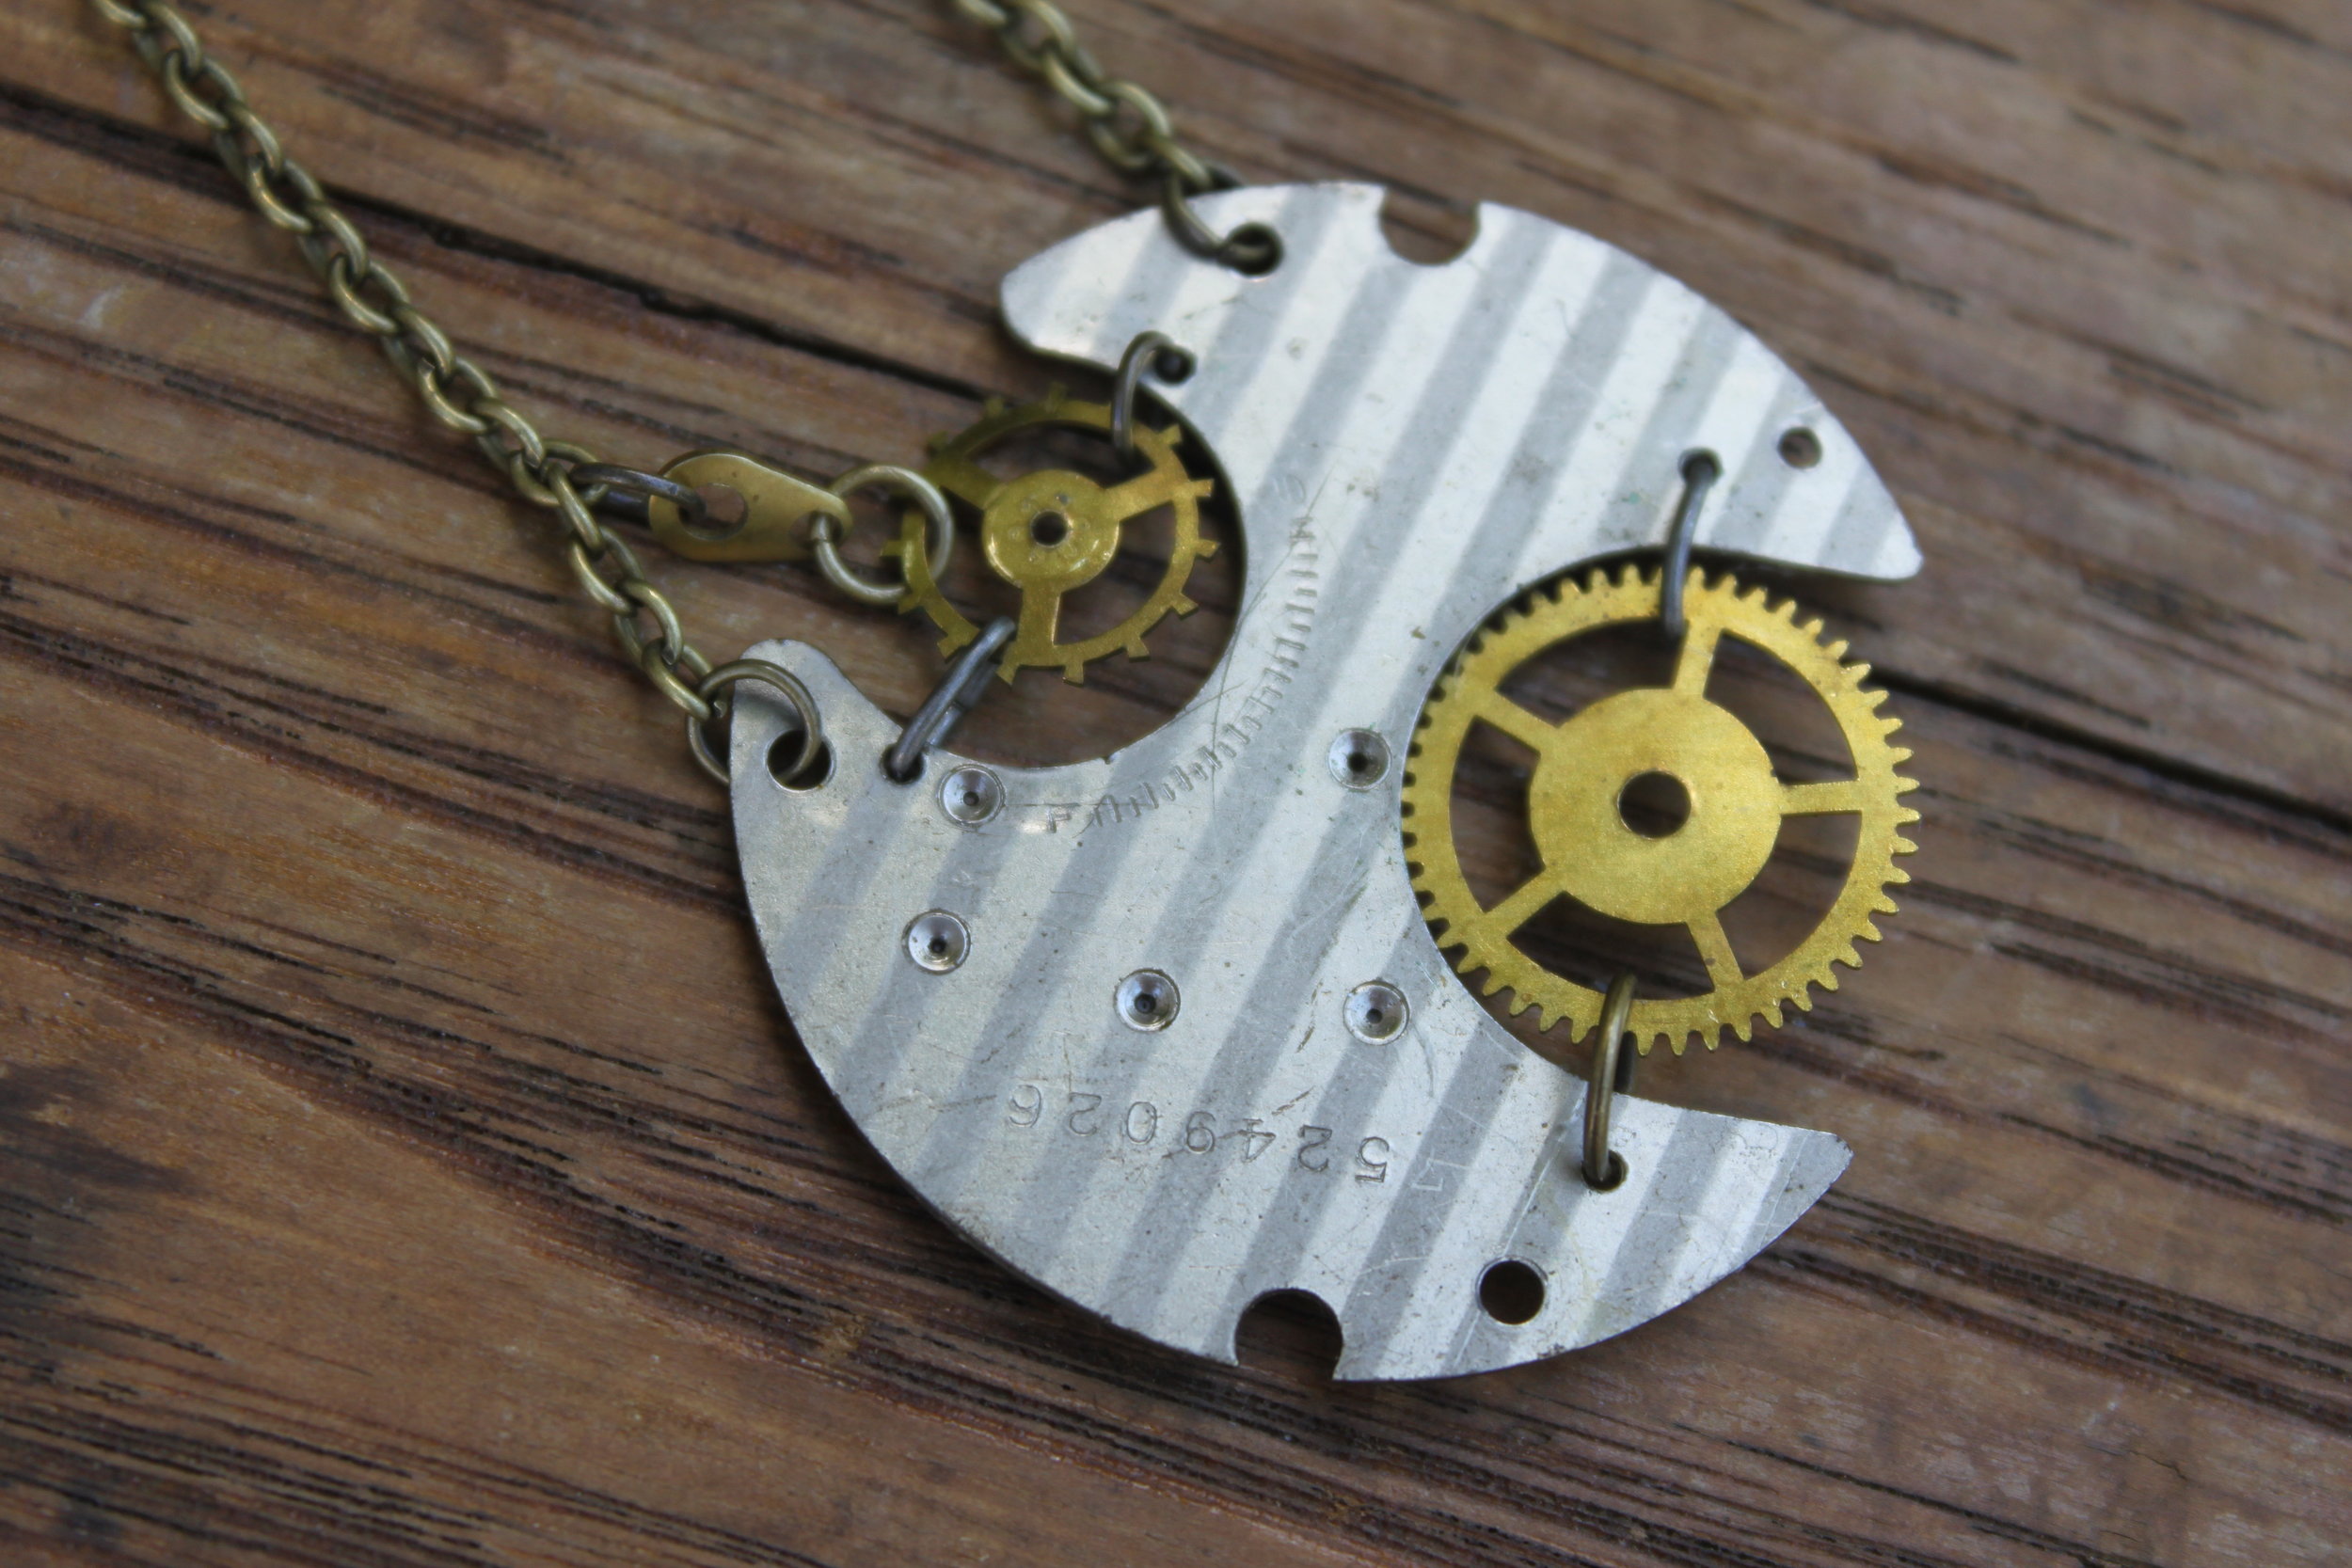
IMG_7714  IMG_7702  IMG_7668  And last but not least, this simply steampunk necklace! IMG_7719So that's a little sneak peek at what I've been up to! Lots more, so stop by Blue Dome this weekend (this Fri, Sat from 11am -10 pm; Sun 11am-5pm at the Make:Tulsa group Booth)! Hope I see some friendly faces!

One of My Pins is Making its Stage Debut!

UncategorizedSamantha Extance4 Comments

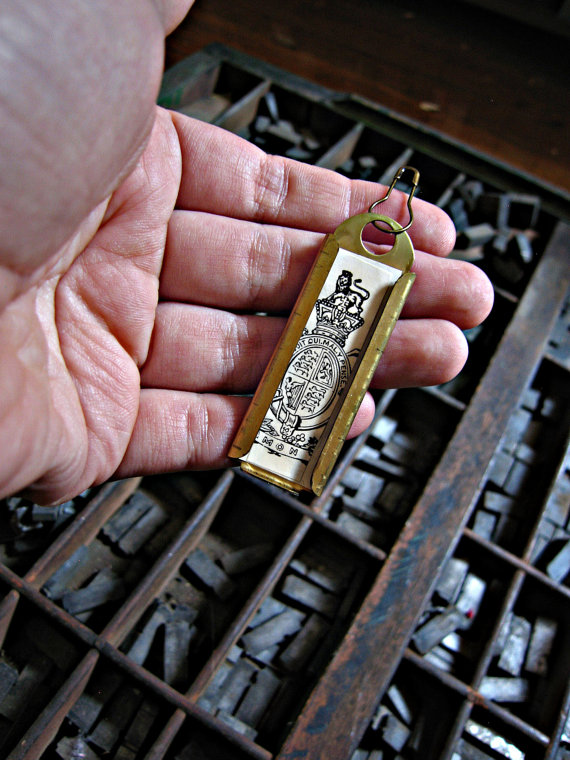
italian crest pinI recently sold one of my pins on Etsy to the props manager of Annapolis Opera! The pin I created (out of an old card catalog brass pull, a safety pin, and an old stamp collector's image) is going to adorn one of the props for the opera house's performances of Verdi's Rigoletto. The pin is going to adorn the key to the court jester's house. For those of you who have not seen the opera, it revolves around the rakish Duke of Mantua who seduces several women--including the daughter of Count Monterone. Rigoletto, the jester, mocks the men of the Duke's conquests which in part leads the Count to curse both Rigoletto and the Duke when he's hauled off to jail in Act I. The second scene revolves around Rigoletto's secret--he has a daughter of his own, Gilda who he has hidden from the Duke to ensure her virtue remains in tact. Of course, with any secret comes mistaken identities & shenanigans--the noblemen, angry with Rigoletto for mocking them for their wives' infidelity, decide to kidnap Gilda--who they wrongly assume is Rigoletto's mistress. They unlock the door (which they trick Rigoletto into opening by blindfolding him and telling him they are kidnapping the Countess Ceprano) and successfully kidnap poor Gilda.

I am so excited about one of my pieces hitting the stage! If you are in the Annapolis area, check out their performance of Rigoletto on March 15th & 17th! For those of us elsewhere, I leave you with one of the famous librettos from the opera--the Duke singing "La Donna e Mobile."

[youtube=http://www.youtube.com/watch?v=xCFEk6Y8TmM]

Style Me Steampunk, Simple Romance

Fashion, UncategorizedSamantha ExtanceComment

I love steampunk fashion & accessories–in fact, I love these 2 things so much that I cannot relegate them solely to cons, shows, or Halloween. “Style me Steampunk” is a series of blog posts on how to infuse your everyday wardrobe with a steampunk flair. From dressy to casual, office appropriate attire to outfits you can wear when you paint the town red–I will offer up ideas for outfits that will hopefully inspire some of you to dip into your closet and get creative! MySteampunkSyle 1Style No. 3: Simple Romance

My mom bought me these lovely tapestry Victorian style high heeled boots for Christmas and it's been challenging trying to place them with the right outfit. Most of us steampunkers have fantastic shoes; however, with other statement steampunk wear the overall look is too costume-y for everyday dress. My advice to you, when you just feel like wearing your steampunk style footwear (or really any other statement piece you own & would love to wear more) is this--let that piece be your only statement. The rest of your outfit should compliment it and also be understated. Basically, keep it simple.

For instance, my boots have an intricate floral pattern so I avoided patterns elsewhere on my clothing. I chose a pale pink dress paired with a charcoal gray knit sweater. (And because I like my outfits a little funky, I wore some brown argyle tights to pick up the brown hue of my boots' soles).

Accessories are always a must! I wore very simple and dainty jewelry--a pair of washer & pearl earrings and a single cog necklace on fine chain. With statement pieces, avoid wearing statement jewelry as it may make you look costume-y.

I like to call this overall look "Simple Romance" because I feel feminine, dainty, and simply elegant.

To Re-Create this Look:

  • Victorian Style Boots (Mine were made by a fabulous shoe company called Poetic License; the style is "Lady Victoria")
  • Chiffon pink dress (I purchased mine from H&M years ago)
  • Gray sweater (purchased from Converse, and they are currently on sale)
  • Tights (to match your boots)
  • Simple steampunk jewelry (which you can purchase from my Etsy shop)

This look would be perfect for Valentine's Day which is just around the corner!

Happy New Year!

UncategorizedSamantha ExtanceComment

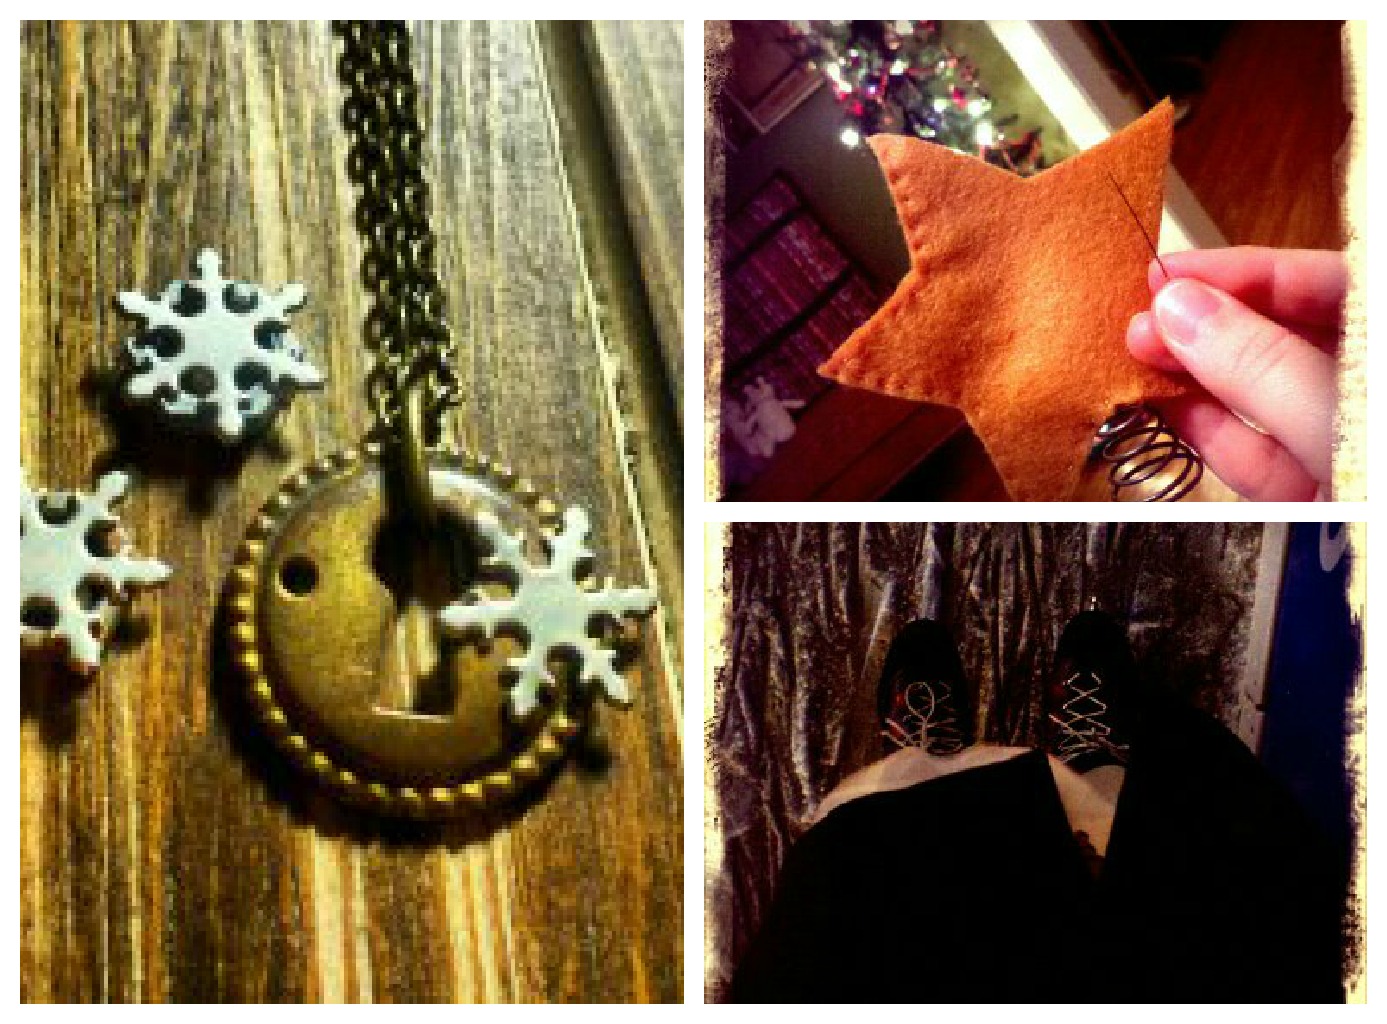
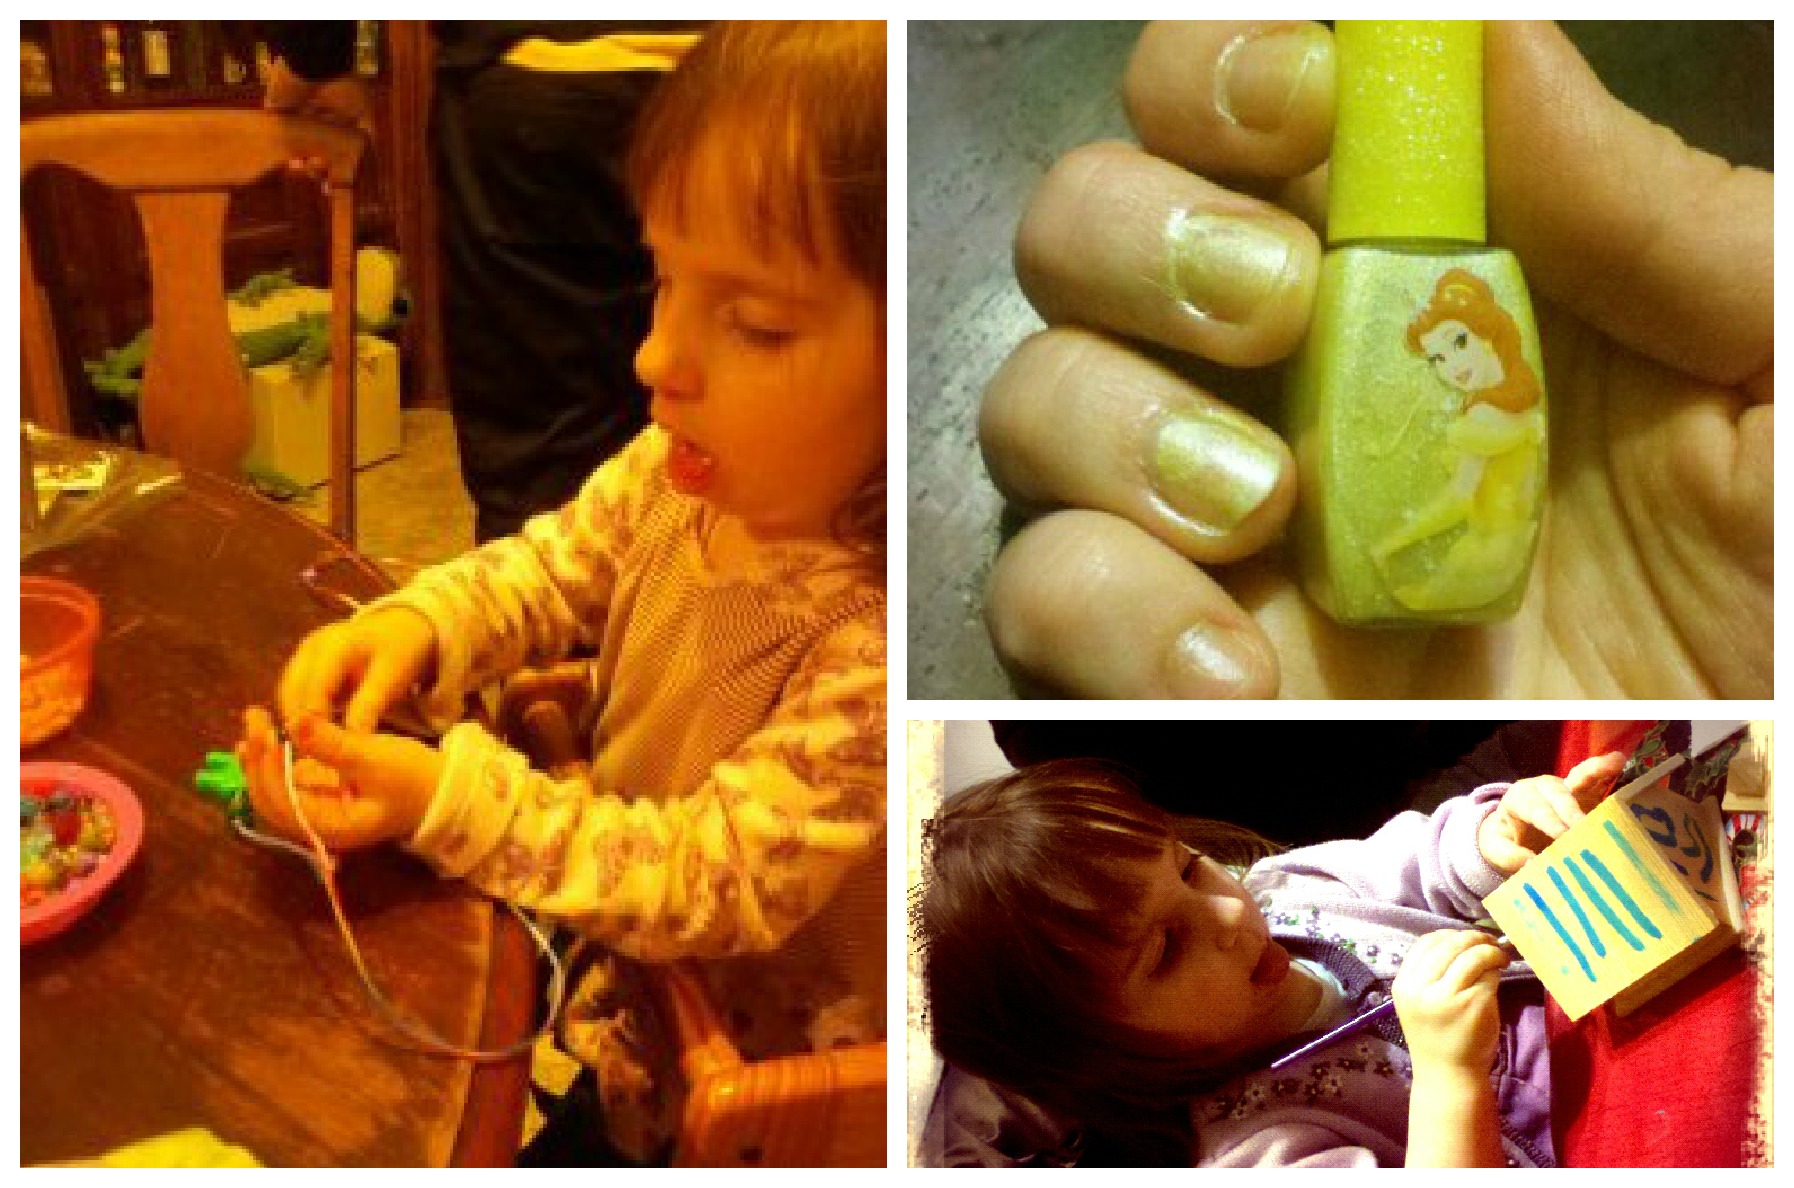
Hope you all had a lovely Christmas, Hanukkah, or Kwanzaa. This time of year has always been a favorite of mine--mostly because I finally have time off to travel and be with my family. I've been so busy at home that I haven't blogged in a while so here's a little of what I've been up to: baking, making presents, ice skating, playing with my 3-year-old niece, and taking long walks on the country roads around my family's house. Christmas Collage 1 Of course, my favorite part of Christmas is spending time with my niece who is already quite a crafter. We made pine cone ornaments, painted birdhouses, and she beaded me the most beautiful necklace I will ever own! She also gave me a fine maincure & painted my nails Belle-o-yellow! Christmas Collage 2

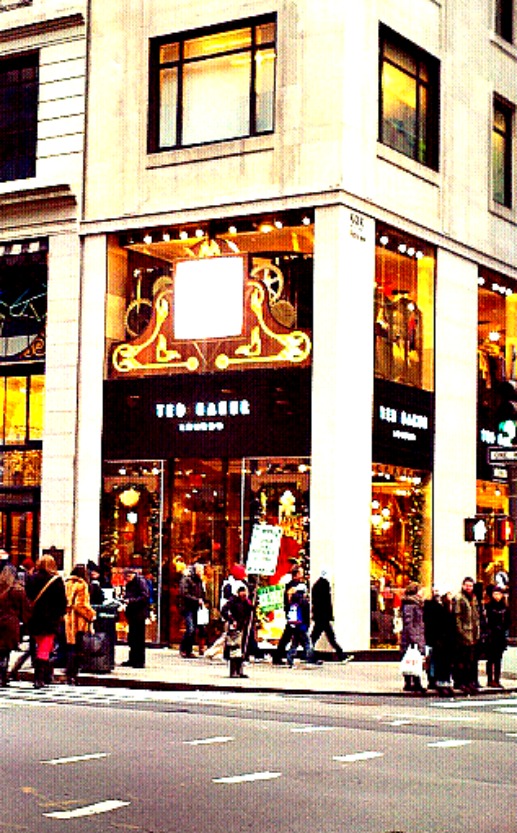
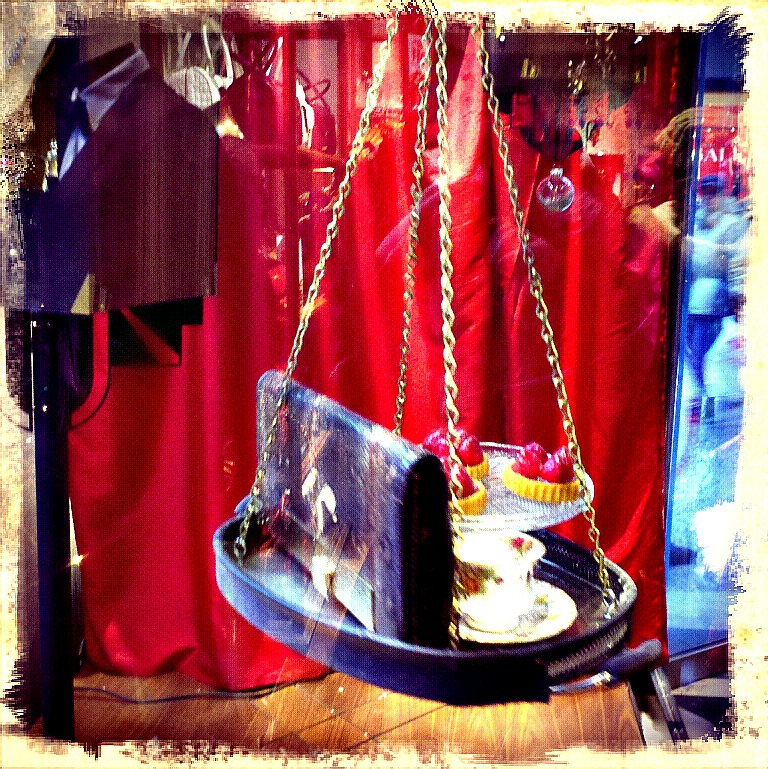
As a tradition my mom and I take the train into New York City and see the tree in Rockefeller Center and take a look at all of the store windows along 5th Avenue. Last year Macy's had an elaborate panel of Steampunk windows and I suspected that this year more stores might deck themselves in gears & clockwork-fa la la la la! Most windows only had subtle hints of Steampunk but I am happy to report that Ted Baker London created an elaborate window display of moving gears, chains, and wood panels. The modest photos I took do not capture the fantastic movement of the display which shifted Ted Baker London's wares around an intricate pulley system.  My favorite aspect of the display was the elegant scroll work painted onto the shop's 2nd floor front window which made the glass resemble a clock tower.

Ted Baker 1 The outside of Ted Baker London. You can see the second story scroll work and gears are both illuminated! It gave you the impression that you were looking at the inside of a clock tower gleaming with sunshine. Ted Baker 2A close-up of one of the windows. The moving gears and chain pulleys were elegantly bordered with garlands wrapped in twinkle lights and small metal ornaments.Ted Baker 6A close-up of the pulley system. It looked like it was constructed from a large metal erector set's parts. Ted Baker 3One of the chain pulleys dropped a small wooden box filled with deconstructed clock parts and featuring this handsome leather shoe. In the other window, another chain pulley dropped a serving tray filled with flowers and bone china. Ted Baker 5 I was thoroughly inspired by Ted Baker London's windows. I can't wait to steampunk some windows myself at Made;the Indie Emporium Shop sometime in the coming months.

2 Simple Ways to Steampunk Your Christmas Balls!

D-I-Y-, UncategorizedSamantha ExtanceComment

IMG_6097Christmas Ball Compass: (Materials Needed: Christmas tree ball, length of chain--appropriate to your ball's size, snowflake sequin, game spinner, and 2 jump rings) Tools Needed: An awl and a pair of flat nosed pliers.

  1. Using your awl, poke a hole in your snowflake sequin.
  2. With your flat nosed pliers, open your jump ring and load your game spinner, snowflake sequin, and chain onto the ring and close securely.
  3. Then attach the other end of your chain to the hook of your ornament with the second jump ring.
  4. Now your ornament is ready to hang on the tree so get to decorating!

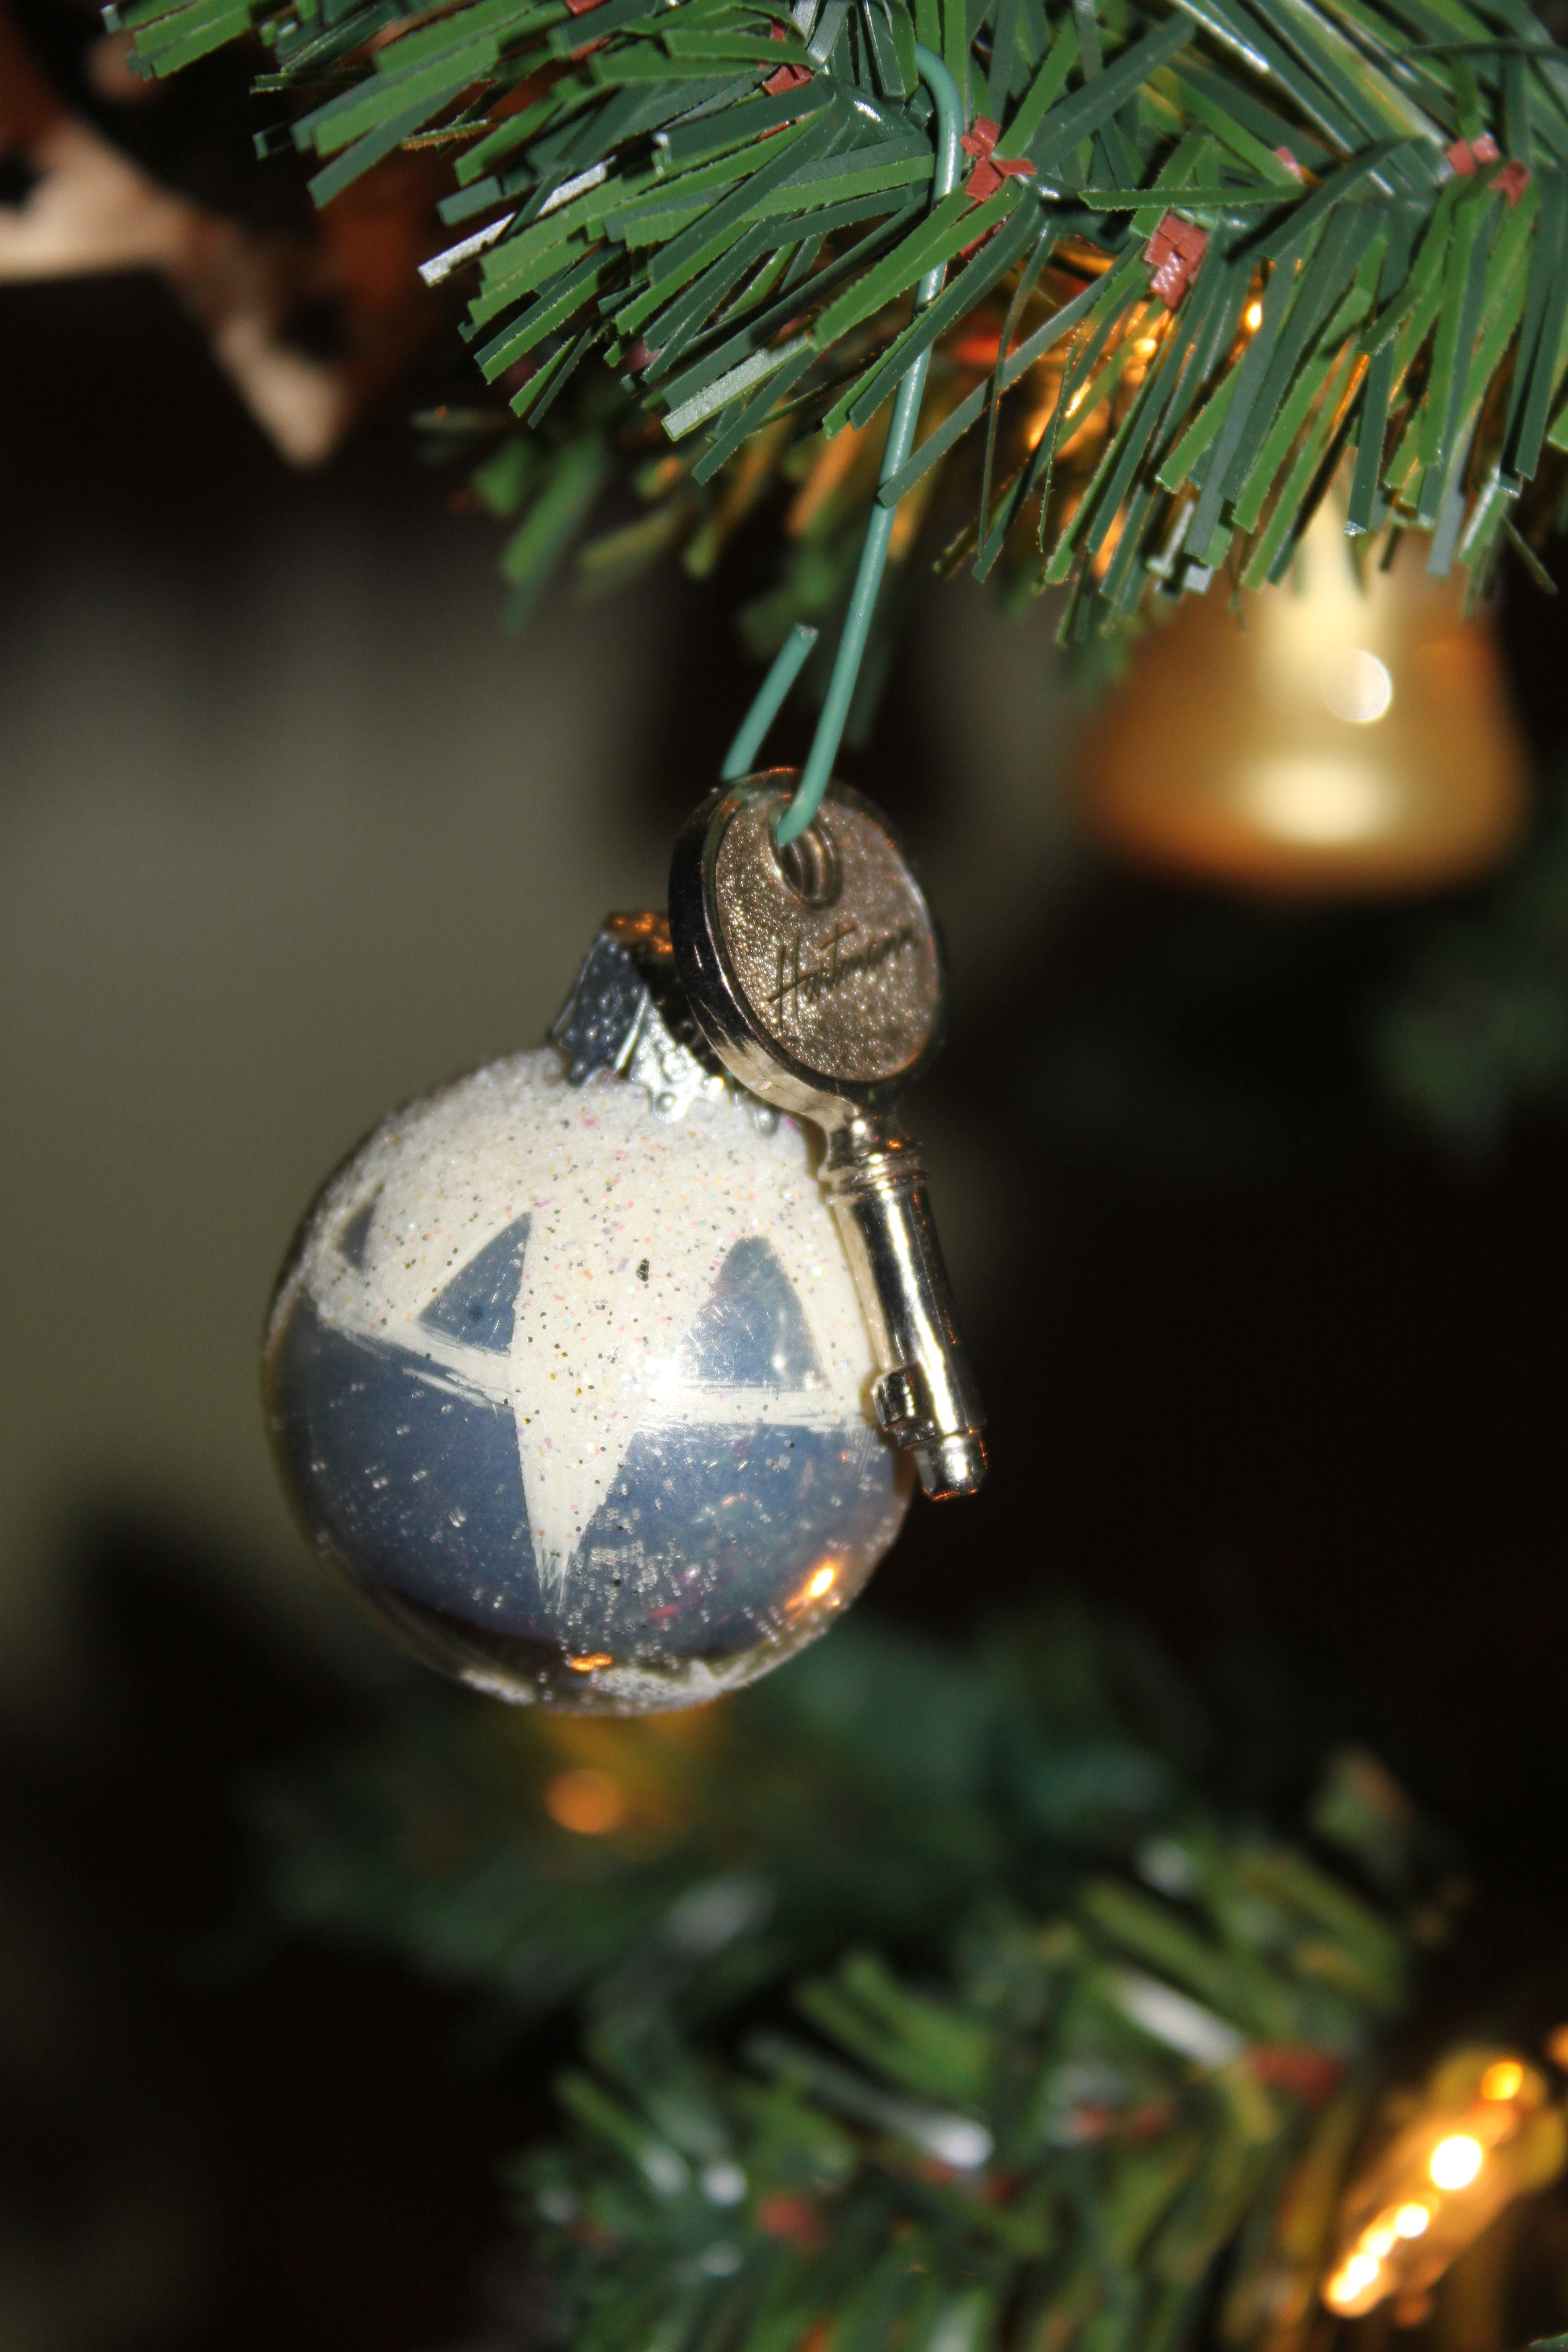
IMG_6102Christmas Key Ball: (Materials Needed: Christmas tree ball, tiny key, and a tree hook) No tools needed.

  1. Load your tree hook with the tiny key and then the Christmas ball.
  2. Then close the hook securely and hang on your tree!

As always, Merry Making!

Steampunk Toys

UncategorizedSamantha Extance2 Comments

I came across these interesting toys on a website called A Mighty Girl. Their mission is to promote books, movies, music, and toys that empower girls to become "smart, confident, and courageous." A Mighty Girl also empowers parents to be more proactive and conscious of the ways in which they can raise their daughters, nieces, granddaughters, etc. I love this website and was happy to discover that they had a couple of steampunk toys so if you have a daughter you'd like to empower (or even a son, nephew, or grandson)--here's a couple things Santa can bring on down the chimney (or they can receive one of the eight nights of Hanukkah)!

A Supersize Set of Gears (building-blocks)

Big Bag of Science (for the future inventors & scientists)

Timeline (seriously cool game of trivia about inventions & patents)--Great for all ages!

Space Module Tent (for space adventurers)

Intro to Simple Machines Gear Building Block Kit: $33.80; Dynamo Torch (pictured above); Crazy Machines, the Wacky Contraptions Games $9.99 and the Robotic Arm Kit $39.35 (for tinker-types in the making)

Aside from A Mighty Girl, there are also many other places to turn for Steampunk Toys for your little ones. I'd recommend:

Young Mad Scientist's Alphabet Blocks

The artful and expensive toy figurines of Stephanie Halleux

And of course, you could make your own Steampunk plushies following the excellent directions in Skeate and Tedman's Steampunk Softies. You could also alter toys or toy DIYs and steampunk them--like the Steampunk Teddy Bear I made!